WHITEPAPER
Formlabs Logo

Printing with the Resin Pumping System

Printing with the Resin Pumping System

Mit dem Formlabs Resin Pumping System können Sie effizienter drucken als mit herkömmlichen Harzkartuschen. Das System verwendet einen Fünf-Liter-Harzbehälter und eine motorisierte Pumpe, um das Harz in den Harztank abzugeben, was zu weniger Druckunterbrechungen führt und den Verbrauch von Einwegkunststoffen reduziert.

Anmerkung:

Nicht alle Formlabs-Kunstharze können mit dem Resin Pumping System verwendet werden. Für einige Harze ist ein 5-Liter-Harzbehälter verfügbar, andere können auf Anfrage angefertigt werden und wieder andere sind mit dem Resin Pumping System nicht kompatibel. Schauen Sie im Formlabs Shop nach, welche Harze verfügbar sind. Bitte kontaktieren Sie den Vertrieb, wenn Sie an einem dort nicht gelisteten Harz interessiert sind.
Komponenten des Resin Pumping Systems

Komponenten des Resin Pumping Systems
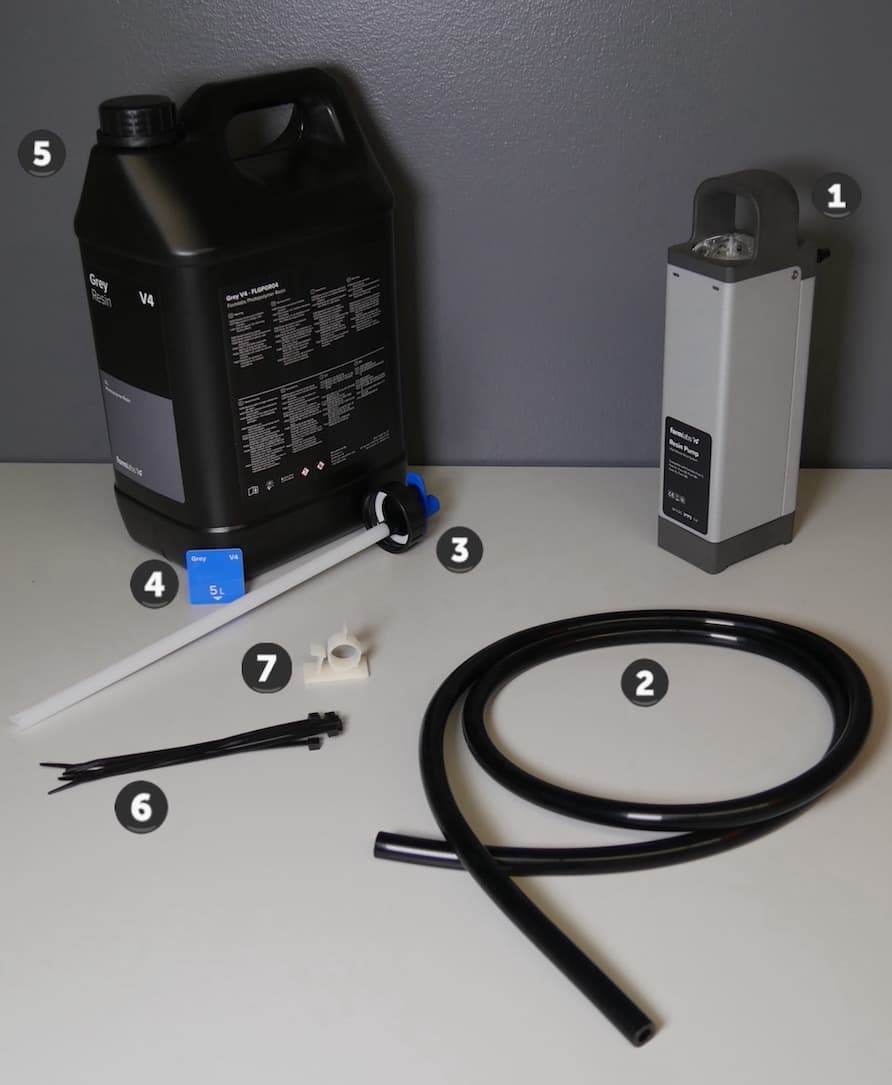
Resin Pumping System (Form 4) components
  1. Resin pump: A motorized pump draws resin from the resin container through the transfer tube to dispense resin into the resin tank.
  2. Transfer tube: A silicone tube used to transfer resin from the resin container to the resin pump.
  3. Transfer cap: A cap with an output barb used to attach the transfer tube to the resin container.
  4. Resin card: An RFID card included with the resin container that is programmed with the resin container’s resin type. The RFID chip comes attached to an instruction card in the box.
  5. 5 L Resin Container: A five liter opaque container that holds uncured resin for printing.
  6. Zip ties: Fasteners used to secure the transfer tube to the resin pump.
  7. Cable clip: A clip with an adhesive back that can be attached to the printer to keep the transfer tube in place.
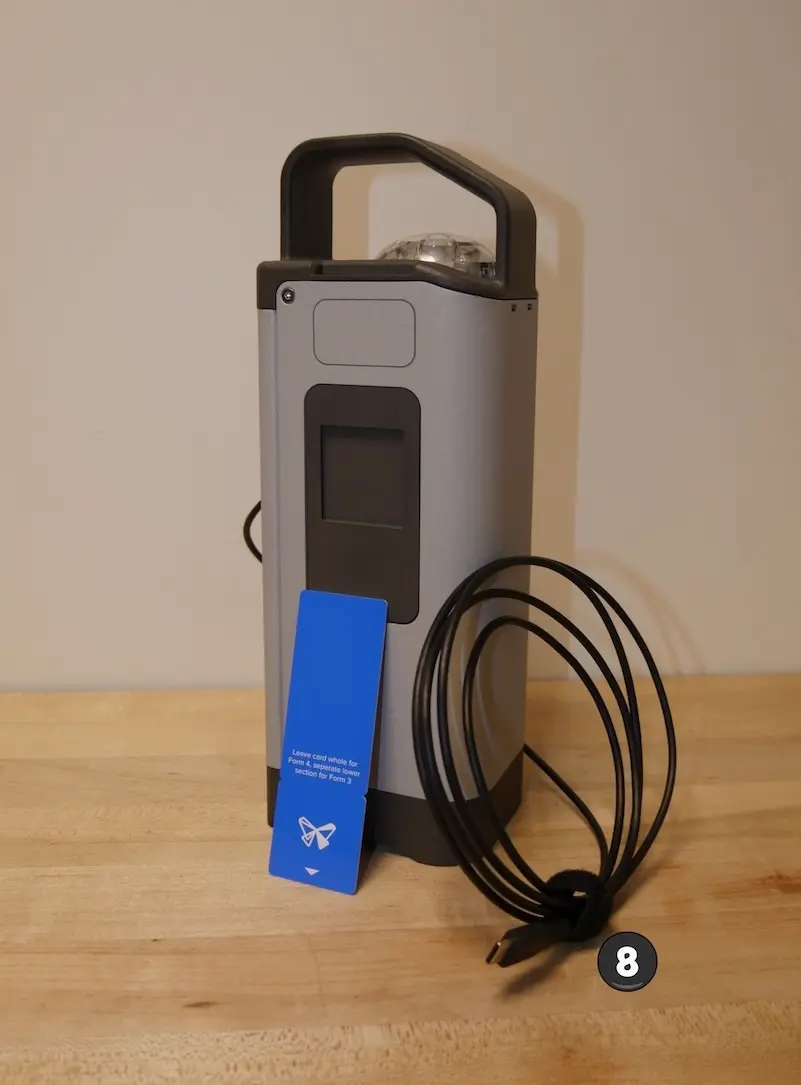
  8. USB-C cable (Resin Pumping System (Form 4) only): A cable that connects the pump to the printer for power and communications

Using the Resin Pumping System

Note:

For best results, update your printer’s firmware before printing with the Resin Pumping System.

Using the Resin Pumping System with SLA printers

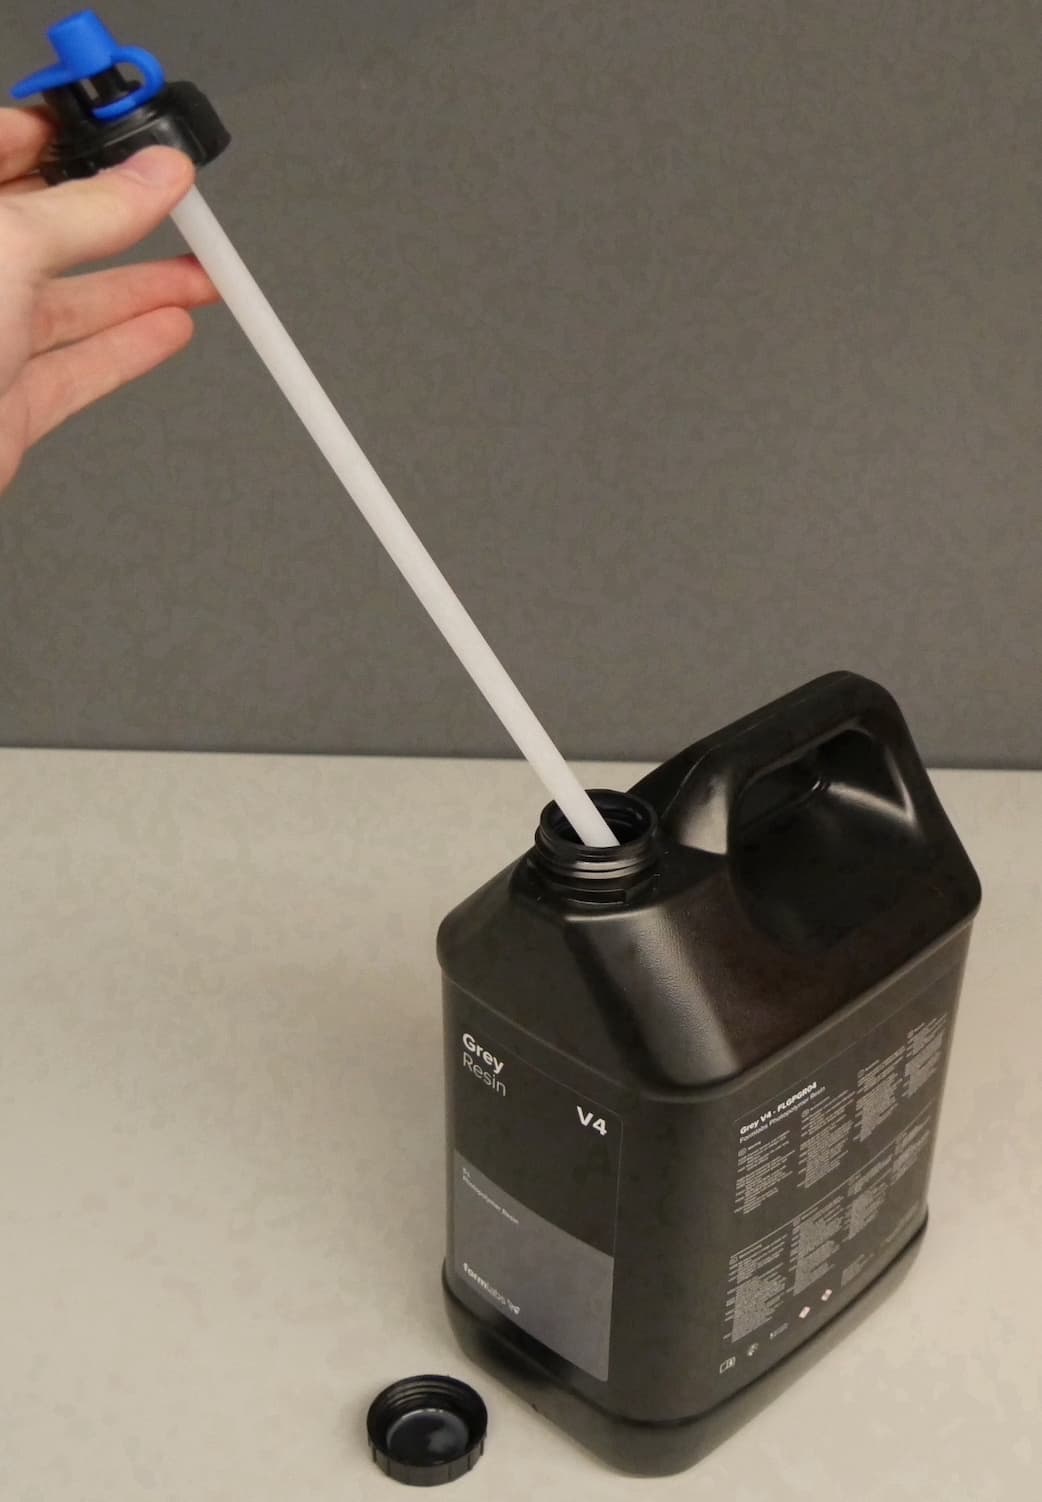
  1. Remove the stock cap from the resin container.
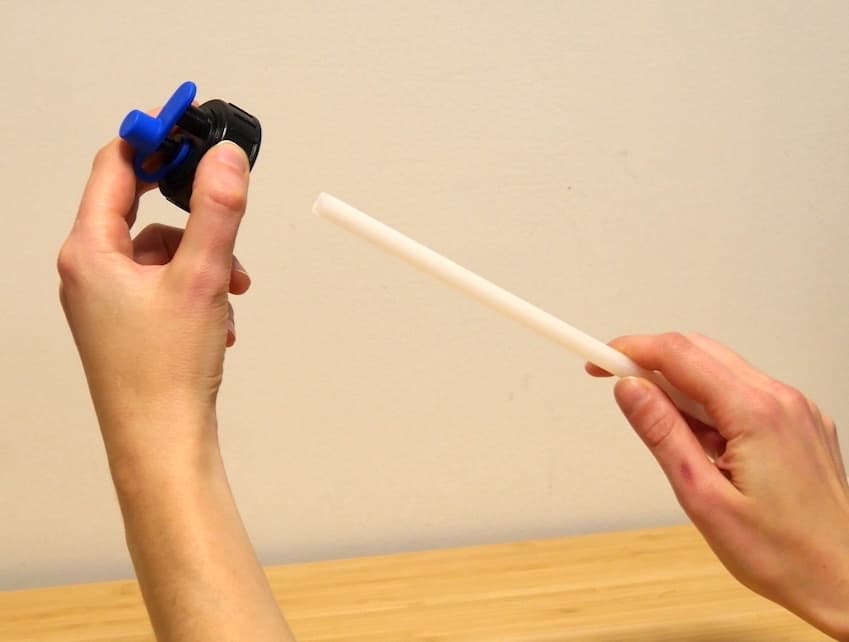
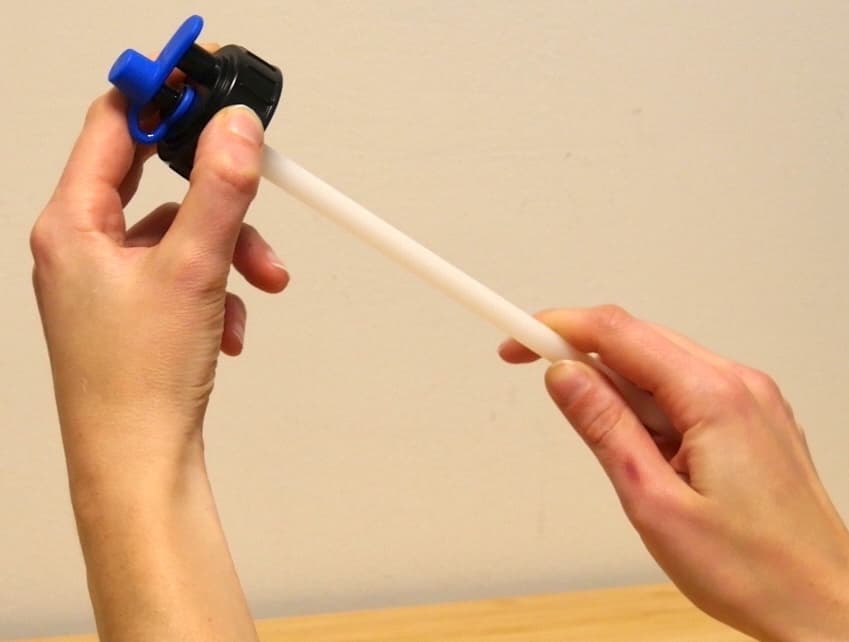
  2. Attach the straw to the transfer cap. Push the straw into the opening in the bottom of the cap until it is fully seated.
alttext
alttext
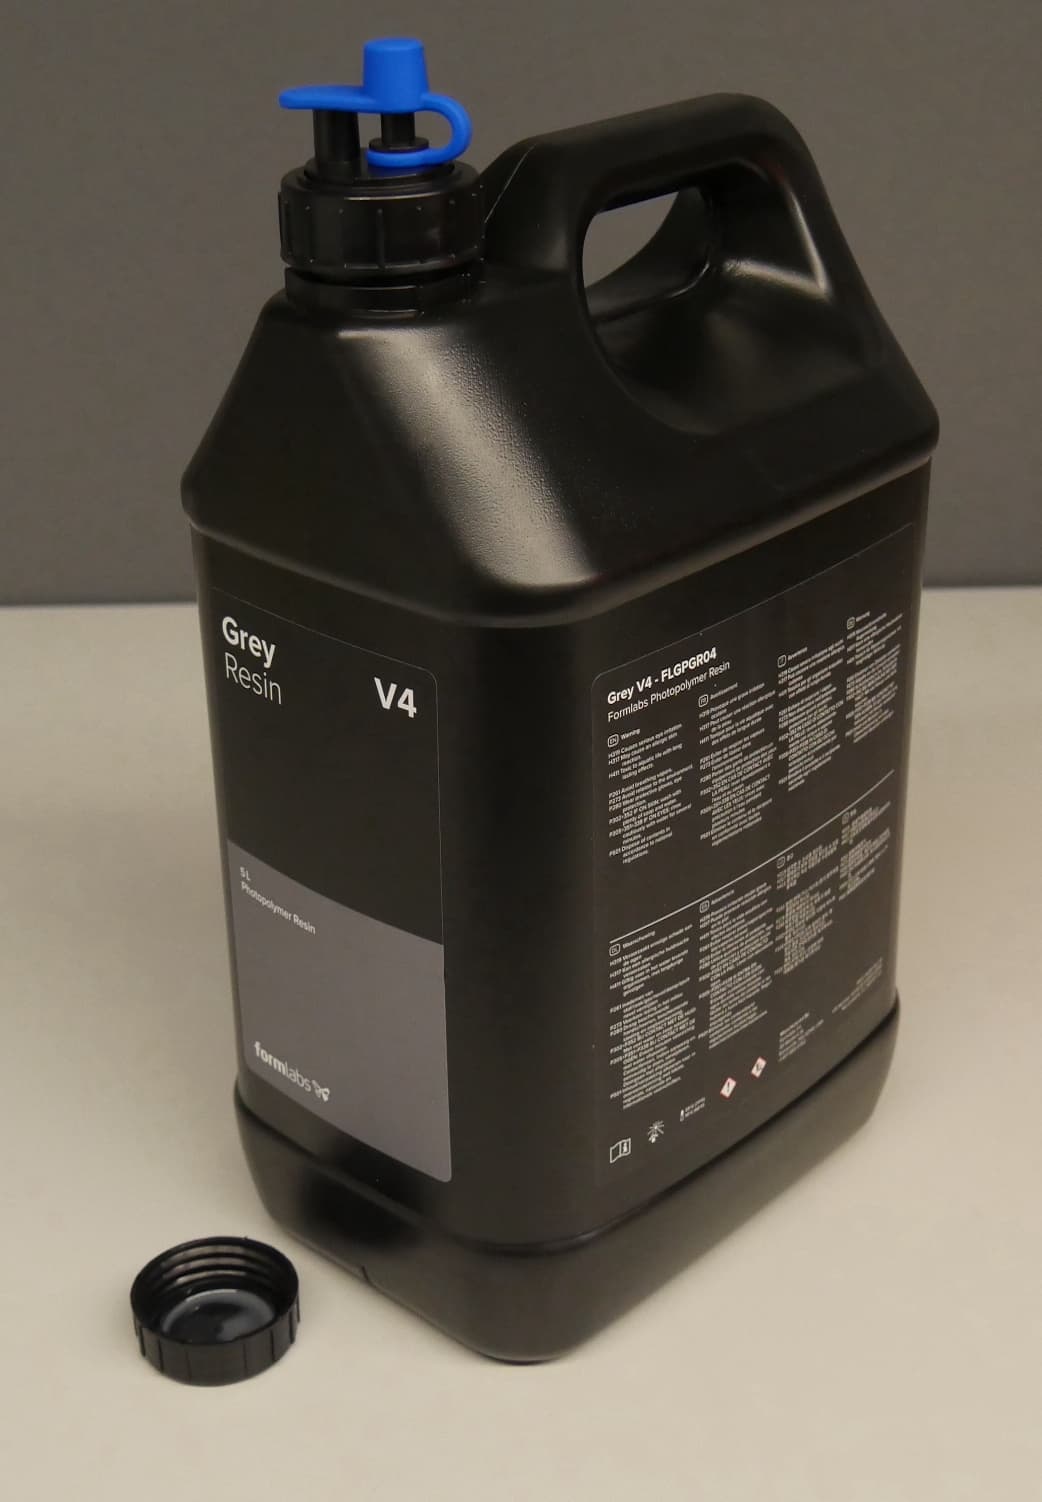
  1. Screw the transfer cap onto the resin container. Ensure it is properly seated and tightened to prevent leaks or spills.
alttext
alttext

  1. Remove the resin card from the resin container. If you are using the Resin Pumping System (Form 3), separate the lower section of the card at the scored line.
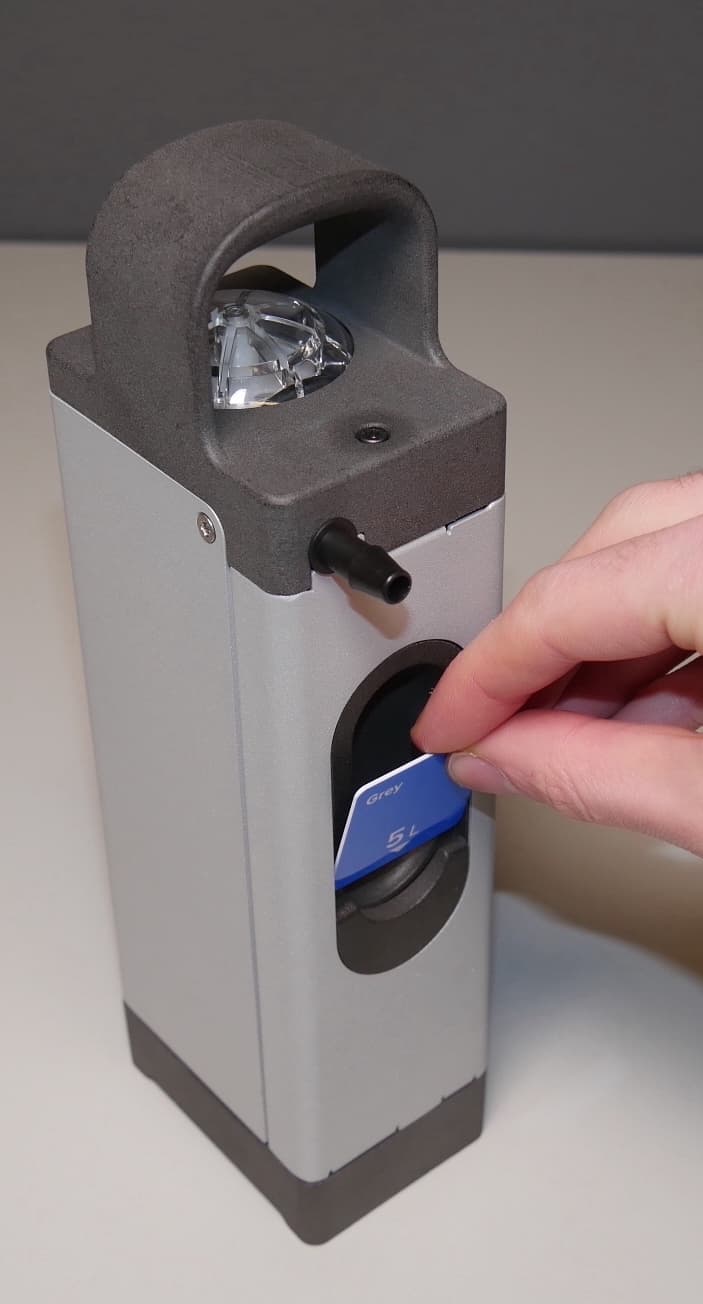
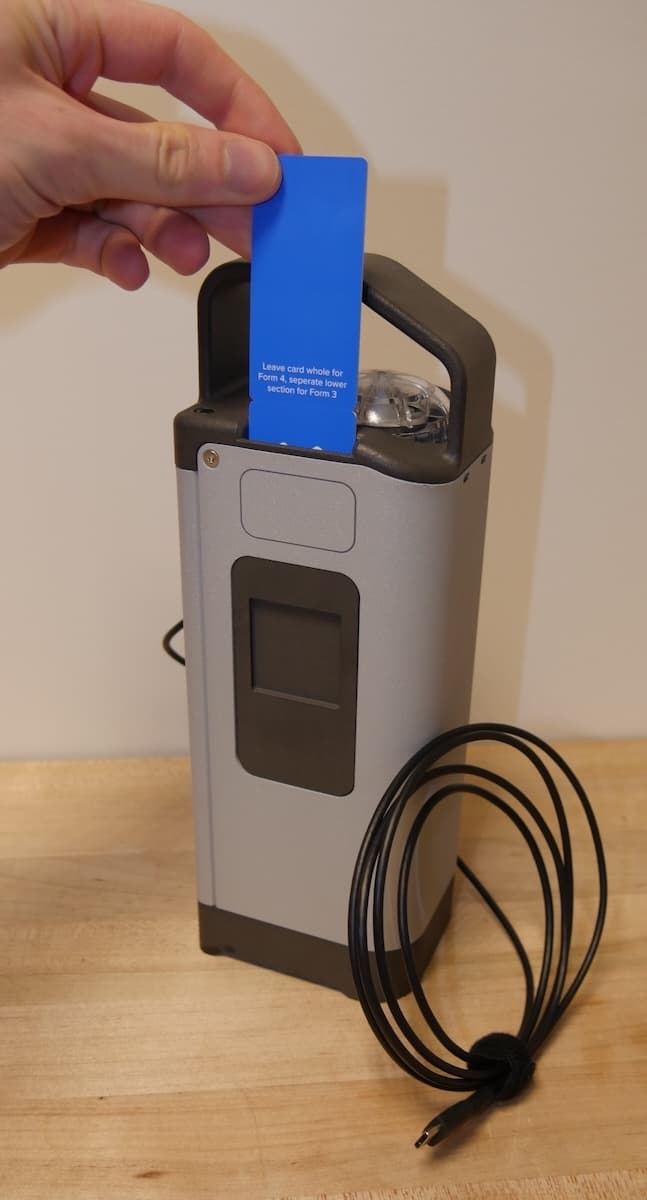
  2. Insert the resin card into the resin pump’s card reader slot. The card should fit snugly into the slot.
Inserting the resin card into the Resin Pumping System (Form 3)
Inserting the resin card into the Resin Pumping System (Form 4)

Tip:

Resin Pumping System (Form 4): Label the pump in the rectangle next to the card reader slot to more easily identify which resin it has been used with.

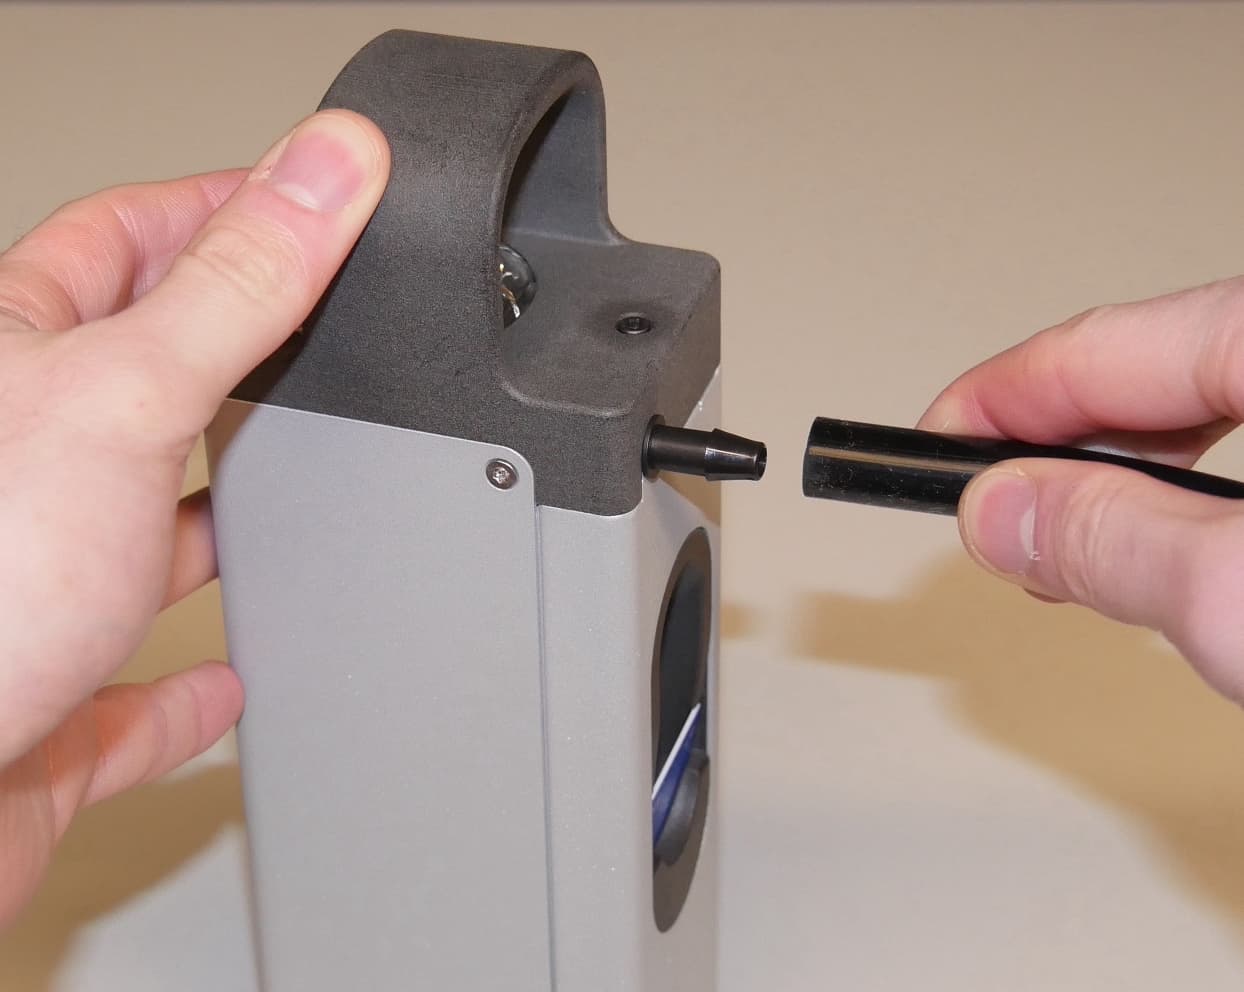
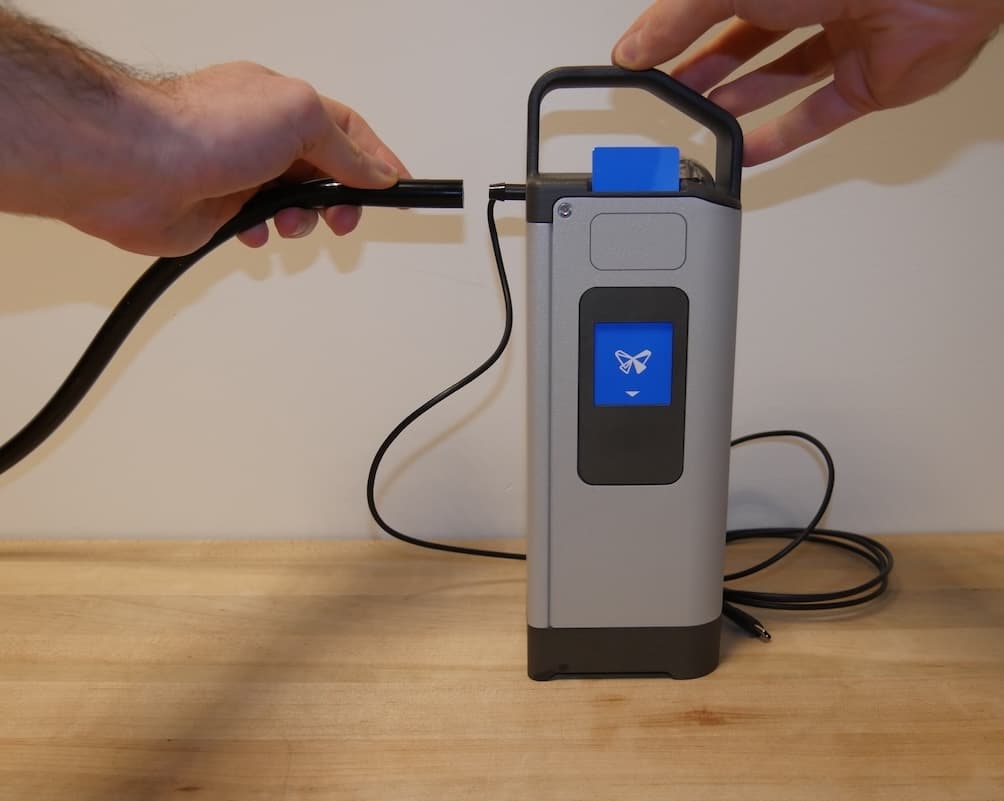
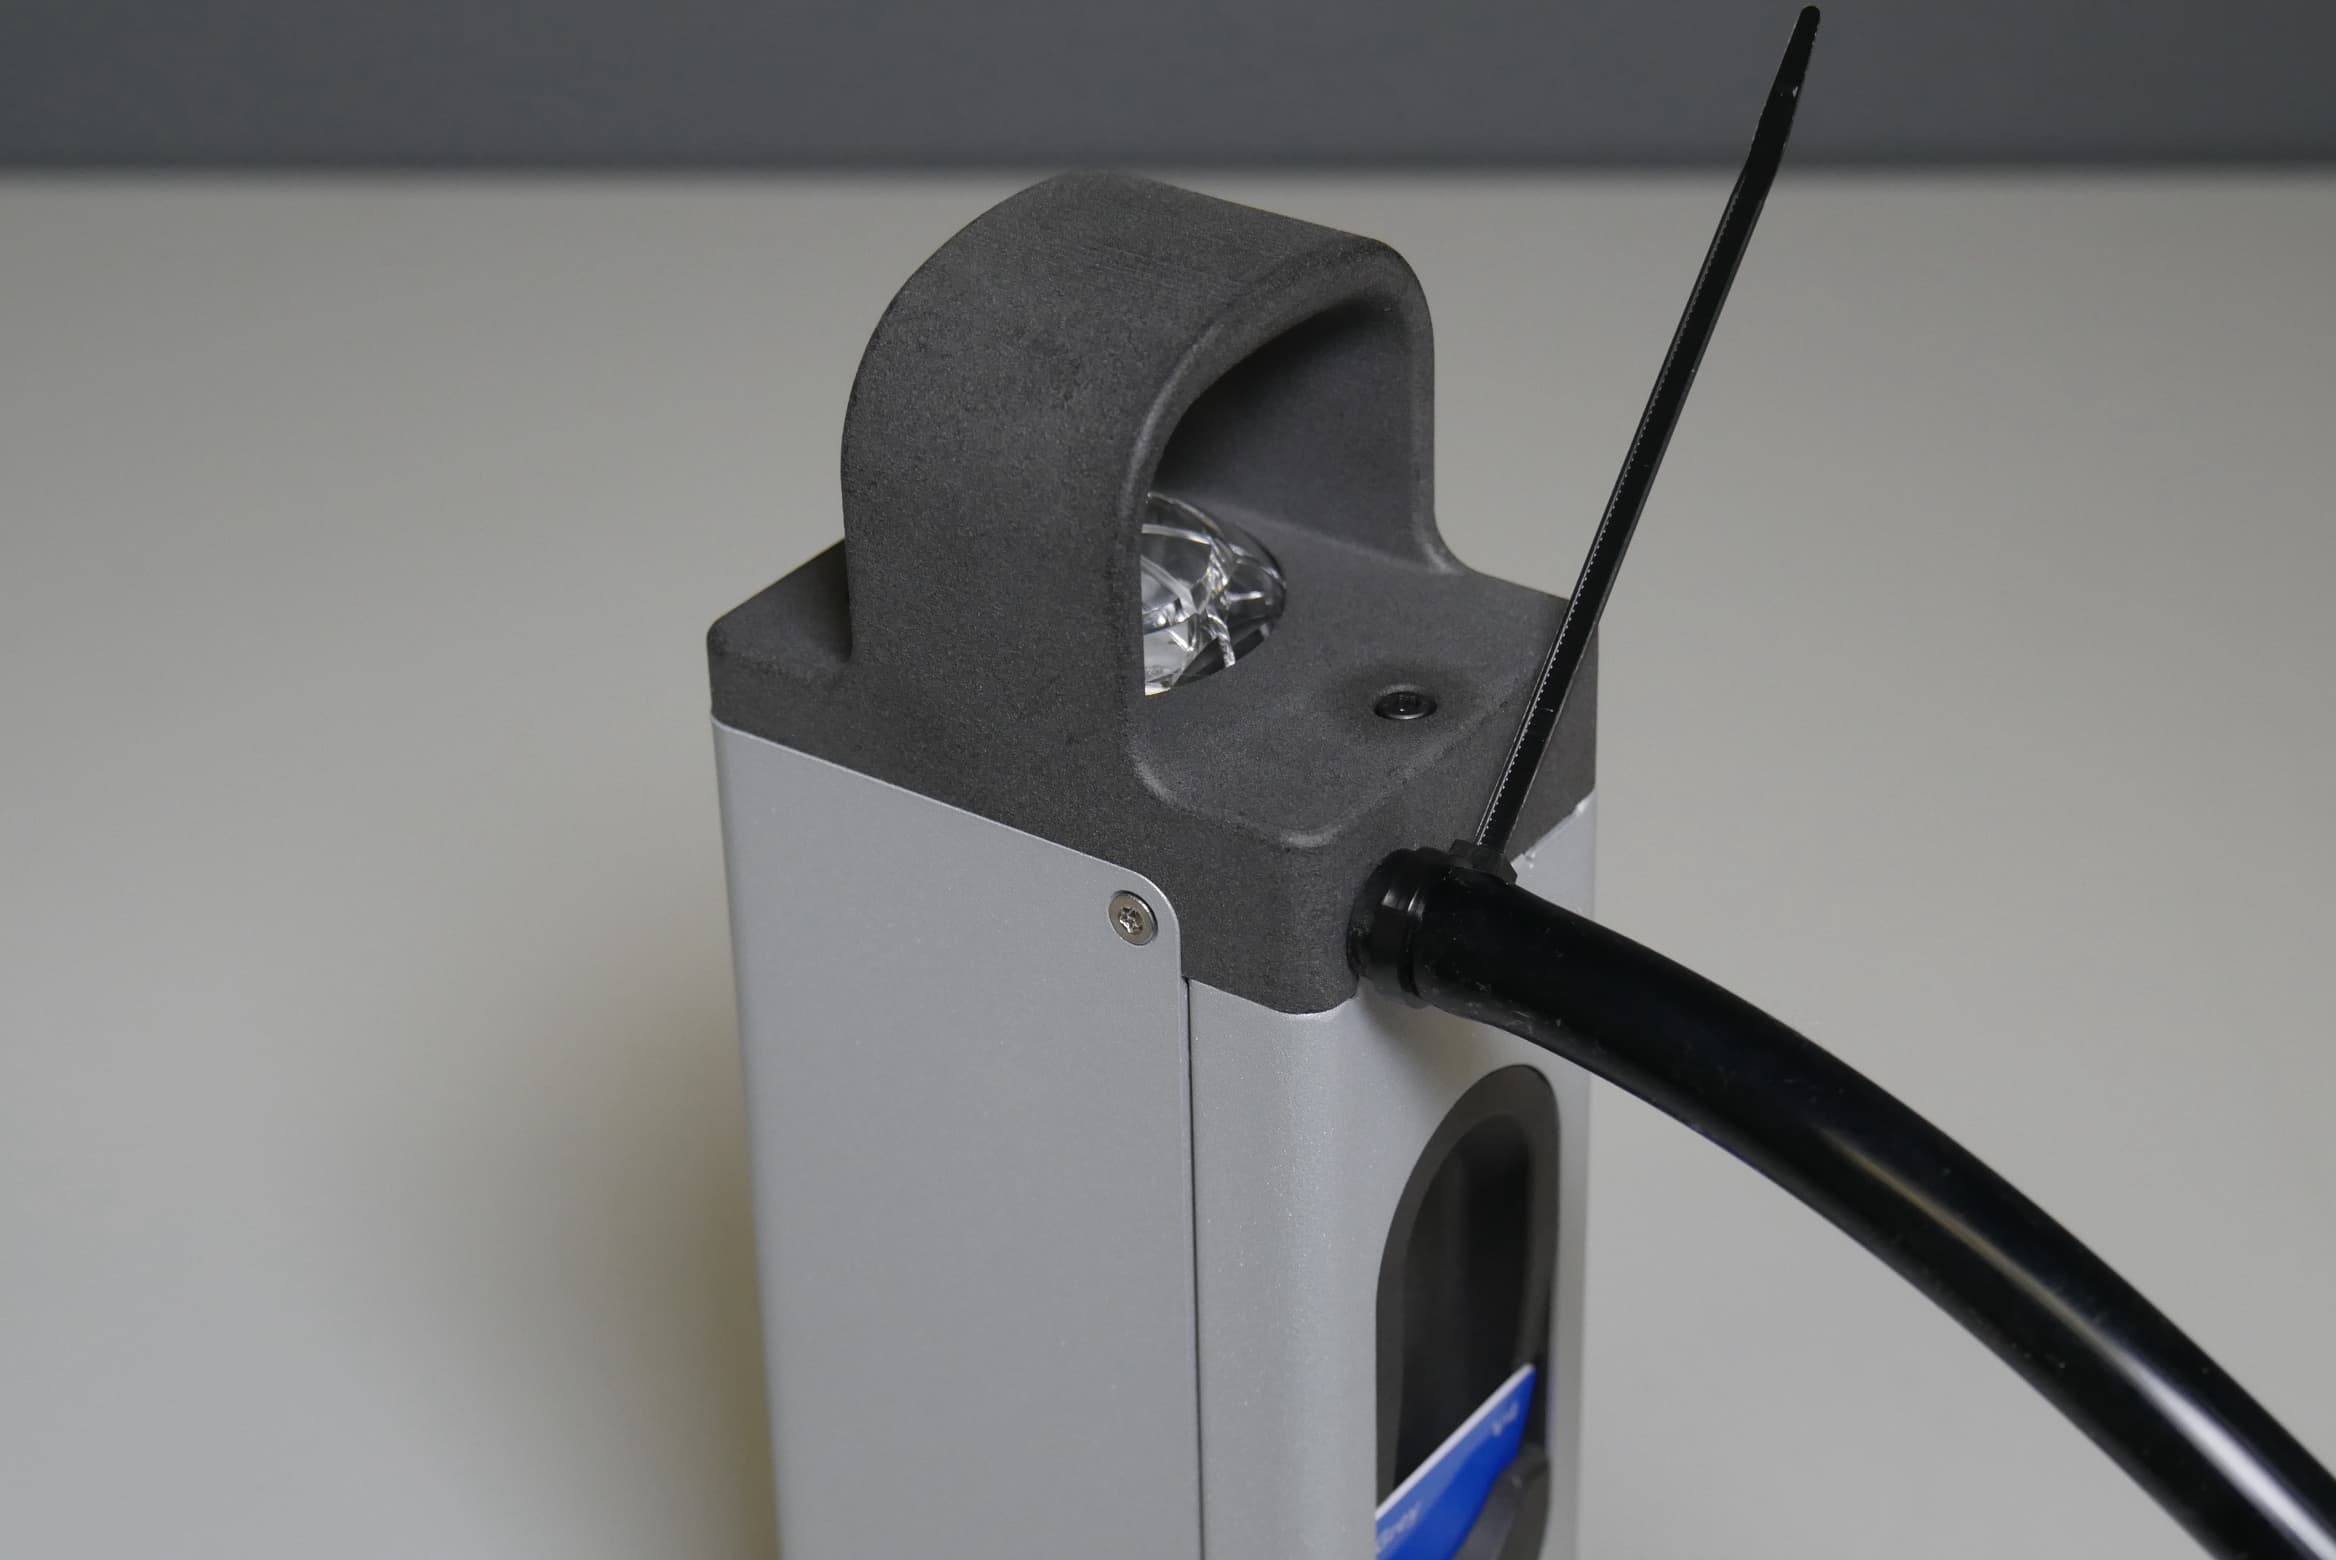
  1. Connect one end of the transfer tube to the exposed barbed fitting on the resin pump. Push the tube onto the barbed fitting until it is flush against the flange at the base of the fitting.
Attaching the transfer tube to the Resin Pumping System (Form 3)
Attaching the transfer tube to the Resin Pumping System (Form 4)

  1. Use a zip tie to secure the transfer tube to the barbed fitting on the resin pump to prevent resin spills.
alttext

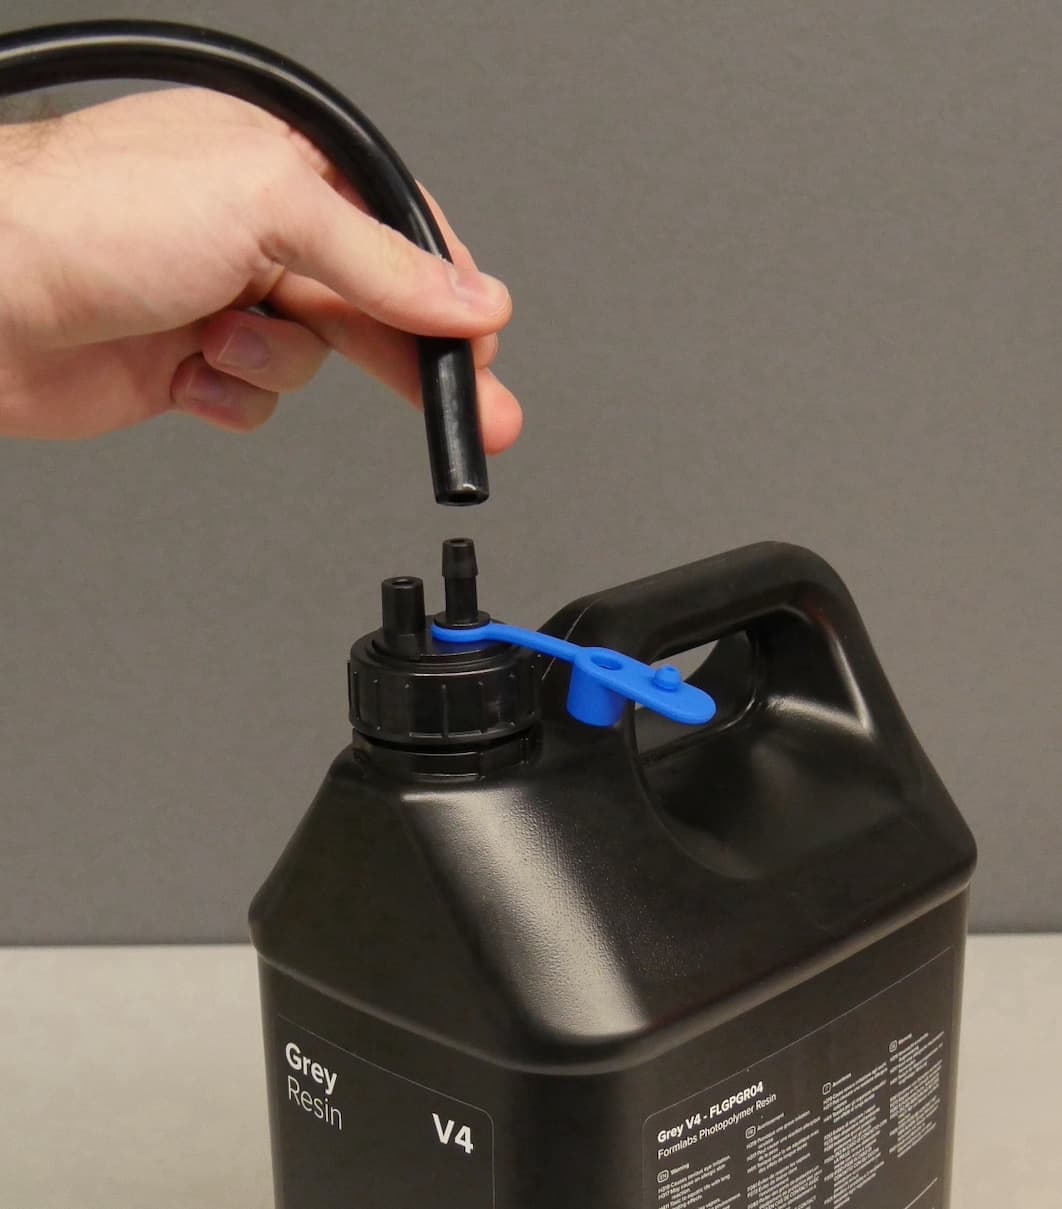
  1. Remove the blue silicone plug from the resin container’s transfer cap to expose the output barb and the vent hole.
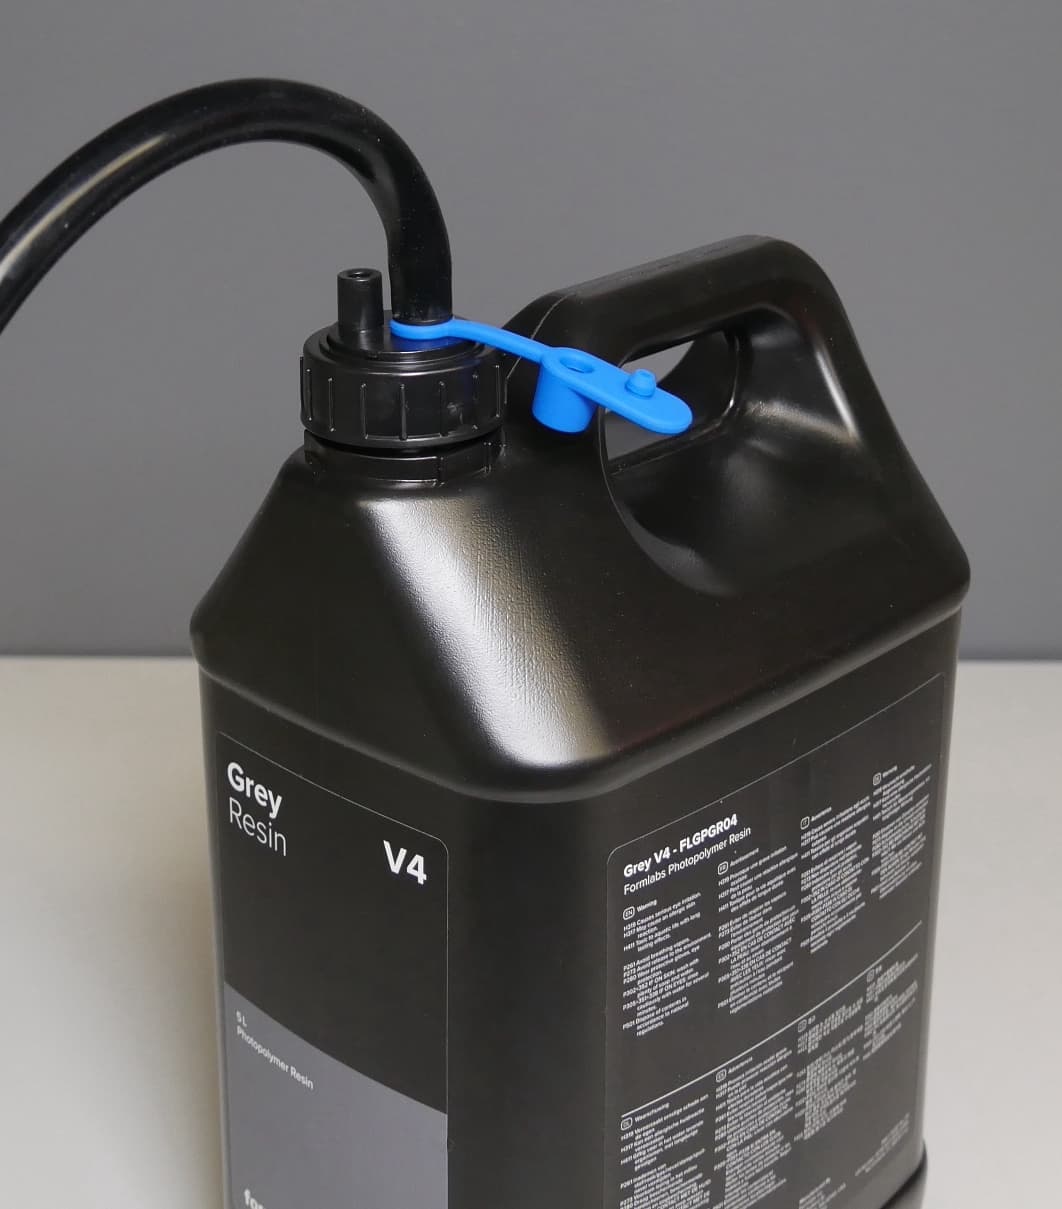
  2. Connect the other end of the transfer tube to the transfer cap’s output barb. For added security, you may optionally secure the transfer tube to the resin container with another zip tie.
alttext
alttext

Tip:

Trim the transfer tube to length to allow for easier routing and speed up resin dispensing.

Hinweis:

Der Pumpenschlauch, der Übertragungsschlauch und der Übertragungsdeckel können nur für einen einzigen Harztyp verwendet werden. Bei einem Materialwechsel dürfen sie nicht wiederverwendet werden. Tauschen Sie den Schlauch aus, wenn Sie das Material wechseln oder nach sechsmonatigem Gebrauch, je nachdem, was zuerst eintritt. Wenn er nicht ersetzt wird, nutzt sich der Pumpenschlauch durch den Kontakt mit den Rollen der Pumpe im Laufe der Zeit ab, was zu einer Verlangsamung des Pumpvorgangs führt. Ersatzschläuche können im Formlabs Shop erworben werden. Folgen Sie dem Leitfaden Ersetzen des Pumpenschlauchs des Resin Pumping System [EN] [DE] [ES] [FR] [IT] [JA] [ZH], um zu erfahren, wie man den Schlauch ersetzt.

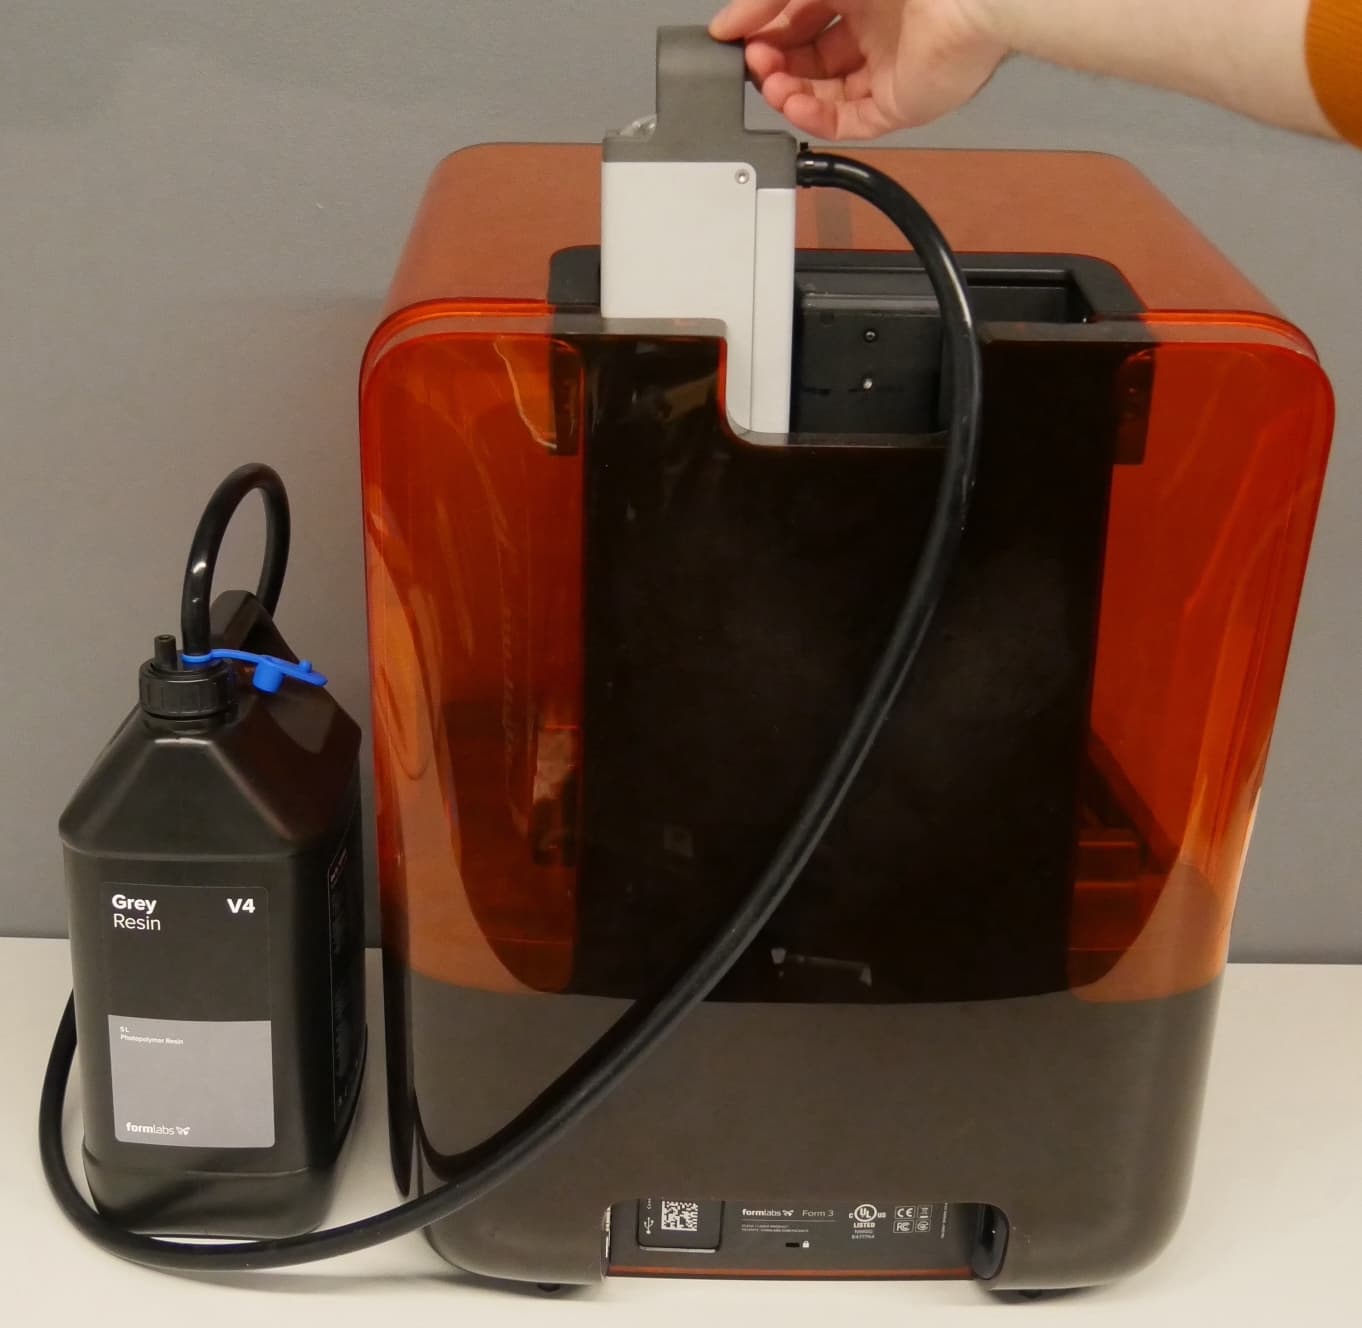
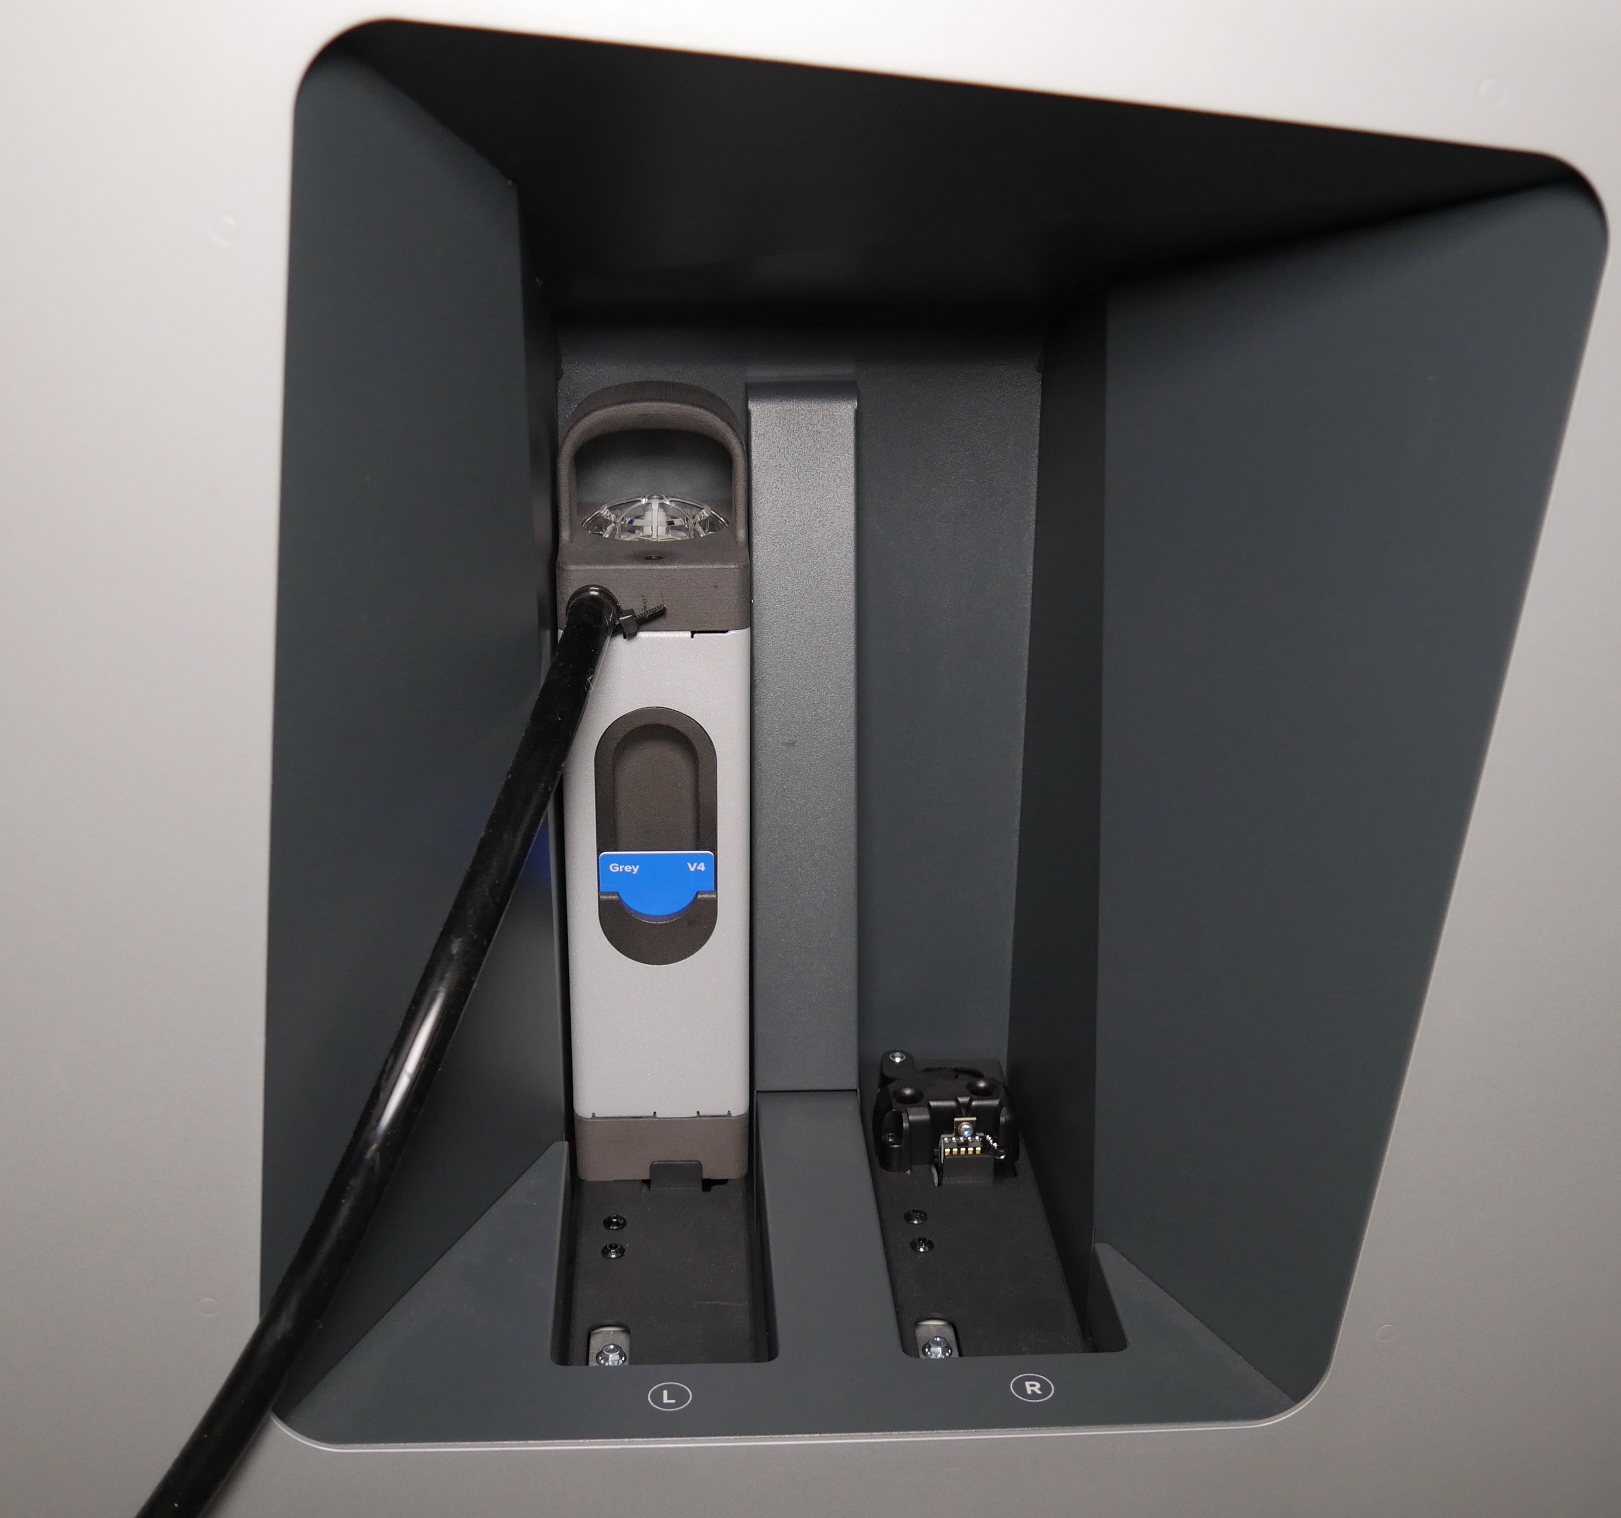
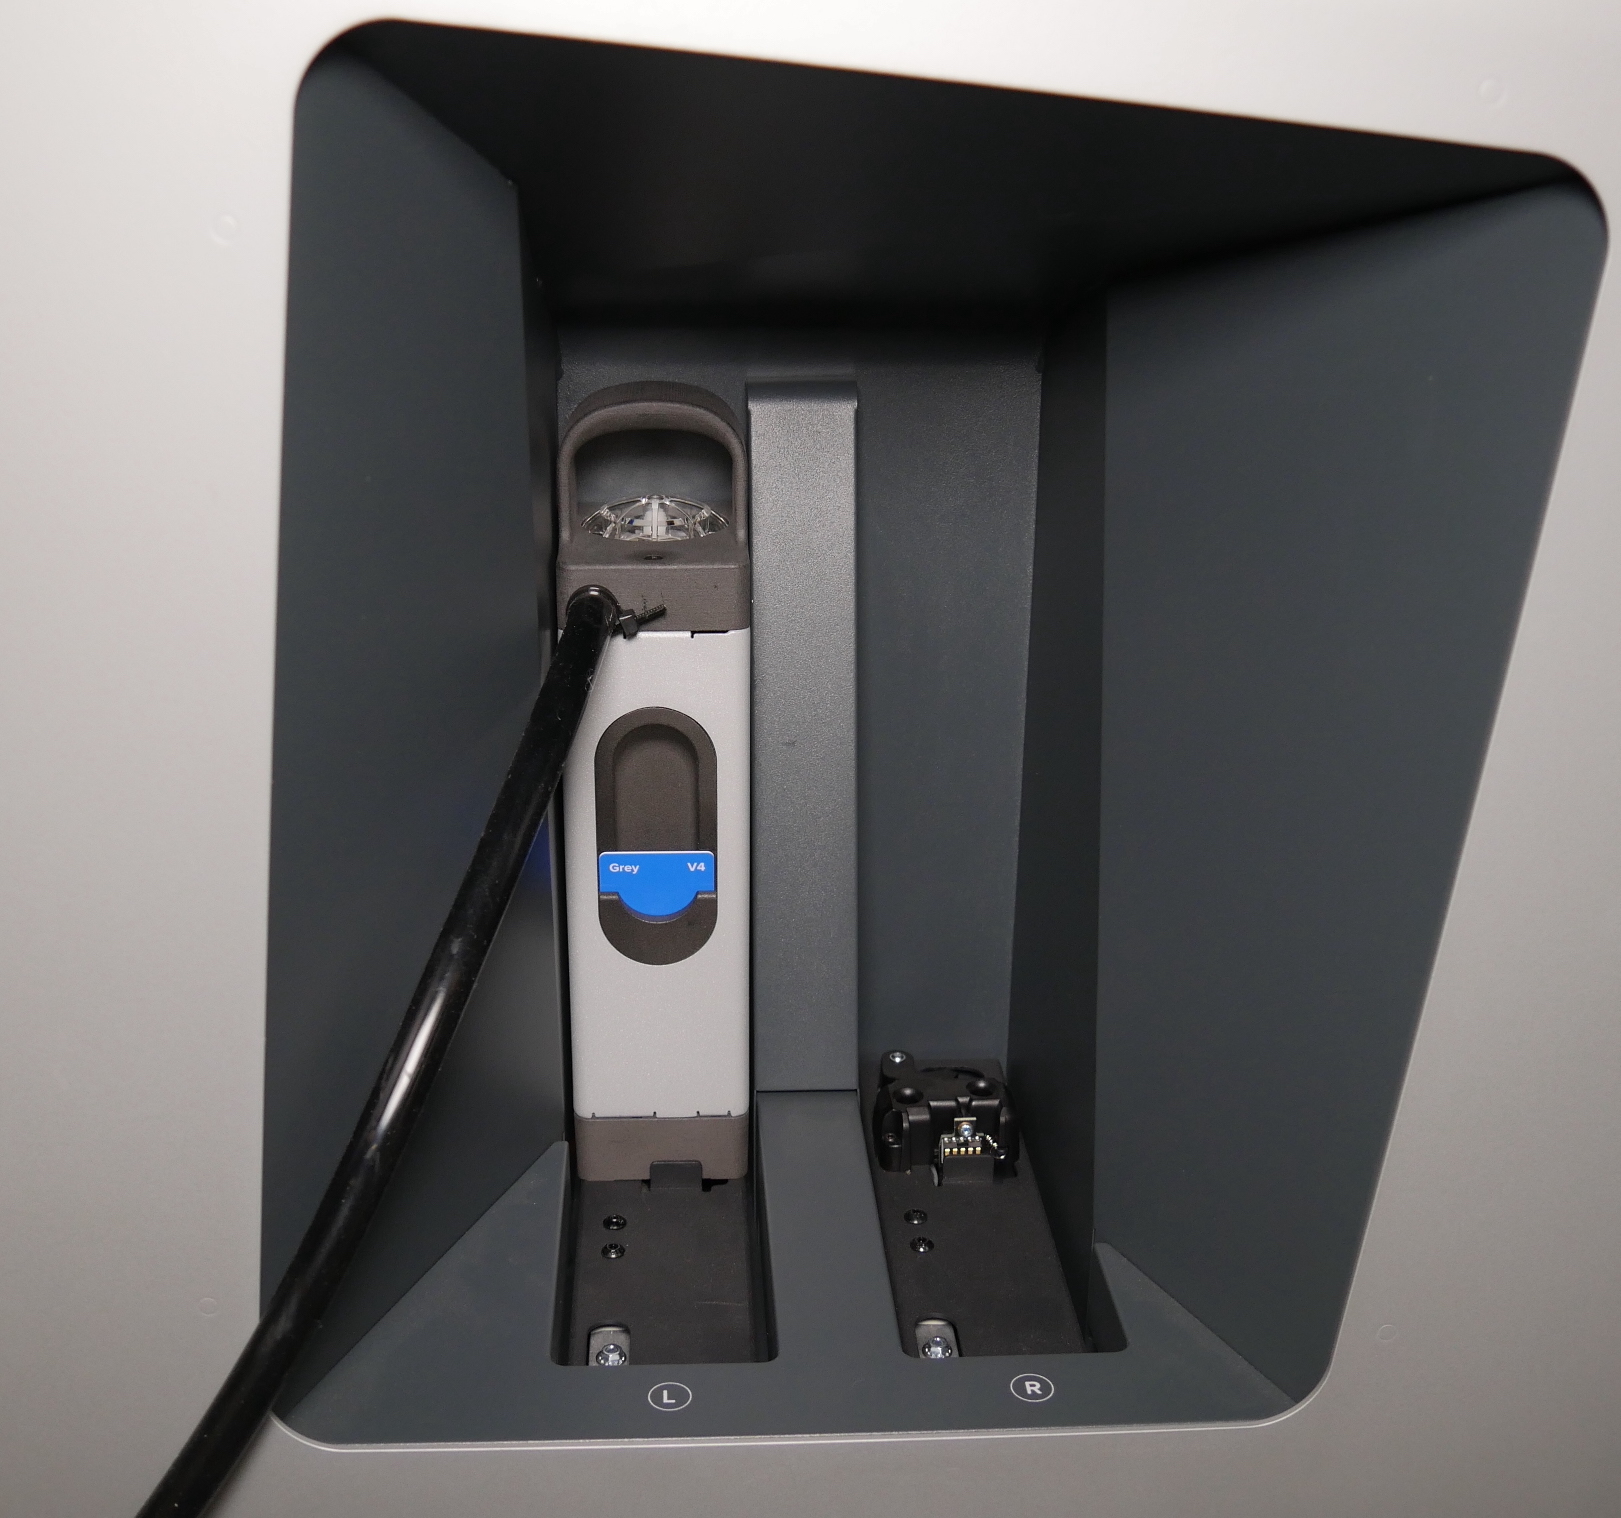
  1. Insert the resin pump into the printer’s cartridge slot.
    • On Form 3L generation printers, the resin pump must be placed in the left cartridge slot.
alttext
Inserting the Resin Pump (Form 3) into a Form 3 printer
alttext
Inserting the Resin Pump (Form 4) into a Form 4 printer
  1. Place the resin container next to the printer on a clean, level surface. Take care to not pull or pinch the transfer tube when moving the resin container.
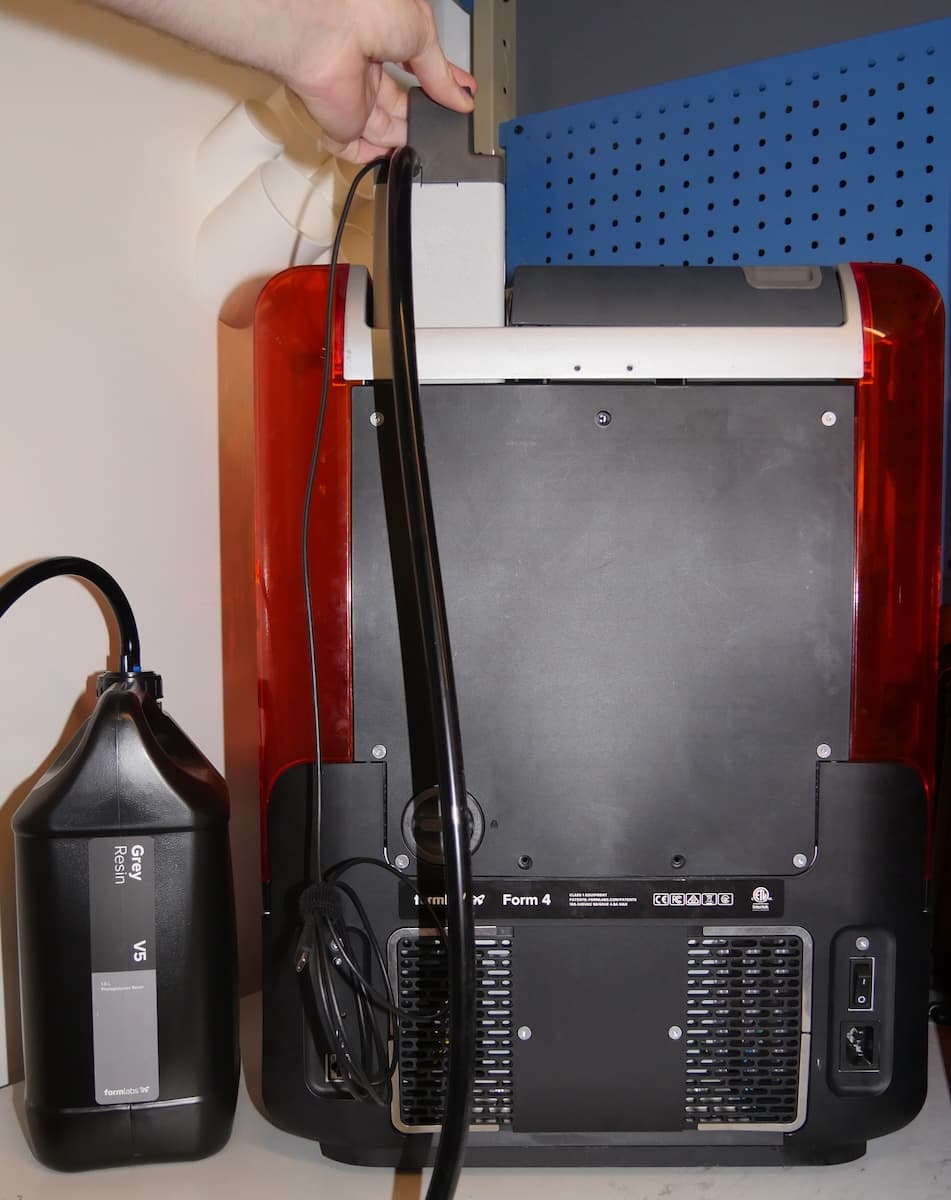
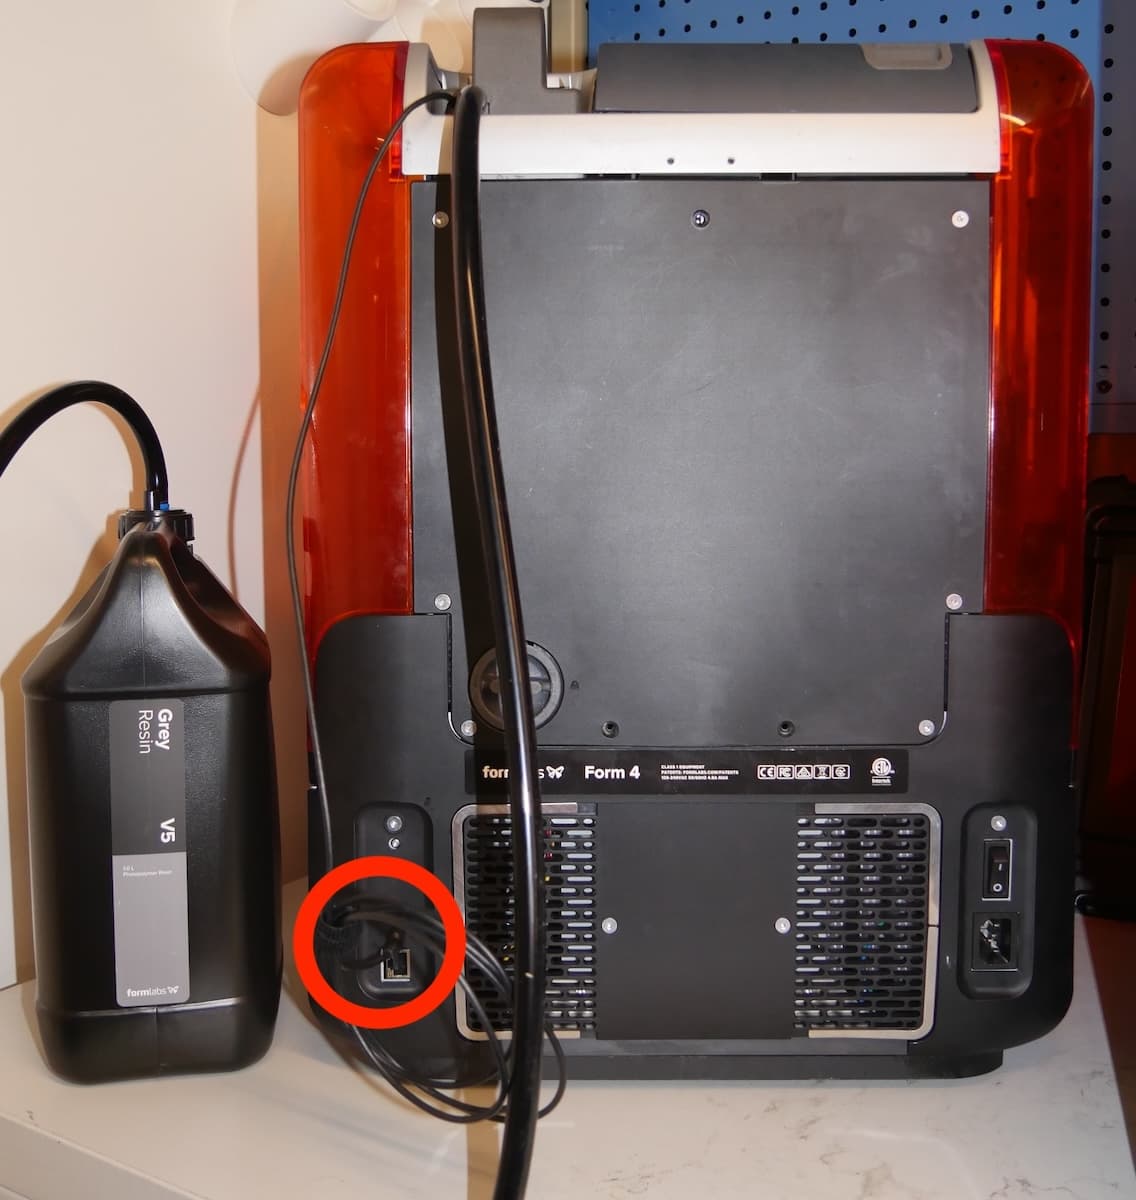
  2. Resin Pumping System (Form 4): Plug the integrated USB-C cable into the port on the back of the printer.
Plugging the Resin Pumping System (Form 4) into a Form 4 printer
  1. If the printer is powered on, it displays a message on the touchscreen and plays a notification sound once it detects the resin pump.

Once the resin pump is inserted into and recognized by the printer, you can start printing.

alttext

Notice:

When using the Resin Pumping System with the Form 3L or Form 3BL, remove any resin cartridges from the printer before inserting the resin pump into the cartridge slot. Do not operate the Resin Pumping System with any other resin cartridges inserted into the printer.

On a Form 4L generation printer with firmware 1.14.0 or later, you can insert a matching resin cartridge into the second cartridge slot. The printer will dispense from this backup resin cartridge if the 5 L resin container empties during a print.

alttext

The transfer tube and pump tube cannot be reused when changing materials for printing with the Resin Pumping System. Transfer tubes and pump tubes are available for purchase from Formlabs on the Formlabs store. The replacement tubes are the same for both the Resin Pumping System (Form 3) and Resin Pumping System (Form 4).

Using the Resin Pumping System (Form 3) with the Form Auto

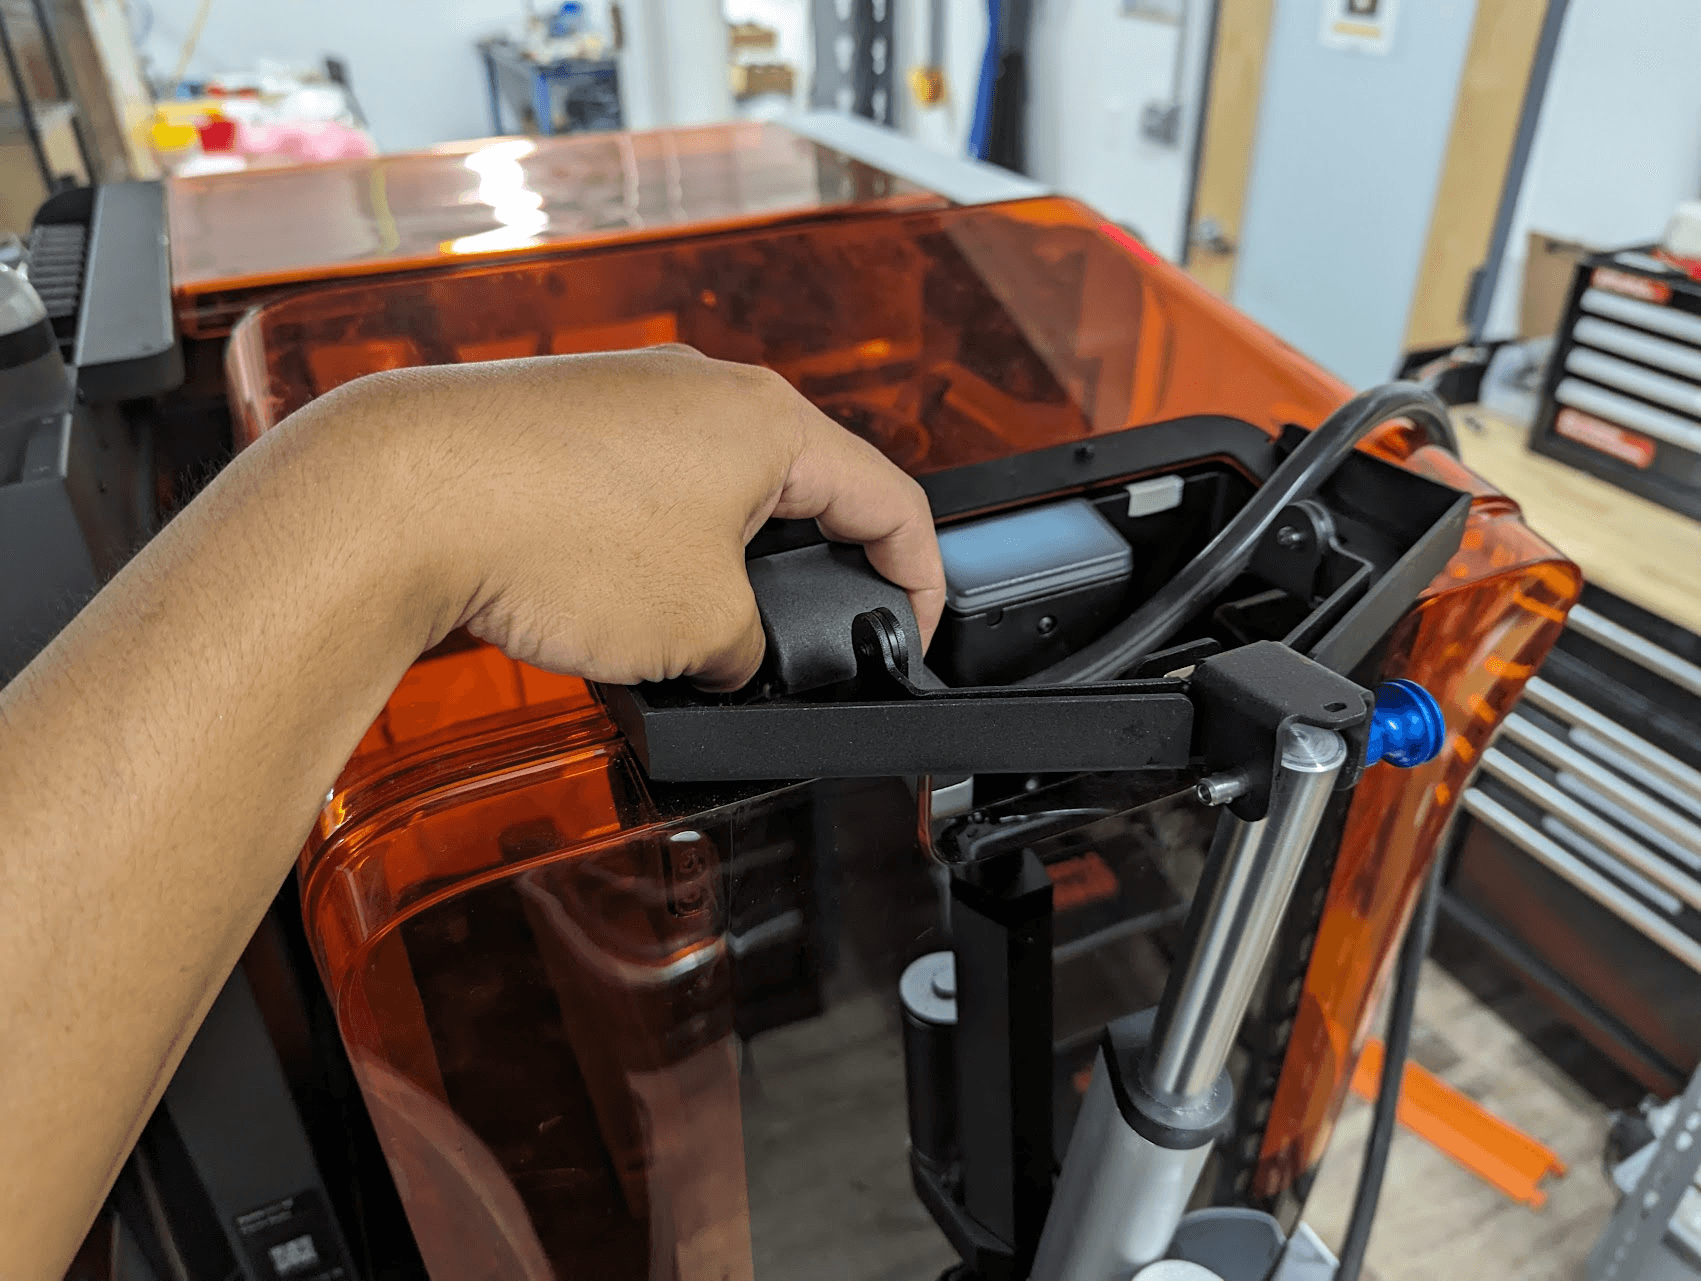
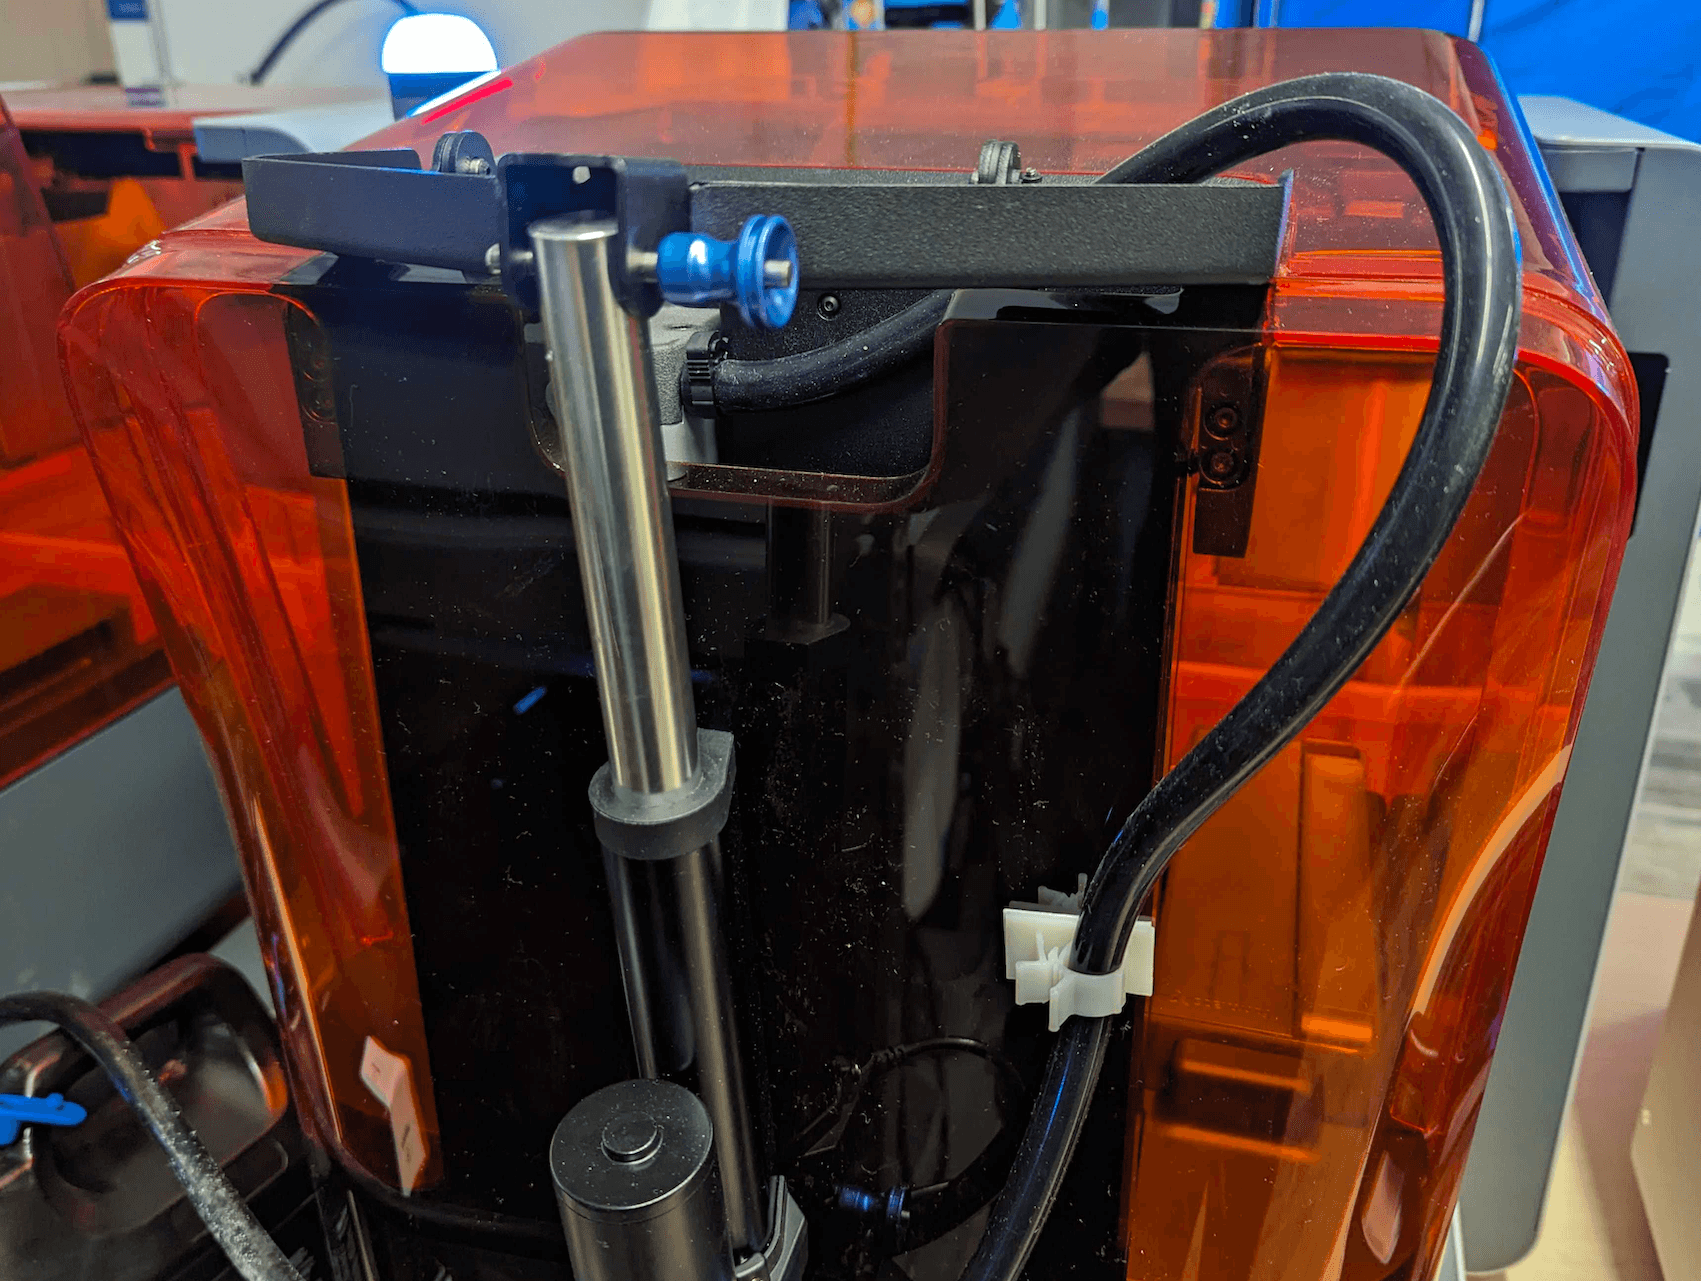
When installing the resin pump into a printer mounted on a Form Auto, attach the included cable clip to the back of the printer to secure the transfer tube in place. Be mindful of the orientation of the transfer tube. Take care not to tangle or pull on the tube when inserting the resin pump into the cartridge slot.

Notice:

Before using the Resin Pumping System with the Form Auto, open and close the printer’s cover to ensure that there is enough clearance for the machine to operate. Place the resin container on a clean, level surface next to the Form Auto without it obstructing the machine, and ensure the transfer tube does not pinch or tangle when opening the cover or rotating the printer.

alttext
alttext
Inserting resin pump into a printer mounted on a Form Auto. Note the transfer tube sits between the printer and the cover actuator.
The cable clip attached to the back of the printer holding the transfer tube in place.

Entsorgung

Resin containers and straw caps are made of high-density polyethylene (HDPE) and polyethylene (PE) and can be recycled with plastic household waste once fully cleaned. The transfer tube is not recyclable and should be disposed of with regular household waste.

Notice:

  • Do not pour liquid or partially cured resin into drains or dispose of it with household waste.
  • Do not pour solvent (IPA, TPM) that contains dissolved resin into drains or dispose of it with household waste. Safe and appropriate disposal methods of used solvent vary by location.
  • Refer to the safety data sheet (SDS) and local authorities for guidance on disposing of resin and solvent. Liquid resin (whether pure liquid, dissolved in solvent, or partially cured) may be classified as hazardous waste in your region and shall be disposed of with care.