WHITE PAPER
Formlabs Logo

Aligning the build platform (Form 4 and Form 4L generation)

Aligning the build platform (Form 4 and Form 4L generation)

The Align build platform calibration tool is an advanced troubleshooting feature on Form 4 and Form 4L generation printers. Align your build platform and Light Processing Unit after replacing the LPU to help with model adherence issues across the build platform.

The Form 4 and Form 4L generation printing process requires the build platform and the LPU surface to be parallel. Deviations may result in model adherence issues and print failures. While the printer is pre-calibrated for build platform parallelism, users can calibrate individual build platforms to improve the printer’s dimensional accuracy and increase print success.

Formlabs recommends using Align build platform in the following situations:

  • Overcompression: A print defect in which reduced space between the build platform and resin tank causes the initial layers to be very thin. The rest of the part prints, but the initial layers are flattened and may be difficult to remove from the build platform.
  • Non-adherence: A print defect in which prints are either partially or completely detached from the build platform. This occurs when the initial layers of a print fail to adhere to the build platform.
  • After replacing the LPU

Note:

  • The Align build platform calibration tool helps you ensure that the build platform is completely parallel to the LPU. Minute differences between build platforms may require individual calibrations. Formlabs recommends repeating the parallelism adjustment process when changing the build platform if you are troubleshooting one of the issues listed above.
  • Running the Align build platform calibration tool will reset any Z offset value previously set in Z-Axis Fine Tuning.
Aligning the build platform

Tools required:

  • Alignment shims (4x, located in the tool caddy)
  • Form 4 generation printers: 4 mm hex key (mounted to the tool caddy)
  • Form 4L generation printers: 5 mm hex key (mounted to the tool caddy)

To align the build platform:

  1. Update the printer’s firmware.
  2. Ensure that the printer is not running a print job and is currently Idle.
  3. Put on a pair of clean nitrile gloves.
  4. Remove the build platform from the printer.
  5. Clean the build platform so that it is entirely free of resin.
  6. Cover the resin tank with its lid.
  7. Remove the resin tank and mixer from the printer.
  8. Remove the resin cartridge from the printer.
  9. Close the cover.
  10. Tap the gear icon on the printer’s touchscreen. The Settings screen appears. Tap Tools > Align build platform.
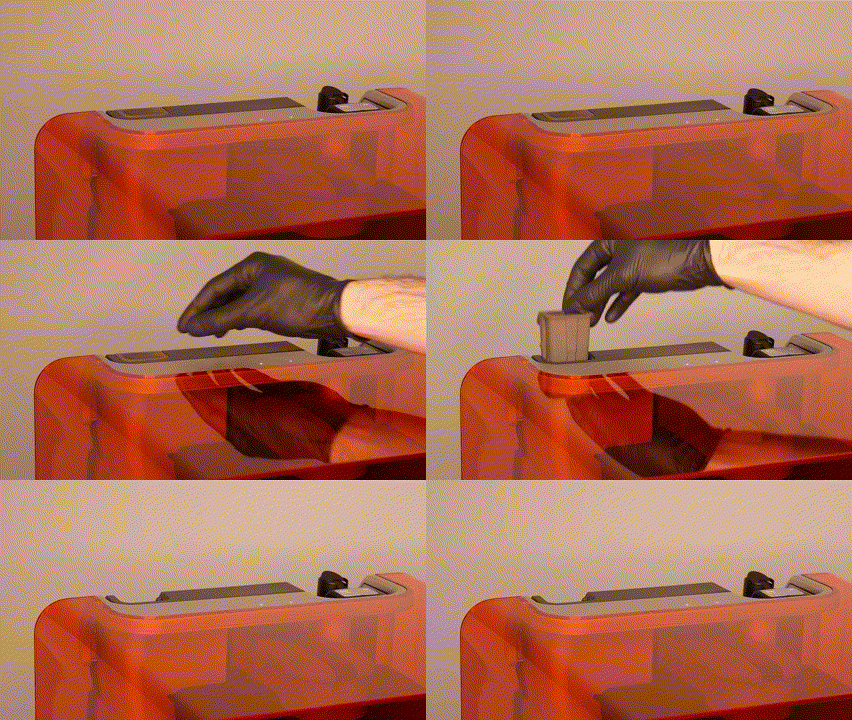
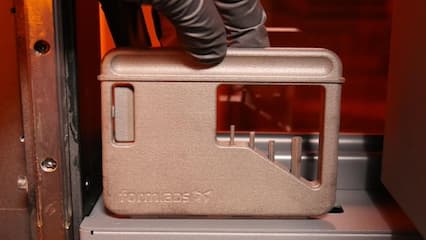
  11. Retrieve four alignment shims and hex key from the tool caddy
    • For Form 4 generation printers: Use the 4 mm hex key.
    • For Form 4L generation printers: Use the 5 mm hex key.
alttext
alttext
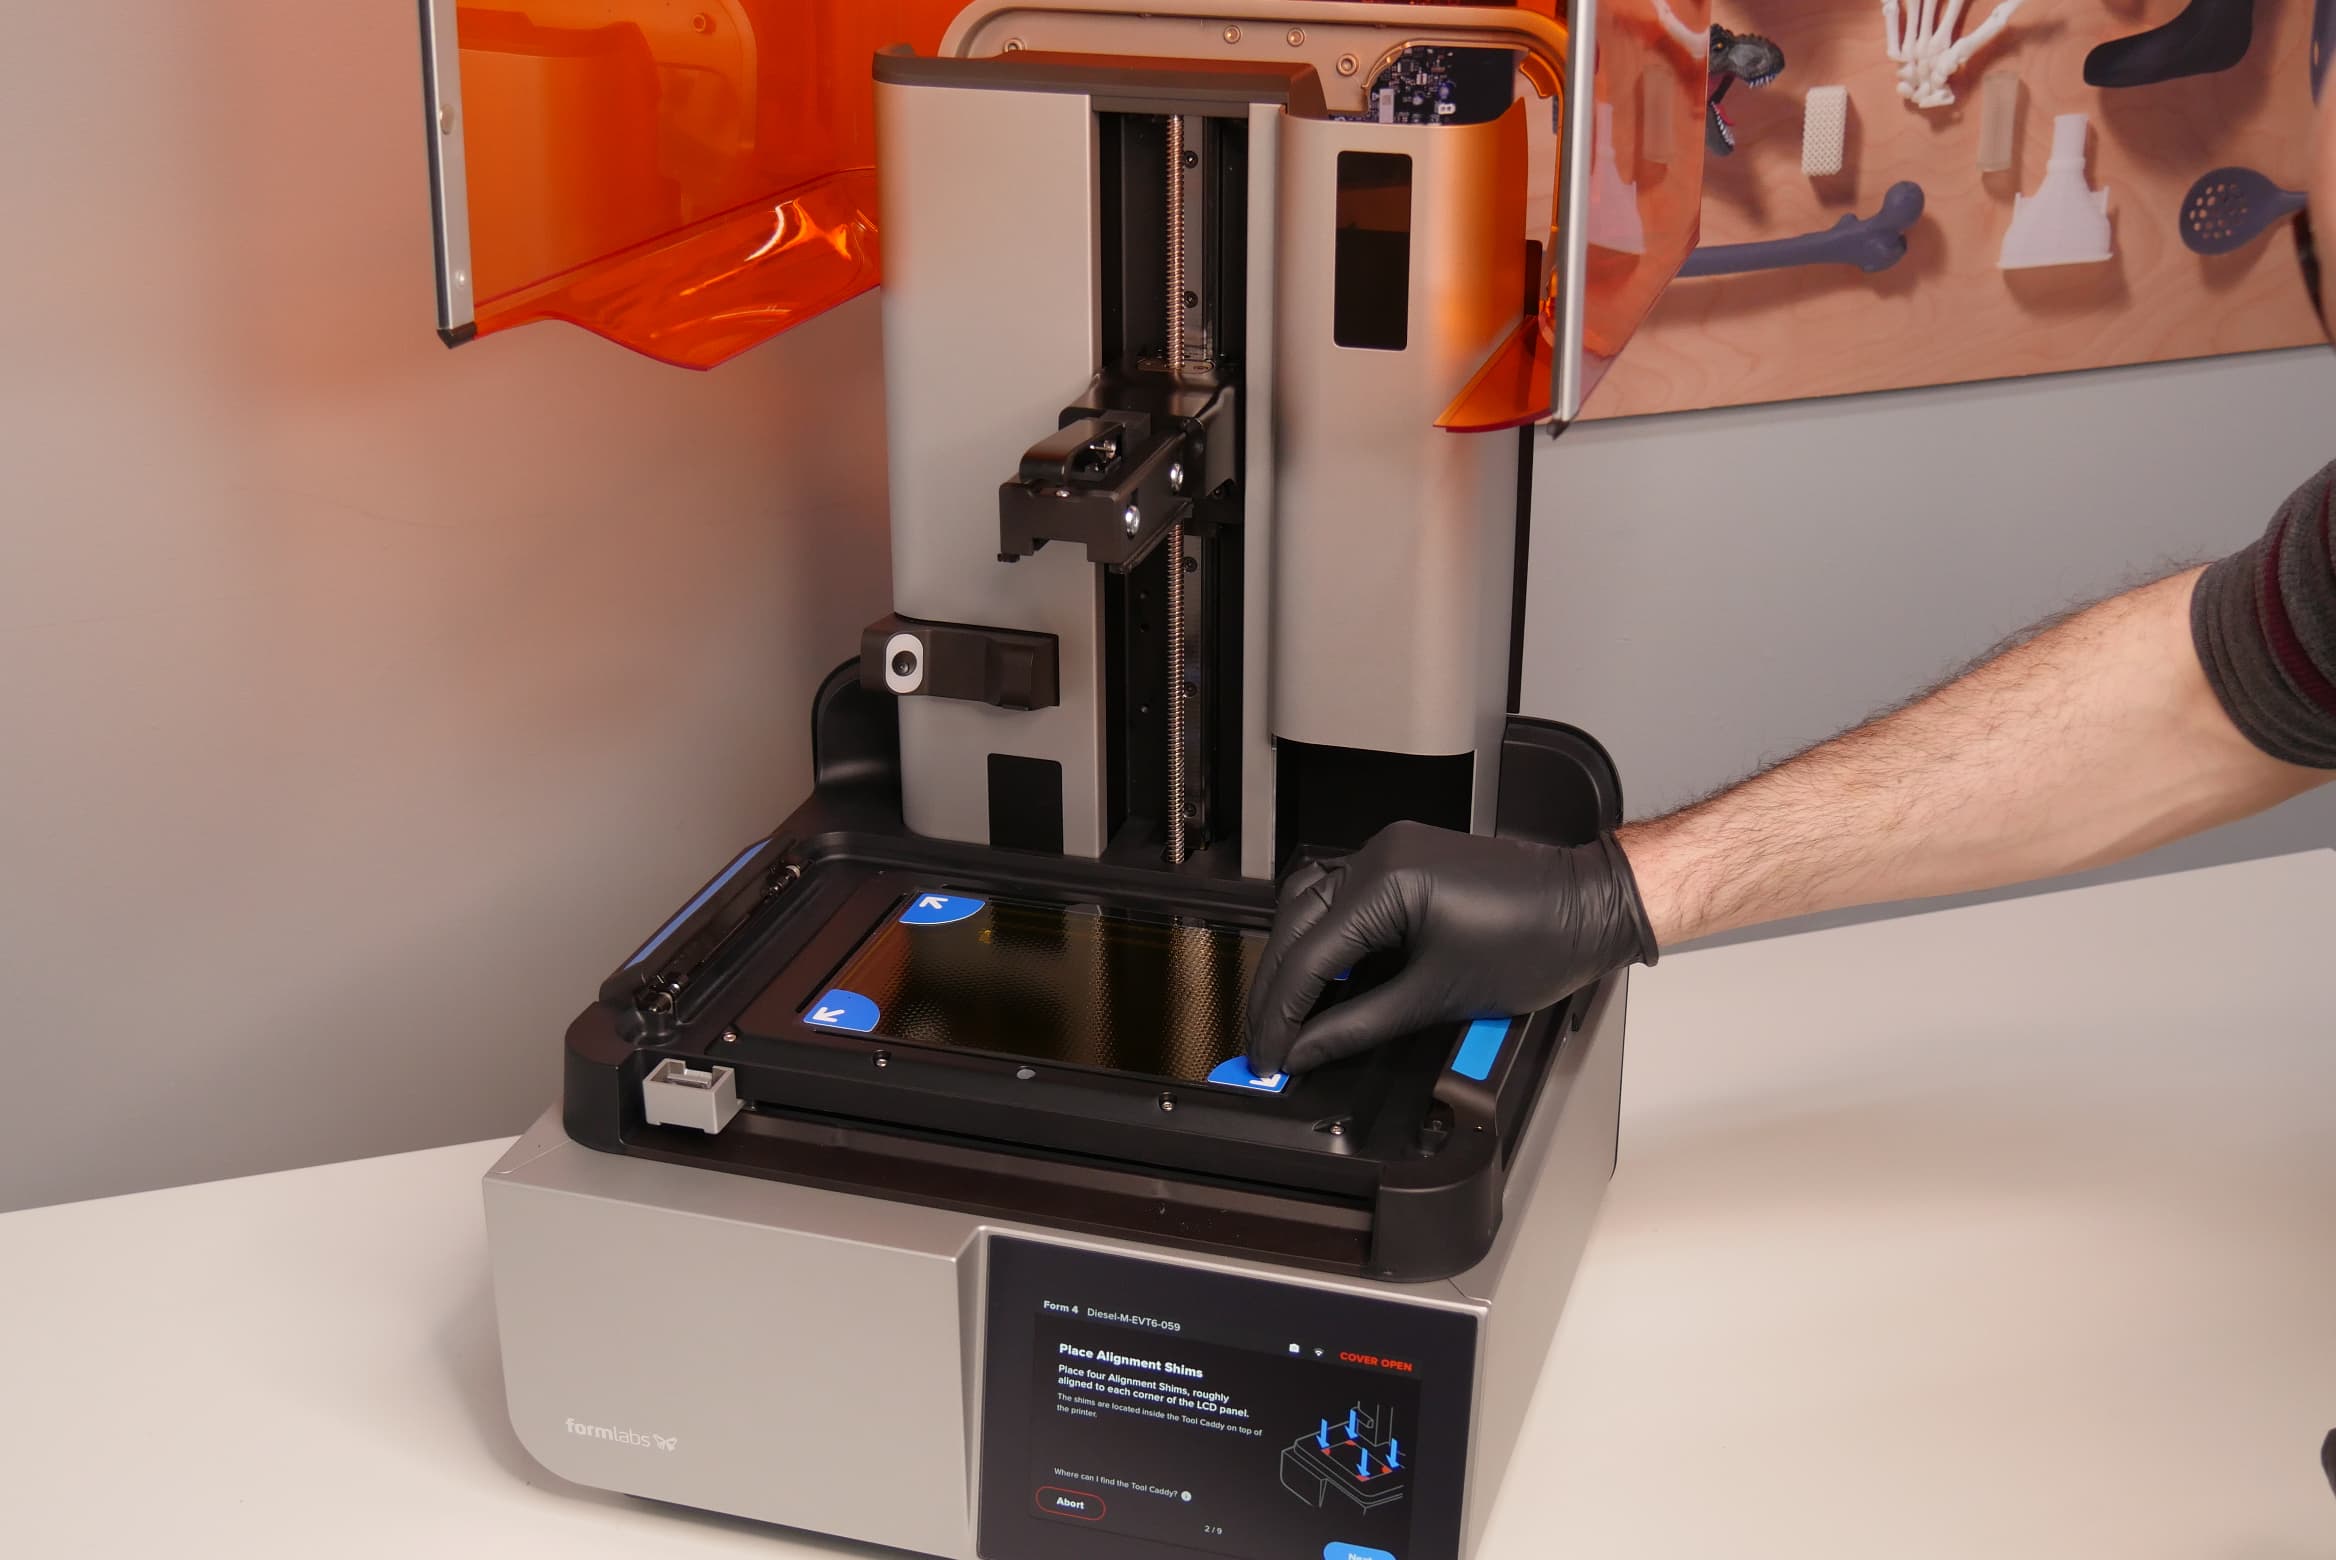
  1. When prompted, place the four alignment shims on the corners of the LPU. Tap Next.
alttext
  1. Insert a clean build platform. Make sure it is completely free of resin. The build platform will make contact with the Light Processing Unit during alignment, and any resin residue may cause contamination or damage.
    • If you are using a Form 4 Flex Build Platform or Form 4L Flex Build Platform, make sure that the print surface is properly installed on the build platform body.
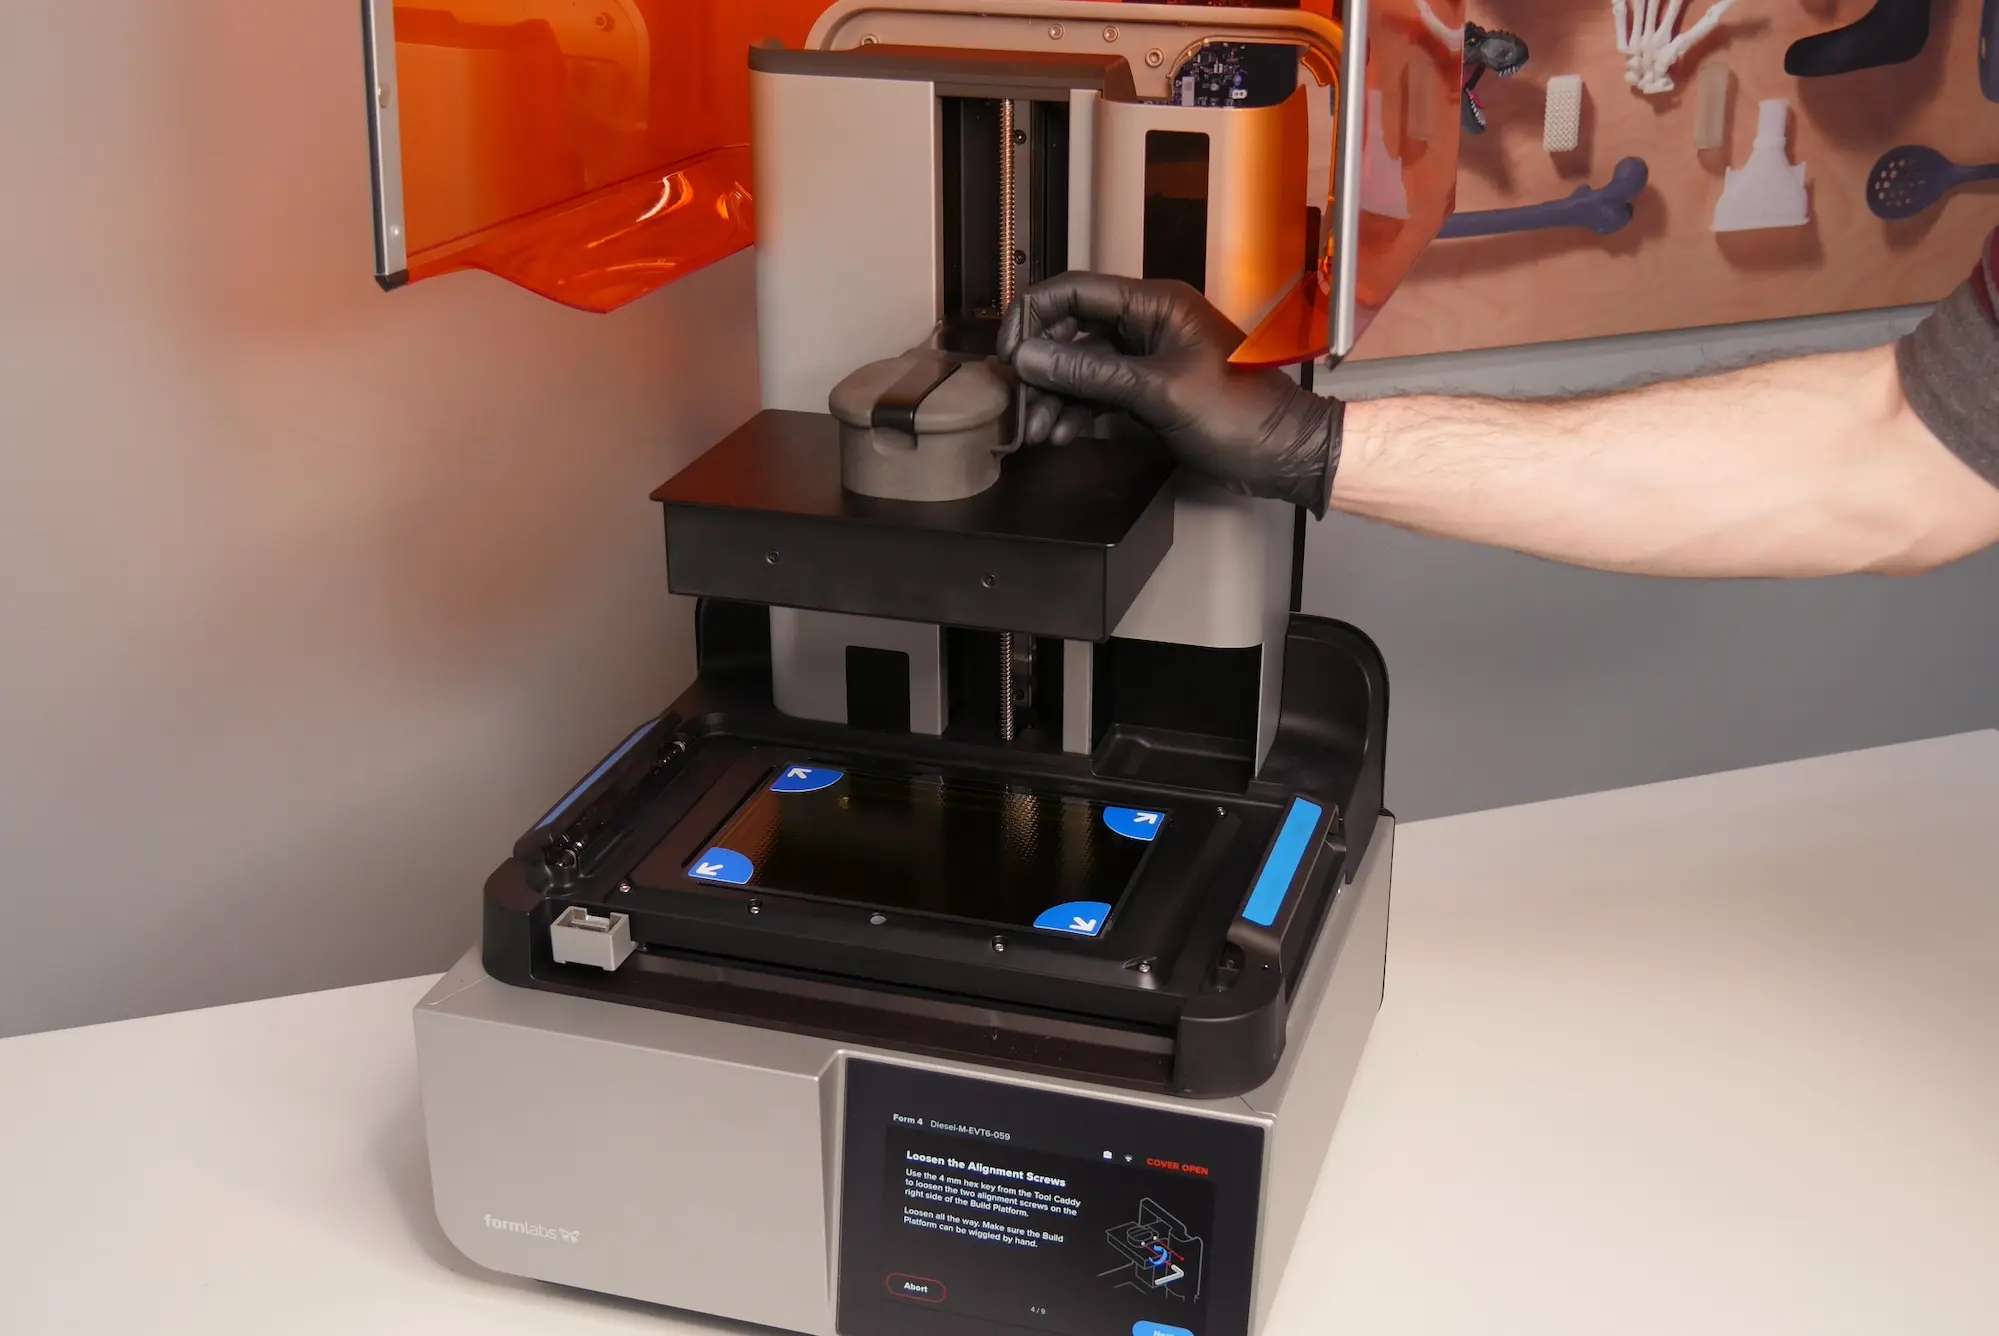
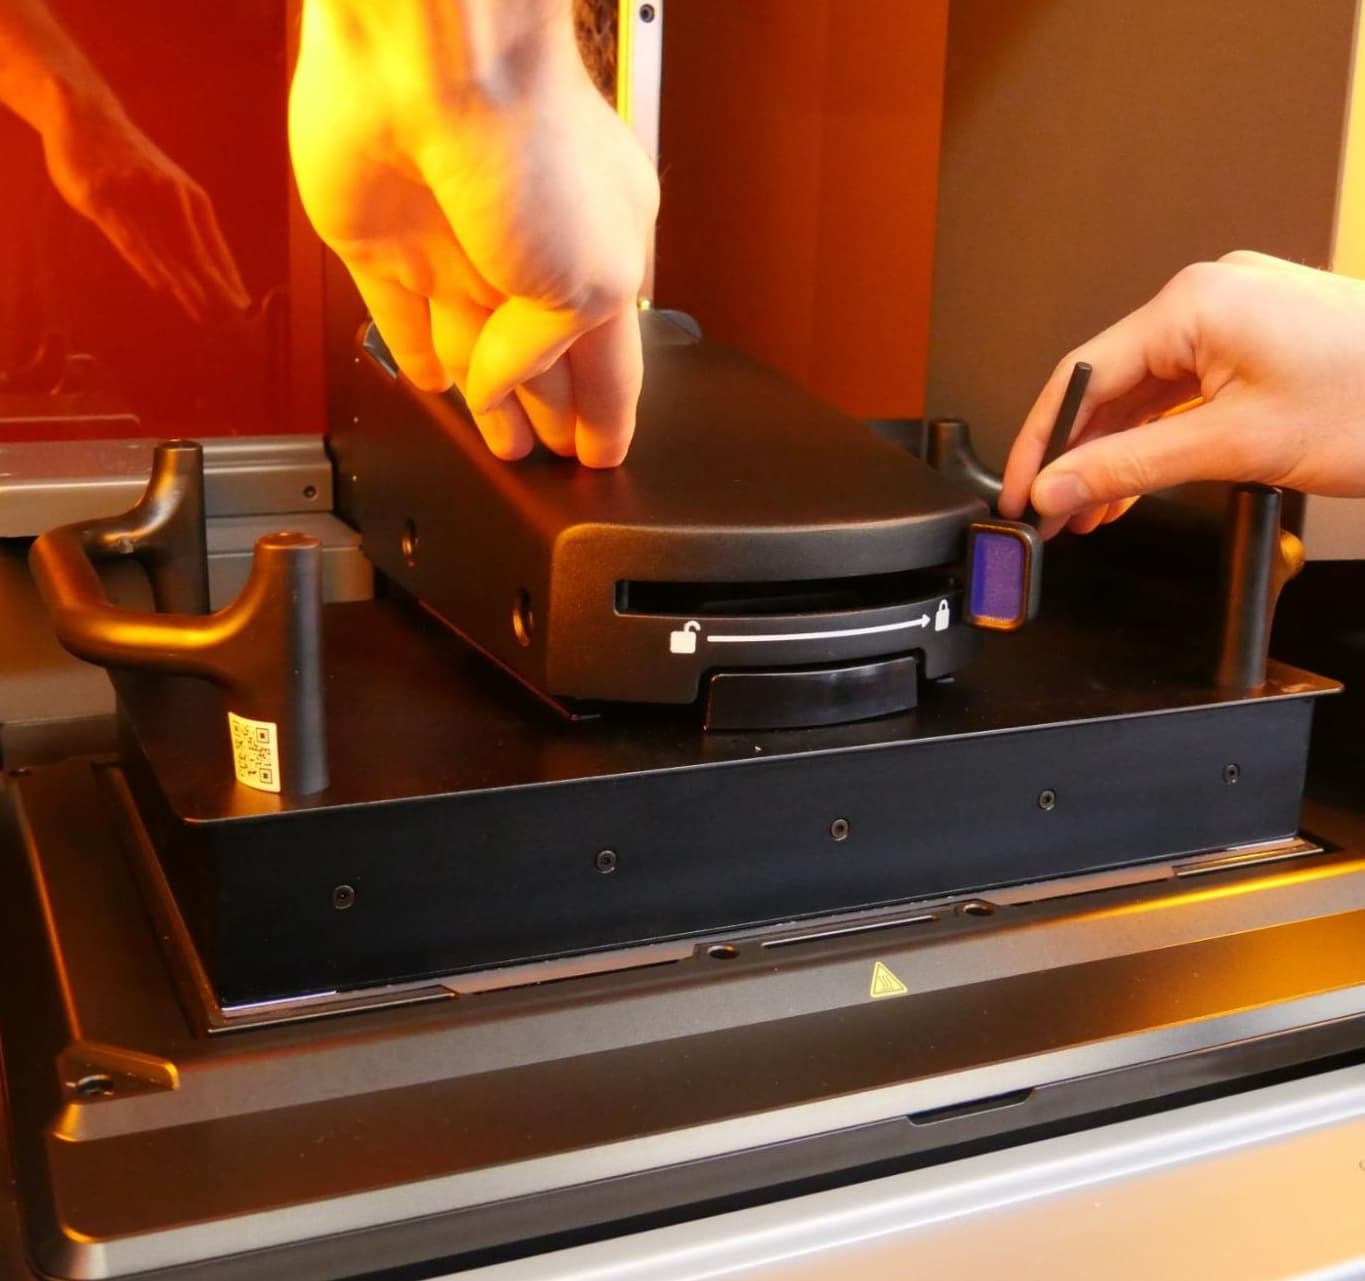
  2. Loosen the alignment screws on the build platform.
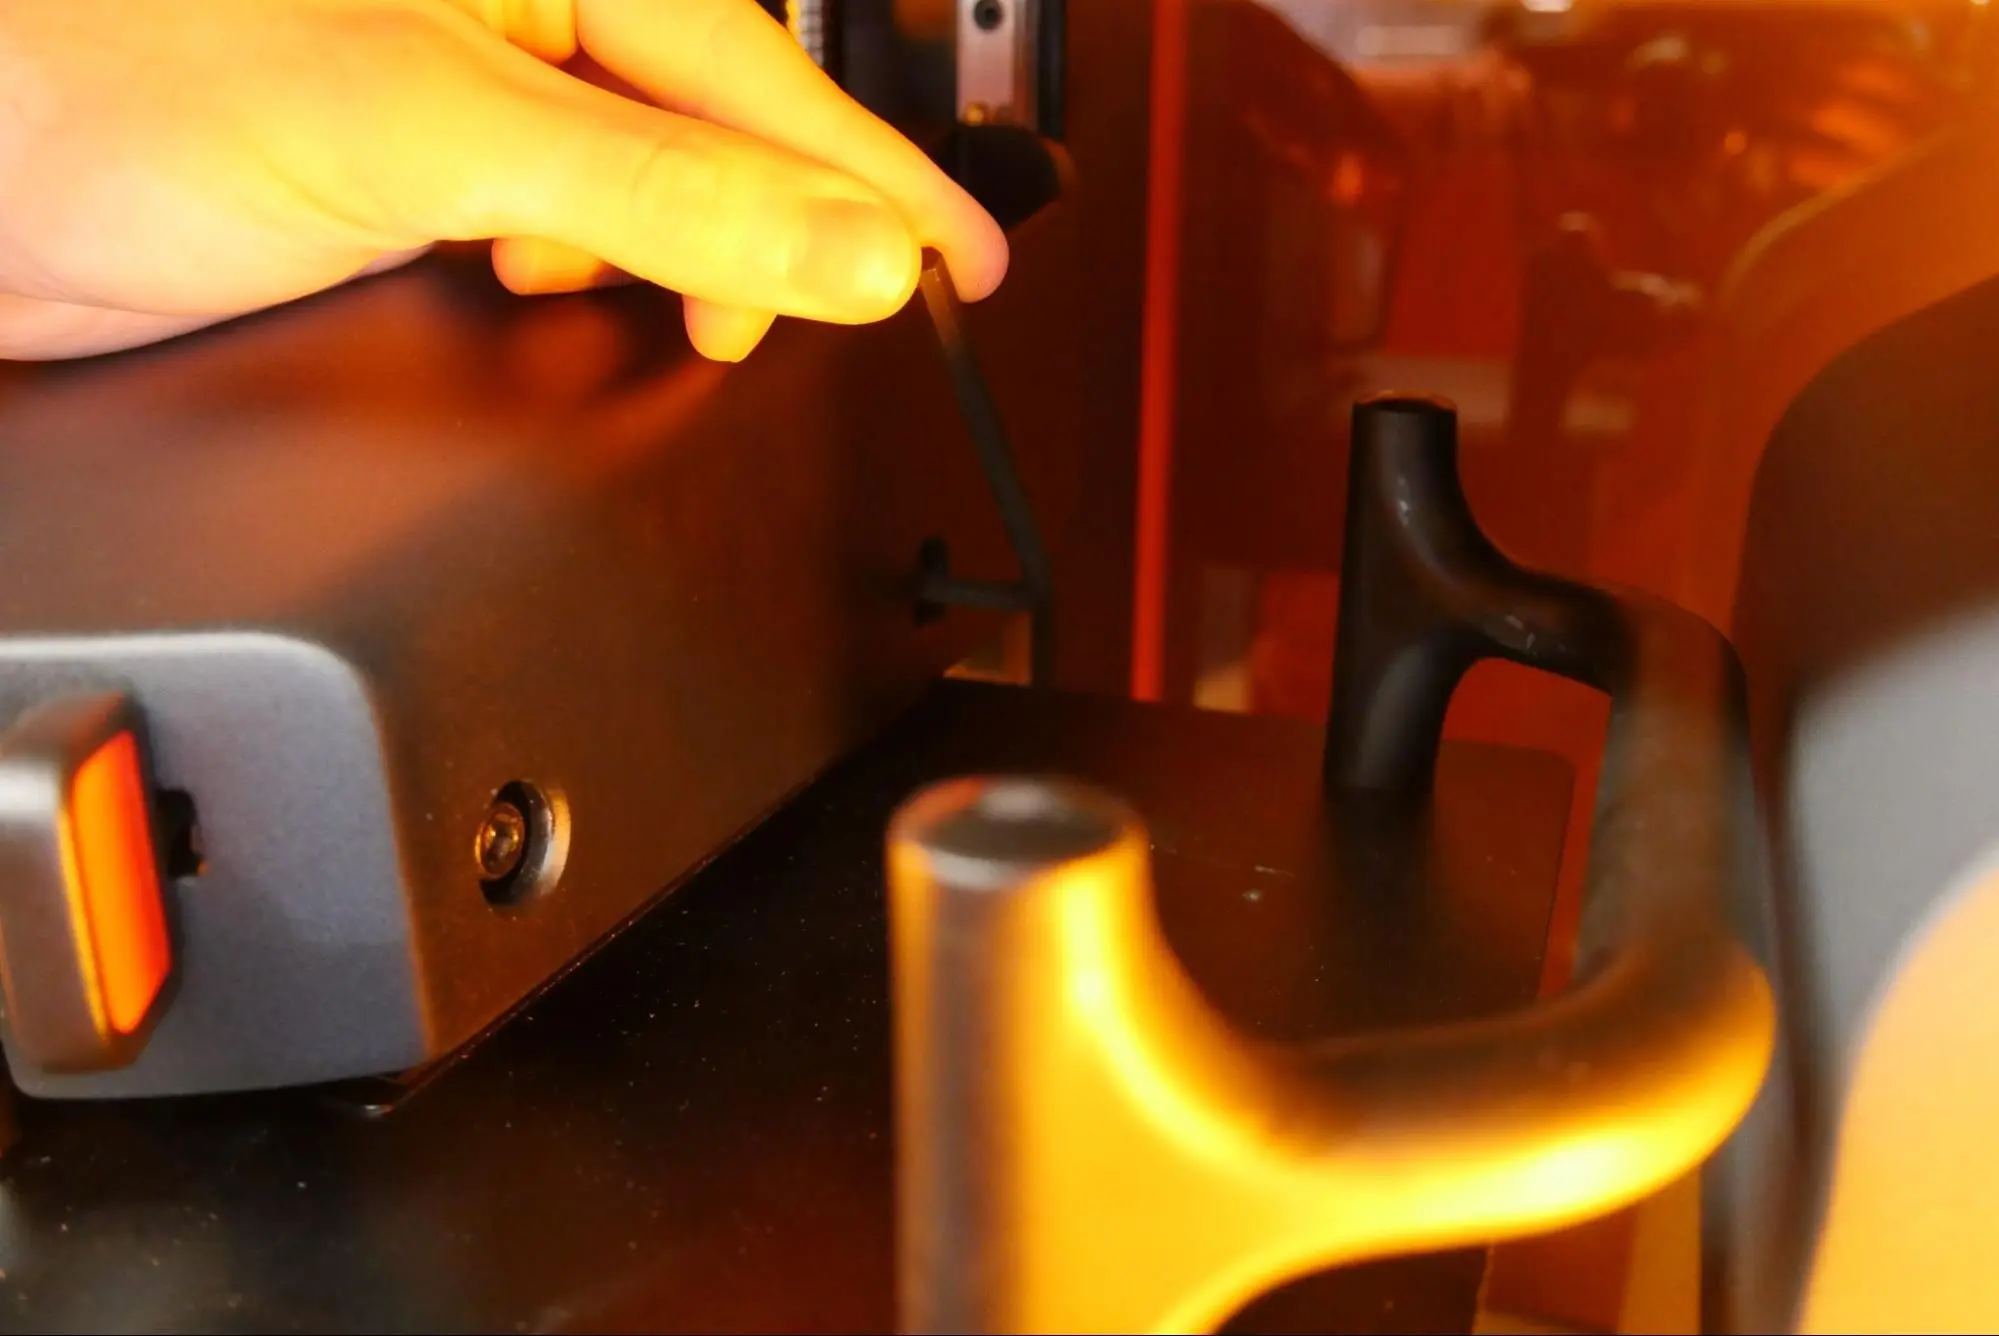
    • For Form 4 generation printers: Use the 4 mm hex key to loosen the two alignment screws on the right side of the build platform. Loosen the screws for 1–2 turns until you can wiggle the build platform by hand. Do not remove the screws.
    • For Form 4L generation printers: Use the 5 mm hex key to loosen the four alignment screws on the build platform. There are two screws on each side of the build platform.
      Loosen the screws for 1–2 turns until you can wiggle the build platform by hand. Do not remove the screws.
alttext
alttext
  1. Close the cover. The printer lowers the build platform to lie flat on the LPU texture.
  2. Open the cover.
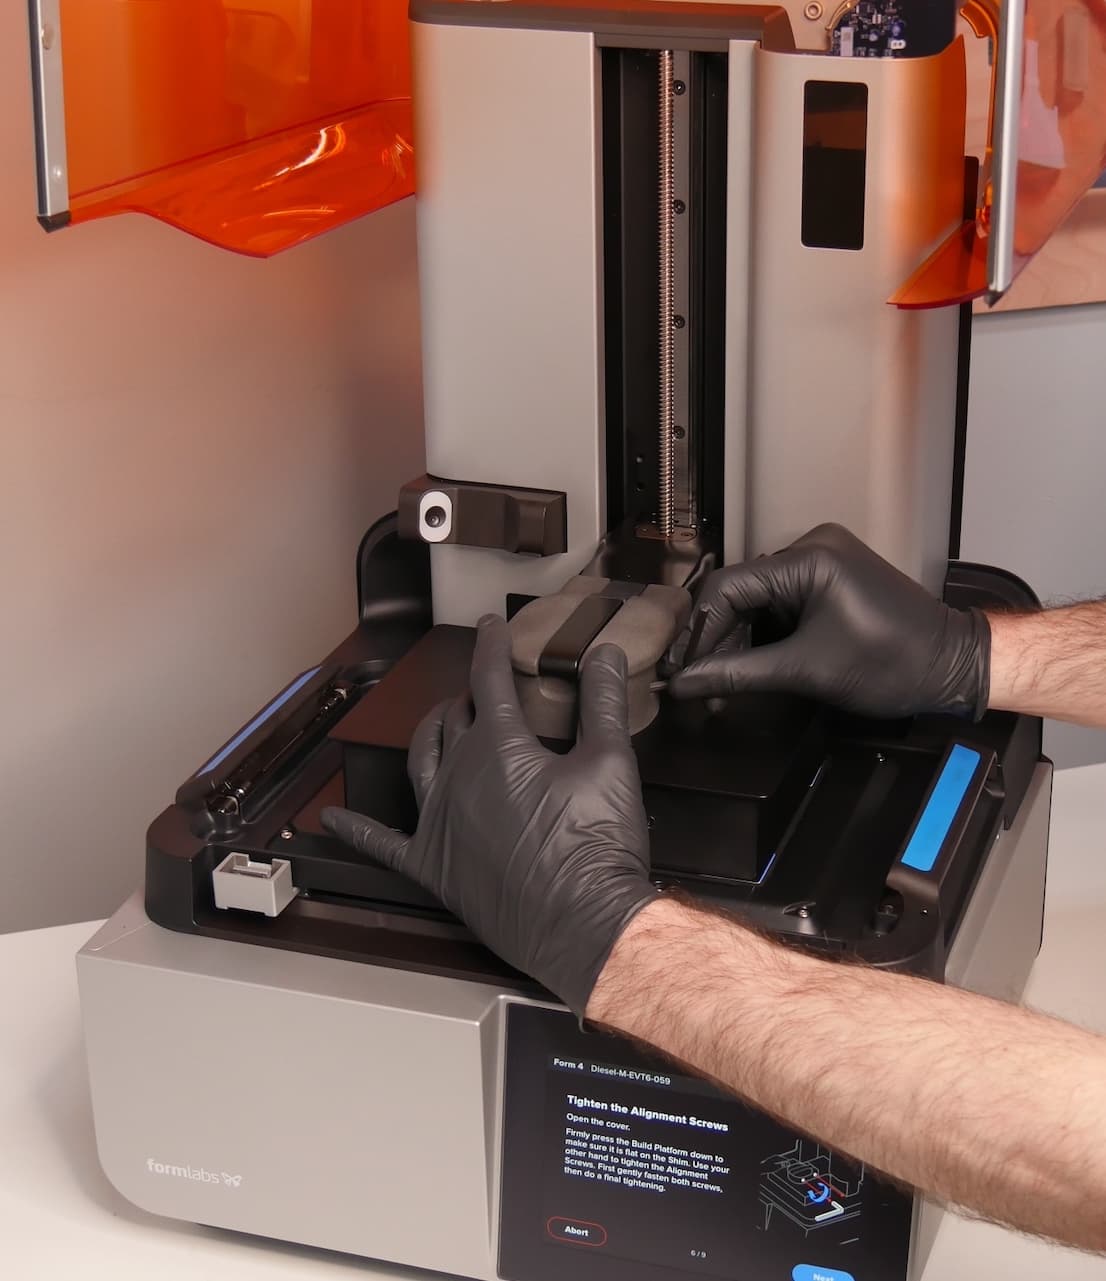
  3. With one hand pressing the build platform to lie completely flat on the LPU texture, use a hex key to tighten the alignment screws over two passes.
    • Use the 4 mm hex key to tighten the alignment screws on Form 4 generation printers. Ensure that both screws are secure.
    • Use the 5 mm hex key to tighten the alignment screws on Form 4L generation printers. Ensure that all screws are secure.
alttext
alttext
  1. Close the cover. The printer calibrates the Z-axis limit.
  2. Once the calibration is complete, return the alignment shims to the tool caddy and reinsert the resin tank, mixer, and cartridge.
  3. Print small models to test the change.
  4. If you continue to experience print failures, contact Formlabs Support or your authorized reseller.