TIPP
Melden Sie sich mit einem Formlabs-Konto bei PreForm an, um Druckaufträge mit dem Konto zu verknüpfen und Dashboard-Benachrichtigungen nur für Drucke zu aktivieren, die mit dem Konto verknüpft sind.


Dashboard ermöglicht mehreren Nutzern den Zugriff auf die Daten eines einzelnen Druckers und jedem Nutzer den Zugriff auf die Daten mehrerer Drucker. Konfigurieren Sie die Benachrichtigungseinstellungen und geben Sie Informationen über jeden Druck frei, um den Druckablauf anzupassen.
Beginnen Sie mit der Registrierung und dem Anschluss eines Druckers an Dashboard. Sobald der Drucker in Dashboard registriert wurde und die Dashboard-Protokollierung aktiviert wurde, sendet er seine Daten an Dashboard. Dafür muss er über WLAN oder Ethernet mit dem Internet verbunden sein.
TIPP
Melden Sie sich mit einem Formlabs-Konto bei PreForm an, um Druckaufträge mit dem Konto zu verknüpfen und Dashboard-Benachrichtigungen nur für Drucke zu aktivieren, die mit dem Konto verknüpft sind.
Gemeinsame Druckerverwaltung
In Dashboard können mehrere Benutzer dieselben Drucker gemeinsam nutzen. Dies ist über die Freigabefunktion möglich, unabhängig davon, ob die Drucker in Druckergruppen organisiert sind oder nicht. Ein Drucker kann nur einer Druckergruppe angehören.
Um einen Benutzer zu einer Druckergruppe hinzuzufügen, wählen Sie die Gruppe in Dashboard aus und klicken Sie auf Share (Freigeben). Wenn der Bildschirm Share Printer (Drucker freigeben) erscheint, laden Sie einen Benutzer in die Druckergruppe ein, indem Sie seine E-Mail-Adresse eingeben, seine Berechtigungsstufe auswählen (Member (Mitglied) oder Admin (Administrator)) und Send Invite (Einladung senden) auswählen. Der neue Benutzer erhält per E-Mail eine Einladung in die Druckergruppe.
Der Bildschirm Share Printers (Drucker freigeben) fügt die E-Mail des Benutzers zur Liste People with access (Personen mit Zugriff) hinzu. Sobald der Benutzer die Einladung angenommen hat, wird er mit seiner E-Mail-Adresse und der Berechtigungsstufe in der Liste People with access (Personen mit Zugriff) auf dem Bildschirm Share Printers (Drucker freigeben) aufgeführt. Benutzer mit Adminrechten können die Mitgliedschaft von Benutzern in der Druckergruppe ändern, indem sie auf den Pfeil neben den Mitgliedschaftsdetails eines Benutzers klicken. Es erscheint ein Dropdown-Menü, das dem Administrator die Optionen Make Admin (Zum Administrator machen), Make Member (Zum Mitglied machen) und Remove Access (Zugriff entfernen) bietet. Nur Administratoren können den Zugriff eines Benutzers von Mitglied auf Admin ändern.
Weitere Informationen finden Sie im Supportartikel Verwalten einer Druckergruppe mit Dashboard oder in unserem Whitepaper Verwalten mehrerer 3D-Drucker.
TIPP:
Dashboard beginnt mit der Freigabe von Druckerdaten, sobald ein Benutzer den Drucker registriert und nur, wenn der Drucker mit dem Netzwerk verbunden ist.
Teilen Sie den Zugriff auf mehrere Drucker, indem Sie eine Druckergruppe im Dashboard erstellen und einzelne Benutzer einladen.
Auf Druckdaten zugreifen
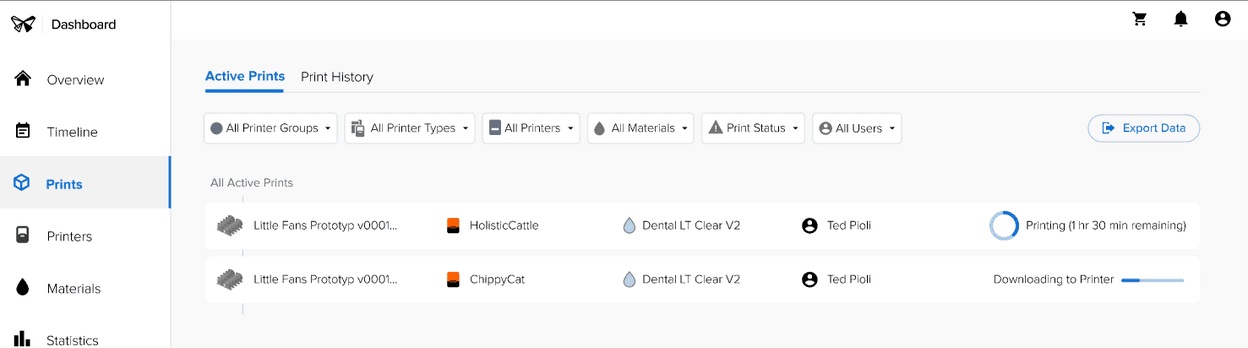
Klicken Sie auf die Seite Prints (Drucke), um allgemeine Drucktrends anzuzeigen und einzelne Druckdaten zu filtern:
Tipp:
Verwenden Sie die Option Suche im Dashboard, um frühere Drucke anhand des hochgeladenen Dateinamens zu suchen.
Erfolgsquoten aufzeichnen
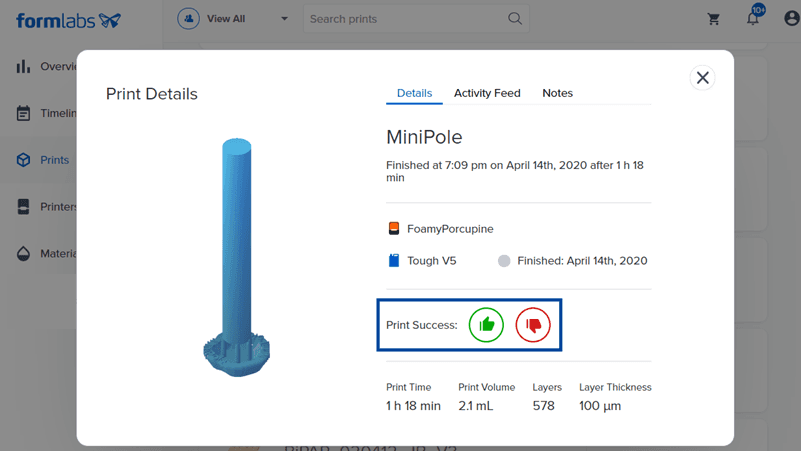
Benutzer-Feedback ist ein wichtiger Bestandteil des Designprozesses. Indem Sie jeden Druck konsequent als Erfolg oder Misserfolg markieren, können Sie alle Iterationen sortieren, um schnell die Drucke zu finden, die funktionieren.
So markieren Sie einen Druck als erfolgreich oder fehlgeschlagen:
Alternativ:
Druckdaten sortieren
So filtern Sie vergangene Druckaufträge nach Ergebnis:
So filtern Sie alle Drucke, um nur Ihre eigenen anzuzeigen:
Exakte Protokollierung gewährleisten
Ist der Drucker online, wird der Druckvorgang beim Start des Drucks in Dashboard protokolliert. Das gilt auch für abgebrochene Druckvorgänge. Zur Ansicht der Daten eines spezifischen Druckauftrags und des genauen Materialverbrauchs muss der Drucker nach Druckbeginn eine Internetverbindung über WLAN oder Ethernet herstellen. Um fehlende Druckaktivitäten und Druckerereignisse zu untersuchen, überprüfen Sie, ob die Dashboard-Verbindung des Druckers vollständig aktiviert ist.
Daten-Feedback an Formlabs weiterleiten
Um Ihre Druckdaten auf Dashboard anzuzeigen, wird Dashboard Logging automatisch über das Menü Settings auf dem Touchscreen des Druckers aktiviert. Dashboard Logging gewährt Ihnen Online-Zugriff auf Ihre Druckzeiten und -volumen, Harztypen und ermöglicht es Ihnen, das Ergebnis jedes Druckauftrags zu verfolgen.
Die Geometrien der 3D-Modelle werden sicher auf Ihrem PC oder Drucker gespeichert. Ohne Ihre ausdrückliche Einwilligung werden diese Daten niemals an Formlabs oder Dritte weitergegeben.
Für die Weitergabe von Daten an Dashboard ist eine gesonderte Datenfreigabe-Genehmigung von PreForm erforderlich. Schalten Sie die Datenerfassungseinstellung von PreForm in der Menüleiste von PreForm um, indem Sie Help > Help Improve PreForm (Hilfe > Hilfe zur Verbesserung von PreForm) auswählen. Spezifische Informationen zu Datenschutz, Datenfreigabe und Zugriff finden Sie unter formlabs.com/privacy.
Weitere Informationen zur Optimierung des Drucks finden Sie unter Verwaltung mehrerer Drucker.