
The most common way to make chocolates and confections is to use pre-made silicone molds, which are filled with molten chocolate and cooled. By designing and 3D printing custom chocolate molds, it’s possible to add a level of detail and customization that was previously only available to skilled artisans. The tools and techniques for creating 3D printed food molds are easy to master, and the results are often stunning.
Custom molds for chocolate, candy, and other types of confectionary must be food safe, flexible, and, ideally, reuseable. While prints made from stereolithography (SLA) resins aren’t suitable for directly molding foods, an SLA 3D printer is the perfect tool to create mold negatives, which can be vacuum formed using food-safe plastic.
Read our guide for an introduction to food safe 3D printing, food safety considerations for 3D printing, and a variety of methods to produce food safe products with common 3D printing technologies.
Moldmaking with 3D Prints: Techniques for Prototyping and Production
Download our white paper to learn about six moldmaking processes that are possible with an in-house SLA 3D printer, including injection molding, vacuum forming, silicone molding, and more.
What You'll Need
The following items are needed to create custom, food-safe molds through 3D printing and vacuum forming:
How to Design, Print, and Vacuum Form Custom Chocolate Molds
1. Design the Mold
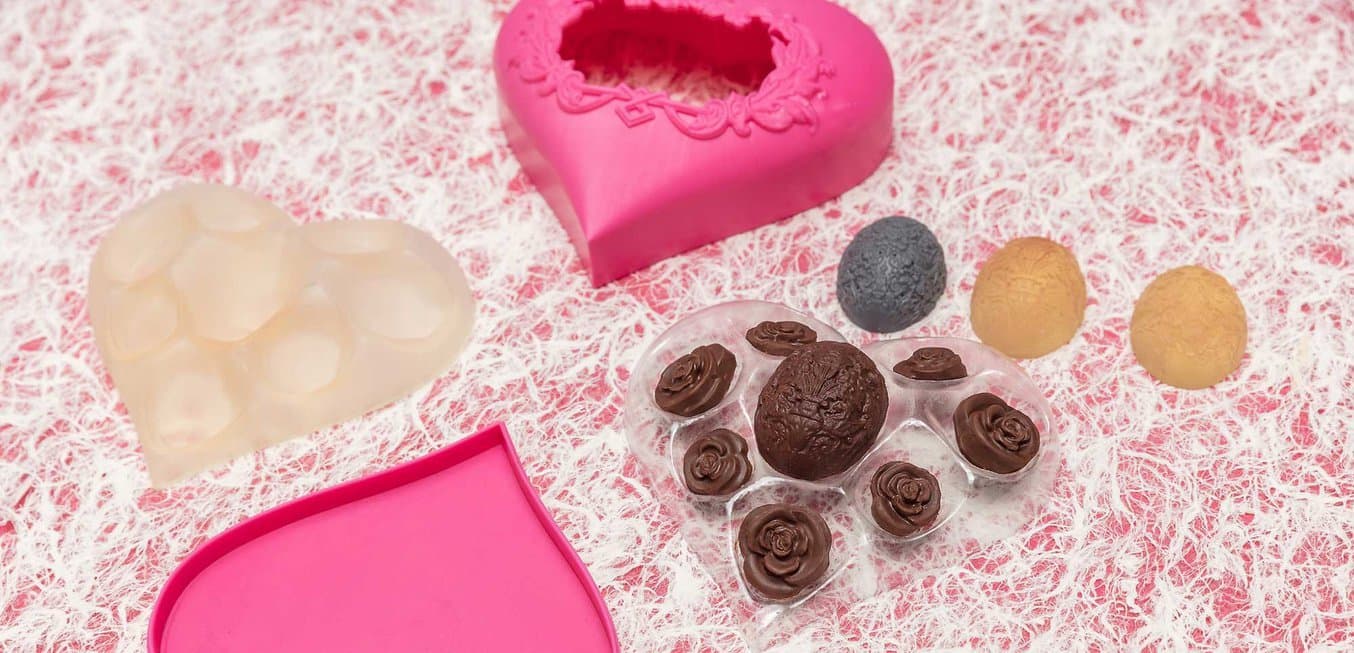
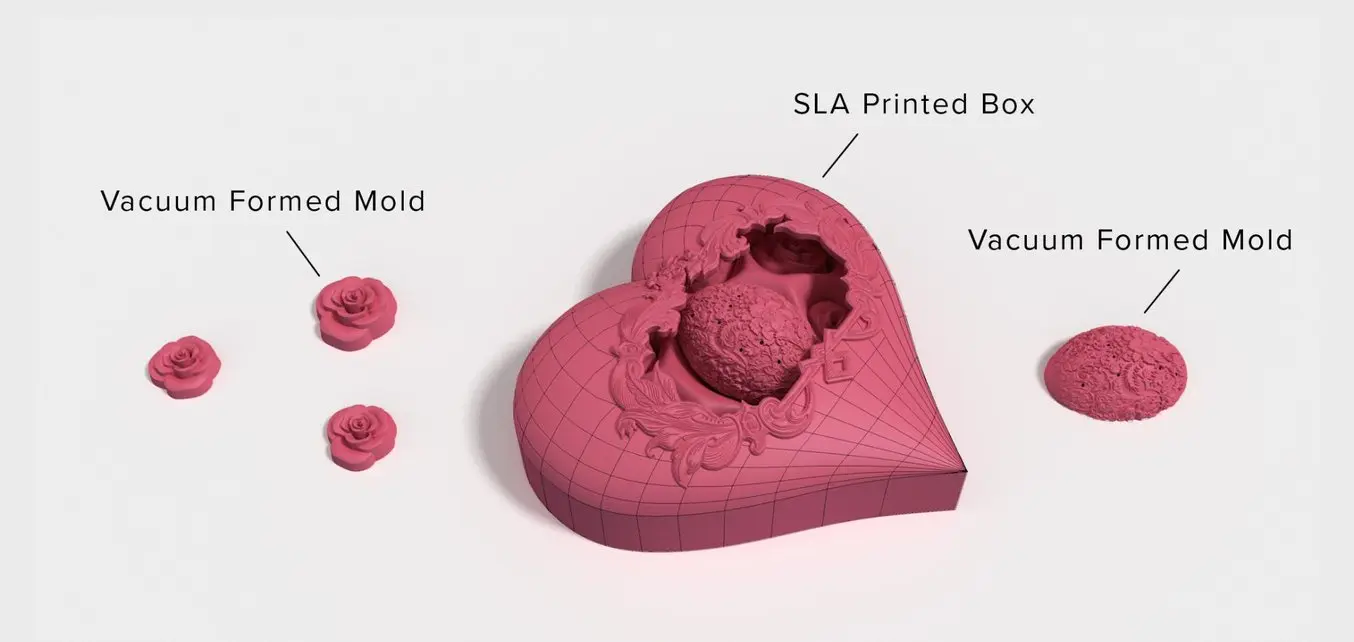
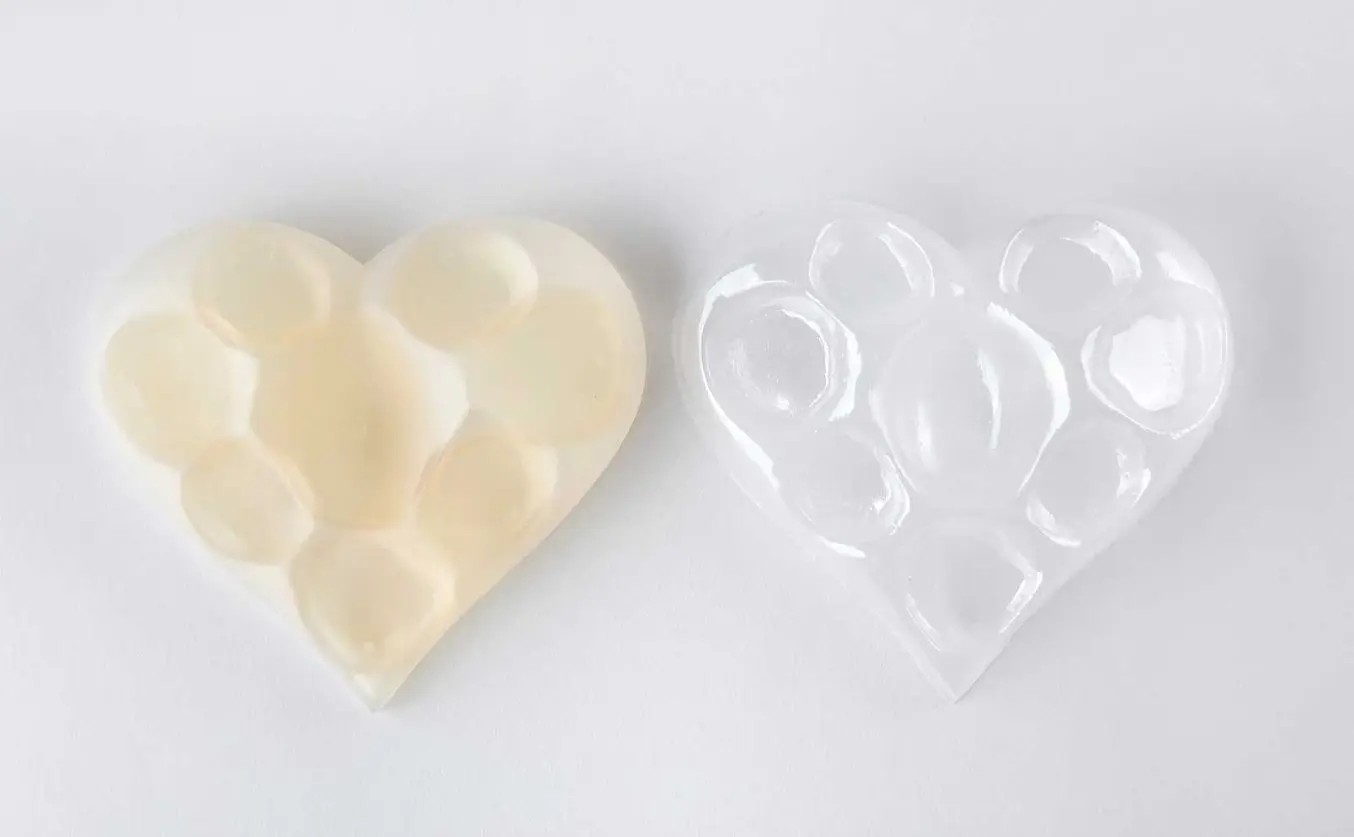
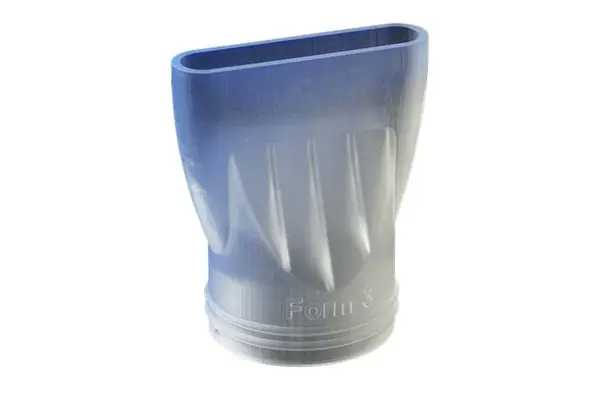
The first step is to design the mold. For our Valentine’s Day-themed chocolates, we’re molding two designs: a flower and an ornate egg. You can use almost any model, so long as it has a flat surface that can sit flush with the a vacuum forming machine. Vacuum forming is a process where a plastic film is heated and pulled against a mold by a vacuum. The most successful models won't have undercuts, which can trap the mold in the vacuum forming sheet. If you’re not an experienced CAD user, lithoforms are a great way to easily create 3D models from 2D images that you or your customers can design.
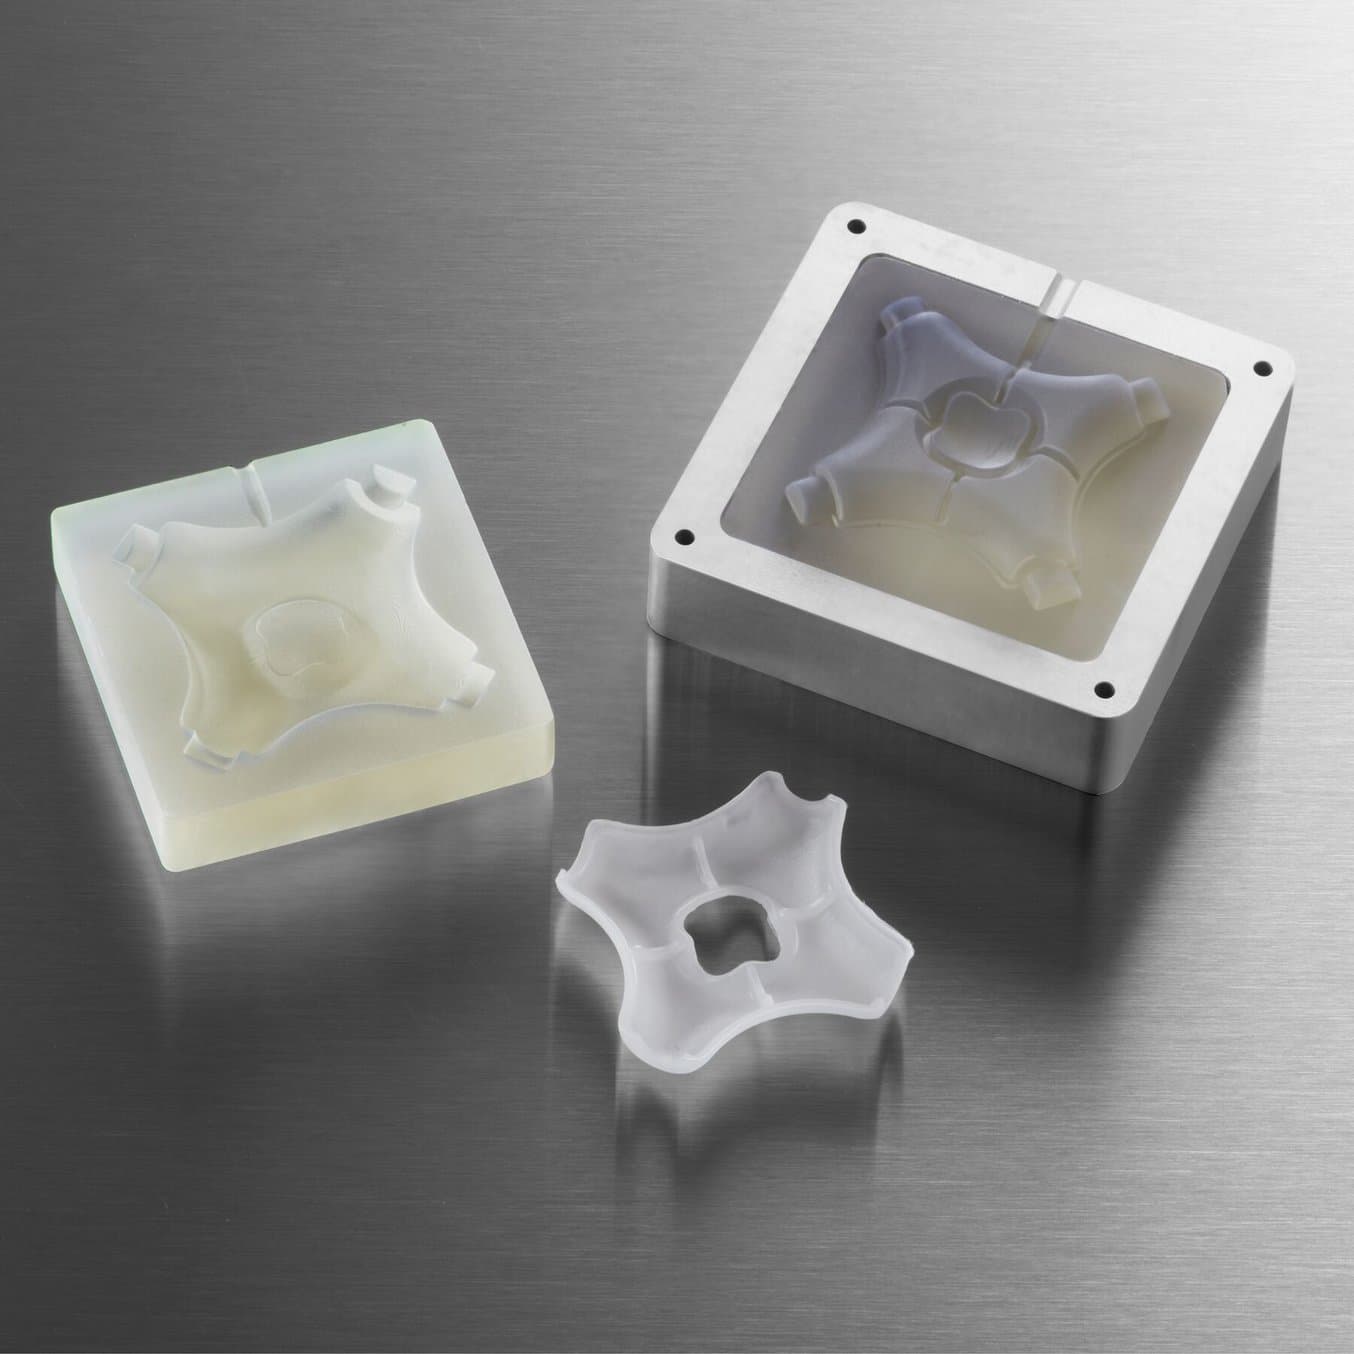
Print the mold in a rigid material. Formlabs High Temp Resin is ideal for printing vacuum form molds; it will not deform or degrade with exposure to heated plastic, even after multiple uses. Standard Resin will also work, though it may degrade over time if used repeatedly.
Request a Free Sample Part
Curious about SLA 3D printing, but haven’t tried it out yet? We’ll ship a free 3D printed sample part to your office.
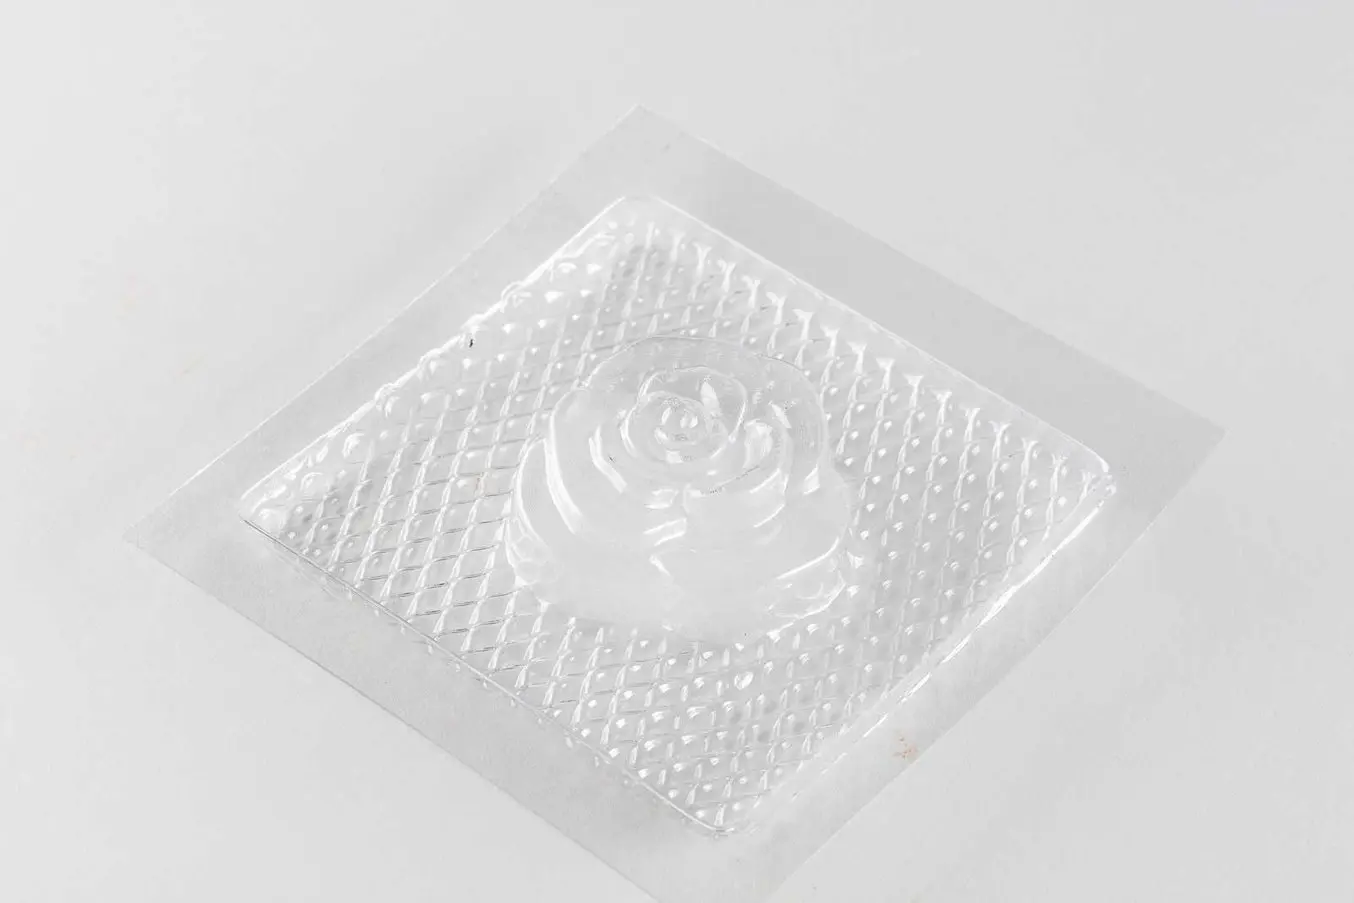
2. Vacuum Forming
Vacuum form the mold using food safe plastic such as high-density polyethylene (HDPE). For the mold to be flexible, the plastic sheet should be around .01 in thick. There are many options for thermoforming machines, ranging from cheap and small, to large units with a lot of space.
If your goal is to create a reusable mold rather than a unique one-off, you can easily increase the size of your batches by vacuum forming multiple prints simultaneously to make a large multi-mold tray.
Low-Volume Rapid Thermoforming With 3D Printed Molds
Download our white paper to see how to create complex molds with 3D printing fast and learn about tips and guidelines that you’ll want to follow when preparing your mold parts.
3. Clean and Prepare
Wash the mold with soap and water. Wiping the interior surface of the mold with a small amount of canola oil will help clean it of any debris, and help the chocolate release from the mold.
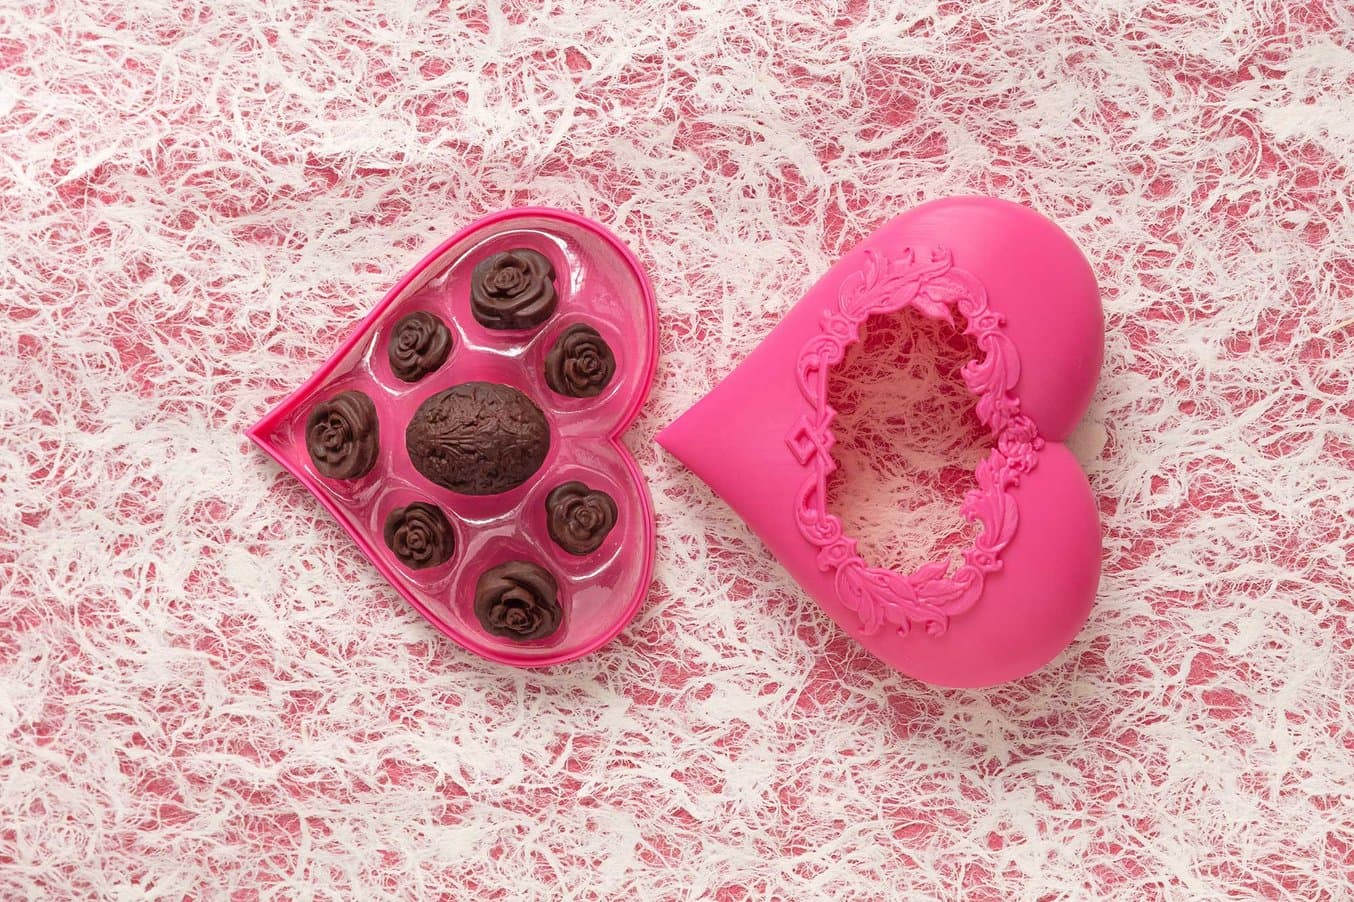
4. Pour the Chocolate
Temper the chocolate and pour it slowly into the plastic shell. While the chocolate is still liquid, tap the mold lightly on a table to give the open tops a flat surface. Place the chocolate in the refrigerator to cool and harden.
5. Remove the Hardened Chocolate
Carefully remove the chocolate by flexing the mold. Use gloves when handling chocolates to avoid melting them.
You can also use 3D printed thermoform molds to make custom sculpted chocolate packaging, customized packaging trays, as well as other products, like artisanal soaps, which can be poured and solidify at room temperature.
We used the Form 2 to print this Valentine’s box using red colored resin, and printed another thermoform mold for the plastic tray that holds each customized chocolate in place.
Techniques for 3D Printing and Moldmaking
Like thermoforming, injection molding and casting can open up a wide range of material possibilities alongside your 3D printer. Watch our webinar, Making Molds with 3D Printing, to learn more about these techniques and design guidelines for each.