
Autodesk’s Fusion 360 is a versatile CAD package that has all the features needed to develop products from the conceptual phase through design verification to manufacturing on both traditional and digital fabrication tools like 3D printing.
In this in-depth Fusion 360 3D printing tutorial, you’ll find a quick overview of Fusion 360’s interface and features for 3D printing as well as detailed tips to help you prepare parts for 3D printing.
What is Autodesk Fusion 360?
Fusion 360 is a cloud-based CAD platform that is an affordable, highly capable alternative to other major players in the industry. It is easy to use and has all the common features you can expect from popular CAD packages. Fusion 360 was built from the ground up to be an all-encompassing product development solution and aims to offer a simple workflow from conceptual design all the way through manufacturing.
Fusion 360 has a very large knowledge base that thoroughly covers every feature of the software, these tutorials can be accessed through Fusion 360 as well as through the Autodesk website. There is also an official YouTube channel with many hours of free tutorials.
The software receives frequent upgrades and new features arrive every few months. Fusion 360 is ideal for high turnover businesses as well as start-ups looking for a professional tool to get them into the market.
Fusion 360 can perform resource-intensive operations on the cloud, including rendering, simulation, shape optimization, and generative design. This means that work can continue while all the heavy lifting is done on the cloud.
How Much Does Fusion 360 Cost?
There are various licensing packages available, these are listed below:
- Free Trial: Autodesk offers a 30-day free trial upon signup.
- Educational: Like most other CAD packages, Fusion 360 comes with an educational license to students, educators, and academic institutions.
- Start-up: A free license is available for start-ups, enthusiast, and hobbyist. In order to use this license, the user must run a company that has a turnover of less than $100 000 per year. The start-up license does not include any of the more advanced features such as generative design.
- Commercial: There used to be two versions of the paid license, namely a standard and ultimate, but these have been merged into one version that contains all the features that used to be in the ultimate version. The fees are structured as a subscription model.
Fusion 360 Basics and Interface
Workspaces
In Fusion 360, you can switch between seven different workspaces. Each workspace has its own set of tools and functions:
- Design: For drawing 3D models and surfaces by making use of sketches, extrusions, revolves, and many other standard CAD tools.
- Generative Design: Generative Design is a form of artificial intelligence that leverages the power of the cloud and machine learning to output efficient design iterations based on your mechanical constraints.
- Render: Create photorealistic renderings of components and products.
- Animation: Animate assemblies to see if they function as expected or to show functionality to prospective clients.
- Simulation: Computer-aided engineering to perform various stress analyses on the designs to make sure they can handle the operating conditions.
- Manufacture: Computer-aided manufacturing (CAM) to assist with manufacturing the part on various digital fabrication tools, such as CNC mills, CNC lathes, laser cutters, and waterjet cutters.
- Drawing: Create shop drawings of designs for manufacturing in a traditional manual machine shop or to accompany the G-code for CNC machined parts.
The Fusion 360 workspace is divided into seven main sections, namely the tool bar, data panel, navigation, timeline, browser, view cube, and the marking menu. Each of these is described in more detail below.
Toolbar
The toolbar contains all the tools and features that are available in a workspace. In the case of the design workspace, these tools help create and modify 3D models, surfaces, sheet metal, and assemblies.

Data Panel
The data panel allows the user to open existing projects, create new ones, manually save a project and access the data panel. The data panel is a space where designs can be saved and organized in an easy to navigate format. The data panel allows you to create project folders as well as a place to find sample parts and tutorials.
Navigation
The navigation bar contains all the tools for rotating, translating and changing the visual style of a model. There are also options to break the canvas into subsections with each indicating a different view of the model.
Timeline
The timeline shows a history of all the operations performed to create the part. This includes all features, patterns, material changes, and sketches to name a few. This is a unique feature that allows you to see the complete history of their part without having to navigate through the browser tree. Any feature can be modified with a right-click within the timeline. The timeline can also be used to find that specific feature in the browser tree.

Browser
The browser contains all the components, features, bodies, sketches, and construction geometry of a design. The browser takes the form a tree-like structure which should be familiar from common CAD packages.

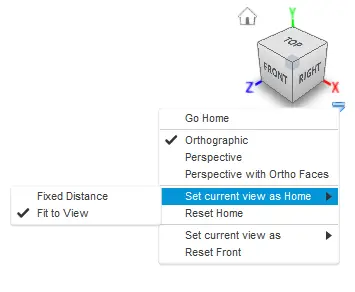
View Cube
The view cube allows you to manipulate the model in a more structured way. By clicking either on the corners, edges, or faces of the cube the model will re-oriented inside the canvas. This makes it easy to switch between standard views. If the user clicks the arrow on the bottom right of the view cube, a drop-down menu appears that provides more options to control the view.
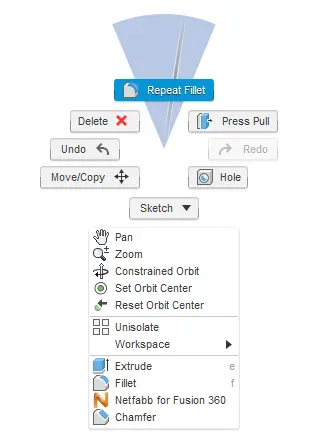
Marking Menu
The marking menu is a situation specific pop-up menu that contains commonly used features, it can be accessed by clicking right on the model or the canvas. The features that show up in the menu are determined by what is clicked and what workspace is currently active. This menu helps increase modeling speed and convenience.
Fusion 360 for 3D Printing
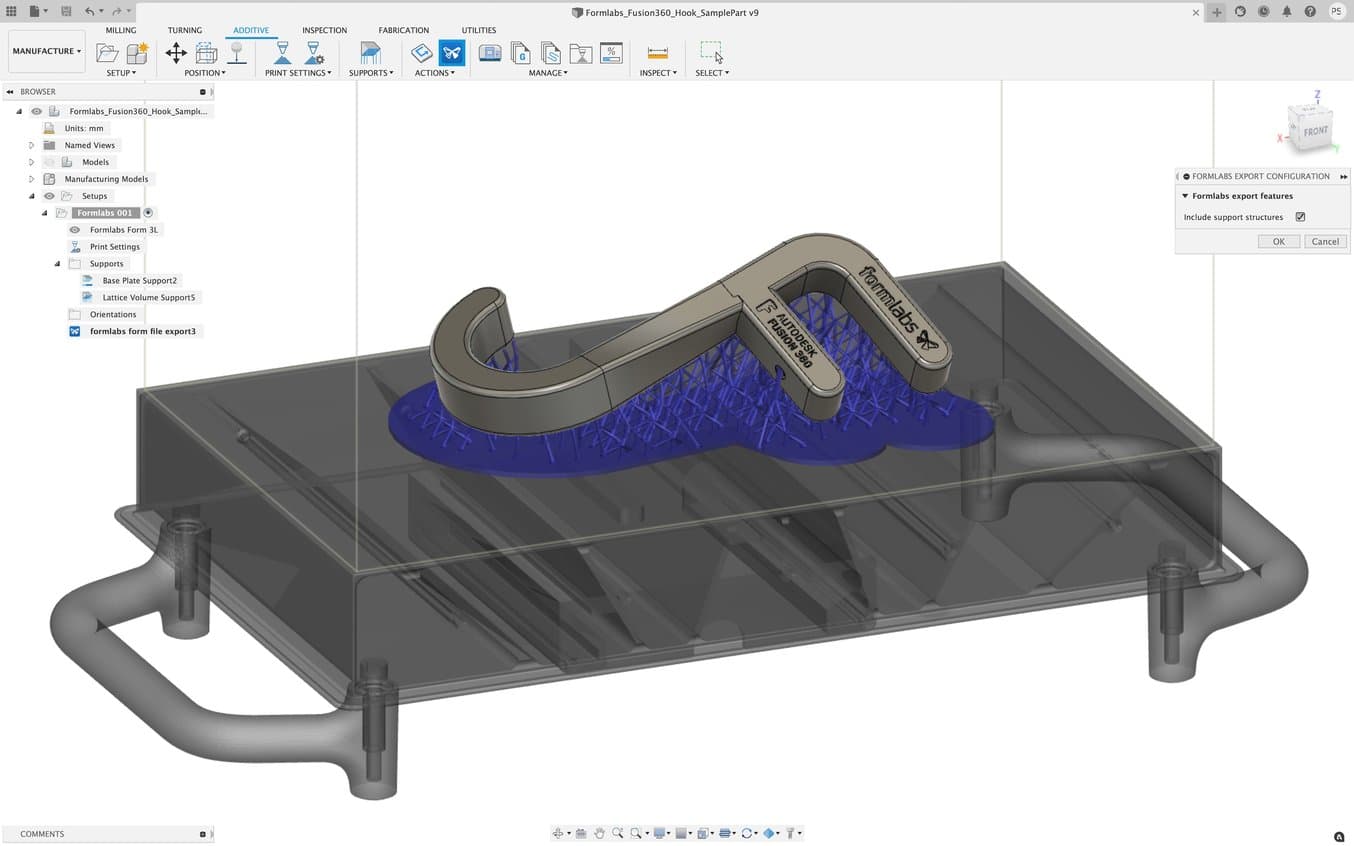
Formlabs and Autodesk have partnered to streamline your digital workflow with introducing new functionality in Fusion 360 for 3D printing your designs with SLA and SLS technologies from Formlabs. Our resin printers Form 2, Form 3+, Form 3B+, large format 3D printer Form 3L and the Fuse 1+ 30W SLS printer are included in the Machine library for Fusion 360. This new workflow combines the best of Autodesk’s versatile CAD package with professional 3D printing results. We’re excited to bring this new functionality to Formlabs users, who can now iterate on new ideas in just a few steps.
The software integration includes a brand new graphic interface where users can visualize how parts will fit into the build volumes of the different printers natively in Fusion 360. Individual designers can orient their parts, arrange them within the build platform and automatically generate support structures parametrically all within the manufacturing workspace of Fusion 360. If they need to make a design change, their print preparation operations update automatically. Teams can also streamline file management by exporting their build platform as a “.form” file from Fusion 360 and open them in PreForm. Soon additive manufacturing setups created in Fusion 360 will be sent directly PreForm as well. This new integration eliminates the need to save individual parts as “.stl” files and importing them to PreForm manually, giving designers and manufacturers more reliable version control.
Request a Free Sample Part
See and feel Formlabs quality firsthand. We’ll ship a free sample part to your office.
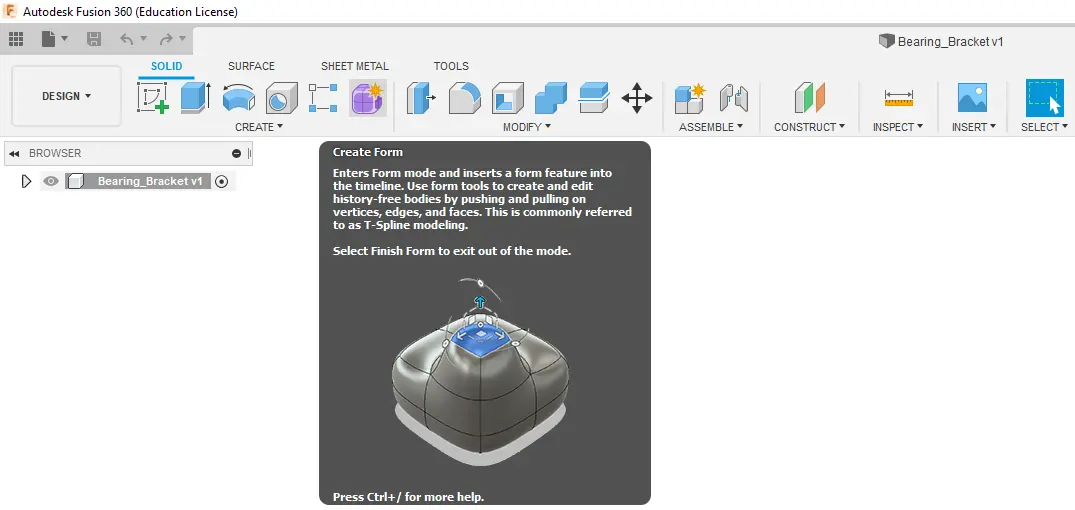
Form Feature
The form feature, denoted by a purple cube, allows the sculpting of complex organic shapes. It opens a new workspace that has a wide array of features for sculpting complex shapes. This feature is ideal for creating organic and artistic models for 3D printing.
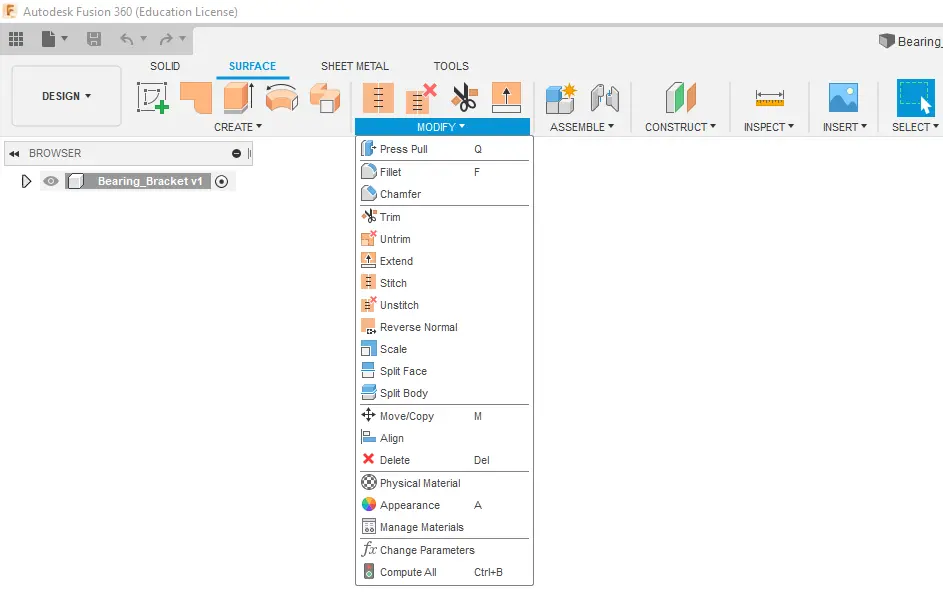
Surfaces
The surface tools allow the user to repair models for 3D printing. Surfaces can be stitched closed, extruded, pulled, and pushed to reshape the part. The surfacing tools also help create a watertight model that has no openings in the shell.
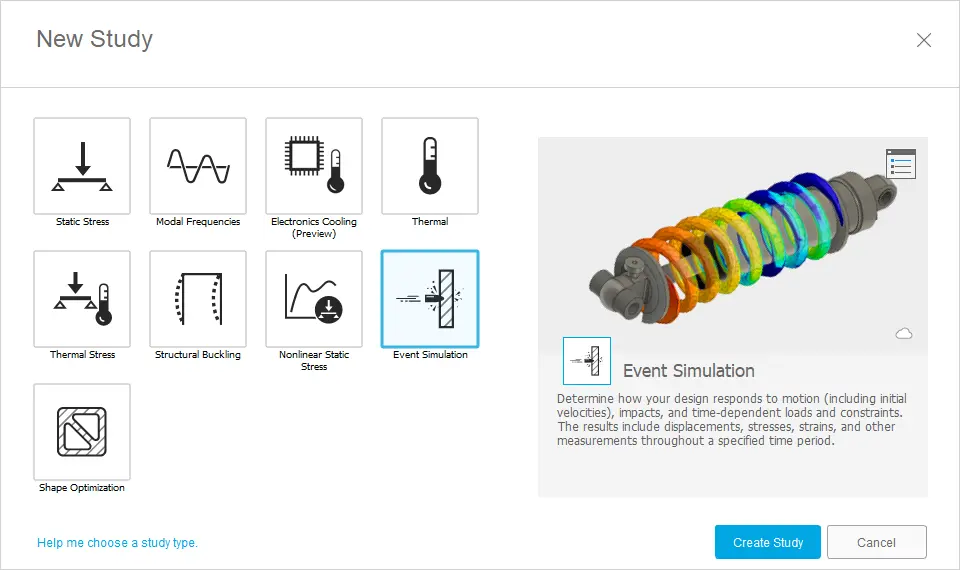
Event simulation
This feature is useful for simulating how your 3D print will behave under time dependant loads and velocities. For example, snap fit joints can be modeled to show what loads are experienced by the clip as it is forced closed, providing a good idea of where the weak points are so that the design can be optimized.
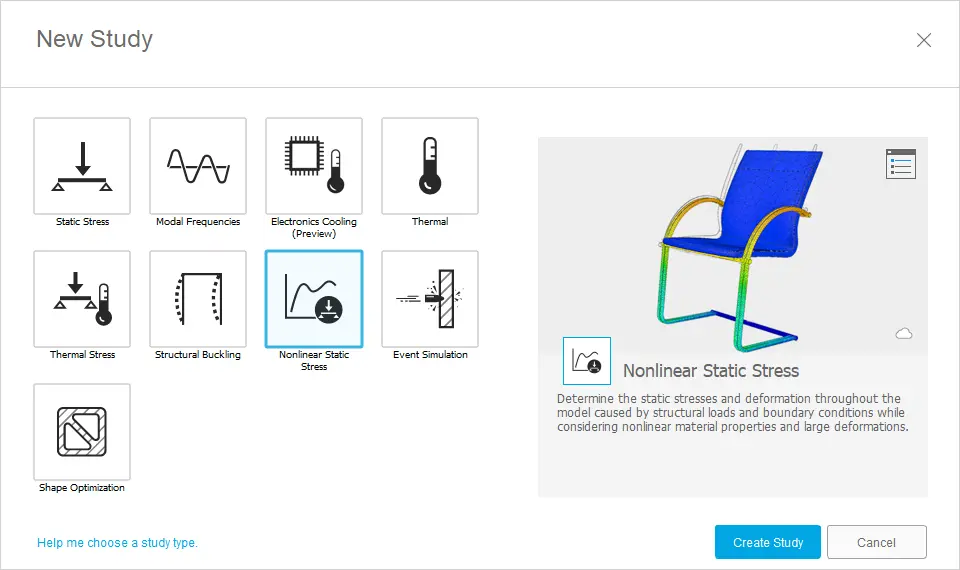
Non-Linear Stress
Some 3D printing technologies like fused deposition modeling (FDM) create parts with non-linear material properties that can only be simulated if the FEA package has a non-linear study type. Fusion 360 features a very capable non-linear study type that can accurately predict the stress on a component provided the correct material data is loaded in.
Find out more about isotropy in 3D printing.
How to Prepare for 3D Printing
Designing for 3D printing is not an overly complex task, however, there are a few general guidelines to ensure a perfect print every time.
Printing Technology
First, consider the 3D printing technology that will be used to print the part(s). This will determine the type of design constraints, the levels of accuracy achievable, and support structure requirements
Learn more about the three most established technologies for 3D printing plastics today—stereolithography (SLA), fused deposition modeling (FDM), and selective laser sintering (SLS)—in our comprehensive guide.
Wall Thickness
Wall thickness is critical because parts with too thin walls will be brittle and might break during 3D printing or in post-processing. The minimum recommended wall thicknesses vary by printing technology.
Download the Formlabs design guide for stereolithography 3D printers.
Overhangs
Overhangs are easy to print on SLS 3D printers, as the material is supported by the unfused powder. Other technologies like SLA or FDM might require support structures for overhanging features.
Warping
Depending on the technology, printing large solid or flat components can result in warping due to the heat build up in the part. Add design features like ribs to make the design structurally stronger and help minimize warping.
Read our guide for ten insights to help you optimize your 3D printing rapid prototyping workflow to be as cost and time efficient as possible.
3D Printing From Fusion 360
Clicking the Make icon in the Design workspace opens the 3D print menu to make a number of modifications to optimize the model for printing and then send the model to a 3D print utility.
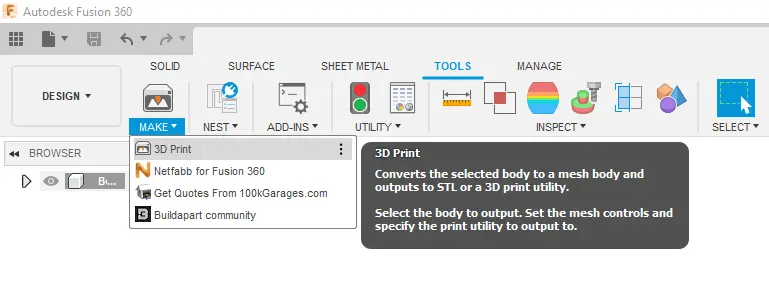
The menu is broken down into a number of options as listed below:

Selection
This option allows the user to select the model for 3D printing.
Preview Mesh
This checkbox shows the mesh on the model that is useful if the user wants to see what effect changes in the settings have on the model.
Number of Triangles
This shows the number of individual triangles that make up the model. A higher refinement will increase this number.
Refinement
This option allows you to select one of three pre-defined refinement settings: low, medium, and high. This determines the total number of triangles used in the model. There is also a custom option which allows the user to further refine the mesh based on specific parameters:
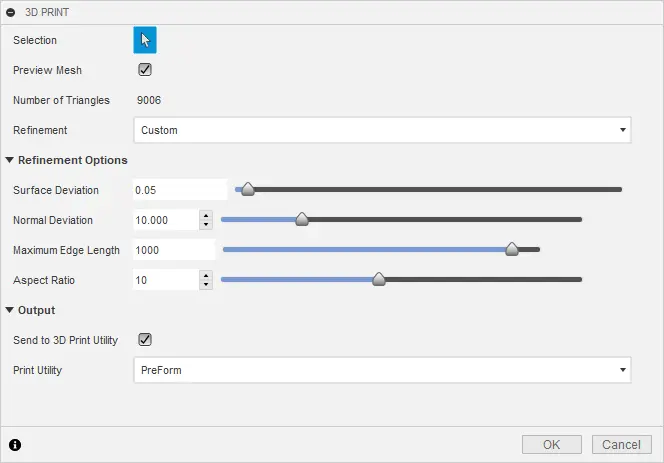
Output
Fusion 360 allows you to send the model to a range of 3D print utilities such as Meshmixer or Formlabs PreForm for 3D printing.
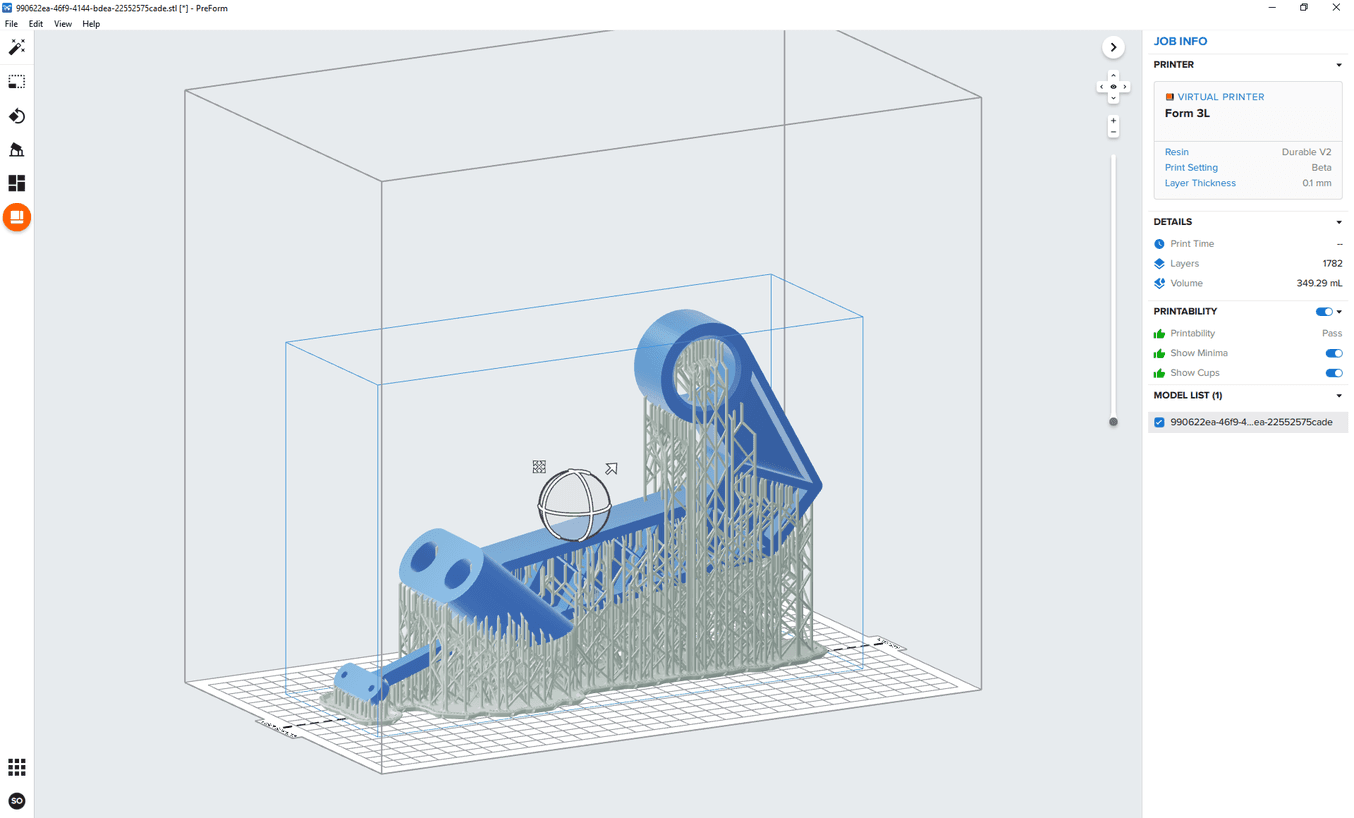
Use PreForm software to prepare parts for 3D printing on Formlabs SLA 3D printers.
If the “Send to 3D print Utility” is not selected Fusion 360 will export the model as an STL file according to the refinement options selected. This STL file can then be loaded into any 3D printer slicer software.
Try Professional 3D Printing
Fusion 360 is a versatile CAD package with an array of features that makes it easy to connect digital workflows and move from design to manufacturing.
Looking for the right tool to turn your design into reality? 3D printers empower engineers and product designers to rapidly prototype in-house, saving time and costs at every stage of product development.
See the quality firsthand by requesting a free sample part printed on a Formlabs industrial-quality 3D printer.