
Great hardware products don’t happen by chance. They are the result of a rigorous product development process that starts with concept development and moves through multiple cycles of design, engineering, and validation before the product enters full production.
Engineers and designers have been creating hardware prototypes for decades, but the tools, materials, and methods used to create those prototypes have evolved tremendously. Prototyping today is easier, faster, and more accurate than ever before—all at a substantially lower cost. This allows teams to efficiently iterate, test, and validate designs early on, leading to final products that work better and require little to no last minute reworking when the product goes into mass production.
Engineering and design teams today might still start prototyping with basic tools in order to iterate quickly at first, but as their designs progress, they now have access to a combination of advanced tools to produce prototypes that look, feel, and function just like the final products.
In this article, we’ll explore the different prototyping tools, from basics to the most advanced processes and machinery and show how they’re used in each stage of product development.
Introduction to 3D Printing for Engineers and Manufacturers
In this webinar, learn how parts created from various printing technologies differ across functionality and appearance, and how these differences impact product development and production workflows for engineers and manufacturers.
Watch the Webinar NowWhat are the Goals of Prototyping?
A prototype is a preliminary model or mock-up of a product. Some prototypes are created to get a better idea of what the final look or feel of a product might be, while others help to prove the functionality of a design.
Consecutive prototypes of the Form 1, the first desktop stereolithography (SLA) 3D printer.
Evaluating and validating designs to test form and function early on is critical to the long-term success of a product.
A company doesn’t want to go through all the time, money, and effort to create a product and ship it, only to find out it fails to meet user needs or falls short of functional requirements. Design changes become increasingly costly as a product moves further along in the development process. Prototypes reduce the need for costly, late-stage design changes to the product.
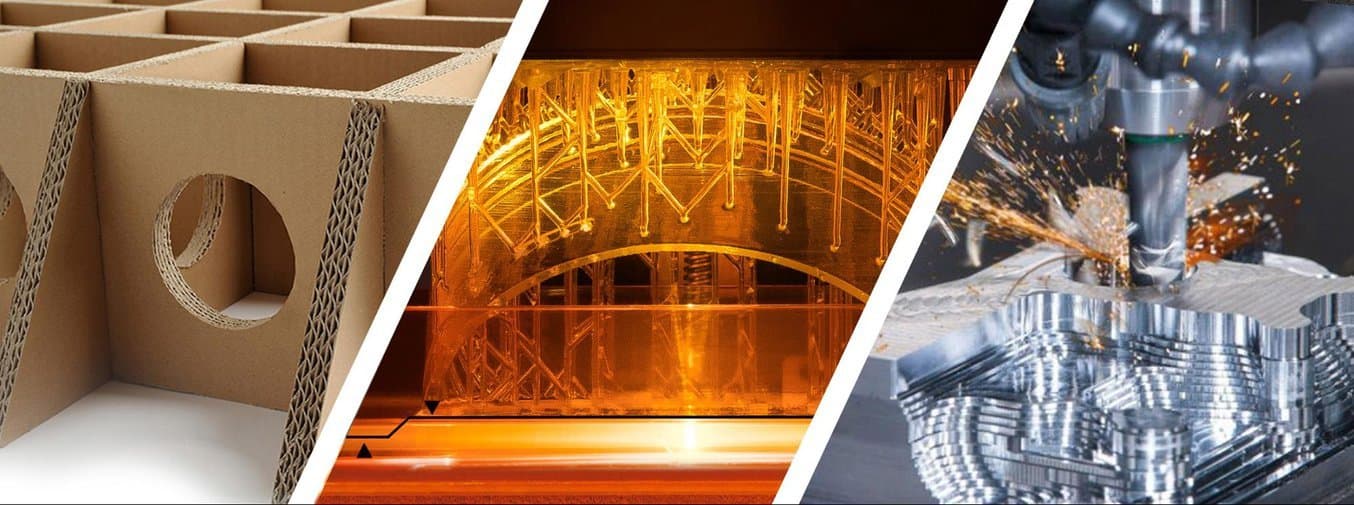
Prototyping Tools and Methods for Hardware and Product Design
Basic Prototyping Tools and Methods
At the early stages of product development, development teams should focus on iterating quickly, testing assumptions and features with the least amount of time and money invested. Basic prototyping tools and methods are cost-effective and facilitate an agile design process, using off-the-shelf parts and low-cost materials as much as possible.
Basic Model Making
For early low-fidelity prototyping, materials like clay, cardboard, foam, and even modular toys like LEGO allow designers and engineers to work quickly and cheaply to develop basic spatial concepts and sketch out the product’s form in three dimensions.
These materials are easy to work with and can be shaped with common tools and adhesives to illustrate roughly what a product might look like, whether life-sized or as a scale model.
| Basic Model Making | |
|---|---|
| Cost | $ |
| Production or Lead time | A few hours |
| Accuracy | ★☆☆☆☆ |
| Materials | Clay, cardboard, LEGO, foam |
| Tools required | Basic cutting tools, adhesives |
| Pros | Affordable Quick turnaround time Materials and tools are easy to access and work with Time and cost to revise a prototype or produce multiples is very low |
| Cons | Difficult or impossible to test meaningful functional aspects of the design Limited in ability to create complex shapes, parts, and assemblies Higher skill required to make presentation-quality models Low precision |
Fabrication
Basic model making and fabrication are similar in approach, but the latter makes use of power tools and superior materials to create prototypes that are stronger, more accurate, and include functional aspects. Fabricated prototypes provide a clearer picture of the design intent and structural requirements of a product.
Engineers and designers use a variety of power tools like drill presses, chop saws, routers, drills, and welders to fabricate and assemble robust prototypes. Materials range from easy-to-assemble modular systems like 80/20® aluminum extrusions, to sheet metal, plastic, and wood.
Not all companies have the necessary tools and suitable facilities in-house, but fab labs provide access to equipment and space for designers, engineers, and makers around the world.
| Fabrication | |
|---|---|
| Cost | $$ |
| Production or Lead time | A few hours to days |
| Accuracy | ★★★☆☆ |
| Materials | 80/20 aluminum extrusion, sheet metal, plastics, wood, mechanical fasteners |
| Tools required | Variety of power tools for cutting, forming, welding, and assembly |
| Pros | Affordable materials Quick turnaround time Tools and materials are moderately easy to access and source Relatively easy to revise prototypes |
| Cons | May be difficult to produce small features and more complex shapes like splines Requires a wide selection of tools Requires moderate to high skill level to produce quality prototypes |
Advanced Prototyping Tools and Methods
As a product moves along in development, design and engineering teams need tools that produce prototypes consistent with the look, feel, and functionality of the final product. Advanced prototyping tools create custom parts from the same or similar materials and with surface finish and mechanical properties comparable to final products. Just as mass market products use a multitude of polymers to meet functional requirements, engineers tend to use multiple materials and methods to manufacture a single prototype assembly.
3D Printing
With a combination of low cost, high speed, and easy in-house operability, industrial-quality 3D printers are some of the most popular rapid prototyping tools today for engineering and design teams.
3D printers create three-dimensional parts directly from CAD models by building material layer by layer until a complete physical part is formed. As they require no tooling and minimal setup time for each new design, the cost of producing multiple iterations of a prototype on a 3D printer is negligible in comparison with traditional manufacturing processes.
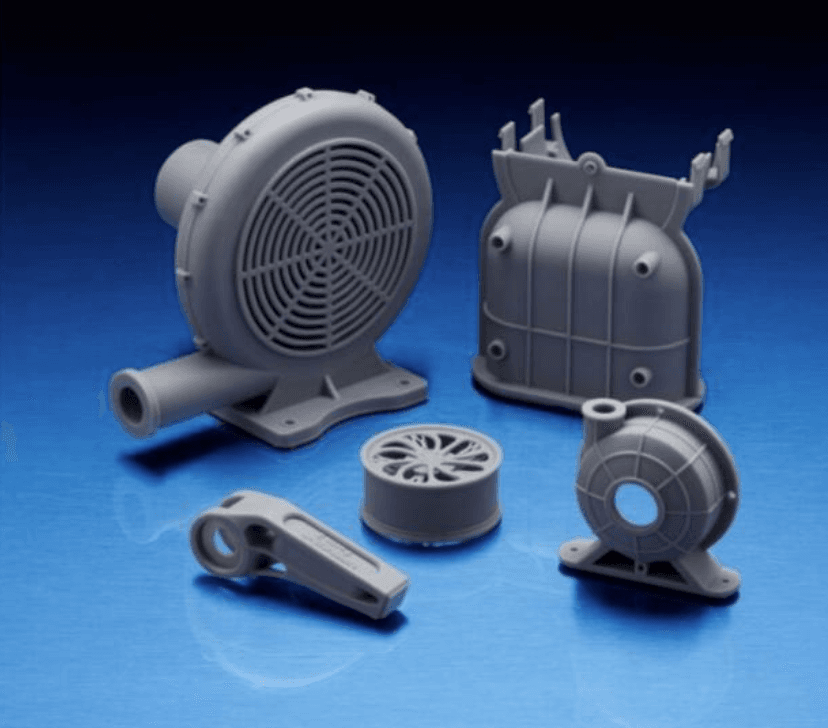
A prototype of a moisture meter from Wohler 3D printed from multiple materials with rigid housing and soft-touch buttons.
Many advanced prototyping tools carry high equipment costs and require skilled operators, which means designers and engineers often outsource those processes for prototype development. One of the main benefits of 3D printing is that it allows companies to create their prototypes in-house. Compact desktop or benchtop 3D printing systems for creating plastic parts are affordable, require very little space and no special skills, enabling professionals to speed up iteration cycles from days or weeks to a few hours.
Watch how stereolithography (SLA) 3D printing works.
There are many types of 3D printers and 3D printing technologies on the market, with stereolithography (SLA) and selective laser sintering (SLS) being two of the most popular options for prototyping and product development. SLA resin 3D printers use a variety of specialized engineering materials and produce smooth, isotropic parts that are strong and highly detailed. SLS printers produce functional prototypes and production parts with durable engineering thermoplastics.
3D printing is also used to supplement traditional manufacturing processes for creating castable parts, low-volume molds and masters, or custom tooling for production.
| 3D Printing | |
|---|---|
| Cost | $$$ |
| Production or Lead time | Less than 24 hours |
| Accuracy | ★★★★★ |
| Materials | Plastics, metals |
| Tools required | 3D printer and finishing tools |
| Pros | Affordable (if using plastic) Fast turnaround time Easy to operate in-house, requires no specialized training or skills Easy integration with CAD software True form, fit and function can be tested Complex shapes and assemblies can be created |
| Cons | Part size restrictions based on the type of 3D printer Fewer material options available than for other processes (like injection molding) Post-processing can be labor-intensive depending on the process and part geometry Metal 3D printing is typically too costly for in-house use |
Request a Free Sample Part
See and feel the quality of SLA 3D printing firsthand. We’ll ship a free 3D printed sample part to your office.
Request a Free Sample PartMachining
Machining includes manual and CNC mills, lathes, electrical discharge machining (EDM) and other subtractive processes. These processes usually start with solid blocks, bars, or rods of metal or plastic that are formed into shape by removing material through cutting, boring, drilling, and grinding.
CNC machines also work with CAD models but require an intermediary step of generating and validating toolpaths (CAD to CAM) that can be time-consuming and requires expertise. CNC machining excels at producing high-precision, repeatable parts from a variety of plastics and metals.
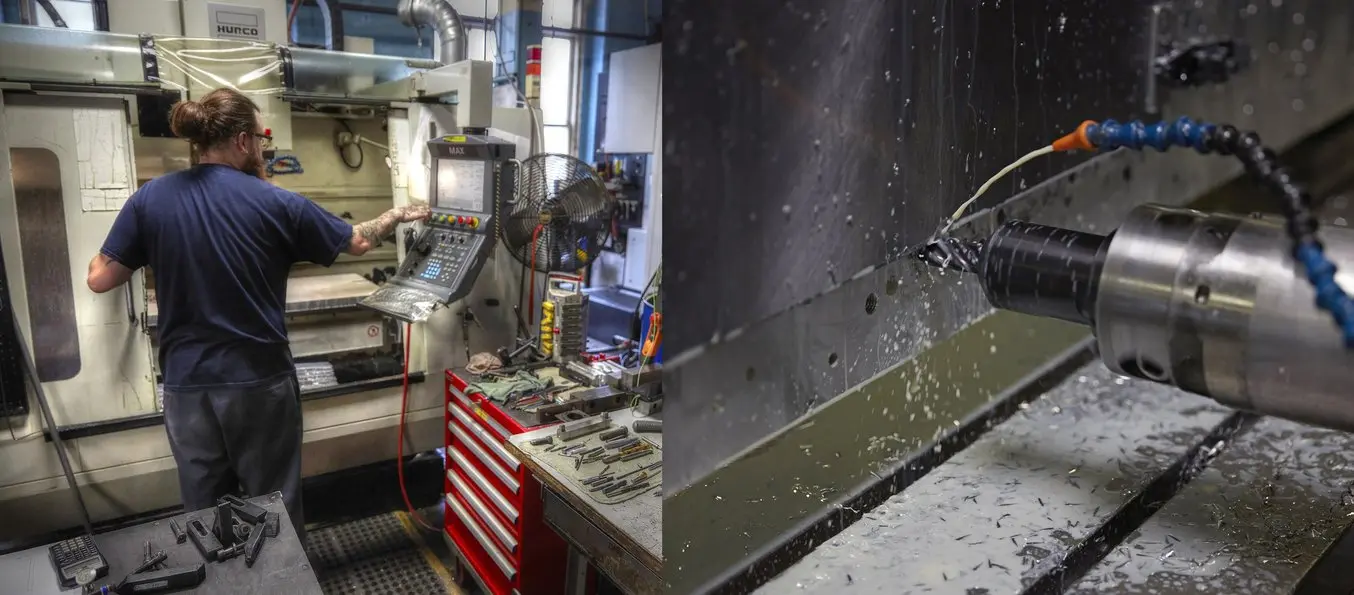
Machining tools in operation at the A&M Tool and Design machine shop.
Compared to 3D printing, these processes come with more design restrictions. Machining processes require allowances for tool access, and certain geometries, like curved internal channels, are difficult or impossible to produce with conventional subtractive processes.
Simple CNC machines are available for a few thousand dollars, but more advanced machines with better capabilities and accessories can easily run into six figures. While all CNC machines require a skilled operator, the complexity of producing a prototype part with a CNC mill or lathe depends on the equipment used, the material selected, and part geometry. For these reasons, many companies outsource machining tasks, which increases lead time and cost.
| Machining | |
|---|---|
| Cost | $$$$ |
| Production or Lead time | A few days to weeks |
| Accuracy | ★★★★★ |
| Materials | Metals, plastics, composites |
| Tools required | CNC or manual machinery, CAD to CAM software |
| Pros | Very high precision with repeatable results Works with a wide assortment of metals, plastics, and composites Complex shapes and assemblies can be created |
| Cons | Expensive Machining in-house requires high investment in machinery, dedicated space, skilled labor to operate Outsourcing machining adds to lead time, slows design cycles Design restrictions mean certain geometries are very expensive—or completely impossible—to produce |
Prototyping Tools for Different Prototype Stages
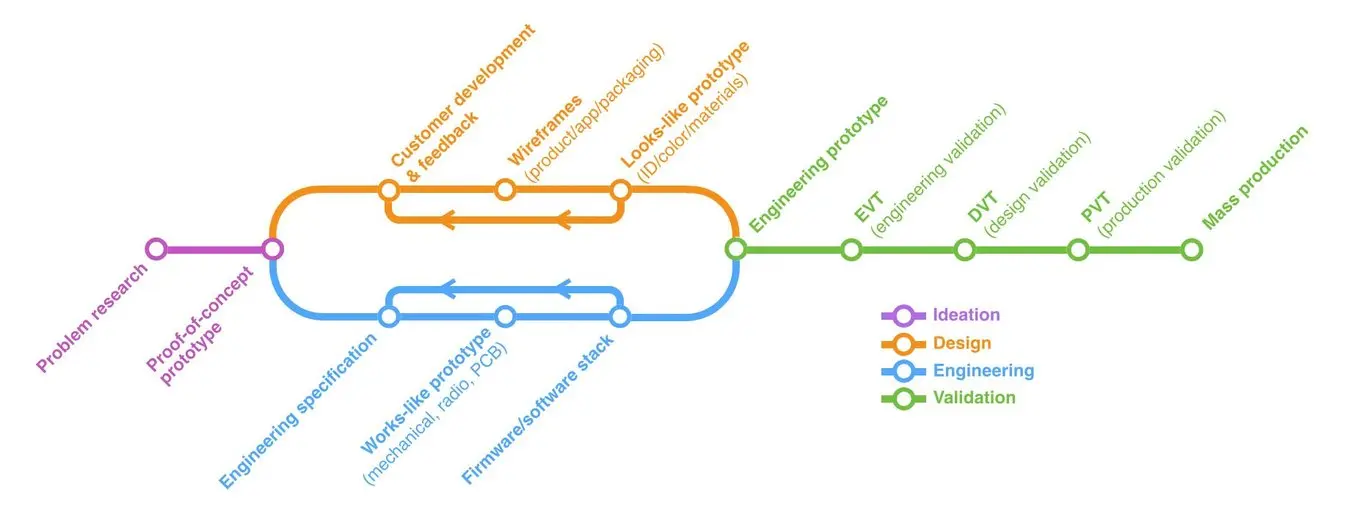
The hardware development process. Source: Ben Einstein, Bolt blog
Proof-of-Concept (PoC) Prototype
Proof-of-concept prototypes aim to prove that an idea is feasible and that there is a potential market for it. PoC prototyping happens at the earliest stages of the product development process, and these prototypes include the minimum functionality needed to validate assumptions before moving the product into subsequent stages of development.
Recommended prototyping tools:
- Basic model making
- Fabrication
- 3D printing
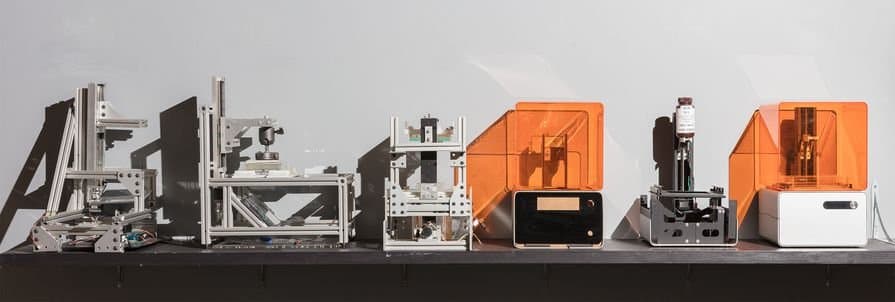
Looks-Like Prototypes
Looks-like prototypes of the Form 2 SLA 3D printer with different solutions for cartridge placement.
Looks-like prototypes represent the final product at an abstract level but may lack many of its functional aspects. Their purpose is to give a better idea of what an end product will look like and how the end user will interact with it. Ergonomics, user interfaces, and overall user experience can be validated with looks-like prototypes before spending significant design and engineering time to fully build out product features.
Looks-like prototype development usually starts with sketches, foam or clay models, then moves into CAD modeling. As design cycles progress from one iteration to the next, prototyping moves back and forth between digital renderings and physical models. As the design is finalized, industrial design teams aim to create looks-like prototypes that accurately resemble the end product by using the actual colors, materials, and finishes (CMF) they specify for the final product.
Recommended prototyping tools:
- Basic model making
- Fabrication
- 3D printing
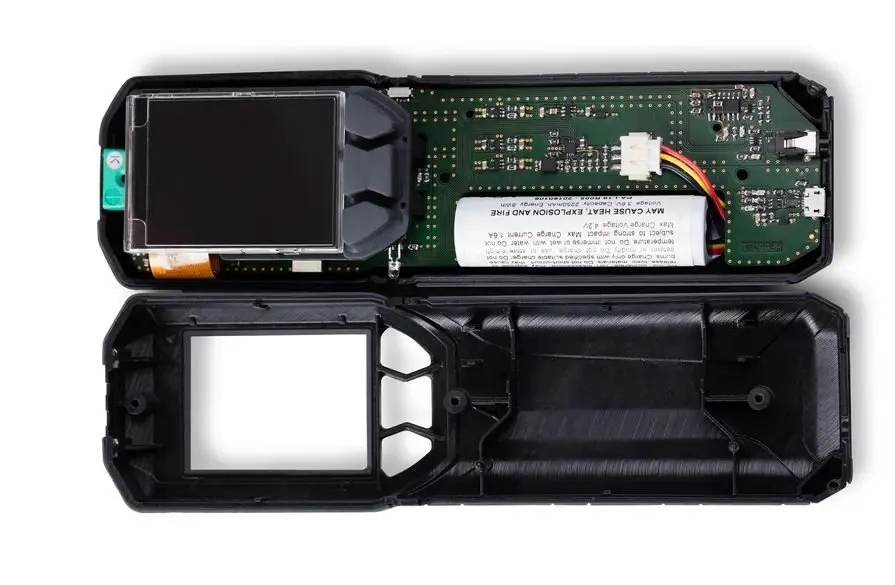
Functional or Works-Like Prototypes
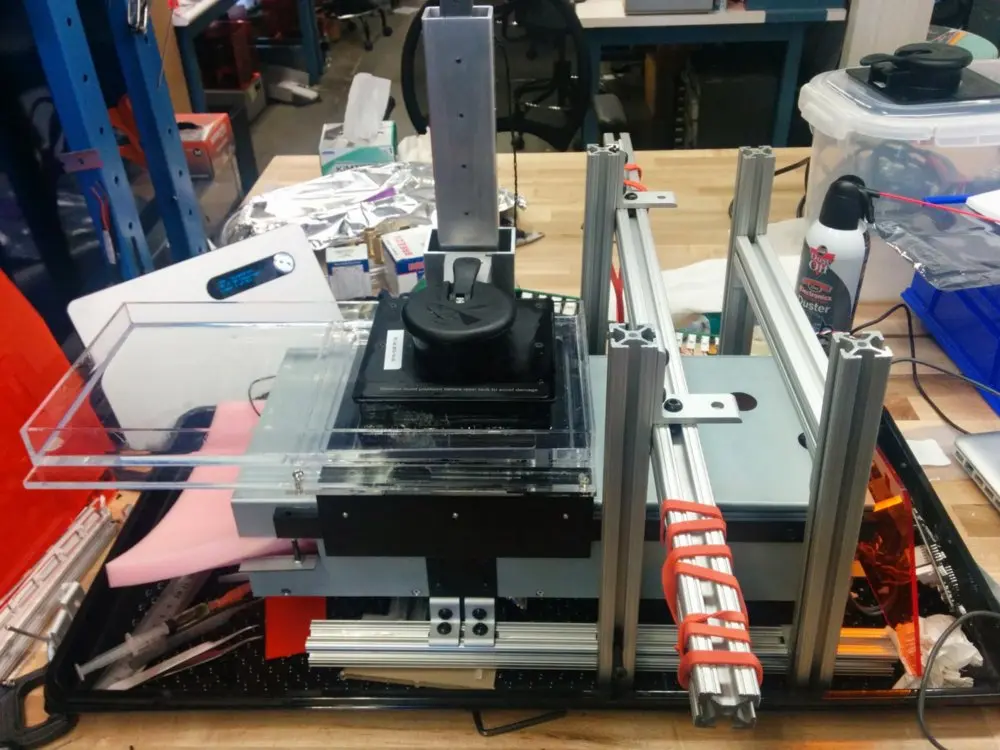
The first works-like prototype of the Form 2 3D printer.
Parallel to the industrial design process, engineering teams work on another set of prototypes to test, iterate, and refine the mechanical, electrical, and thermal systems that make up the product. These works-like prototypes might look different from the final product, but they include the core technologies and functions that need to be developed and tested. Often, these critical core functions are developed and tested in separate sub-units before being integrated into a single product prototype. This subsystem approach isolates variables, making it easier for teams to split up responsibilities and ensure reliability on a more granular level before folding all of the elements together.
Recommended prototyping tools:
- Fabrication
- 3D printing
- Machining
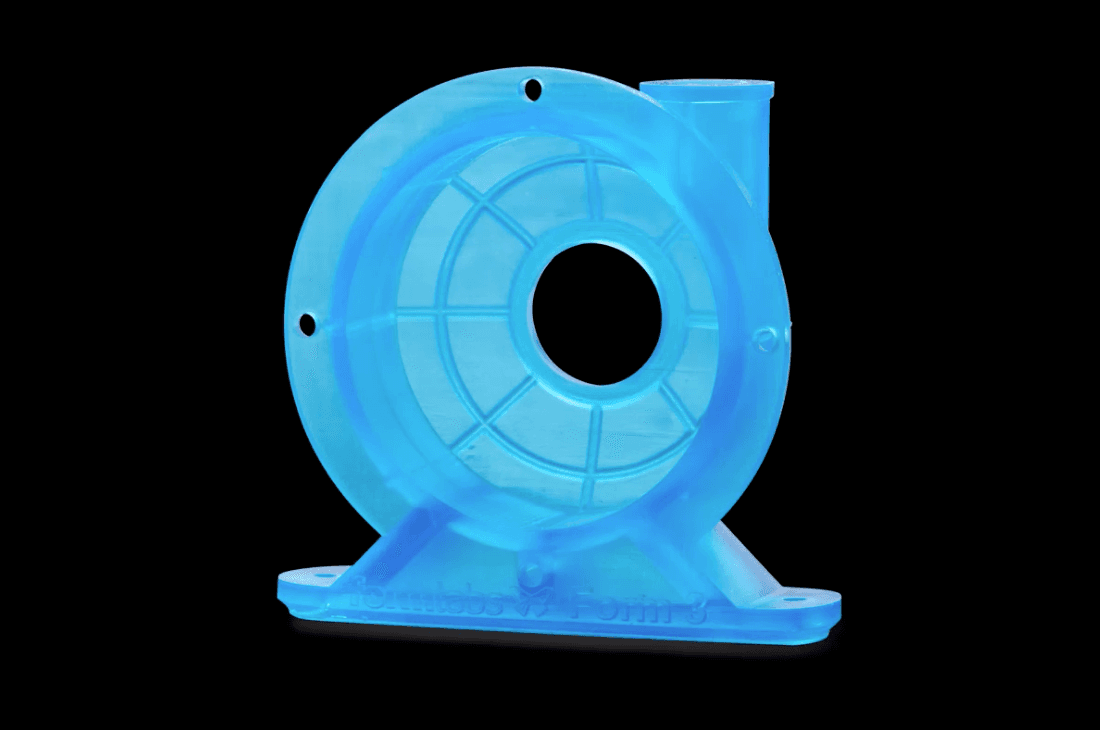
Engineering Prototypes
Engineering prototype (EP) is where design and engineering prototypes meet, which often requires concessions from both sides. EP builds are usually the last prototypes built in-house before validation builds begin at the manufacturer. These prototypes should be made using the final materials, parts, and processes wherever possible, but without investing in costly tooling prematurely. For example, an engineering prototype with structural plastic parts in nylon and ABS might use SLS 3D printing for producing the nylon component and CNC milling for the ABS part, rather than committing to tooling for injection molding.
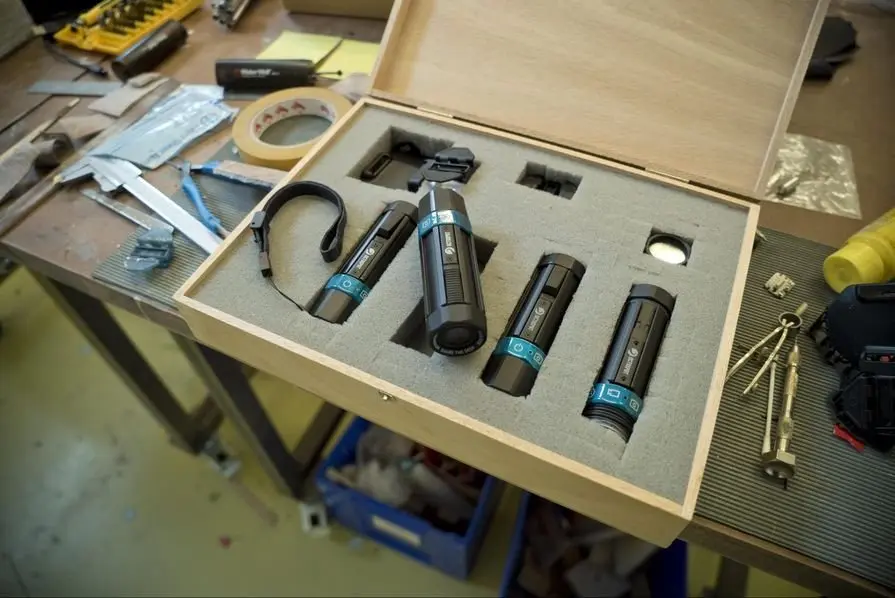
Engineering prototypes built by Paralenz helped simplify communication with contract manufacturers overseas.
The more rigorous and disciplined the product development process has been up to this point, the less likely last minute changes will be necessary. Still, mistakes can happen, and long-term testing might raise new issues at a late stage. Best practices call for delaying tooling and design handoffs to the factory as long as possible, so that your design and engineering teams have the flexibility to solve any last minute problems.
Recommended prototyping tools:
- 3D printing
- Machining
Speed up Prototyping Workflows with 3D Printing
In all stages of the product development process, 3D printing is an easy and affordable way to produce prototypes rapidly in order to evaluate form, fit and function. With the ability to quickly produce multiple iterations, design and engineering teams can test and implement changes quickly, allowing a product to reach the market faster.
Learn more about 3D printers and explore how leading manufacturers leverage 3D printing to save money and shorten lead times from design to production.