WHITE PAPER
Formlabs Logo

Using Group Queues

Using Group Queues

Simplify how you manage a fleet of Formlabs SLA 3D printers and a group of users with Group Queues in Dashboard. Activate new features within Formlabs’ PreForm and Dashboard software to start automating and optimizing your workflow for maximum fleet productivity.

Setting up printers for Fleet Control for the first time

Before you can send print jobs freely to a set of printers using Dashboard, remote printing needs to be switched on for those printers.

Enable remote printing

Dashboard sends an uploaded print job to an available printer when that printer is ready to print. To do that, remote printing must be enabled on the printer.

To enable remote printing:

  1. Tap the gear icon on the printer’s touchscreen. The Settings screen appears.
  2. Tap Connectivity. The Connectivity screen appears.
  3. Tap Remote Printing. The Enable Remote Printing screen appears. Follow the prompts to enable remote printing.
  4. Repeat these steps on any other printers you want to use with Group Queues.

Register or request access to your printers on Dashboard

You can use Dashboard with a specific Printer Group or with your default list of registered printers, make sure the list of printers or the Printer Group is shared with you.

Sending Print Jobs using Dashboard

After setting up a Printer Group with Fleet Control, send print jobs to the group through PreForm.

Open PreForm

Install and open the latest version of PreForm.

Connect your Dashboard account to PreForm

Log in to Dashboard through PreForm.

Select the Printer Group

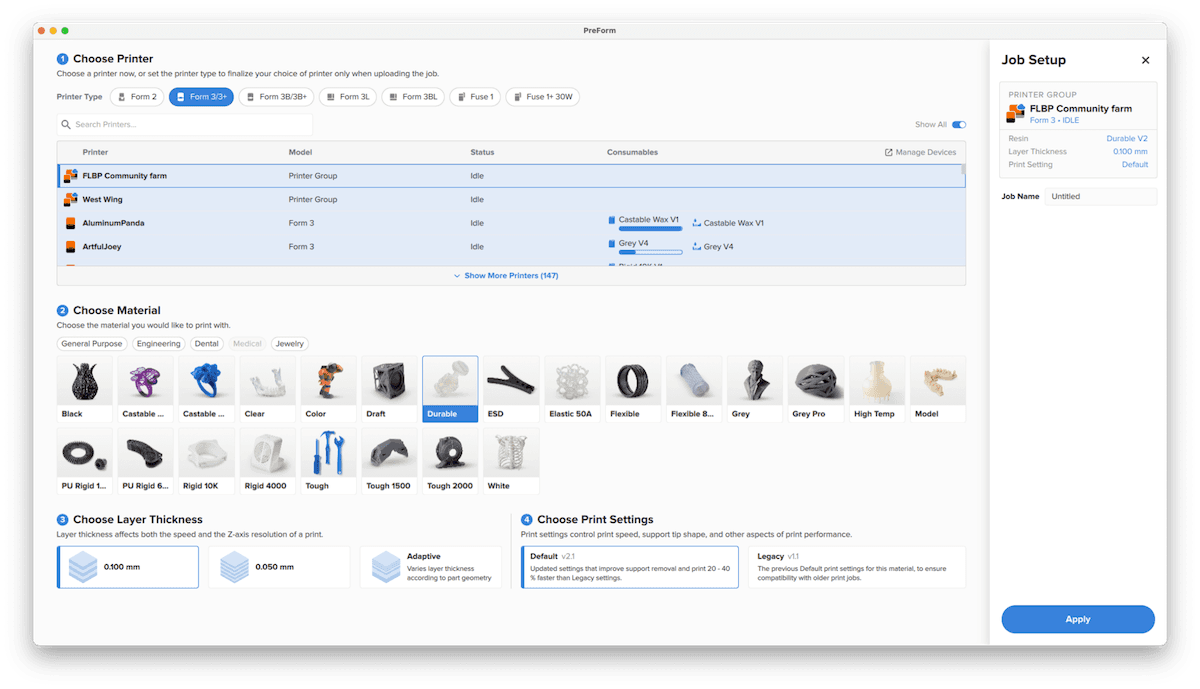
While setting up your print, select the Printer Group from the Job Setup screen as you would an individual printer.

Job Setup screen with a Printer Group selected

Import a model

Import your files into PreForm.

Support and orient models

Support and orient your model.

Send job to a Printer Group

Send the print job to the Printer Group.

If none of the printers in the selected group are ready to print with the appropriate consumables for the uploaded print job, the print job will stay in the queue until one does. In order for a print to be assigned to a printer, the printer must be have all its consumables inserted, confirm the Build Platform is clean, and, if Automatic Ready to Print is disabled, tap the Ready button on the printer touchscreen.

The Form Auto automatically marks the Build Platform as clean and becomes ready to print the next job assigned in the print queue once parts are harvested successfully.

Note:

  • Depending on network traffic or any web infrastructure issues, there may be some lag between uploading a print and the print being assigned to a printer, even if one is ready.
  • If the uploaded print is already on the target printer (e.g., if your Printer Group only has a single printer and the print job is already in that printer’s queue), it may not display correctly in the Queued Prints list or start printing automatically. Delete the old print job from the printer, power cycle the printer, and try again.
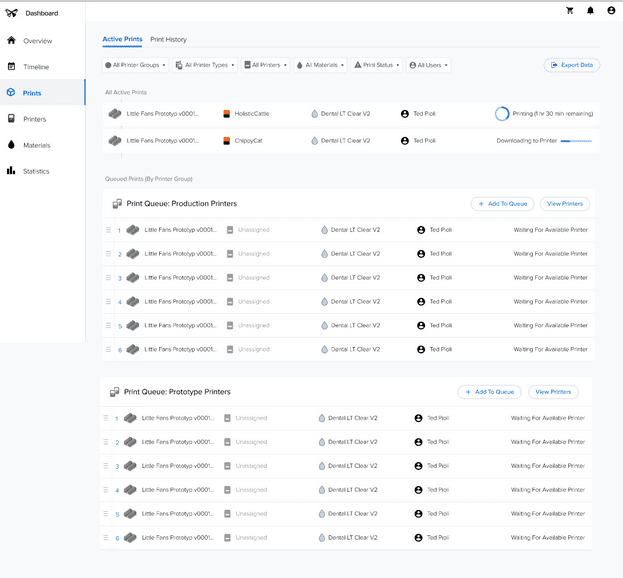

Track the print in Dashboard

Track print progress in Dashboard.

Managing queued print jobs in Dashboard

In Dashboard, click Prints to view the Queued Prints for each Printer Group.

The print queue on the 'Prints' page

Reordering print jobs

To reorder prints within the queue, click and drag a print to a new position.

Reordering a queued print job in Dashboard

Duplicating queued print jobs

To duplicate a print job:

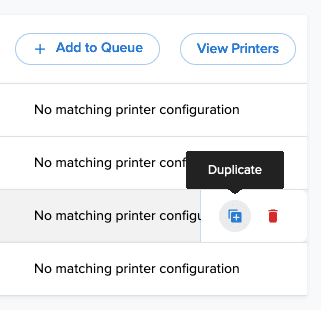
  1. Hover over a print within the queue. A context menu appears.
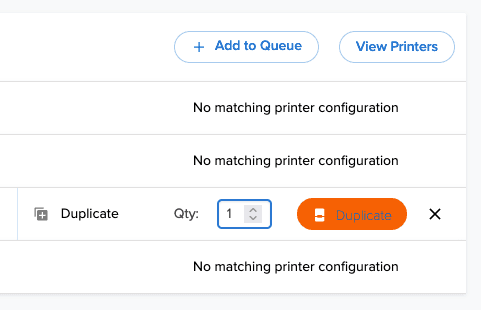
  2. Click Duplicate. The Quantity field appears.
  3. Input a number of duplicates and click Duplicate. The specified number of duplicates of the selected print are added to the end of the queue.
Duplicating a queued print job in Dashboard

Alternatively:

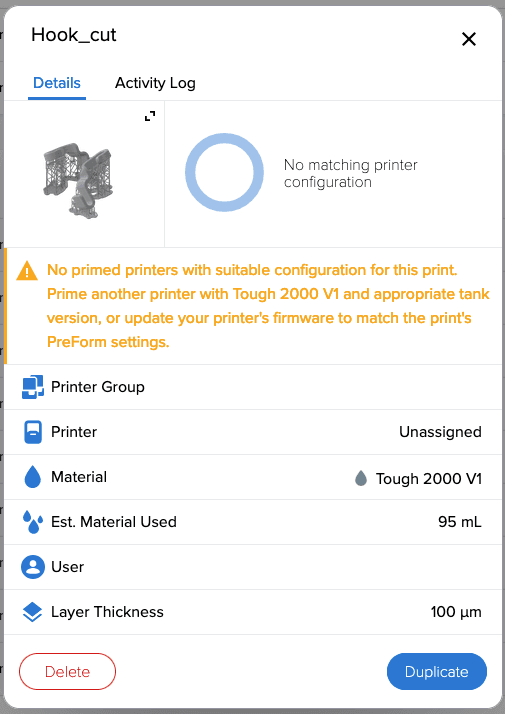
  1. Click on a print within the queue. A print details window appears.
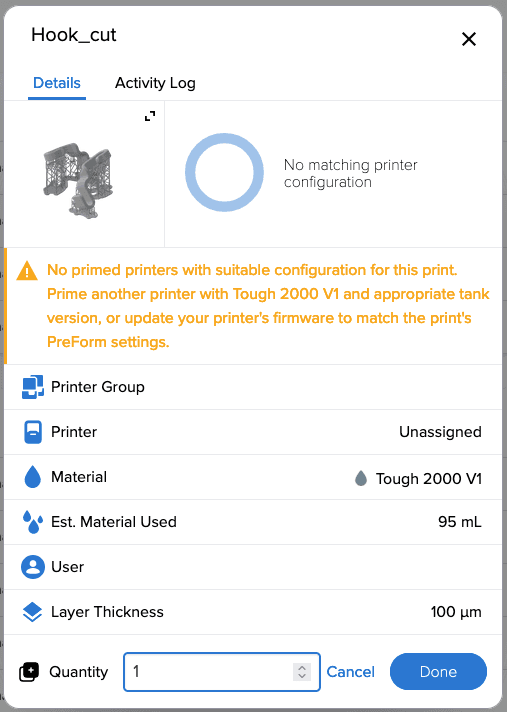
  2. Click Duplicate. The Quantity field appears.
  3. Input a number of duplicates and click Done. The specified number of duplicates of the selected print are added to the end of the queue.
Duplicating a queued print job in Dashboard

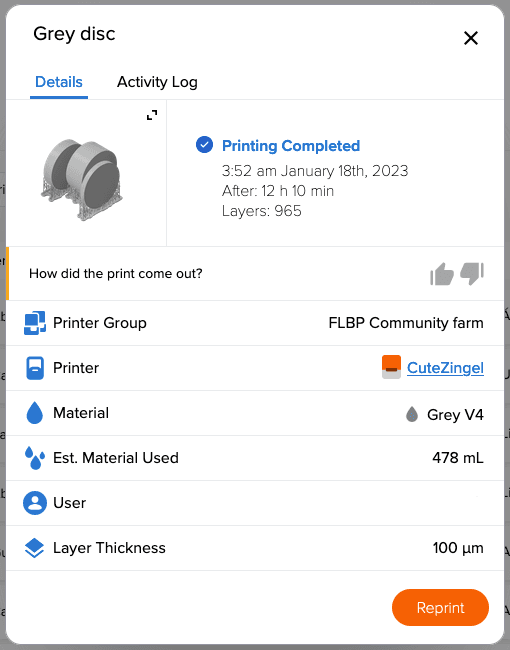
Reprinting completed print jobs

To reprint previously-completed print jobs:

  1. Click Print History. The Print History page appears.
  2. Locate the print job you want to reprint.
  3. Click on the print job. A print details window appears.
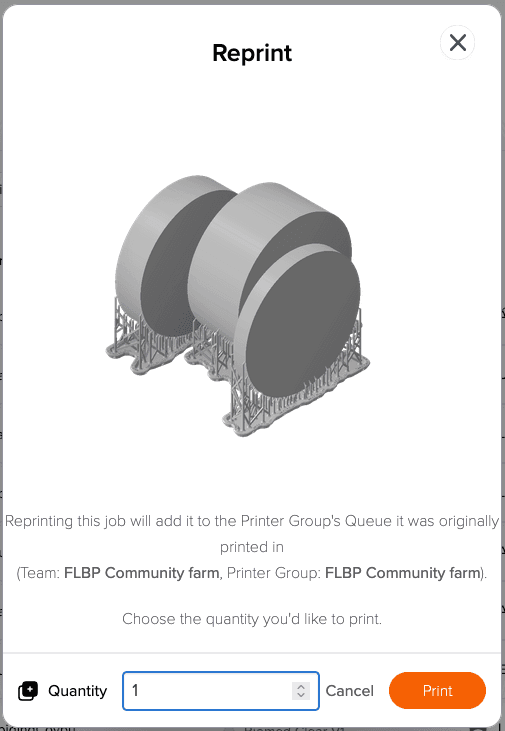
  4. Click Reprint. The Reprint window appears.
  5. Input a number of times you would like to reprint the print job in the Quantity field and click Print. The specified number of copies of the print job is added to the end of the queue for the Printer Group that originally ran the print job.
Reprinting a print job in Dashboard

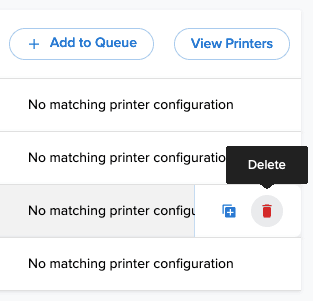
Deleting queued print jobs

To delete an upcoming queued print job:

  1. Hover over a print within the queue. A context menu appears.
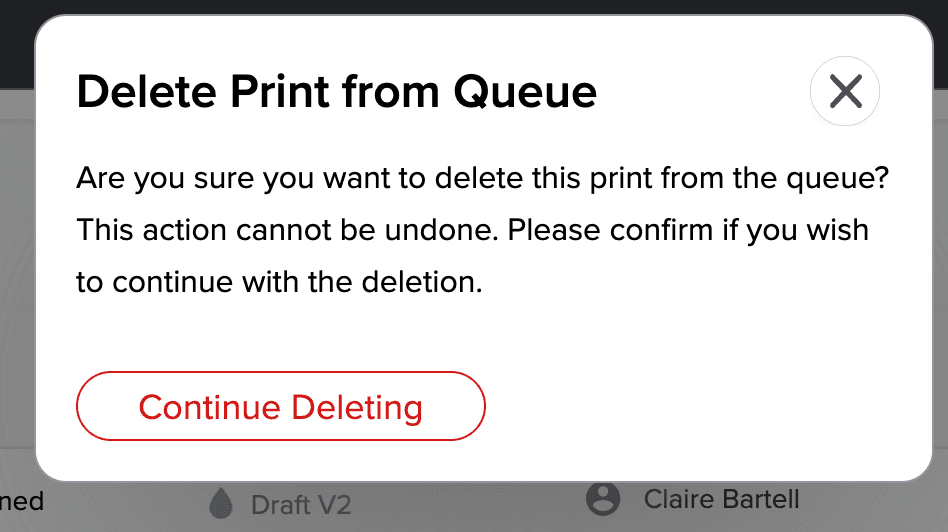
  2. Click Delete. A confirmation screen appears.
  3. Click Continue Deleting. The print job is removed from the queue.
Deleting a queued print job in Dashboard

Alternatively:

  1. Click on a print within the queue. A print details window appears.
  2. Click Delete. A confirmation screen appears.
  3. On the confirmation screen, you have the option to leave a note about why you deleted the queued print. Input your feedback and click Continue Deleting. The print job is removed from the queue.

Maintaining and administering printer fleets

For continued printing, replace consumables and check printers for maintenance.

  1. Check, maintain, and replace resin cartridges as needed.
  2. Check, maintain, and replace resin tanks as needed.
  3. Replace build platforms for ones without adhered parts.
  4. Ensure firmware is up to date on all printers.
  5. Check and maintain printers for regular wear and tear.