
Many of us haven’t touched a crayon since childhood, but vivid pigments and the ability to manipulate the paraffin wax material with heat makes them a useful tool for more than just filling in coloring books. With this simple technique, anyone can use household items to add a pop of color to a portion of a 3D printed part by melting crayons.
Formlabs mechanical engineer Christian Reed discovered an easy way to add color to parts when he wanted to emphasize the logo on looks-like prototypes of the GRIPsher, a multitool product that he created and successfully funded on Kickstarter. This technique can add uniform, bright colors to a section of a part, or even cover entire parts in a pinch.
What You’ll Need

- 3D printed part (we printed on the Form 2 using Standard Resin)
- Crayons in colors of your choosing
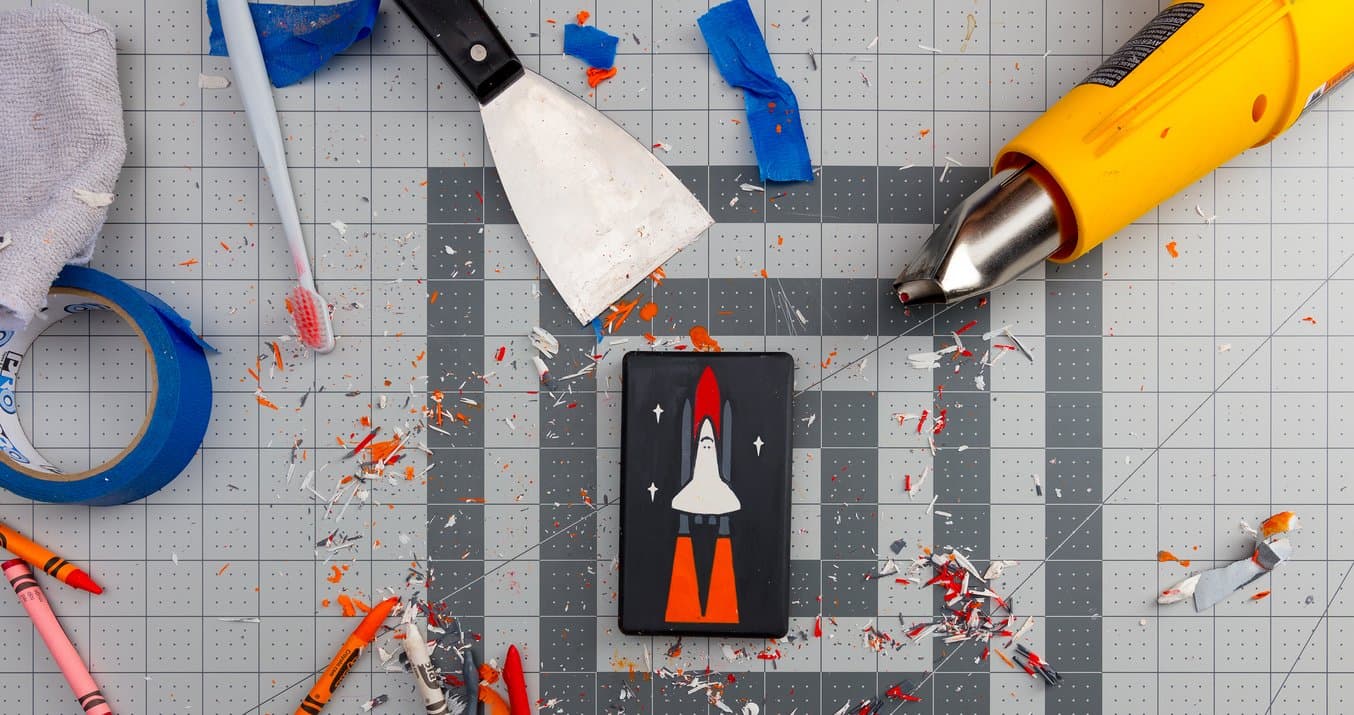
- Heat gun (or a regular lighter in a pinch)
- Masking tape
- Scraper tool (we used the one from from the Form 2 Finish Kit)
- Sandpaper of varying grits
- Microfiber cloth
This process can be a bit messy, so we recommend using a cutting board or other surface, like a layer of newspaper, to collect the shavings and keep your workspace clean.
Step 1: Design Your Part
Design a part with a slight recess of 0.5 mm - 1 mm where you’d like to add color. This could be a logo, some text, or anything else you want to emphasize. If you’d like to try this technique with a pre-made file, we posted some designs you can download and print right away on Pinshape.
Step 2: Print and Finish Your Part

Print your part with a 3D printer of your choosing, remove support marks, and sand until you’re satisfied with the surface finish. Wax will seep into layer lines, so a smooth finish is important for clean coloring. We recommend starting with a rougher grit, like 150 or 220, and moving toward the finest grit until the surface is smooth.
For stereolithography prints, you might also want to apply mineral oil to the surface before moving on to the next step.
For more tips on sanding your parts, read our documentation on removing support marks.
Step 3: Prepare Your Tools
Choose your color and remove the paper from the crayon. You can do this by hand, or use a utility knife or the scraper tool.

If you’re using a heat gun, use a low air pressure setting if possible to prevent melted wax from spraying outside the designated area.
Step 4: Apply Color
Use the heat gun (or lighter, in a pinch) to melt the crayon. Start by melting the crayon away from the part, then let it drip down over the part, to avoid melting any hardened wax that has already been applied.

If you want to mask off specific parts of the colored area, apply masking tape throughout the process. Make sure to wait until the wax is completely dry (which takes about ten minutes) before removing the tape–otherwise it may pull all of the wax out in one piece.

It may take a couple tries to perfect the technique—hold the crayon slightly away from the heat or flame and rotate it to avoid burning the crayon and getting ash in the part. If you do get ash in the part, you can scrape it out before it cools and try again.
Step 5: Scrape to Perfection

Scrape off the wax using the scraper tool. Think of the motion as more like shaving than a single swipe: use a delicate, finessed motion, shaving a bit at a time.

If any areas need a touchup, you can use the actual crayon for small fixes. A flatheaded screwdriver or other more precise tool may also be handy for final tweaks.

Wipe the part clean with a microfiber cloth to remove excess wax scrapings. You can also use a toothbrush to help clean up.
Share Your Results
We hope you’ll find this technique useful for looks-like prototyping, modelmaking, and beyond!
We’ve tried it on a few different parts, from simple, flat surfaces like the one above to rounded surfaces like the globe model included in our Pinshape collection, and we’d love to hear about your results and any supplementary techniques you discover along the way if you give it a try.