Tank film warping (Form 3L/Form 3BL)

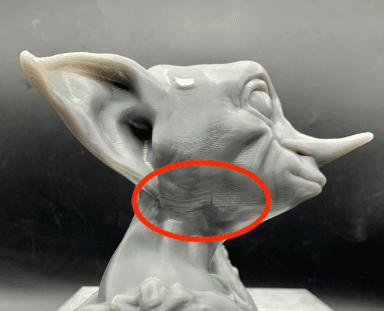
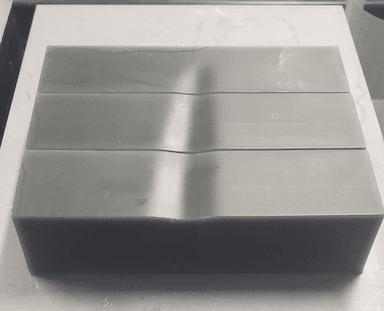
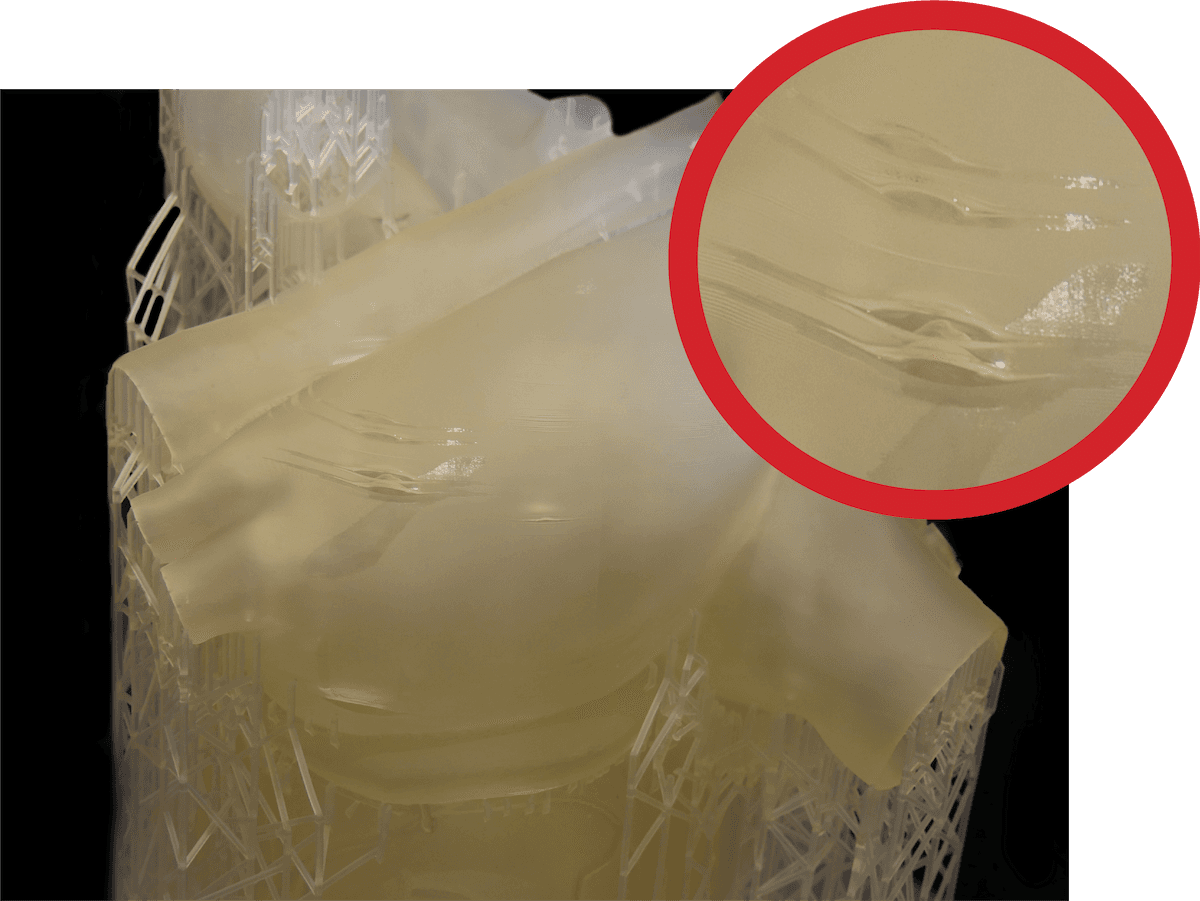
LFS resin tanks have a flexible film on the bottom. On the Form 3L and Form 3BL, this film can become wrinkled in certain locations. These wrinkles may cause layers on a print to warp or print unevenly. This leads to corresponding areas of the print that look like they have sagged.

Symptoms

alttext
alttext
alttext
  • The print has curved layers that are not even across the whole print
  • The warped layers cause cured layers to separate from one another

Common causes

  • The flexible resin tank film warps or wrinkles through ordinary use. During printing, the printer pulls on the film layers to create a taut, uniform print area for each layer. If the film is not flat, the layer will not be flat either.
  • Repeatedly printing the same model in the same location on a tank can cause the tank film to wear more quickly.
  • The part is oriented improperly.

Note:

It can be difficult to distinguish one print failure from another. Tank film warping can lead to other print failures, such as delamination. Tank film warping itself is not caused by optical contamination or by using an expired resin.

Troubleshooting steps

Note:

Make sure that your firmware and PreForm versions are up to date. To check your printer’s firmware version, refer to the support article Checking the firmware version for Formlabs SLA printers. To update your PreForm version, refer to the FAQ article How do I update PreForm?

Step 1: Check the model in PreForm

Forces imparted on the resin tank’s flexible film during printing can damage it or cause it to warp. These forces can be lessened by redesigning your models or reorienting them in PreForm.

Tip:

Formlabs recommends following the orientation tips outlined in the article Model orientation best practices for SLA printing.

Common orientation issues that can cause parts to warp include:
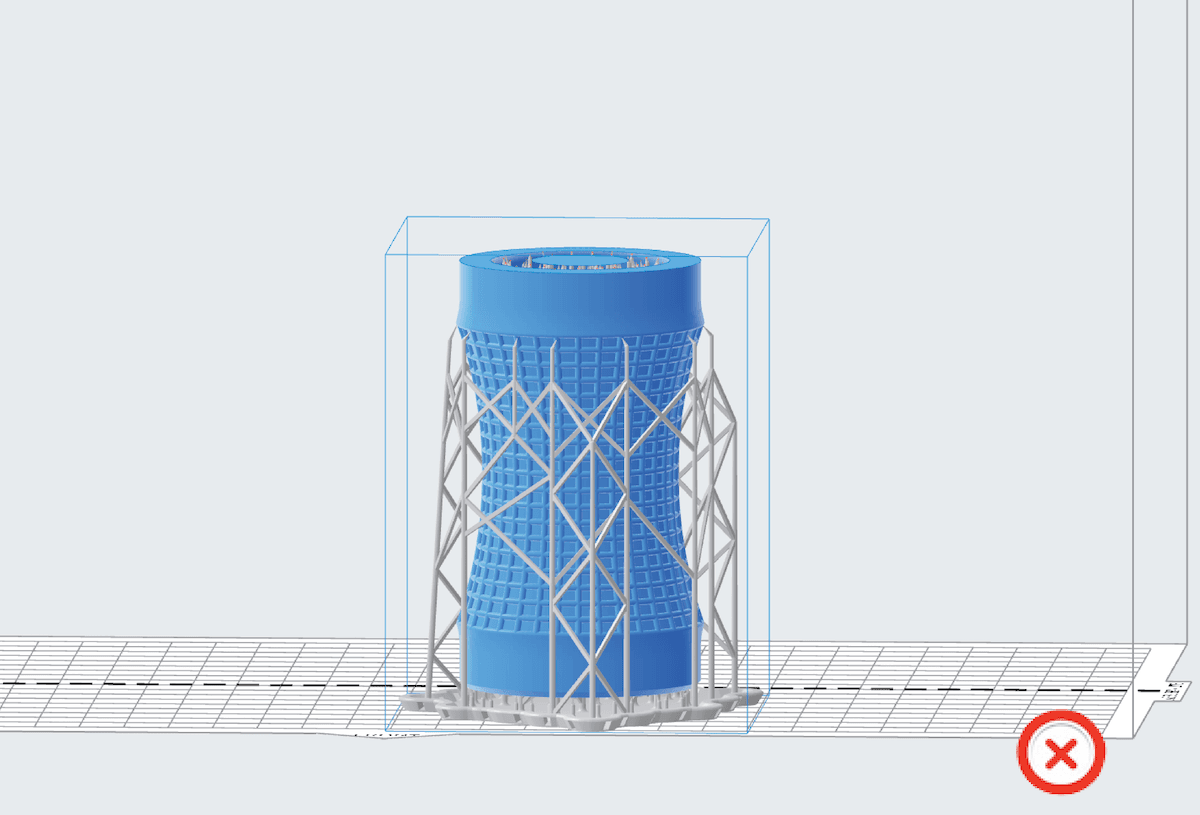
  • Printing cup-like models face-up in PreForm. This orientation causes air to become trapped between the printed part and the resin tank, which causes suction that makes your part stick and detach. Use PreForm to view and resolve suction cups.
  • Printing cup-like models face-up in PreForm. This orientation causes air to become trapped between the printed part and the resin tank, which causes suction that makes your part stick and detach. Use PreForm to view and resolve suction cups.
  • Incorrect cup orientation causing suction
    Correct cup orientation to prevent suction
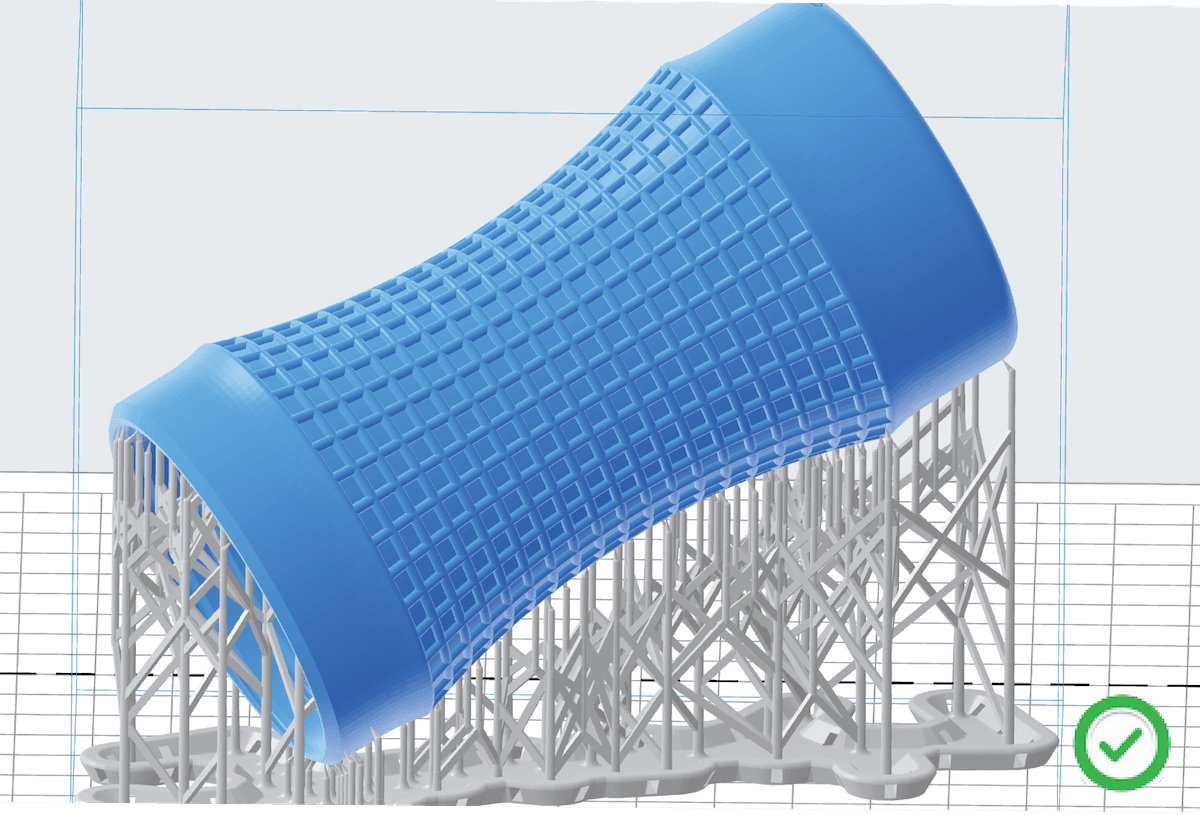
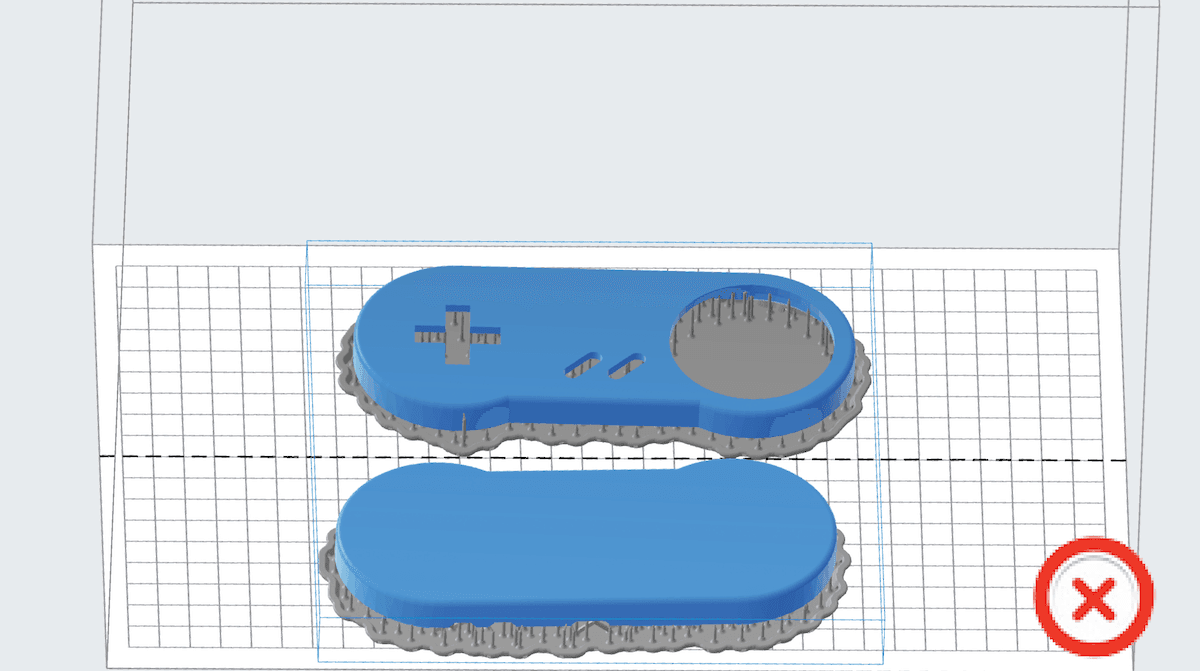
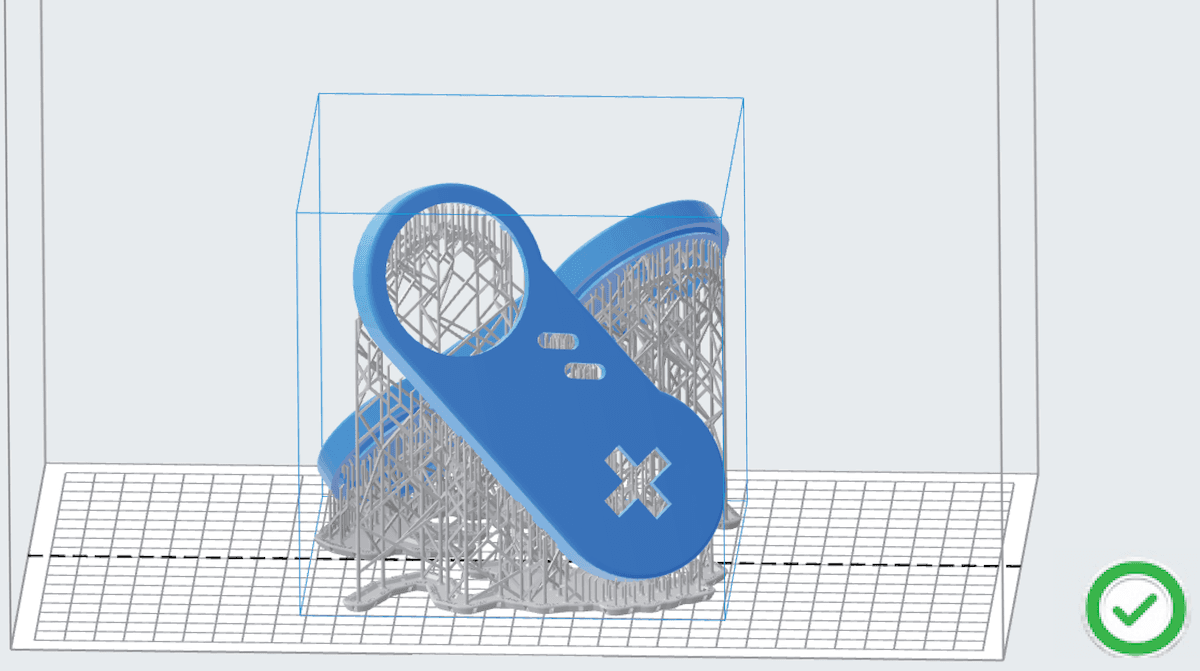
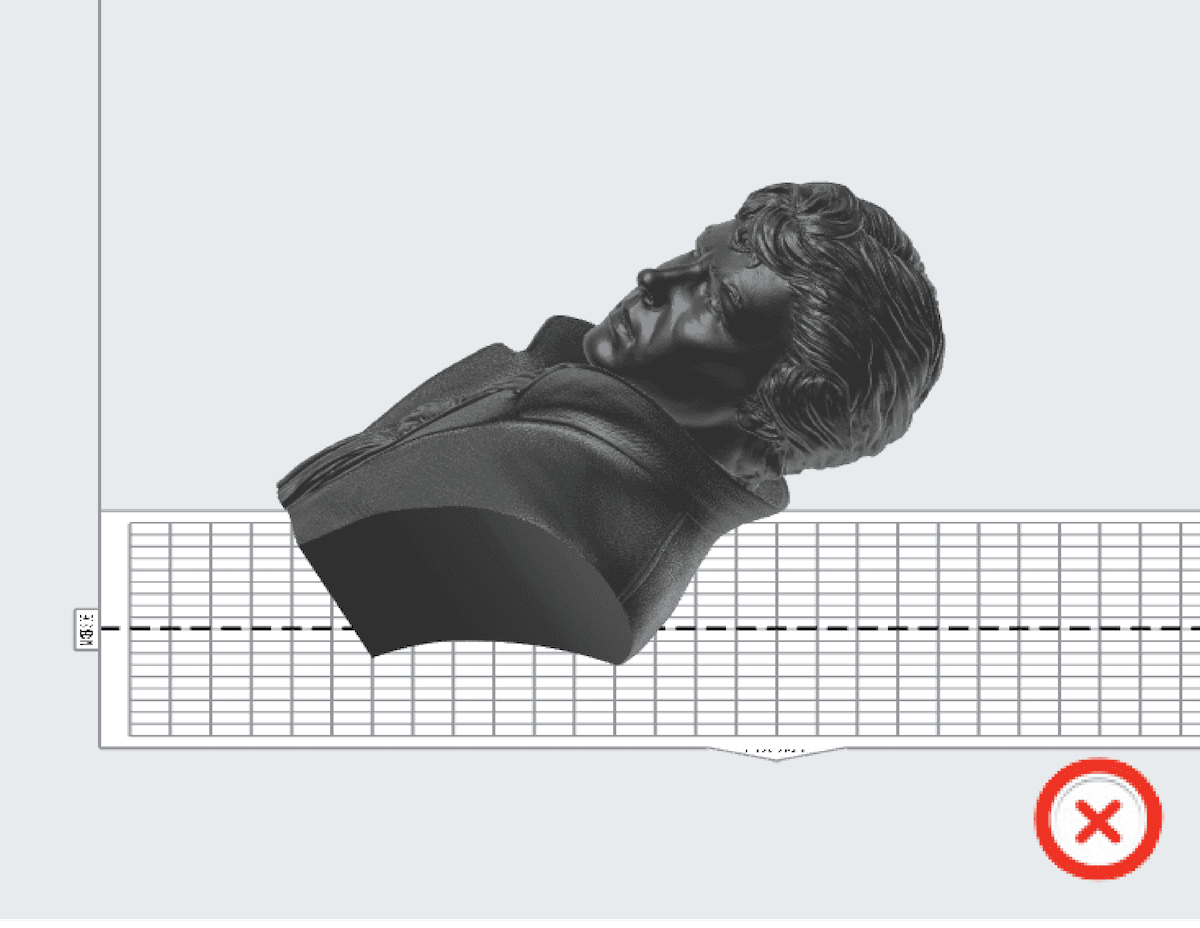
  • Orienting parts parallel to the build platform. This increases the amount of contact that the part has with the resin tank. The part is then subjected to more force as the build platform raises with each layer, which can lead to a distortion in print layers. Reorient the part in PreForm to reduce the difference in surface area between adjacent layers.
  • Incorrect flat orientation
    Correct slanted orientation
  • Printing long models aligned with the X and Y axes. Rotate the models so that they lay along a diagonal.
  • Bad orientation straight with axes
    Correct diagonal array
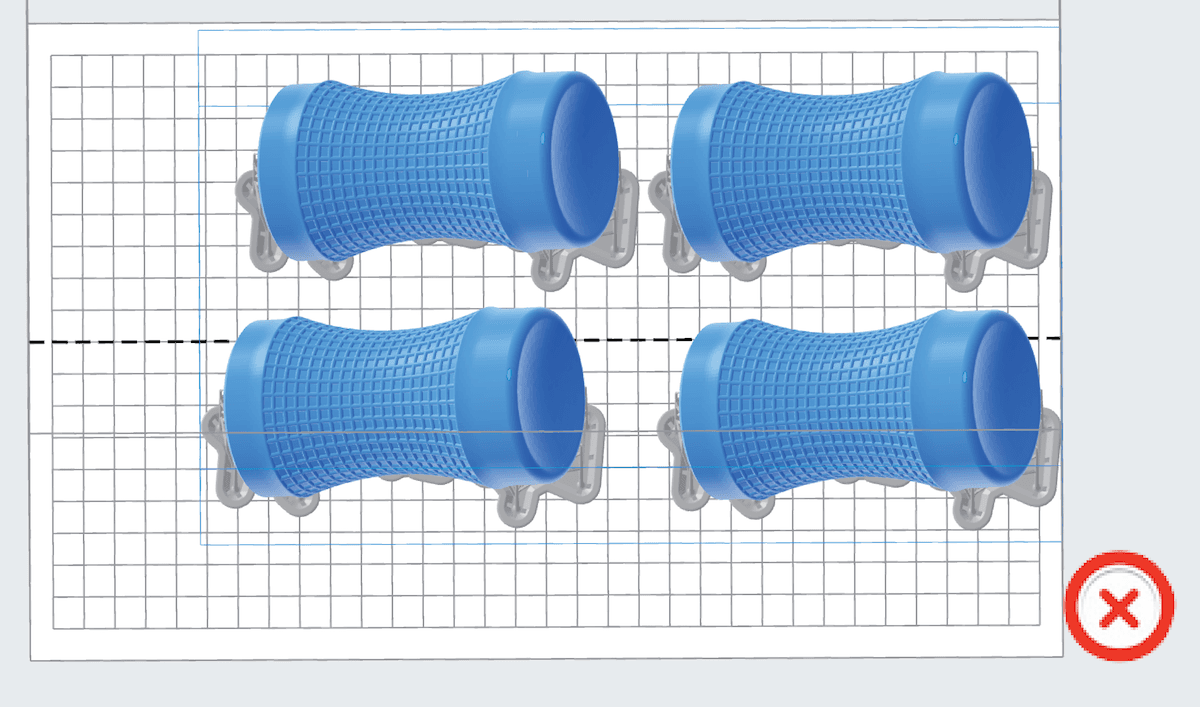
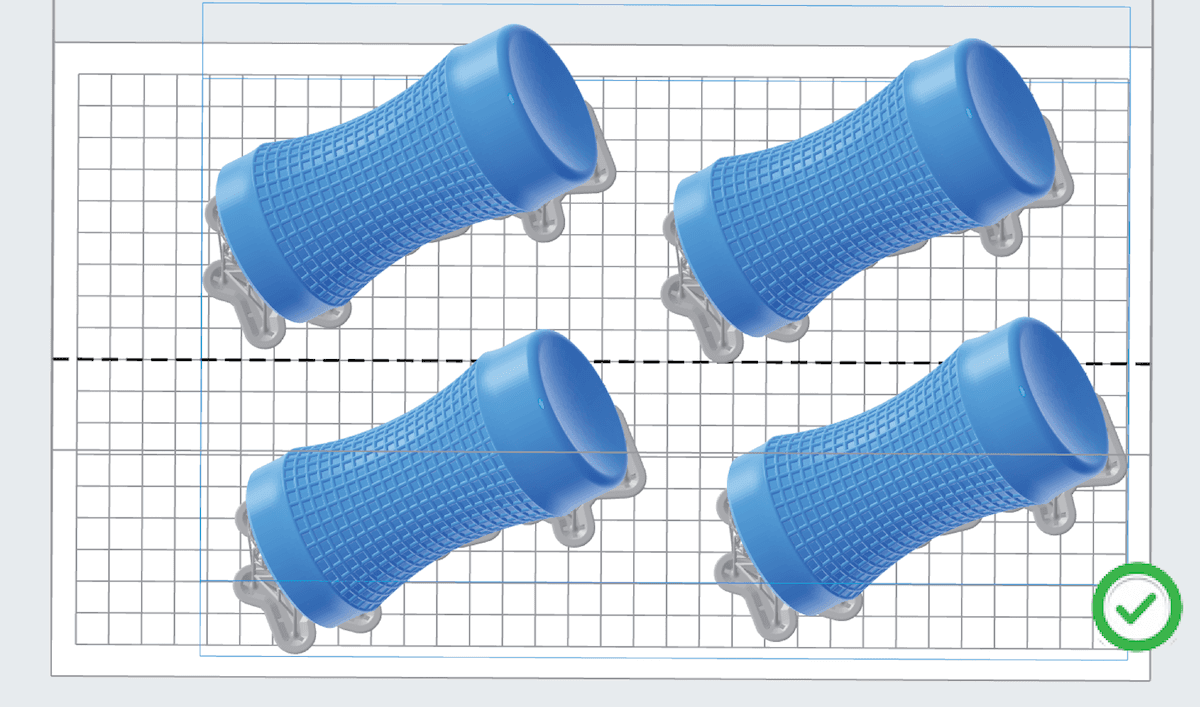
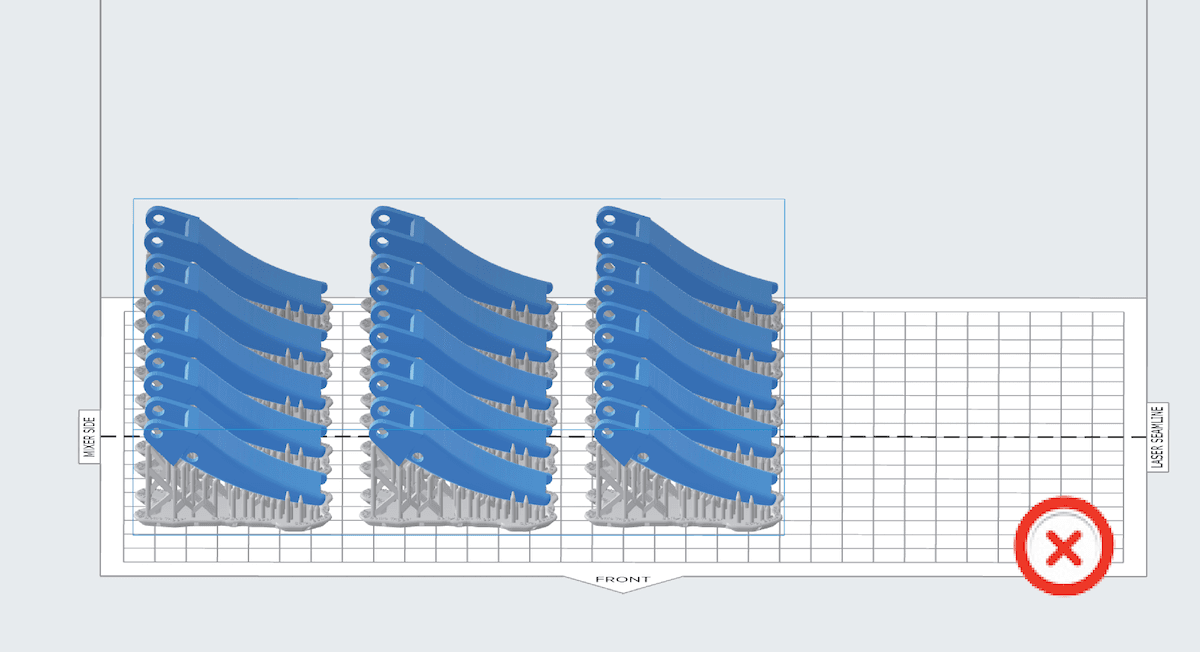
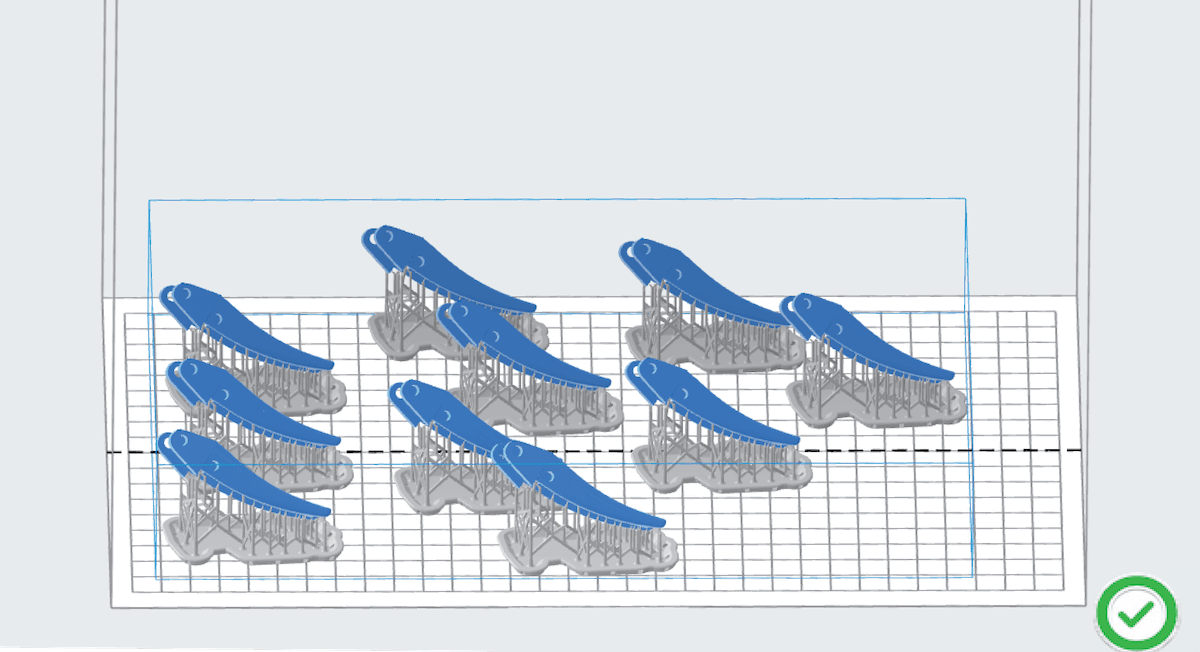
  • Printing arrays of models copied and pasted in a perfect grid aligned with the X- and Y- axes. Rotate the pattern so that models repeat on a diagonal.
  • Poor straight layout
    Correct diagonal model array
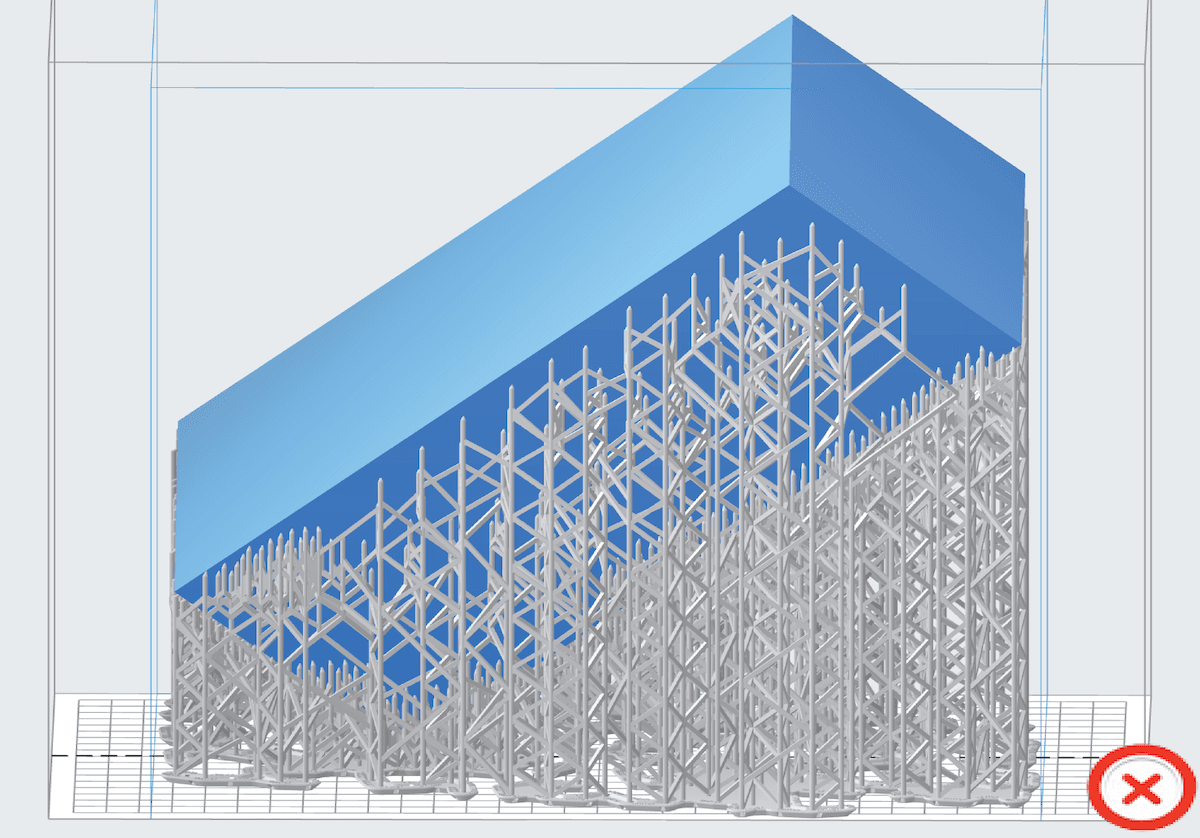
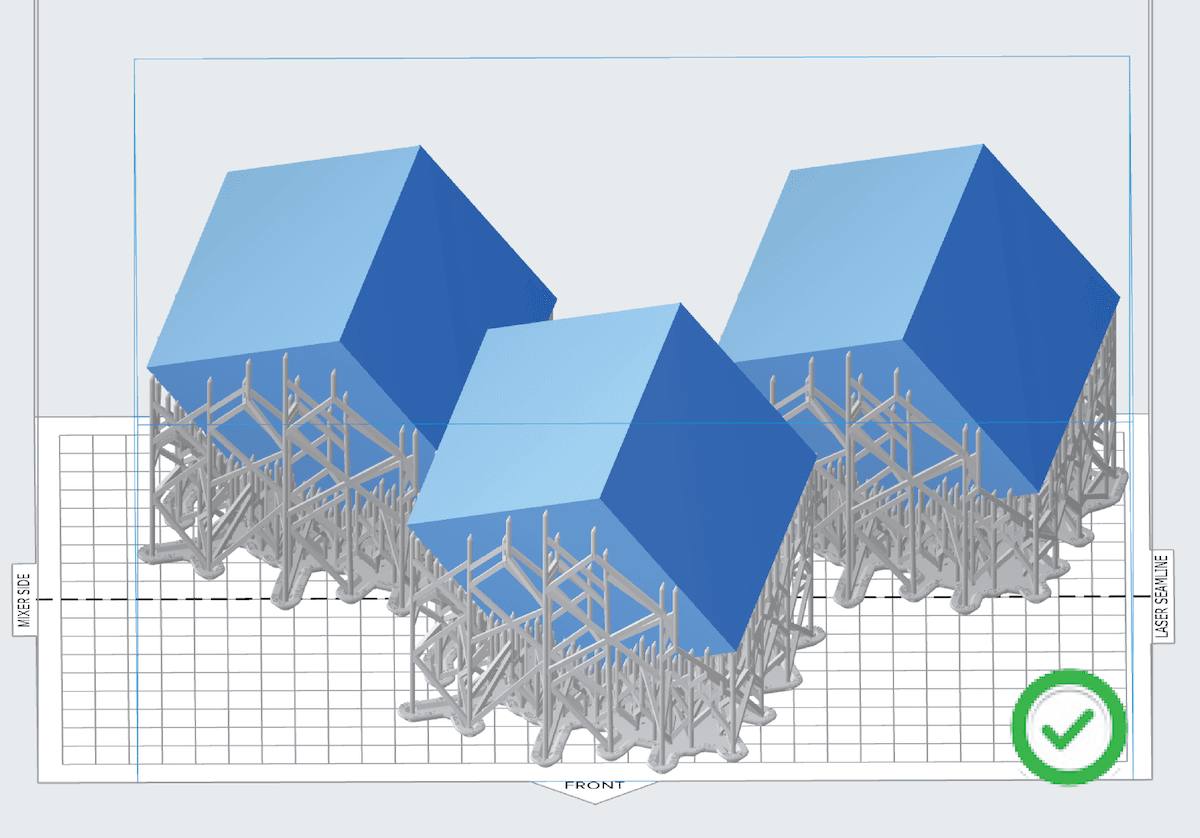
  • Printing large models that approach the printer’s maximum part size in any axis. Divide large models into multiple smaller models using the CAD software of your choice. Add features such as pins or slots to help assemble the final printed part.
  • Large brick layout bad orientation
    Model divided into smaller cubes good practice
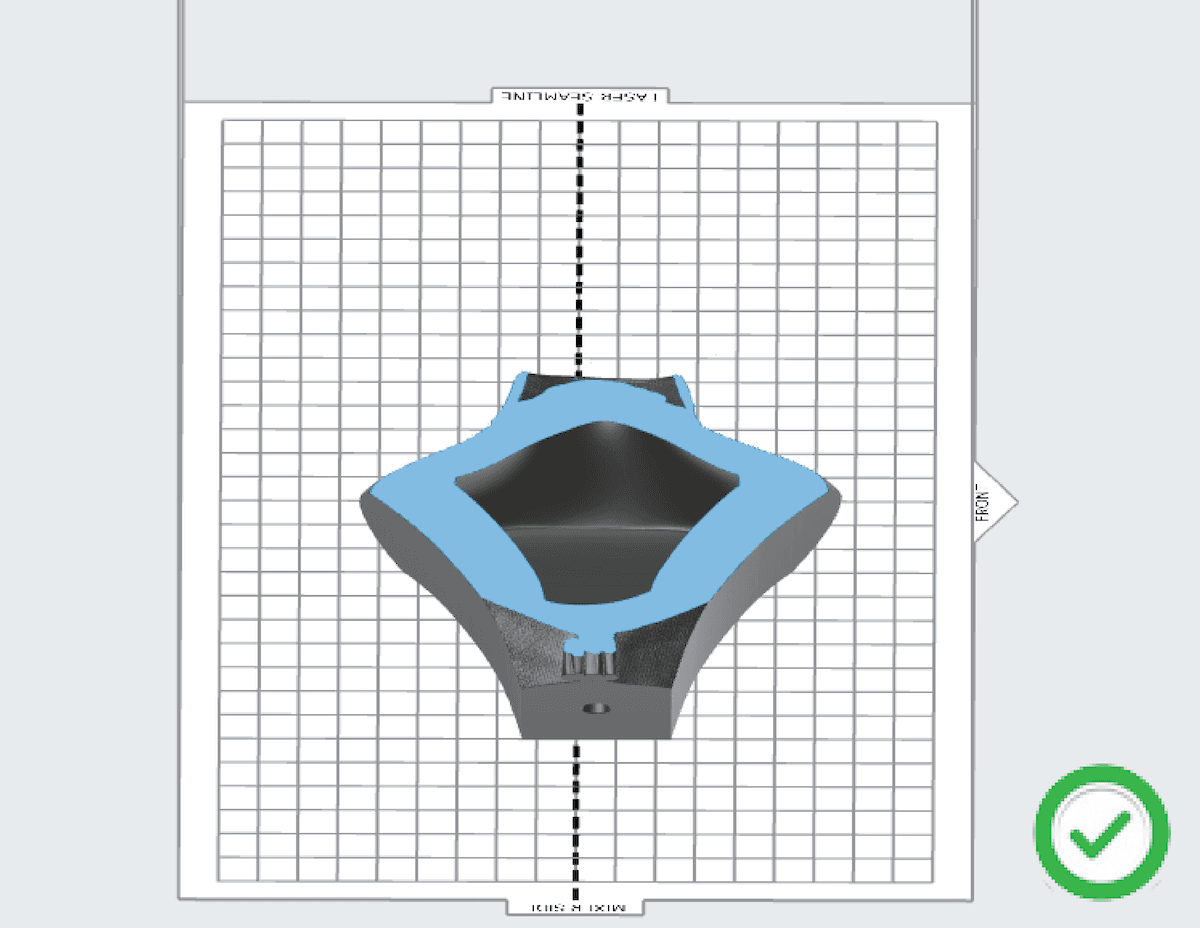
  • Printing bulky models. Hollow out bulky models using the CAD software of your choice. Add drainage holes to allow for air to escape and orient the model to avoid any potential cupping.
  • Bulky model with solid cross-section
    Hollowed out model with drainage holes

    Step 2: Check the resin tank

    Inspect the inside and underside of the tank for dirt, dust, and fingerprints. The bottom of the tank must be clean for the best print results. For examples of wear and tear on Form 3L tanks, please see LFS resin tank damage and wear.

    Note:

    Damage to the resin tank is not a cause of tank film warping, but inspecting your resin tank helps distinguish and diagnose other root causes of print failures. Keep resin tanks clean and well-maintained between prints for reliable and successful printing.

    1. Inspect the resin tank for debris with the tank tool.
    2. Remove any failed prints and cured resin using the tank tool.
    3. Alternatively, remove failed prints and cured resin by printing a cleaning mesh.
    4. Filter the resin to remove any contamination or cured resin.
    5. Inspect the flexible film at the bottom of the resin tank for scratches or wear. Excessive wear means the resin tank needs to be replaced.
    6. Inspect the underside of the flexible film for dirt, dust, or fingerprints. Clean it with Formlabs recommended steps and supplies.

    Contacting Formlabs Support

    If the troubleshooting steps above do not resolve the print failure, contact Formlabs Support or your authorized reseller.

    To help us provide the fastest and most effective response to your issue, please share the following:

    1. Upload your printer’s diagnostic logs
    2. Serial name of the printer
      • Tap the printer icon on the Home screen.
    3. Troubleshooting steps attempted
      • Example: “I reoriented the model in PreForm. I inspected the resin tank and did not notice any damage, clouding, or debris.”
    4. Resin formulation and lot number
    5. Layer thickness
      • Tap Queue on the Home screen. The Queue screen appears.
    6. Relevant FORM files
      • If available, attach FORM files of the model to the support request.
    7. Previous attempts to print the part and any successful prints
      • Example: “I printed the file part2.form three times previously. The first and second were successful. The third one failed.”