
Note:
Formlabs resins do not require an inert atmosphere for post-curing and results have not been validated. Adding a nitrogen gas feed to the Form Cure V2 is an option for customers whose workflows or materials require it.

Some resins benefit from being post-cured in an inert atmosphere. The Form Cure V2 can be retrofitted with a nitrogen gas feed to allow for this.
Note:
Formlabs resins do not require an inert atmosphere for post-curing and results have not been validated. Adding a nitrogen gas feed to the Form Cure V2 is an option for customers whose workflows or materials require it.
Use this guide to install a nitrogen feed onto the Form Cure V2.
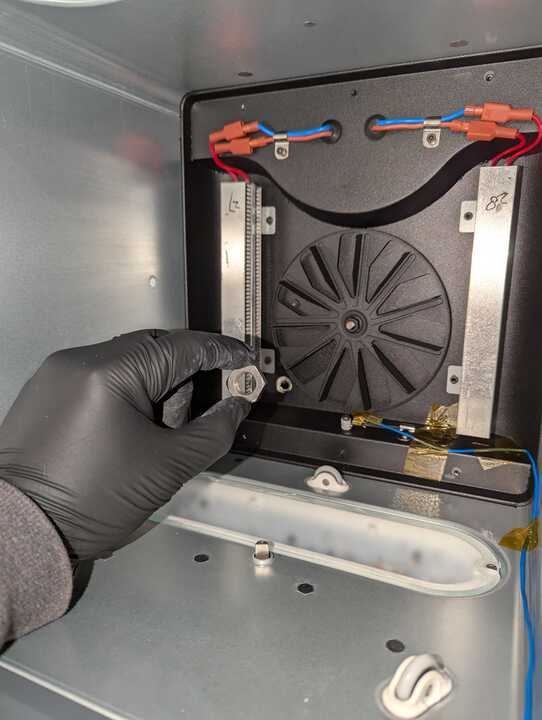
Required Supplies:
Formlabs:
Third-party:
Estimated time: 10–20 minutes (additional time may be required to allow the post-cure chamber to cool if the machine was recently in use)
DANGER:
Read and follow all safety instructions and warnings in the operator manual. Replacement with incorrect parts can lead to burns, shock, fire, or explosion. Dispose of all parts in accordance with local regulations.
Preparing the workspace
Overview: Prepare the Form Cure V2 and workspace for adding a nitrogen feed.
Step 1: Prepare the workspace
Clear a workspace around your machine. Ensure that the workspace is well-ventilated and free of dust.
Step 2: Clean the cure chamber
WARNING:
Resin may cause skin irritation or an allergic skin reaction. Wear gloves when handling liquid resin or resin-coated surfaces. Wash skin with plenty of soap and water.
Open the Form Cure door. Clean any resin that may have pooled or cured in the post-cure chamber with paper towels. Dampen the paper towels with isopropyl alcohol if necessary.
DANGER:
IPA is flammable. Keep containers closed, and keep out of the reach of children. Allow IPA to fully evaporate before starting a post-cure cycle.
Step 3: Remove the turntable
Lift the turntable directly upwards off the rollers and set it aside.
Step 4: Unplug the machine
Turn off the machine using the power switch on the back of the unit. Disconnect the power cable before continuing with maintenance. Do not perform maintenance on the machine while it is connected to power. Wait five minutes after disconnecting the machine from power before proceeding. If the machine was recently in use, the post-cure chamber will be warm. Wait at least 10 minutes for the chamber to cool.
DANGER:
Performing maintenance on the machine while it is plugged in increases the risk of electric shock. Never remove the machine's shells while it is plugged in. Never reconnect the machine to power while the shells are uninstalled.
Accessing the nitrogen inlet hole
Overview: Remove the rear shell and convection fan panel to access the nitrogen inlet hole.
Step 1: Remove the inner fan cover
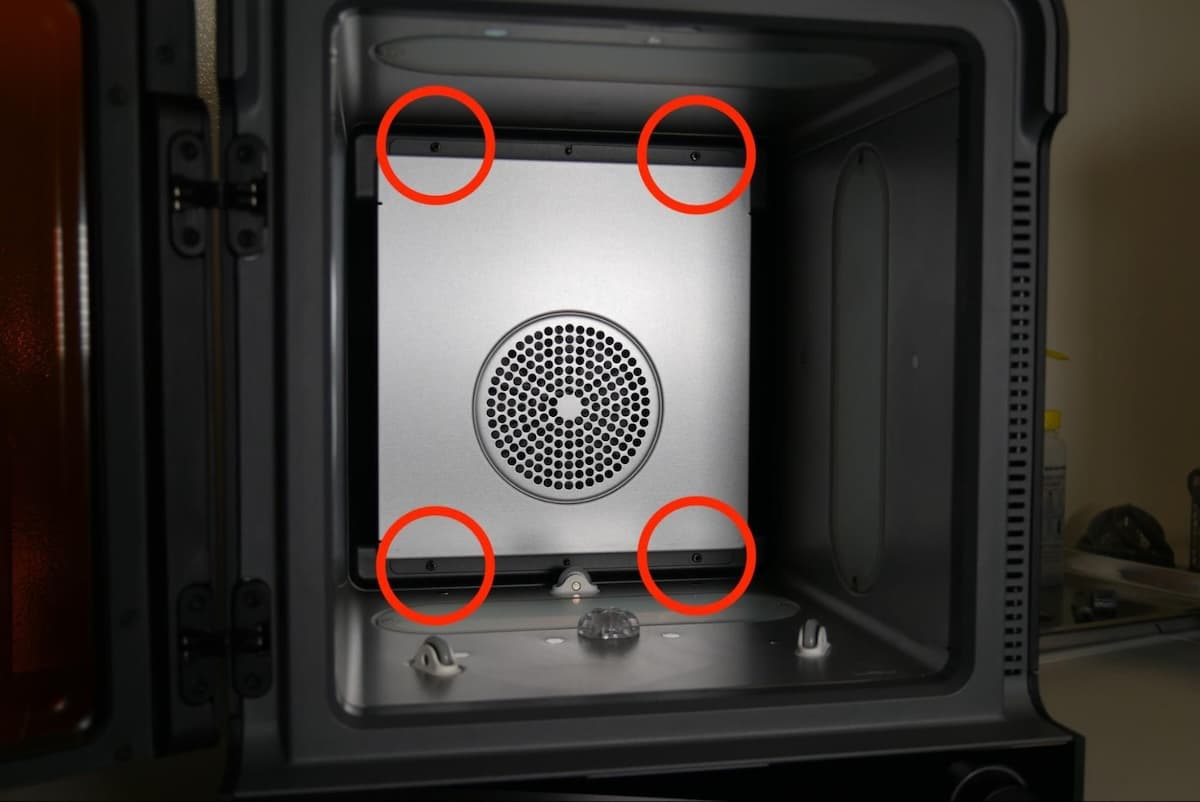
Using a 2.5 hex driver, unscrew and remove the four convection fan panel retention screws at the back of the post-cure chamber. Set the screws aside.
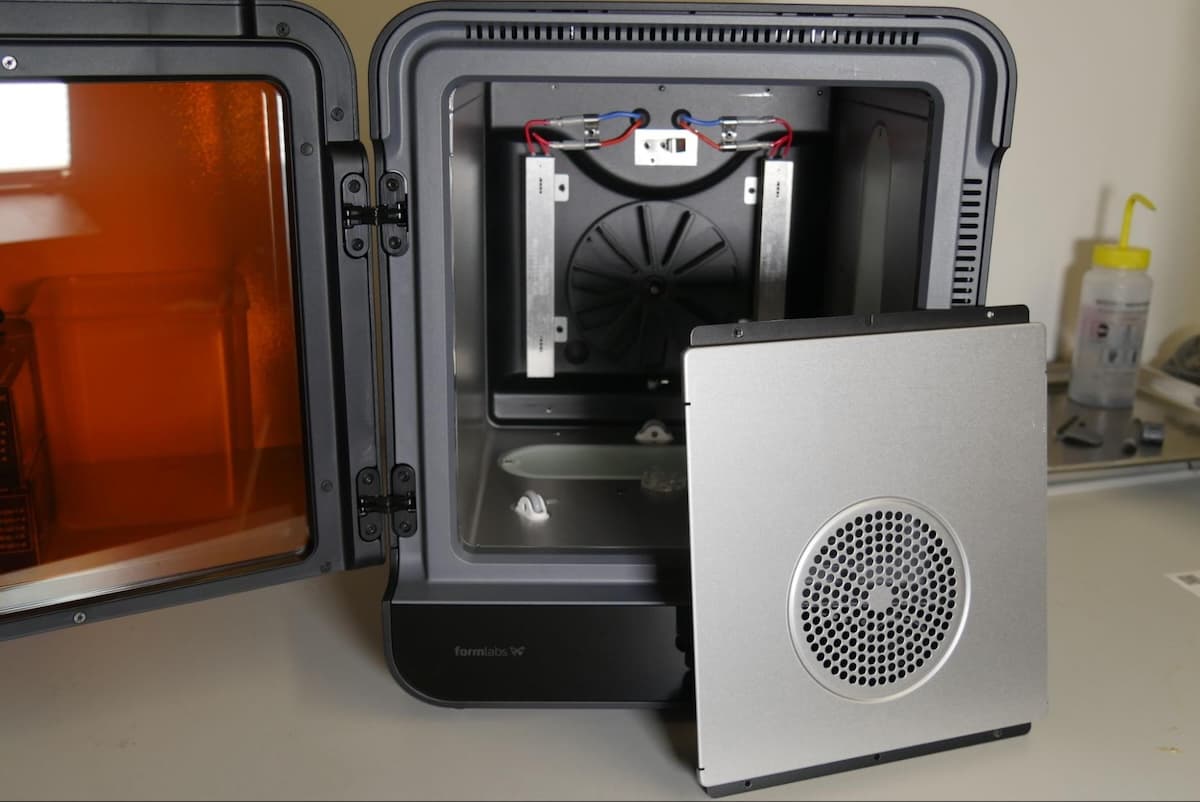
Remove the panel from the machine and set it aside.
Step 2: Remove the inner inlet plug
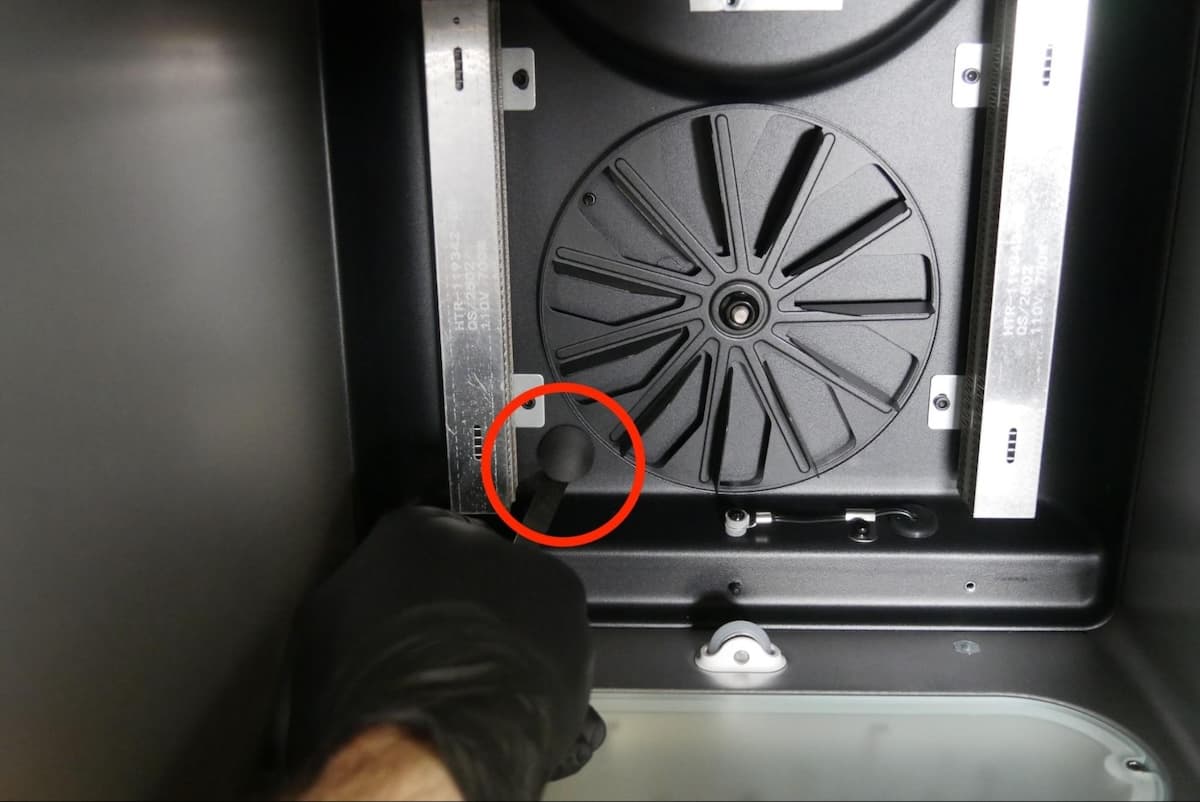
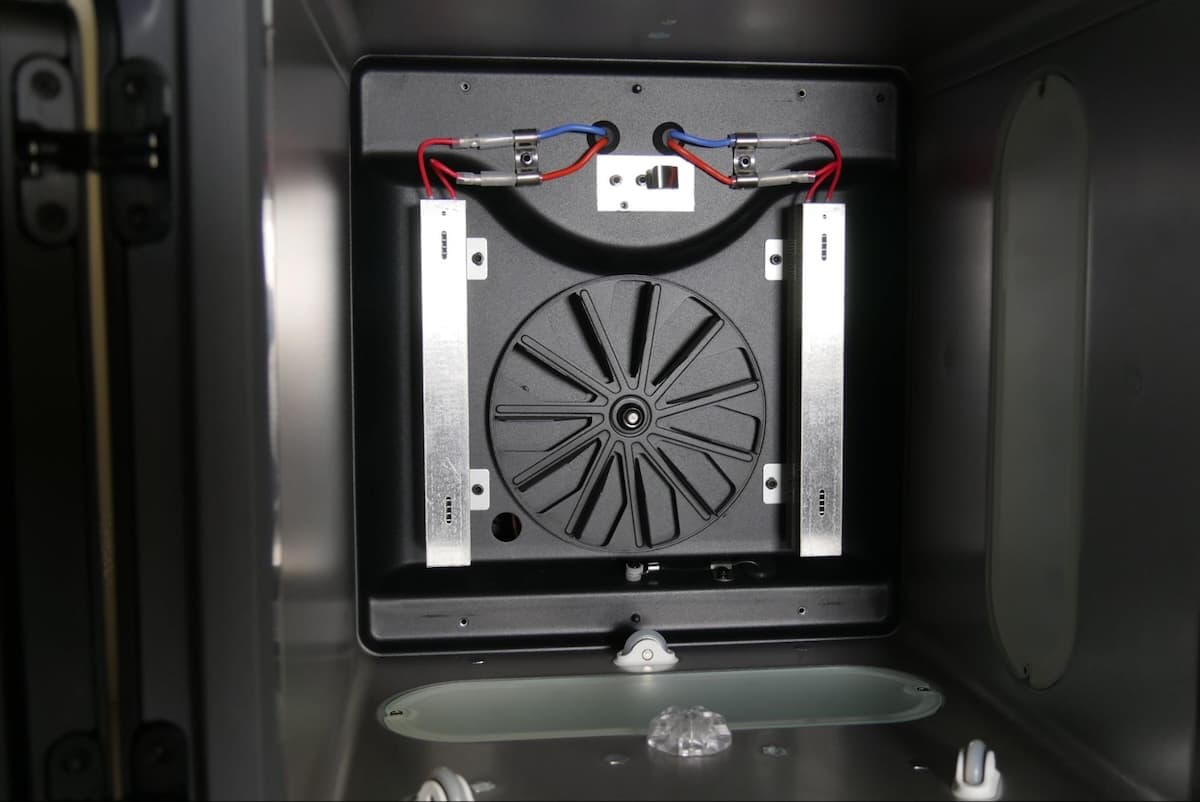
Using tweezers, a spudger, or another similar tool, remove the rubber plug sealing the inlet hole. Set the plug aside. If any insulation is visible through the inlet hole, gently move it aside so the hole is clear.
Step 3: Remove the outer inlet plug
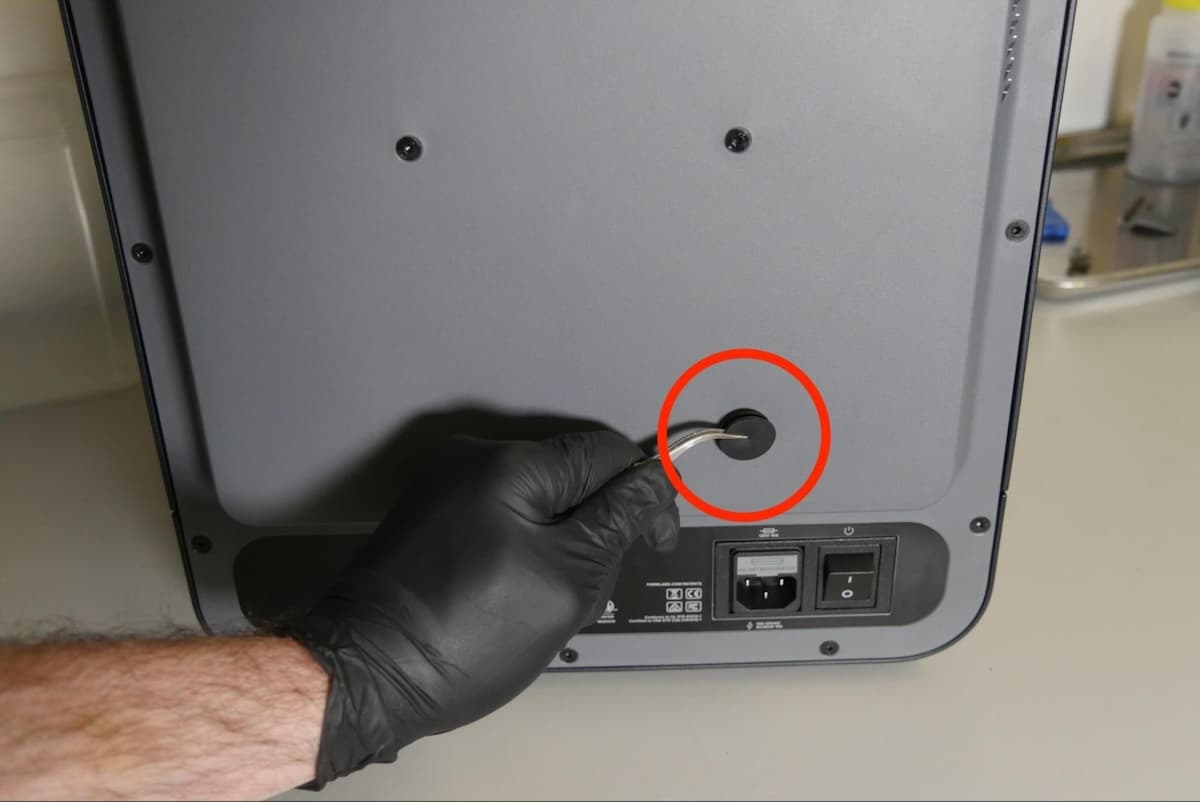
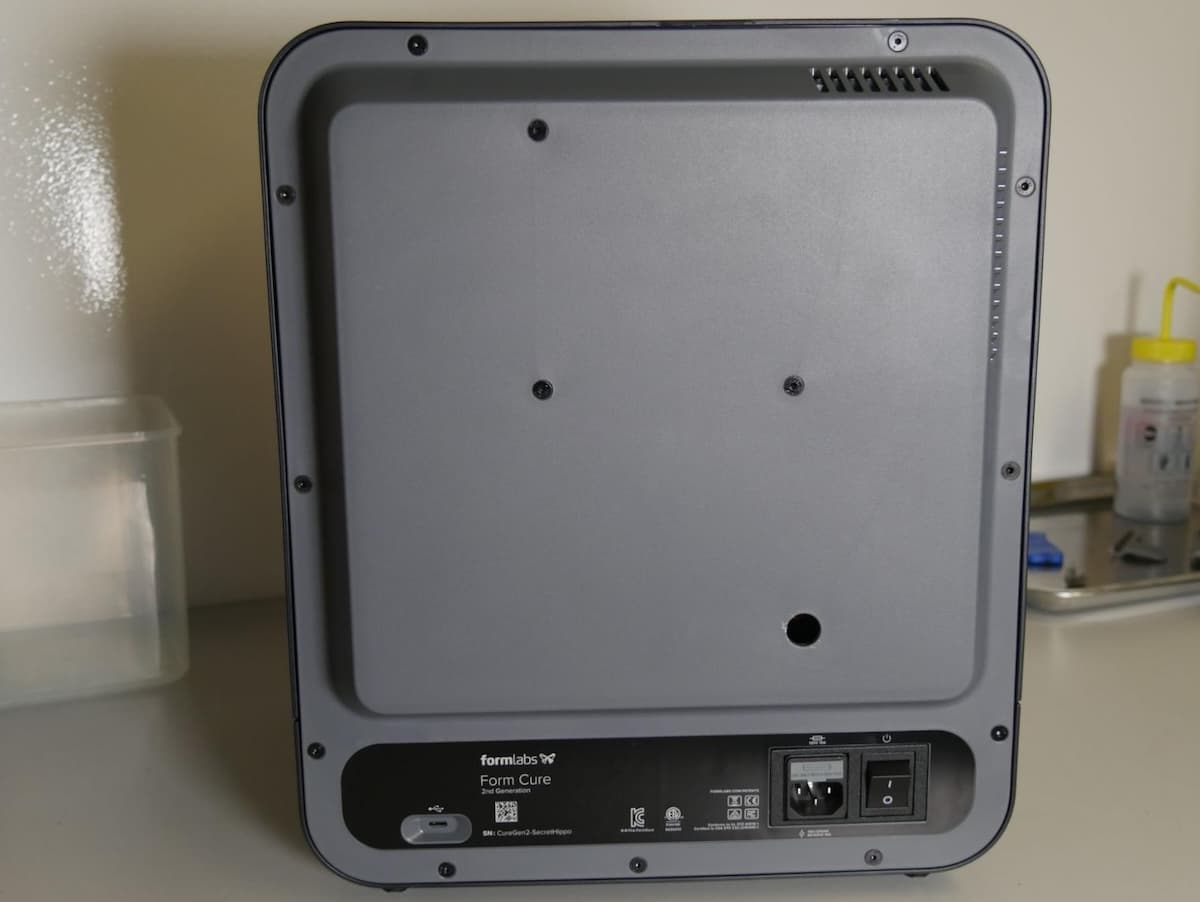
Close the Form Cure door and rotate the machine so the rear shell is accessible. Using tweezers, a spudger, or another similar tool, remove the rubber plug sealing the inlet hole. Set the plug aside.
Step 4: Remove the rear shell
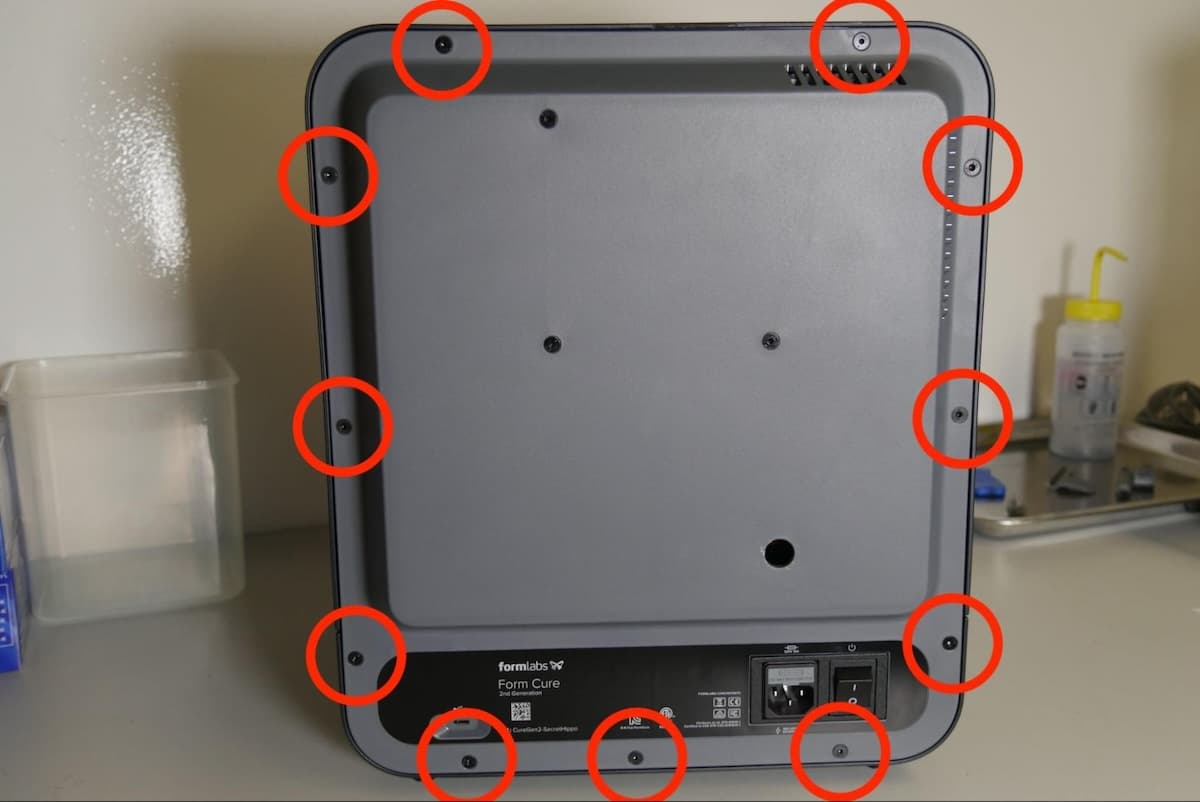
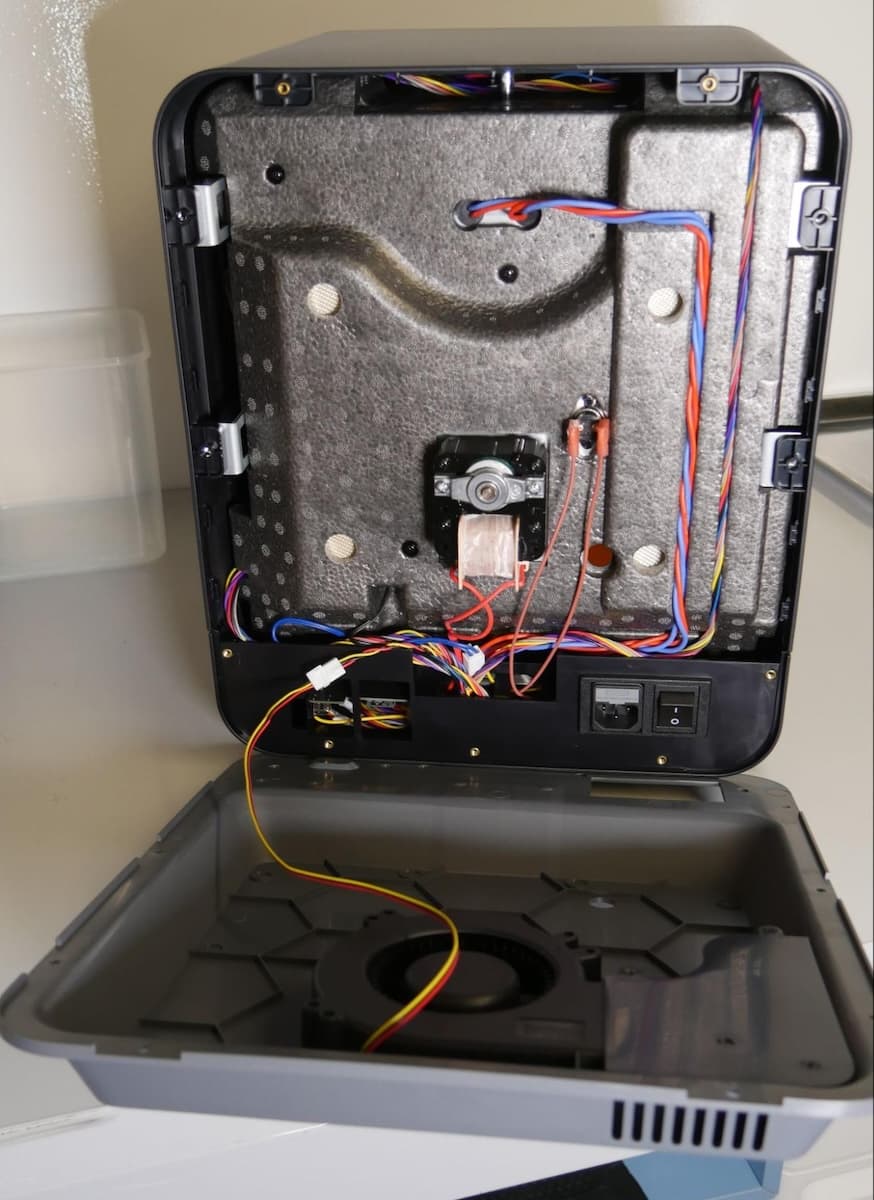
Using a 2.5 mm hex driver, loosen and remove the 11 screws securing the rear shell to the frame of the machine. Set the screws aside. Gently tilt the rear shell down so it rests on the work surface. Do not pull on the rear shell, as it is still attached to the machine via the fan cable.
Installing the nitrogen feed fitting
Overview: Mount and secure the fitting for the nitrogen feed.
Step 1: Thread the nitrogen feed hose
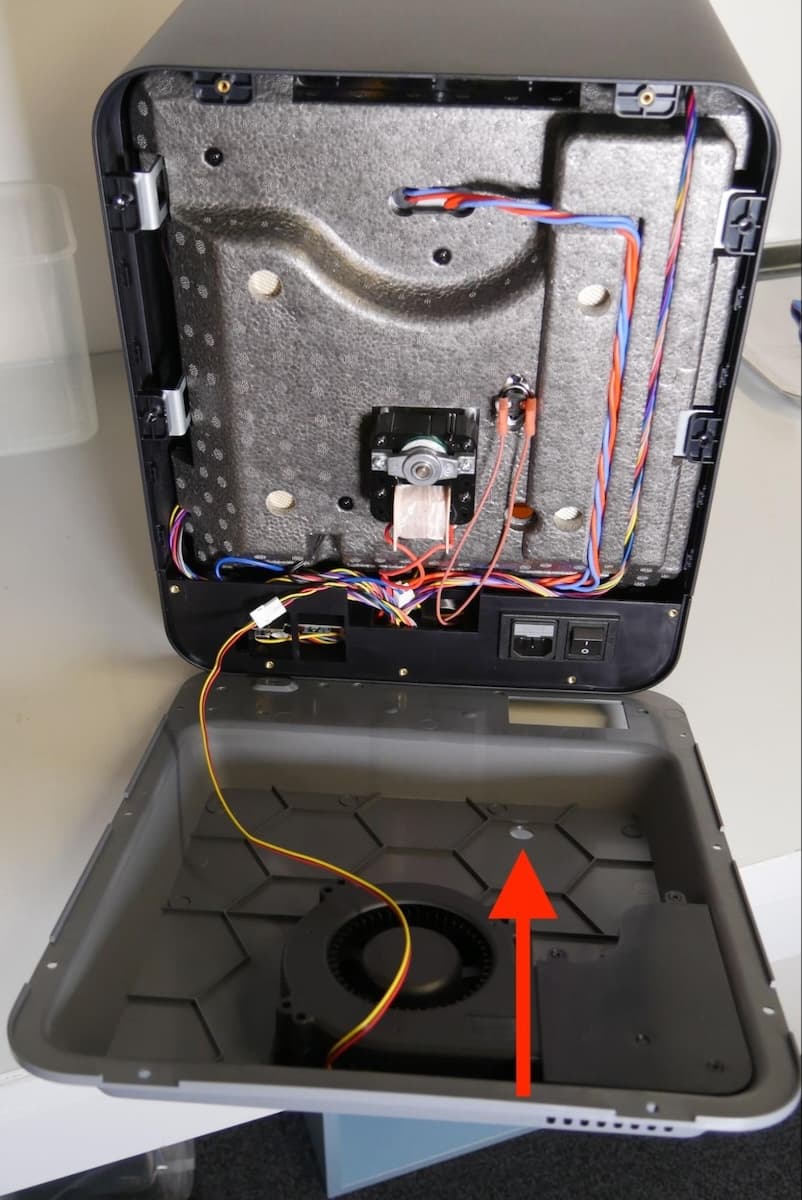
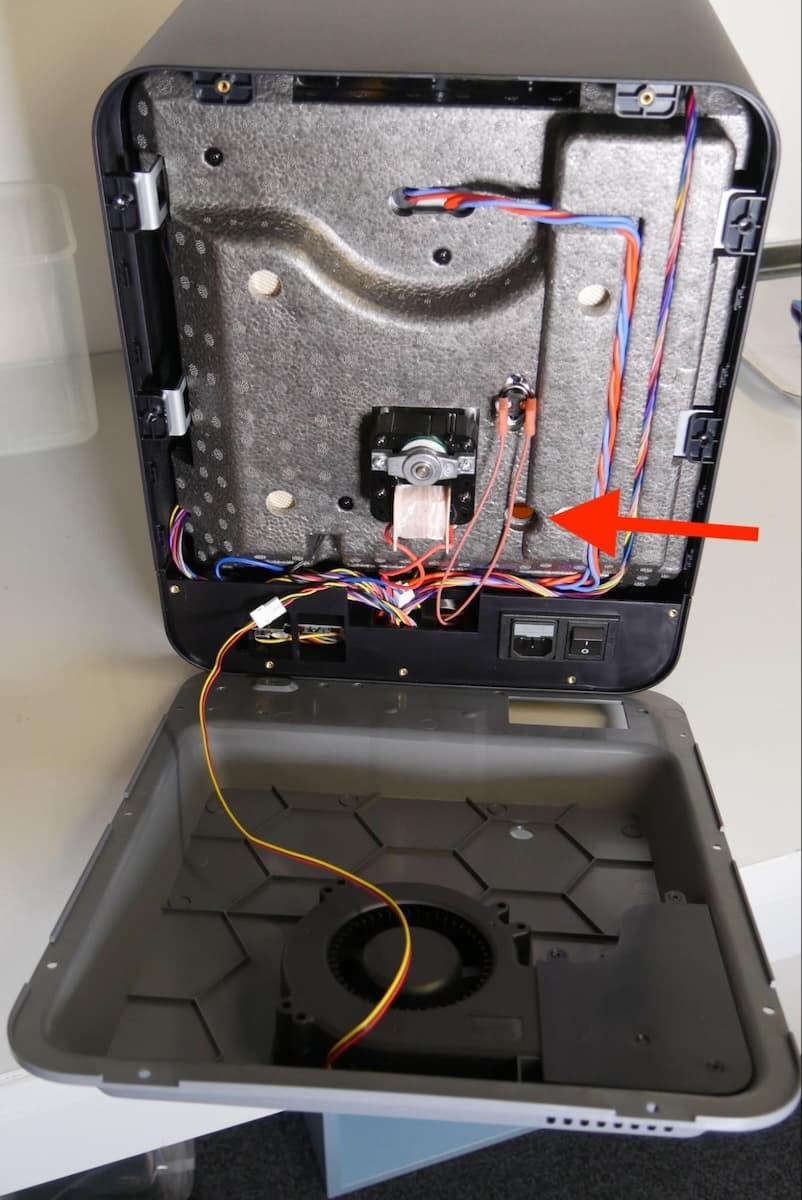
Thread the tubing from your nitrogen source up through the hole in the rear shell of the machine. Attach the tubing to the push-to-connect fitting. Push the threaded end of the fitting through the hole in the back of the machine.
Step 2: Mount the nitrogen fitting
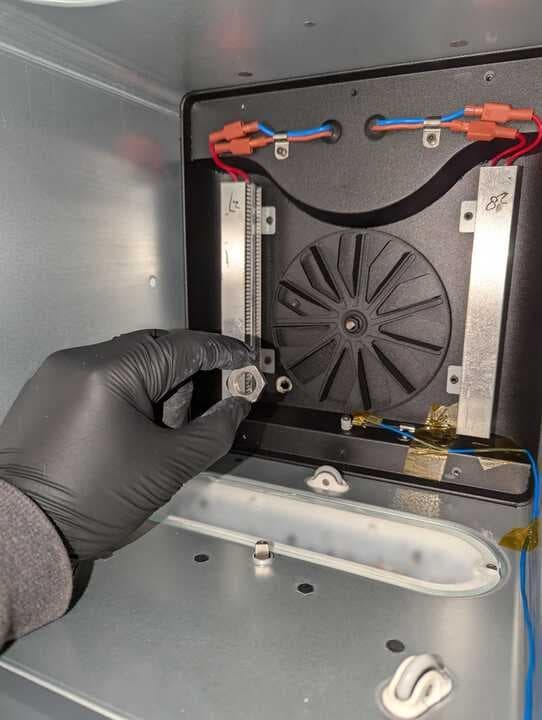
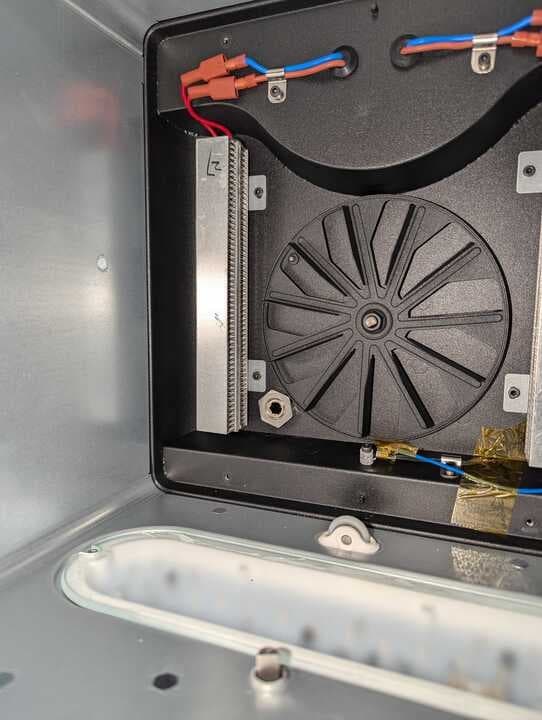
From the inside of the post-cure chamber, thread a matching nut onto the fitting. Tighten until snug.
Reinstalling the rear shell and fan cover
Overview: After installing the nitrogen feed, reinstall the rear shell and convection fan panel.
Step 1: Mount the rear shell
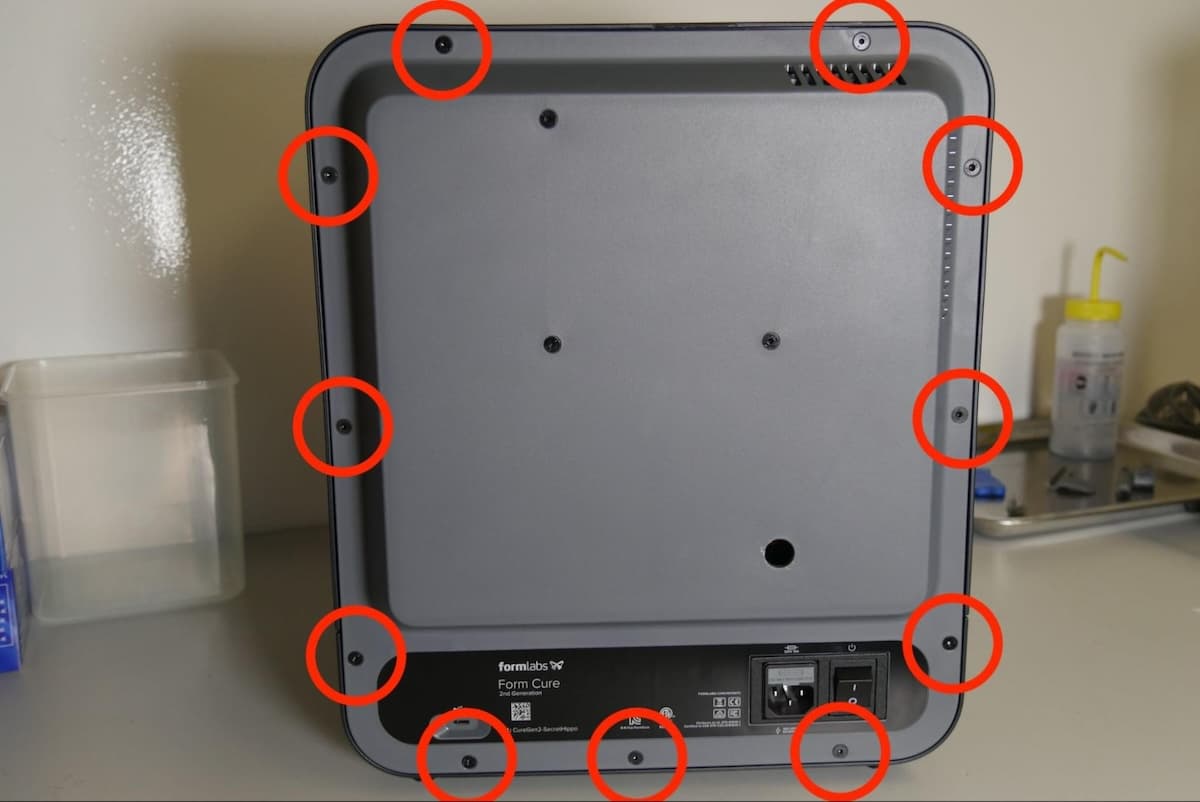
Mount the rear shell back onto the machine, being careful not to crush or damage the nitrogen feed line. Thread one flat head screw into each of the 11 screw holes in the rear shell. The four longer screws go into the middle and upper screw holes on the left and right sides of the shell. Using a 2.5 mm hex driver, tighten the screws until snug.
Step 2: Reinstall the convection fan panel
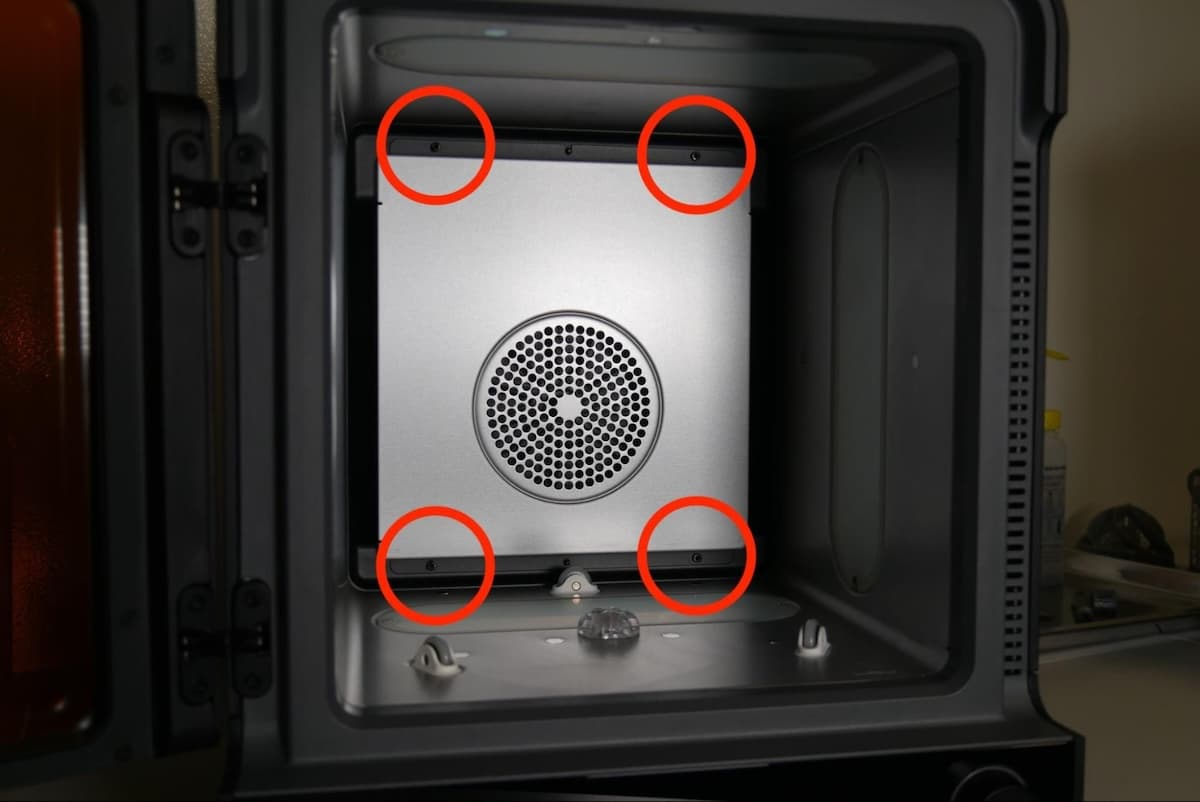
Rotate the machine so the front is accessible and open the door. Mount the fan panel at the back of the post-cure chamber, aligning the screw holes in the cover with the corresponding screw holes in the back wall of the chamber. Thread one button head screw into each of the four screw holes in the panel. Using a 2.5 hex driver, tighten the screws until snug.
Finalizing the repair
Overview: After installing the nitrogen feed line, power on the machine and perform final checks.
Step 1: Insert the turntable
Place the turntable onto the turntable mount.
Step 2: Power on the machine
Close the Form Cure door. Connect the power cable to the Form Cure and the power supply. Flip the breaker switch on the back of the unit to the ON position to turn on the machine. The Form Cure initializes.
Step 3: Use the nitrogen feed during post-curing
Prior to curing, place the part to be cured into the Form Cure and close the door. Begin flowing nitrogen at 1 L/min for seven minutes, then start a post-cure cycle with your desired settings. Continue flowing nitrogen until the cycle is complete. Shut off the nitrogen feed before opening the Form Cure door and retrieving your printed parts.