WHITE PAPER
Formlabs Logo

Supporting the Form Wash L V2 impeller motors

Supporting the Form Wash L V2 impeller motors

The Form Wash L contains two impellers to agitate the solvent in the wash bucket and help clean printed parts. The impellers are magnetically coupled to motors sitting below the wash bucket. In some Form Wash L V2 units, the impellers can have difficulty moving through the solvent. The impellers may be unable to turn or the machine may make unusual noises as the impellers repeatedly uncouple from and recouple to the motors.

Use this guide to add support to the impeller motors on a Form Wash L V2.

Required supplies:

Required supplies:

  • Form Wash L V2 impeller motor shims (2x)
    • Print in advance in any inflexible resin, such as Grey Resin, Tough 1500 Resin, or Rigid 10K Resin. Print directly on the build platform without supports. Do not use Elastic 50A Resin, Flexible 80A Resin, or another resin with similar material properties.
  • 2.5 mm hex driver
  • 43 L (11.4 US gal) of fresh solvent (IPA, TPM, or Formlabs Resin Washing Solution)
  • Electric siphon pump, included with the Form Wash L
  • Empty container, suitable for storing up to 43 L (11.4 US gal) of solvent
  • Non-reactive nitrile gloves
  • Safety glasses

Estimated time: 20–30 minutes, plus time to print the motor shims

Preparing the workspace

Overview: Prepare the Form Wash L and a dust-free workspace for adding support to the impeller motors.

Caution:

Wear gloves when handling parts and surfaces that come into contact with solvents or liquid resin.

Step 1: Print the impeller motor shims

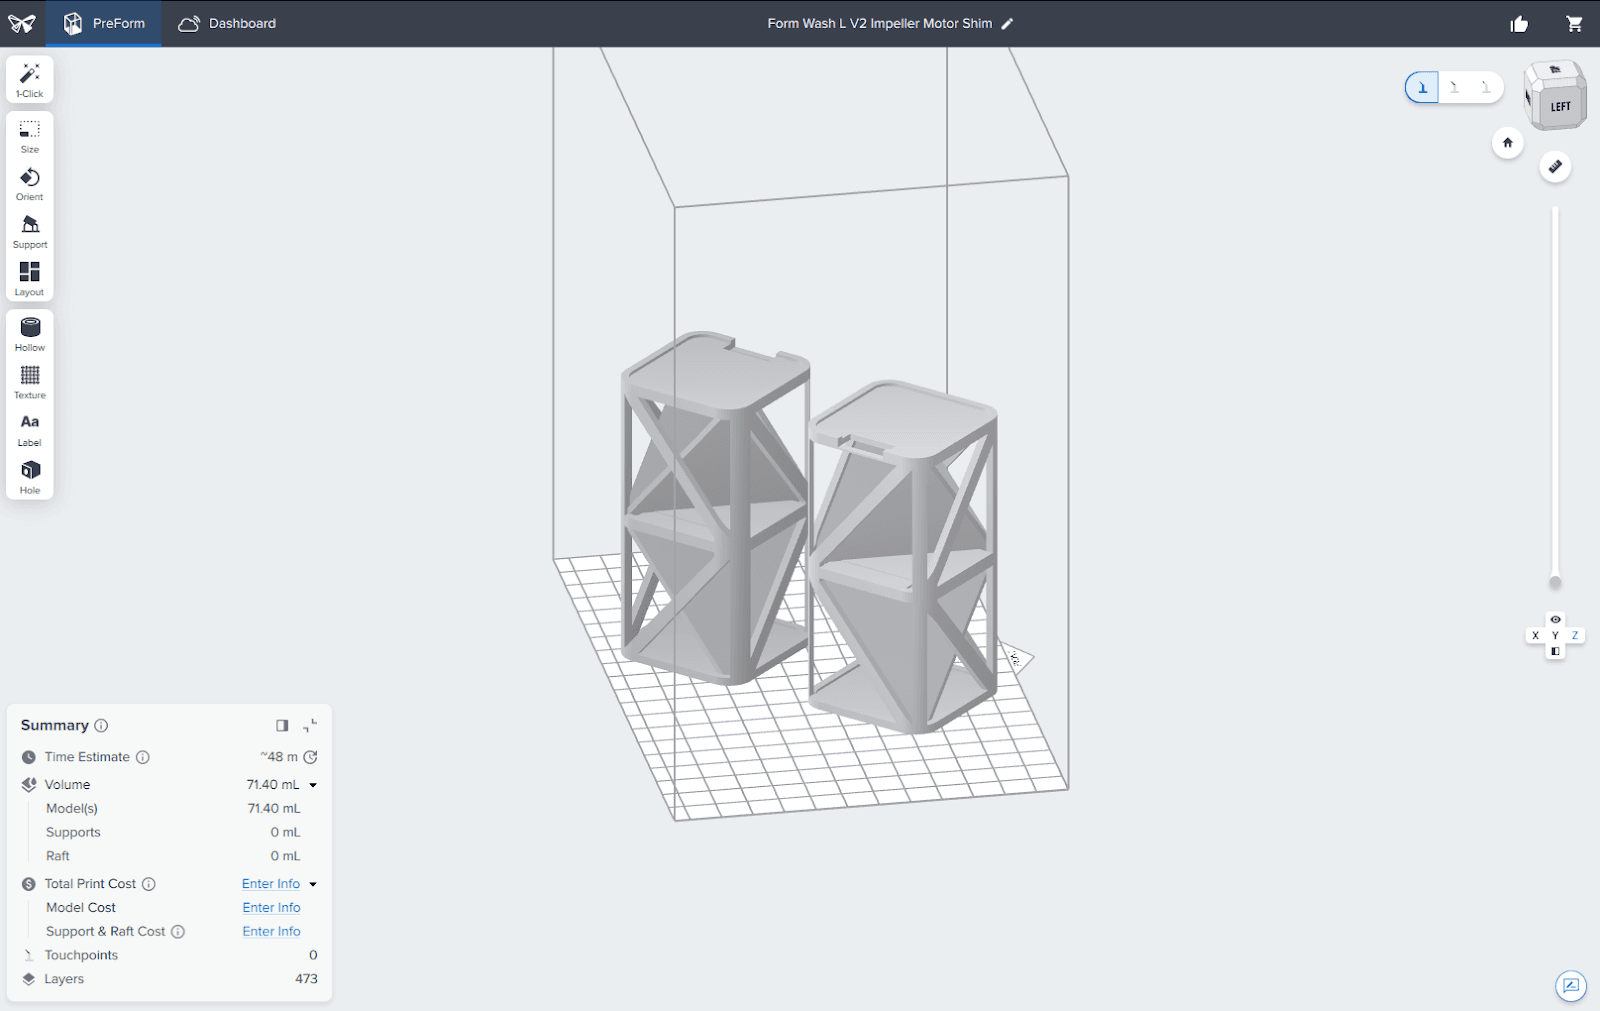
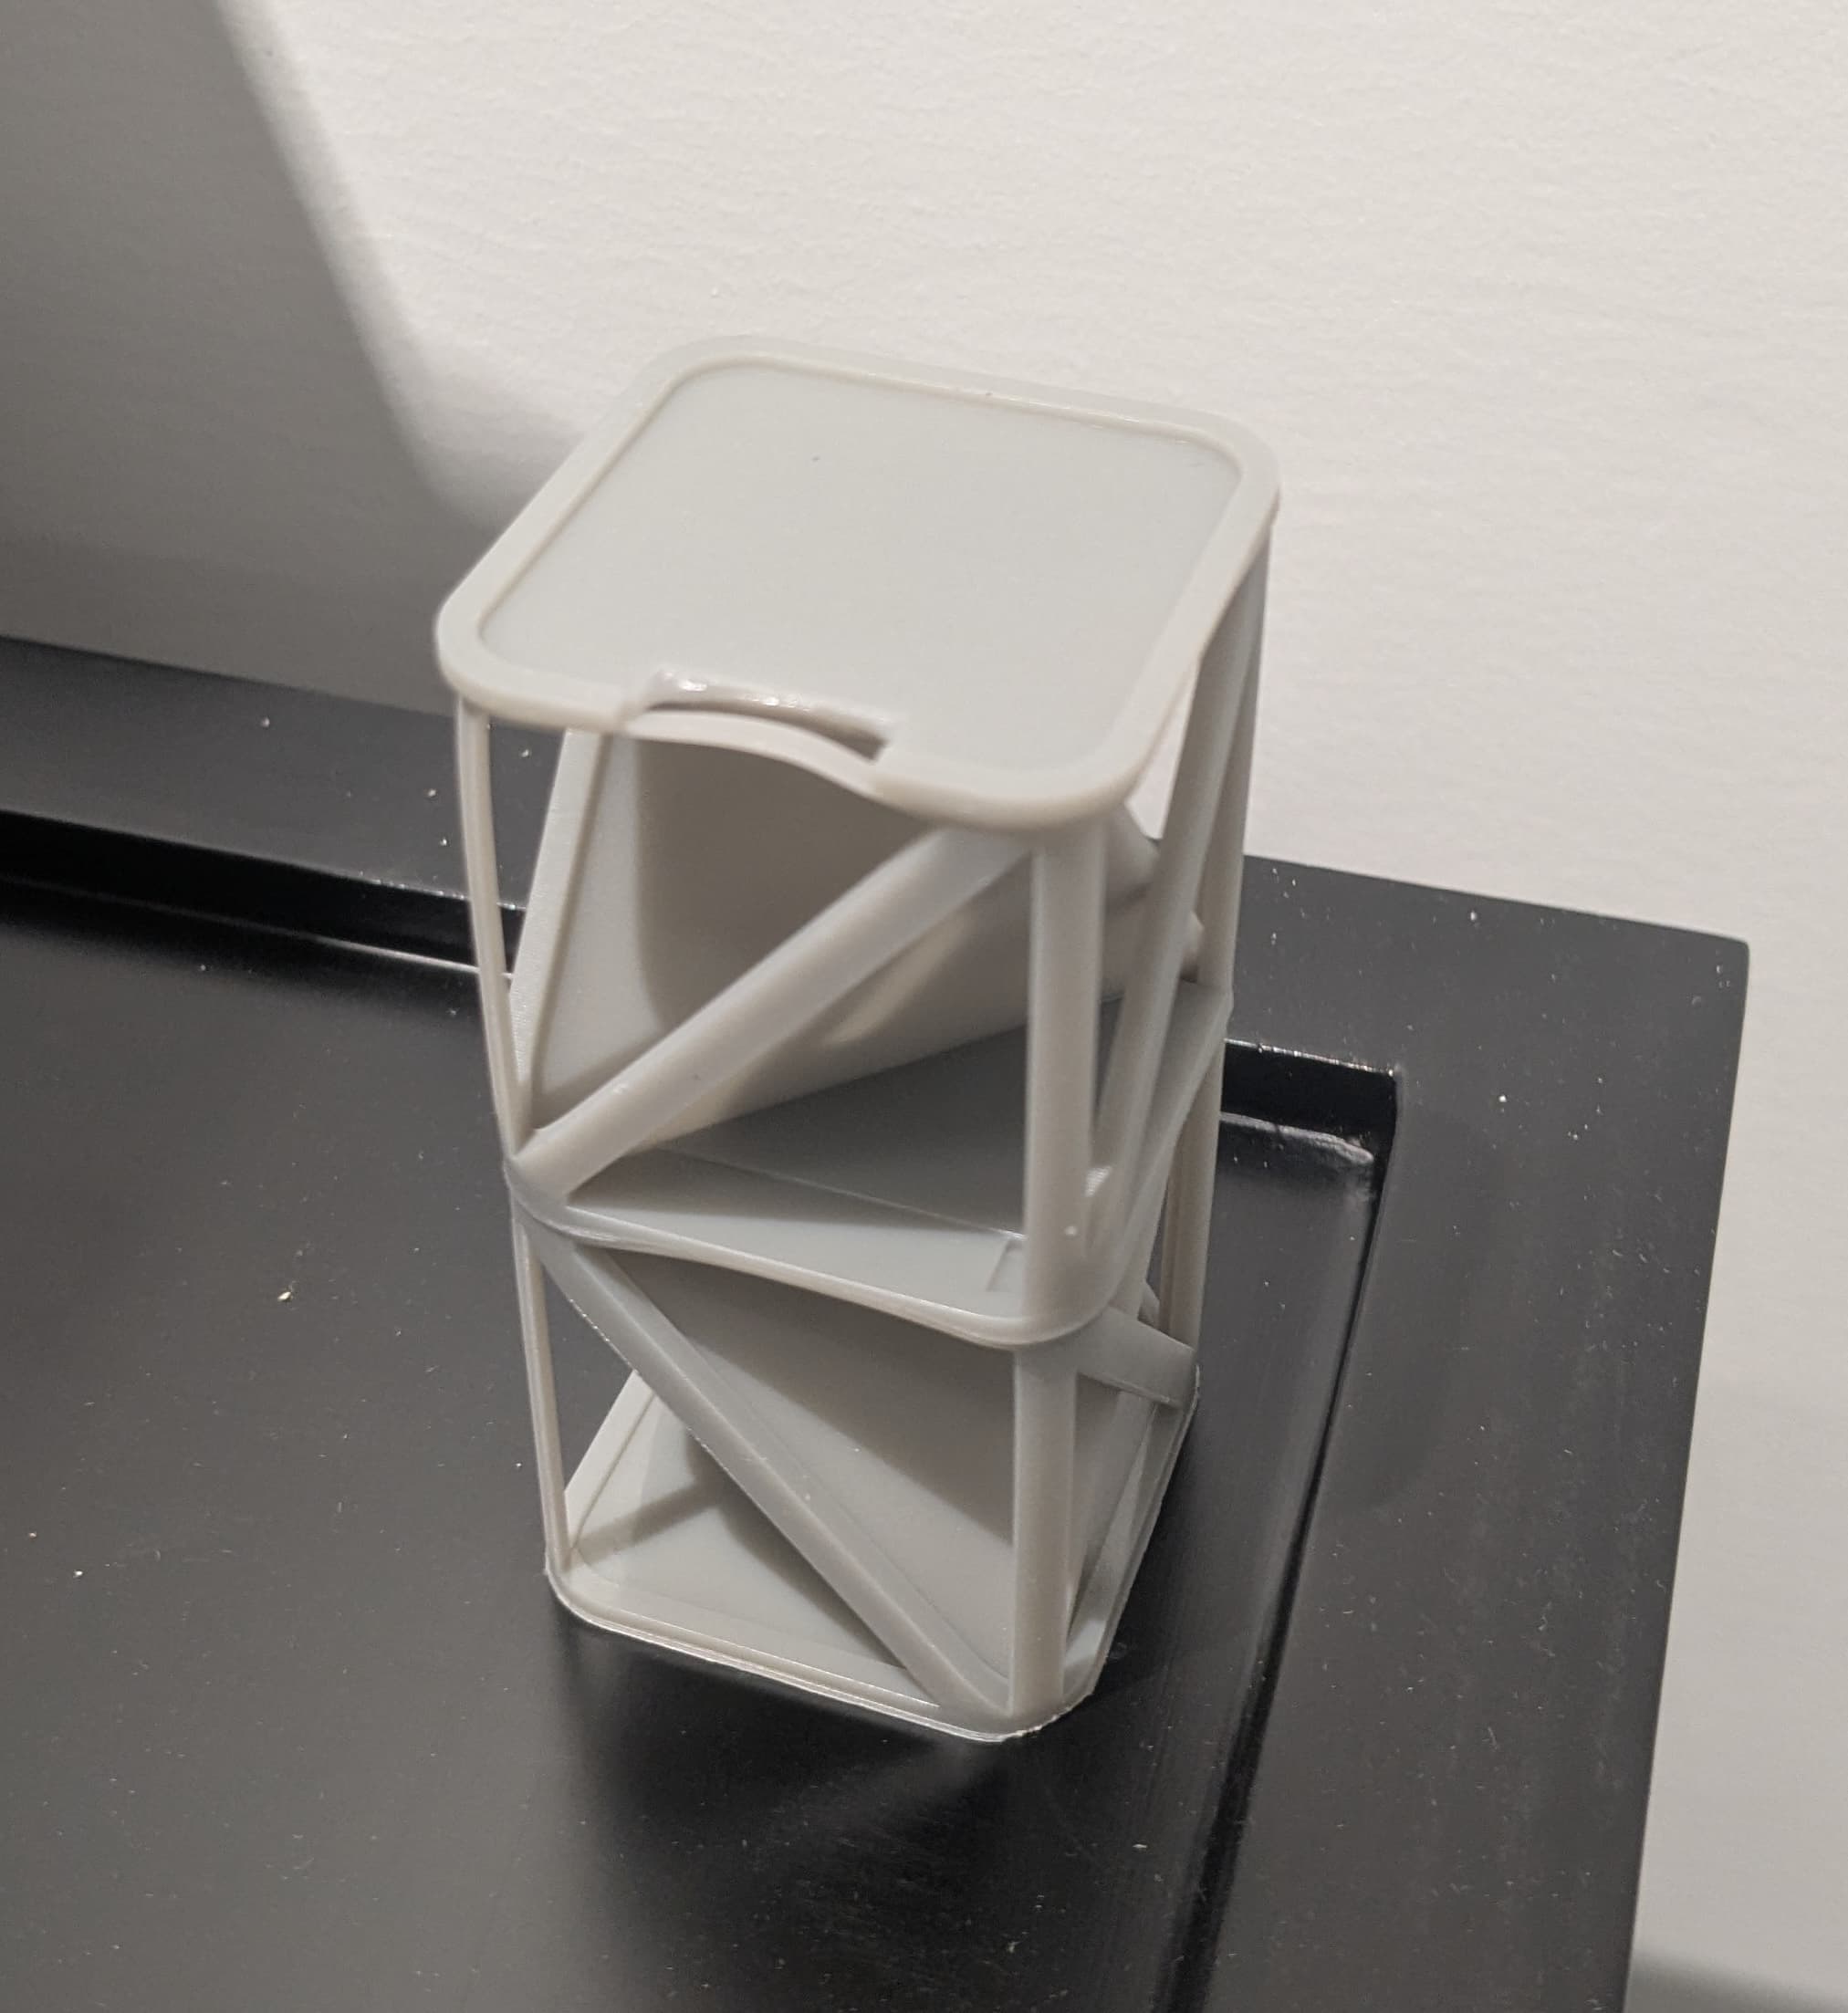
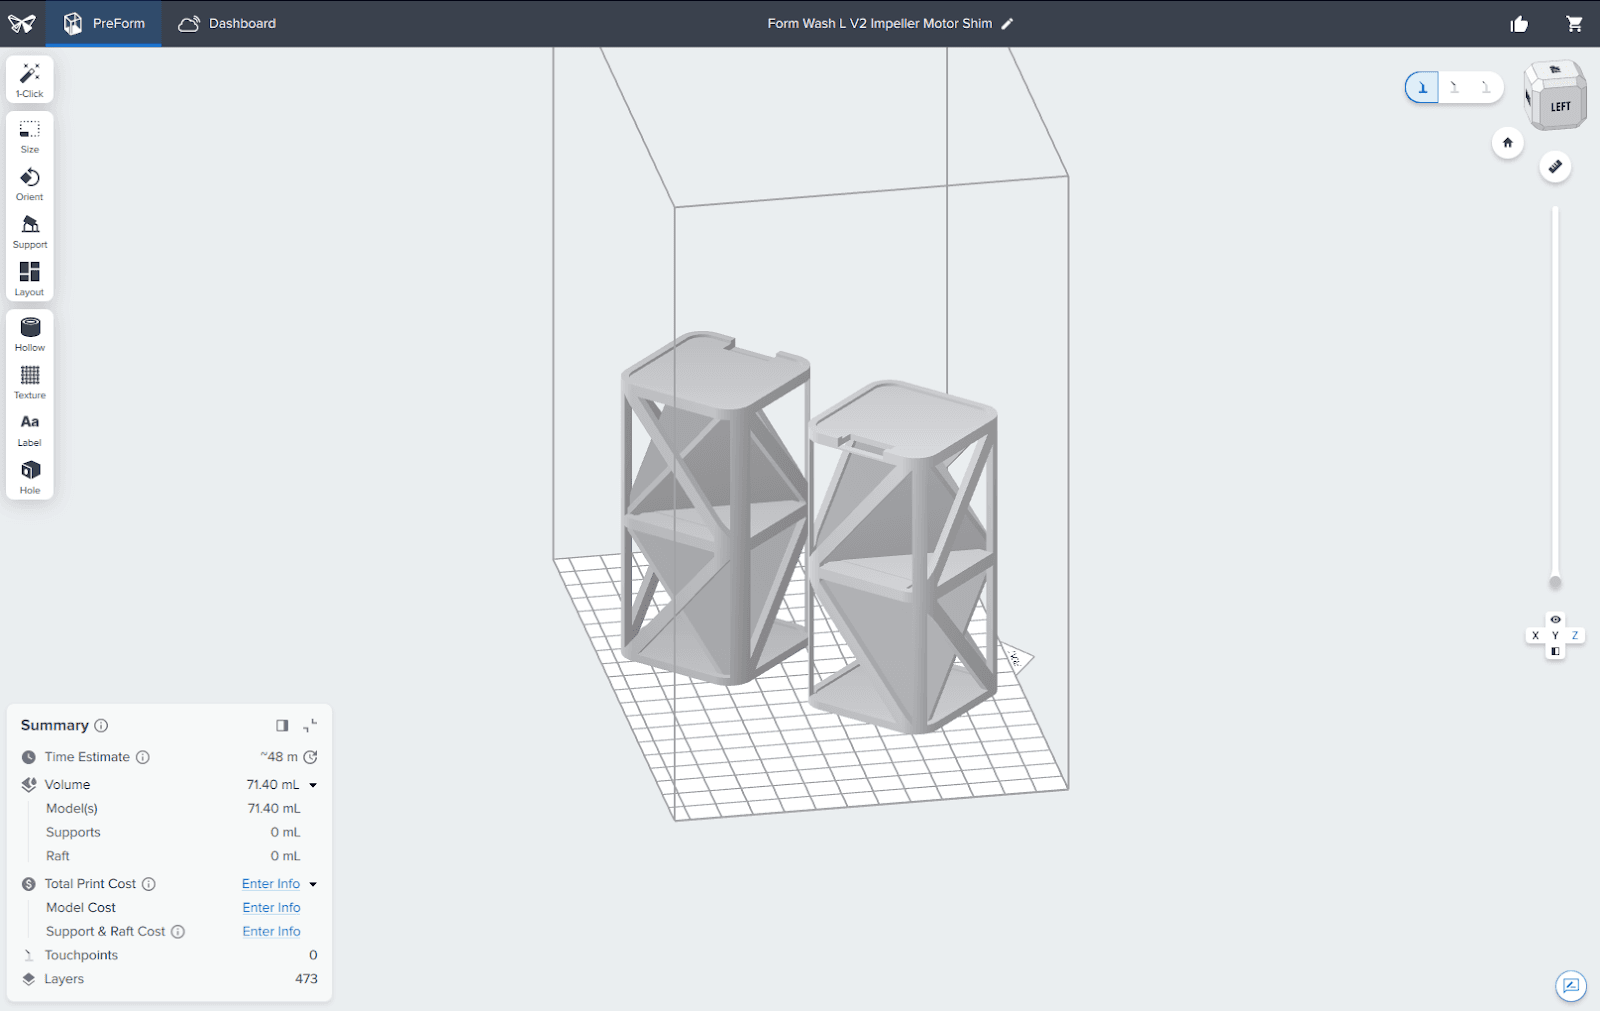
Print two impeller motor shims in any inflexible resin, such as Grey Resin, Tough 1500 Resin, or Rigid 10K Resin. Print directly on the build platform without supports. Do not use Elastic 50A Resin, Flexible 80A Resin, or another resin with similar material properties. Wash and post-cure the parts appropriately for the material you use.

Form Wash L V2 impeller motor shim models in PreForm

Step 2: Unplug the machine

Disconnect the power cable before continuing with maintenance. Do not perform maintenance on the machine while it is connected to power. Wait five minutes after disconnecting the machine from power before proceeding.

Danger:

Performing maintenance on the machine while it is plugged in increases the risk of electric shock. Never remove the panels of the machine while it is plugged in. Never reconnect the machine to power while the panels are uninstalled.

Removing the lower front panel

Overview: Remove the lower front panel to access the impeller motors.

Notice:

The Form Wash L contains sensitive electronic components. Ground yourself before touching any electronics in the machine by using a grounding strap or touching a grounded piece of metal.

Step 1: Open the front panel

Pull the front panel from the right side. Leave it open to access the solvent monitor and bucket.

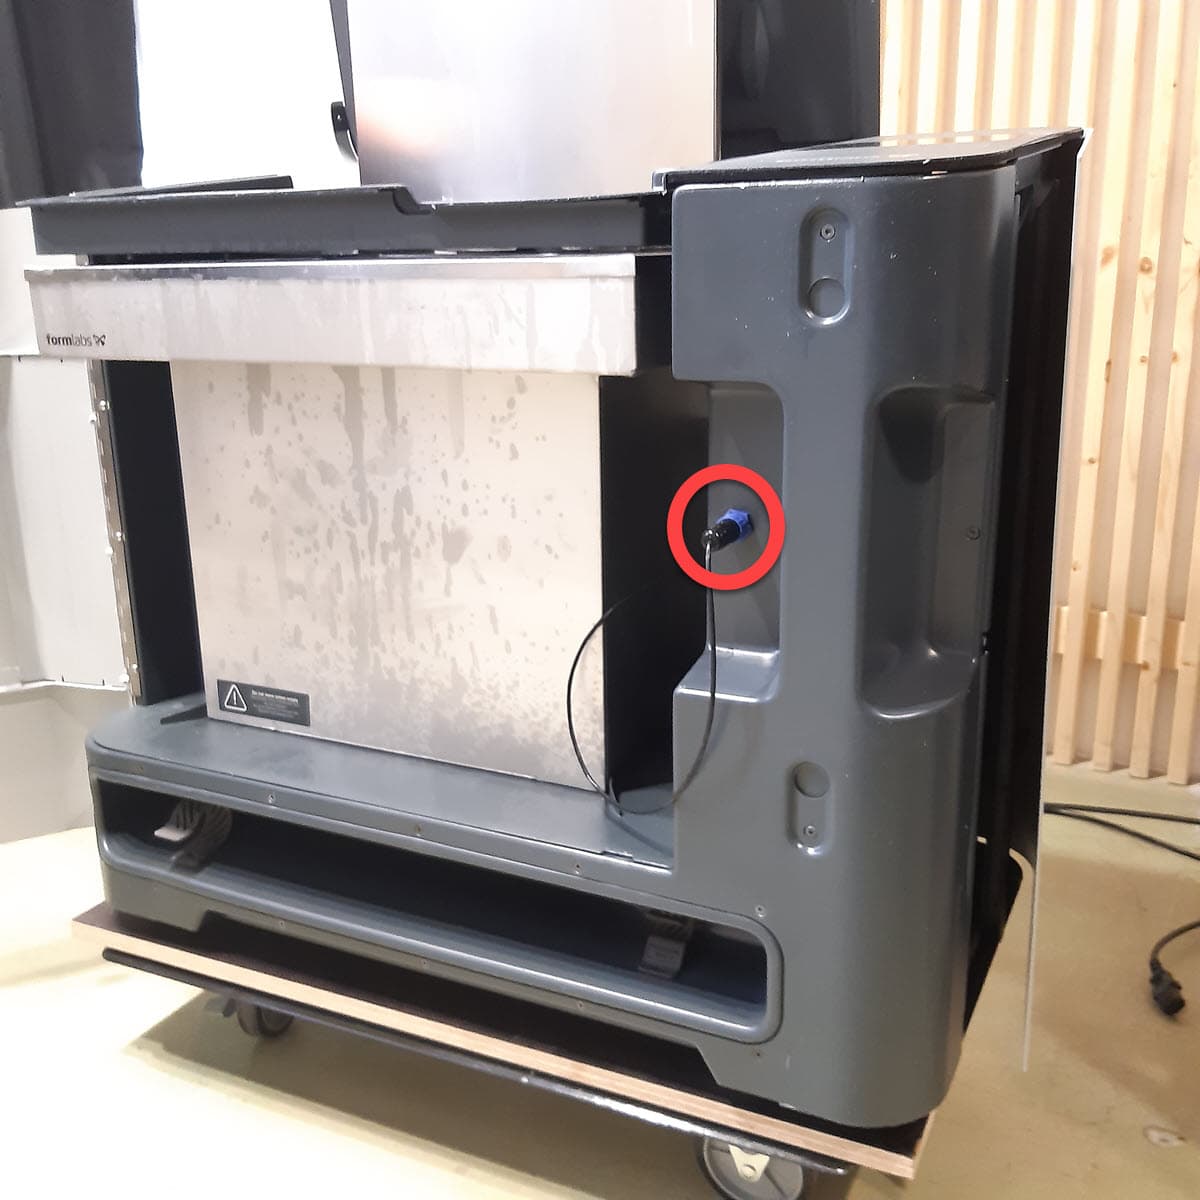
Step 2: Unplug the solvent monitor

Disconnect the solvent monitor from the front of the Form Wash L.

Step 2: Unplug the solvent monitor

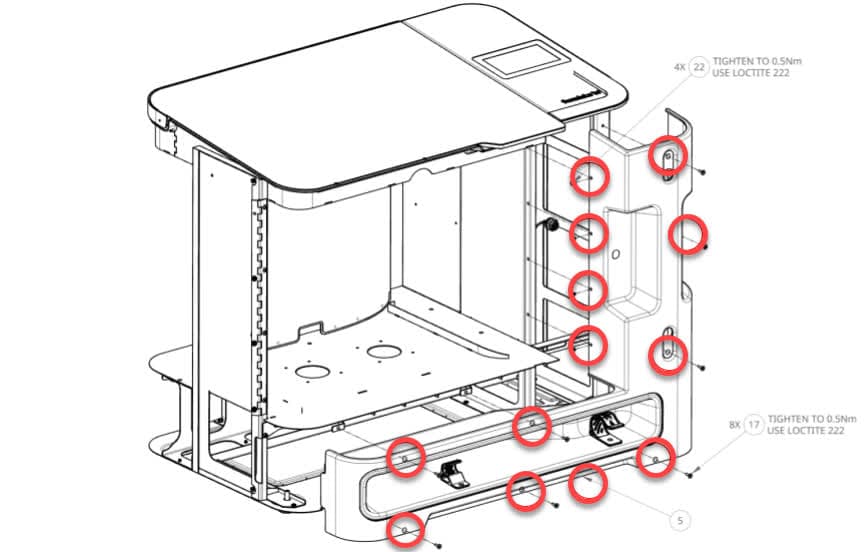
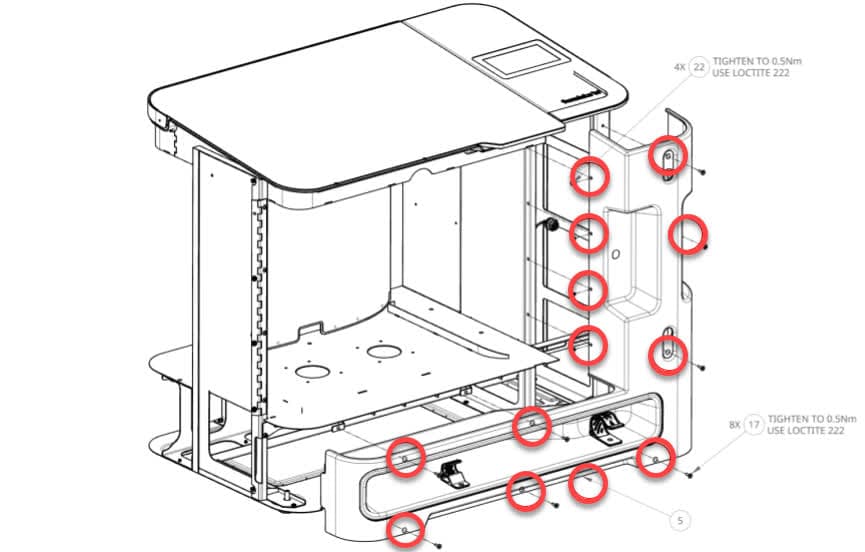
Step 3: Remove the lower front panel screws

Step 6: Remove the lower front panel

Use a 2.5 mm hex driver to unscrew the 12 screws shown above. Set the screws aside.

Pull the panel slightly towards yourself until you can see the solvent monitor cable behind the panel. Do not fully remove the panel, as it is still connected to the motherboard via this cable.

Step 4: Unplug the solvent monitor cable

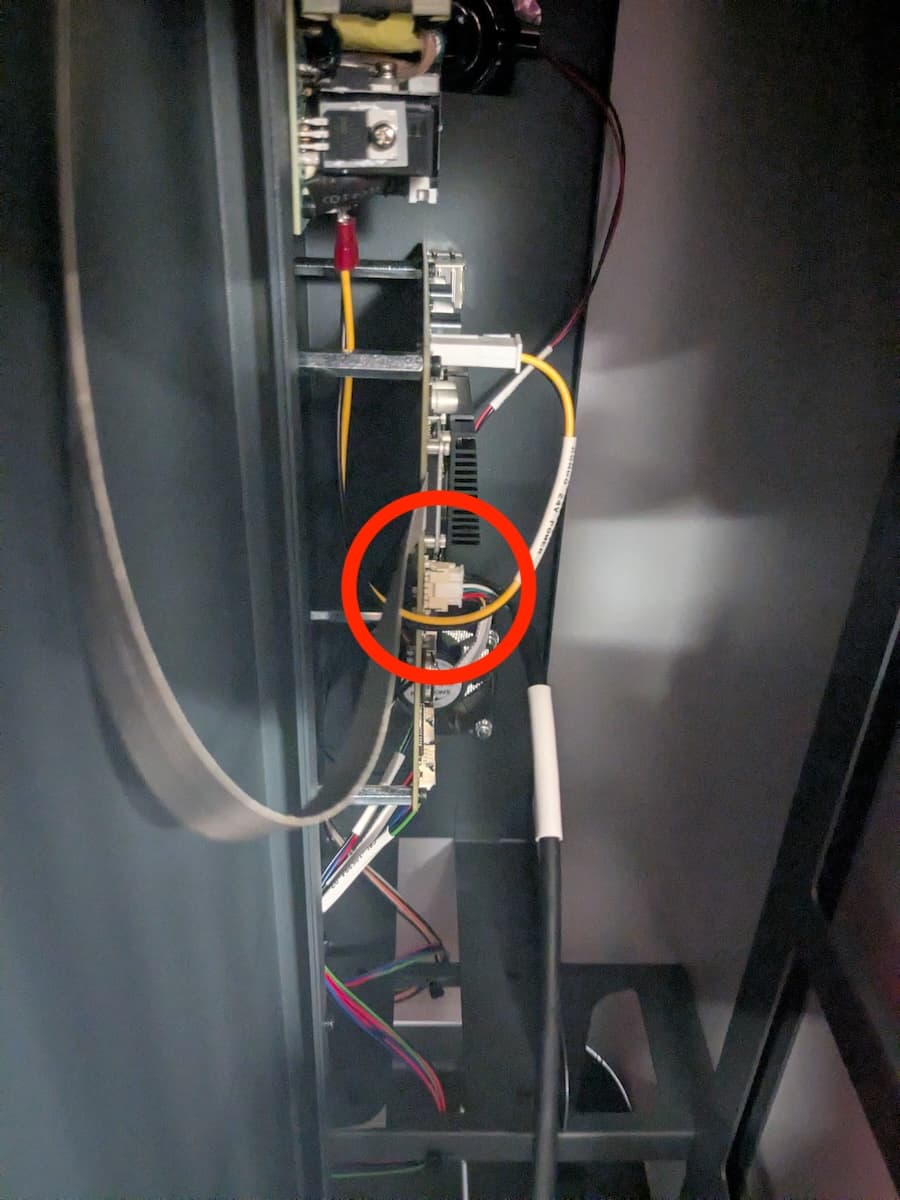
Disconnecting the solvent monitor cable from the motherboard

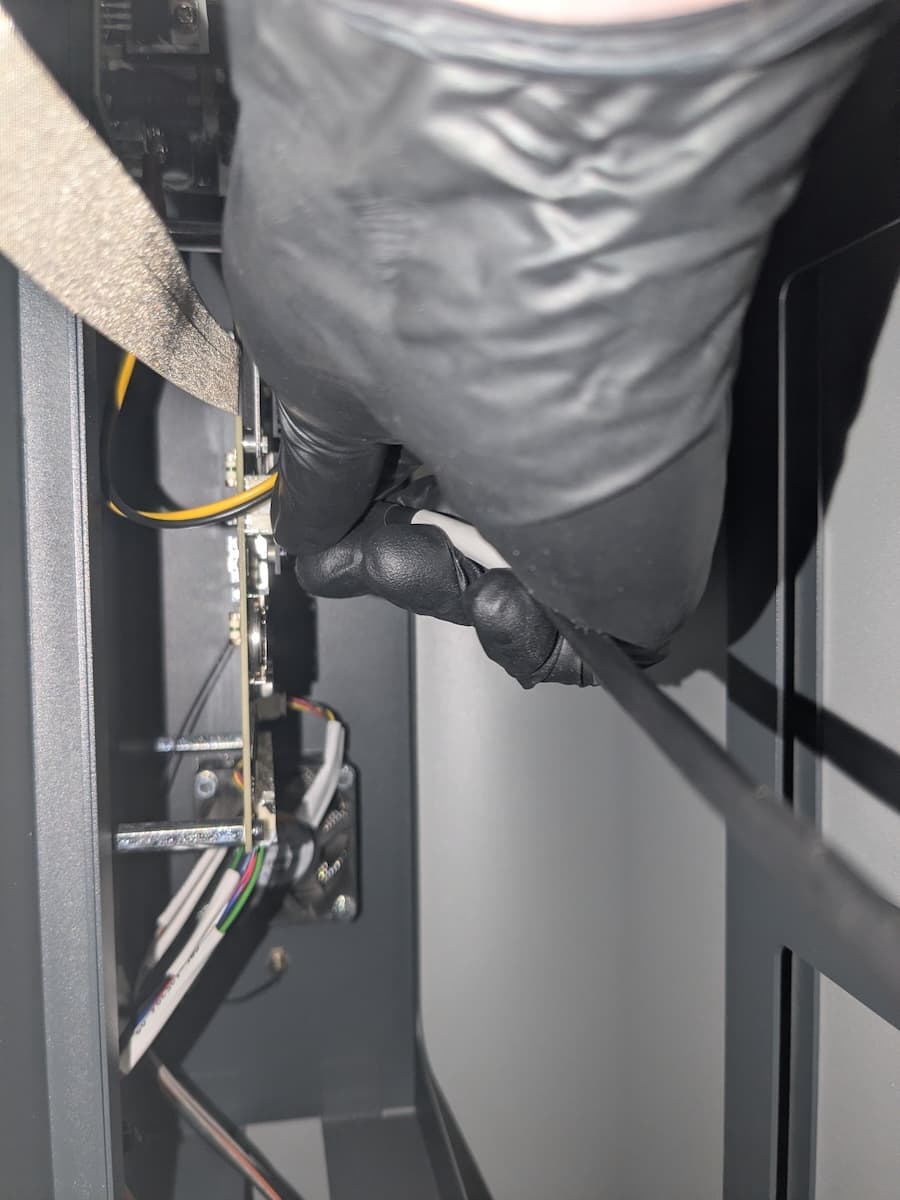
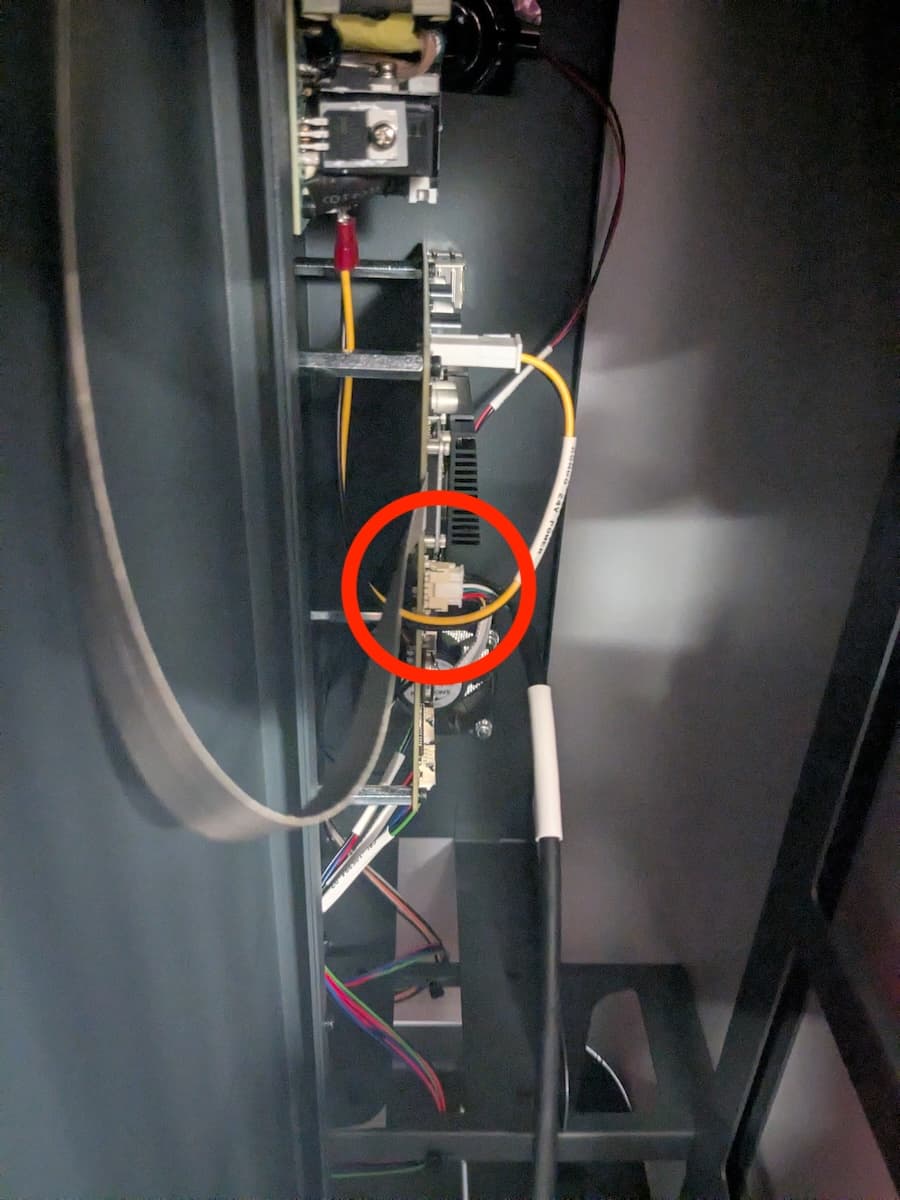
Follow the solvent monitor cable from the lower front panel into the Form Wash L and locate its connector on the front edge of the motherboard. Squeeze the locking tab on the connector and pull it away from the motherboard to disconnect the cable. Do not pull on the wires themselves.

Step 5: Remove the lower front panel

Carefully pull the lower front panel away from the machine and set it aside.

Installing the impeller motor shims

Overview: Install the impeller motor shims below the impeller motors.

Step 1: Locate the motor assemblies

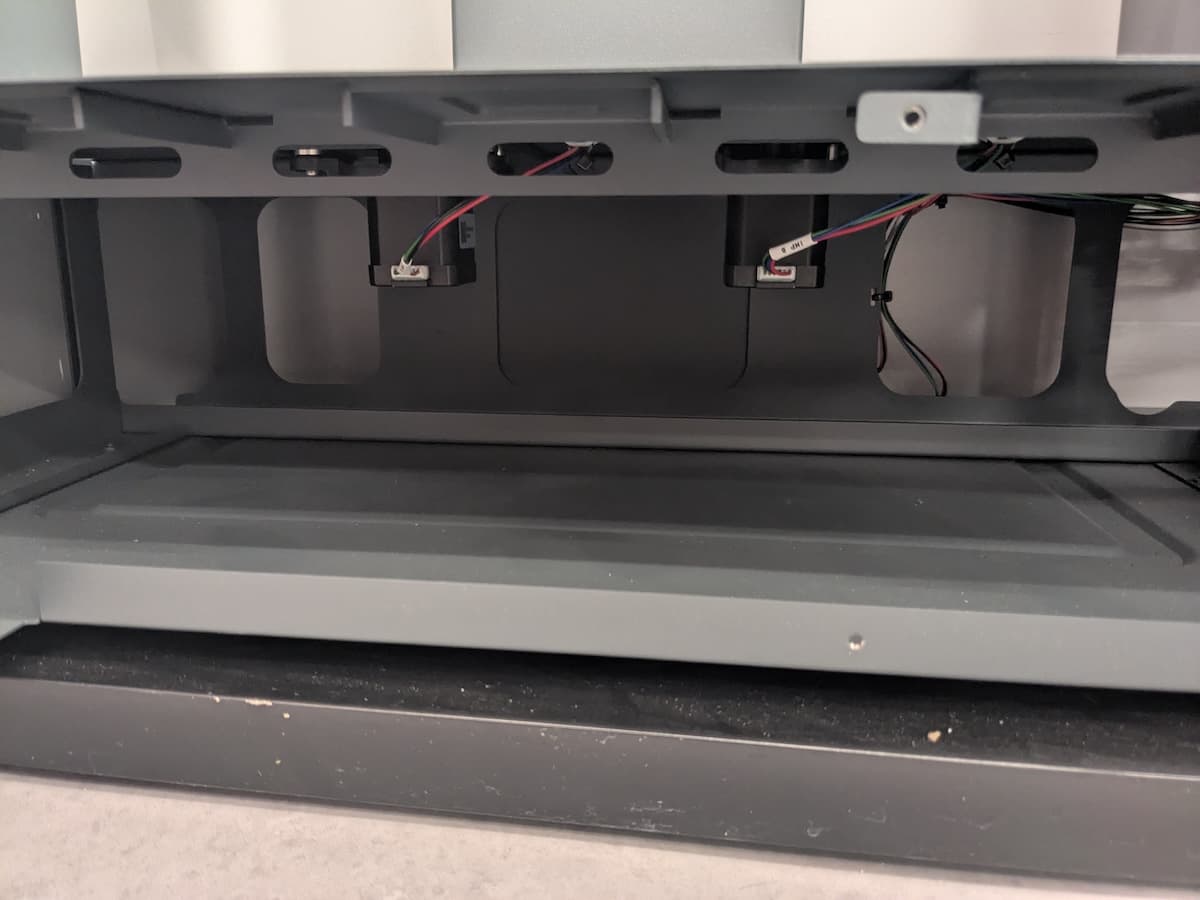
The Form Wash L has two impeller motor assemblies located underneath the base plate of the machine. Identify and locate the motors.

Form Wash L motor assemblies

Step 2: Install the motor shims

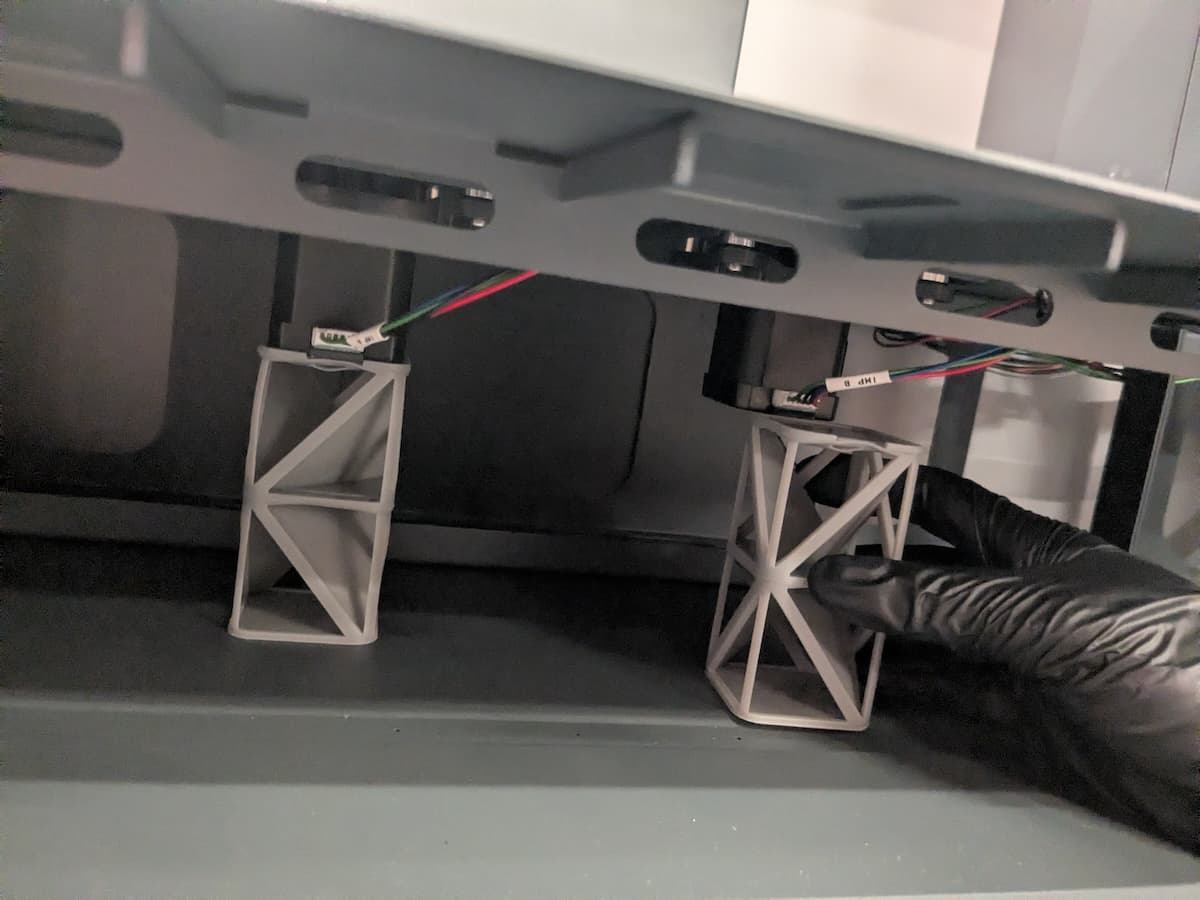
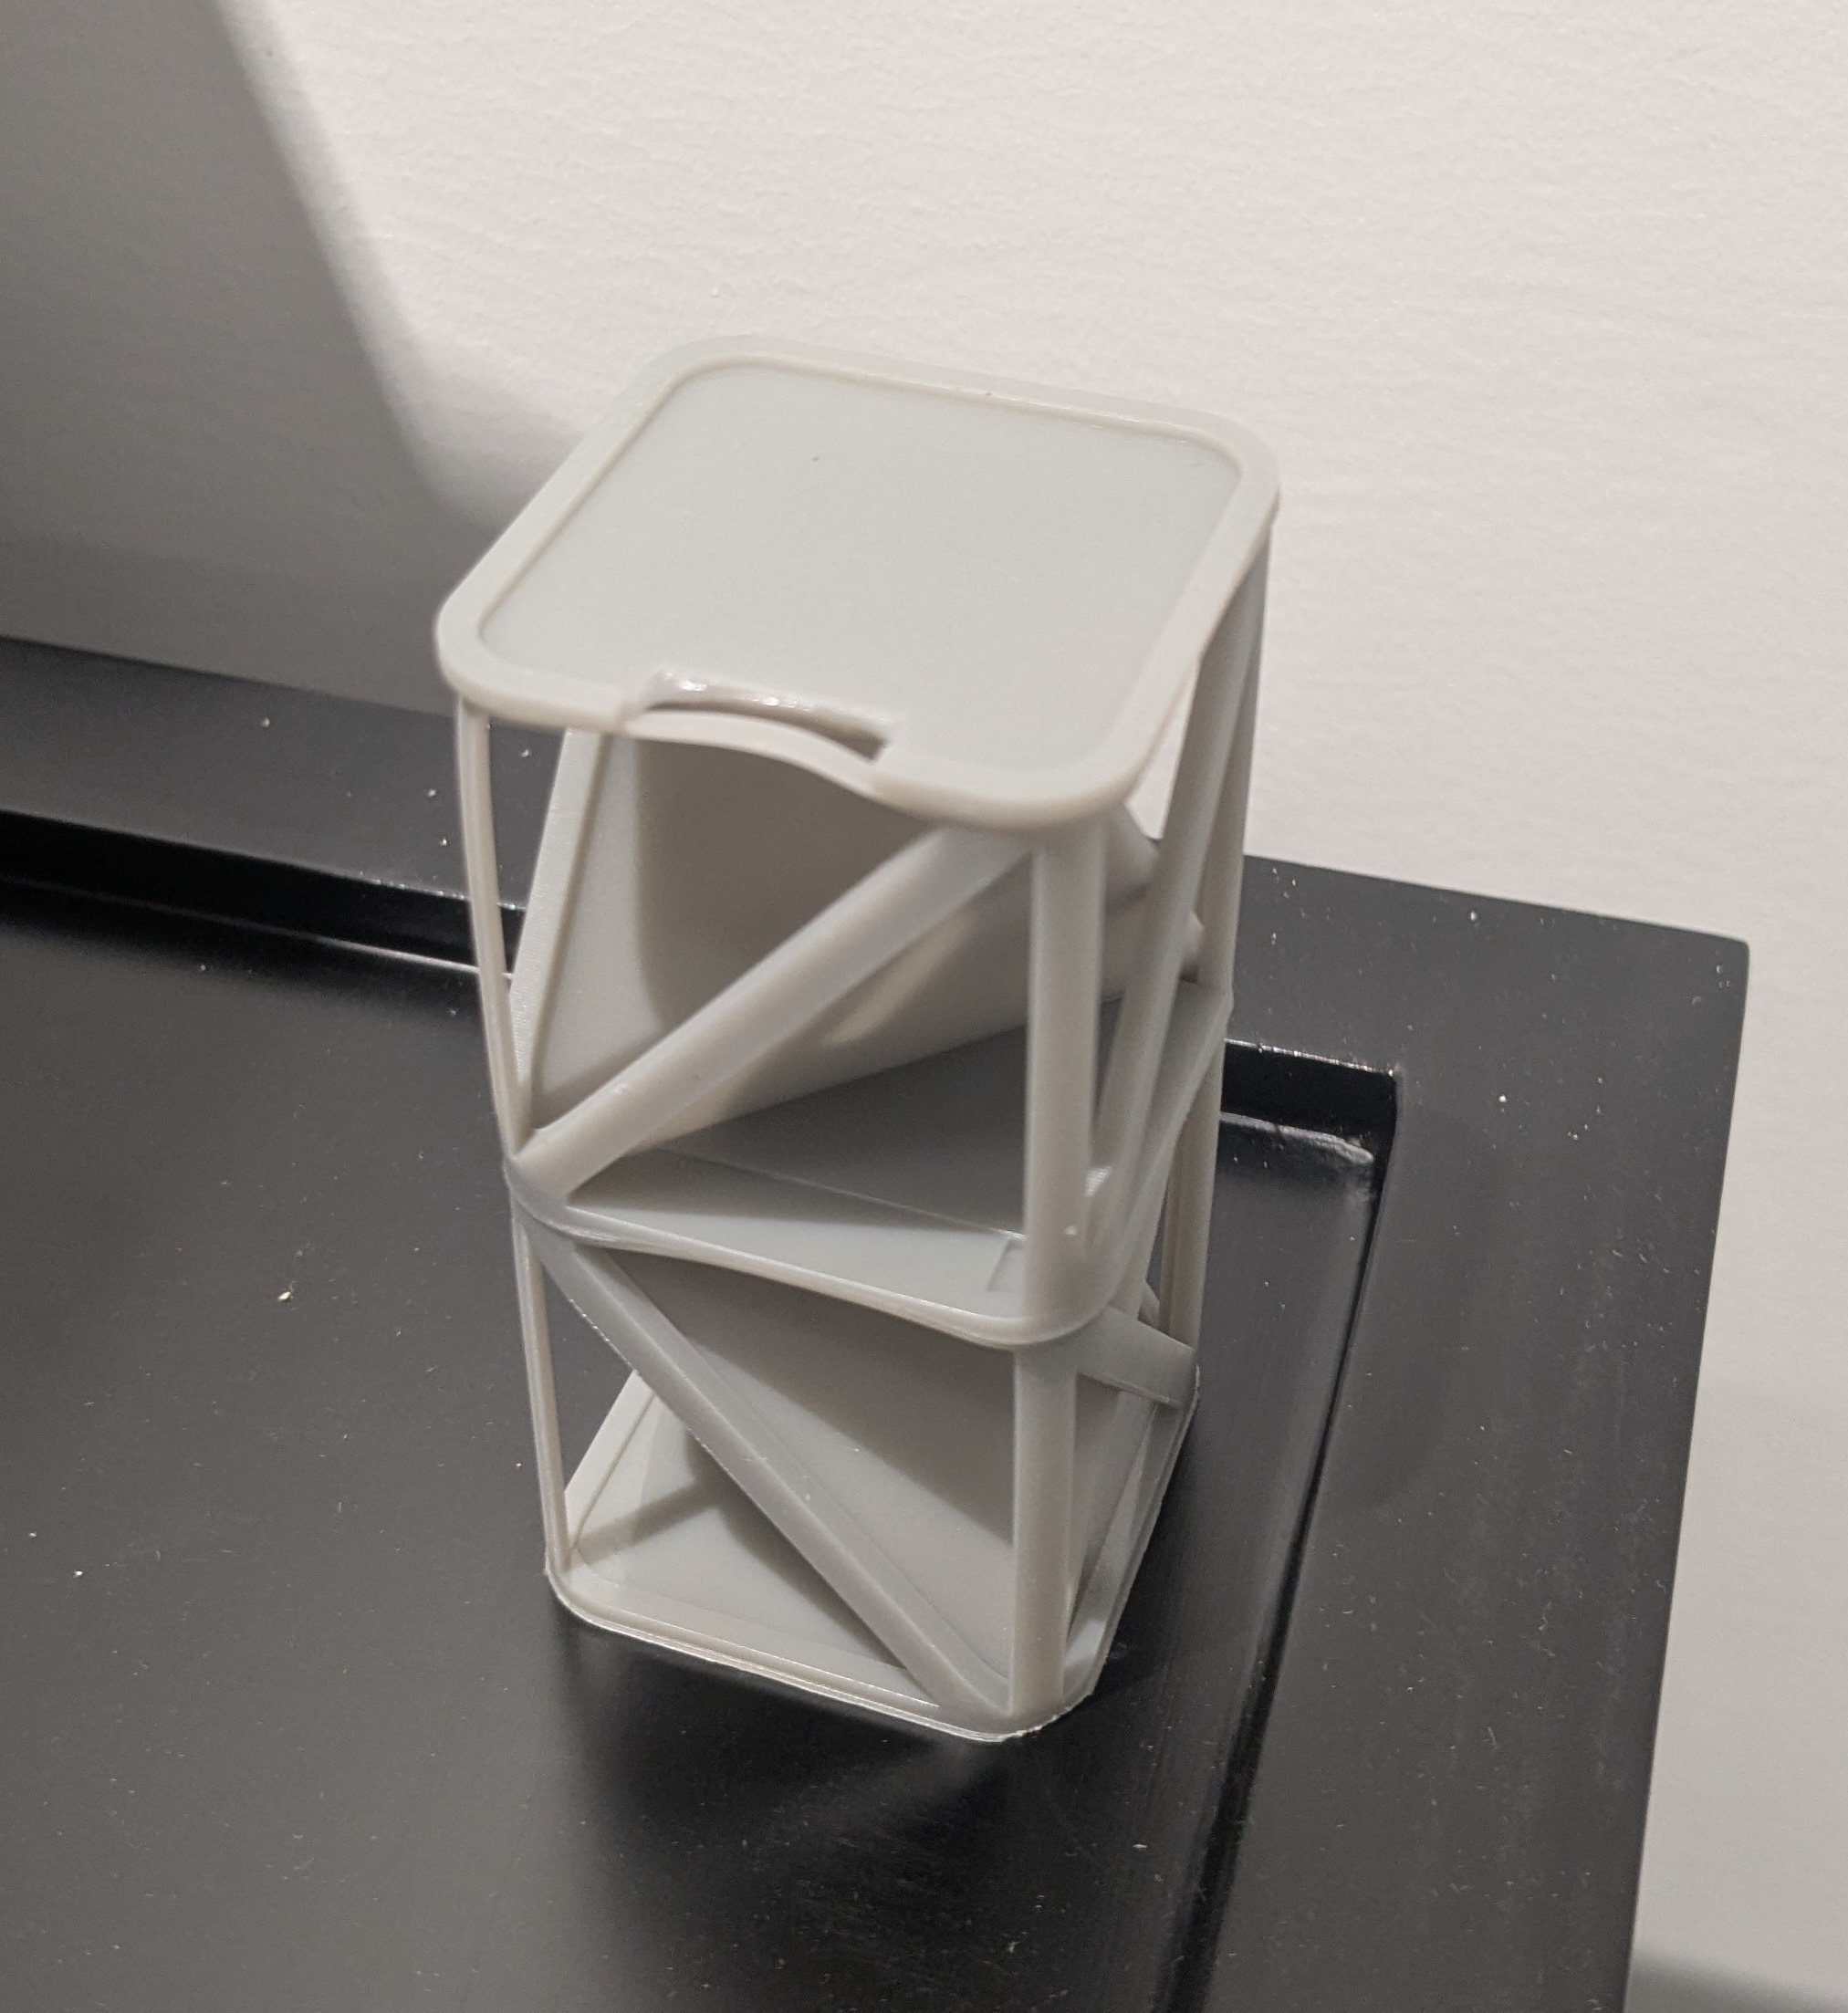
Installing the Form Wash L V2 impeller motor shims

Orient the motor shims with the small slot at the top-front. The slot gives clearance for the motor cables. Slide the shims underneath the motors until they click into place, with the raised lip on the shim sitting around the edge of the motor.

Reinstalling the lower front panel

Overview: Reattach the solvent monitor cable and the lower front panel to the Form Wash L.

Step 1: Align the lower front panel

Bring the lower front panel near the front of the machine so that the solvent monitor cable can reach the motherboard.

Step 2: Reconnect the solvent monitor cable

Reconnect the solvent monitor cable to its socket on the motherboard. The connector only fits into the socket in one orientation. The locking tab clicks into place when the cable is secure.

Step 3: Reattach solvent monitor cable

Step 3: Reattach the lower front panel

Reattaching the lower front panel

Slide the lower front panel into position. Thread one 2.5 mm hex screw into each of the 12 screw holes in the lower front panel. Tighten the screws using the 2.5 mm hex driver until finger tight.

Step 4: Reconnect the solvent monitor

Plug the solvent monitor cable from the wash bucket into the socket on the front panel.

Finalizing the repair

Overview: After installing the impeller motor shims, power on the machine and perform final checks.

Step 1: Power on the machine

Connect the power cable to the Form Wash L and the power supply. Flip the breaker switch on the back of the unit to the ON position to turn on the machine.

Step 2: Test the repair

Start a wash cycle. The impellers should rotate properly if the repair was successful. If they do not, continue.

Step 3: Enlarge and reprint the shims (optional)

Depending on the manufacturing and assembly tolerances of your machine, the shims may still allow sufficient flexing for the impellers to decouple from the motors. If that is the case, reopen the provided shim file in PreForm. Click the Size tool and increase the Z dimension of both models by 3 mm. Print the rescaled shims, install them, and test the machine.

If the issue persists, increase the Z dimension by an additional 3 mm. If the impeller decoupling issue persists with +6 mm shims, contact Formlabs Support.

Enlarging the motor shims