
Tip:
Check the support article Form Cure time and temperature settings to find post-cure settings for each Formlabs material.

The Form Cure helps ensure consistent post-curing by rotating printed parts during the post-cure cycle and exposing the part to light from all directions, including underneath the turntable.
The Form Cure requires time to reach the specified temperature before the 405 nm lights begin post-curing. The heating time depends on the current temperature and the target post-cure temperature.
Tip:
Check the support article Form Cure time and temperature settings to find post-cure settings for each Formlabs material.
Before you begin
Before inserting a printed part into the Form Cure:
Note:
Consider the size and geometry of each part when choosing a post-cure cycle for the Form Cure.
Form Cure controls
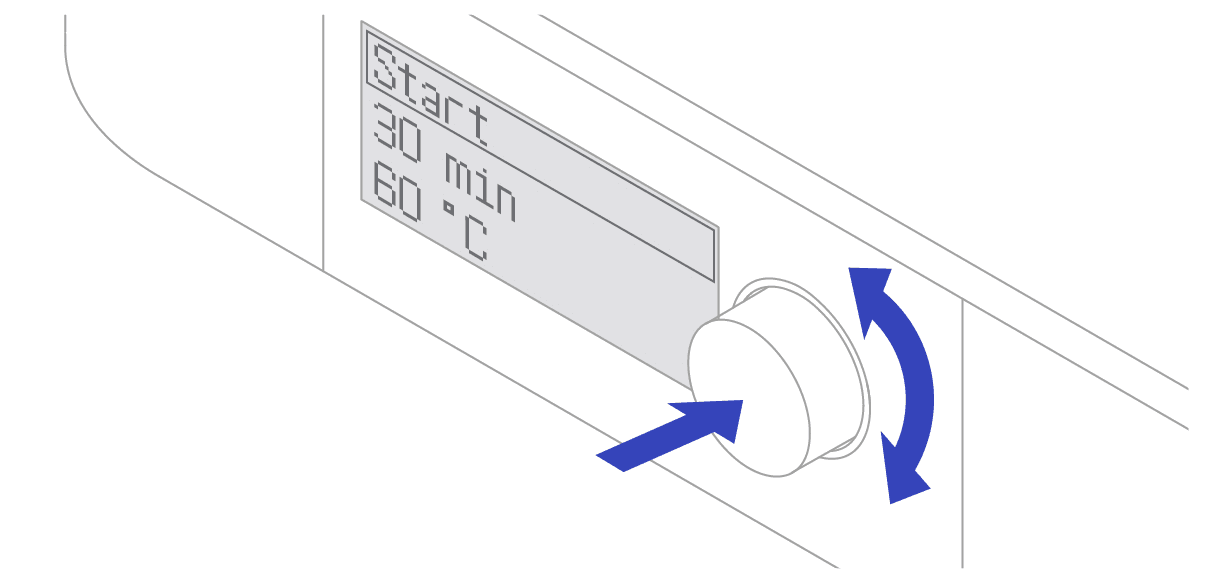
Use the knob to operate the Form Cure. Rotate the knob counterclockwise or clockwise to move between items in a menu, and push the knob to select an option on the display.
Controls to start a post-cure cycle
Note:
Formlabs develops multiple post-cure settings for many of its resins. To use an alternate post-cure setting, adjust the time and temperature manually.
Form Cure workflow
Insert washed and fully dried parts into the Form Cure. Let the Form Cure preheat by selecting a time and temperature, leaving the prints inserted. Remove the parts when the post-cure cycle finishes.
Note:
Always consult the support article Form Cure time and temperature settings as the primary source of information for up-to-date post-cure settings.
Notice:
Do not operate the Form Cure with uncured resin, partially cured resin, or solvents on the turntable. Always let prints fully dry (whether they have been washed with IPA, TPM, or water) before post-curing them with the Form Cure. Forced air, such as a fan or clean compressed air may dry parts more quickly.
Step 1: Insert washed and dried prints
Allow parts to fully dry after washing. Check surfaces and interior spaces for trapped solvent. Curing parts that contain solvent and dissolved resin may cure solvent inside the part, prevent parts from strengthening, and affect material properties.
Lift the cover and distribute parts on the round turntable. Space parts evenly to allow light and heat to reach all areas. Gently close the cover.
Step 2: Set the post-cure time and temperature
During preheating, the display shows the Preheating status, which includes the current temperature and the target temperature.
Notice:
The printed part must be in the Form Cure while it heats. If the part is not placed in the Form Cure until preheating is complete, it may cause cracking.
Step 3: Remove parts
The LEDs and heater turn off automatically at the end of the post-cure cycle. Lift the cover to remove parts.
Caution:
The Form Cure contains a 100 W heater to help post-cure parts. Internal surfaces and printed parts may be hot during and after use. Take care when removing parts.
After post-curing
Note:
The Total LED Time feature was added to the Form Cure in a firmware update released with PreForm 3.6.0 on June 18, 2020. The Form Cure did not track usage time before this firmware version. As a result, if your Form Cure was manufactured before this date and you subsequently updated the firmware, the Form Cure will display its Total LED Time as Unknown. Usage time can be tracked manually, and any Form Cure manufactured with a firmware version that includes the Total LED Time feature will automatically track usage time.