WHITE PAPER
Formlabs Logo

Packaging and transporting a Fuse 1 generation printer

Packaging and transporting a Fuse 1 generation printer

Clean the printer and reuse the original packaging to prepare the printer for shipping or transit.

Tip:

If you are shipping the printer, review its shipping weight and dimensions.

Required resources

The original packaging is designed to be kept and reused for transporting or shipping the machine for service. Save the complete packaging including any inserts for your convenience.

Made by Formlabs:

  • 1 pallet, plywood and foam
  • 1 inner C-fold, cardboard and foam
  • 1 outer C-fold, cardboard and foam
  • 1 topper, cardboard and foam
  • 1 accessory tray, foam
  • 1 optics protector, cardboard and foam
  • 1 protective bag, plastic
  • 1 protective pad, cardboard and foam
  • 8 strapping protectors, cardboard
  • 2 lifting straps

Made by third parties:

  • 7 binding straps, nylon

Preparing for transportation

Before repackaging, remove the build chamber and optical cassette. Vacuum the print enclosure and air filters, then empty the printer's hopper.

Caution:

A Fuse 1 generation printer is a heavy object. A two person lift is required to prevent injury and avoid damage to the machine.

Notice:

  • Do not ship the printer with any powder inside the print enclosure or hopper. Powder left inside the machine can leak during transit, which may result in additional fees or void the warranty.
  • Do not ship the printer without fully securing an optical cassette in the cassette tray. Foreign objects or debris can enter the optical cavity during transit and damage sensitive components, which may result in additional fees or void the warranty.

To prepare the printer:

  1. Clean any powder out of the printer.
  2. Transfer any currently-loaded powder credit off of the machine and onto a powder credit card.
  3. Flip the breaker switch on the back of the unit to the OFF position to turn off the machine.
  4. Unplug all cables (power, Ethernet, and USB) from the back of the machine.
  5. Unscrew the Wi-Fi antenna from the back of the unit.

Packaging

Thoroughly read and follow the instructions to properly package the machine. Skipping any of the following steps may result in shipping damage and void the warranty.

To package the machine:
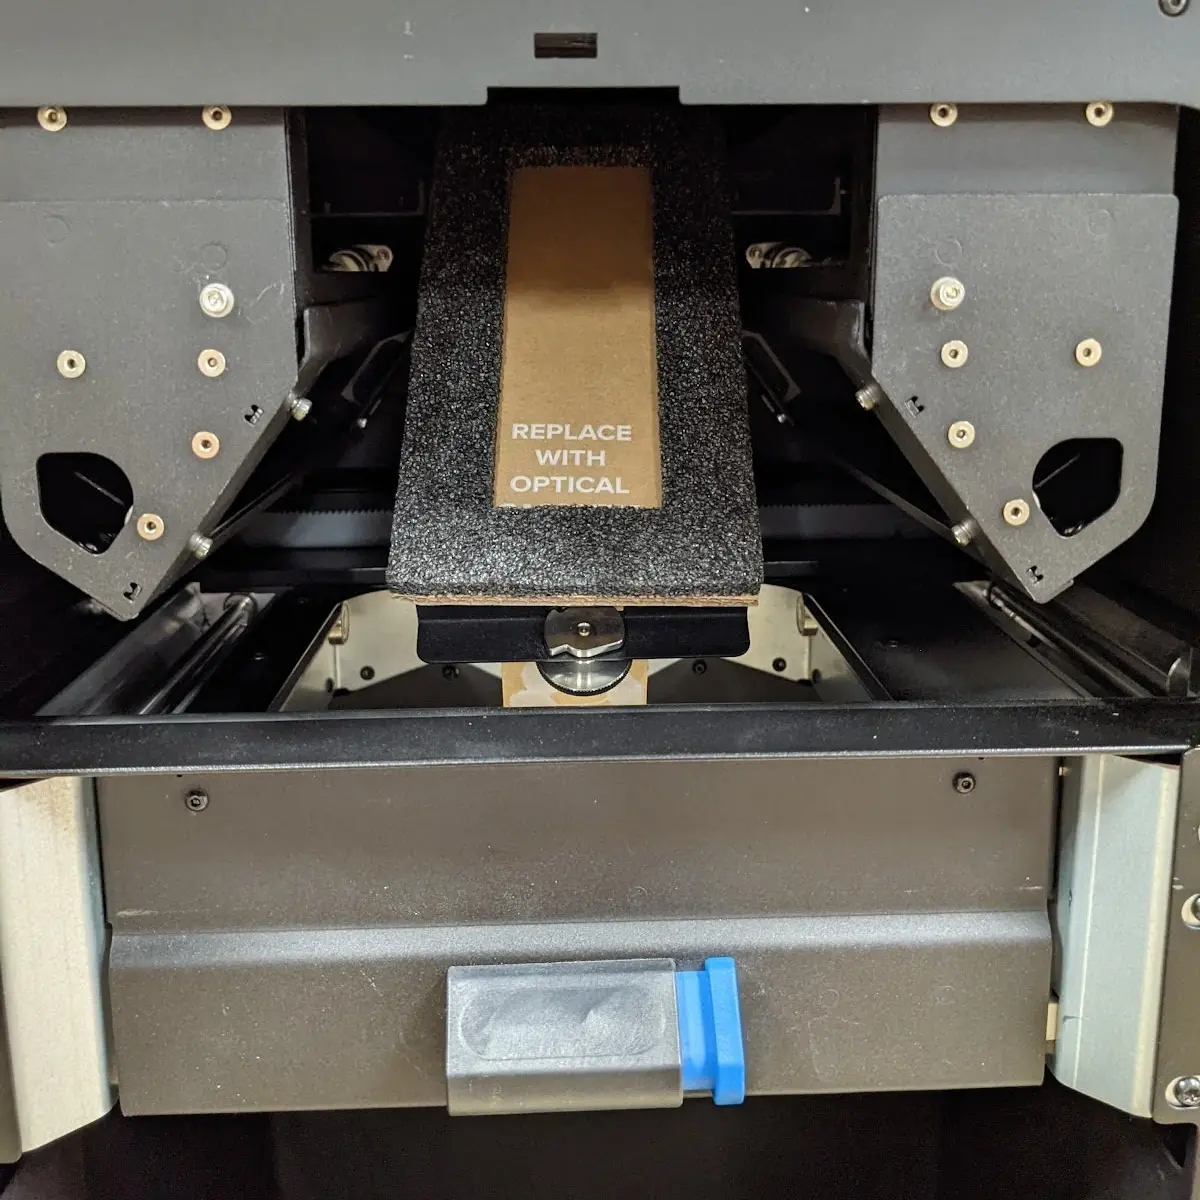
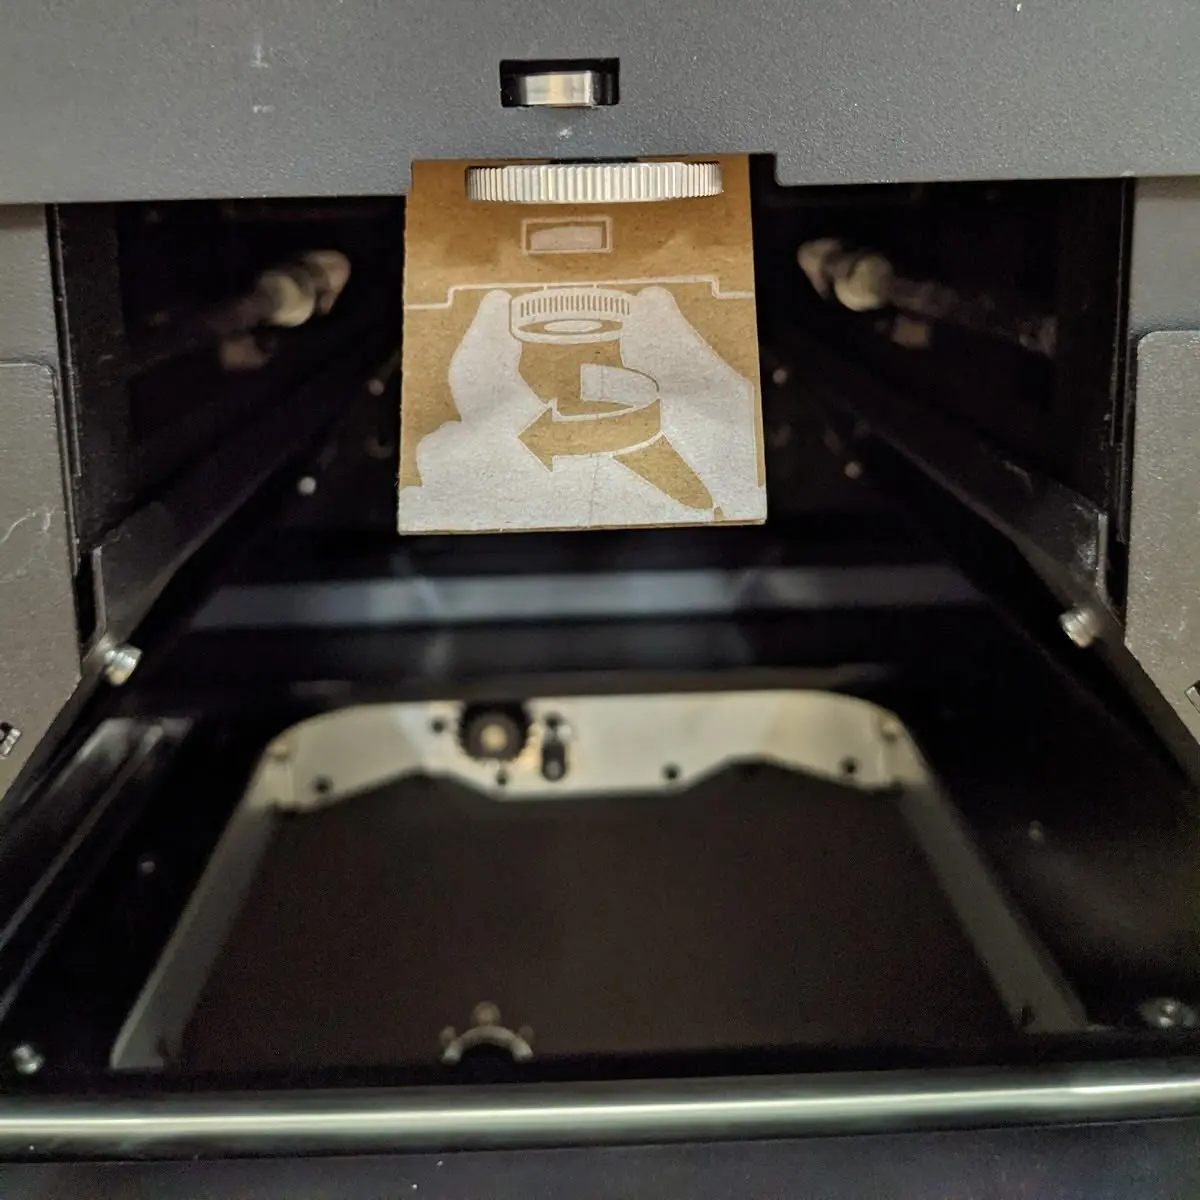
  1. Open the air filter door and pull the door release to open the print enclosure door. Place the optics protector in the optical cassette tray with the foam side facing up. Close and secure the optical cassette tray. Close the print enclosure door.
Inserting the optics protector into a Fuse 1 generation printer
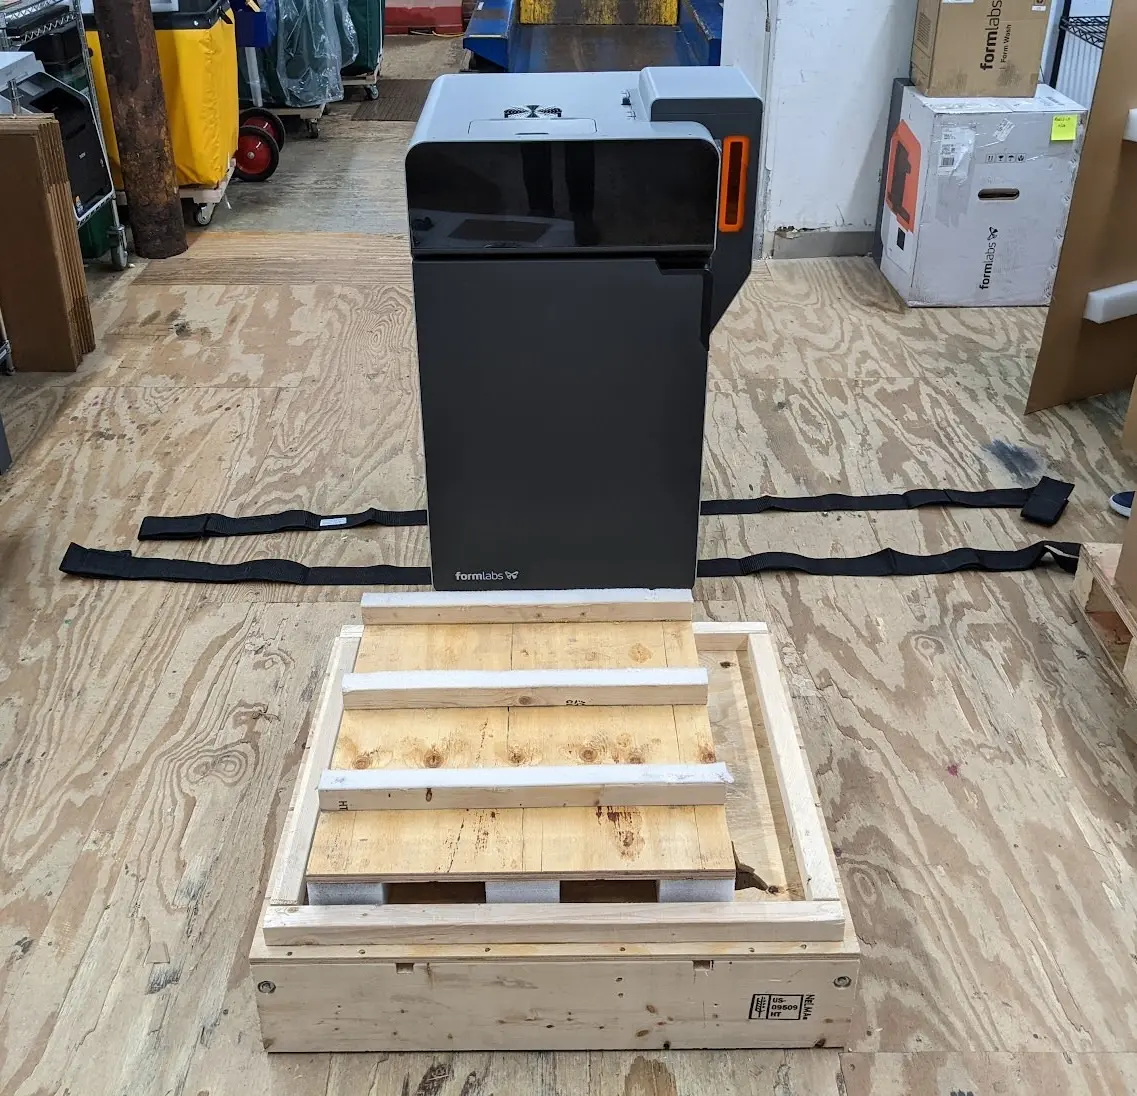
  1. There is a platform on the pallet with holes three horizontal wooden beams. This platform is not centered on the pallet. Instead, it is closer to the left side of the pallet than the right, allowing room for the printer’s hopper. Place the pallet in front of the machine such that the right side of the pallet is aligned with the right side of the machine.
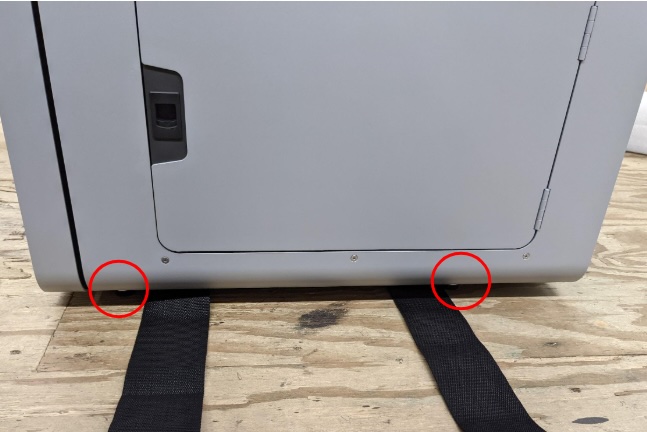
  2. Have a partner slip the two lifting straps underneath the printer such that the handles are accessible on the left and right sides of the machine. Spread the lifting straps so that one is next to the rear feet of the machine and the other is next to the front feet.
Aligning a Fuse 1 generation printer with its pallet for shipping
Proper alignment of lifting straps under a Fuse 1 generation printer

Notice:

Do not tilt the machine when placing the lifting straps. Doing so may damage the print enclosure door or cause the machine to topple over.
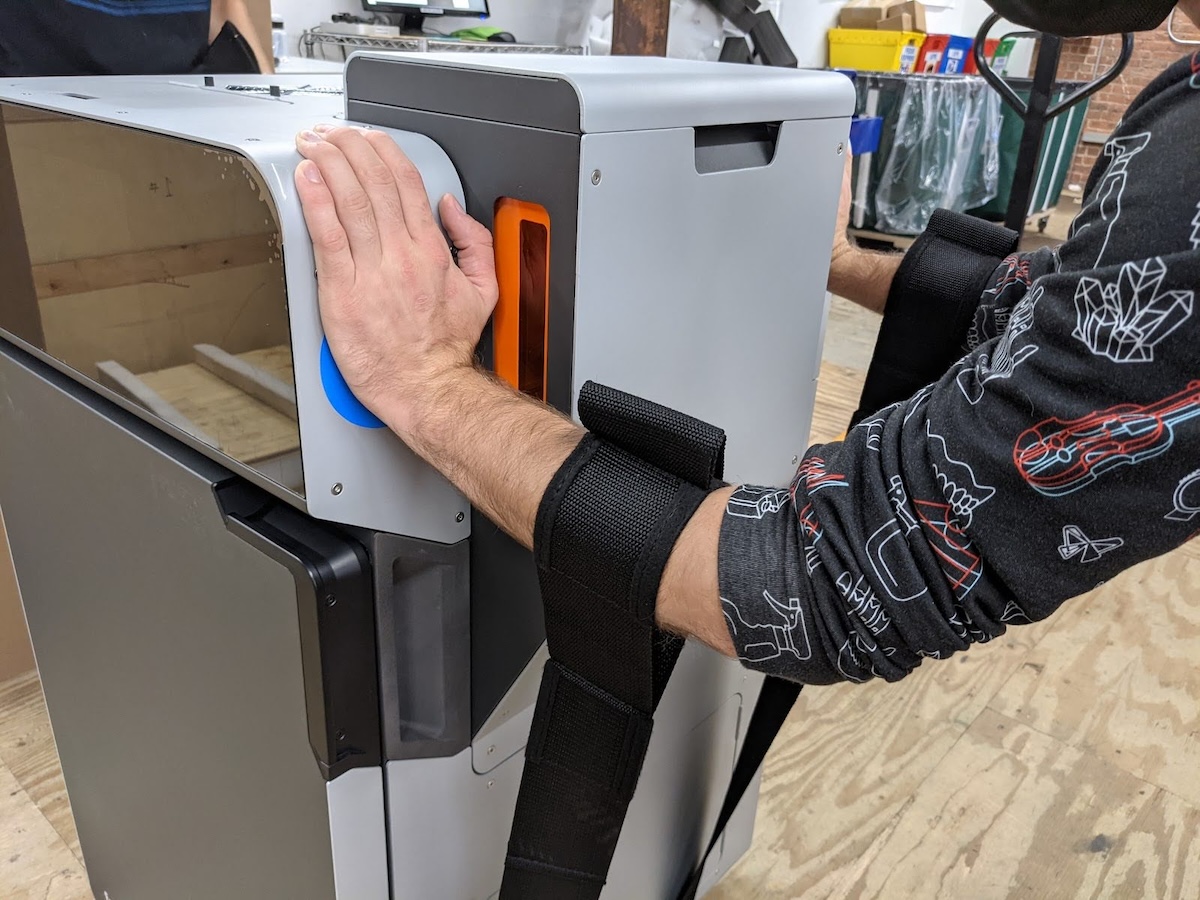
  1. Stand on one side of the printer and route your arms through the lifting straps. There are three positions in the straps to route your arms through, depending on your height and the placement of the printer. Place your hands on the hand placement stickers on the side of the machine. Have your partner do the same on the other side of the printer.
  2. Lift the machine using the lifting straps. Each person should push at an upward angle when lifting to keep the printer steady and level.
Proper hand positioning when lifting a Fuse 1 generation printer

Caution:

A Fuse 1 generation printer is a heavy object. Use appropriate precautions and correct lifting form when moving the machine.
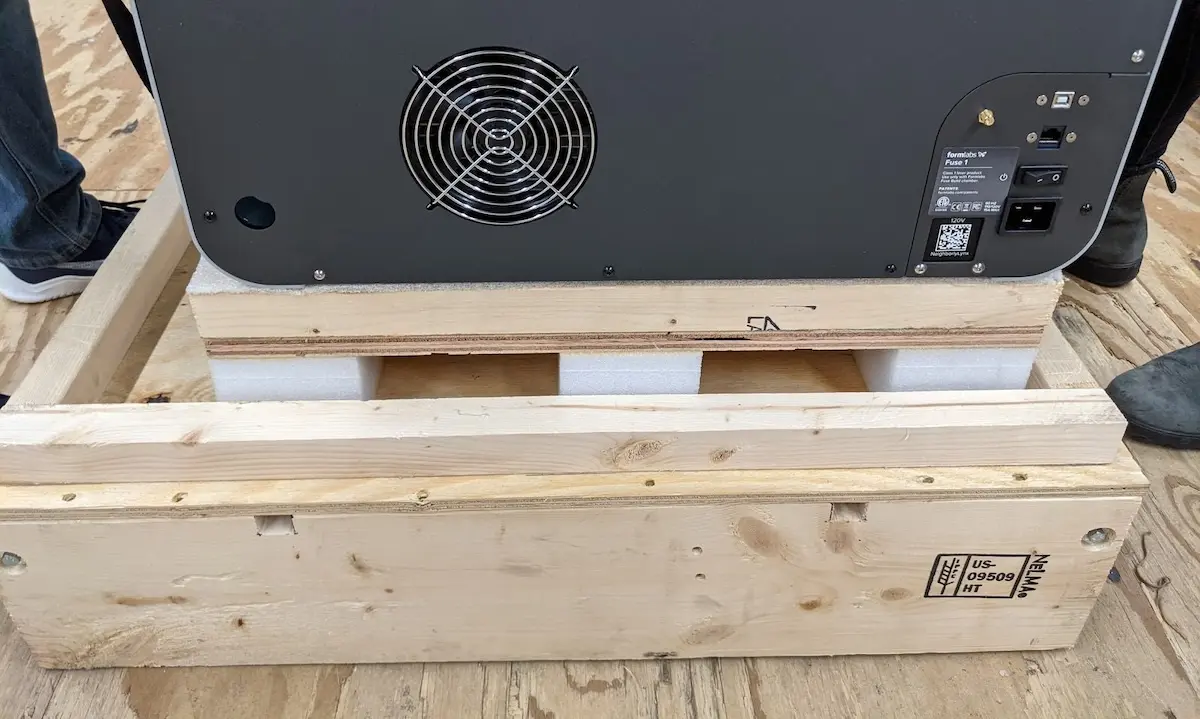
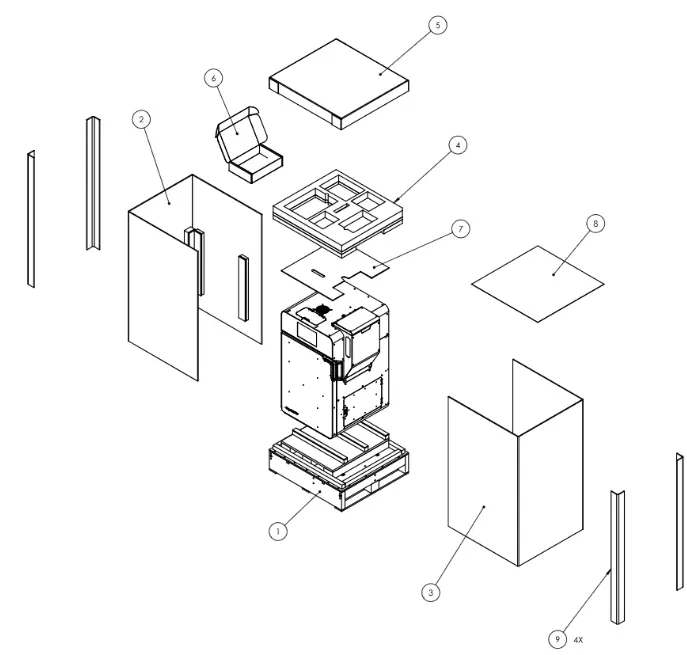
  1. Lift the machine onto the pallet (1), aligning the rear of the printer with the rear wooden beam, then lower it onto the platform.
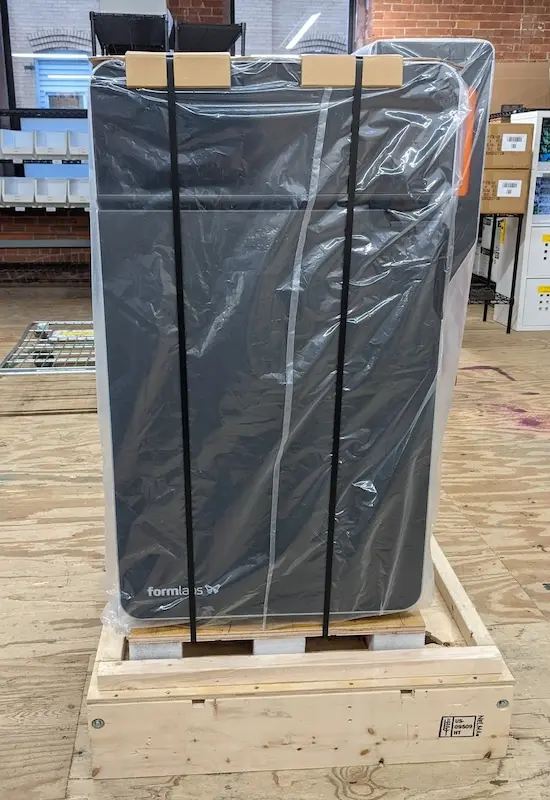
A Fuse 1 generation printer placed on its pallet
  1. Remove the lifting straps.
  2. Lower the protective bag over the top of the machine. Tuck any excess bag material between the platform and the bottom of the machine.
  1. Place the protective pad (7) on top of the printer. The cutout in the protective pad fits around the hopper lid.
  2. Insert two nylon binding straps (commercially available) through the small holes in the pallet underneath the platform on the hopper side of the printer. Thread through to the hopper side of the printer and pull vertically around the printer.
  3. Tighten and secure the straps over the protective pad.
  4. Insert two nylon binding straps through the slots in the pallet to the front or the back of the printer. Thread through to the opposite side of the printer and pull vertically around the printer.
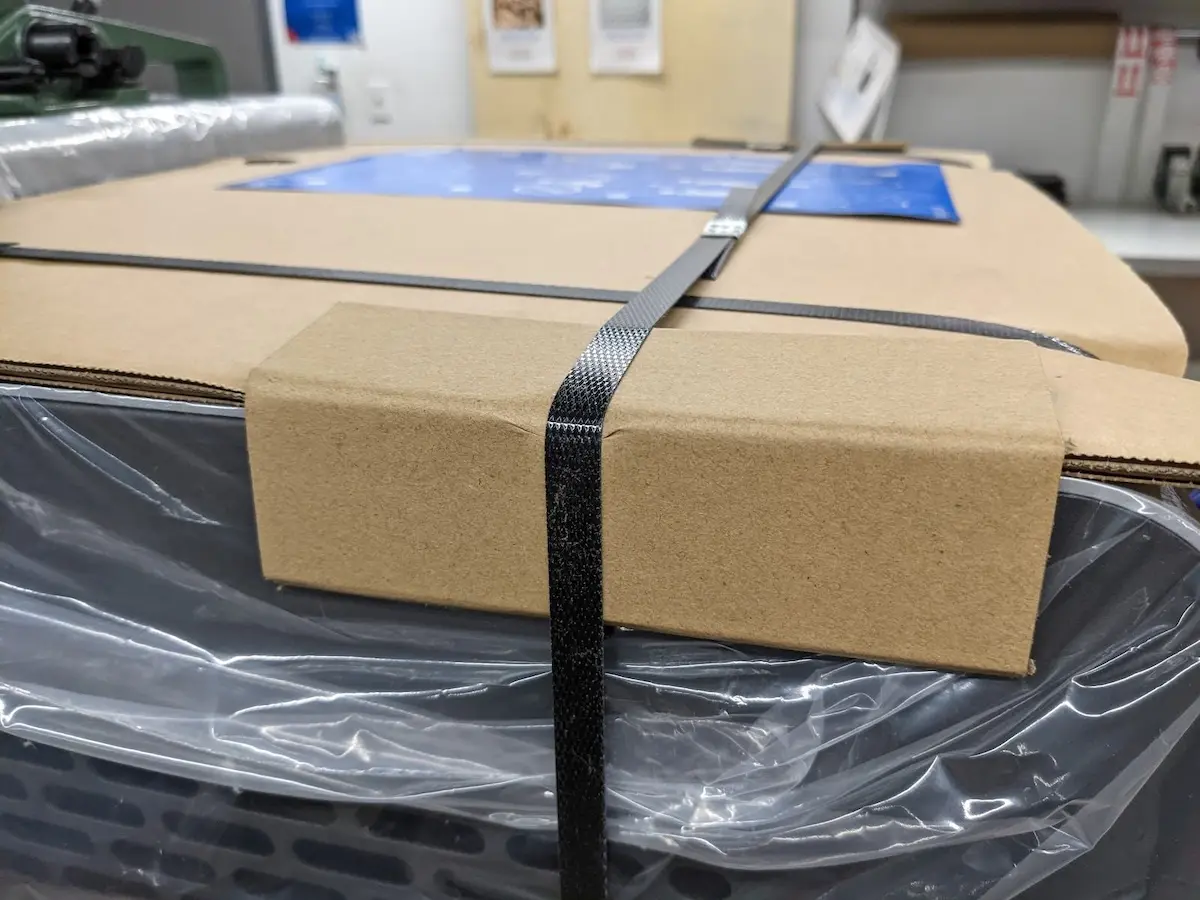
  5. Place one strapping protector over each edge to protect the top of the printer from scratches. Tighten and secure the straps. The printer should be rigidly attached to the pallet.
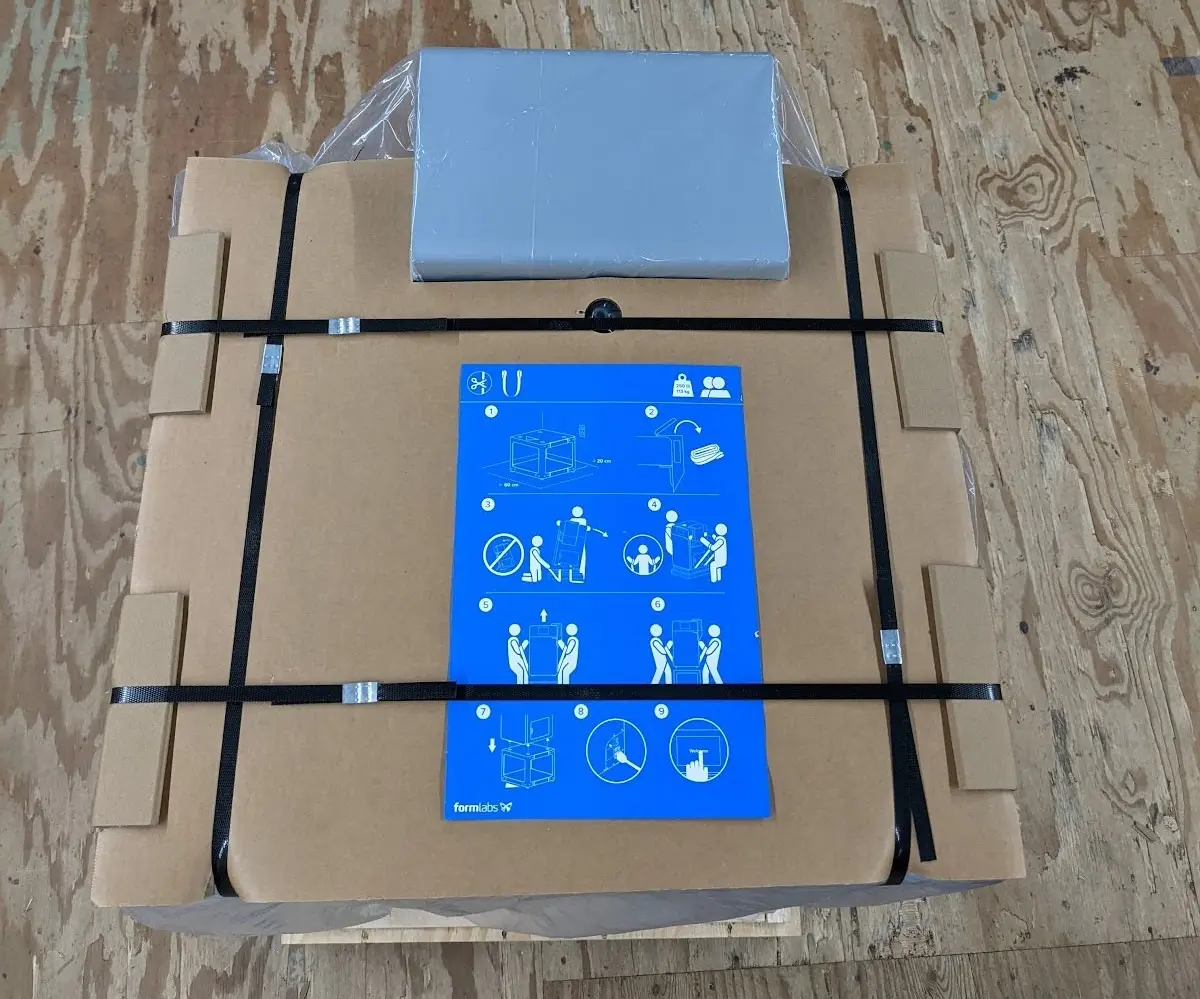
The product is placed on a pallet and encased from four sides by two C-fold segments, a topper, and a protective pad.
Edge protectors on a packaged Fuse 1 generation printer
Fuse 1 generation printer secured to pallet
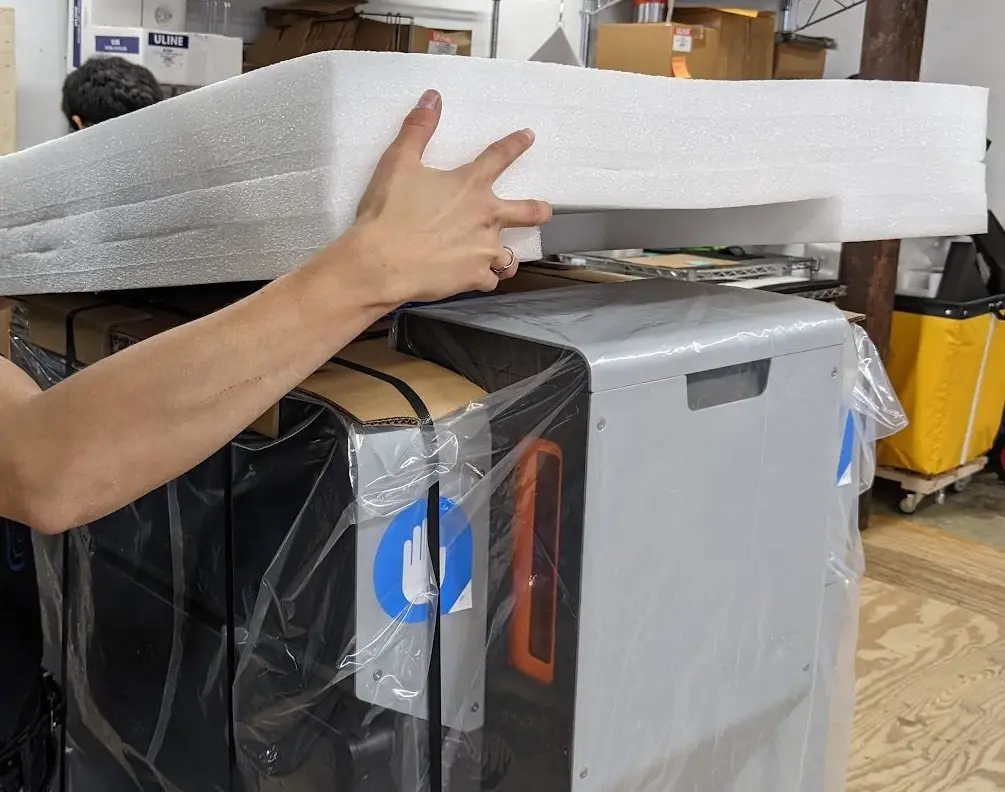
  1. Place the foam accessory tray (4) on the top of the printer. The cutout in the tray fits around the hopper lid.
Placing the foam accessory tray on top of a Fuse 1 generation printer
  1. Encase the machine with the inner C-fold segment (2), leaving the hopper side open. Ensure that the graphics on the exterior of the C-fold are oriented upwards.
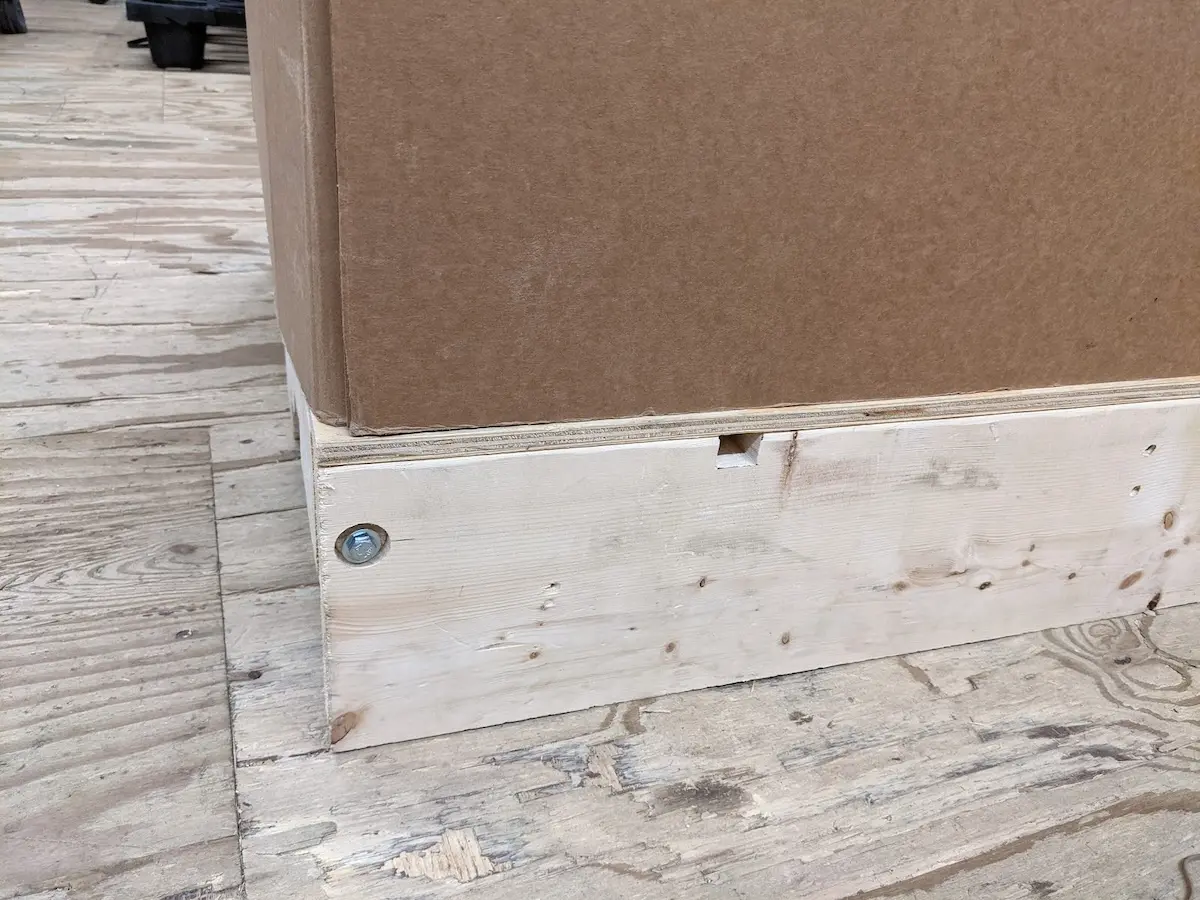
  2. Encase the machine with the outer C-fold segment (3) from the hopper side, such that all four sides of the machine are now covered. The foam on the outer C-fold fits underneath the hopper. The C-fold should be flush with the lip of the pallet on all four sides.
Protective C-folds aligned with the pallet
  1. Place the topper (5) on top of the C-folds. The cutout in the foam aligns with the printer’s hopper.
  2. Insert the four long corner protectors (9) under the corners of the cardboard topper such that they run all the way to the pallet platform.
  3. Wrap a nylon binding strap horizontally around the C-folds. Position the strap one-third of the way up from the bottom of the C-fold (approximately 50–70 cm/20–28 in). Tighten and secure the strap.
  4. Loop two nylon binding straps vertically around the machine, passing them through the pallet using the four small holes in the external sides of the pallet. Place one strapping protector on each of the top edges of the package topper. Tighten and secure the straps.