
Warning:
Use appropriate personal protective equipment when handling loose or unsintered powder. Refer to the support article Safety with Formlabs SLS products for more information.

Before transporting your Fuse 1 generation printer or using a different material, thoroughly clean all powder out of the machine. This includes cleaning powder out of the hopper, print enclosure, air filters, and off sensitive components such as the optical cassette and heater tubes. It is critical to fully clean all powder out of the machine before using it with a different material. You may need to perform this cleaning multiple times.
In most cases, when switching between two materials, you will need to thoroughly and comprehensively clean your printer, Fuse Sift, and build chamber. If you are switching between Nylon 12 Powder and Nylon 12 GF Powder or between Nylon 11 Powder and Nylon 11 CF Powder, you can follow a simplified cleaning procedure. Clean the hoppers and dosing assemblies of your printer and Fuse Sift. In most cases, repeated cleaning passes and detailed cleaning of optical surfaces, heaters, and filters are not necessary. You do not need to clean your build chamber when switching between these pairs of materials.

Warning:
Use appropriate personal protective equipment when handling loose or unsintered powder. Refer to the support article Safety with Formlabs SLS products for more information.
Notice:
Failing to clean out all powder before switching materials can lead to print failures or permanent damage to the machine. Read and understand all instructions in this article before proceeding.
Required supplies
Estimated time required: 2–3 hours
Supplies:
Notice:
Dedicate each of the items listed below to its own material type. Do not clean and reuse them with a different material type.
Tip:
Use anti-static vacuum attachments to prevent shocks. For 3D printed attachments (such as the hopper attachment), apply anti-static spray to the part after printing.
Before cleaning
Prepare the machine and a dust-free work environment before starting the cleaning process.
Warning:
Do not perform this procedure if the machine has printed within the last 24 hours. Failure to do so may result in serious burns or lacerations from broken quartz glass. Allow the print enclosure to fully cool to room temperature before touching or inspecting any printer components.
Step 1: Print the vacuum cleaning attachment
Download and print the STL file for the cleaning attachment in advance of this procedure. Use your Fuse printer to print this attachment, then wait 24 hours for the quartz heaters to fully cool.
You can also optionally print a set of nozzles to help reach into tight spaces within the printer:
Mount the base nozzle on your vacuum hose, then use the bayonet fitting to quickly swap between the default tip (good for general usage), hook tip (for reaching into Fuse 1 generation powder troughs), and precision tip (for reaching into tight spaces, such as between the blades of the use 1+ 30W hopper agitator.
Step 2: Collect tools
Collect the required cleaning tools and put on your personal protective equipment (respiratory protection, gloves, and safety glasses).
Step 3: Insert an optical cassette
Before vacuuming any powder, install an optical cassette in the printer.
Notice:
Failing to install an optical cassette before cleaning powder out of the printer leads to contamination of the optics and upper laser window.
Cleaning the hopper
When cleaning powder out of a Fuse 1 generation printer, remove the bulk of the powder from the hopper and print enclosure before wiping surfaces or cleaning more sensitive components.
Note:
You may need multiple passes to remove the bulk of the powder from the printer. Repeat as needed, alternating between cleaning the hopper and the print enclosure.
Step 1: Insert an empty build chamber
Insert and plug in an empty build chamber. Close the print enclosure door.
Step 2: Empty the hopper
Tap Settings > Tools > Empty Hopper on the printer’s touchscreen. Follow the on-screen prompt on the Empty Hopper screen to transfer the powder from the hopper to the build chamber. This process may take up to an hour.
Step 3: Vacuum remaining powder out of the hopper
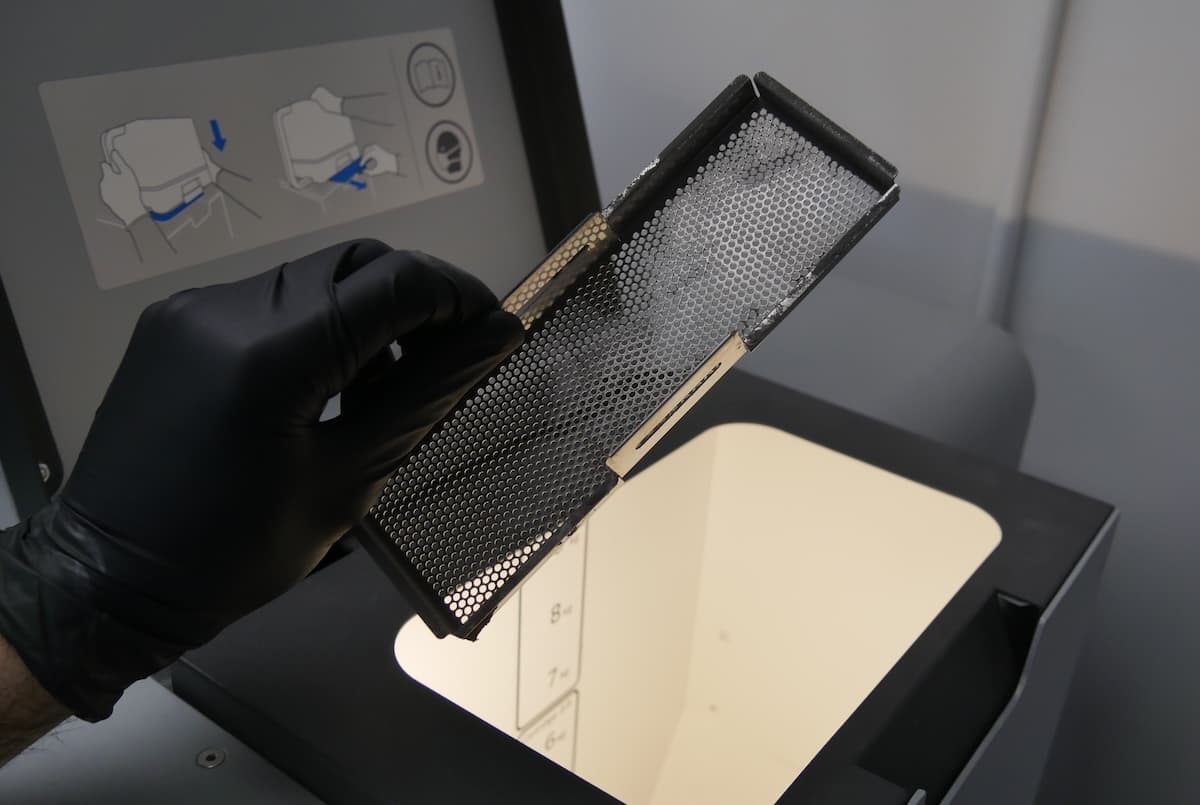
Remove the grate for better access to the hopper before vacuuming any remaining powder.
|  |
|  |
|  |
|  |
|  |
|
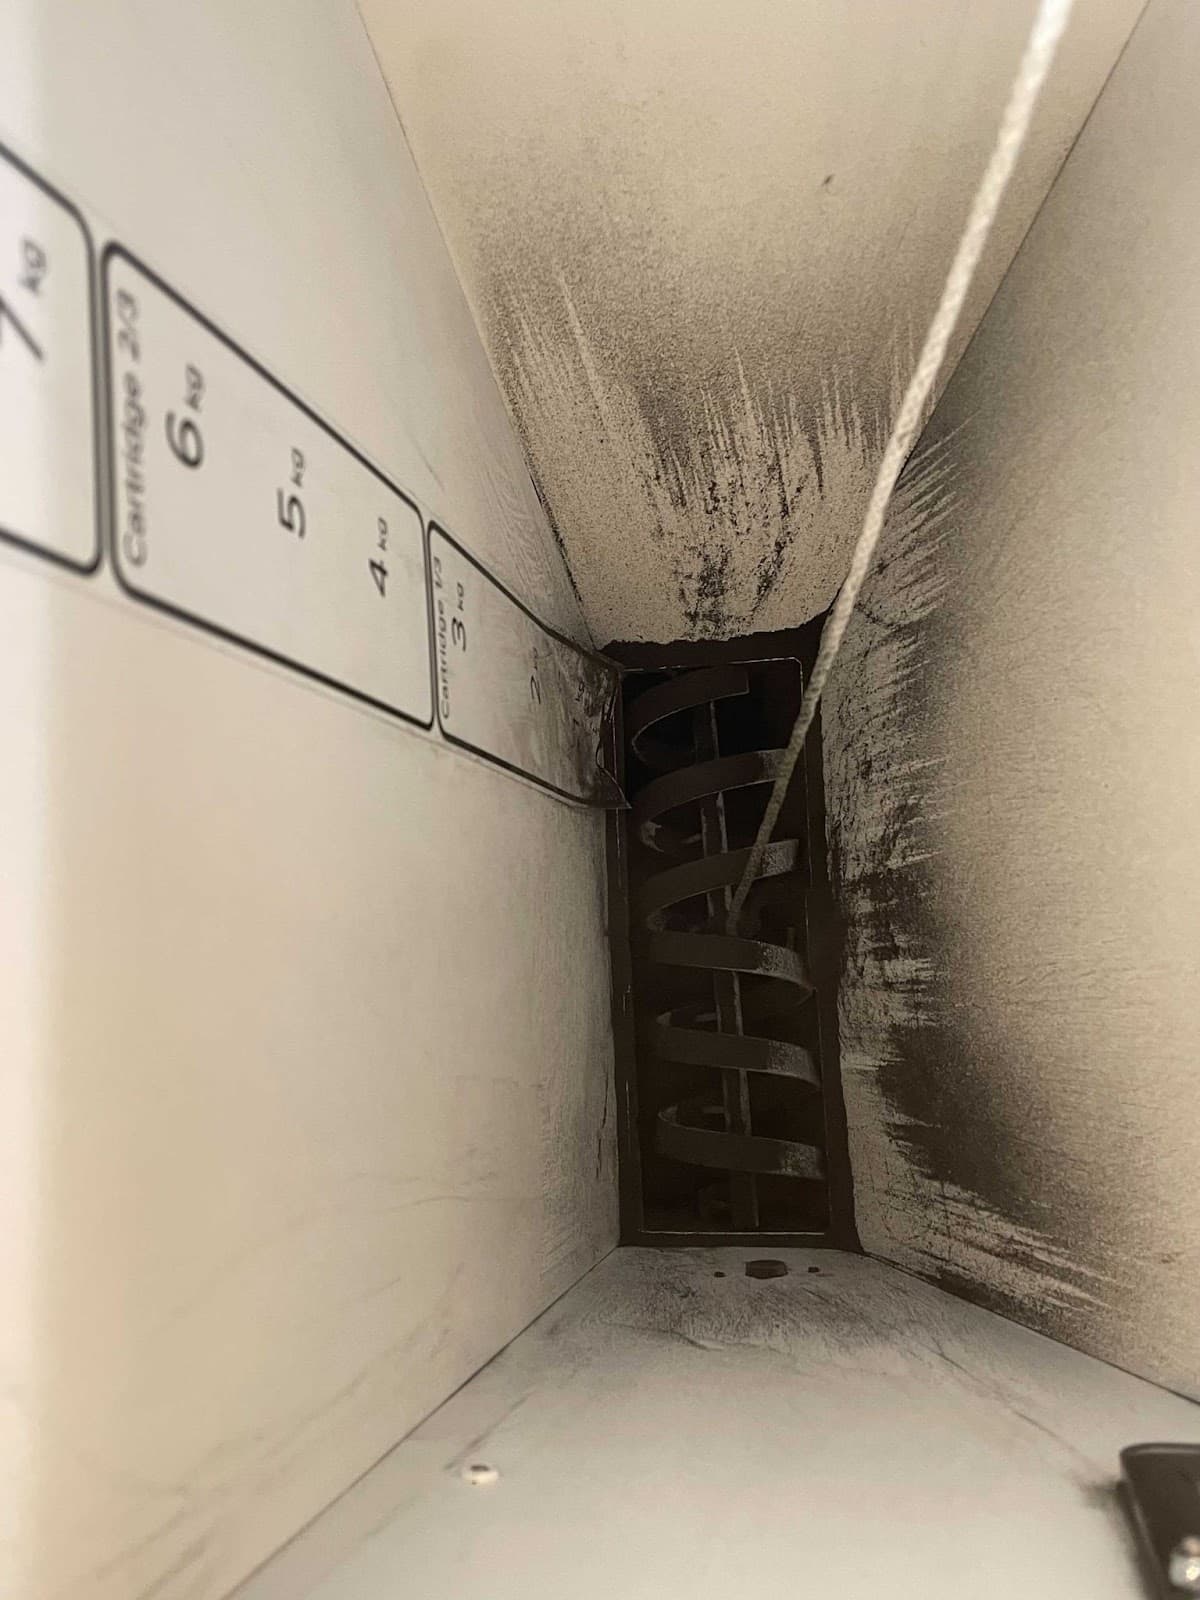
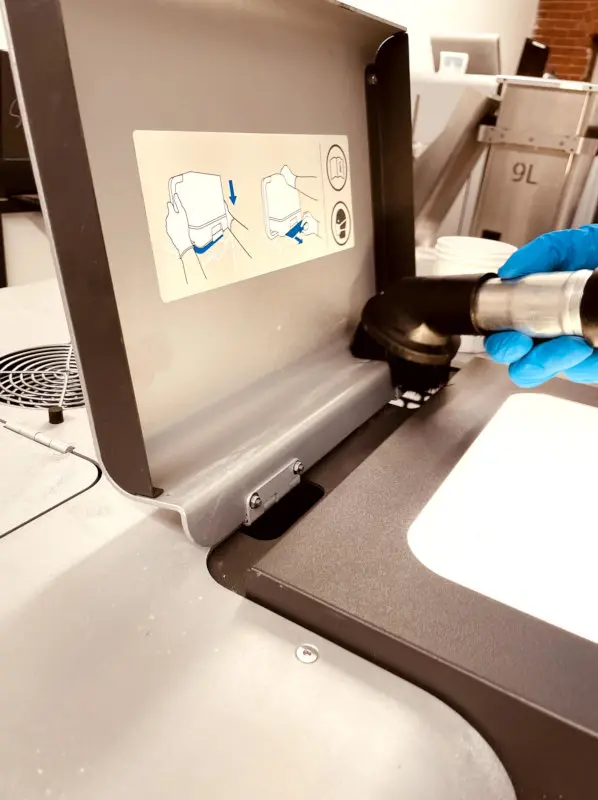
Step 4: Clean the doser assembly
Leave the vacuum with the attachment inserted inside the trough as you move the doser inside the hopper to dislodge powder.
Notice:
Cleaning the print enclosure
After cleaning the hopper, clean the print enclosure. Clean the main open area, then the powder handling mechanisms at the top of the print enclosure.
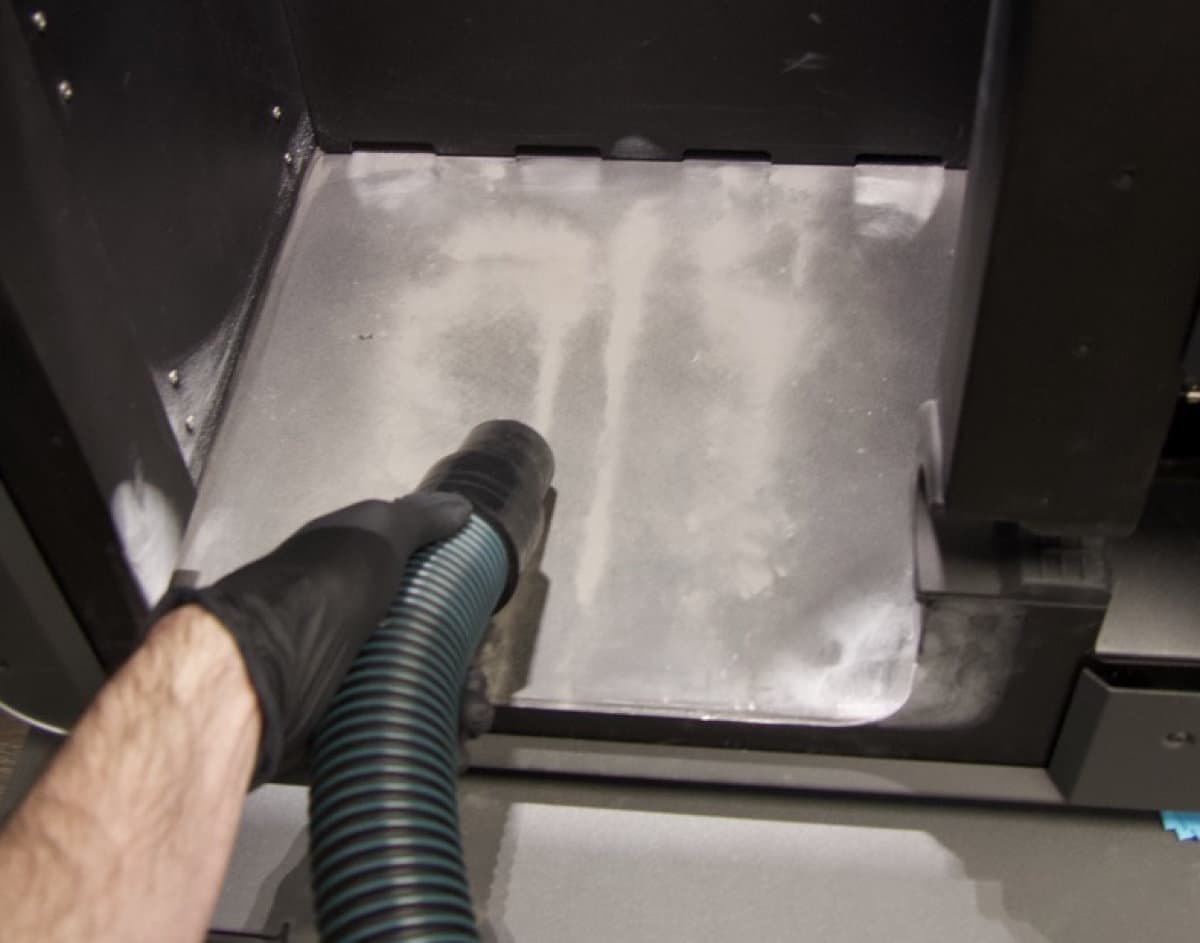
Step 1: Vacuum the print enclosure
Open the print enclosure door. Vacuum any loose powder in the print enclosure. Use compressed air or a gas duster as necessary to remove powder from hard-to-reach areas.
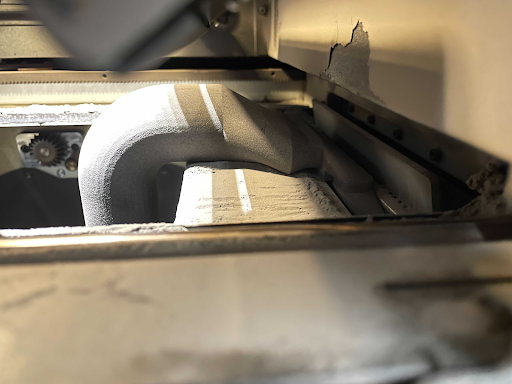
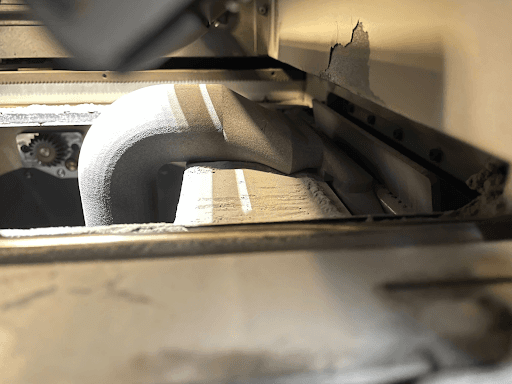
Step 2: Clean the powder troughs
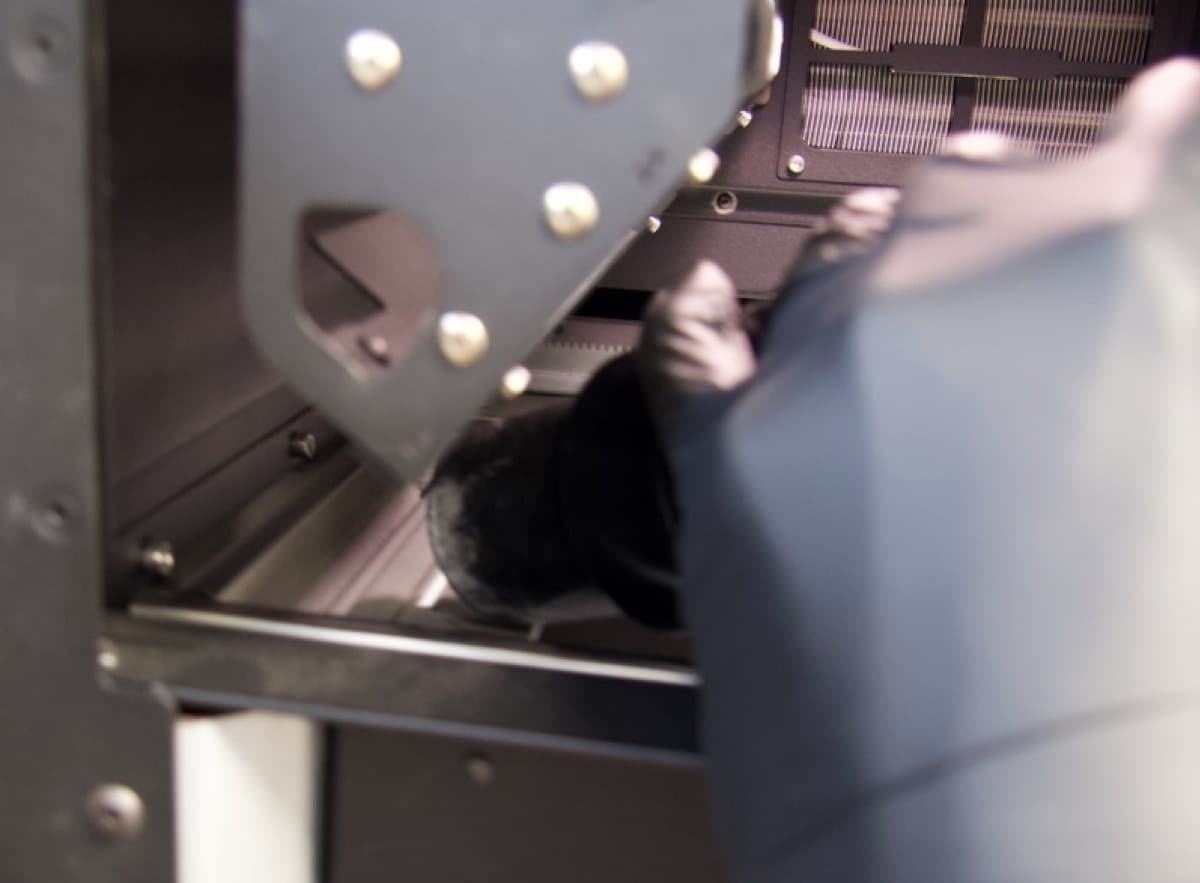
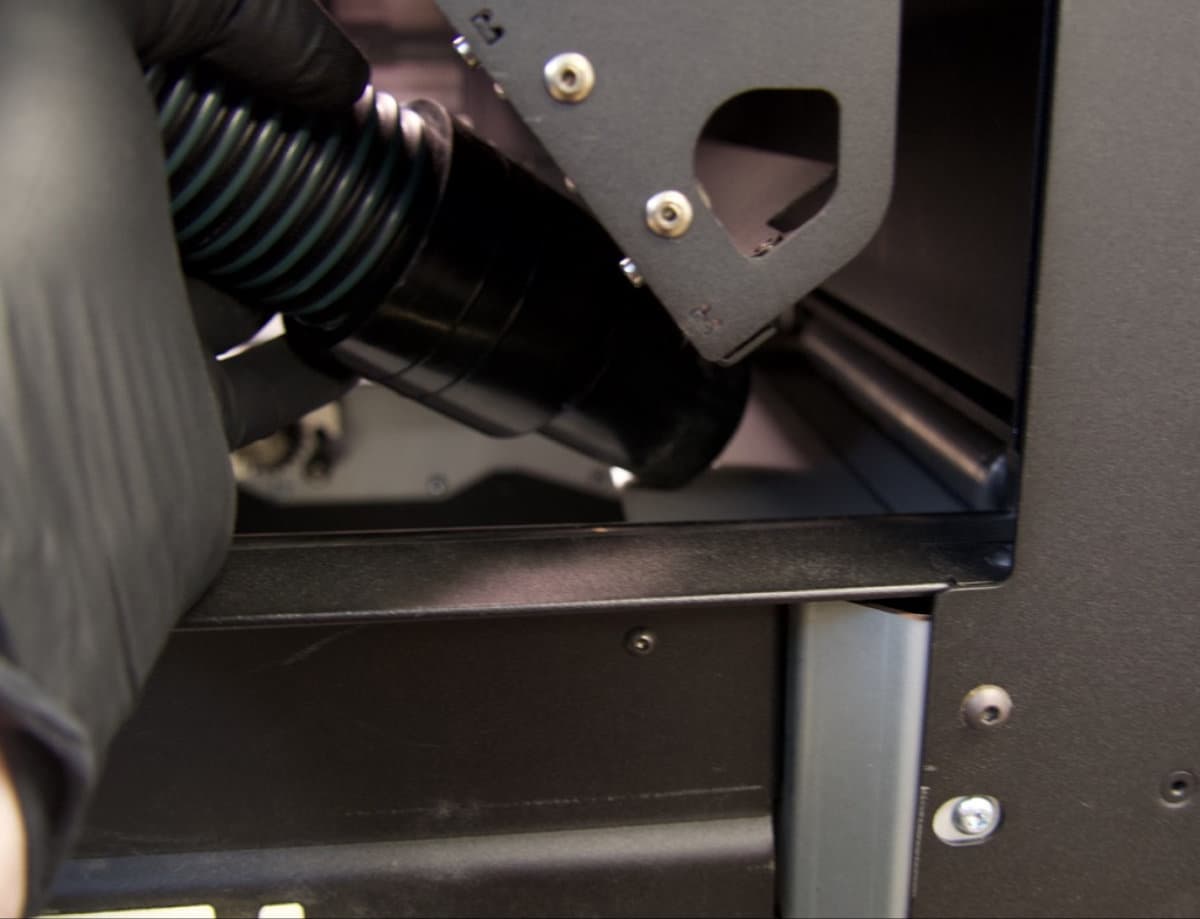
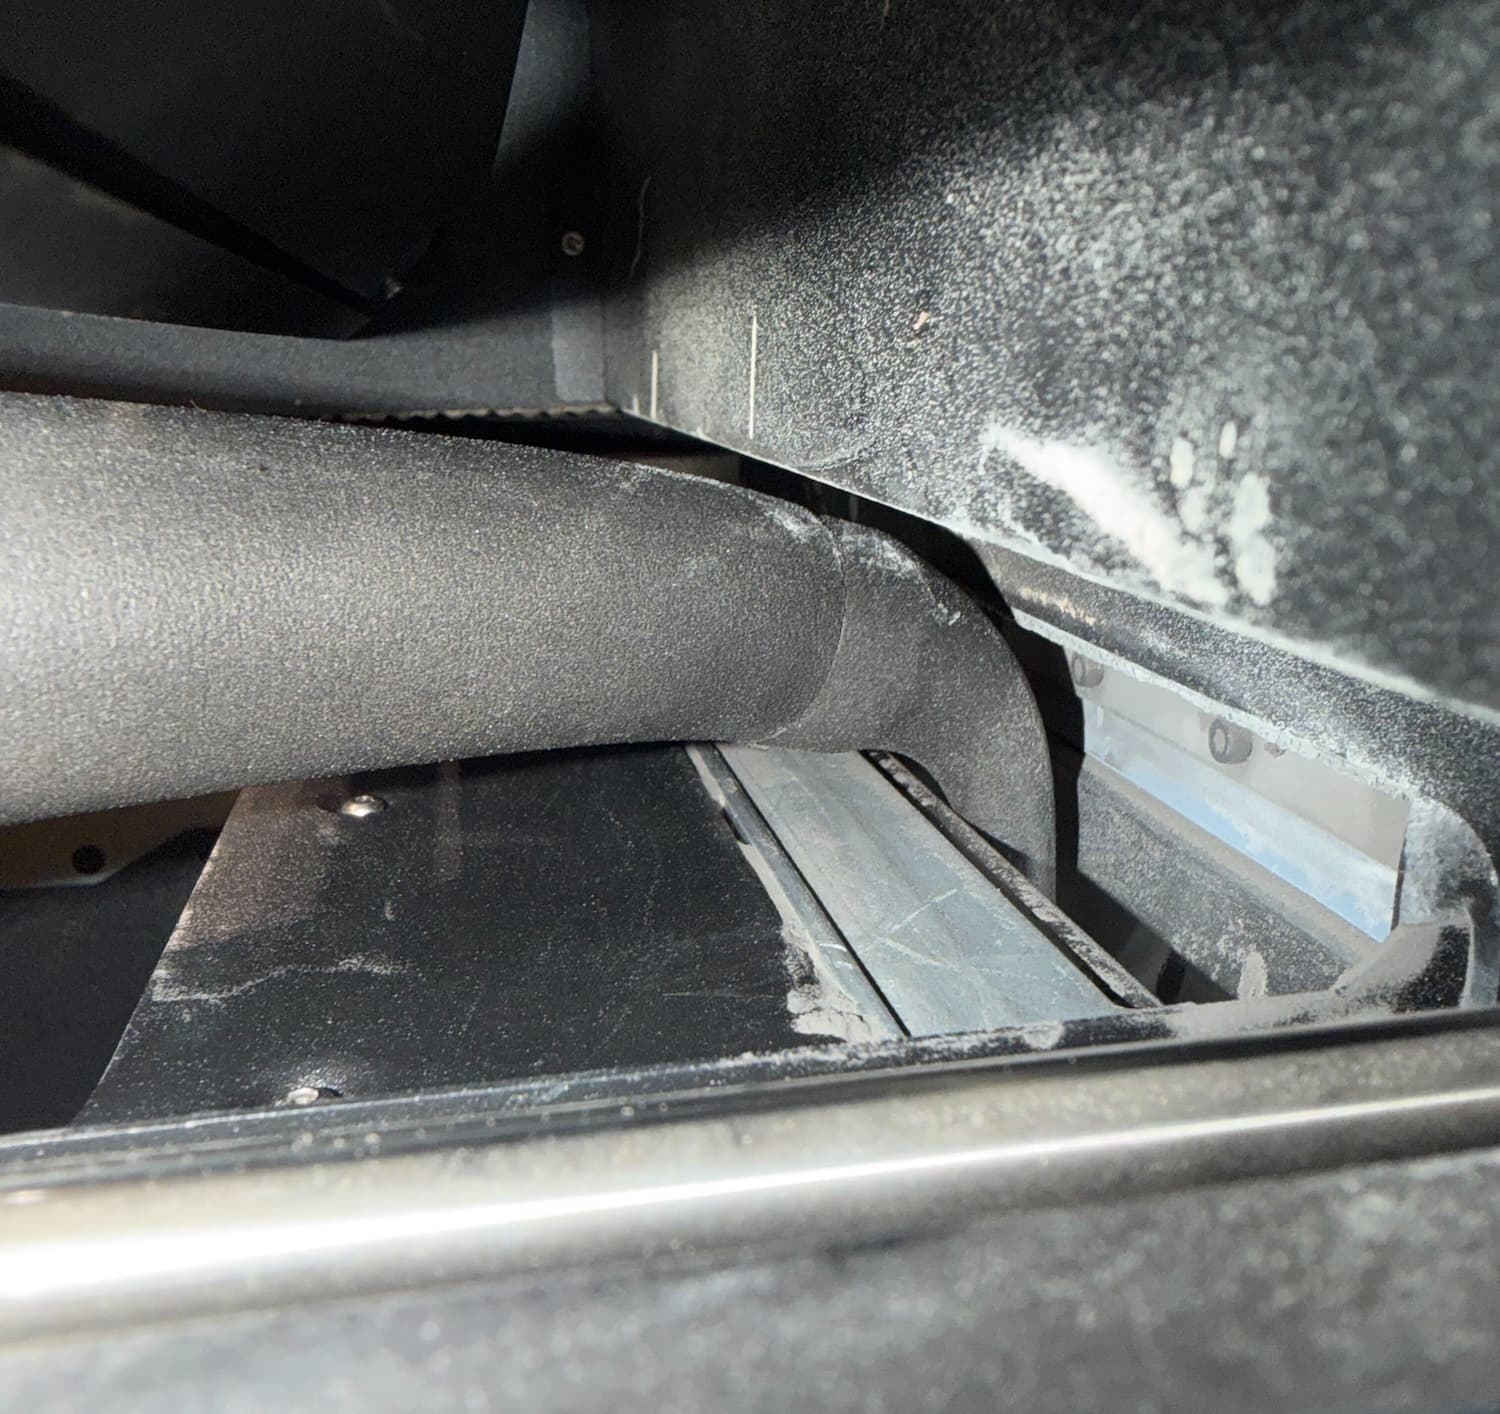
Two troughs run from the front to the back of the printer at the top of the print enclosure. The troughs store powder to be dispensed into the build chamber. Use the vacuum, fitted with a small brush attachment or the flexible hose attachment, to clean all powder out of the troughs. Use compressed air or a gas duster as necessary to remove powder from hard-to-reach areas. Check in particular for powder buildup along the inner walls and corners of the troughs.
If you previously printed the nozzle set, you can use the hook tip to reach into the troughs.
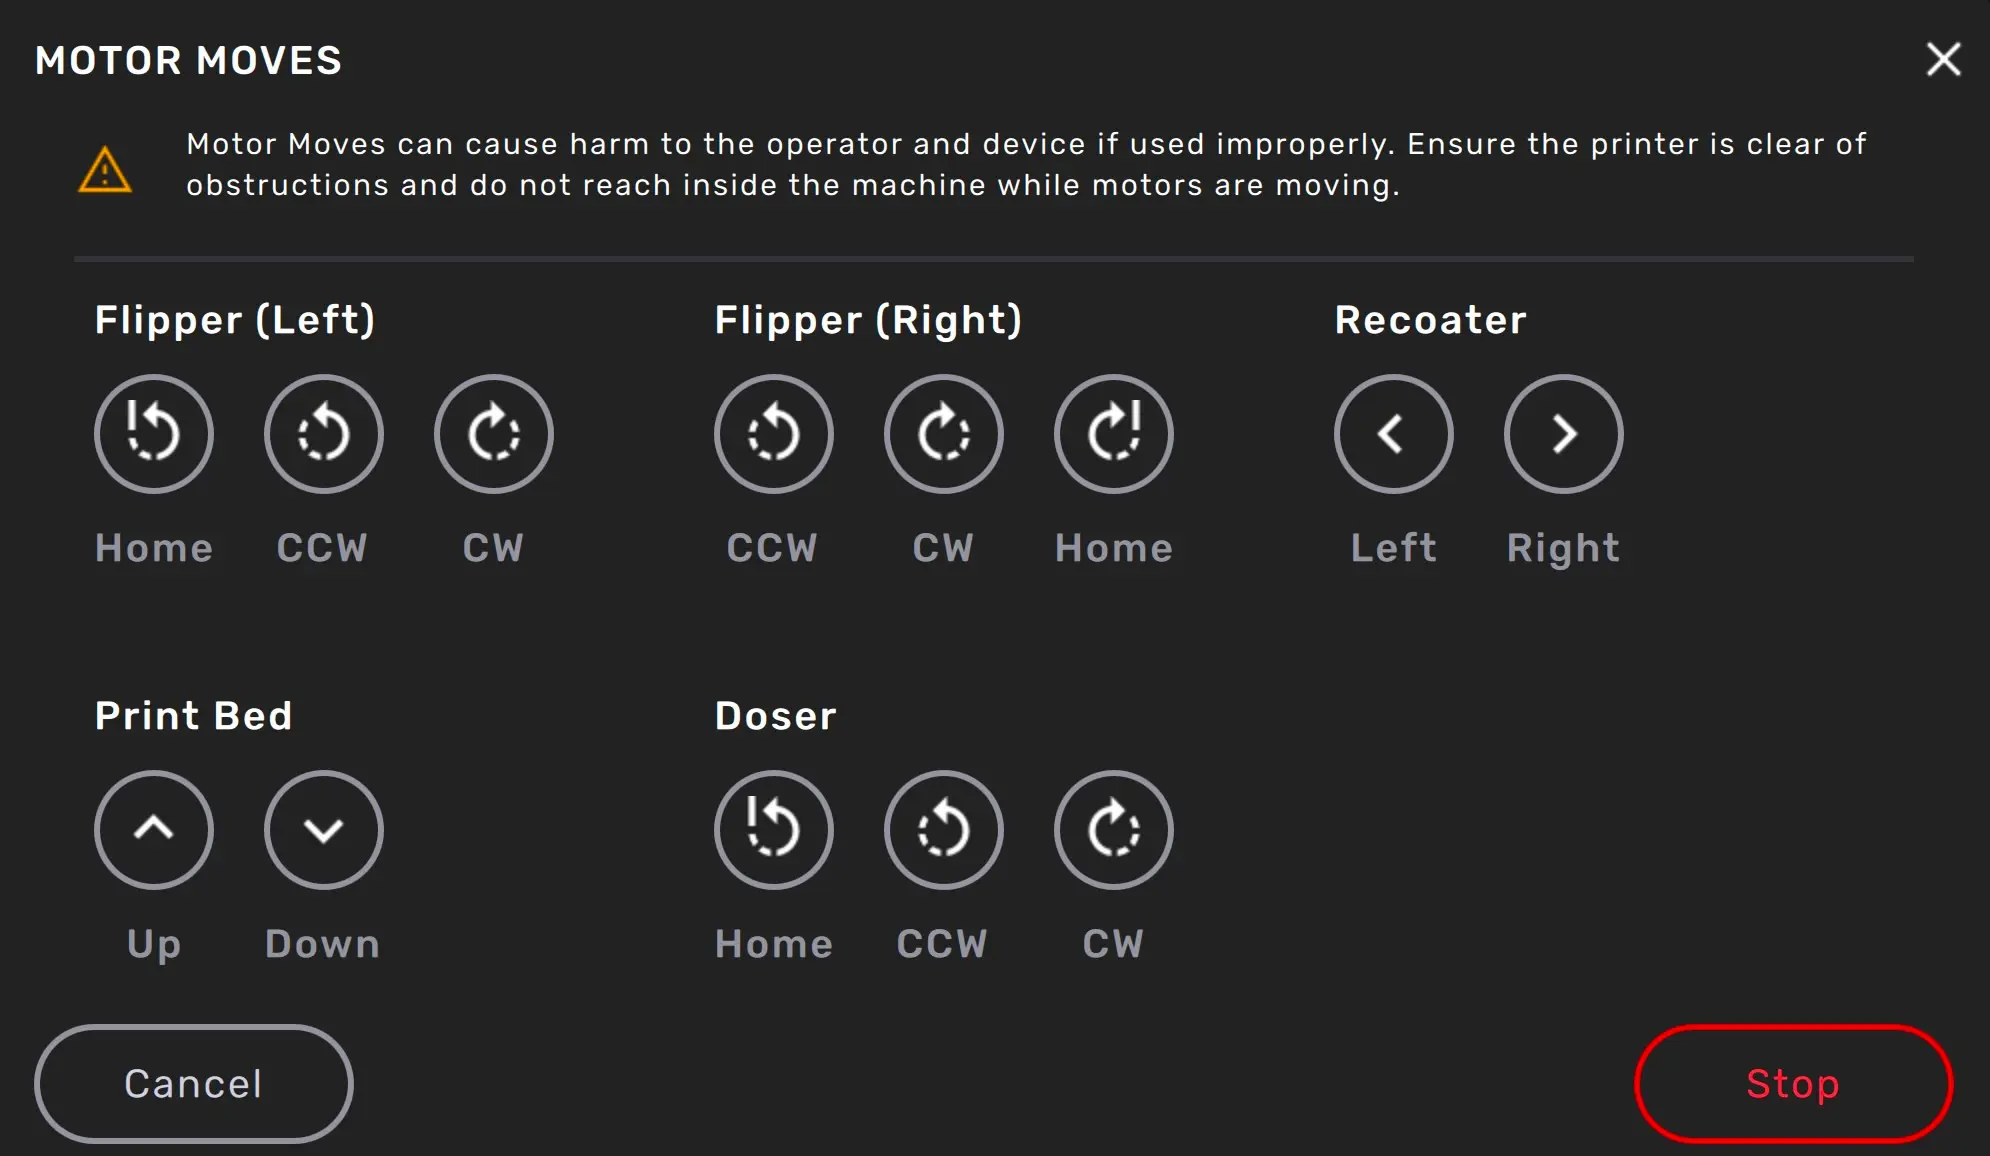
Step 3: Move powder trough motors
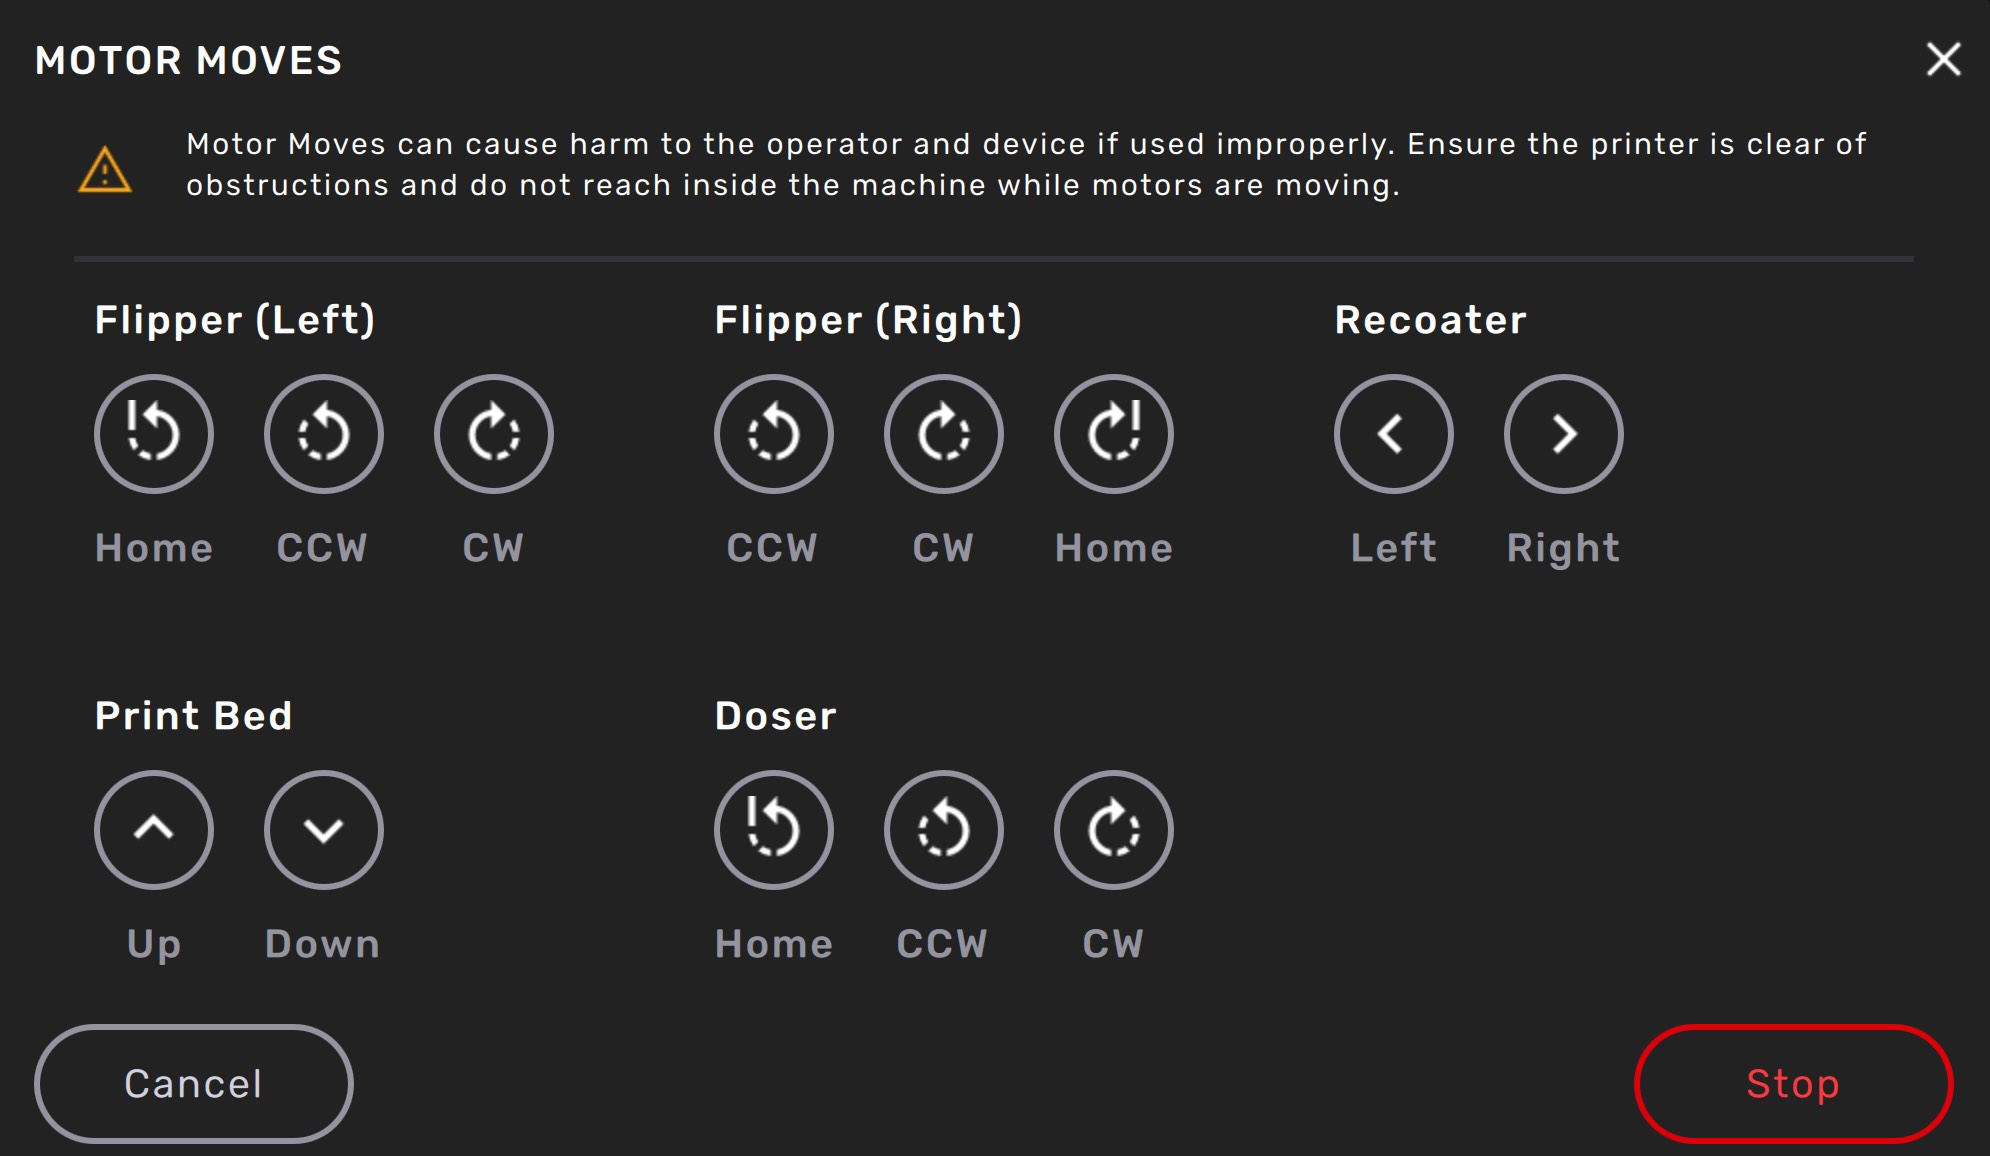
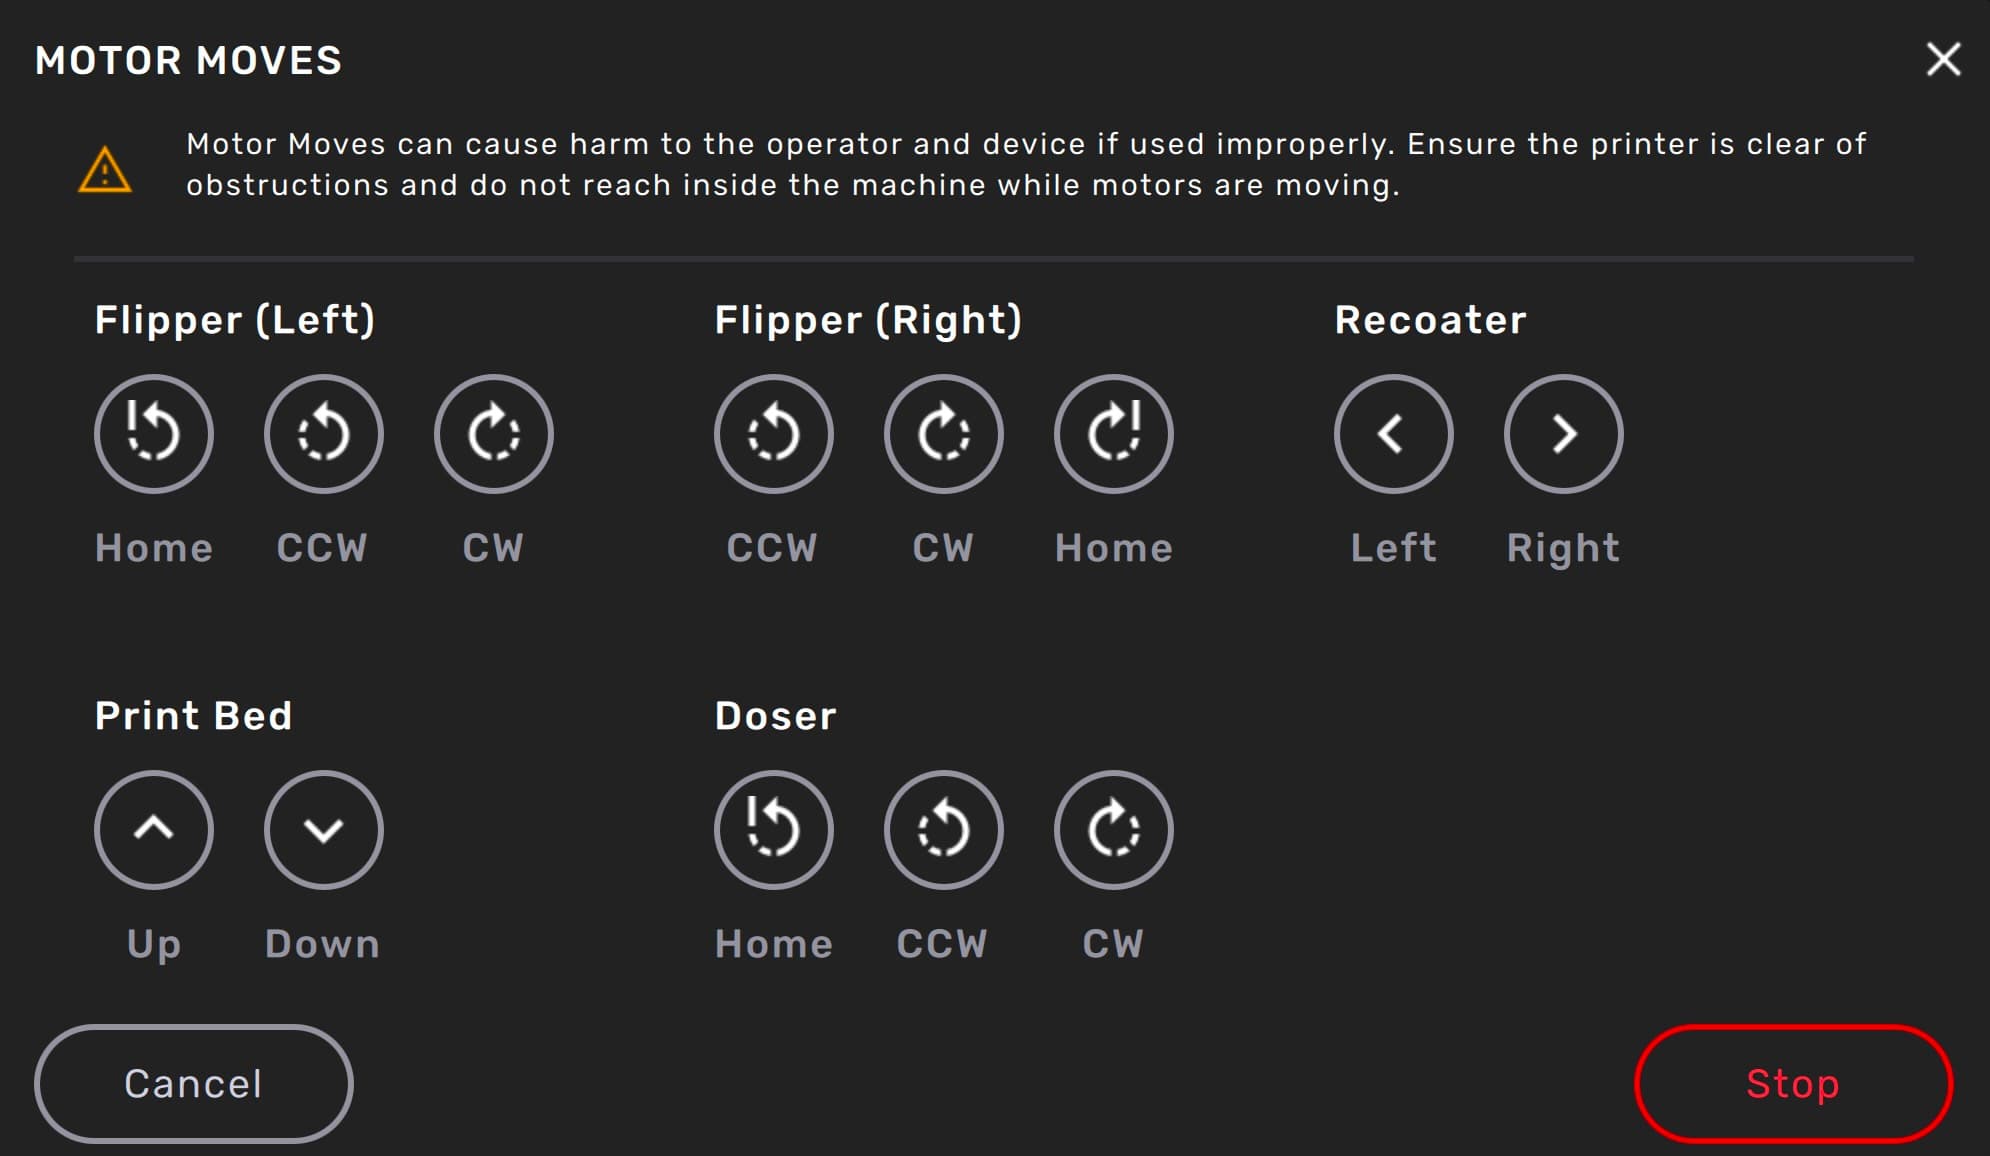
Close the print enclosure door and move the flipper motors to dislodge powder for cleaning.
To move the flipper motors:
Caution:
Unless specifically advised, do not select any of the options in the Motor Moves menu while the print enclosure door is open or any objects are in the path of the powder handling mechanisms at the top of the print enclosure. Moving parts present a crushing or tangling hazard. If necessary, tap the Stop button on the touchscreen to stop a motor movement.
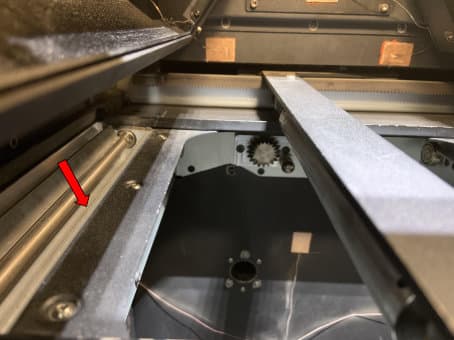
Step 4: Check the hopper gasket
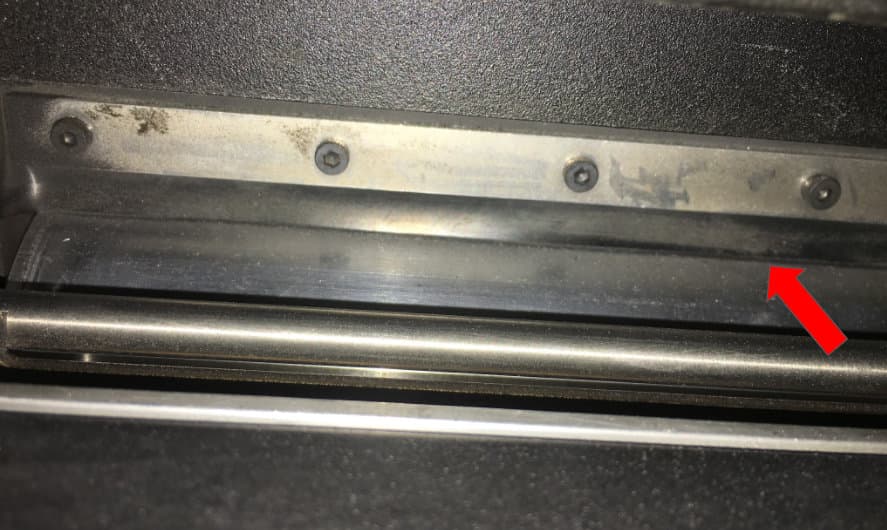
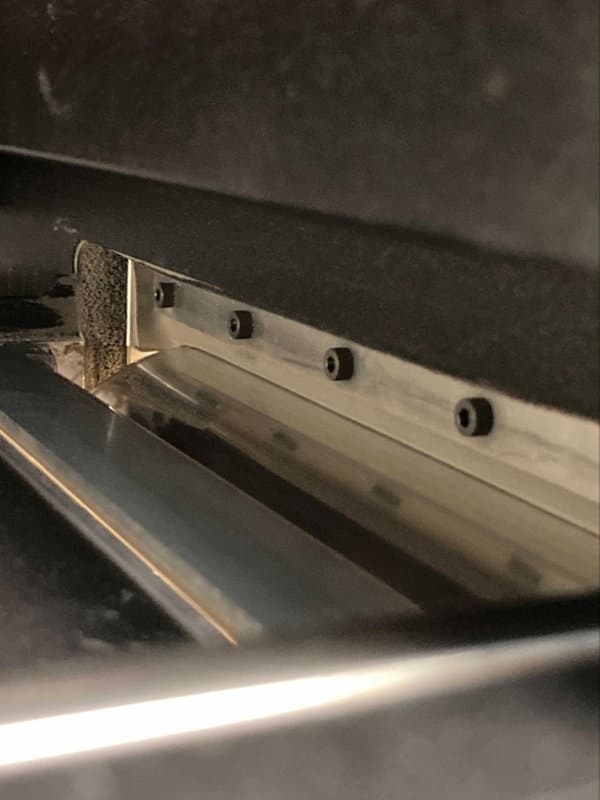
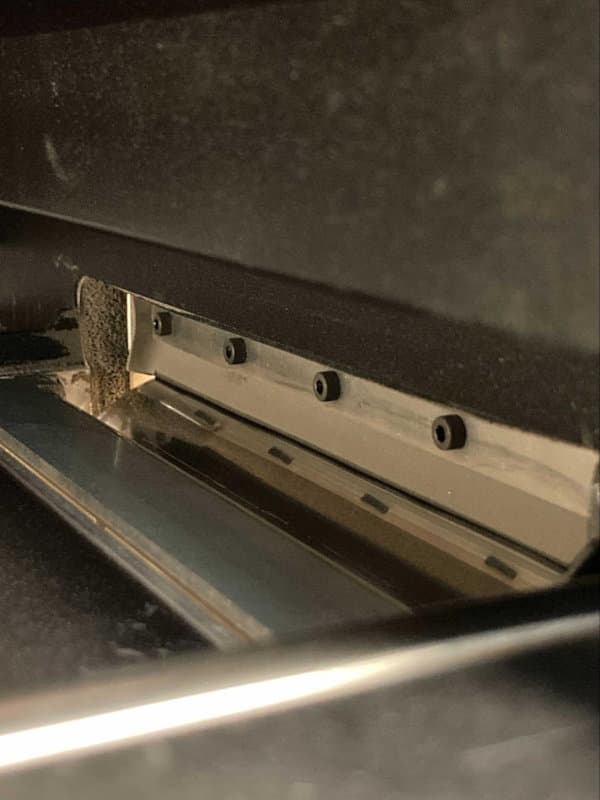
After cleaning the powder troughs, examine the trough on the right side of the printer. Check the position of the gasket running along the outside edge of the trough. Blowing compressed air down into the hopper can force the gasket out of place and into the path of the recoater. Use a thin tool or your gloved fingers to push the gasket back into place behind the edge of the trough.
Step 5: Wipe the print enclosure
Wipe the print enclosure with a clean microfiber cloth to remove any residual powder.
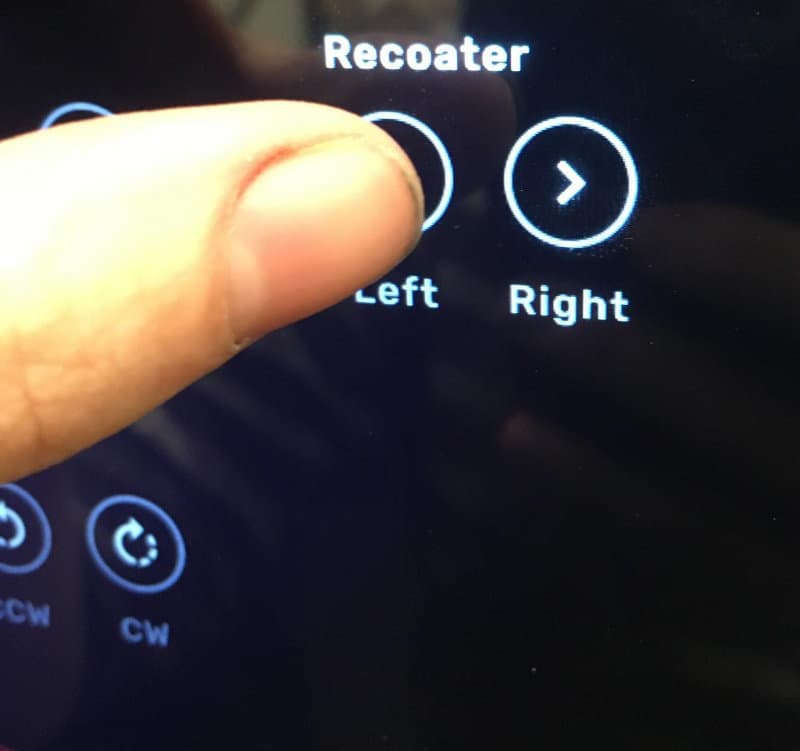
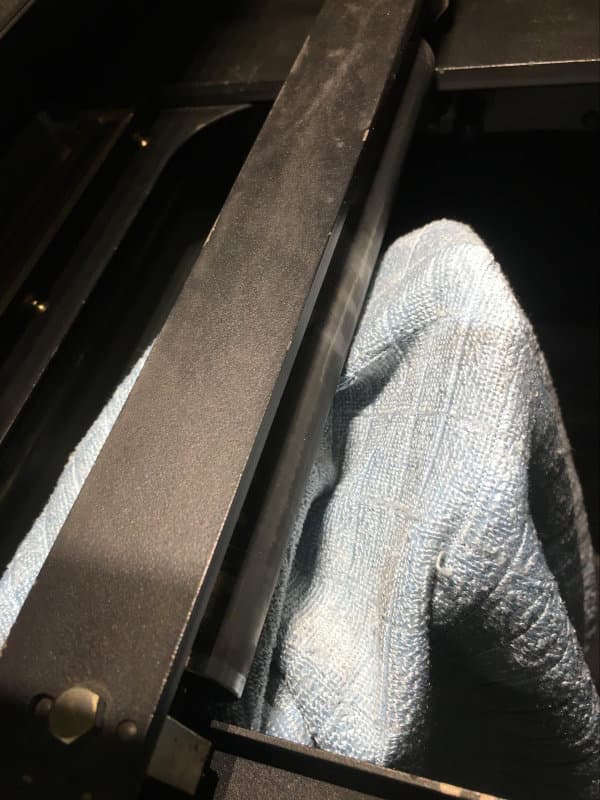
Step 6: Wipe the recoater
The recoater is a bar that moves left and right across the top of the print enclosure, spreading powder across the print surface to form a new layer of the print.
To move the recoater into position for cleaning:
Caution:
Unless specifically advised, do not select any of the options in the Motor Moves menu while the print enclosure door is open or any objects are in the path of the powder handling mechanisms at the top of the print enclosure. Moving parts present a crushing or tangling hazard. If necessary, tap the Stop button on the touchscreen to stop a motor movement.
Notice:
If you are switching between Nylon 12 Powder and Nylon 12 GF Powder or between Nylon 11 Powder and Nylon 11 CF Powder, stop here. If you are switching between any other two materials, continue following the cleaning steps below.
Step 7: Repeat as needed
Repeat the steps for cleaning the hopper and cleaning the print enclosure until there is no powder in recessed areas and all surfaces are clean. Alternate between cleaning the hopper and the print enclosure.
Note:
You may need to repeat these steps several times before all surfaces are clean.
Cleaning surfaces and sensitive components
After you have removed the bulk of the powder from the printer, move on to wiping surfaces and cleaning sensitive components.
Note:
You may need multiple passes to remove all powder from the printer’s surfaces and sensitive components. Repeat the following steps as needed until all surfaces are fully clean.
Cleaning the print enclosure door
Clean any powder that may have settled on the inside of the print enclosure door, particularly behind and around the gasket.
Step 1: Vacuum the print enclosure door
Connect a brush attachment to the vacuum hose. Vacuum the inside surface of the print enclosure door.
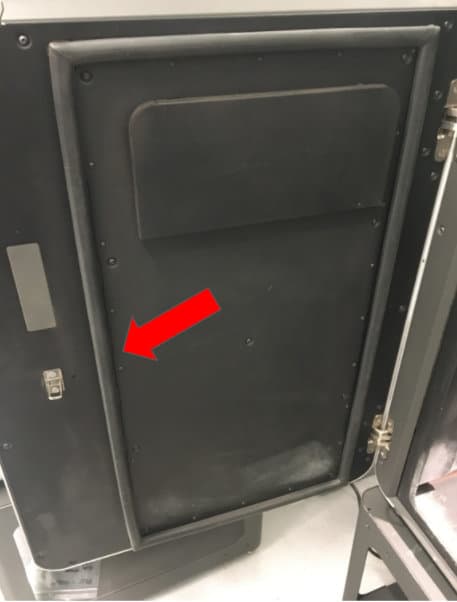
Step 2: Clean behind the door gasket
The print enclosure door has a large rectangular gasket on its inner face. Use compressed air or a gas duster to remove powder from around and behind the gasket.

Notice:
When using compressed air or a gas duster to clean the machine, always keep the vacuum running to catch any mobilized powder.
Cleaning the quartz heaters
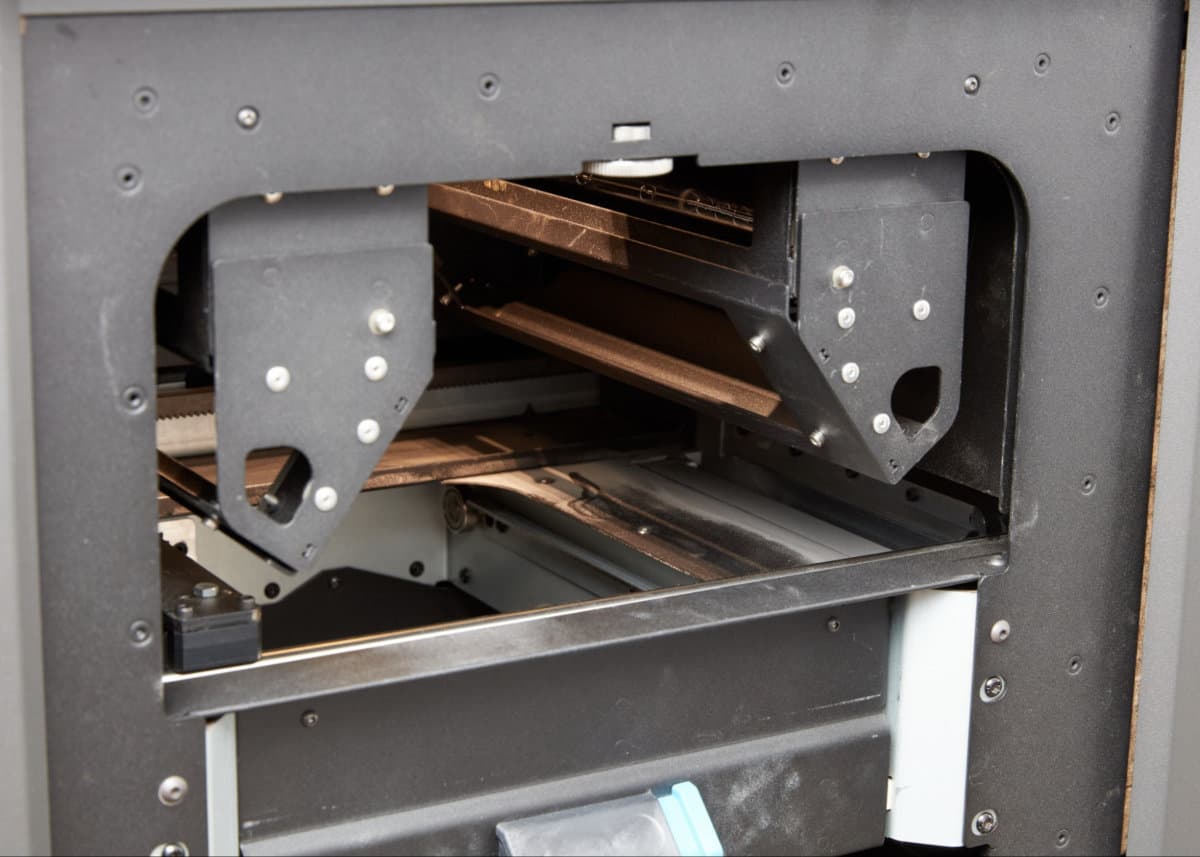
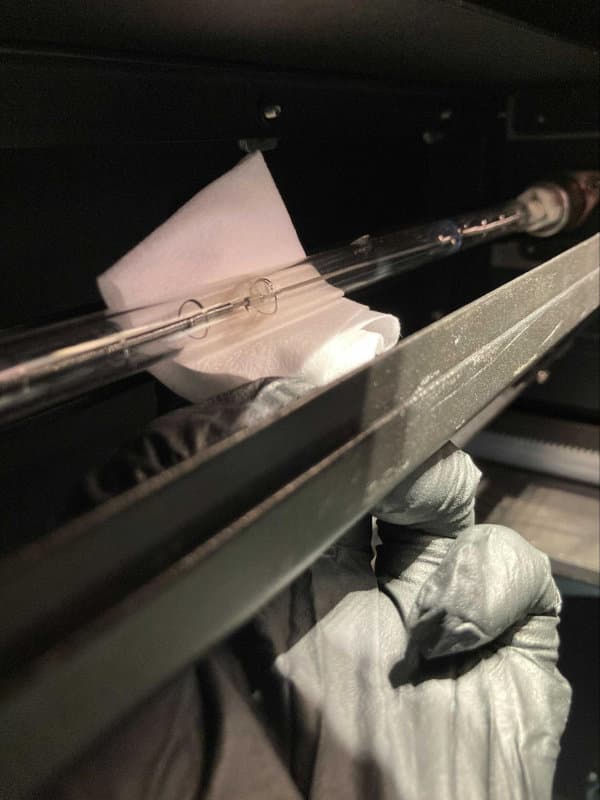
Put on a new, clean pair of nitrile gloves. Carefully wipe the quartz heater tubes with a clean, dry PEC*PAD.
Warning:
The heater tubes are fragile and very sensitive to damage and contamination from skin oils. A damaged or contaminated heater tube may explode when heated. Do not turn on the machine if the heater tubes are damaged or contaminated.
Step 1: Wipe the heater tubes
Two quartz heater tubes run from the front to the back of the printer at the top of the print enclosure. Gently clean one of the heater tubes with a clean, dry PEC*PAD to remove any powder buildup. Repeat with a new PEC*PAD for the other heater tube.

Notice:

Never handle the heater tubes with your bare hands. If at any point bare skin contacts the quartz glass, thoroughly clean the tube with a clean PEC*PAD wetted with ethanol.
Cleaning optical surfaces and sensors
Clean the optical and sensor surfaces: the optical cassette, IR sensor, and upper laser window. Follow the normal cleaning procedures for these components, as you would when doing routine maintenance.
Step 1: Clean the optical cassette
Remove the installed optical cassette and clean it to remove any powder that may have settled on it during cleaning.
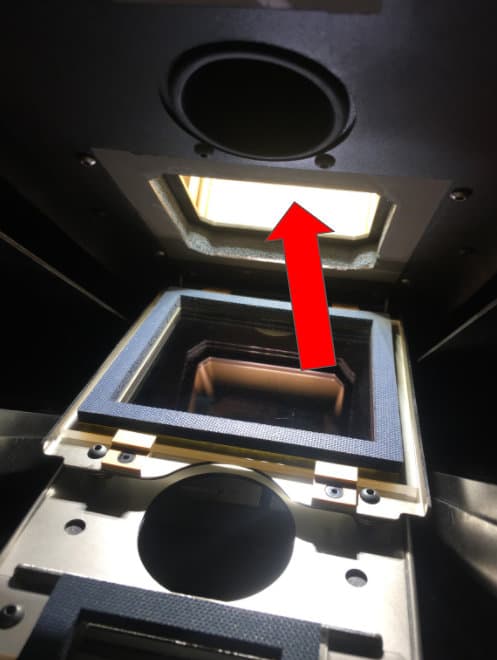
Step 2: Clean the upper laser window
Inspect and clean the upper laser window. Reinstall the optical cassette.
Step 3: Clean the IR sensor
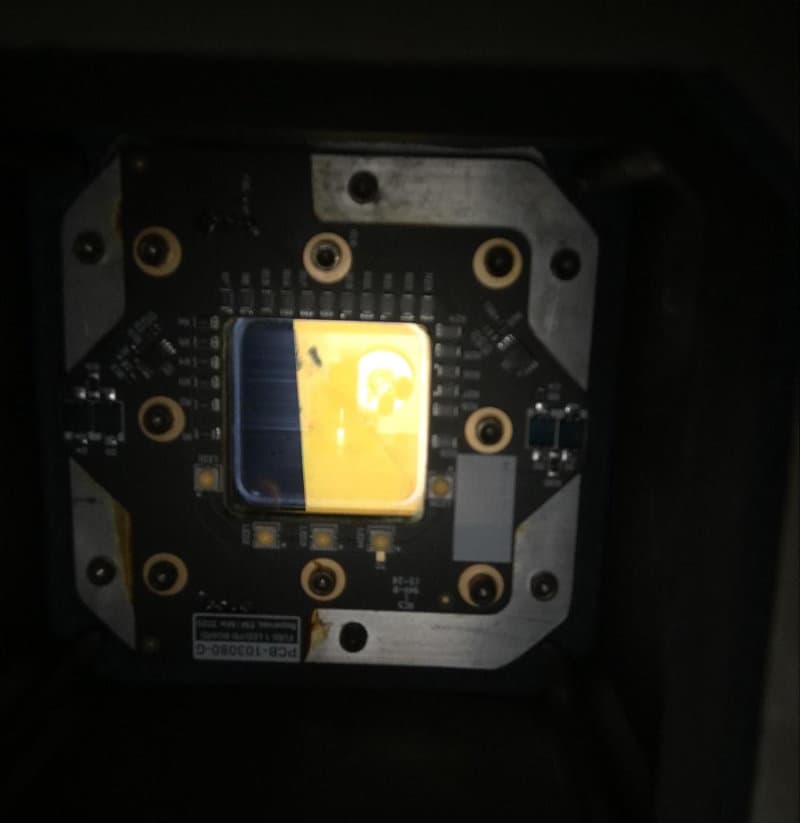
Open the IR sensor door at the top of the printer. Clean the IR sensor. Reinstall the sensor and close the IR sensor door.
Cleaning the air filters
Vacuum or replace the air filters and clean the related air handling hardware. Take care to clean any powder that may be mobilized while working with the filters.
Step 1: Vacuum or replace the air filters
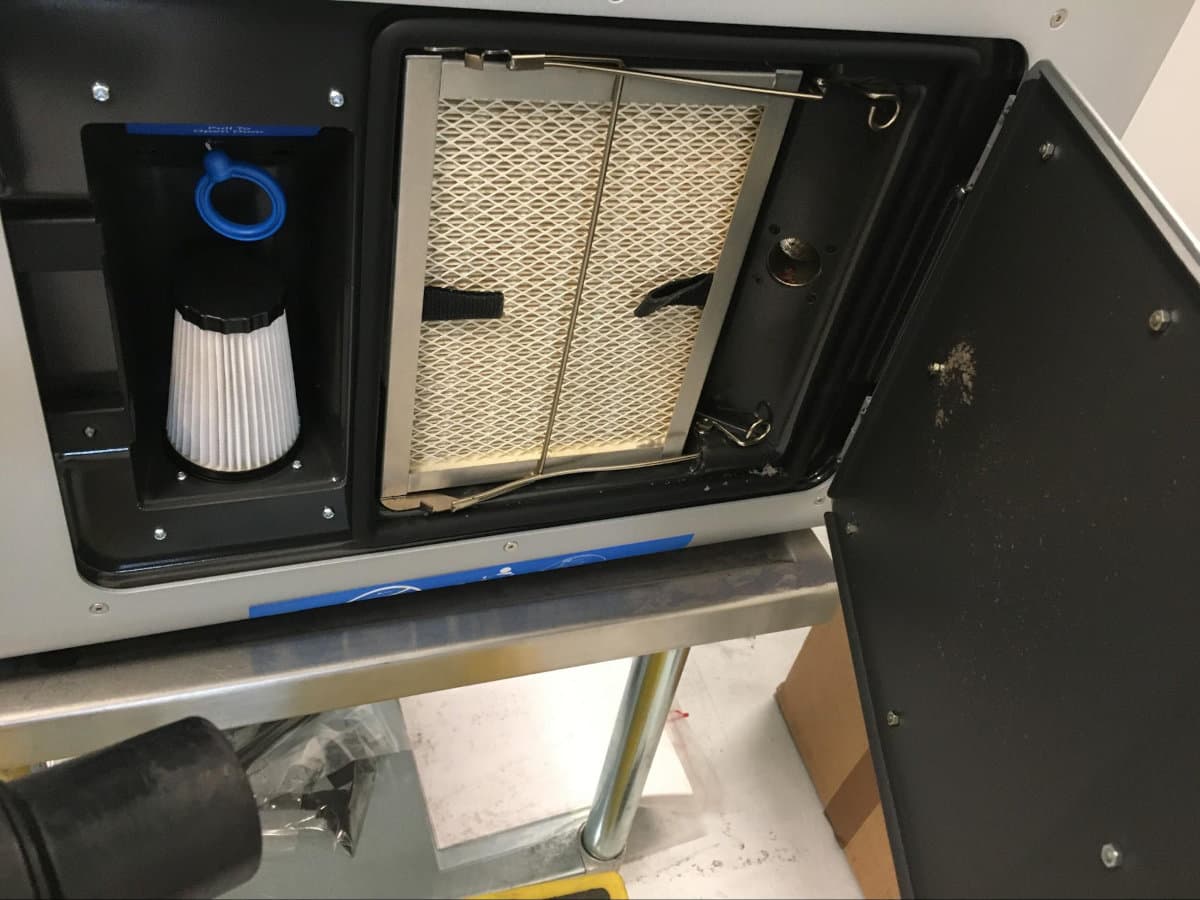
Open the filter cabinet door on the right side of the printer. Clean the air filters, exhaust lines, and exhaust fan. As an alternative, replace both the intake filter and the exhaust filter.
Tip:
Gently use compressed air, a gas duster, or soft brushes to knock powder loose from the filters.
Step 2: Reinstall the air filters
Reinstall the filters and close the filter cabinet door.
Wiping the powder hopper
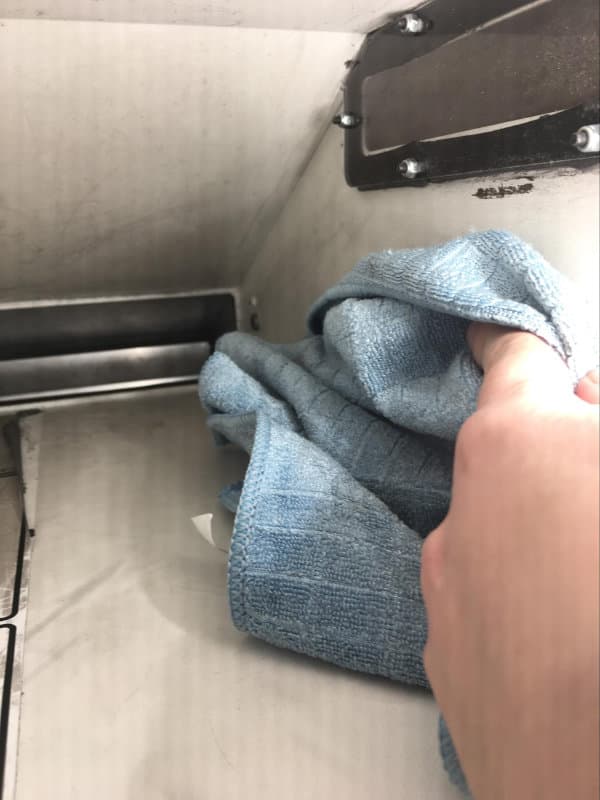
Finish by wiping down the inside of the hopper with a clean microfiber cloth. If you used compressed air to clean inside the print enclosure, powder may have been blown back into the hopper.
Step 1: Wipe the hopper
Wipe the inside of the hopper with a clean microfiber cloth to remove any residual powder.
Next steps
After reinspecting all surfaces and confirming that all powder has been removed from the machine, the cleaning procedure is complete.
If you cleaned the machine in order to transport it, it is now ready to be packaged.
Notice:
Some materials have specific machine setup requirements that are not captured in the UI. Be sure to follow all required setup requirements and part design guidelines for your chosen material:
Closely watch the initial stages of the print for signs of contamination, such as streaking or discoloration from mixed powder types. If signs of contamination are present, stop the print, dispose of any contaminated powder, and repeat all cleaning steps described in this article.