WHITE PAPER
Formlabs Logo

Unboxing and setting up the Fuse 1

Unboxing and setting up the Fuse 1

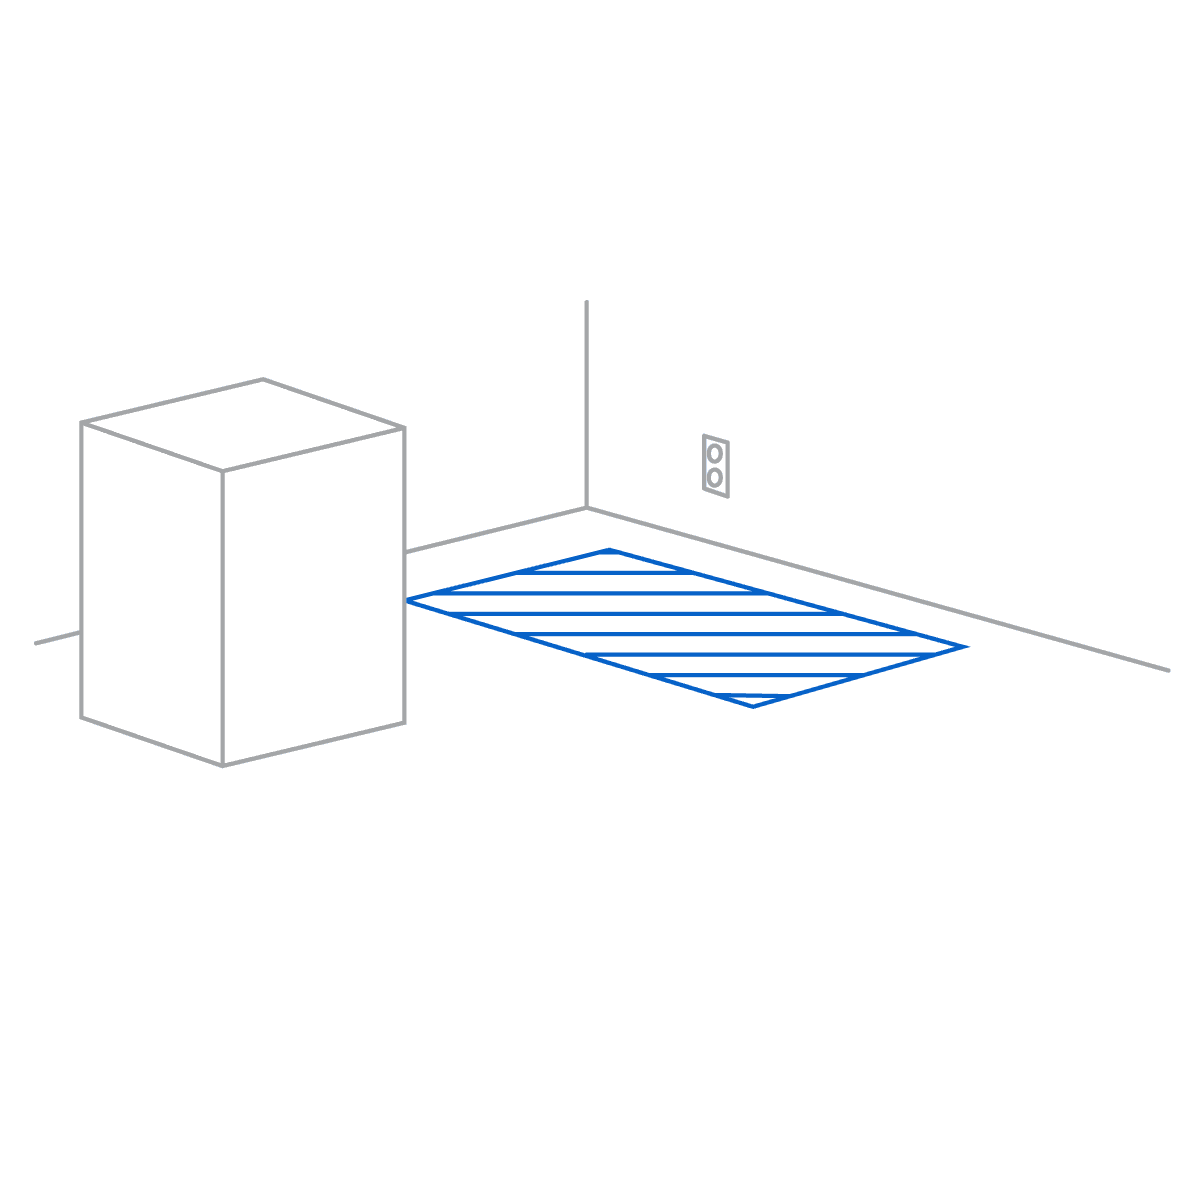
Prior to unboxing and installing the printer, prepare a suitable workspace for the Fuse 1 and Fuse Sift, ensure you have sufficient space to store consumables, and purchase additional supplies so you are ready to process powder when your Fuse 1 arrives.

Follow Formlabs instructions to unbox, connect cables, level the printer and turn on your Fuse 1. Connect the machine to a network to print remotely, manage your printer, and receive notifications about print events.

Receiving

The standard Fuse 1 package ships on a pallet and contains the Fuse 1 printer, stand, build chamber, and powder cartridge. Additional powder cartridges and accessory boxes ship separately from the printer's packaging.

Note:

  • Depending on the package you purchase, the accessories may ship together on a pallet. If you are in a building with palletized deliveries, ensure you have access to the loading dock.
  • As of June 2025, Fuse 1 generation printers are packaged with the build chamber installed but unplugged within the print enclosure.
 PrinterStandBuild chamber (if shipped separately)Powder cartridgePallet including product and boxes (if applicable)
Shipping dimensions80 × 82 × 121 cm
32 × 32 × 48 in
63.5 × 66 × 22.9 cm
25 × 26 × 9 in
41 × 48 × 64 cm
16 × 19 × 25 in
41 × 21 × 27 cm
16 × 8 × 11 in
80 × 83 × 130 cm
32 × 33 × 52 in
Shipping weightPrinter without build chamber:
120.6 kg
265.9 lb

Printer with build chamber:
131.6 kg
290.1 lb
24 kg
53 lb
13.5 kg
29.7 lb
2.3 kg
5 lb
138.4 kg
305.1 lb
Product weightPrinter without build chamber:
114 kg
251.3 lb

Printer with build chamber:
125 kg
275.6 lb
23.9 kg
52.6 lb
11 kg
24.3 lb
1.8 kg
4 lb
n/a

Unboxing

The custom packaging the printer arrives in is specially designed to protect the machine during shipping. During unboxing, inspect the product for any damage or missing items. In the case of damage or missing items, contact Formlabs Support or a certified service provider.

Caution:

Removing the machine from its packaging requires at least two people that are comfortable lifting large and heavy objects.

Step 1: Position the packaging

Position the packaging near the designated location, leaving enough room for two people to comfortably maneuver throughout the area. Stand the packaging upright to ensure it is level.

The printer's packaging is positioned near the designated area.

Step 2: Assemble and position the stand

Locate the box containing the stand and assemble the stand according to the included instructions. Check that the stand is level before unboxing the printer.

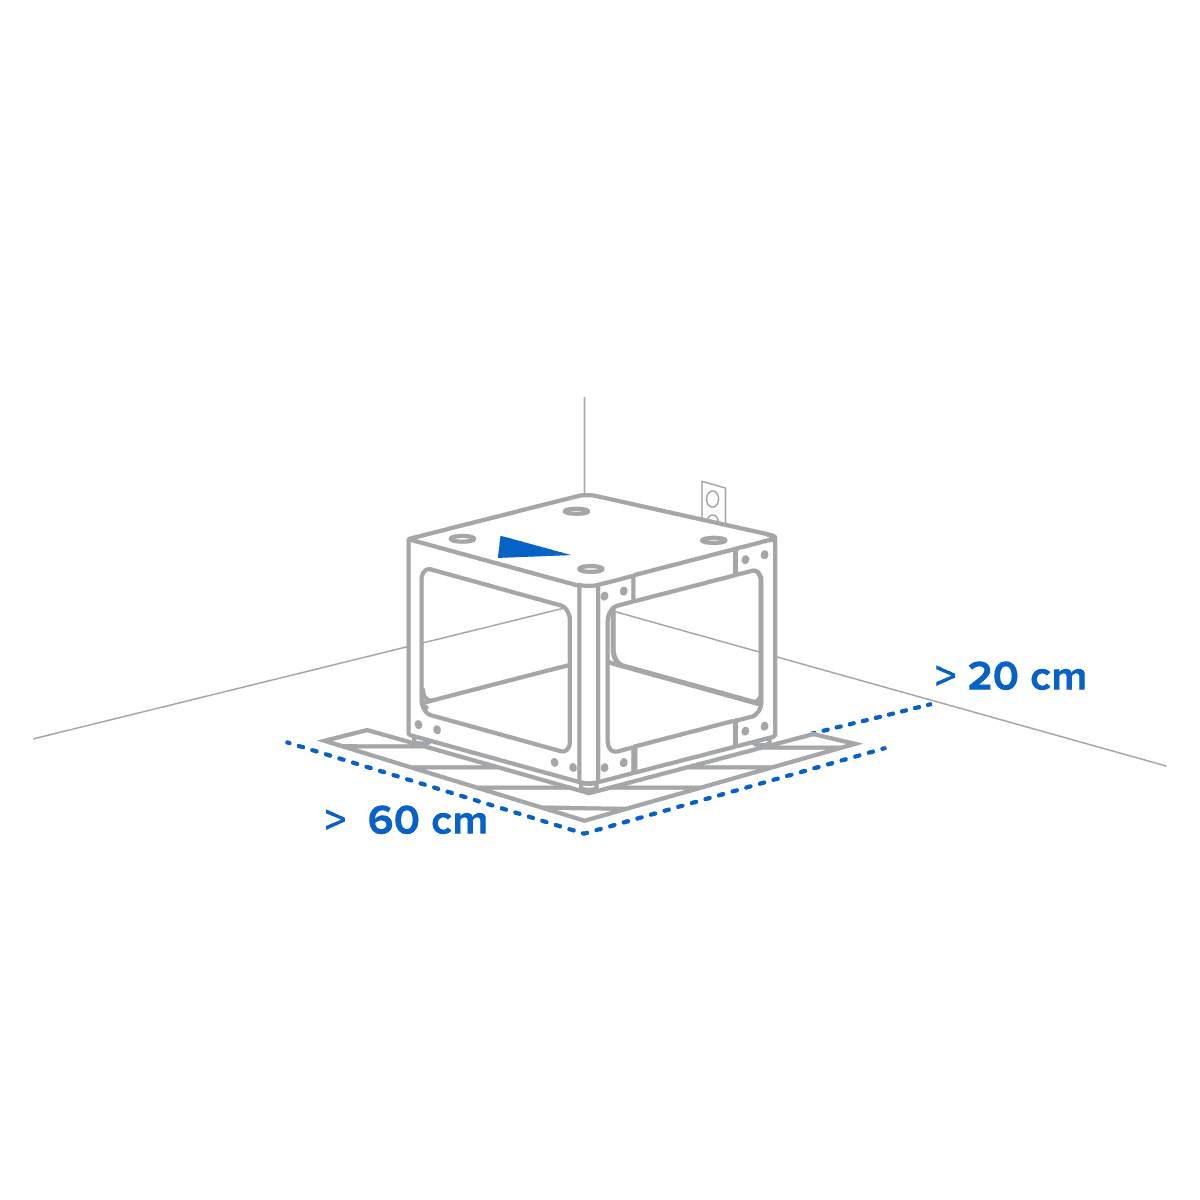
Position the assembled stand in the printer’s designated area with the front facing towards the operator. An arrow on the stand’s instructions indicates the front.

The stand is positioned in the designated area with the front facing towards the operator.

Step 3: Open the box

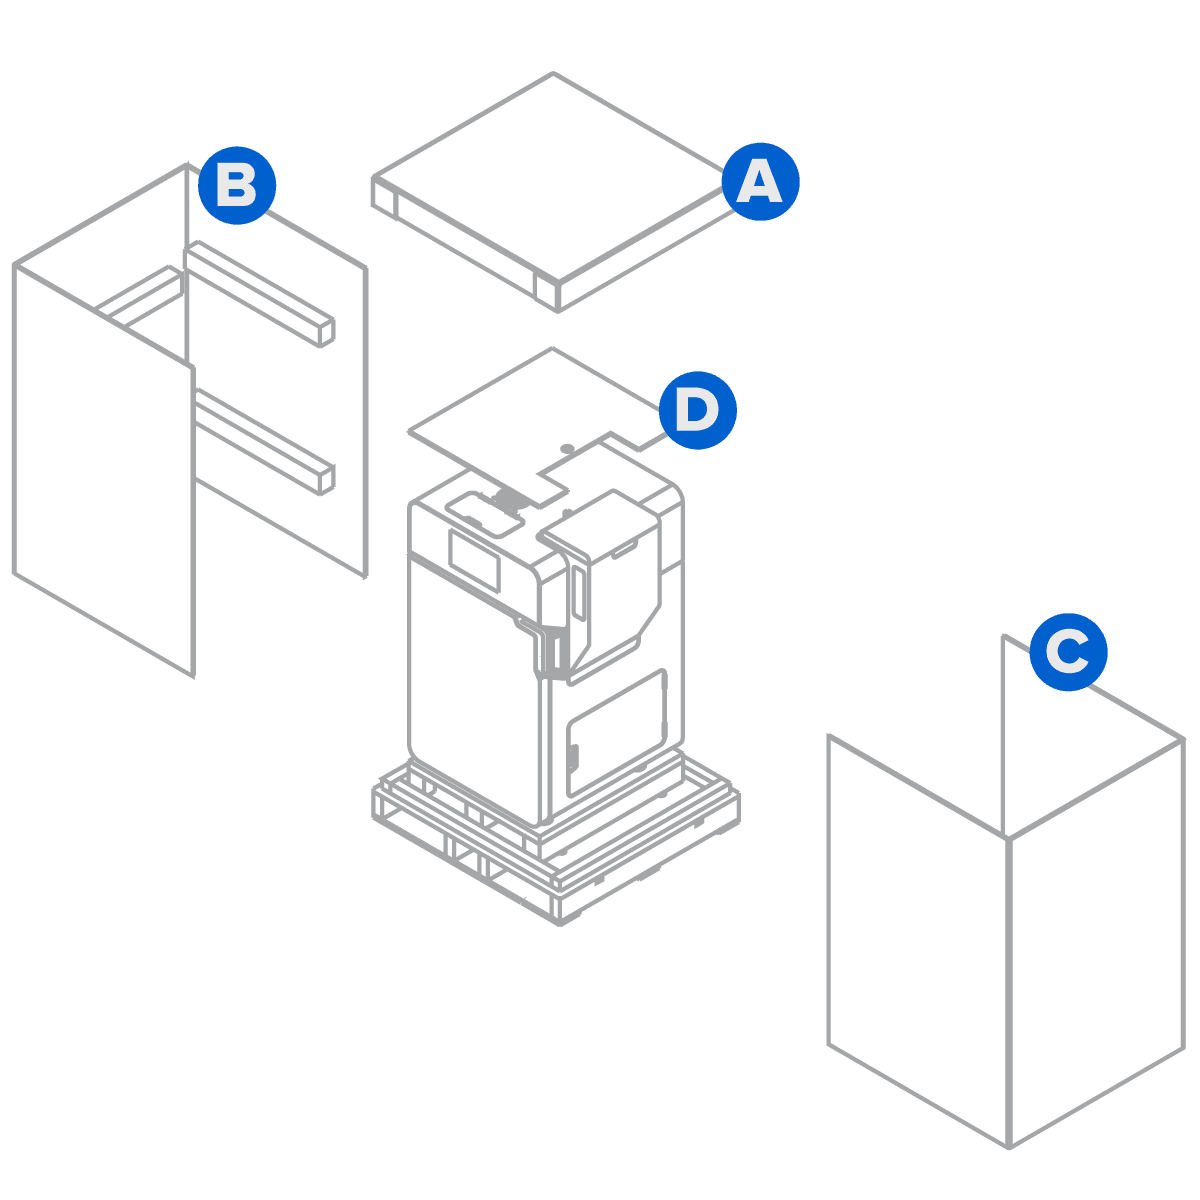
Open the printer’s box from the top by removing the lid (A), then consecutively remove the two C-shaped shells from the left (B) and right (C) sides, and then remove the protective pad (D) from the top of the printer.


Step 4: Remove accessories

Open the hopper and remove the power cable, lifting straps, and optical cassette packed inside.

The printer's packaging should be removed in that order: lid on top first, then two C-shaped shells from left-to-right, and the protective pad last.

Step 5: Loop the lifting straps under the machine

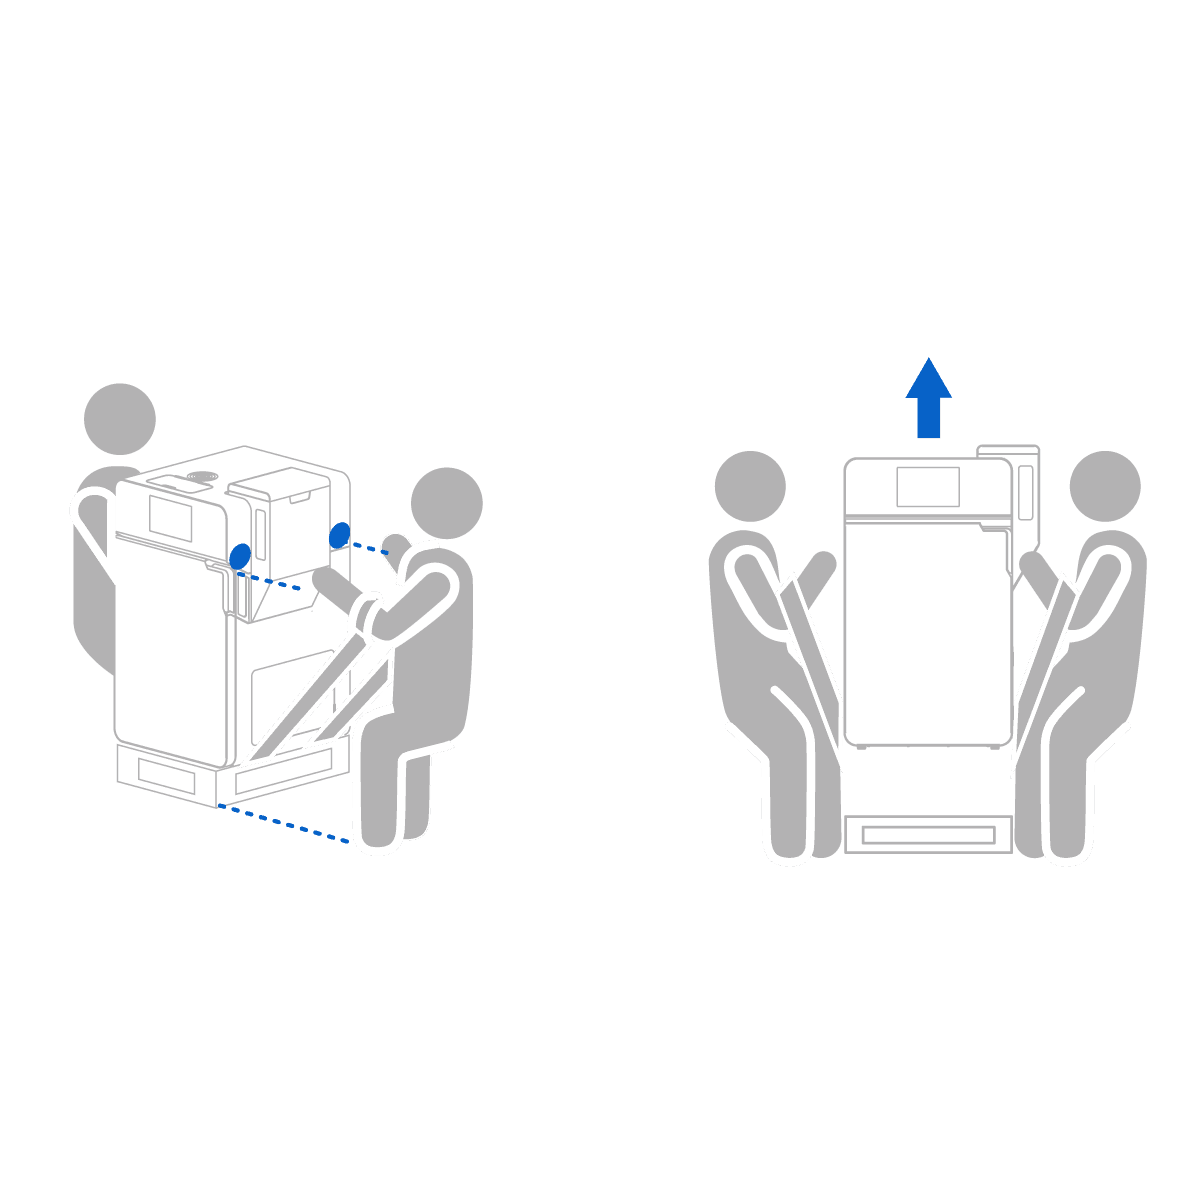
Loop both lifting straps under the machine from left-to-right, ensuring that the straps are not crossed. With one person on each side, insert your forearms into each loop so they do not go past your elbows.

Each person inserts their forearms in each loop, not further than their elbows.

Step 6: Brace against the machine to lift it out the box

With your back straight and knees slightly bent, brace against the machine with your palms as you and a second person lift the unit up.

Two people using the proper technique to lift the printer.

Step 7: Position the machine

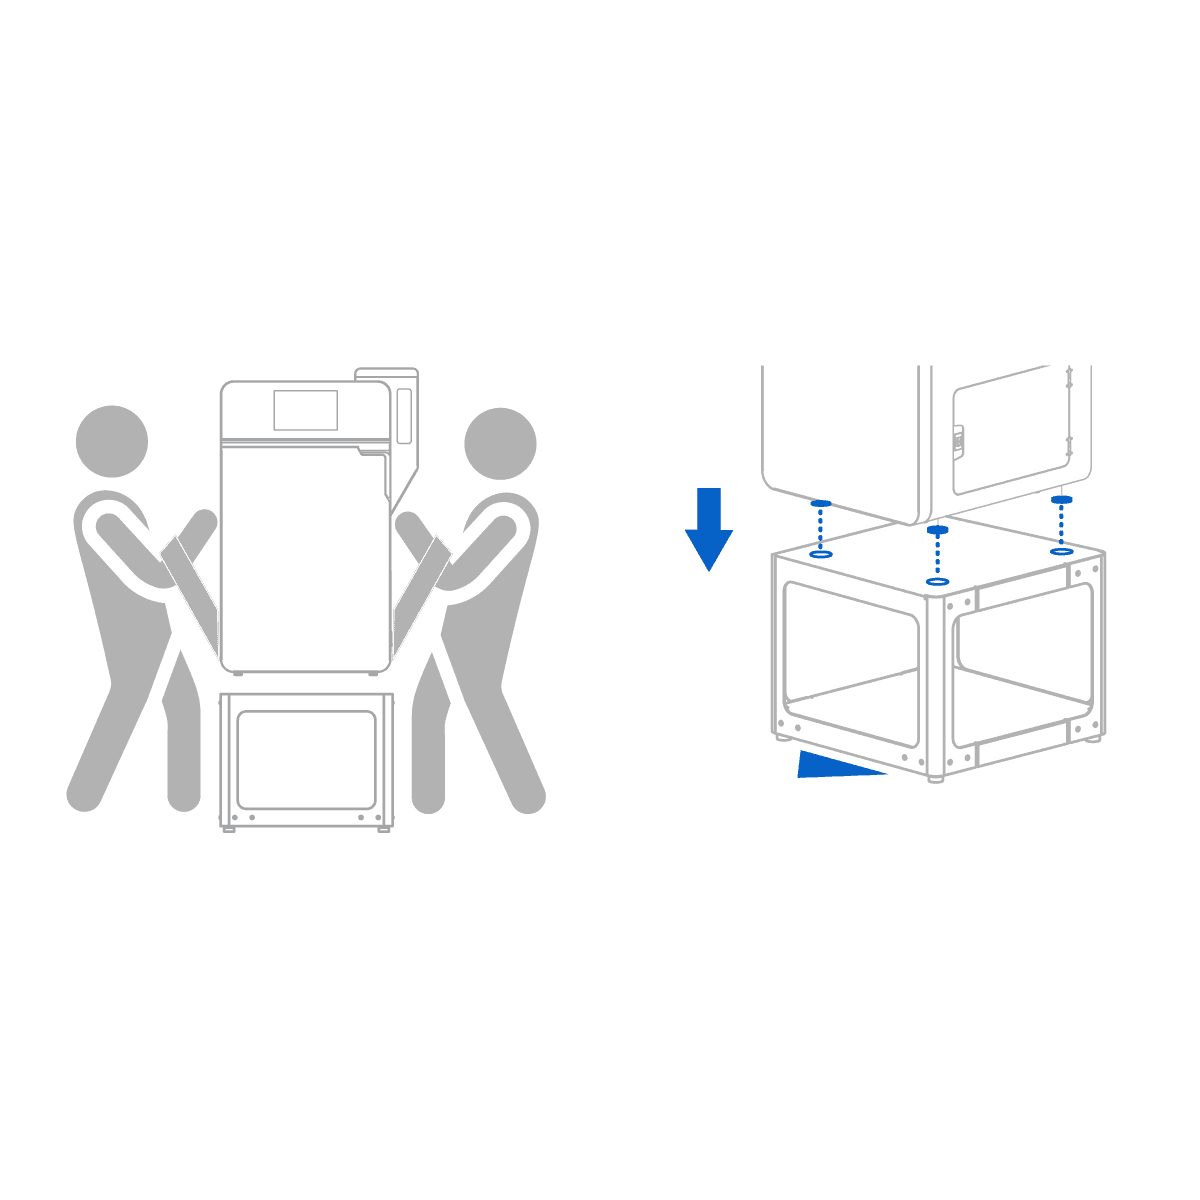
Carefully move the printer onto the stand, keeping the four feet aligned with the corresponding recesses on the stand.


Step 8: Remove additional packaging material

Remove any additional wrapping and packaging from outside of the printer before connecting the machine to power.

Two people align the printer's four feet with the recesses onto the stand.

Caution:

If you need to readjust the machine, use the lifting straps to pick it back up. Do not pick up the machine without lifting straps.

Note:

The original packaging is designed to be kept and reused for transporting or shipping the machine for service. Save the complete packaging including any inserts for your convenience.

Installing

Connect the cables and install the Wi-Fi antenna, then turn on the machine. Last, connect the Fuse 1 to a network via Wi-Fi or Ethernet.

Step 1: Connect the cables

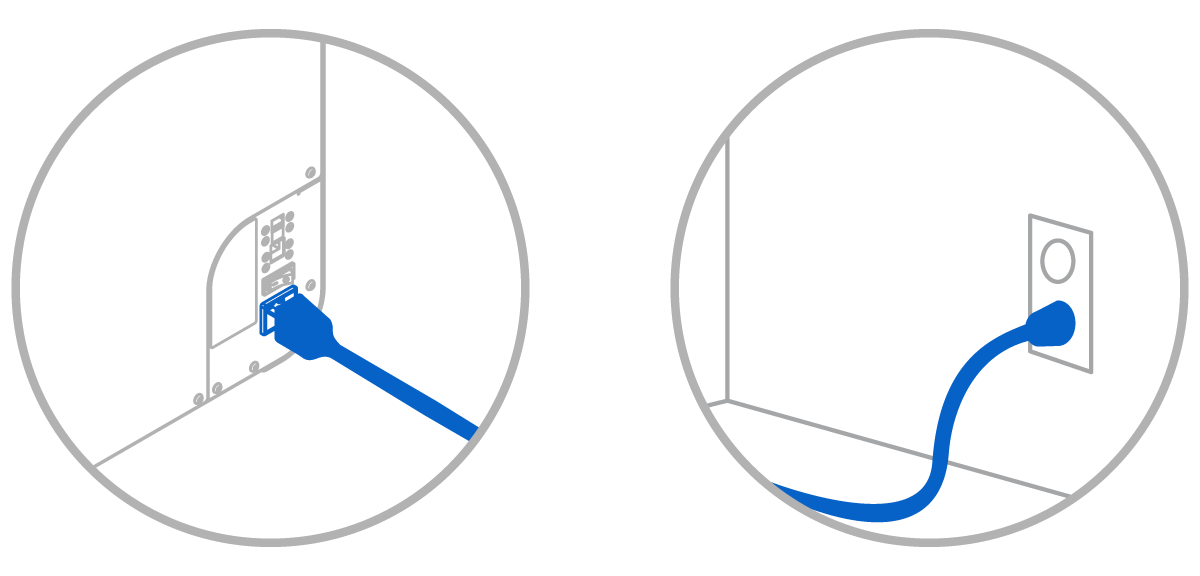
Plug the included power cable into the power port on the back of the unit and connect the power cable to a dedicated circuit.

Power cable plugged into the power port on the back of the unit and into a power outlet.

Notice:

The Fuse 1 requires a dedicated AC circuit, providing at least 7.5 A at 230 VAC (EU) or 15 A at 120 VAC (US), as well as reliable grounding. This circuit must be separate from other devices, including the corresponding Fuse Sift, fans, vacuums, power tools, space heaters, or any large appliances or power tools. Power surges may disrupt prints and/or permanently damage sensitive components, jeopardizing the reliability of the product. Formlabs suggests the use of line conditioners or UPS in regions with voltage fluctuations.

Leveling

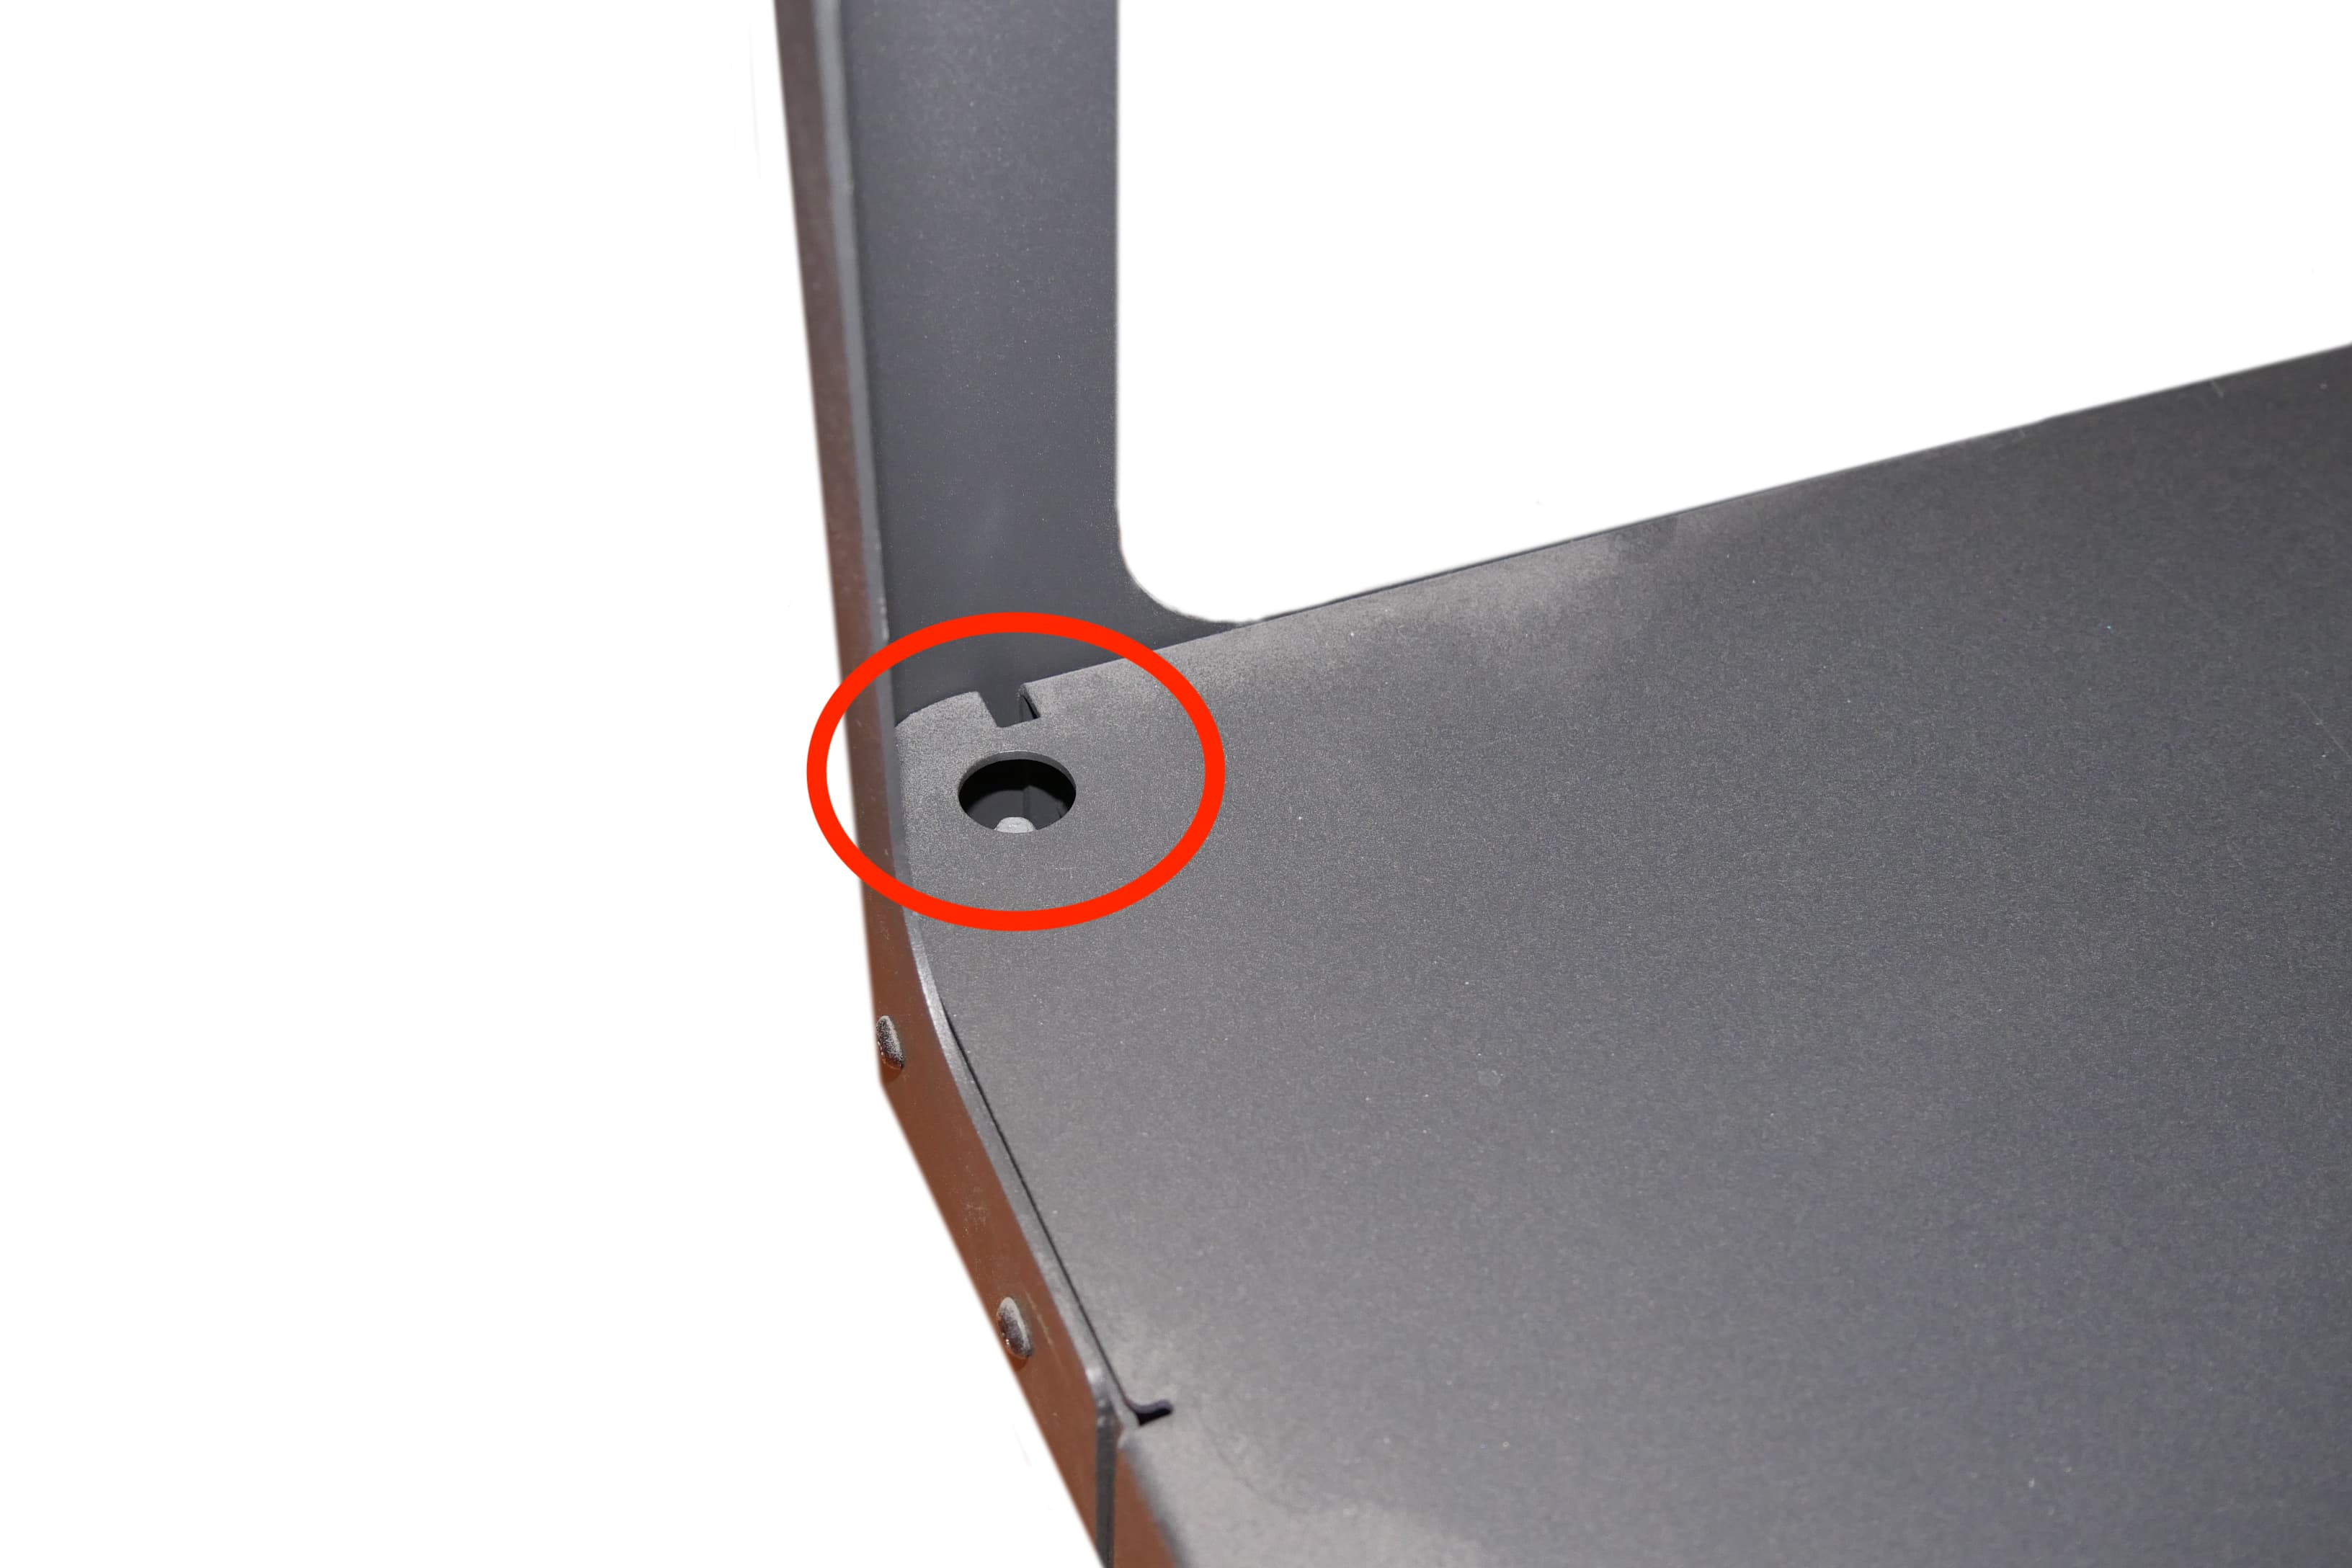
The printer must be completely level before printing can begin. If prompted, use a 7 mm hex socket to raise or lower each foot of the stand.

Step 1: Follow the on-screen prompts

As the printer initiates, the Formlabs logo with a progress bar appears on the touchscreen, followed by the onboarding process. If necessary, the touchscreen prompts you to level the printer.

Step 2: Adjust the stand’s feet (if needed)

The top of each of the stand’s feet ends in a 7 mm hex head. Using a 7 mm hex socket, turn the foot as indicated on the touchscreen to adjust its height. Adjust the feet until the touchscreen indicates the printer is level.
alttext

Connecting

Step 1: Connect to a network

For uploading print jobs to the Fuse 1 and remotely monitoring the printer, ensure that the machine maintains a constant connection to a secured network. The machine also connects directly to a computer via USB.

Step 2: Register your Fuse 1 on Dashboard

Register the machine to Dashboard through the touchscreen. Connecting only to a local area network is not sufficient for sending data to Dashboard.