技術白書
Formlabs Logo

Quick Start Guide (Form 3B/Form 3B+)

Quick Start Guide (Form 3B/Form 3B+)

This guide illustrates the printer’s various components, the initial setup, and how to begin printing. For additional information, consult the Form 3B/Form 3B+ manual and safety documentation.

Warning:

Read and understand all relevant safety instructions before using the Form 3B/Form 3B+.

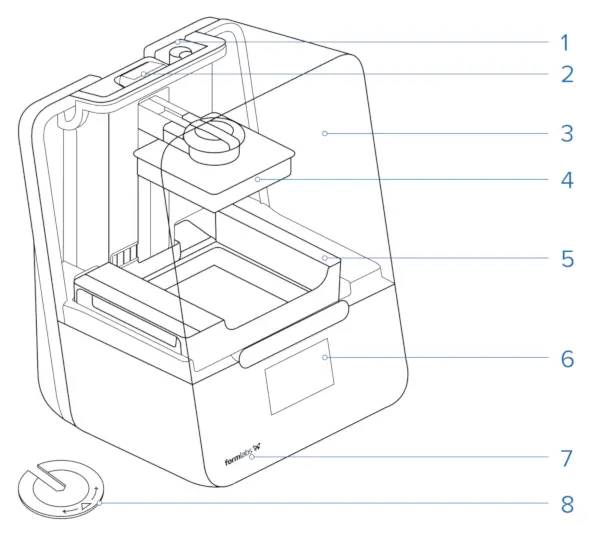
プリンタの構成要素

  1. レジンカートリッジ
  2. ステータスライト
  3. カバー
  4. ビルドプラットフォーム
  5. レジンタンク
  6. タッチスクリーン
  7. ステータスライト
  8. レベリングディスク
Form 3B/Form 3B+ components

For additional information on printer components, refer to the support article: Product glossary (Form 3B/Form 3B+).

ロック解除

プリンタの輸送中、中にあるLight Processing Unit(LPU)はラッチによって固定されています。

備考:

プリンタを電源に接続する前に、ラッチを取り外します。

LPUハウジングを輸送位置から外すには:
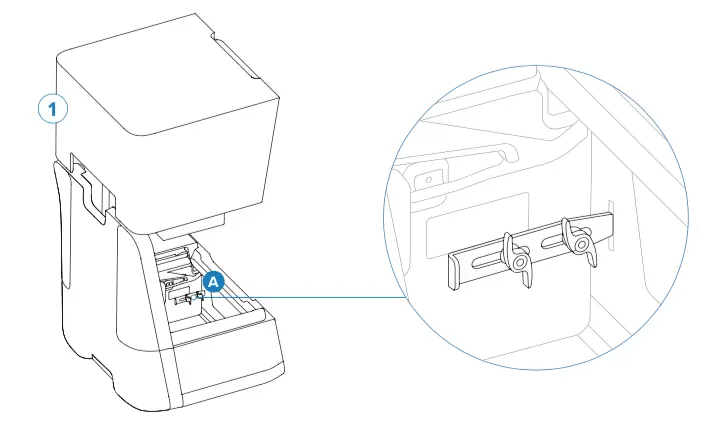
  1. LPUハウジングのラッチ(A)の位置を確認します。
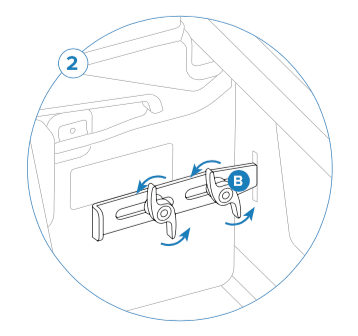
  1. つまみネジ(B)を緩めて、LPUのラッチを取り外します。
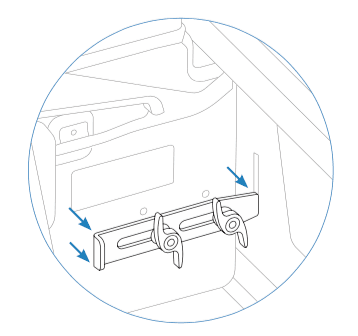
  1. つまみネジとラッチを元の梱包材と共に保管しておきます。プリンタを輸送する際、LPUはつまみネジとラッチで固定されている必要があります。

For additional information on removing the LPU latch, read our support article on receiving and unboxing the Form 3B/Form 3B+.

プリンターの電源を入れる

プリンタを使用する水平な場所に配置します。電源ケーブルをプリンタとコンセントに接続します。
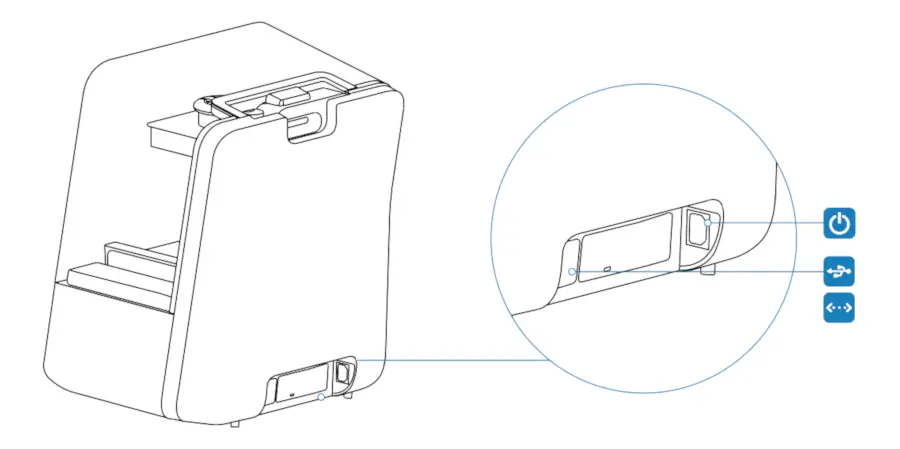
Form 3B/Form 3B+ plugs

セットアップ

タッチスクリーンに表示される指示に従ってセットアップ手順を完了します。
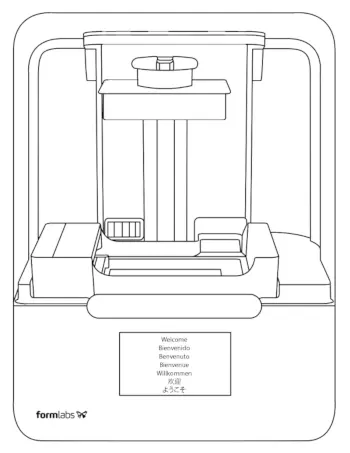
  1. プリンターを水平にします。
  2. ネットワークの接続をセットアップします。
  3. プリンターのファームウェアを最新バージョンに更新します。
  4. 消耗品(レジンカートリッジ、レジンタンク、ビルドプラットフォーム)を装着します。
Form 3B/Form 3B+ setup procedure

追加の製品サポートが必要な場合は、Formlabsサポートまたは正規販売代理店にご連絡ください。

次のステップ

Once you’ve set up your Form 3B/Form 3B+, download PreForm to your computer and start printing.

Step 1: Prepare a file for printing

After downloading PreForm, read the support articles on designing successful 3D models and using PreForm to learn more about the software and preparing models for printing on Formlabs SLA printers.

If this is your first time using PreForm, an onboarding tutorial will appear and walk you through the software’s capabilities. Click Help > Show Onboarding Tutorial to review this information at any time.

When you’re ready, send your print to your Form 3B/Form 3B+ and start printing.

Step 2: Start a print

Step 3: Register your printer on Dashboard

Add your printer to Dashboard to track print progress, manage printers, and more. Read the support articles on using Dashboard to learn more.

Step 4: Finish your printed part

Once the print is complete, remove the build platform from the printer, wash any remaining liquid resin off your printed part, and post-cure and remove supports as necessary. Read the support article on SLA basic finishing steps to learn more.

Step 5: Between prints

Between prints, be sure to keep your Form 3B/Form 3B+ clean, paying particular attention to spilled resin. Handle the Form 3B/Form 3B+ resin tank with care to ensure print success and printer reliability.