
備品:
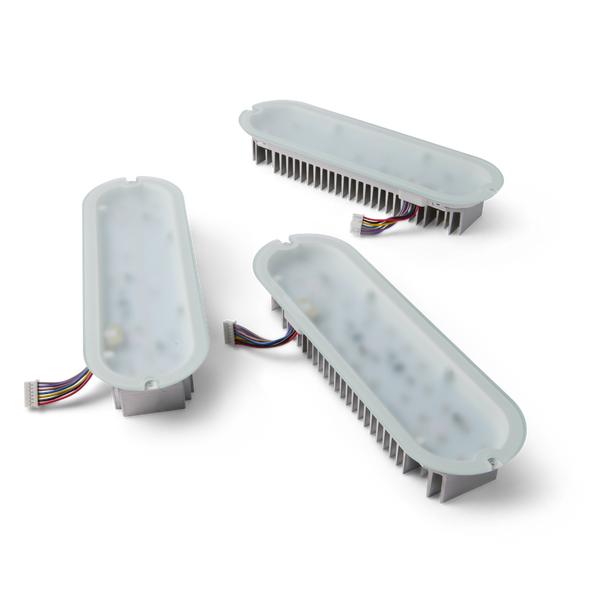
Formlabs:- 交換用LEDモジュール
- 2.5mm六角ドライバー(Form 4のツールキャディに付属)
- マイナスドライバー
- ニトリル手袋

Form Cure(第2世代)には、二次硬化中に造形品に光を照射する3つのLEDモジュールが搭載されています。LEDモジュールのいずれかに不具合や故障があった場合、造形品が適切に二次硬化されず、最適な機械的特性を得られない可能性があります。
このガイドを参照し、Form Cure(第2世代)のLEDモジュールを取り外して交換してください。
備品:
Formlabs:所要時間(目安): 20~30分(マシンを最近使用した場合や複数のモジュールを交換する場合は、二次硬化チャンバーを冷却するために追加の時間が必要になる場合があります)
危険:
この操作マニュアルに記載されている安全に関する指示内容や注意事項をすべて熟読し、順守してください。間違った部品と交換すると、火傷、電気ショック、火災または爆発につながる恐れがあります。廃棄する部品はすべて、現地の法規制に従って処分してください。
作業スペースを用意する
概要: LEDモジュールを交換するために、Form Cure(第2世代)と作業スペースを準備します。
ステップ1:作業スペースを準備する
マシンの周りに作業スペースを確保します。作業スペースはよく換気された埃のない場所に確保してください。
ステップ2:硬化チャンバーを清掃する
警告:
レジンが肌に触れると、皮膚炎またはアレルギー性皮膚反応の原因になる恐れがあります。液体レジンまたはレジンが付着した表面に触れる際は、必ず手袋を着用してください。レジンが皮膚に付着したら、石鹸と水で念入りに洗い流してください。
Form Cureのドアを開けます。二次硬化チャンバー内に溜まったレジンや硬化したレジンをペーパータオルで拭き取ります。必要に応じて、ペーパータオルをイソプロピルアルコール(IPA)で湿らせます。
危険:
IPAは可燃性の溶剤です。容器は必ず蓋が閉じた状態で、お子様の手が届かないところで保管してください。IPAを使ってクリーニングを終えたら、二次硬化サイクルを開始する前に、IPAを完全に蒸発させてください。
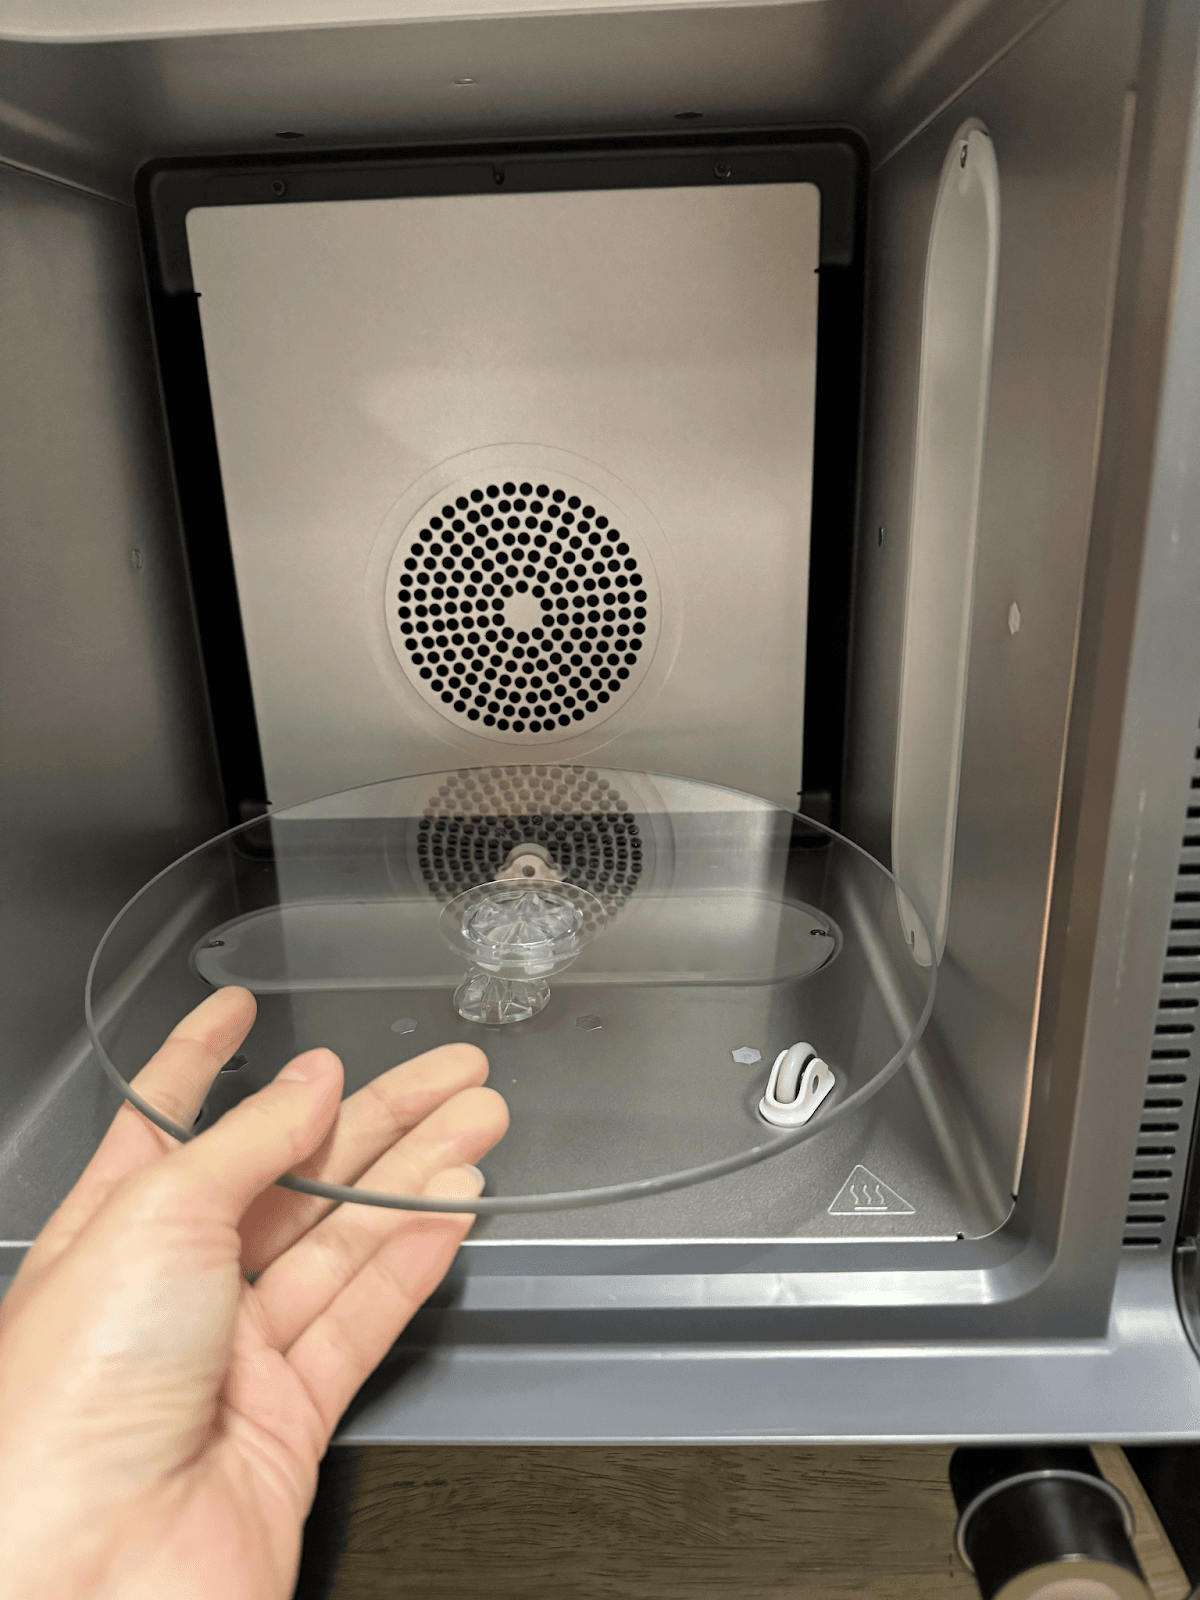
ターンテーブルを直接上方に持ち上げてローラーから外し、脇に置きます。
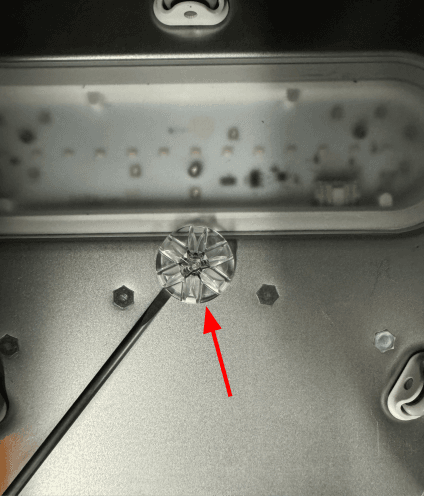
マイナスドライバーを使ってターンテーブルマウントを取り外します。ターンテーブルマウントは、後で再装着するために脇に置いておきます。
ステップ5:マシンの電源を切る
本体背面の電源スイッチを使ってマシンの電源を切ります。作業を進める前に、プリンターに接続されている電源ケーブルを抜きます。マシンの電源ケーブルをコンセントに繋いだままメンテナンス作業を行わないでください。マシンの電源を切って5分ほど待ってから作業を開始してください。マシンを使用したばかりであれば、二次硬化チャンバーは温かくなっています。チャンバー内が冷えるまで少なくとも10分間待ちます。
危険:
電源プラグをコンセントに差し込んだままマシンのメンテナンスを行うと、感電のリスクが高まります。マシンのパネルを取り外す際は、必ず電源ケーブルをコンセントから抜いてから作業してください。パネルを外している間は、絶対にマシンの電源を再投入しないでください。
LEDモジュールの交換
概要: ネジを外し、プラグを抜いて、故障したLEDモジュールを取り外します。
ステップ1:LEDモジュールの固定ネジを外す
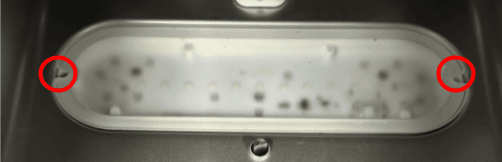
2.5mmの六角ドライバーを使って、故障したLEDモジュールをマシンに固定している2本のLEDモジュール固定ネジを緩めて取り外します。外したネジは脇に置いておきます。
ステップ2:LEDモジュールのケーブルを外す
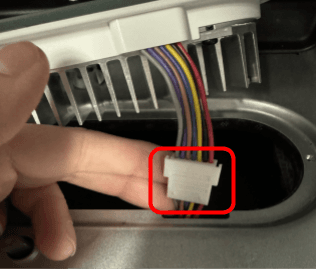
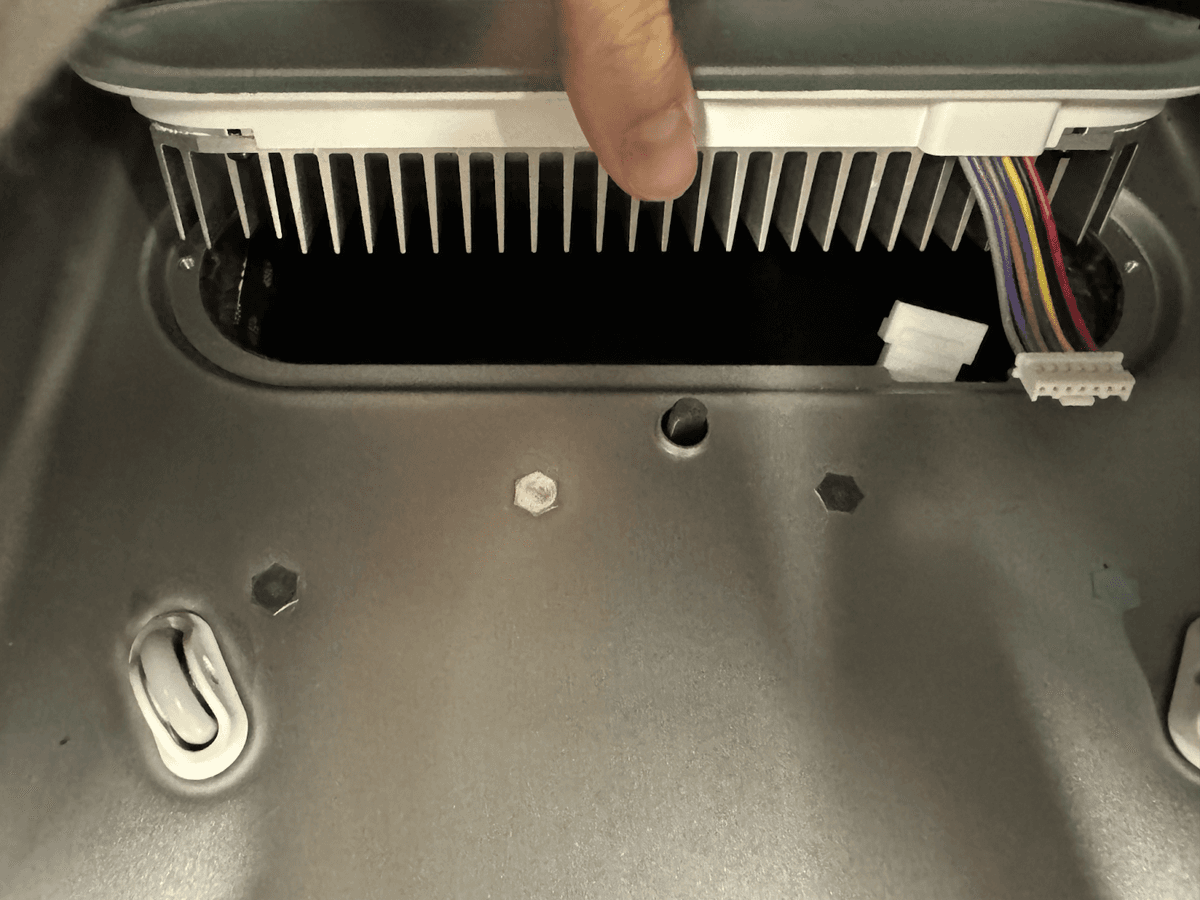
LEDモジュールをマシンからゆっくりと持ち上げます。LEDモジュールはまだ本体に接続されているため、引っ張らないでください。交換するモジュールのコネクタをつかみ、取り外します。ケーブル抜去時、ケーブル本体を引っ張らないでください。ケーブルがキャビティに落ちないようにしてください。
ステップ3:LEDモジュールを取り外す
LEDモジュールをマシンから取り外します。LEDモジュールは電子廃棄物として廃棄するため、脇に置いておきます。
ステップ4:他のLEDモジュールを取り外す(オプション)
交換する他のLEDモジュールについても、ステップ1~3を繰り返します。
交換用LEDモジュールの取り付け
概要: 交換用LEDモジュールを取り付けて固定します。
ステップ1:交換用LEDモジュールを合わせる
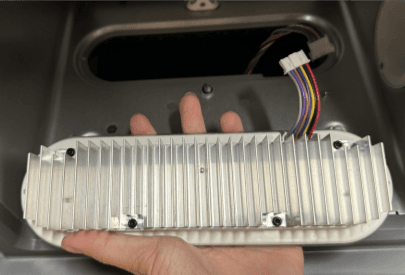
LEDを二次硬化チャンバーのキャビティに合わせ、モジュール内のLEDケーブルを二次硬化チャンバーの対応するケーブルコネクタに合わせます。
ステップ2:LEDモジュールのケーブルを接続する
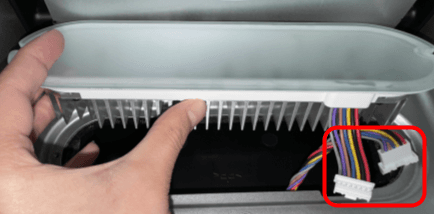
LEDモジュールのケーブルを交換用LEDモジュールに接続します。コネクタは正しい向きでのみモジュールに差し込むことができます。差し込む際、コネクタ内のピンが折り曲がらないようにご注意ください。
ステップ3:交換用LEDモジュールを取り付ける
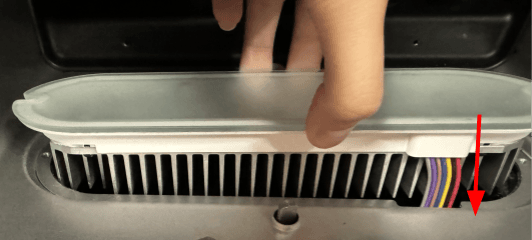
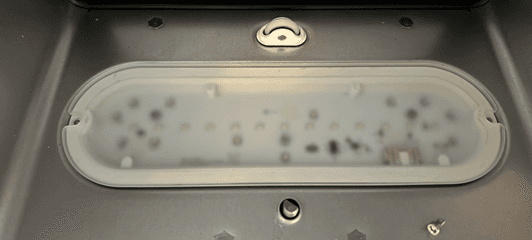
交換用 LEDモジュールを取り付け面に置きます。ケーブルハーネスがキャビティ内にあり、LEDモジュールが内側のパネルと同じ高さになっていることを確認します。
ステップ4:交換用LEDモジュールを固定する
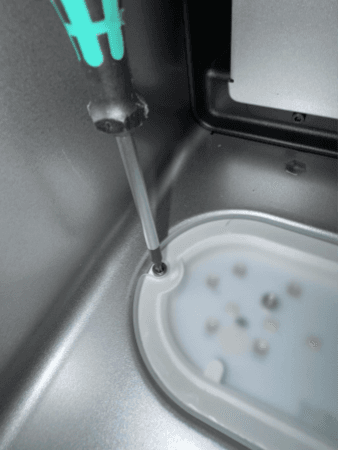
LEDモジュール固定用ネジを2つのネジ穴に1本ずつねじ込みます。2.5mmの六角ドライバーを使用して、ネジをしっかりと締め付けます。
ステップ5:他のLEDモジュールを取り外す(オプション)
交換する他のLEDモジュールについても、ステップ1~4を繰り返します。
修理を完了する
概要: 交換用LEDモジュールを取り付けた後、マシンの電源を入れ、最終チェックを行います。
ステップ1:ターンテーブルマウントとターンテーブルを取り付ける
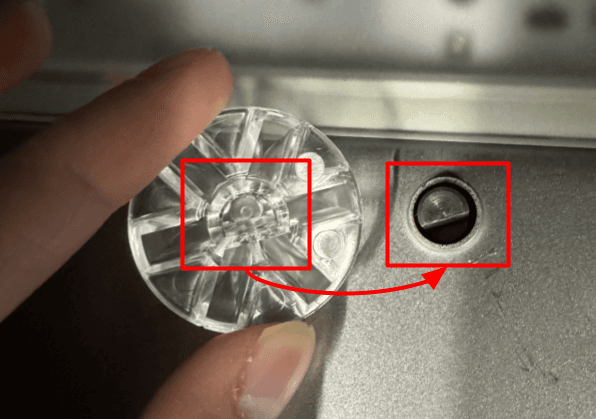
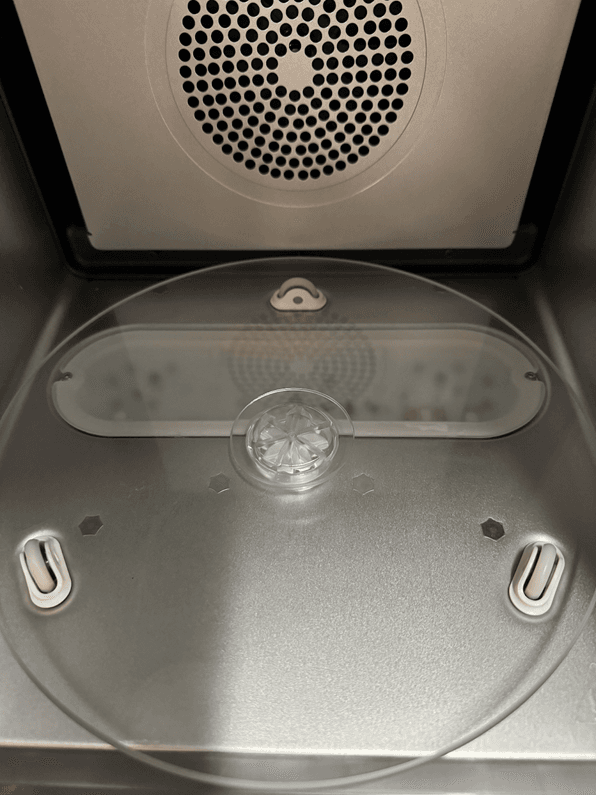
ターンテーブルマウントを、二次硬化チャンバー内の対応するプロファイルに合わせます。押し込んで所定の位置に固定します。ターンテーブルをターンテーブルマウントに置きます。
ステップ2:Form Cureの電源を入れる
Form Cureのドアを閉めます。電源ケーブルをForm Cureと電源に接続します。Flip the breaker switch on the back of the unit to the ON position to turn on the machine. Form Cureが初期化されます。
ステップ3:修理のテスト