技術白書
Formlabs Logo

Replacing the Form Cure (2nd Generation) heaters

Replacing the Form Cure (2nd Generation) heaters

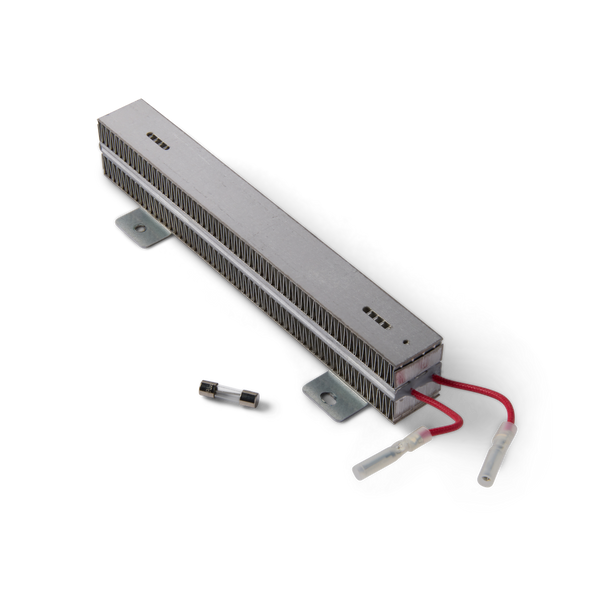
The Form Cure contains two heaters that heat printed parts during post-curing. If the heaters are broken or malfunction, printed parts may not post-cure properly and may not reach their optimal mechanical properties. Replace the heaters to restore proper functionality.

Use this guide to replace the Form Cure (2nd Generation) heaters.

Form Cure (2nd Generation) heater

Required Supplies:

Formlabs:

  • 2 heaters
  • 2 mm hex driver (included in the Form 4/Form 4L tool caddy)
  • 2.5 mm hex driver (included in the Form 4/Form 4L tool caddy)

Third-party:

  • Nitrile gloves
  • Phillips or flat head screwdriver
  • Anti-static grounding strap

推定所要時間: 30分

Notice:

Formlabs devices contain sensitive electronic components. Ground yourself before touching any electronics in the machine by using an antistatic wrist band or touching a grounded piece of metal.

作業スペースを用意する

Overview: Prepare the Form Cure (2nd Generation) and workspace for replacing the heater.

Step 1: Prepare the workspace

Clear a workspace around your machine. Ensure that the workspace is well-ventilated and free of dust.

Step 2: Clean the Form Cure chamber

警告:

レジンが肌に触れると、皮膚炎またはアレルギー性皮膚反応の原因になる恐れがあります。液体レジンまたはレジンが付着した表面に触れる際は、必ず手袋を着用してください。レジンが皮膚に付着したら、石鹸と水で念入りに洗い流してください。

Form Cureのドアを開けます。二次硬化チャンバー内に溜まったレジンや硬化したレジンをペーパータオルで拭き取ります。必要に応じて、ペーパータオルをイソプロピルアルコール(IPA)で湿らせます。

危険:

IPAは可燃性の溶剤です。容器は必ず蓋が閉じた状態で、お子様の手が届かないところで保管してください。IPAを使ってクリーニングを終えたら、二次硬化サイクルを開始する前に、IPAを完全に蒸発させてください。

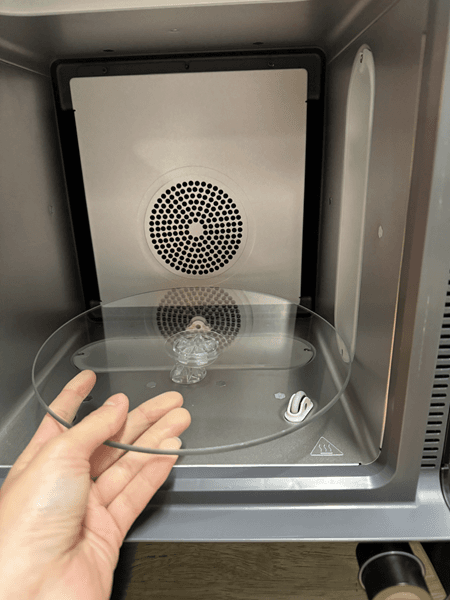
Step 3: Remove the turntable

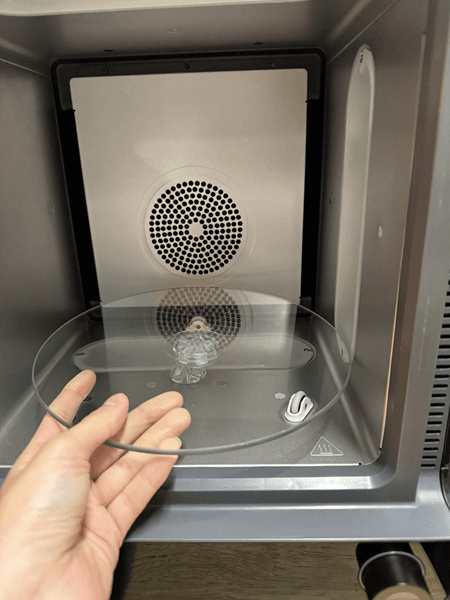
Remove the turntable

Lift the turntable directly upwards off the rollers and set it aside.

Step 4: Unplug the machine

Turn off the machine using the power switch on the back of the unit. Disconnect the power cable before continuing with maintenance. Do not perform maintenance on the machine while it is connected to power. Wait five minutes after disconnecting the machine from power before proceeding. If the machine was recently in use, the post-cure chamber will be warm. Wait at least 10 minutes for the chamber to cool.

危険:

電源プラグをコンセントに差し込んだままマシンのメンテナンスを行うと、感電の危険性が高まります。マシンのパネルを取り外す際は、必ず電源ケーブルをコンセントから抜いてから作業してください。パネルを外している間は、絶対にマシンの電源を再投入しないでください。

ヒーターの取り外し

Overview: Remove the heater cover panel to remove the heaters.

Step 1: Remove the heater cover panel screws

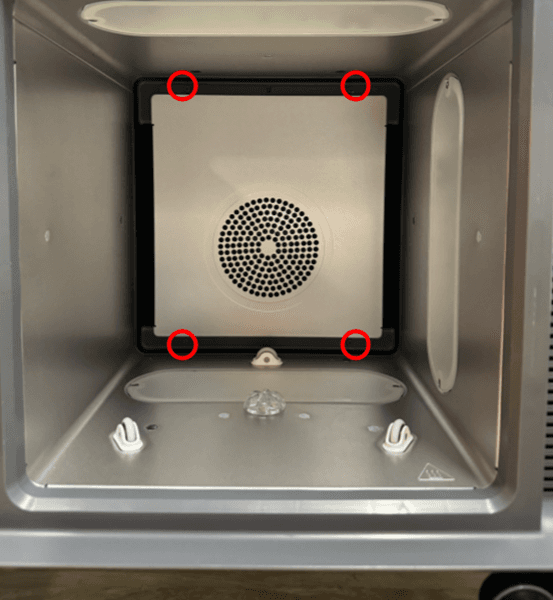
Remove the heater cover panel screws

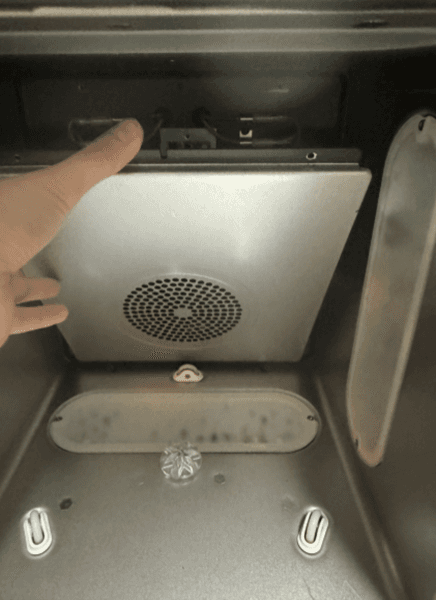
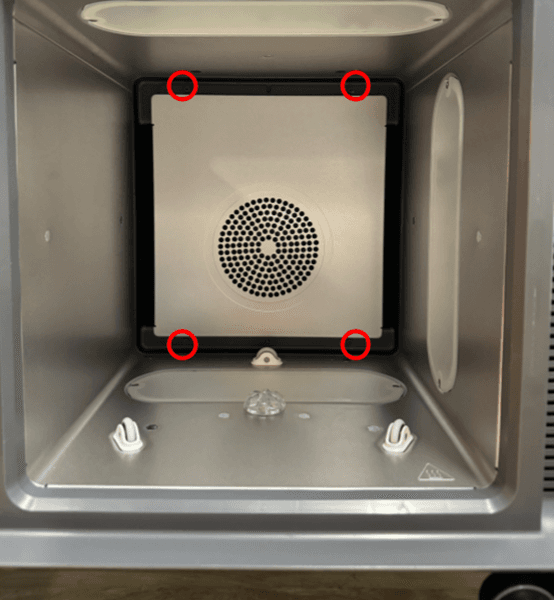
Use a 2.5 mm hex driver to remove the four screws that secure the heater cover panel to the machine. Set the panel and the screws aside.

Step 2: Disconnect the heater cables

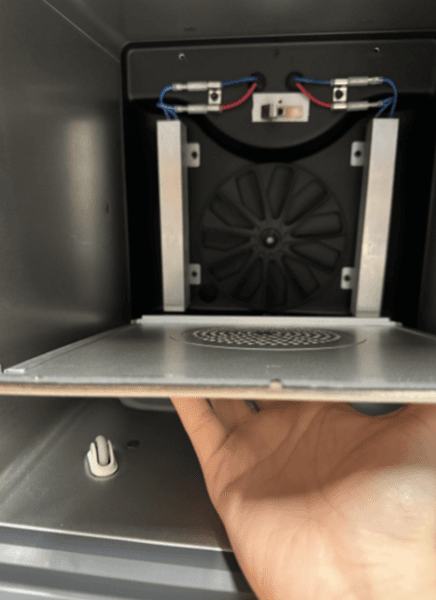
Disconnect the heater cables

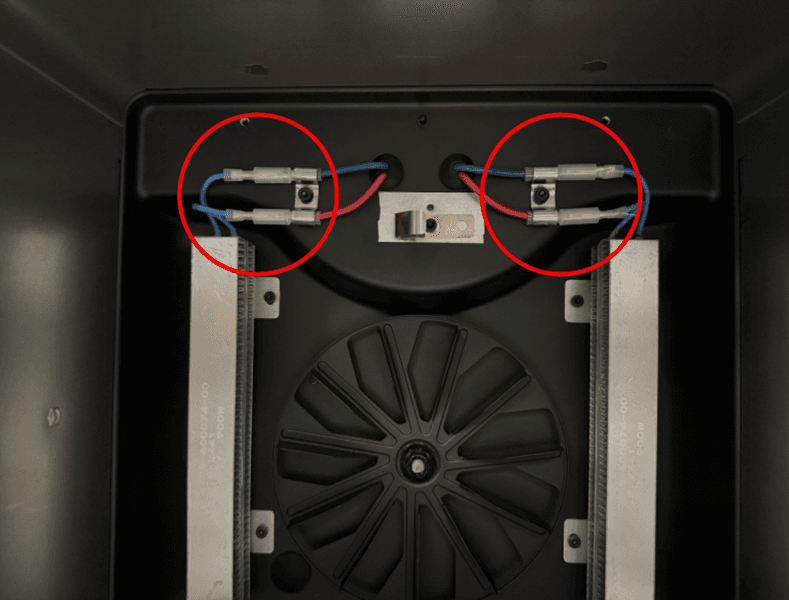
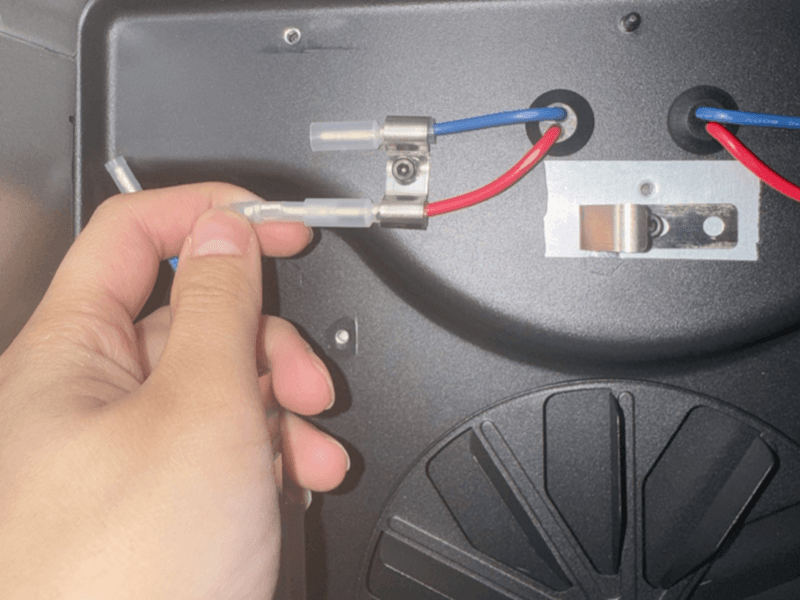
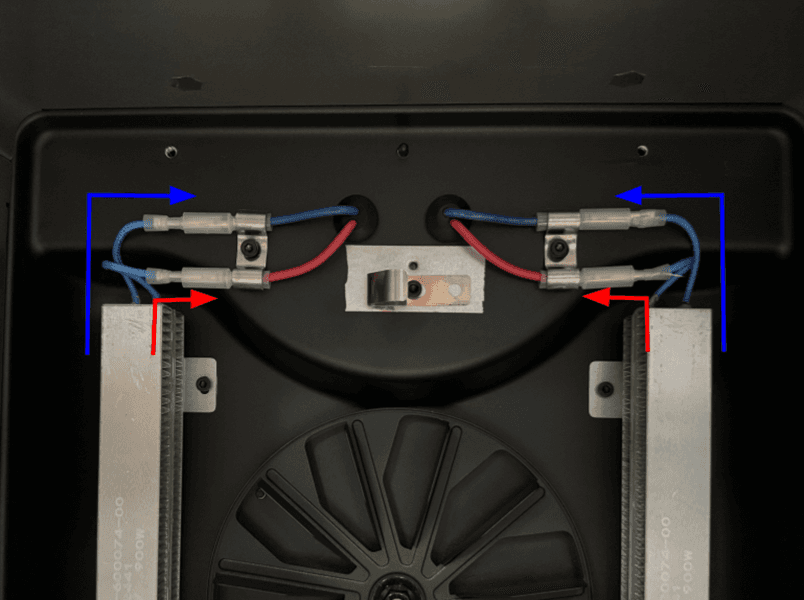
Each heater connects to the machine with one blue cable and one red cable. Gently pull the plastic housing on each of the four cables to disconnect the heaters. Do not pull on the individual wires.

Step 3: Remove the heater retention screws

Remove the heater retention screws

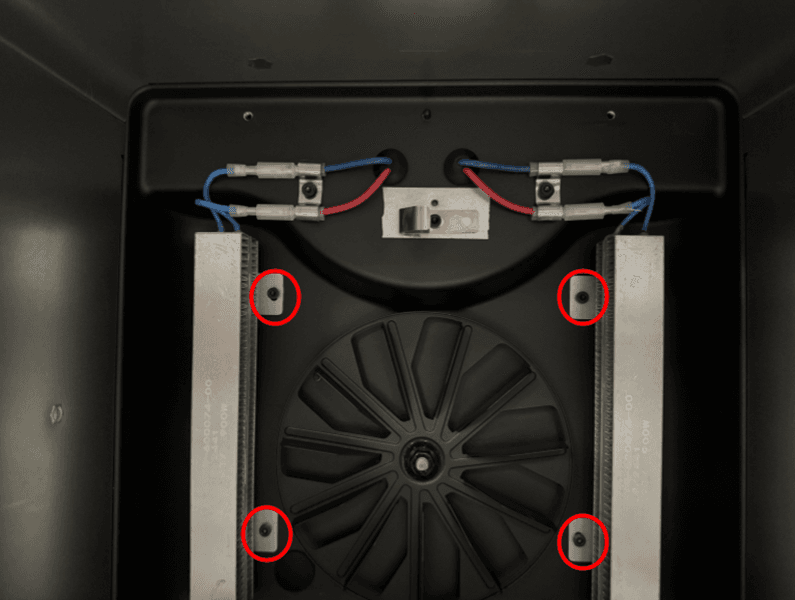
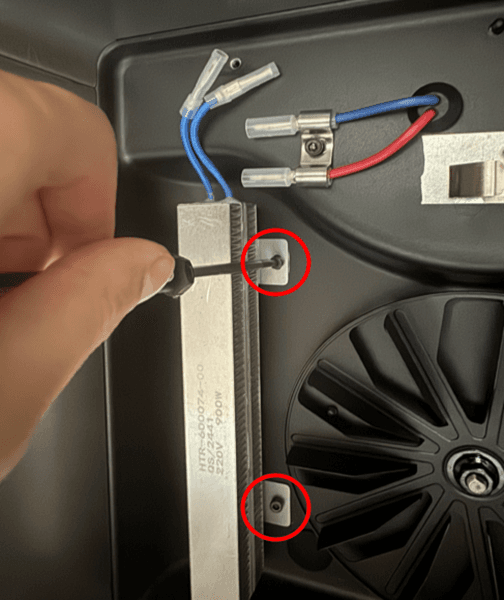
Use a 2.5 mm hex driver to remove the two heater retention screws that secure each heater to the machine. Set the four screws aside.

Step 4: Remove the heaters

Remove the two heaters from the machine. Set aside for disposal with electronic waste.

交換用ヒーターの取り付け

Overview: Mount and secure the replacement heaters.

Step 1: Mount and secure the replacement heater

Mount and secure the replacement heater.

Position the replacement heater on its mounting surface, aligning the screw holes on the mounting bracket with the screw holes in the machine. Ensure the cables are in the correct position.

Thread one heater retention screw into each of the two screw holes. Use a 2.5 mm hex driver to tighten until snug.

Step 2: Secure the second replacement heater to the machine

Repeat Step 1 to secure the second replacement heater to the machine.

Step 3: Connect the heater cables

Connect the heater cables

Each heater has two cables that connect to the machine. Attach the inner cable to the red cable. Attach the outer cable to the blue cable. The cable makes an audible click when properly connected.

Step 4: Align the heater cover panel

Align the heater cover panel

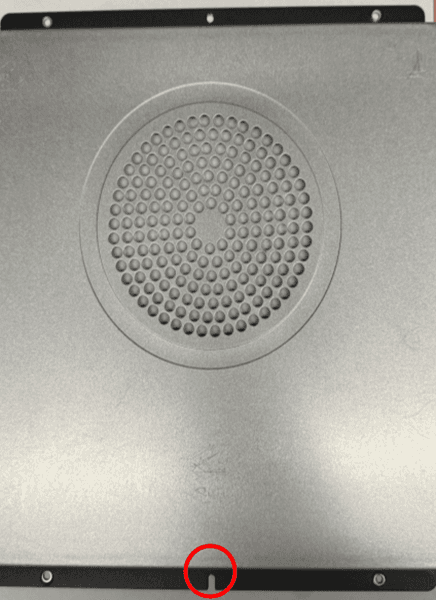
Align the heater cover panel in the correct orientation with the notch on the bottom and the black mounting brackets facing out into the curing chamber. Tilt the heater cover panel at an angle to insert into place without interfering with the fan.

Step 5: Secure the heater cover panel

Secure the heater cover panel

Thread one heater cover panel screw into each of the four screw holes. Use a 2.5 mm hex driver to tighten until snug.

修理を完了する

Overview: After installing the replacement heaters, power on the machine and perform final checks.

Step 1: Insert the turntable

Insert the turntable

Place the turntable onto the turntable mount.

Step 2: Power on the machine

Close the Form Cure door. Connect the power cable to the Form Cure and the power supply. Flip the breaker switch on the back of the unit to the ON position to turn on the machine. The Form Cure initializes.

Step 3: Test the repair

Start a post-cure cycle to test the replacement heaters. Monitor the Form Curec to ensure it heats up properly. Contact Formlabs Support or your authorized reseller to share the results of the procedure.