
Required Supplies:
Formlabs:
- Replacement motherboard (RP-CU2L-MOBO-01)
- 2 mm hex driver (included in the Form 4L tool cap assembly)
Third-party:
- Phillips driver
- Nitrile gloves
- Anti-static grounding strap

The Form Cure L V2 motherboard is mounted to the back of the machine’s display assembly. If the motherboard is faulty or malfunctioning, the Form Cure L V2 may behave erratically or not function at all.
Use this guide to replace the motherboard on a Form Cure L V2.
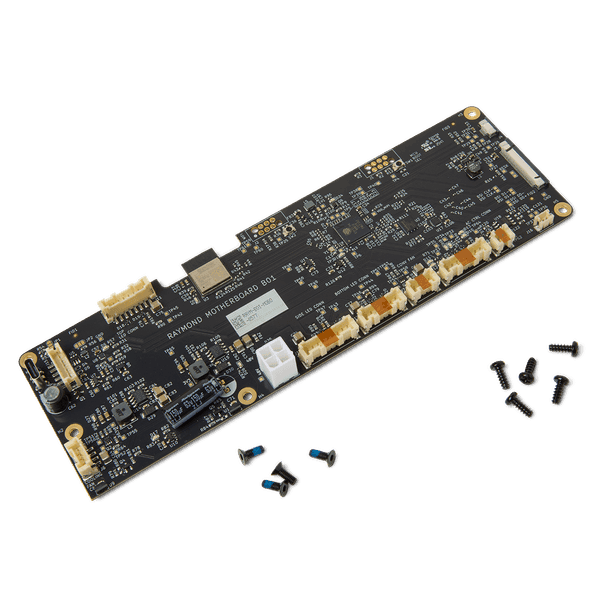
Required Supplies:
Formlabs:
Third-party:
推定所要時間: 15–20 分
危険:
この操作マニュアルに記載されている安全に関する指示内容や注意事項をすべて熟読し、順守してください。間違った部品と交換すると、火傷、電気ショック、火災または爆発に繋がる恐れがあります。廃棄する部品はすべて、現地の法規制に従って処分してください。
作業スペースを用意する
Overview: Prepare the Form Cure L V2 and workspace for replacing the motherboard.
Step 1: Prepare the workspace
Clear a workspace around your machine. Ensure that the workspace is well-ventilated and free of dust.
Step 2: Unplug the machine
Turn off the machine using the power switch on the back of the unit. Disconnect the power cable before continuing with maintenance. Do not perform maintenance on the machine while it is connected to power. Wait five minutes after disconnecting the machine from power before proceeding. If the machine was recently in use, the post-cure chamber will be warm. Wait at least 10 minutes for the chamber to cool.
危険:
電源ケーブルが接続された状態でマシンのメンテナンスを行うと、感電の危険性が高まります。マシンのパネルを取り外す際は、必ず電源ケーブルをコンセントから抜いてから作業してください。パネルを外している間は、絶対にマシンの電源を再投入しないでください。
マザーボードの取り外し
Overview: Disconnect and remove the original motherboard.
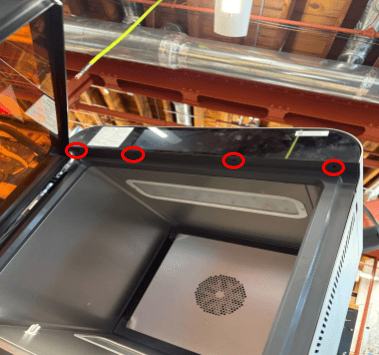
ステップ1:ドアを開ける
二次硬化チャンバーのドアを開け、前面パネルを固定しているネジにアクセスします。
ステップ2:マザーボードとディスプレイアセンブリのネジを外す
2mmの六角ドライバーを使って、マザーボードとディスプレイアセンブリをマシンのフレームに固定している4本のネジを緩めて取り外します。外したネジは脇に置いておきます。
ステップ3:マザーボードとディスプレイアセンブリを取り外す
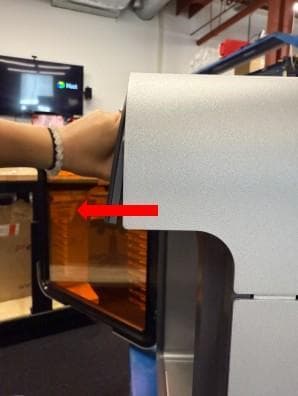
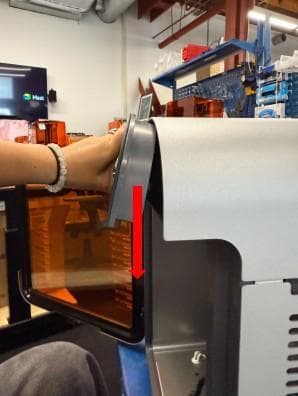
マザーボードとディスプレイアセンブリをゆっくりと上に傾け、下に引きます。アセンブリがマシンのフレームから外れます。マザーボードとディスプレイアセンブリはケーブルでForm Cure L V2に接続されているため、強く引っ張らないでください。
ステップ4:マザーボードのケーブルを外す
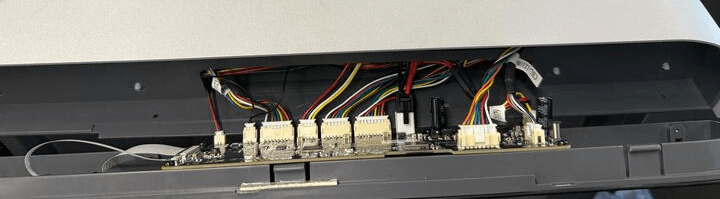
Disconnect all of the cables from the motherboard except for the two ribbon cables. For each, squeeze the tab and slide the cable out of the connector. Take care not to pull on the wires themselves.
Fully separate the motherboard and display assembly from the machine and set it display-side down on your work surface.
Step 5: Uninstall the motherboard
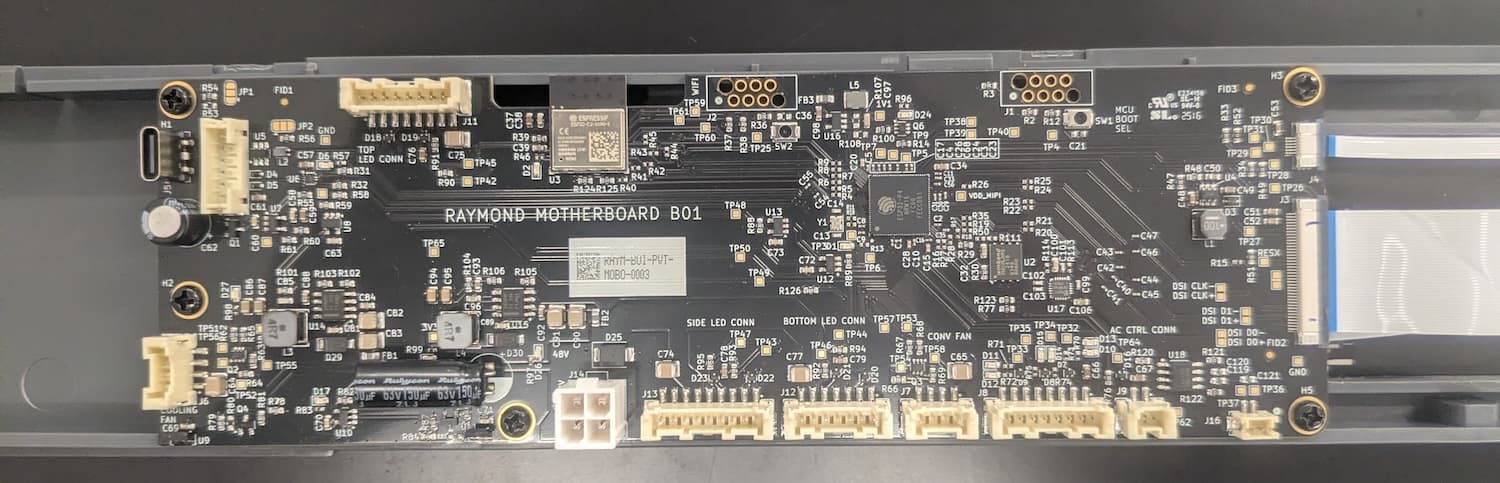
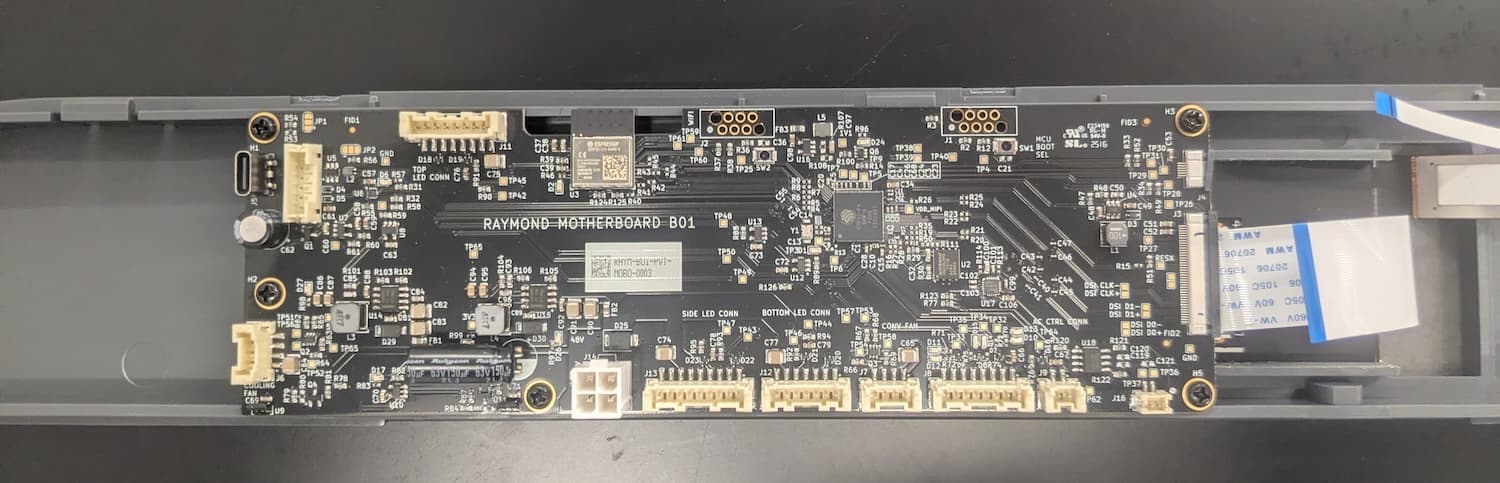
Disconnect the two ribbon cables from the side of the motherboard. For both, slide the black latch on the cable connector away from the white connector body. Once the latch is open, the ribbon cable should separate from the connector with minimal force. Take care not to fold or otherwise damage the ribbon cables.
Using a Phillips driver, loosen and remove the five screws securing the motherboard to the display assembly. Set the screws aside.
Fully separate the motherboard from the display assembly and set it aside for disposal with electronic waste.
交換用マザーボードの取付け
Overview: Connect, mount, and secure the new motherboard.
Step 1: Mount and secure the motherboard
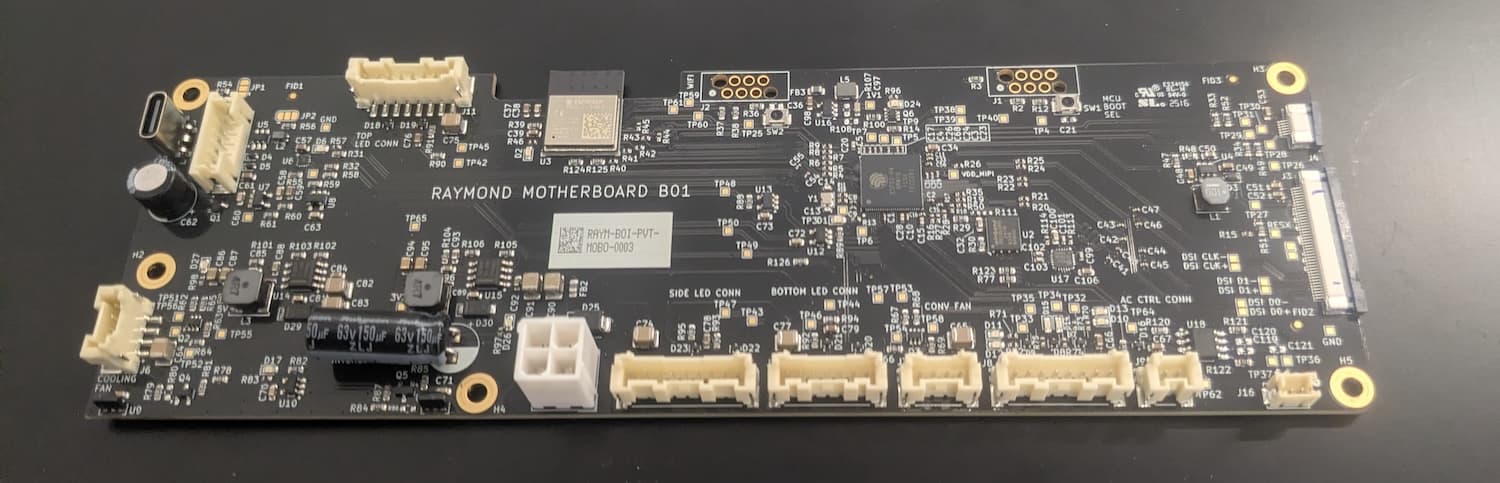
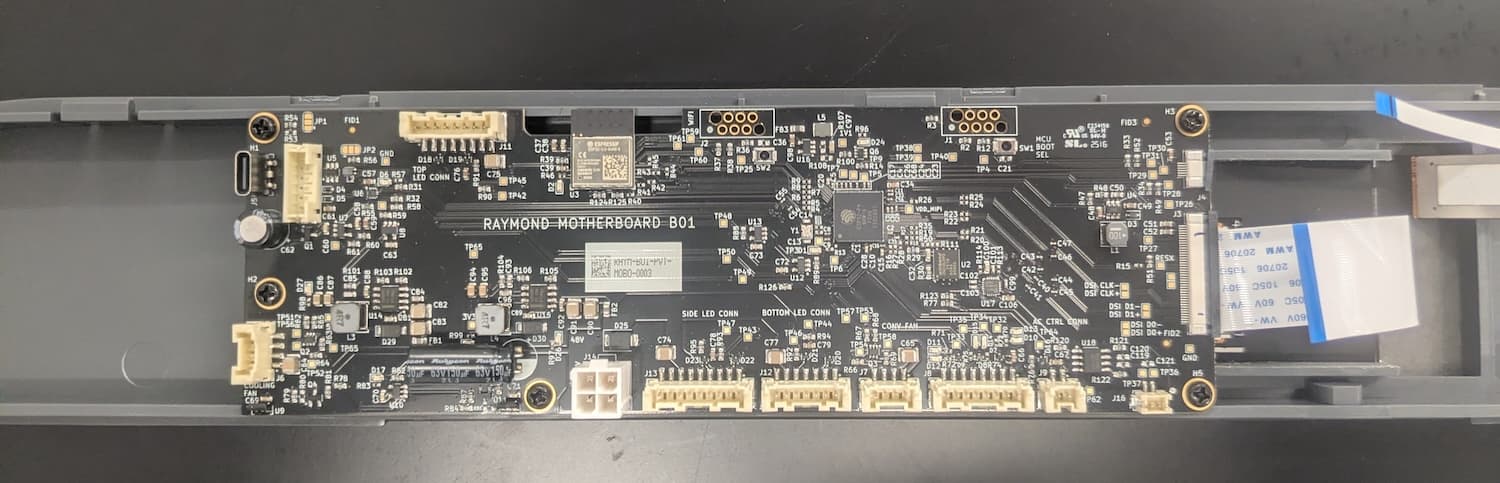
Remove the replacement motherboard from its packaging and place it on the back of the display assembly, aligning the five screw holes in the motherboard with the corresponding screw holes in the display. Thread one motherboard mounting screw into each of the five screw holes, then use a Phillips driver to tighten until snug.
Step 2: Connect the ribbon cables to the motherboard
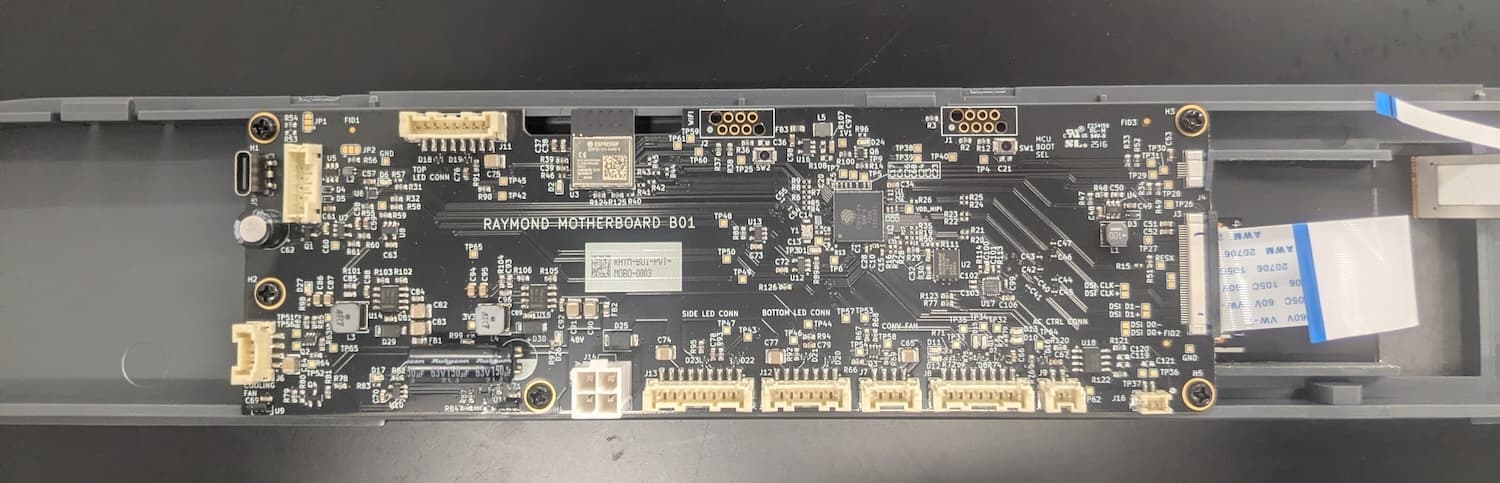
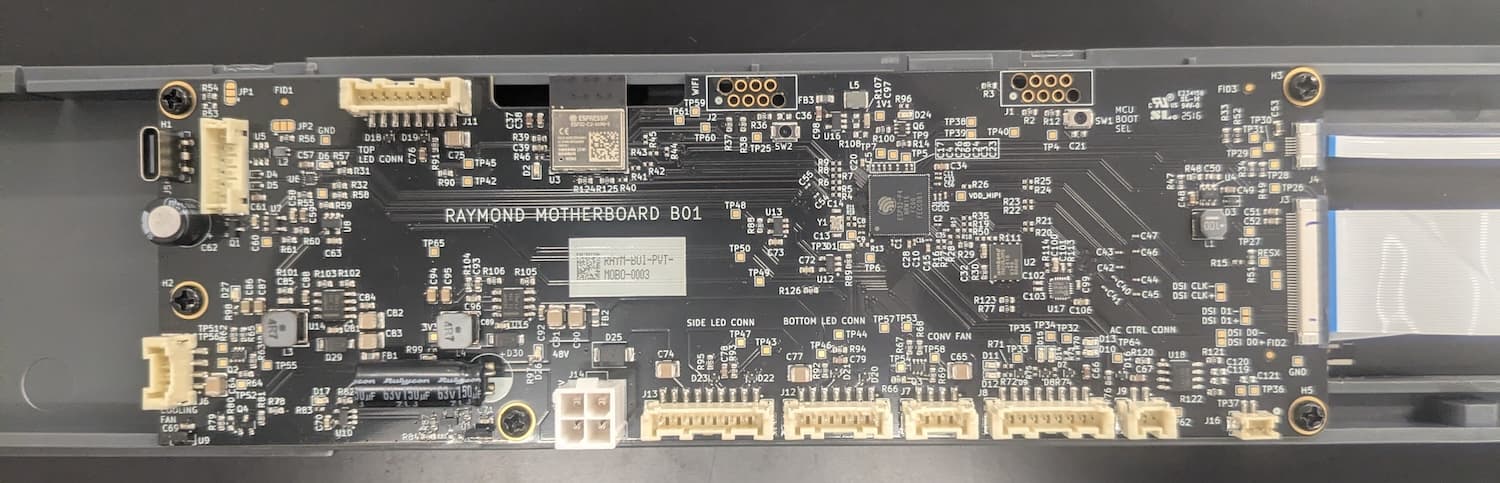
Carefully slide the two ribbon cables into their respective connectors on the motherboard. Push the black latches towards the white connector body. When the latch is flush with the connector body, the ribbon cable is secure.
Step 3: Connect the remaining motherboard cables
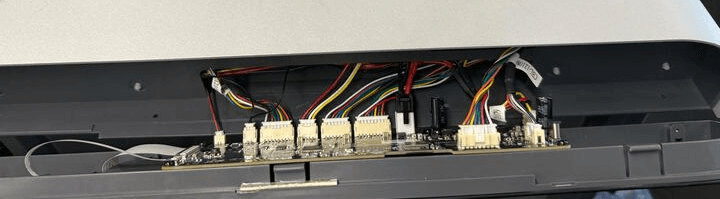
Hold the motherboard and display assembly in front of the machine, near its mounting point. Reconnect all cables to the motherboard, using the image here as a reference. Each cable only fits into its connector in the correct orientation. The locking tab clicks into place when the cable is fully connected.
Step 4: Mount the motherboard and display assembly
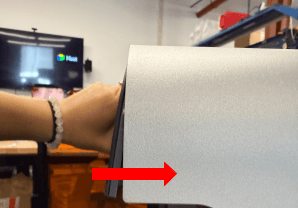
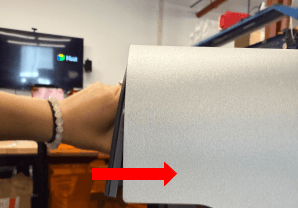
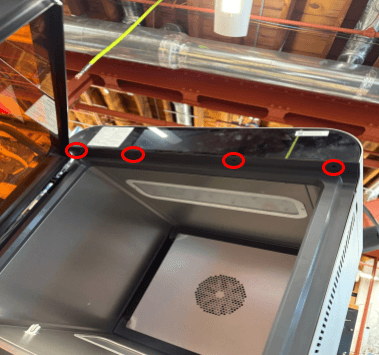
マザーボードとディスプレイアセンブリを少し上向きに傾けます。上部パネルの前端の下に差し込み、アセンブリの下部を所定の位置に傾けます。マザーボードとディスプレイアセンブリの底面にある4つのネジ穴が、Form Cure L V2の対応する穴と合っていることを確認します。
Thread one mounting screw into each of the four screw holes in the bottom of the motherboard and display assembly. Using a 2 mm hex driver, tighten the screws until snug.
修理を完了する
Overview: After installing the new motherboard, perform final checks.
Step 1: Power on the machine
Connect the power cable to the machine and its power supply. Turn on the switch at the back of the machine. Start a post-cure cycle and check that the machine operates normally.