技術白書
Formlabs Logo

Form Wash L V2のインペラーモーターをサポート

Form Wash L V2のインペラーモーターをサポート

The Form Wash L contains two impellers to agitate the solvent in the wash bucket and help clean printed parts. The impellers are magnetically coupled to motors sitting below the wash bucket. In some Form Wash L V2 units, the impellers can have difficulty moving through the solvent. The impellers may be unable to turn or the machine may make unusual noises as the impellers repeatedly uncouple from and recouple to the motors.

Use this guide to add support to the impeller motors on a Form Wash L V2.

必要な備品:

必要な備品:

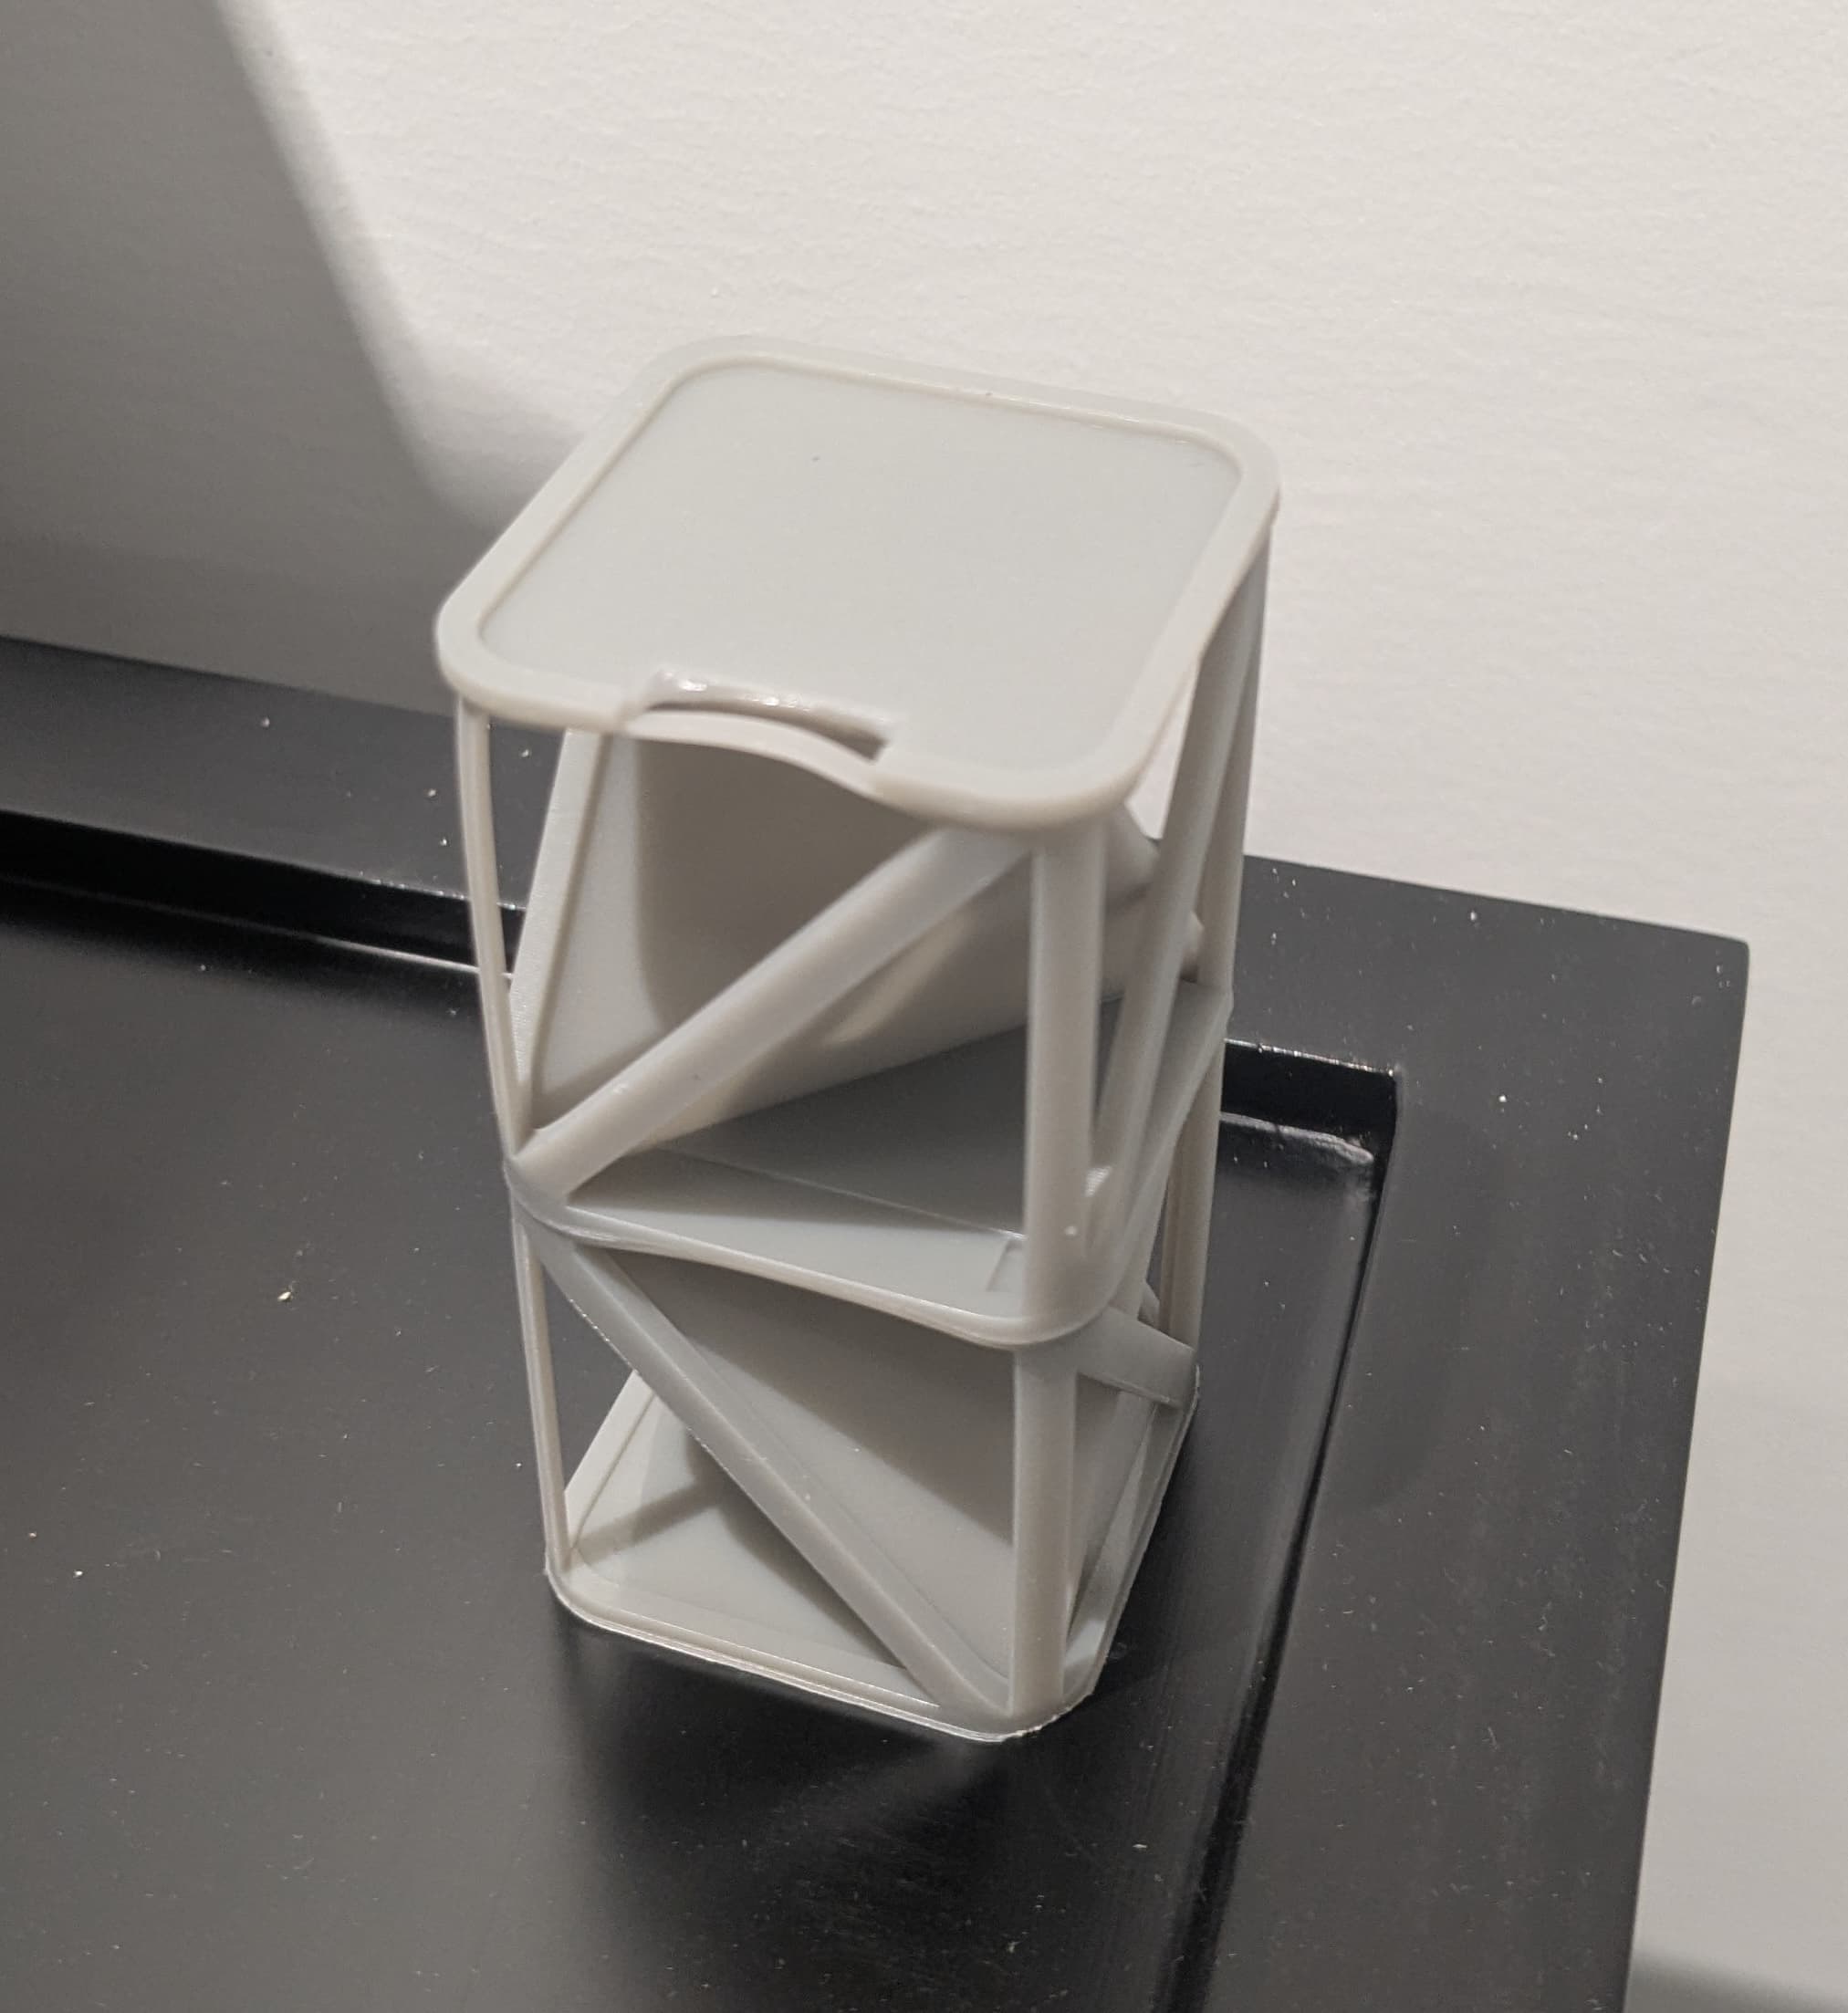
  • Form Wash L V2インペラーモーターシム(2個)
    • Greyレジン、Tough 1500レジン、Rigid 10Kレジンなどの硬質レジンで事前にプリントしてください。サポート材を使わずビルドプラットフォーム上で直接プリントElastic 50Aレジン、Flexible 80Aレジン、または同様の材料特性を持つ他のレジンは使用しないでください。
  • 2.5mm六角ドライバー
  • 43Lの未使用溶剤(IPA、TPM、またはFormlabs Resin Washing Solution)
  • Form Wash Lに付属の電動サイフォンポンプ
  • 43Lまでの溶剤を保管できる空の容器
  • 非反応性ニトリル手袋
  • 安全メガネ

推定所要時間: 20~30分+モーターシムの造形時間

作業スペースを用意する

概要: インペラーモーターにサポートを追加するために、Form Wash Lと埃のない作業スペースを用意します。

注:

溶剤や液体レジンに触れる可能性のあるパーツや表面を取り扱う際は、必ず手袋を着用してください。

ステップ1:インペラーモーターシムをプリントする

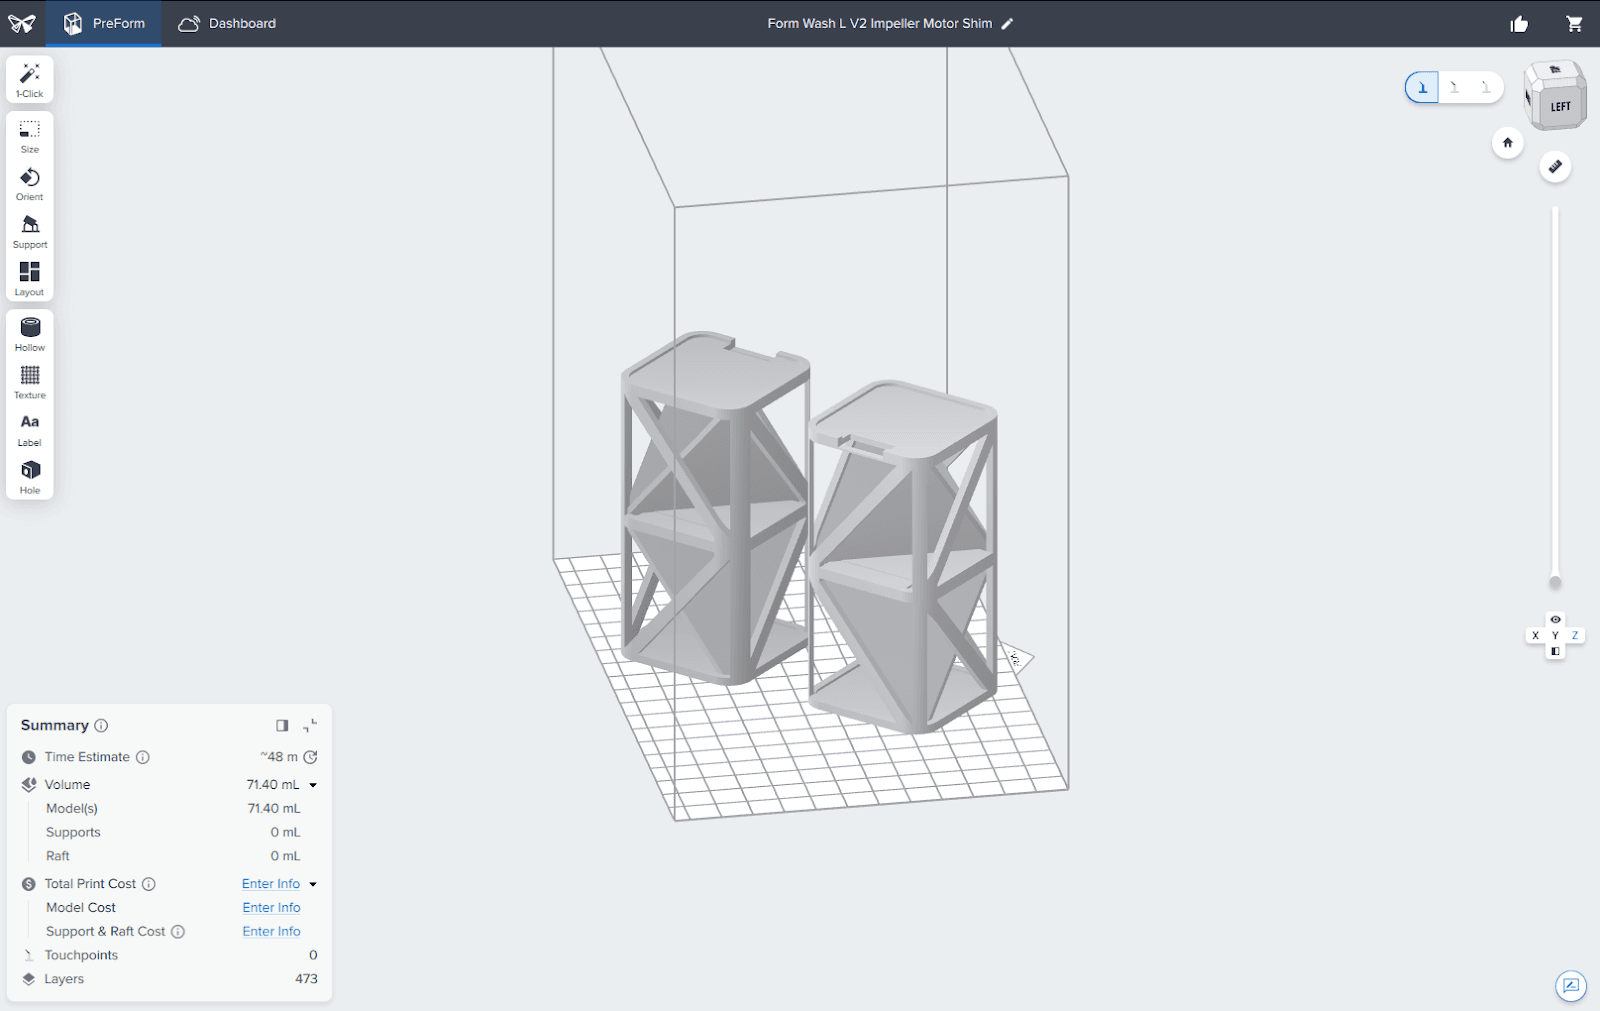
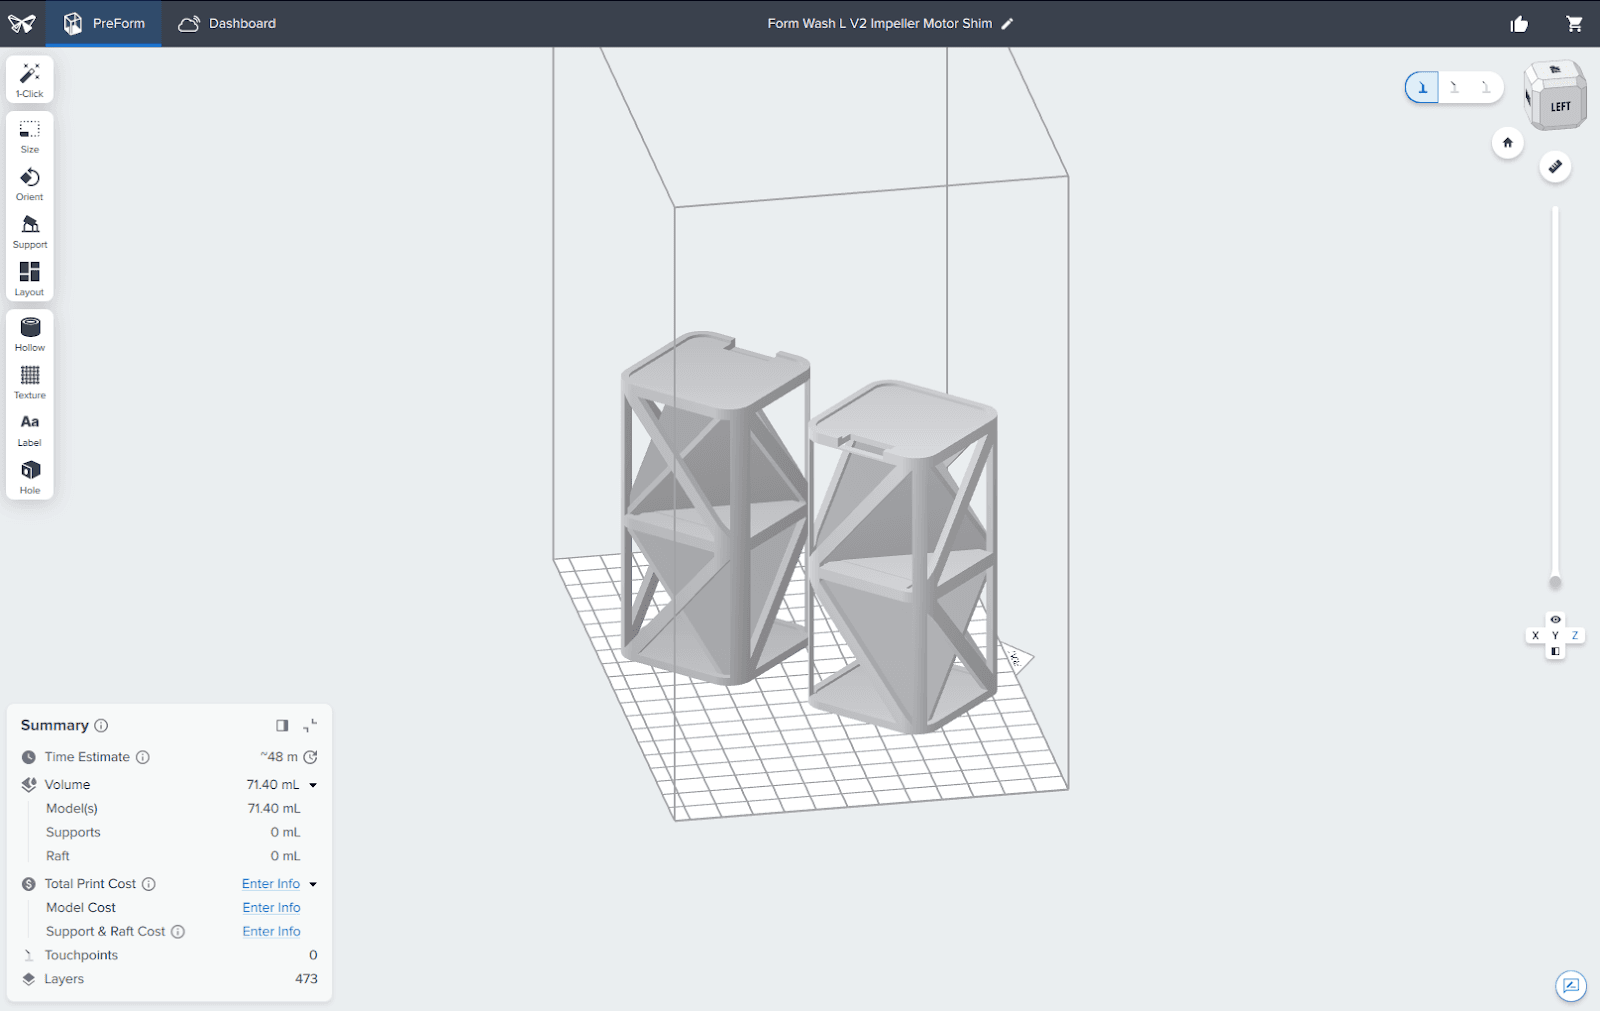
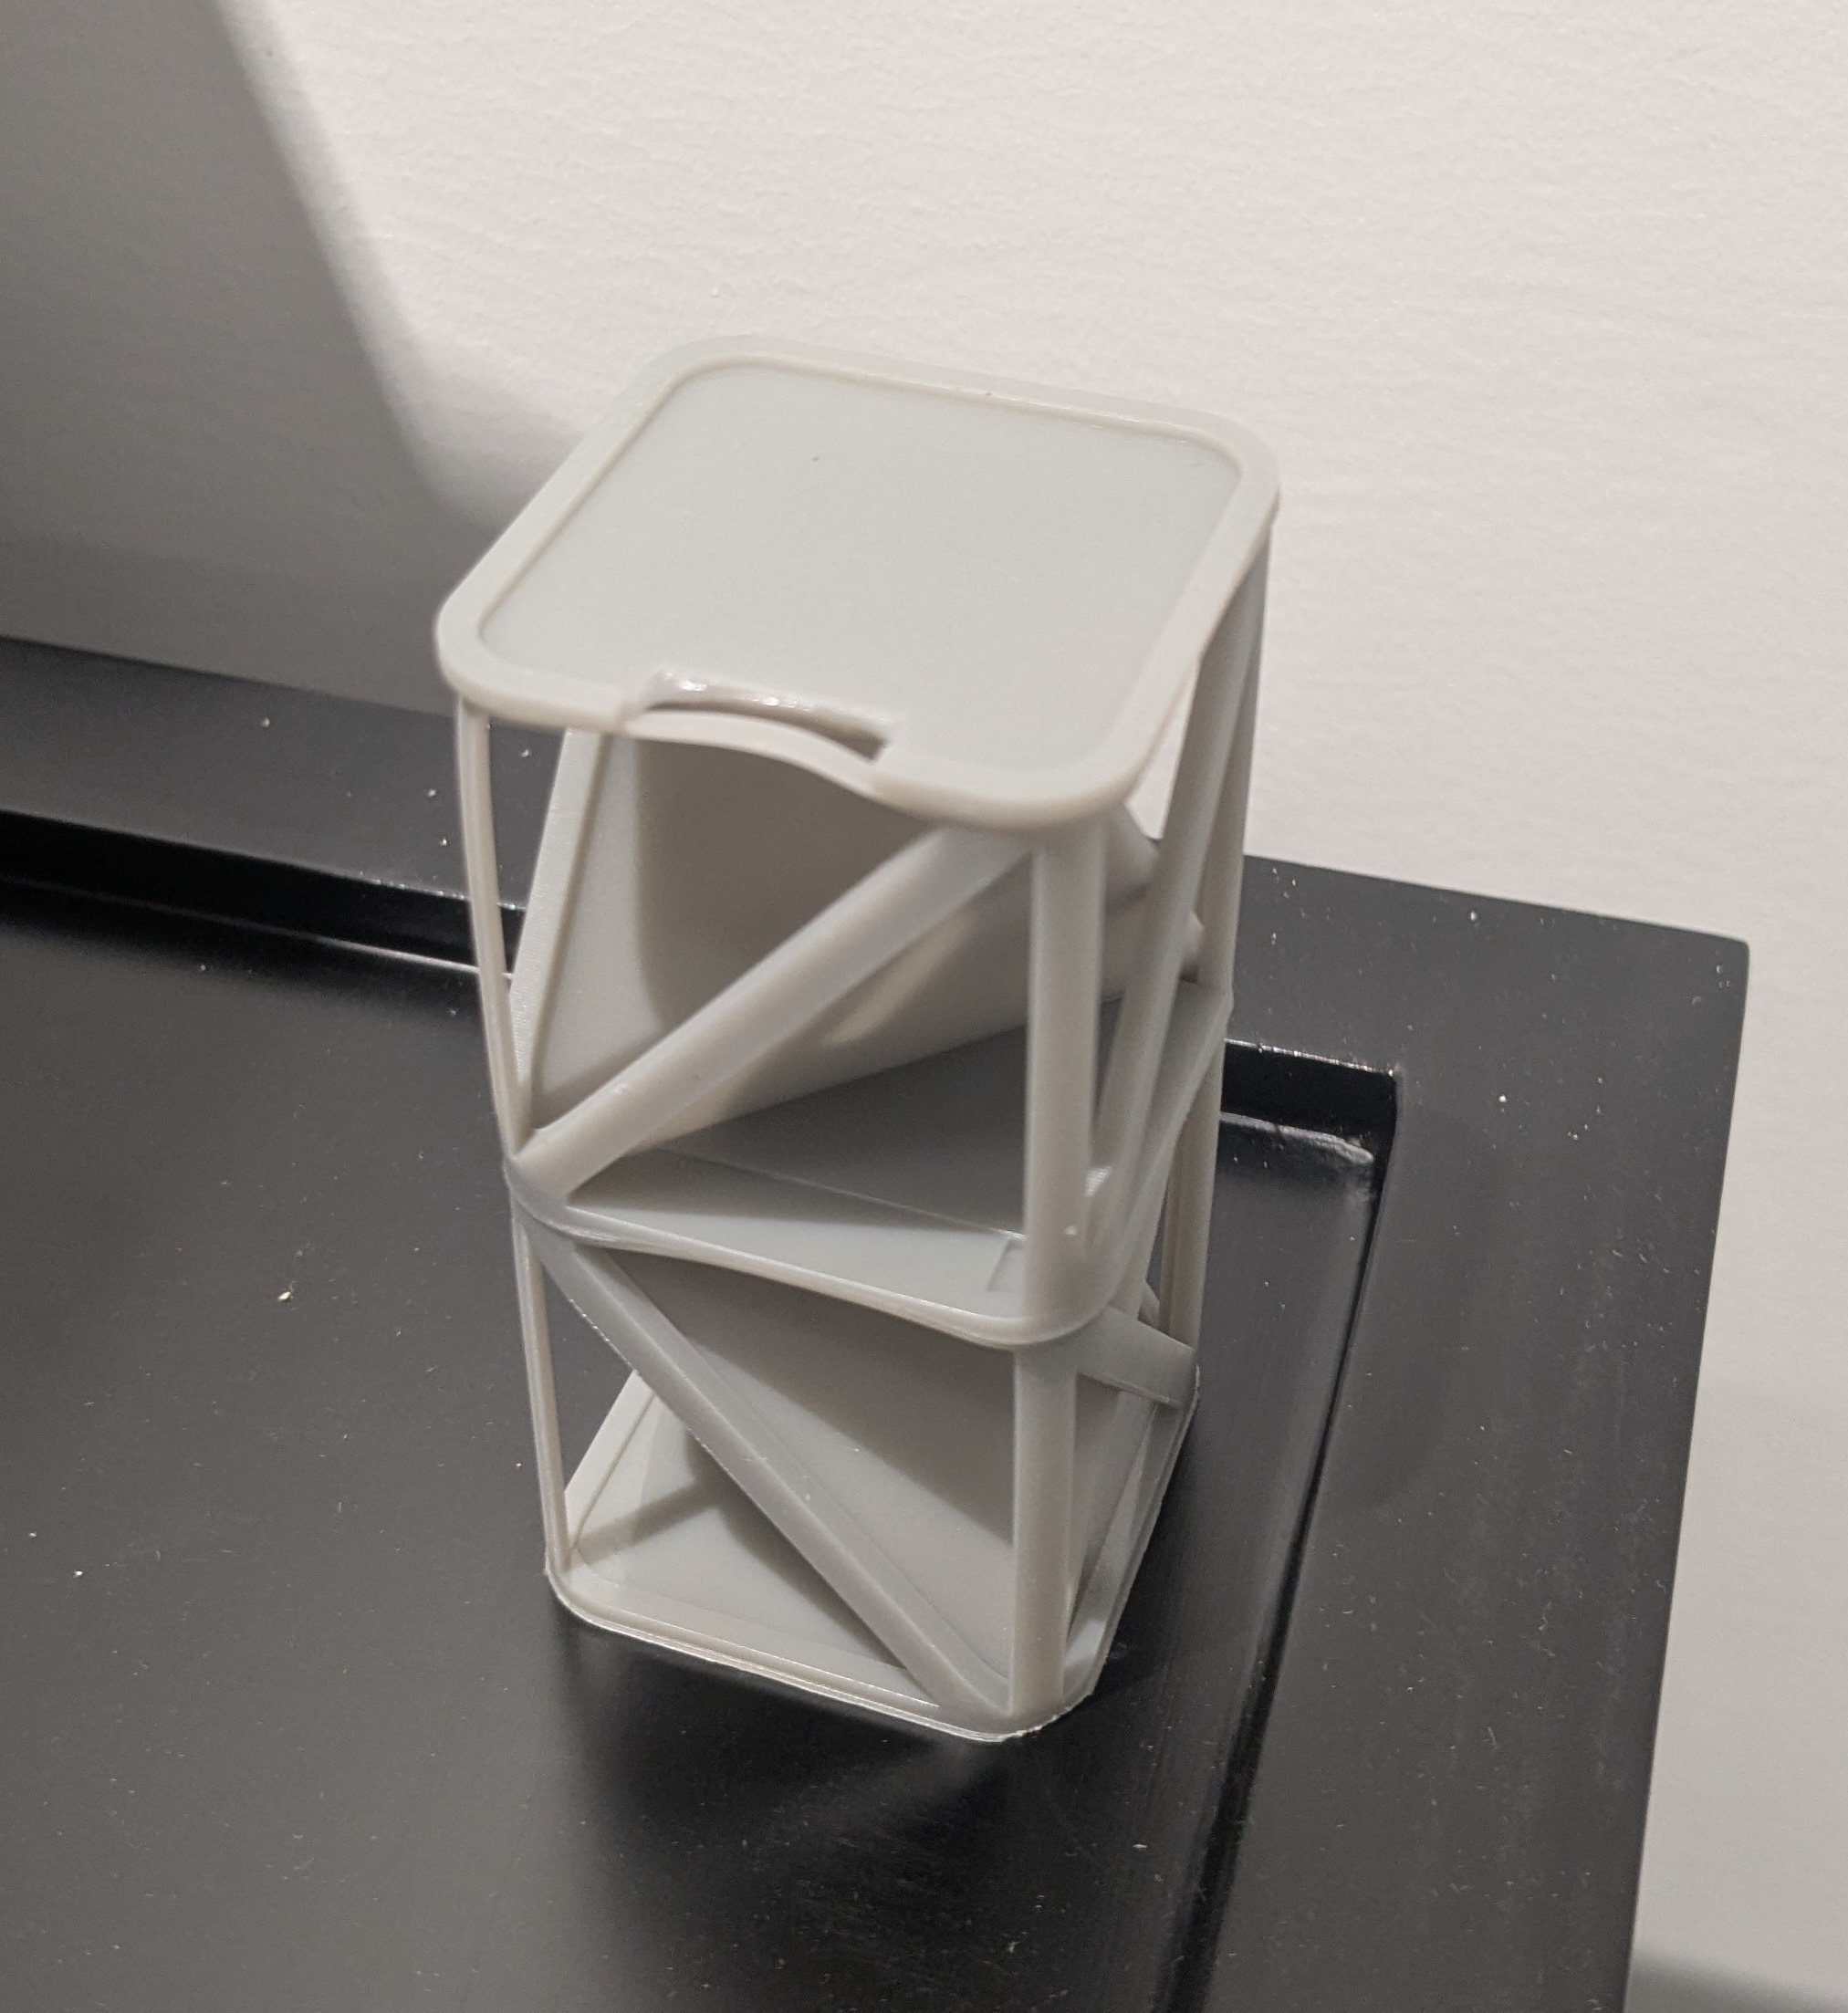
インペラーモーター用シムを2つ、Greyレジン、Tough 1500レジン、Rigid 10Kレジンなどの硬質レジンでプリントします。サポート材を使わずビルドプラットフォーム上で直接プリントElastic 50Aレジン、Flexible 80Aレジン、または同様の材料特性を持つ他のレジンは使用しないでください。使用する材料に応じて、造形品を洗浄し、二次硬化させます。

PreFormでForm Wash L V2のインペラーモーターシムモデルを表示

Step 2: Unplug the machine

Disconnect the power cable before continuing with maintenance. Do not perform maintenance on the machine while it is connected to power. Wait five minutes after disconnecting the machine from power before proceeding.

危険:

電源プラグを差し込んだままマシンのメンテナンスを行う 感電の危険性が高まります。電源に接続した状態のままで マシンのパネルを取り外さないでください。パネルを取り外した状態で、 マシンの電源は絶対に入れないでください。

下部前面パネルの取り外し

概要: 下部の前面パネルを取り外し、インペラーモーターにアクセスします。

備考:

Form Wash Lには、デリケートな電子部品が含まれています。マシン内の電子部品に触れる前に、静電気防止用ストラップを使用するか、接地用金属に触れてください。

ステップ1:前面パネルを開く

前面パネルを右側から引っ張ります。溶剤モニターとバケットにアクセスできるように、開けたままにしておきます。

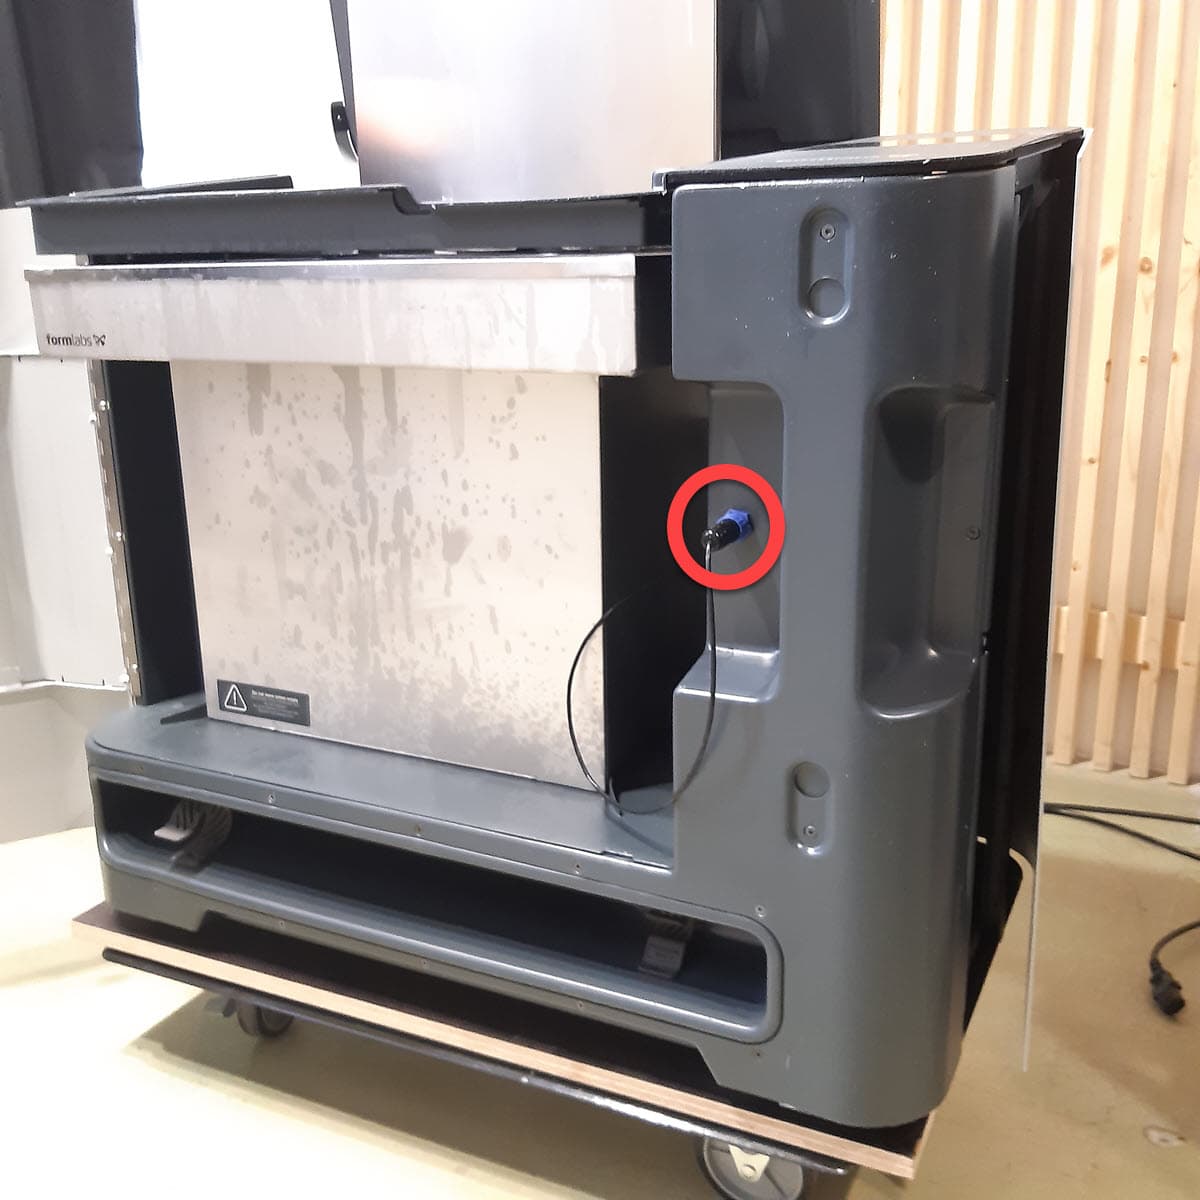
ステップ2:溶剤モニターのプラグを抜く

Form Wash Lの前面から溶剤モニターを取り外します。

ステップ2:溶剤モニターのプラグを抜く

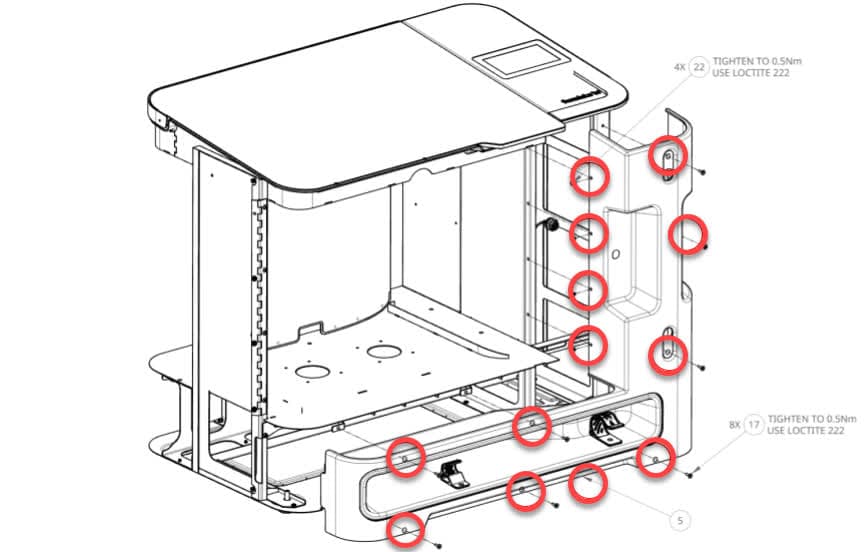
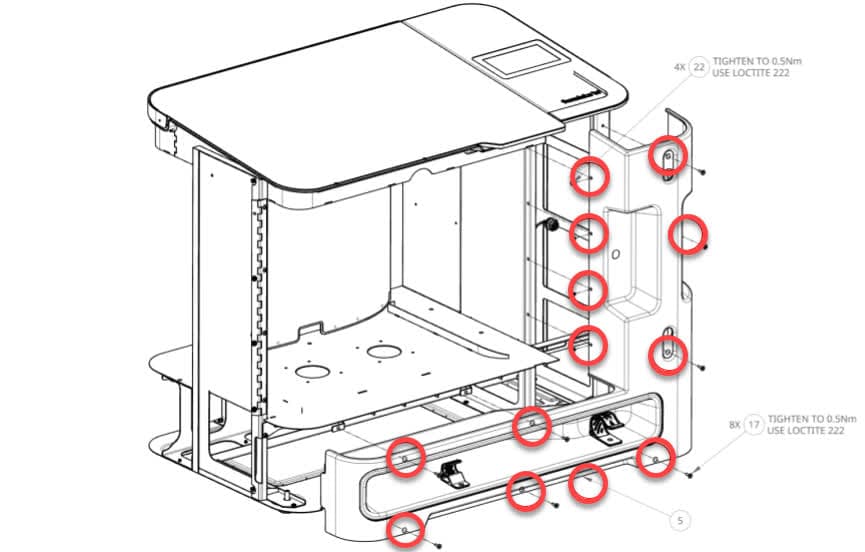
ステップ3:下部の前面パネルのネジを外す

ステップ6:下部の前面パネルを取り外す

2.5mmの六角ドライバーを使って、上図の12本のネジを外します。外したネジは脇に置いておきます。

パネルの後ろにある溶剤モニターのケーブルが見えるまで、パネルを少し手前に引きます。パネルはまだケーブルでマザーボードに接続されているため、完全に取り外さないでください。

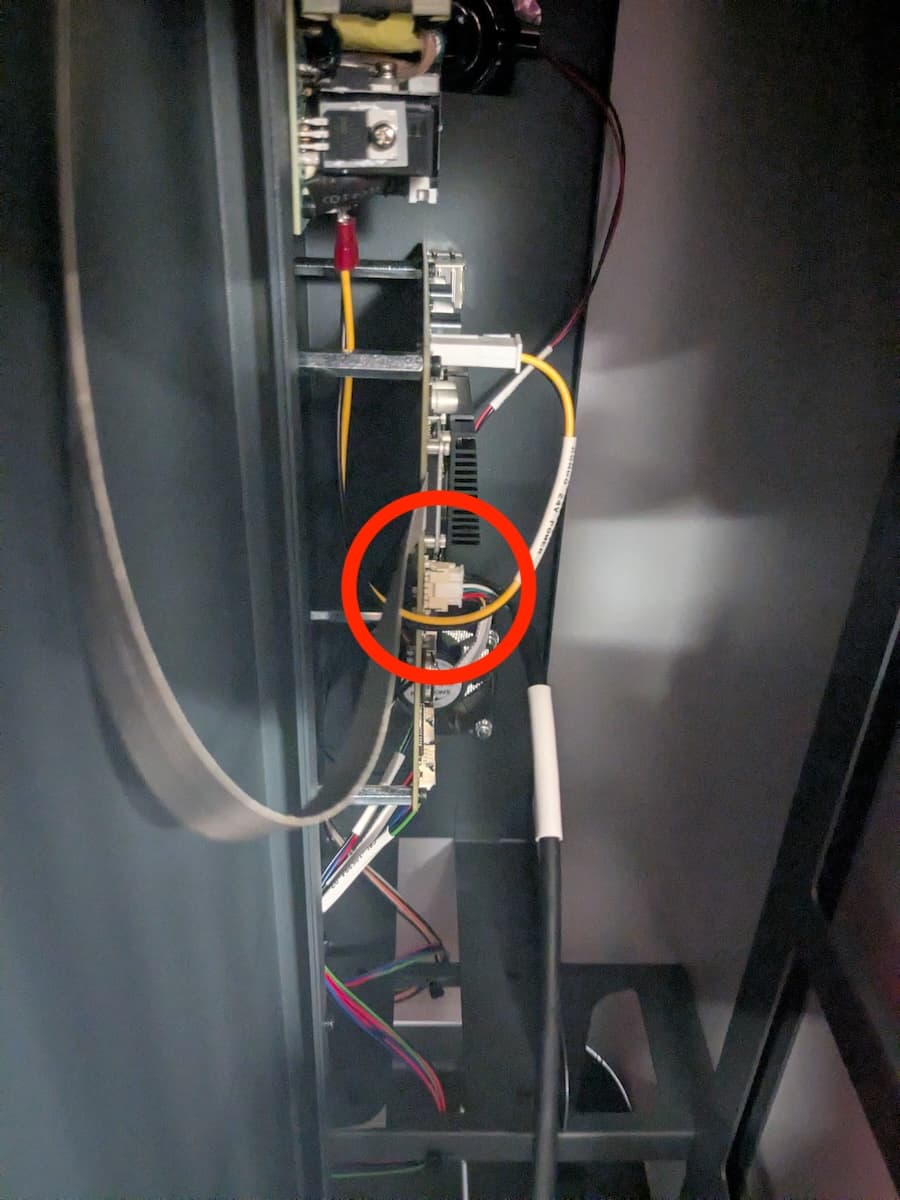
ステップ4:溶剤モニターのケーブルを抜く

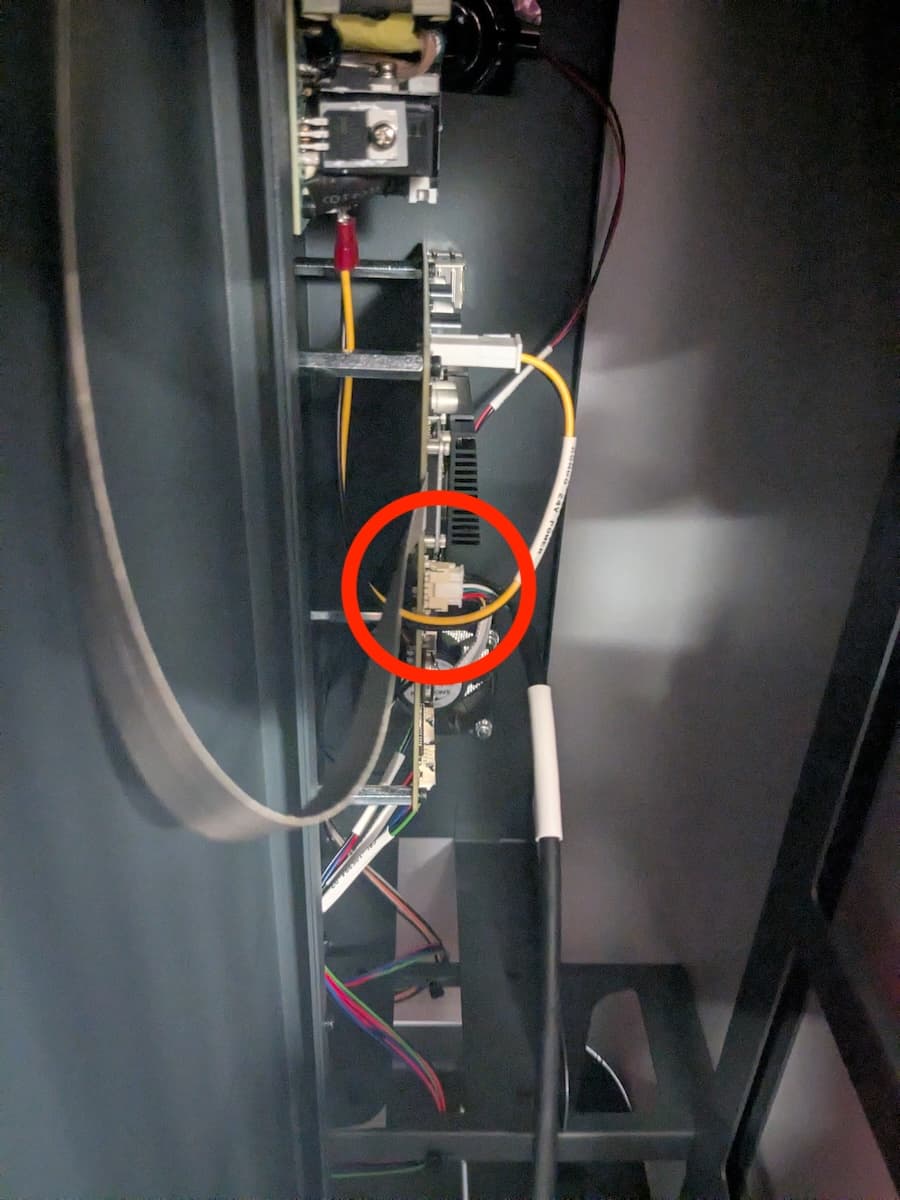
マザーボードから溶剤モニターのケーブルを取り外す

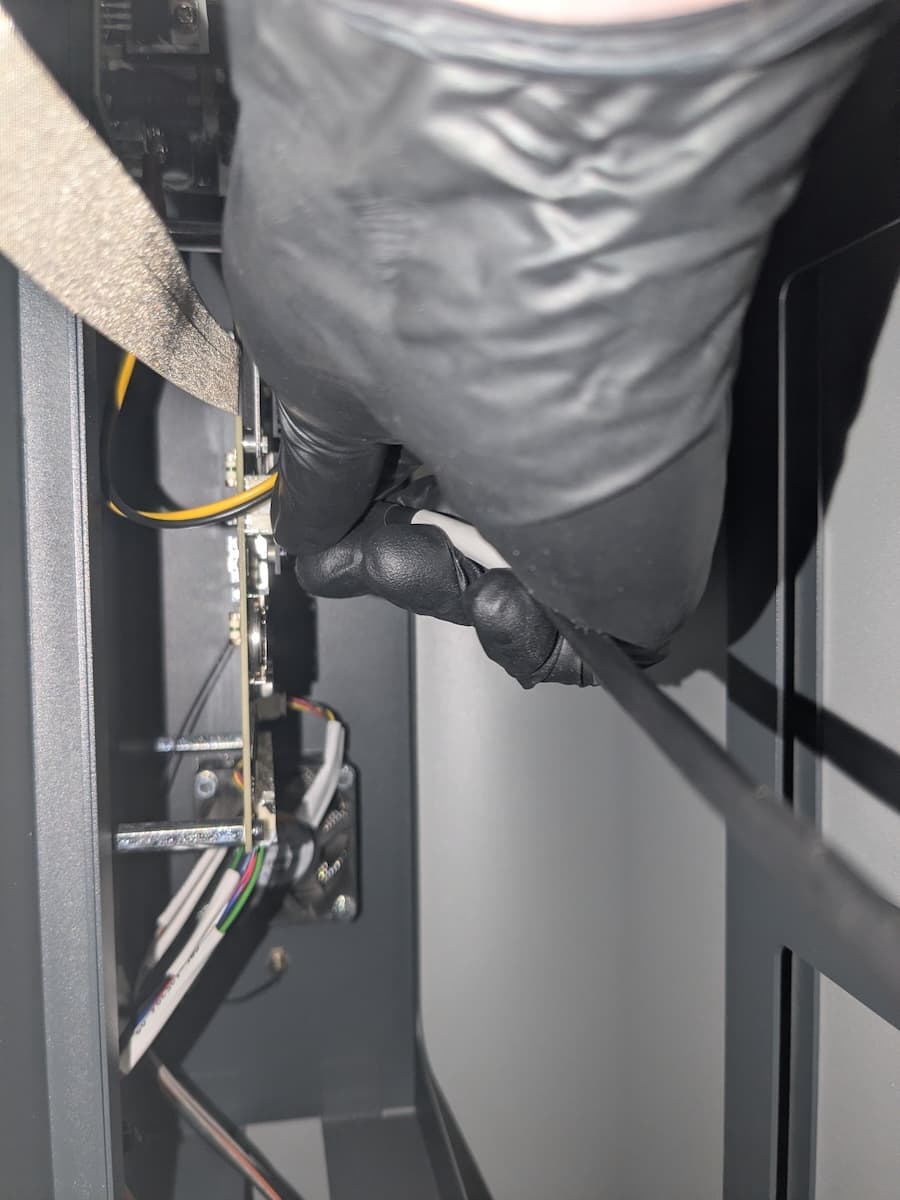
下部の前面パネルから溶剤モニターのケーブルをたどり、Form Wash Lのマザーボードの前端にあるコネクタを見つけます。コネクタのロックタブを押し、マザーボードから引き離してケーブルを外します。ワイヤー自体を引っ張らないでください。

ステップ5:下部の前面パネルを取り外す

下部の前面パネルを慎重に本体から引き離し、脇に置きます。

インペラーモーターシムの取り付け

概要:インペラーモーターの下にインペラーモーターシムを取り付けます。

ステップ1:モーターアセンブリの位置を確認する

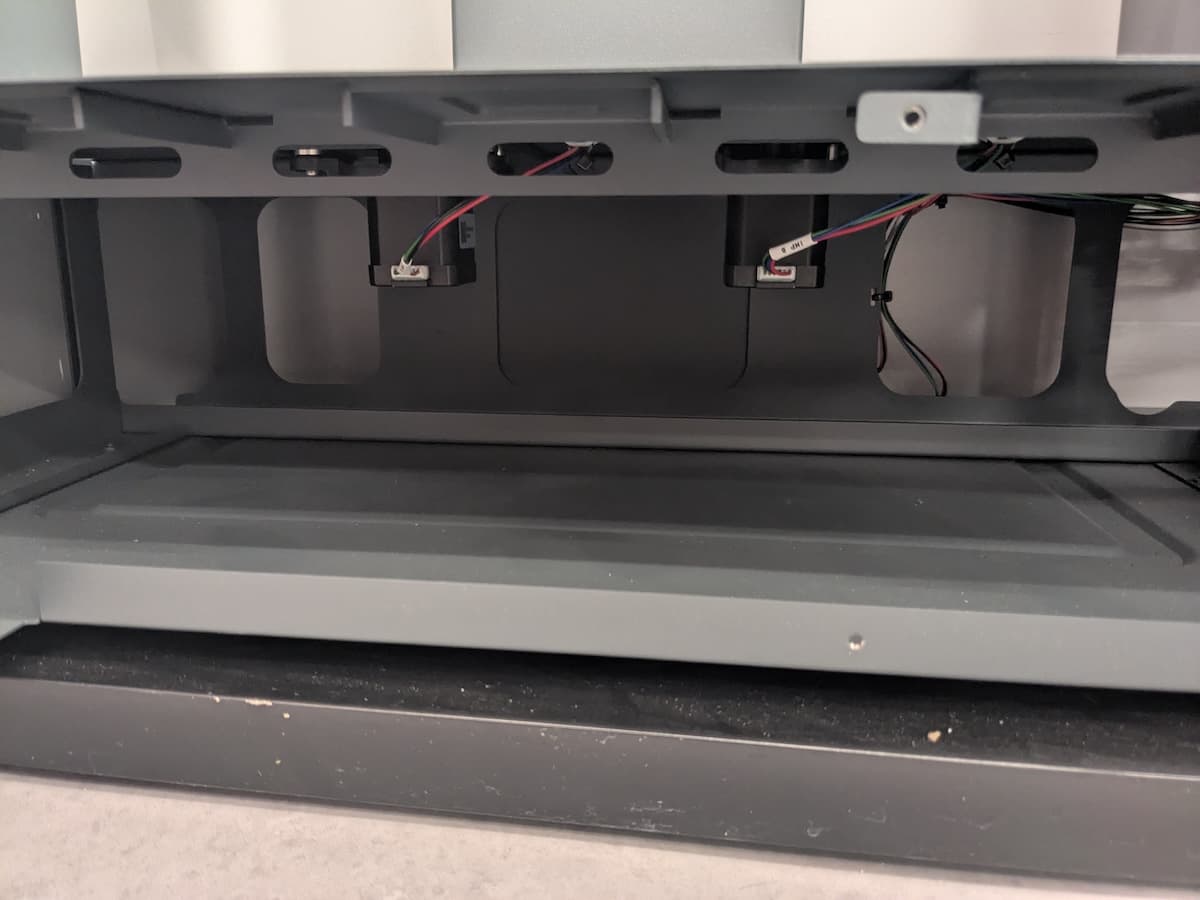
Form Wash Lには、本体のベースプレートの下に2つのインペラーモーターアセンブリが取り付けられています。モーターの位置を確認します。

Form Wash Lのモーターアセンブリ

ステップ2:モーターシムを取り付ける

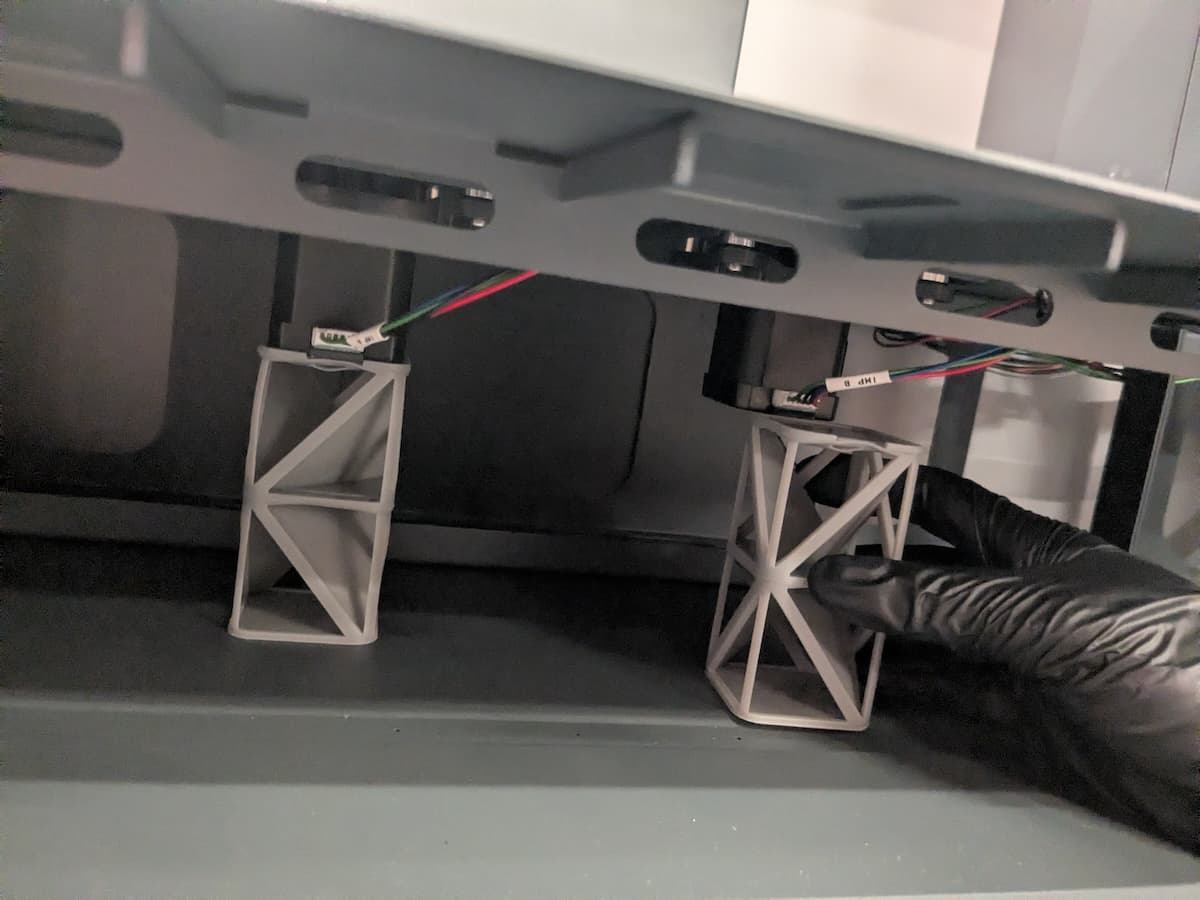
Form Wash L V2のインペラーモーターシムの取り付け

モーターシムの小さなスロットが上前方に来るようにします。スロットは、モーターケーブルのクリアランスを確保するためのものです。シムをモーターの下にスライドさせ、シムの縁がモーターの端に沿うようにして、カチッと音がするまで押し込みます。

下部前面パネルの再装着

概要: 溶剤モニターのケーブルと下部の前面パネルをForm Wash Lに再度取り付けます。

ステップ1:下部の前面パネルを合わせる

下部前面パネルをマシン前面の近くまで持ってきて、溶剤モニターケーブルがマザーボードに届くようにします。

ステップ2:溶剤モニターのケーブルを再接続する

溶剤モニターのケーブルをマザーボードのソケットに再接続します。コネクタは一方向にしかソケットに挿入できません。ケーブルが正しく接続されると、ロックタブがカチッと音を立てて固定されます。

ステップ 3:溶剤モニターのケーブルを再接続する

ステップ3:下部の前面パネルを再装着する

下部前面パネルの再装着

下部の前面パネルをスライドさせて、所定の位置にセットします。一方の 下部前面パネルの12箇所のネジ穴に2.5mmの六角ネジを取り付けます。ネジを締める 使用 2.5mm 六角 ドライバーで締め付けます。

ステップ4:溶剤モニターを再接続する

ウォッシュバケットからの溶剤モニタケーブルを前面パネルのソケットに差し込みます。

修理を完了する

Overview: After installing the impeller motor shims, power on the machine and perform final checks.

Step 1: Power on the machine

Connect the power cable to the Form Wash L and the power supply. Flip the breaker switch on the back of the unit to the ON position to turn on the machine.

Step 2: Test the repair

Start a wash cycle. The impellers should rotate properly if the repair was successful. If they do not, continue.

Step 3: Enlarge and reprint the shims (optional)

Depending on the manufacturing and assembly tolerances of your machine, the shims may still allow sufficient flexing for the impellers to decouple from the motors. If that is the case, reopen the provided shim file in PreForm. Click the Size tool and increase the Z dimension of both models by 3 mm. Print the rescaled shims, install them, and test the machine.

If the issue persists, increase the Z dimension by an additional 3 mm. If the impeller decoupling issue persists with +6 mm shims, contact Formlabs Support.

モーターシムの拡大