
Required Supplies:
- Protective material (packing paper, foam, cardboard,etc)
- Nitrile gloves
- Masking tape
- Coarse sandpaper (80–120 grit), cut into a 9 mm × ~150 mm strip
- Vacuum cleaner or compressed air

Form 4 generation printers have a mixer that latches into a base at the front of the machine. You should be able to close and open the latch with one hand and minimal force. If the base is too tight and the latch requires significant force to actuate, you may need to adjust the base.
Use this guide to adjust the mixer base on a Form 4 generation printer.
Required Supplies:
Estimated time: 10 minutes
Preparing the workspace
Overview: Prepare the printer and a dust-free workspace for adjusting the mixer base.
Step 1: Remove the build platform
Remove the build platform first to avoid dripping resin onto the Light Processing Unit (LPU) .
Step 2: Remove the resin cartridge
Remove the resin cartridge and close the vent cap to prevent resin from dripping off of the bite valve and into the printer.
Step 3: Remove and store the resin tank and mixer
Unlatch the mixer and resin tank. Remove the resin tank and cover it with its lid. Set the tank aside on a clean, flat surface.
Notice:
Wear gloves and hold the resin tank by the tank grips on either side to avoid contamination or damage to the underside of the tank.
Step 4: Prepare the workspace
Clear a workspace around your printer. Ensure that the workspace is well-ventilated and free of dust.
Step 5: Clean the printer
Warning:
Resin may cause skin irritation or an allergic skin reaction. Wear gloves when handling liquid resin or resin-coated surfaces. Wash skin with plenty of soap and water.
Open the printer cover and clean any resin pooled on and around the LPU with paper towels. Dampen the paper towels with isopropyl alcohol if necessary to fully remove the resin.
Danger:
Fire hazard. IPA is flammable. Keep containers closed, and keep out of the reach of children.
Step 6: Unplug the printer
Disconnect the power cable before continuing with maintenance. Do not perform maintenance on the printer while it is connected to power. Wait five minutes after disconnecting the printer from power before proceeding.
Step 7: Cover the LPU
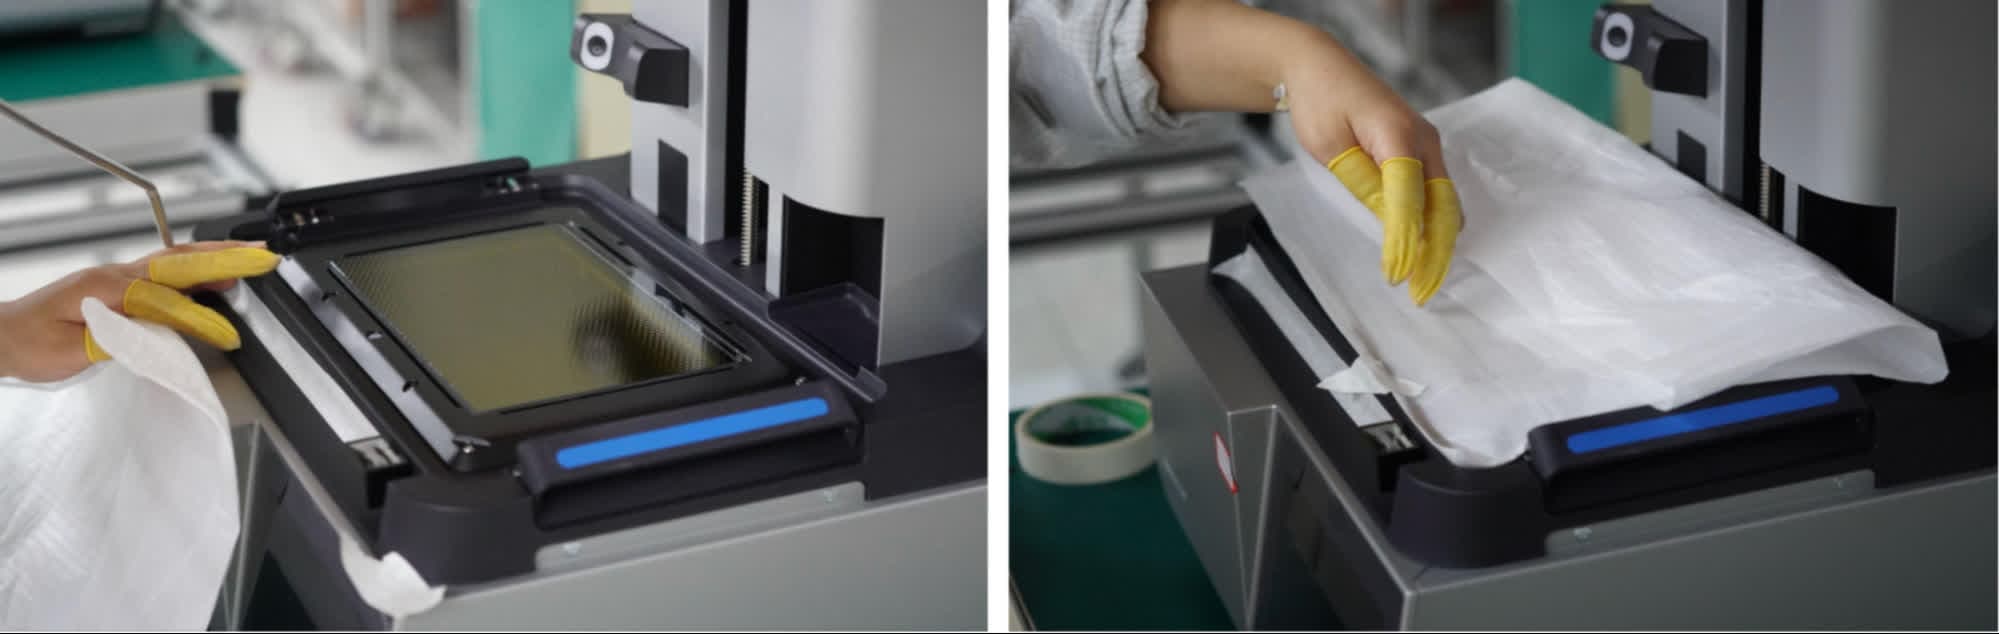
Lift the printer’s cover to access the LPU. Place a lint-free cloth or other similar protective material over the LPU. Make sure the entire surface is covered.
Step 8: Home the mixer base
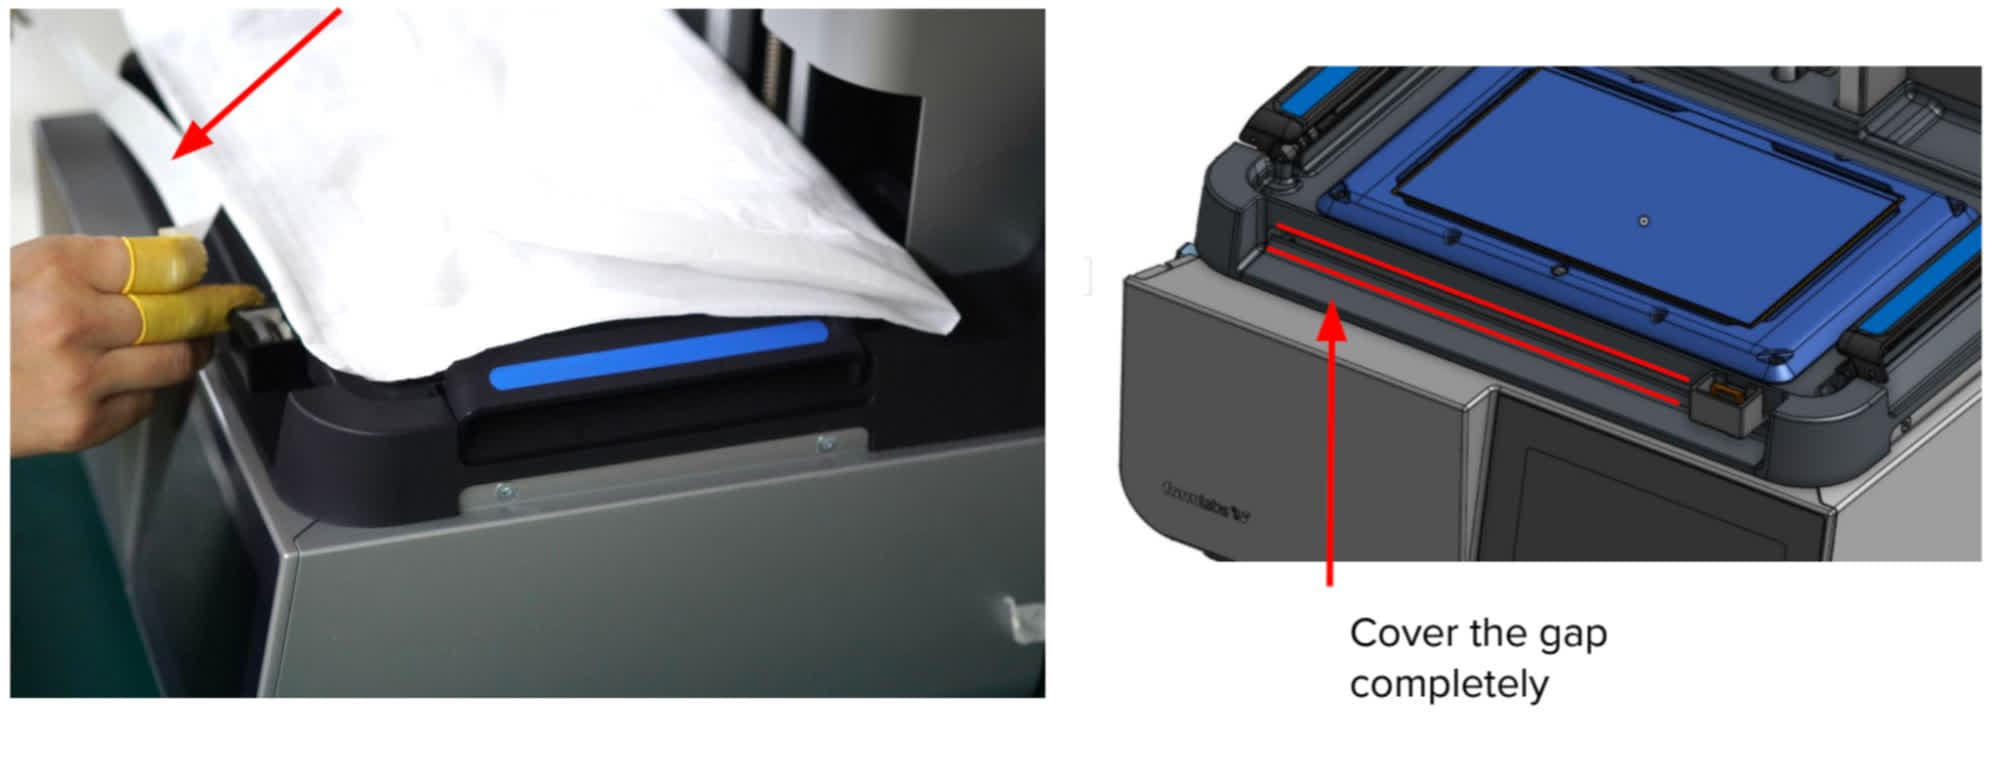
Move the mixer base to the right side of the machine.
Step 9: Cover the gap under the LPU
Place a strip of tape on the front of the printer to cover the gap between the LPU and the lip the mixer base rides on. Be sure to cover the gap completely to prevent debris from entering the printer.
Step 10: Cover the gap under the mixer base
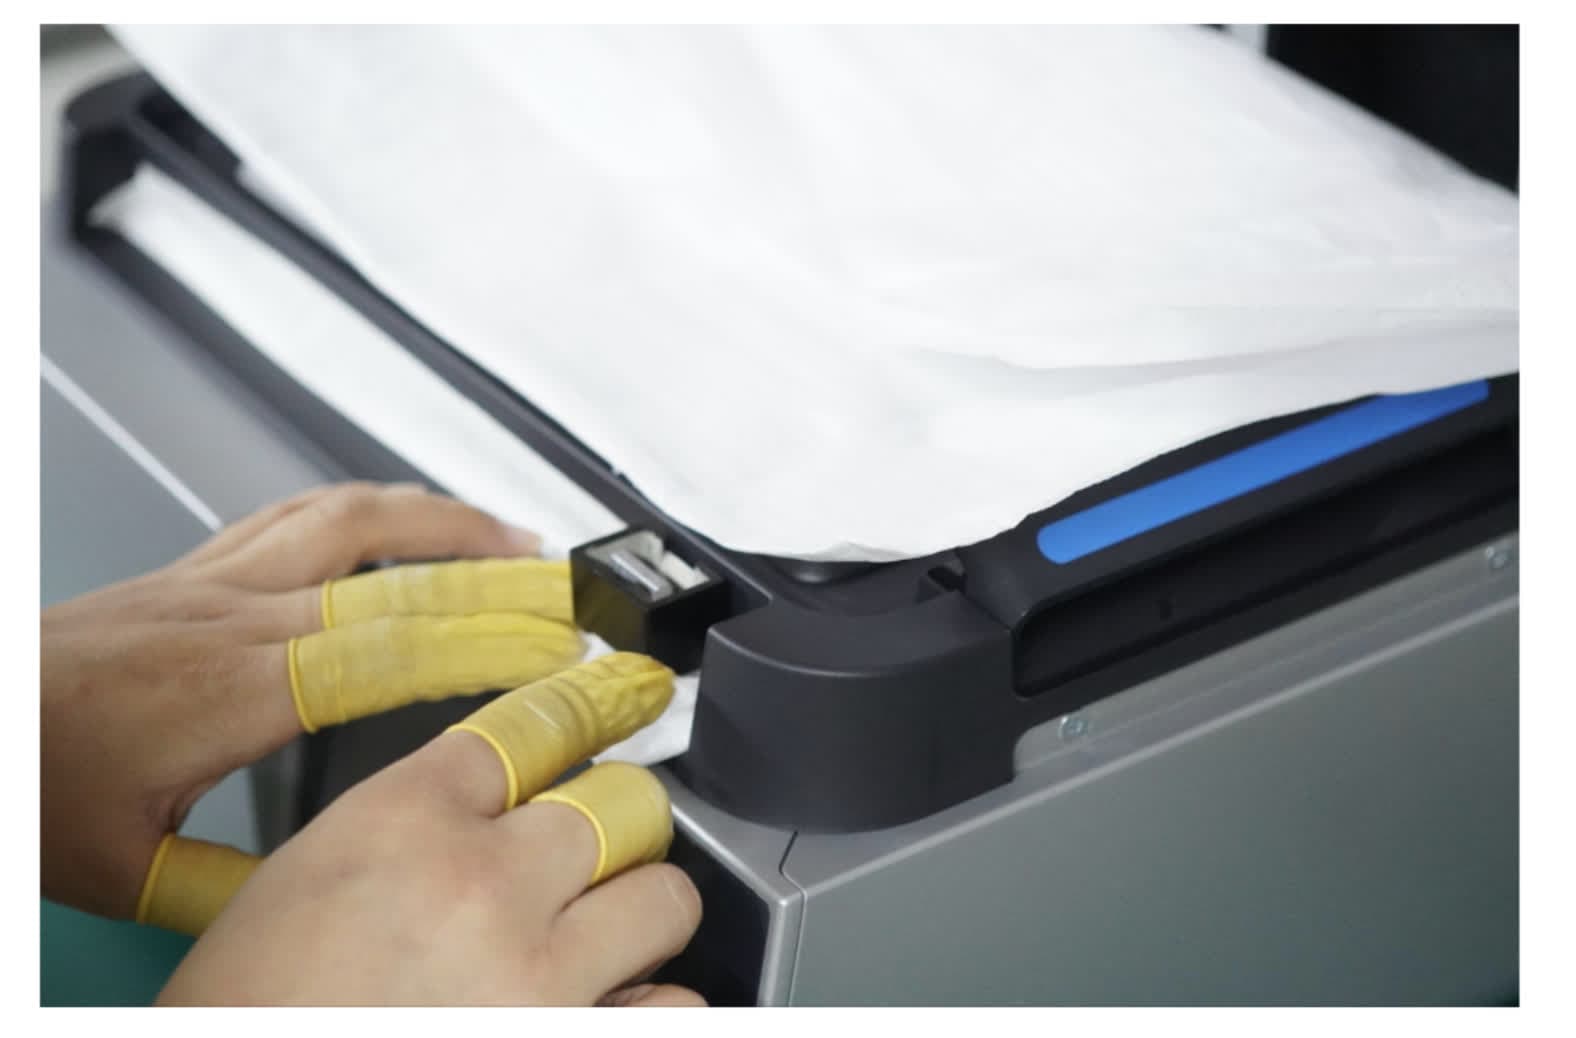
Place a piece of folded lint-free cloth or other similar protective material underneath the mixer base. Make sure the mixer base is entirely covered.
Adjusting the mixer base
Overview: After preparing the printer and a dust-free workspace, adjust the mixer base.
Step 1: Loop sandpaper
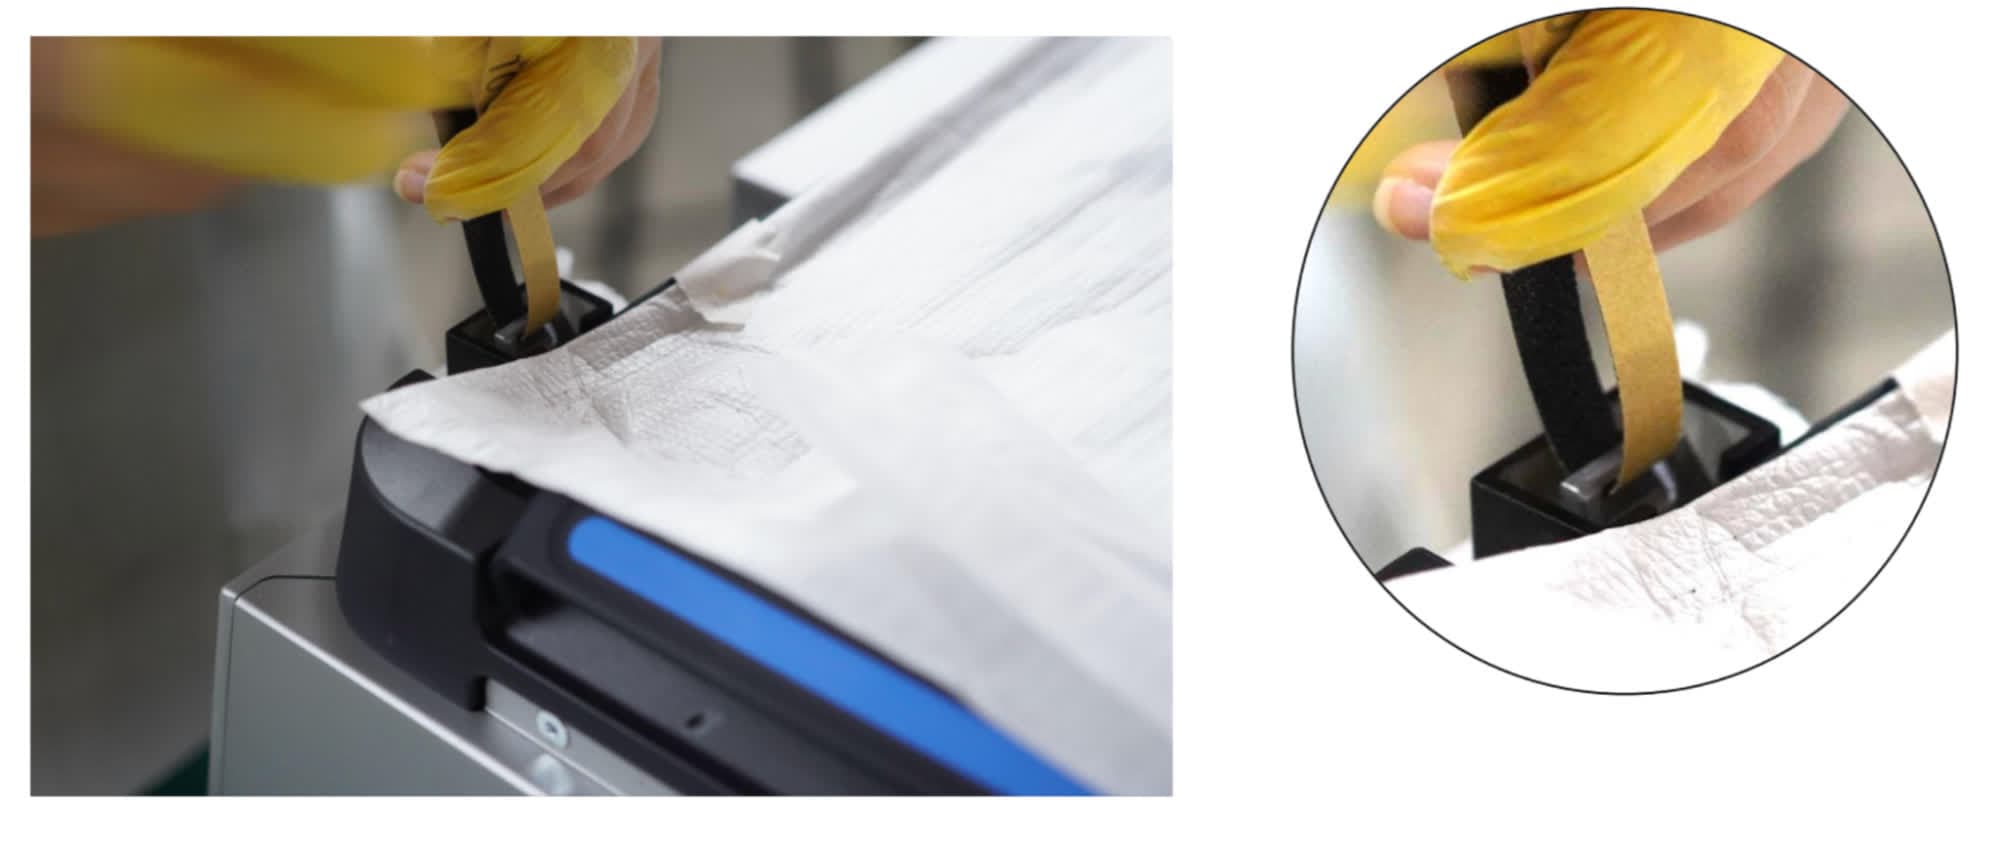
Loop a piece of coarse (80 grit) sandpaper under the latch lock in the mixer base. Formlabs recommends using a strip of sandpaper that measures around 9 mm × 150 mm.
Step 2: Sand the latch lock
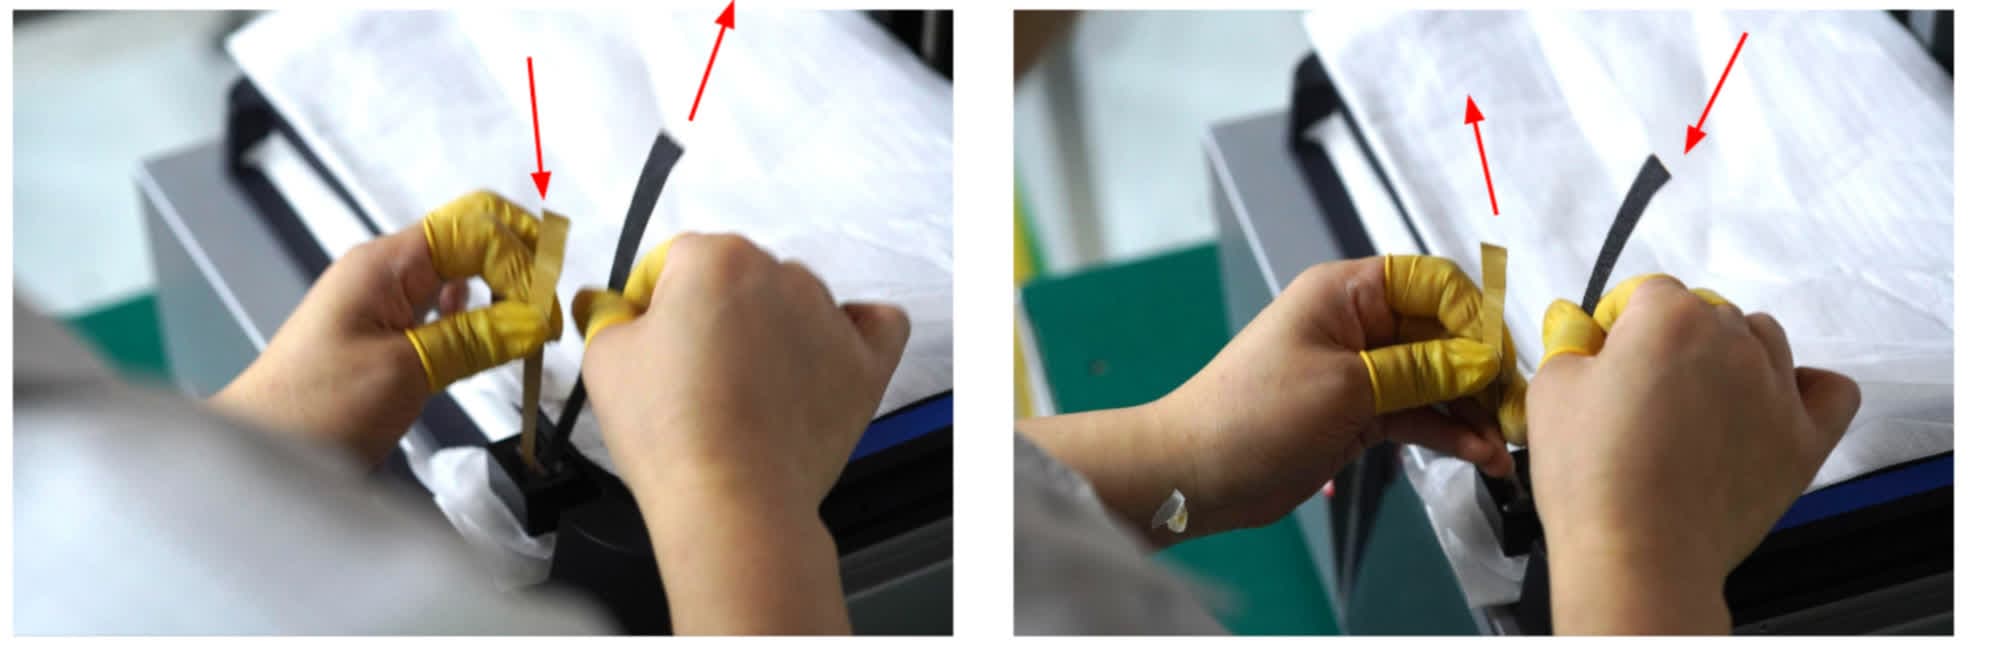
Pull gently on both ends of the sandpaper and move the ends quickly up and down. Repeat this motion 60 times, or about 30 seconds. Discard the sandpaper after use.
Step 3: Test the latch
Insert the mixer into the base. Latch and unlatch the mixer.The mixer should latch firmly when installed but still be removable with one hand.
Step 4: Continue sanding (optional)
If there are issues latching the mixer, perform additional sanding. There is little to no risk of oversanding.
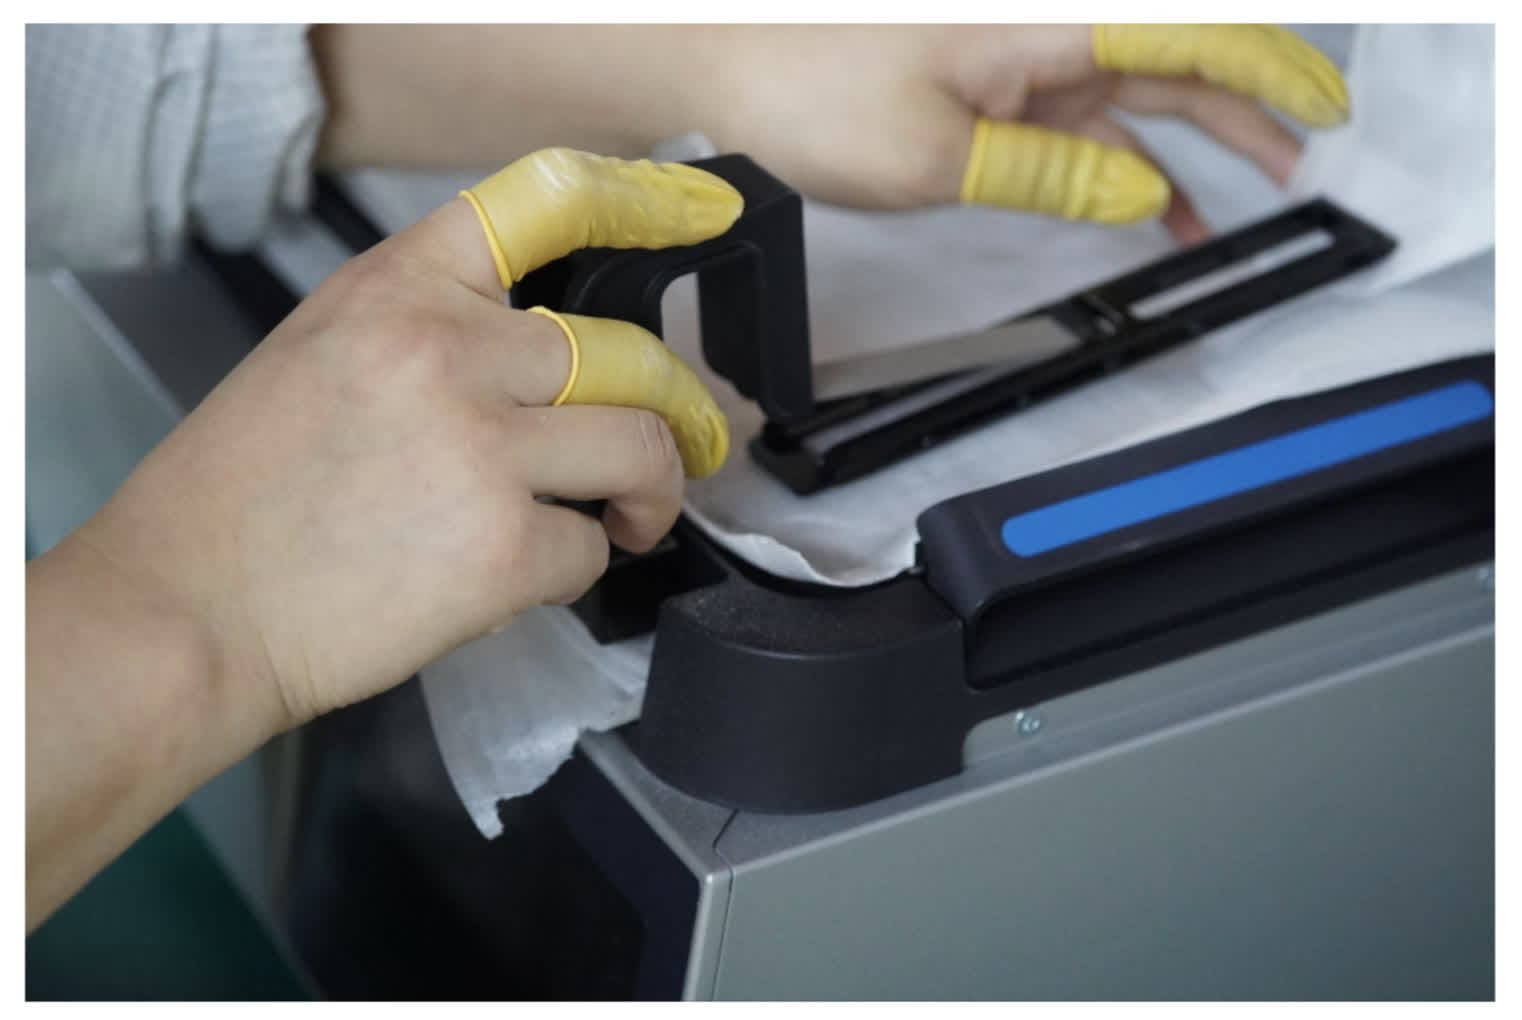
Step 5: Clean the mixer base
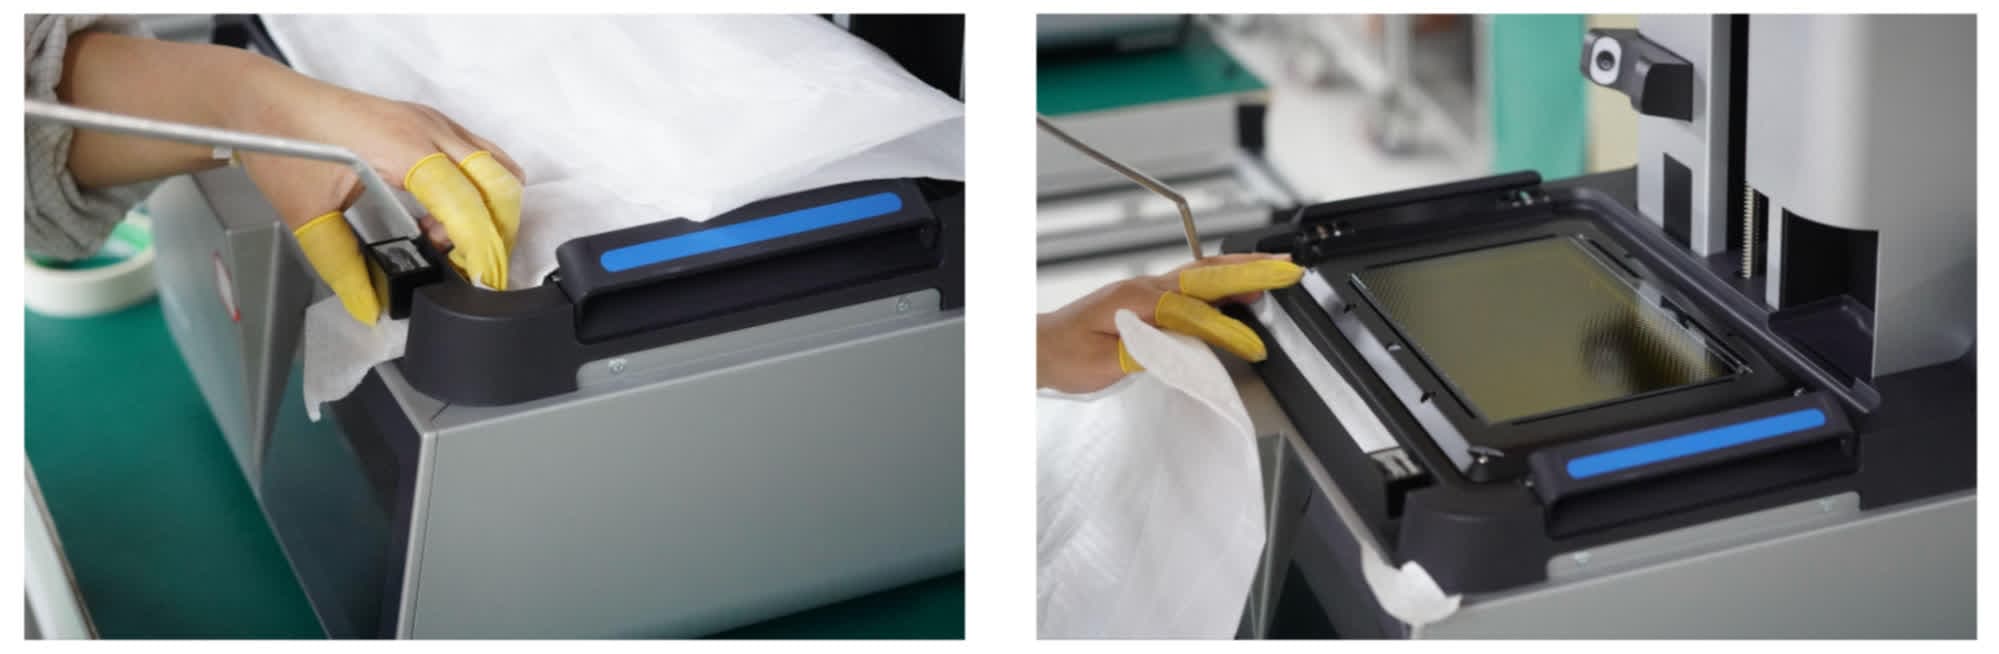
Use a vacuum cleaner or compressed air hose to clean dust from the mixer base, printer, and LPU. Ensure all dust is removed before removing tape and protective material.
Step 6: Remove protective material
Remove all protective material from the LPU, mixer base, and printer.
Finalizing the repair
Overview: After adjusting the mixer base, power on the printer and perform final checks.
Step 1: Power on the printer
Connect the power cable to the printer and the power supply. The printer initializes.
Step 2: Test the repair
Insert a resin cartridge, resin tank, build platform, and mixer, then start a print. Check that the mixer moves properly and remains properly latched to the mixer base. Contact Formlabs Support or your authorized reseller to share the results of the procedure.