
Note:
Your printer must be running firmware version 1.5.15 or later to use the cleaning mesh.

Print failures can be messy. The tank tool may have trouble gripping and removing cured resin if it is small or oddly shaped. Instead, The Form 3/Form 3B has the option to print a cleaning mesh that binds the cured resin together into a single piece that can be easily extracted from the tank. Print a cleaning mesh through the Settings menu on the printer’s touchscreen.
Note:
Your printer must be running firmware version 1.5.15 or later to use the cleaning mesh.
The following resins can currently be used to print the cleaning mesh in the Form 3/Form 3B:
Printing a cleaning mesh
The cleaning mesh is a thin part that prints directly on the resin tank film and is perfect for removing several print failures from a resin tank at the same time. It should take approximately 15–20 minutes to complete.
To begin printing the cleaning mesh:
Note:
The build platform does not lower into the tank while the cleaning mesh is printing.
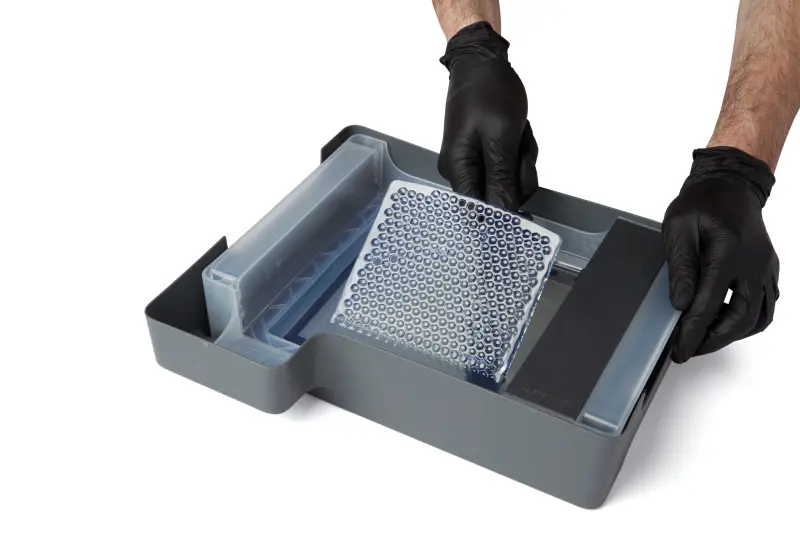
Preparing the workspace to remove a cleaning mesh
The cleaning mesh causes other bits of cured resin to adhere and become caught in a net. After the cleaning mesh has finished printing, it’s time to remove all cured resin from the resin tank.
To remove the cleaning mesh from the tank:
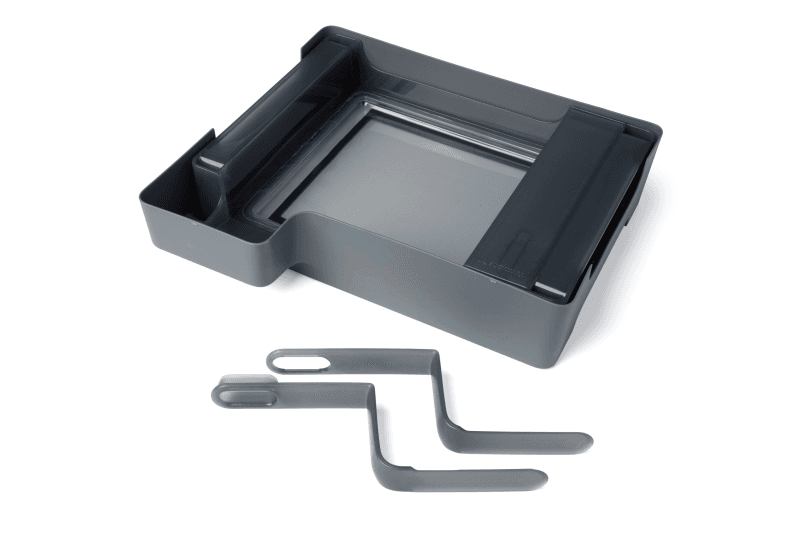
Removing a completed cleaning mesh
After your printer and workspace have been prepared, use the tank tool to slide under the partially adhered cleaning mesh to remove it.
Step 1: Place the tank tool on the right side of the tank
Place the tank tool on the right side of the resin tank, opposite the mixer.
Tip:
The cleaning mesh does not cover the entirety of the resin tank area—it is only the size of the build platform. Start with the tank tool near the center of the resin tank.
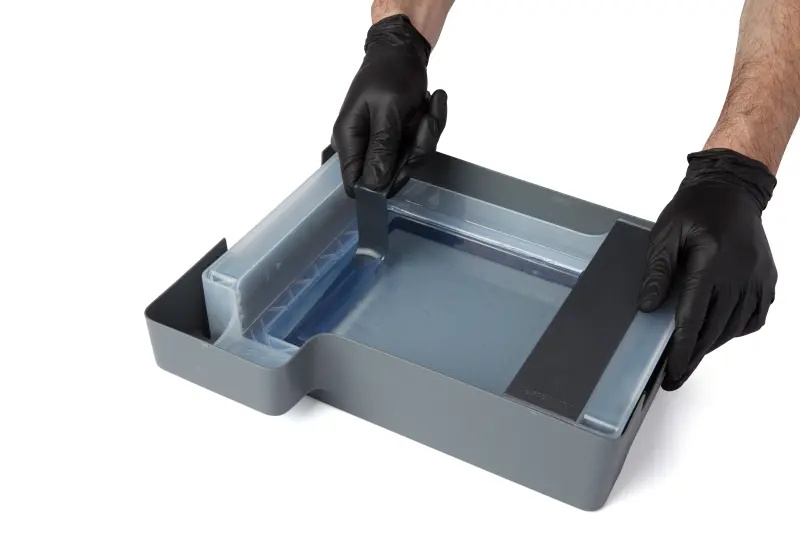
Step 2: Slide the lower edge under the cleaning mesh
Slide the entire lower edge of the tank tool along the bottom of the tank.
Tip:
Apply pressure to the flexible film at the bottom of the tank to reach underneath the cleaning mesh.
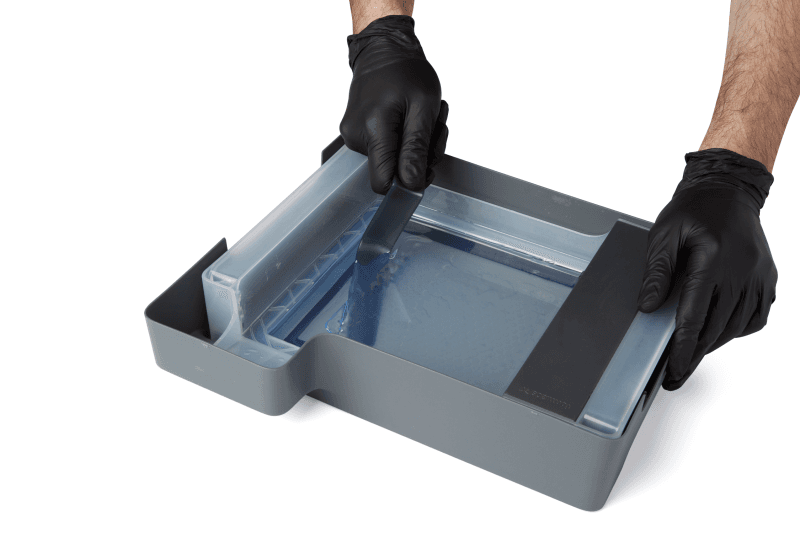
Step 3: Continue sliding the tank tool
Continue to slide the entire edge of the tank tool under the cleaning mesh until it is past the halfway point
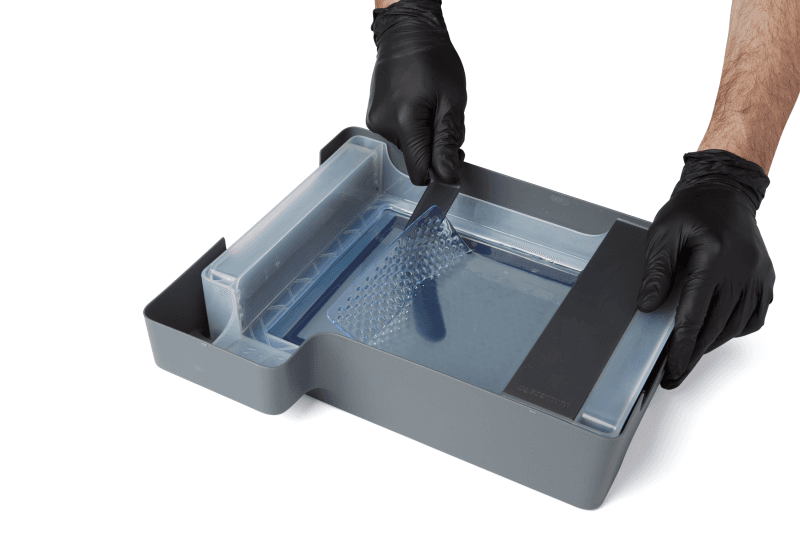
Step 4: Peel the cleaning mesh upward
Once the tank tool has reached the halfway point of the cleaning mesh, lift the handle of the tank tool to peel the full cleaning mesh off the bottom of the resin tank.
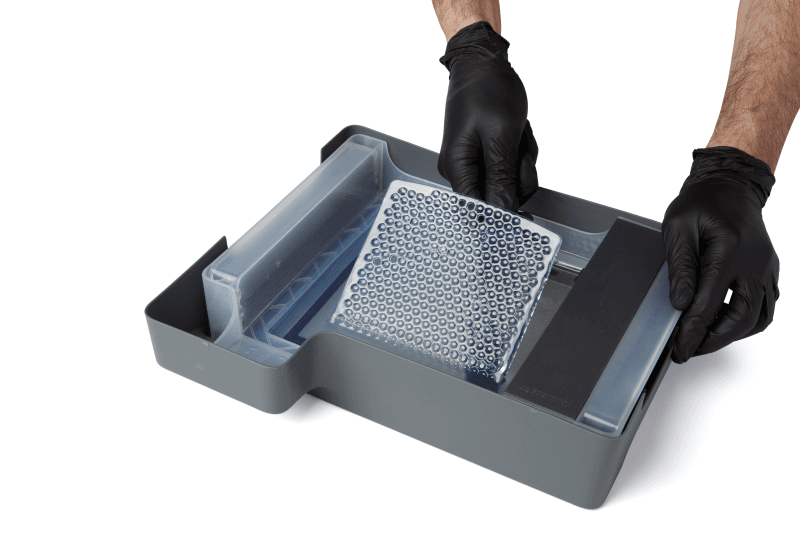
Step 5: Dispose of the cleaning mesh
The cleaning mesh is cured resin and can be deposited in any trash receptacle. If there is uncured resin on your cleaning mesh, place the cleaning mesh on a sunny windowsill for 24–48 hours until all resin has completely cured.
Tip:
To conserve resin, you can drain the uncured resin coating the cleaning mesh back into the tank.