

WHITE PAPER
Formlabs Logo

Preparing your workspace for the Form Auto

Preparing your workspace for the Form Auto

Before unboxing and setting up your Form Auto, prepare a workspace for the machine.

  • Leave enough space to access the part release bin, fully rotate the printer on the turntable, and for the printer cover to open. Reserve the following minimum dimensions (W x D x H) for the most convenient access: 61 × 91.5 × 91.5 cm (24 × 36× 36 in).
  • With the printer installed, the Form Auto weighs approximately 50 kg (110 lbs), so ensure that the workbench, shelving, or other surface can safely support it.
  • The Form Auto also needs access to power and, if you are planning to use a wired internet connection, an Ethernet port.

Note:

If your product has any visible shipping damage upon delivery, add a note to the shipping receipt or bill of lading. Contact Formlabs Support or your authorized reseller and provide photos of the damage, both to the unopened package and its contents.
If you are planning to install a previously-used printer onto the Form Auto:

  1. Remove and store the build platform, resin cartridge, and resin tank.
  2. Unplug the power, USB, and Ethernet cables from the printer.
  3. Thoroughly clean the printer of any liquid resin.

Warning:

Resin may cause skin irritation or an allergic skin reaction. Wear gloves when handling liquid resin or resin-coated surfaces. Wash skin with plenty of soap and water.

Suggested setups

Install your Form Auto such that you can access the part release bin and also rotate the printer on the turntable so you can prepare the printer and perform maintenance. Consider these requirements when selecting a location or shelving solution for your Form Auto, particularly if you are installing multiple units. Formlabs suggests two arrangements:

Option 1: Freestanding work surface or shelving

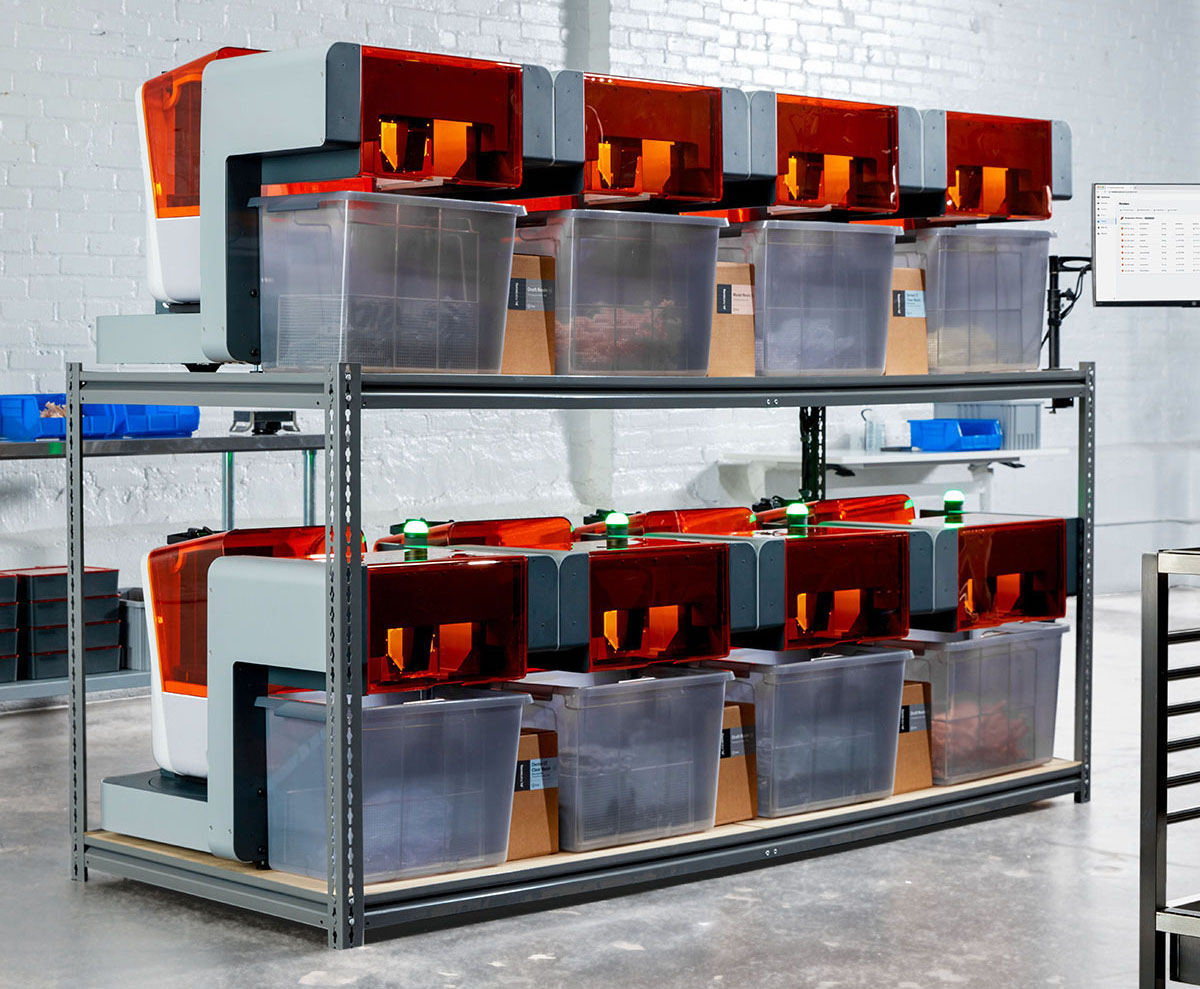
For work surfaces or shelving positioned away from a wall, where you can access both sides easily, arrange the units side-by-side with the part release bins in a row. Ensure that the work surface or shelf is deep enough to fully support the Form Auto and part release bin.

Option 2: Work surface or shelving against a wall

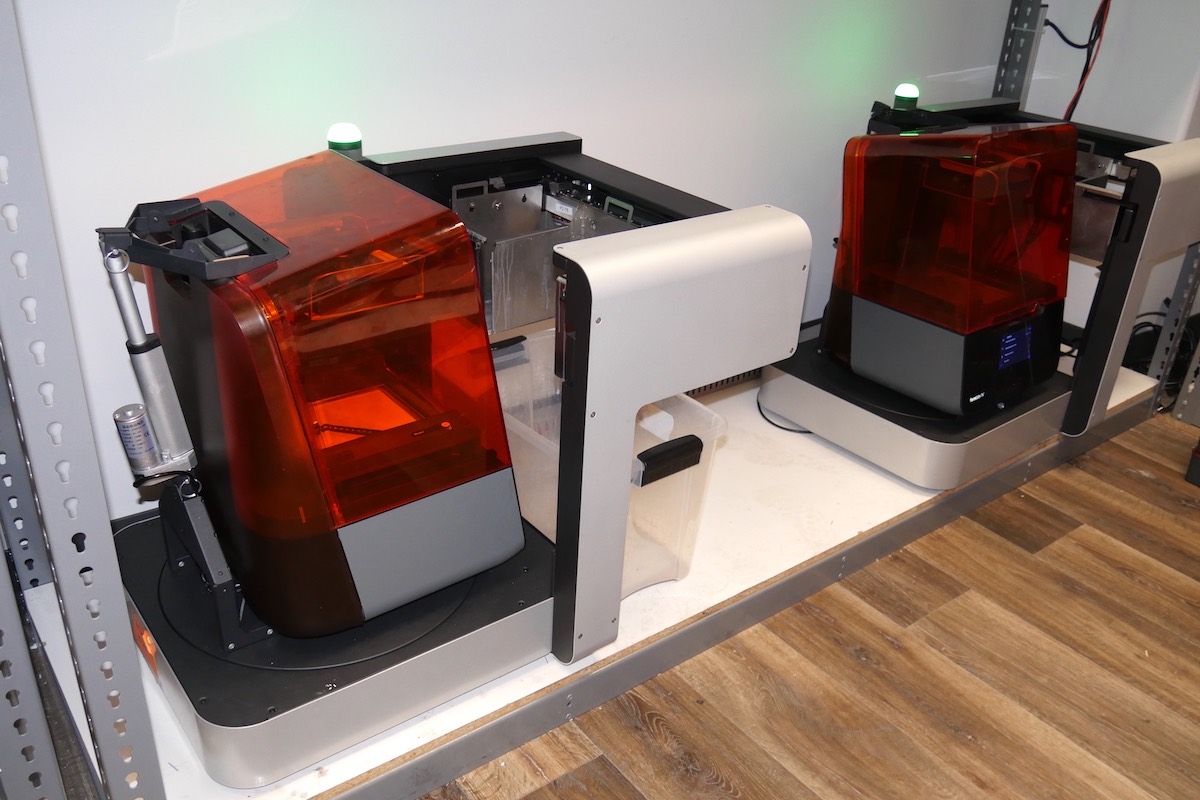
For work surfaces or shelving positioned against a wall, arrange the units end to end, with the part release bin of one unit next to the base of the next. Orient the machines so that the part release bins are on the right, as shown.

A row of Form Auto units on freestanding shelvesA row of Form Auto units positioned next to a wall

Next steps

After preparing your workspace for the Form Auto, receive and unbox the unit once it arrives.