
Required Supplies:
Formlabs:
- Light Processing Unit
- Light Processing Unit ribbon cable
- 2 mm hex driver
- 3 mm hex driver
- Glass cleaning wipe
Third-party:
- Nitrile gloves
- Paper towels
- Clean isopropyl alcohol (IPA, 90% or higher)

The Light Processing Unit (LPU) contains the printer’s laser diode, galvanometer, and other mirrors and lenses that aim the laser along its path for each layer of a print. The LPU sits within the LPU housing, which travels left and right underneath the resin tank. A malfunctioning LPU will prevent the printer from printing properly.
Use this guide to replace the Form 3 Light Processing Unit.
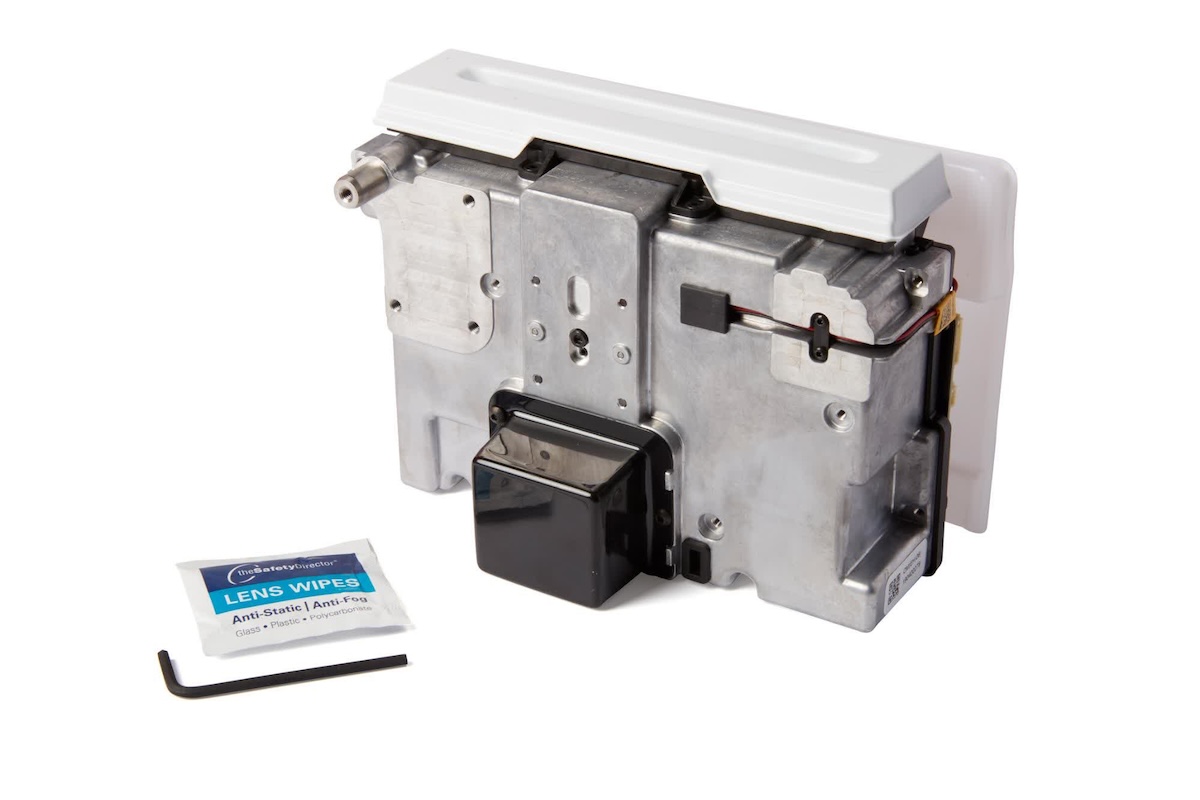
Required Supplies:
Formlabs:
Third-party:
Estimated time: 20–30 minutes
Preparing the workspace
Overview: Prepare the Form 3 and a dust-free workspace for replacing the LPU.
NOTICE:
The LPU, rollers, and optical window are sensitive to dust and contaminants. Do not remove the LPU from its packaging until instructed. Do not touch the rollers or optical window, located on top of the LPU housing, during maintenance.
Step 1: Remove the build platform
Remove the build platform first to avoid dripping resin onto the LPU or into the printer cavity.
Step 2: Remove the resin cartridge
Remove the resin cartridge and close the vent cap to prevent resin from dripping off of the bite valve and into the printer.
Step 3: Remove and store the resin tank
Remove the resin tank, place it in the resin tank case, and cover it with its lid. Set the case and tank aside on a clean, flat surface.
NOTICE:
Wear gloves and hold the resin tank by the tank grips on either side to avoid contamination or damage to the underside of the tank.
Step 4: Prepare the workspace
Clear a workspace around your printer. Ensure that the workspace is well-ventilated and free of dust.
Step 5: Clean the printer cavity
WARNING:
Resin may cause skin irritation or an allergic skin reaction. Wear gloves when handling liquid resin or resin-coated surfaces. Wash skin with plenty of soap and water.
Open the printer cover. Clean any resin pooled on the printer floor, inside the printer cavity, with paper towels. Dampen the paper towels with isopropyl alcohol if necessary to fully remove the resin.
DANGER:
Fire hazard. IPA is flammable. Keep containers closed, and keep out of the reach of children.
Step 6: Move the LPU to its maintenance position
With the printer plugged in and powered on, tap the gear icon to enter the Settings menu, then tap Calibration, then LPU Replacement. Follow the on-screen instructions. The LPU housing will move from its storage position on the right side of the printer into its maintenance position.
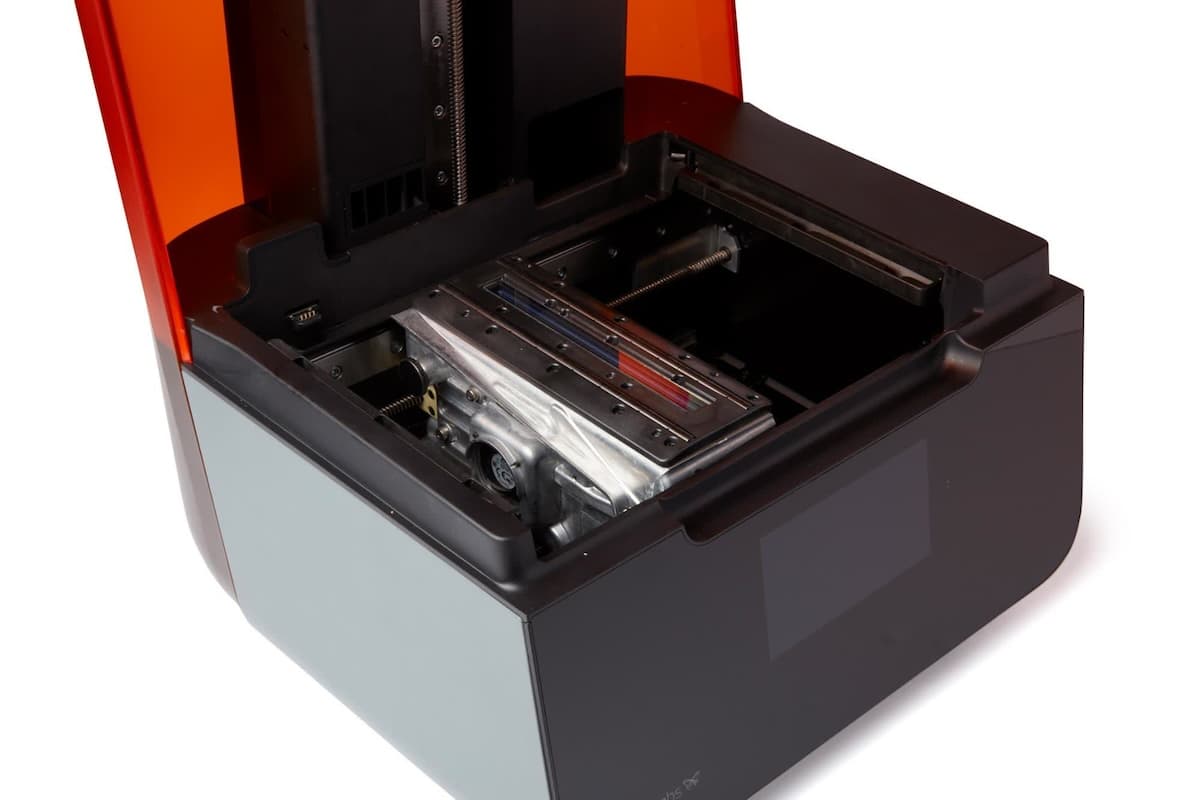
Notice:
If you are moving the LPU to reseat its cables rather than replace it, use the Motor Moves tool on the touchscreen instead. Tap Settings > Maintenance > Motor Moves, then move the LPU as needed. Using the LPU Replacement tool when not actually replacing the LPU can lead to errors.
Step 7: Unplug the printer
When prompted by the touchscreen, disconnect the power cable before continuing with maintenance. Do not perform maintenance on the printer while it is connected to power. Replacing the LPU while the printer is connected to power will permanently damage the printer.
WARNING:
Moving parts and lead screws present crushing and tangling hazards. Be sure that the printer is unplugged from its power source and powered down before interacting with the LPU.
Step 8: Clean the LPU housing
Clean any resin in the area of the LPU housing or on the printer with paper towels. Dampen the paper towels with isopropyl alcohol if necessary to fully remove the resin.
Removing the LPU
Overview: After moving the LPU housing into its maintenance position, remove and unplug the LPU.
Step 1: Cover the laser window
The roller holder, located on top of the LPU housing, has a clear window in the middle through which the laser passes. Cover the window with a lint-free cover, such as a PEC*PAD, to protect it during maintenance.
Step 2: Loosen the LPU housing screws
Use the provided 3 mm hex driver to fully loosen the three hex screws in the LPU housing. The screws are located towards the rear of the left side of the LPU housing. Loosen the screws until they disengage from the LPU.
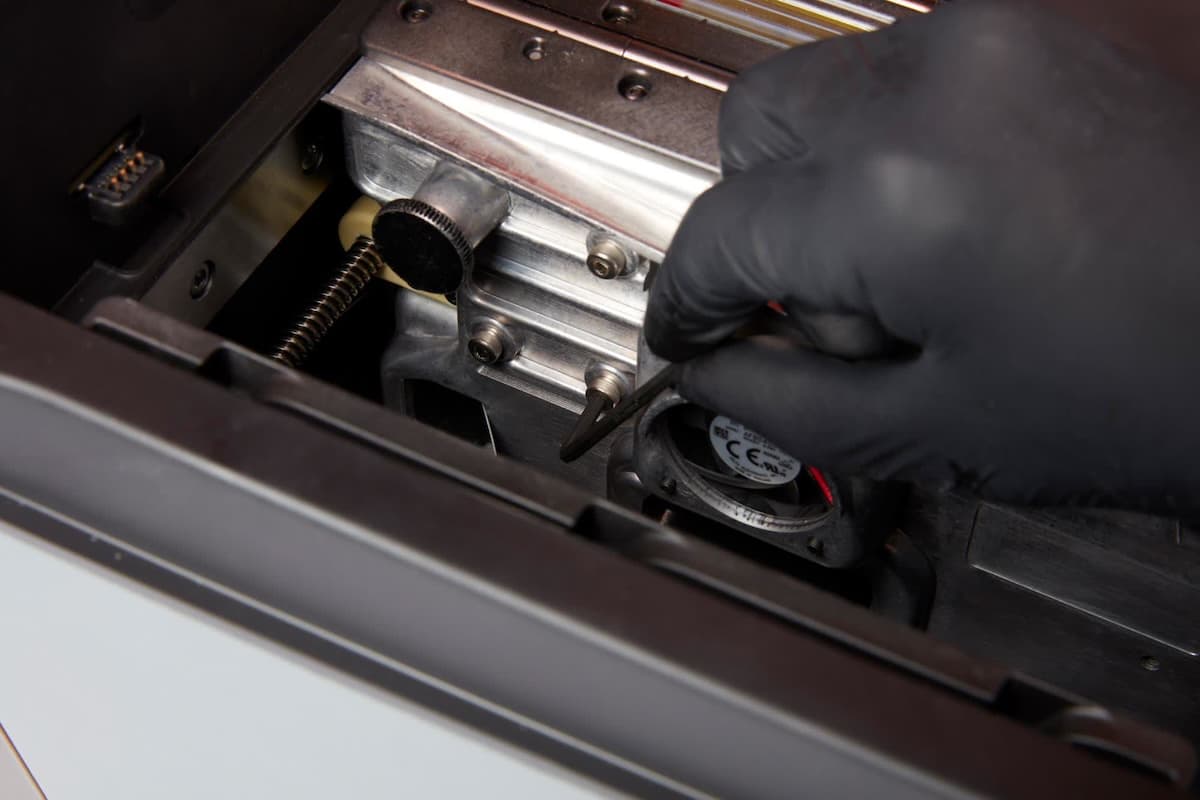
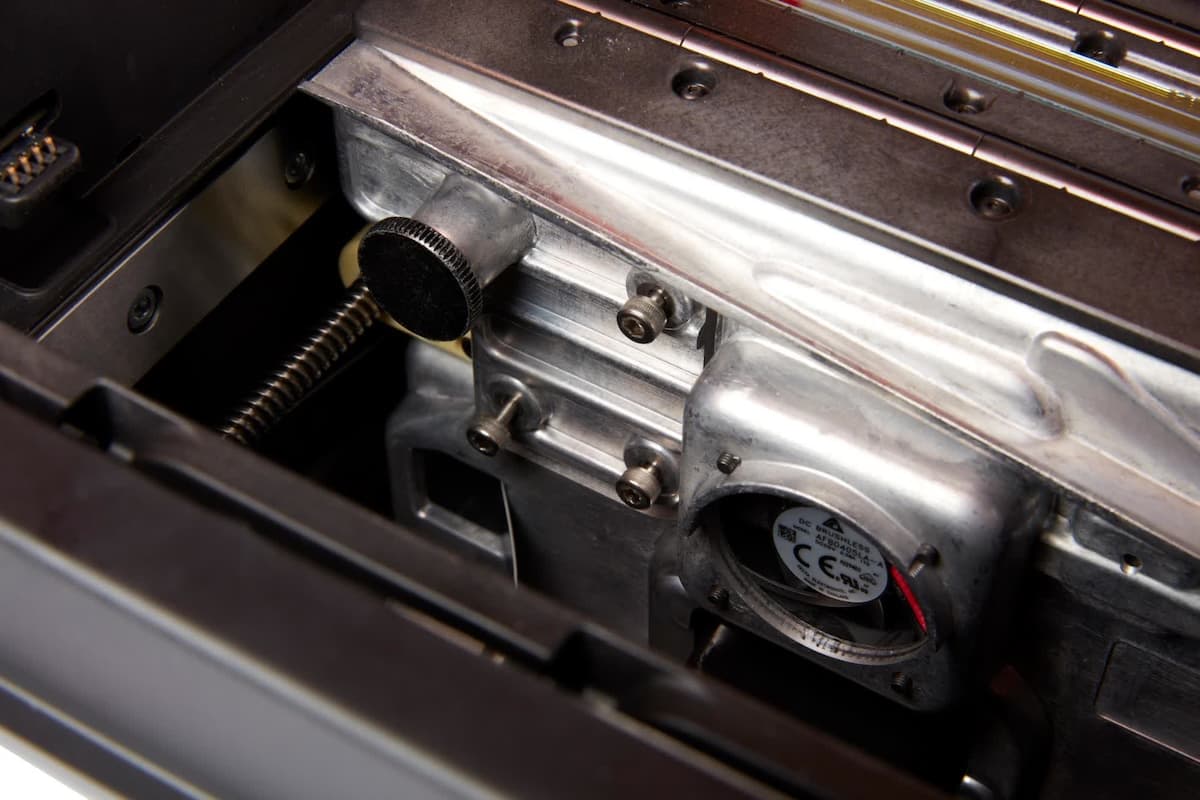
The screws are captive and will remain attached to the LPU housing when fully loose. If any of the captive screws come out of the LPU housing, thread them back into the LPU housing before continuing.
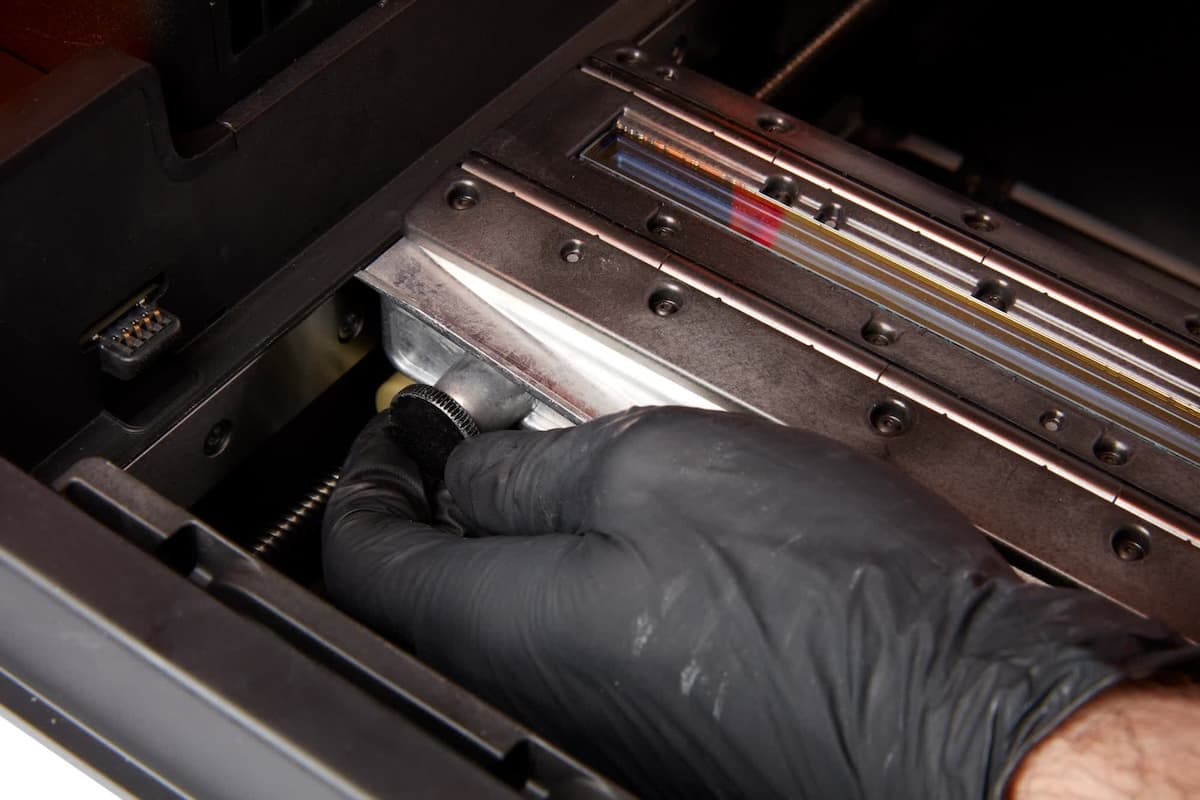
Loosen the thumb screw at the rear of the LPU housing. Leave the last two or three threads of the thumb screw engaged.
Step 3: Remove the LPU from the LPU housing
Unseat the LPU from the LPU housing by pressing on the thumb screw while pulling on the plastic cover on the right side of the LPU. Do not pull on the LPU’s circuit board.
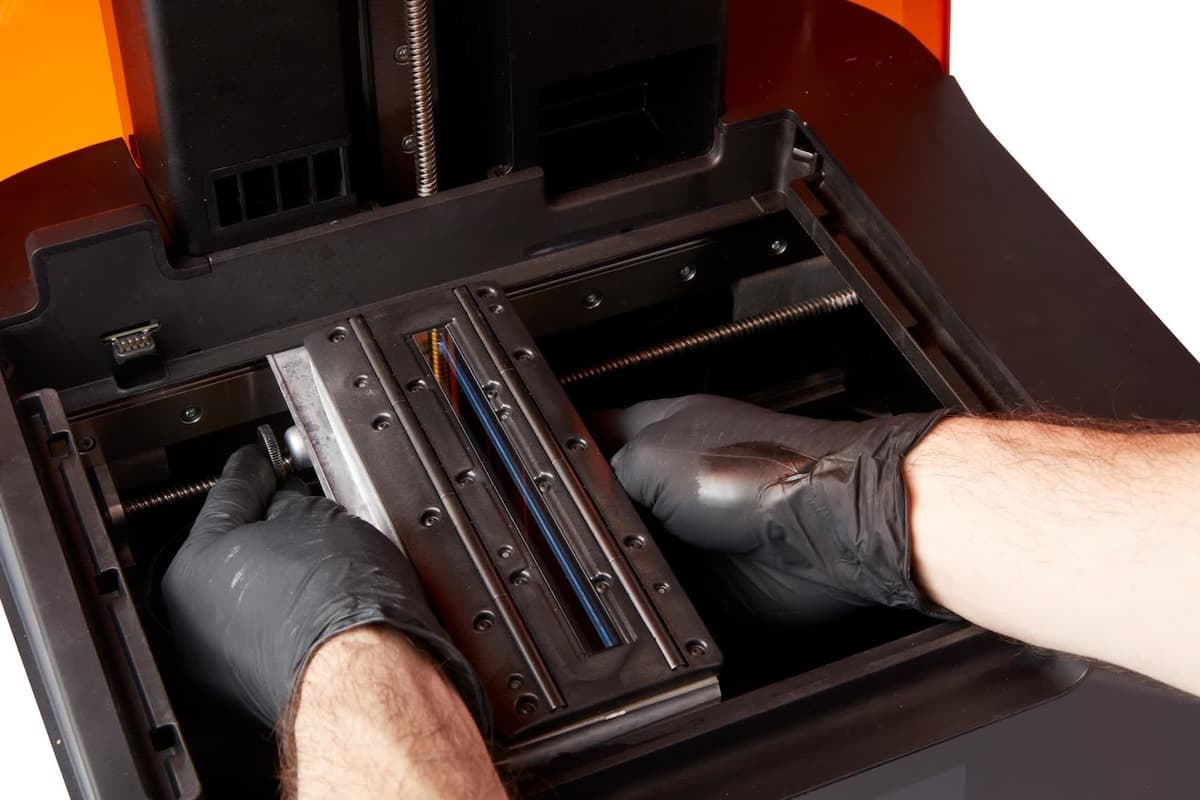
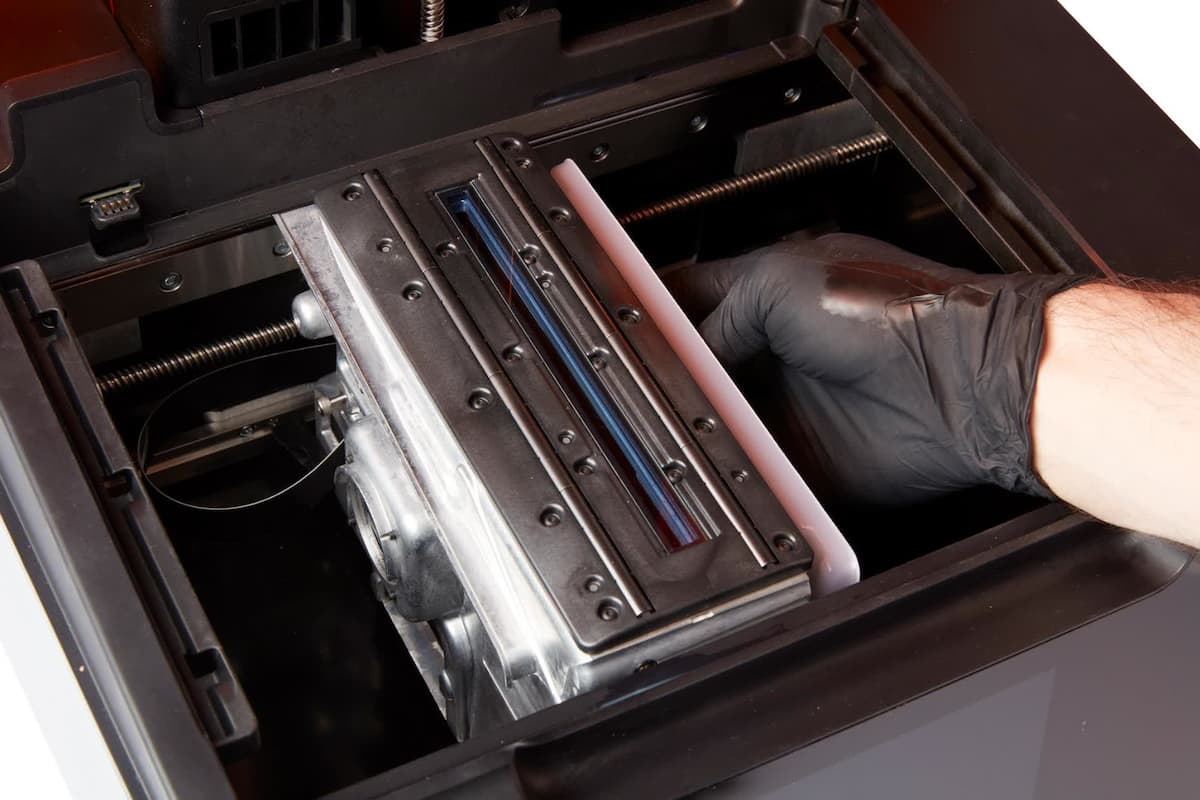
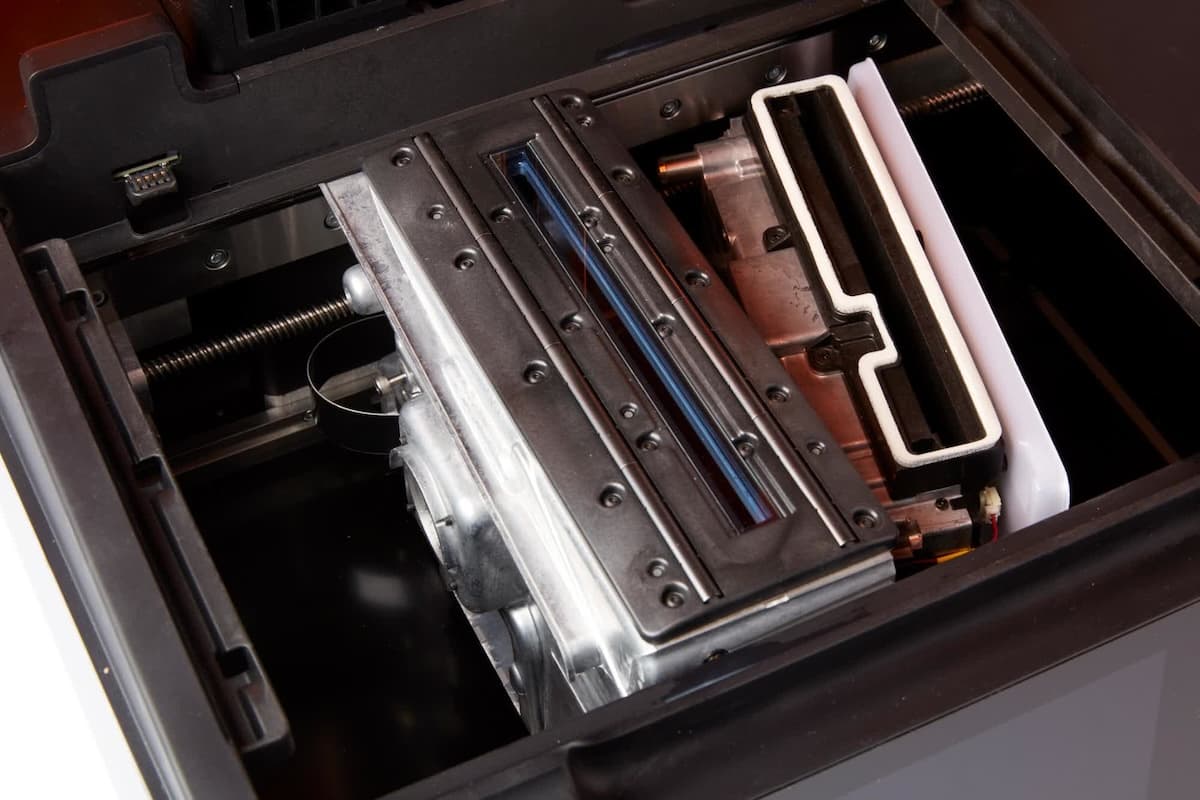
Once the LPU begins to move, loosen and remove the thumb screw. Continue to pull on the plastic guard until the LPU is fully free and rests to the right of the LPU housing.
NOTICE:
Do not pull on the LPU sharply or attempt to remove it from the printer cavity at this time. Doing so can damage the cables that connect the LPU to the printer.
Step 4: Disconnect the ribbon cable
Tilt the LPU forwards, towards the front of the printer. A black ribbon cable will be visible, attached to the rear of the LPU.
NOTICE:
The LPU ribbon cable is delicate. Do not bend, fold, or otherwise damage the ribbon cable.
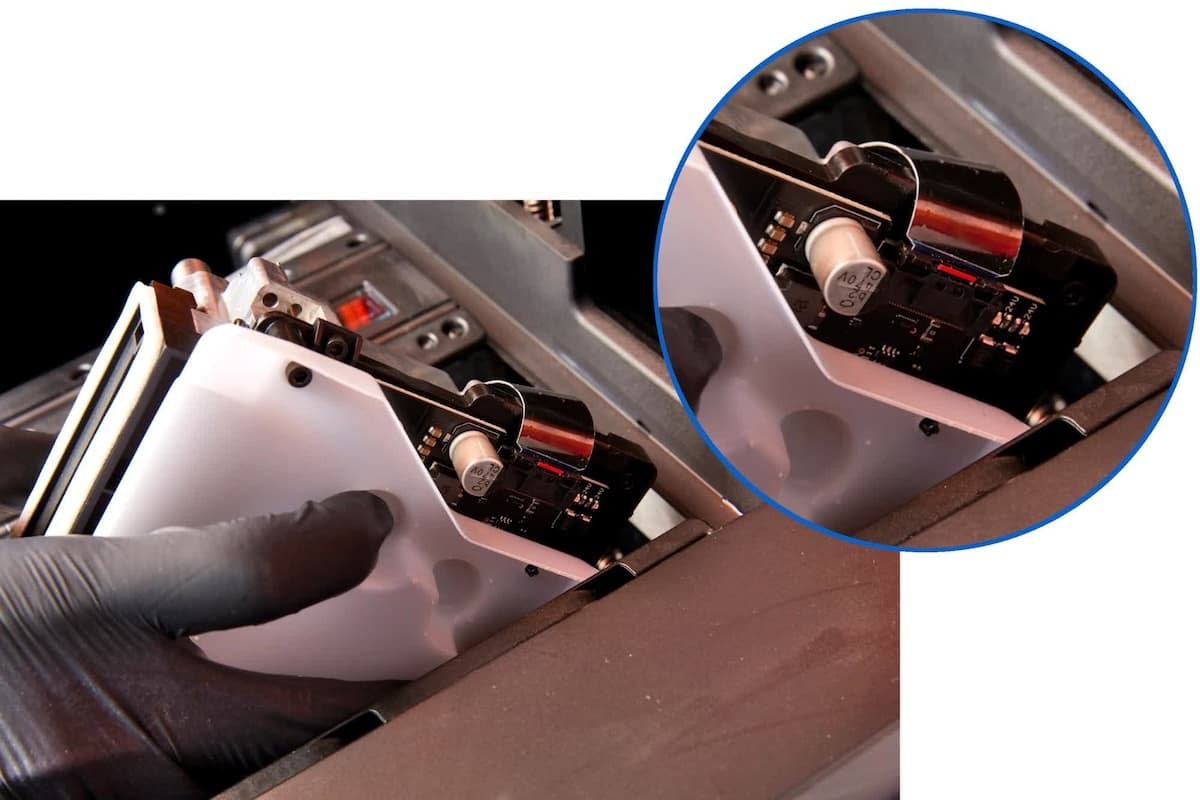
There is a small tab at the base of the ribbon cable plug. Press it toward the left side of the printer (i.e., toward the cable), and gently pull on the plug to disconnect the ribbon cable from the LPU. You may find it easier to use a small plastic tool, such as a pair of tweezers, to press on the tab.
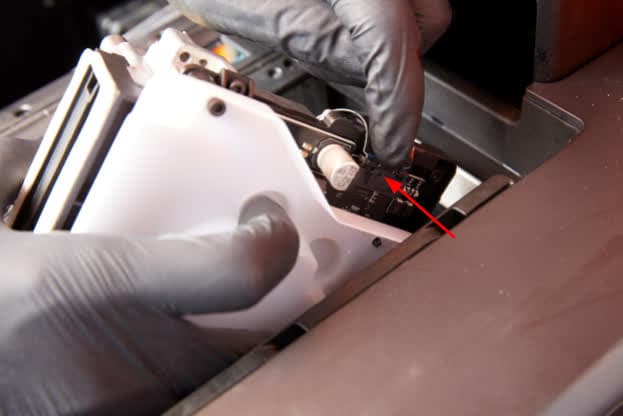
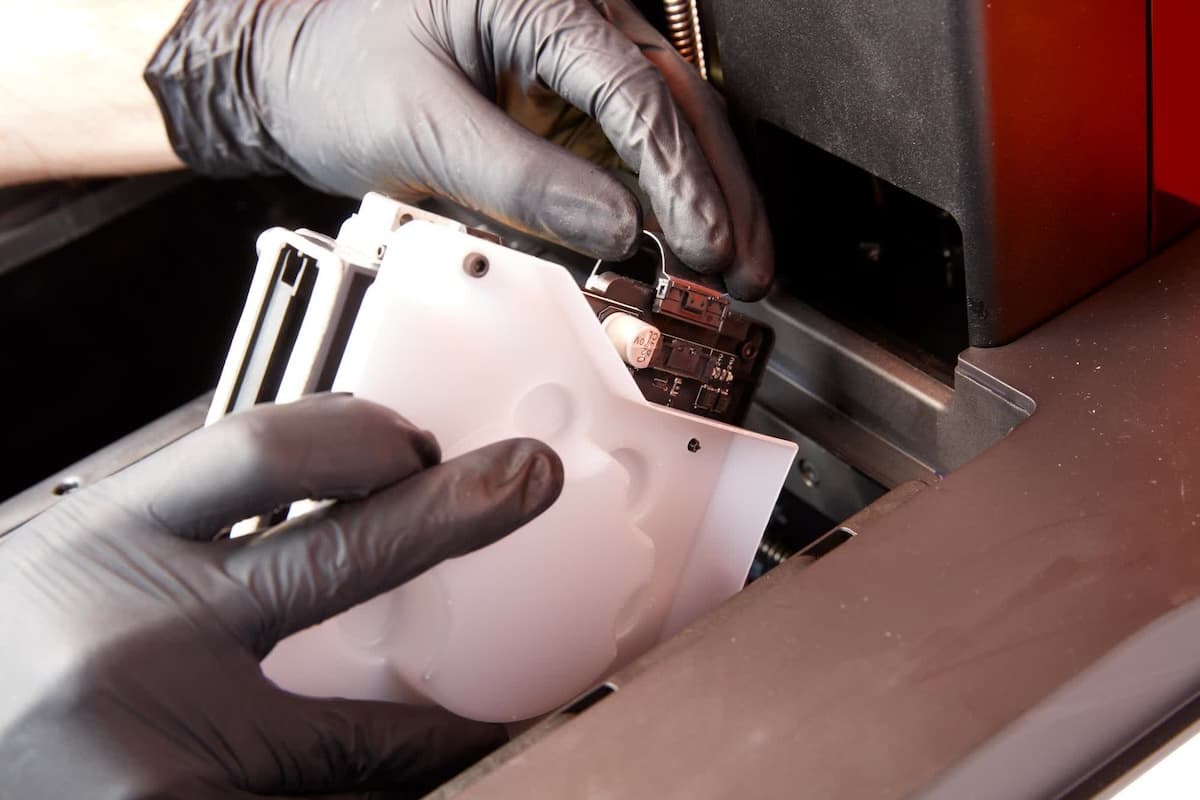
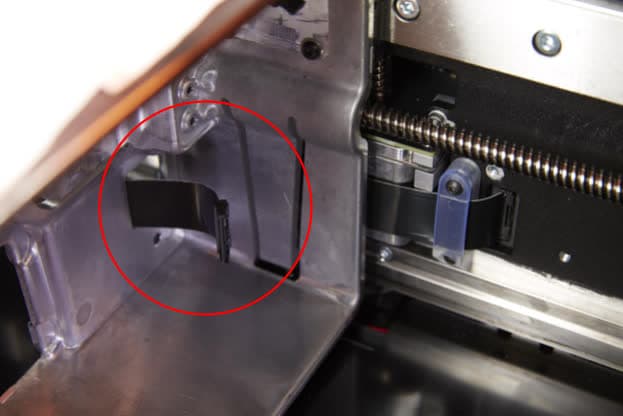
Feed the ribbon cable through the LPU housing so that the ribbon cable connector rests inside the housing. This will protect the ribbon cable from damage during the rest of the LPU removal procedure.
Step 5: Disconnect the front cables
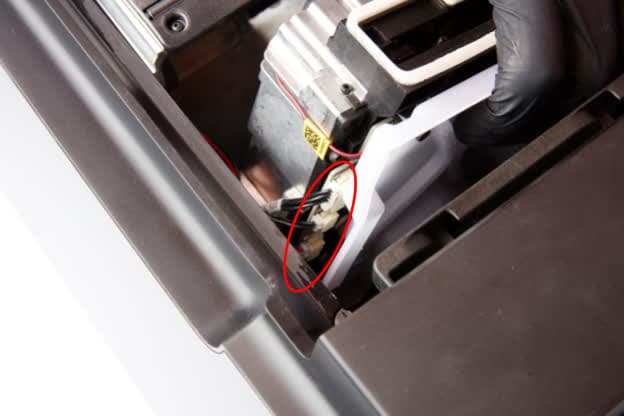
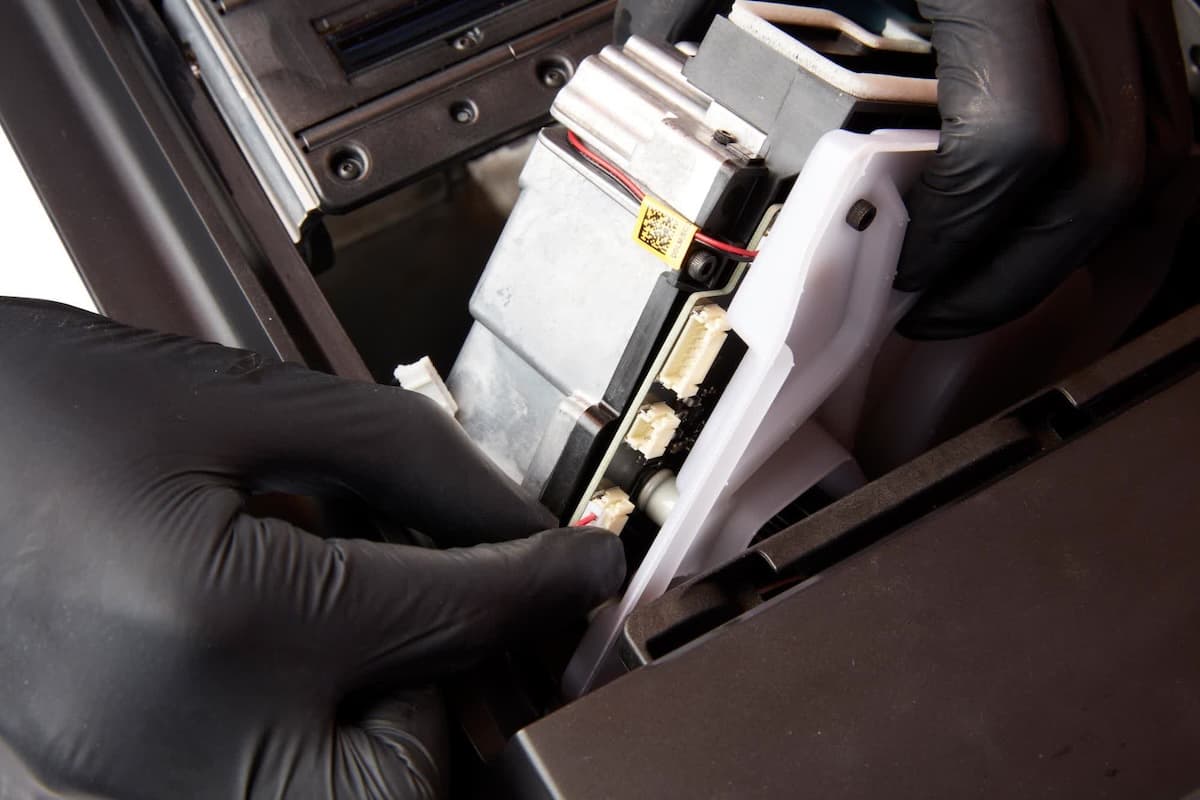
Tilt the LPU backwards, towards the rear of the printer. Three cables will be visible, connected to the front of the LPU. Disconnect each of the three cables by gripping its plug and gently pulling it away from the LPU.
Step 6: Remove the LPU
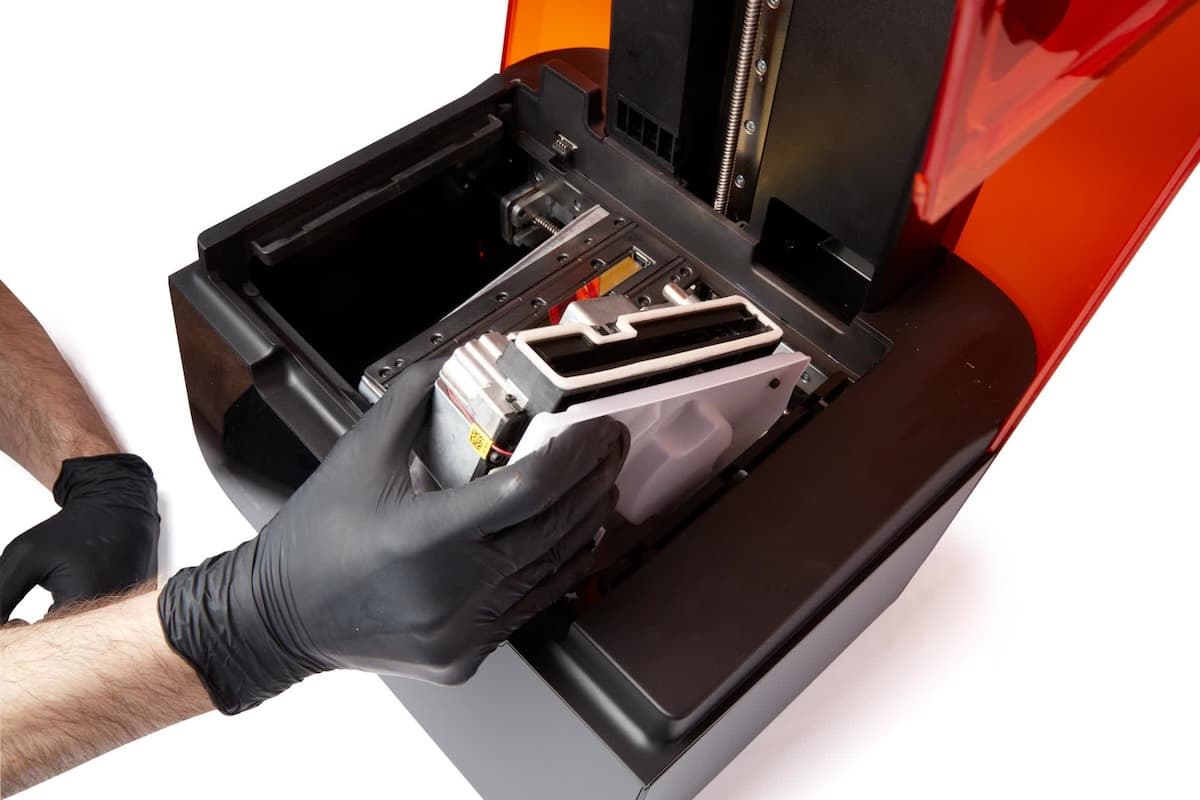
Remove the LPU from the printer and place it aside. If the LPU has resin on it or in it, place the LPU on a paper towel away from the printer to avoid contaminating other surfaces.
Optional: Replacing the LPU ribbon cable
Overview: If the LPU ribbon cable has been damaged before or while replacing the LPU, remove and replace the ribbon cable.
Step 1: Disconnect the ribbon cable from the printer
Using the provided 2 mm hex driver, unscrew and remove the two 2 mm screws holding the LPU ribbon cable retention clip to the printer frame.
There is a small tab at the base of the ribbon cable plug. Press it toward the left side of the printer (i.e., toward the cable), and gently pull on the plug to disconnect the ribbon cable from the printer. You may find it easier to use a small plastic tool, such as a pair of tweezers, to press on the tab.
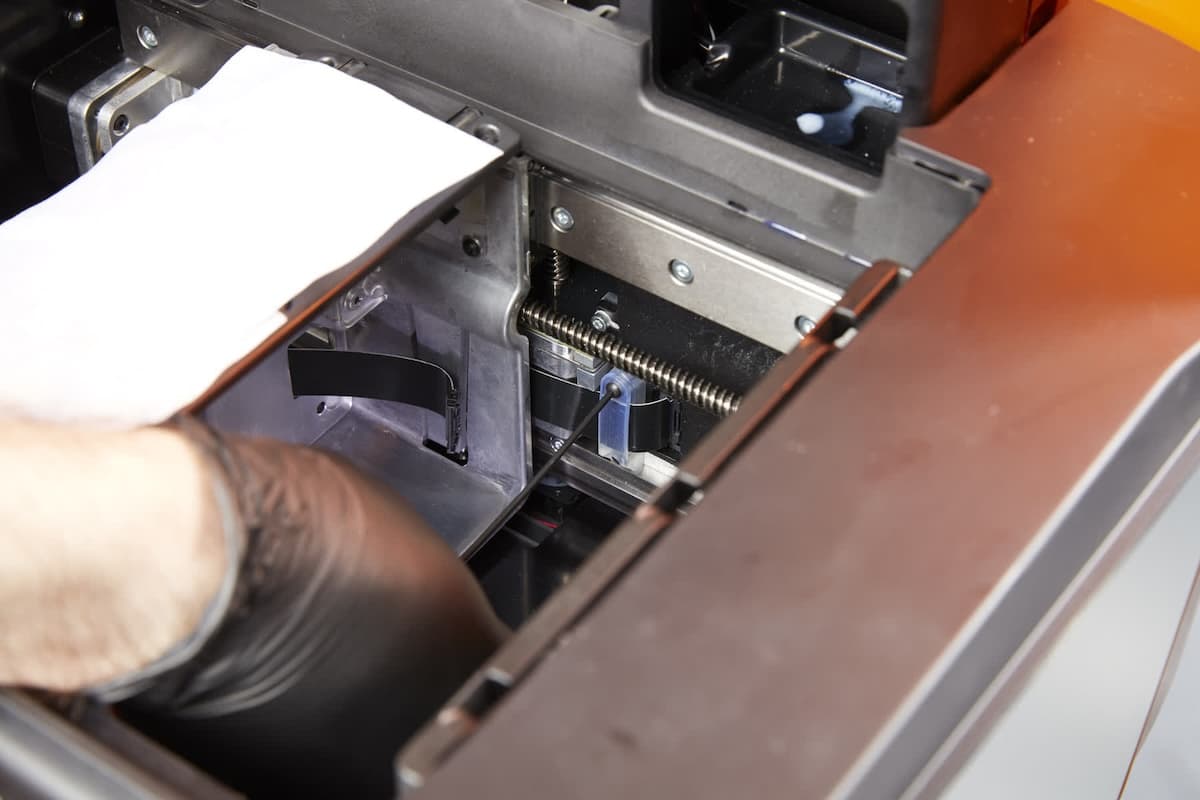
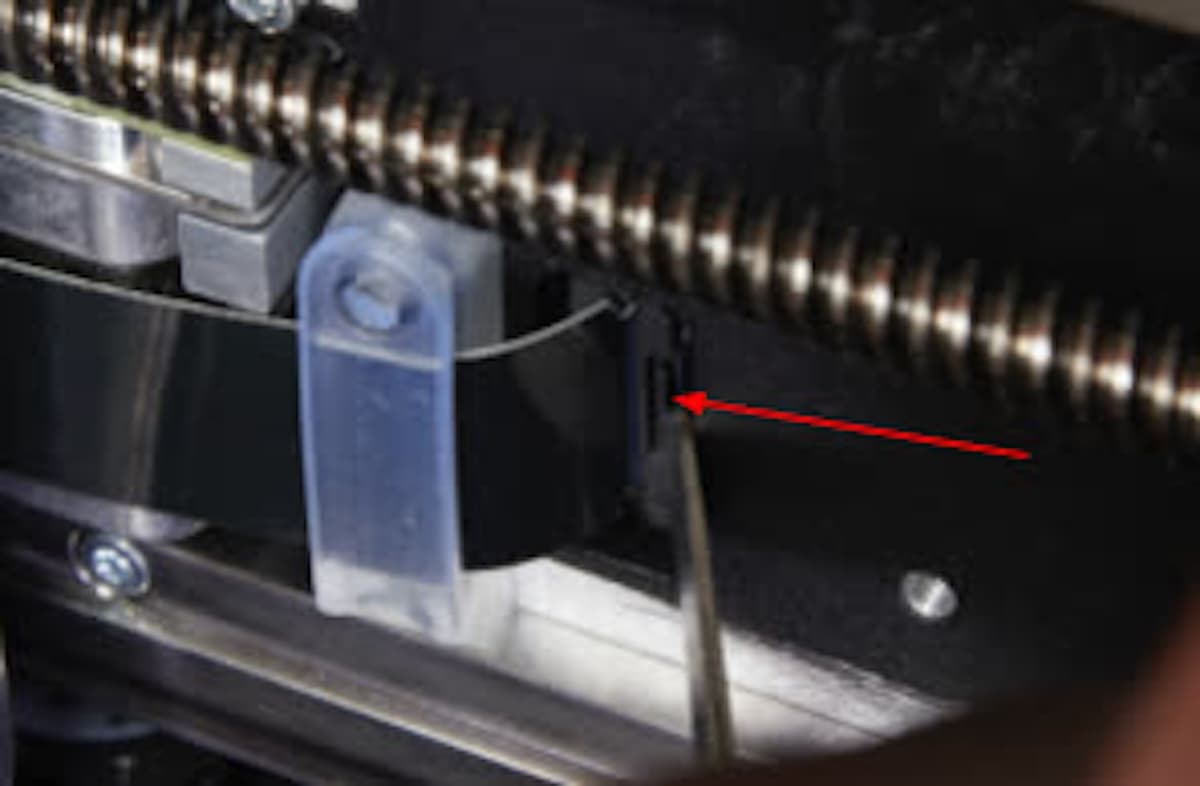
Remove the retention clip from the ribbon cable and set it aside.
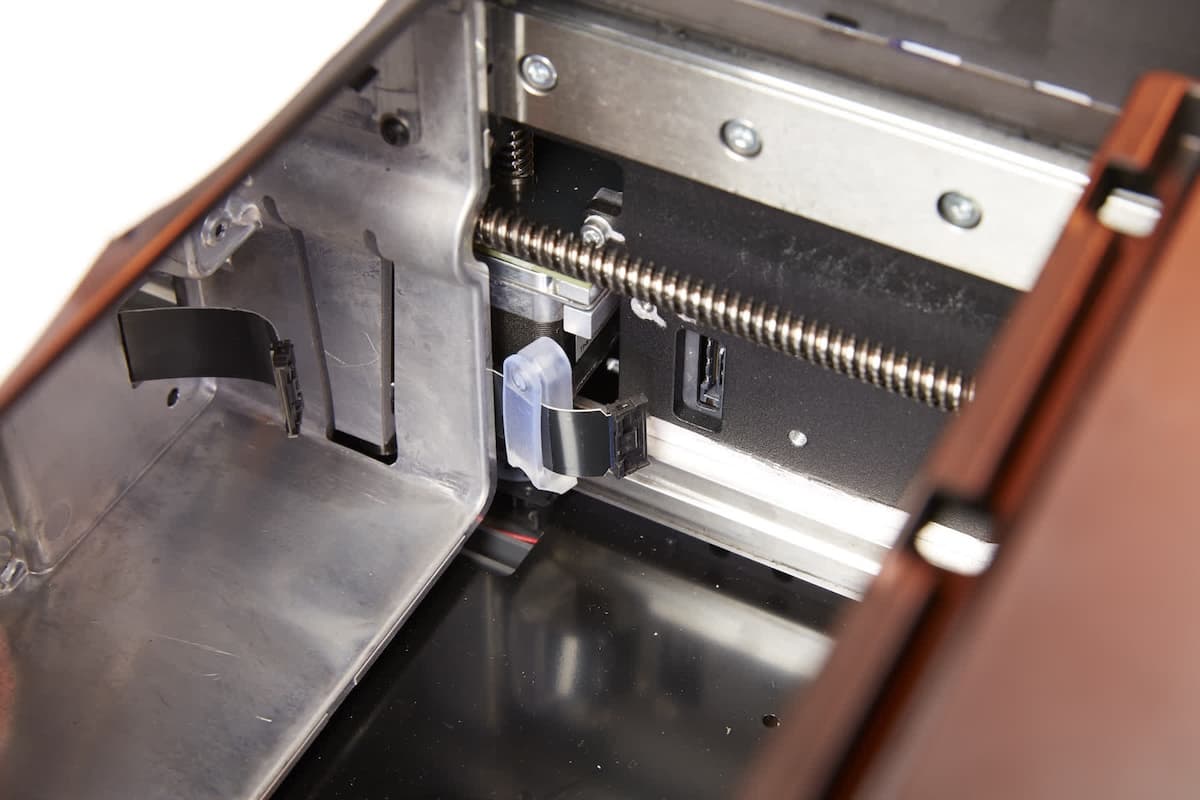
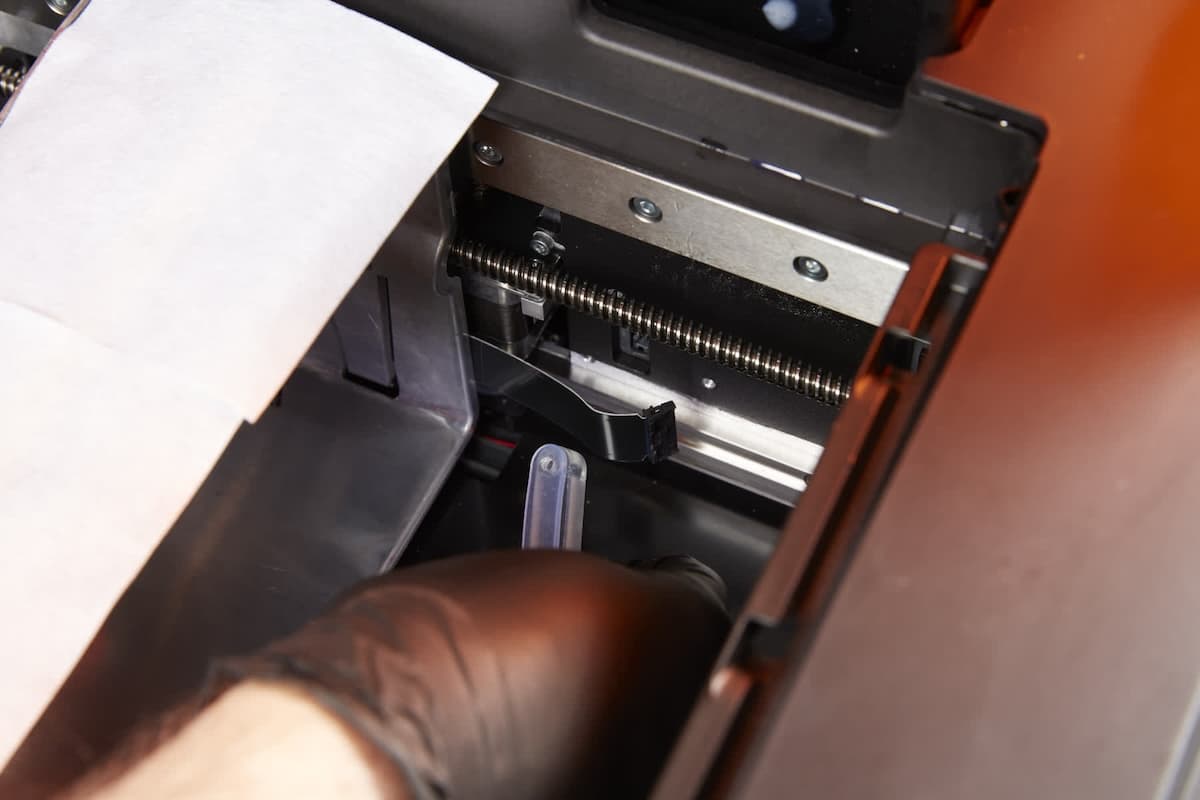
Gently thread the ribbon cable between the LPU housing and the rear of the printer to remove it from the printer.
Slide the ribbon cable retention clip onto one end of the new ribbon cable. Connect the ribbon cable to the cable connector in the printer cavity, ensuring that the cable is fully seated. The cable will only fit into the plug in one orientation.
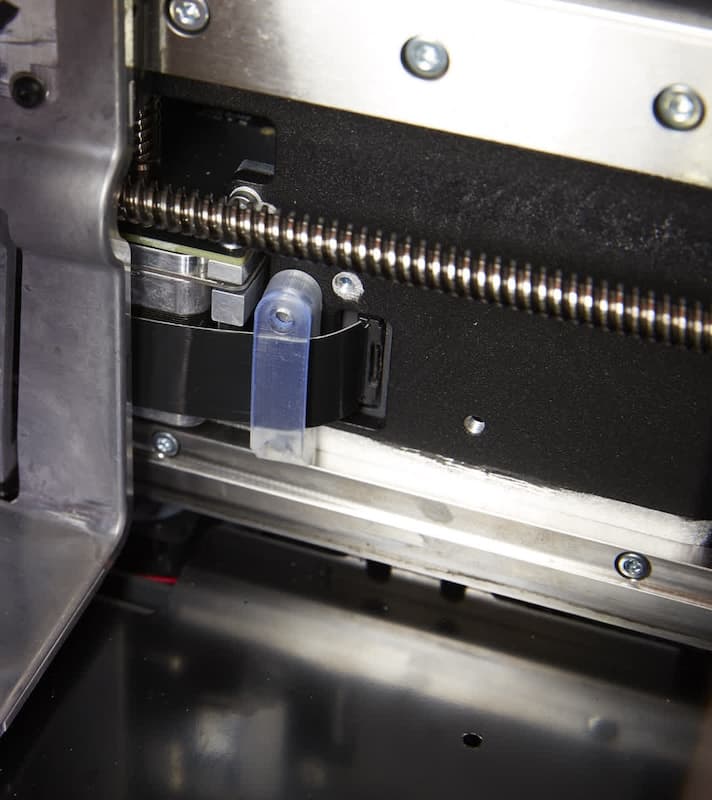
Step 4: Thread the ribbon cable through the LPU housing
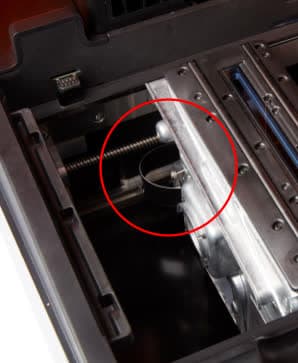
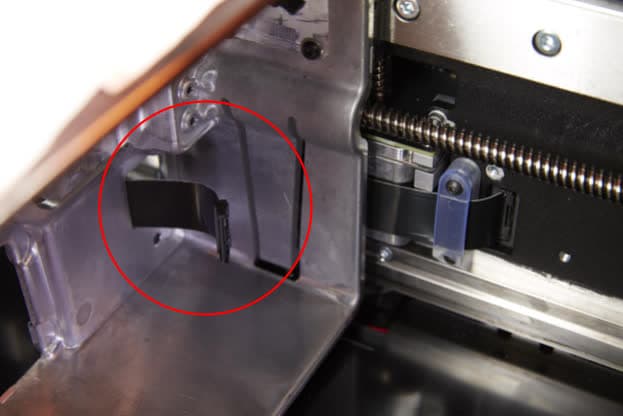
Thread the free end of the ribbon cable to the left, behind the LPU housing. Then, thread it back into the LPU housing through the small rectangular hole in the left side of the LPU housing.
Step 5: Secure the ribbon cable
Insert the two 2 mm hex screws into the ribbon cable retention clip and thread them into the printer frame. Using the provided 2 mm hex driver, tighten both screws until snug.
Installing the new LPU
Overview: After removing the old LPU, connect and install the replacement LPU.
Step 1: Clean the LPU housing
If there was resin on the old LPU, clean the inside of the LPU housing with paper towels before continuing. Dampen the paper towels with isopropyl alcohol if necessary to fully remove the resin.
Step 2: Prepare the LPU
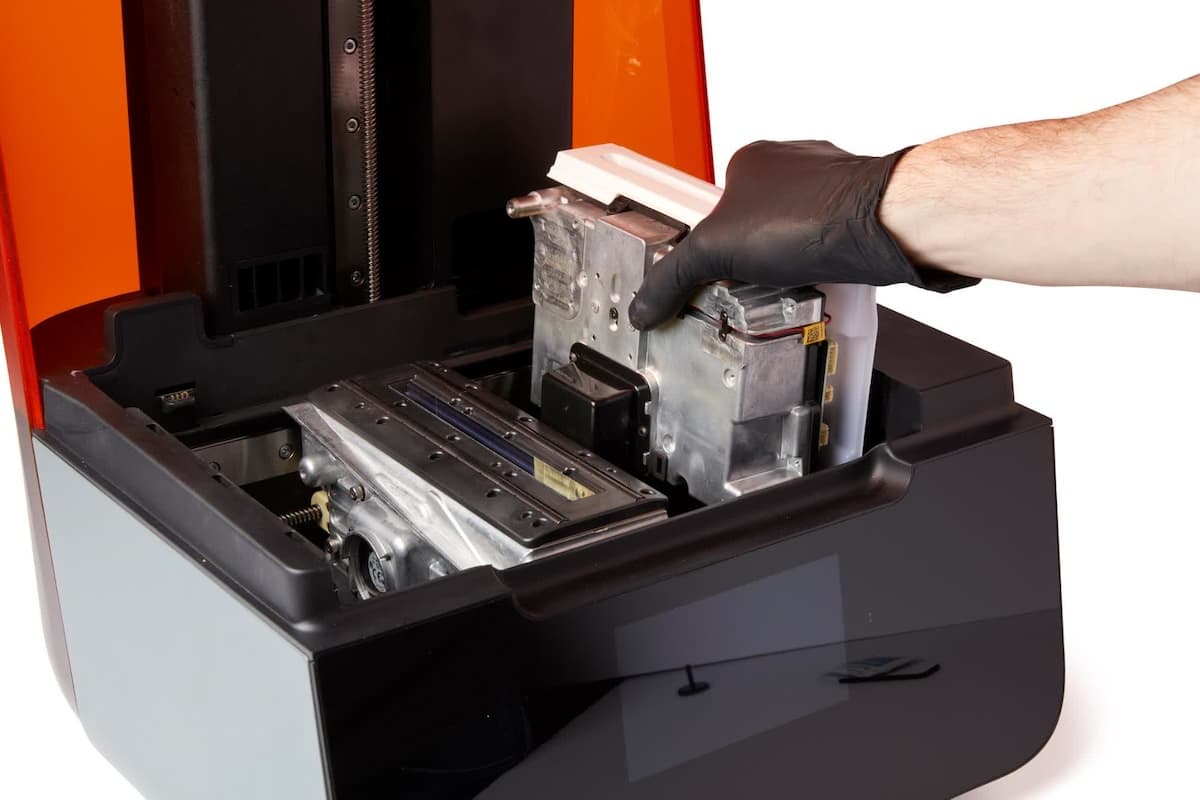
Carefully remove the new LPU from its packaging. Do not remove the cover from the module at this time. Insert the LPU into the printer in the same orientation as the old module.
Step 3: Reconnect the front cables
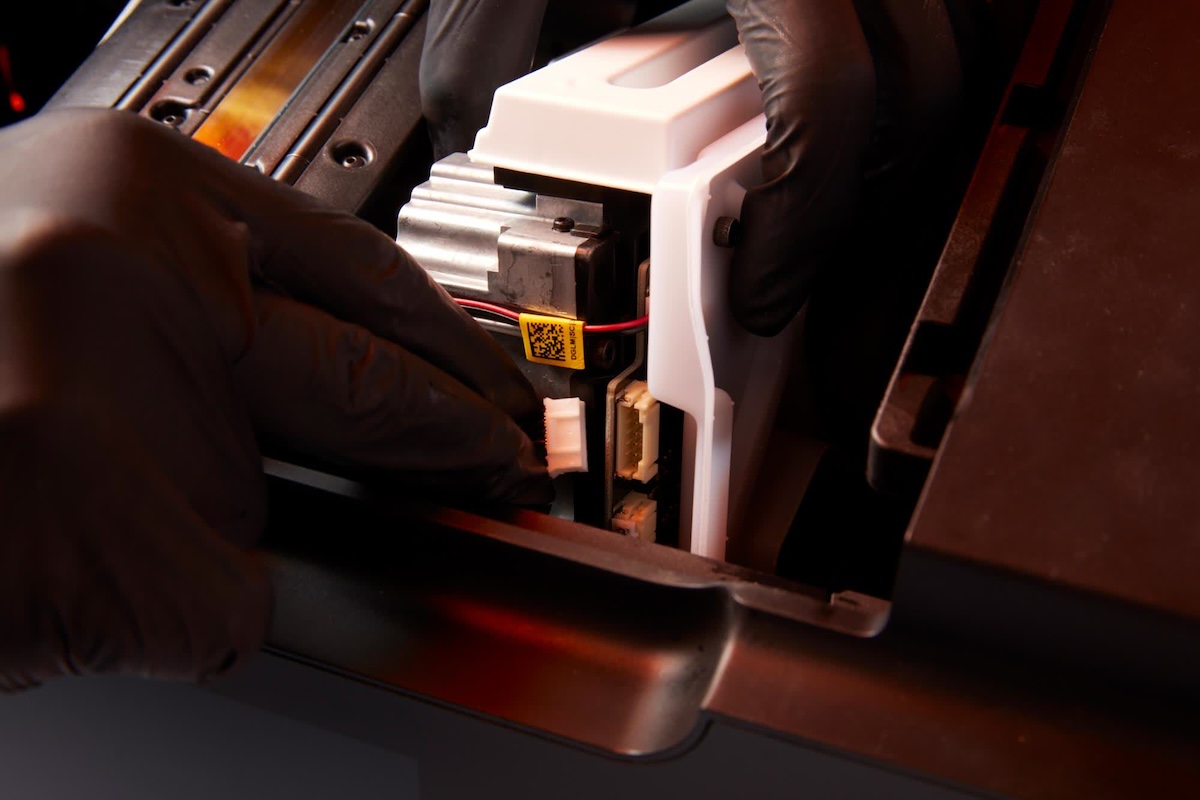
Tilt the LPU backwards, towards the rear of the printer. Reconnect the three cables to the front of the LPU, ensuring that each is fully seated. Each plug is sized so that it will only fit into the appropriate connector.
NOTICE:
Do not bend the pins inside of the connectors on the LPU.
Step 4: Reconnect the ribbon cable
Tilt the LPU forwards, towards the front of the printer. Reconnect the ribbon cable to the cable connector on the back of the LPU, ensuring that the cable is fully seated.
Step 5: Insert the LPU into the LPU housing
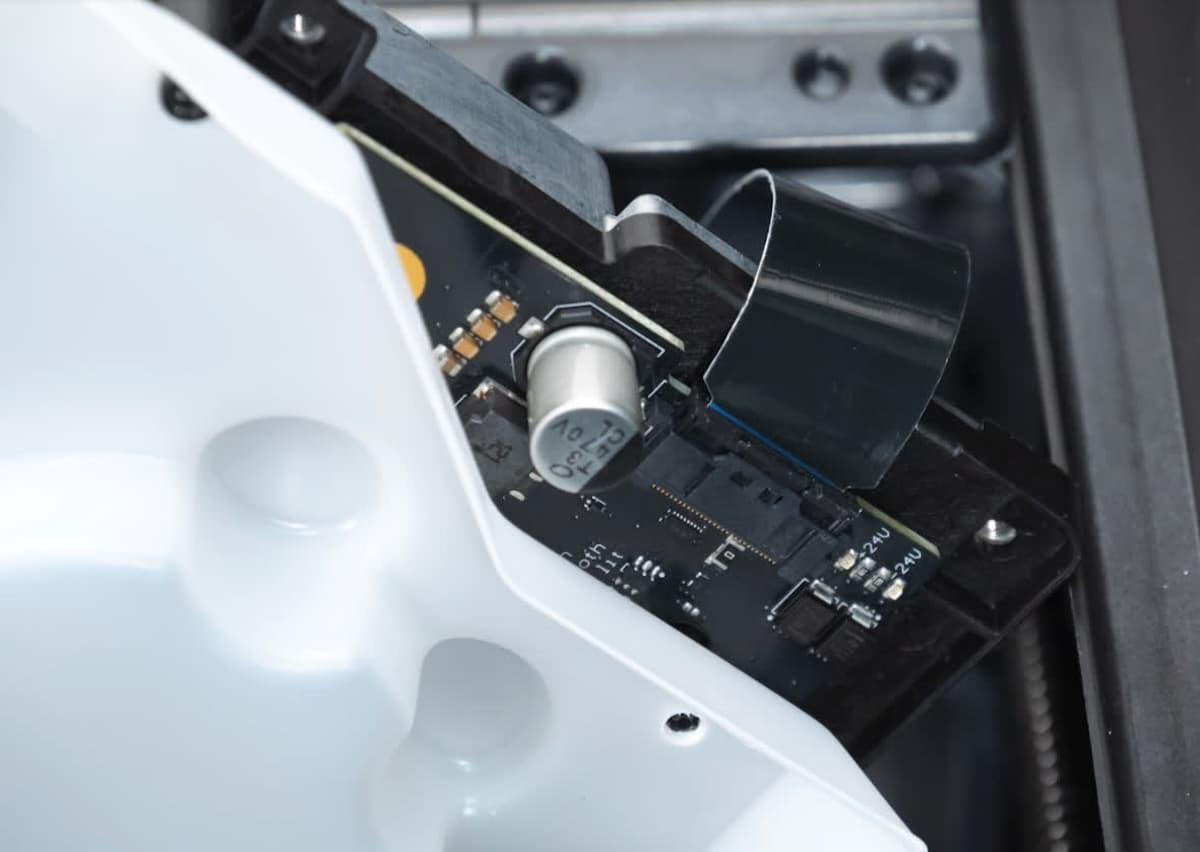
Remove the cover from the LPU. Gently feed the ribbon cable through the back of the LPU housing while guiding the LPU into position.
NOTICE:
Be careful not to crush or crease the LPU ribbon cable while inserting the LPU into its housing. Damaging the LPU ribbon cable will prevent the printer from working properly.
Do not tuck or force the front cables into the LPU housing. There are gears and other moving parts inside the LPU housing. If these cables become caught in these moving parts, the printer will be damaged and require repair.
Push on the plastic cover on the right side of the LPU to press the LPU into its housing. Be sure not to push on the circuit board underneath the cover. When the LPU is in place, the white gasket around the top of the LPU may still be visible through the laser window in the roller holder.
Step 6: Secure the LPU
Insert the thumb screw into its hole on the left side of the LPU housing and tighten it. Tightening the thumb screw will pull the LPU further into the housing. When the LPU is fully seated, the white gasket should no longer be visible.
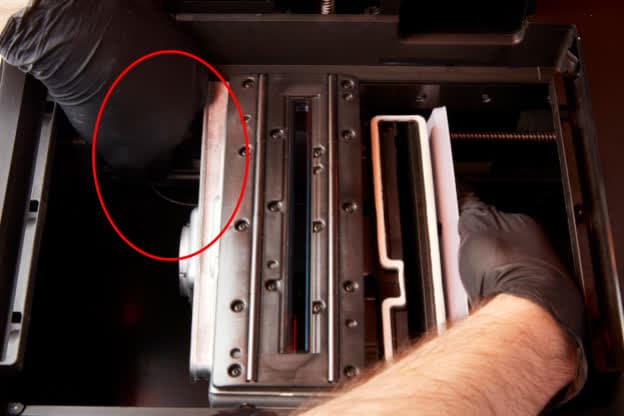
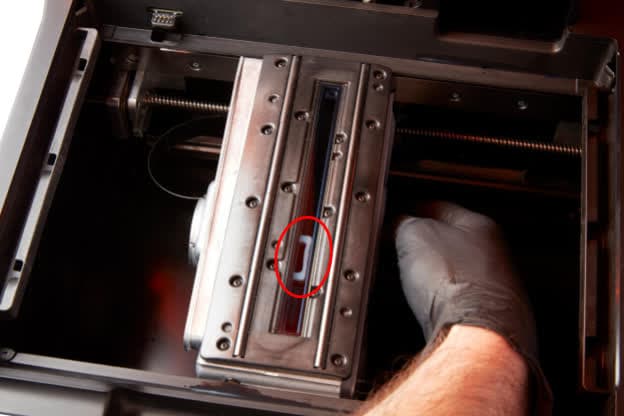
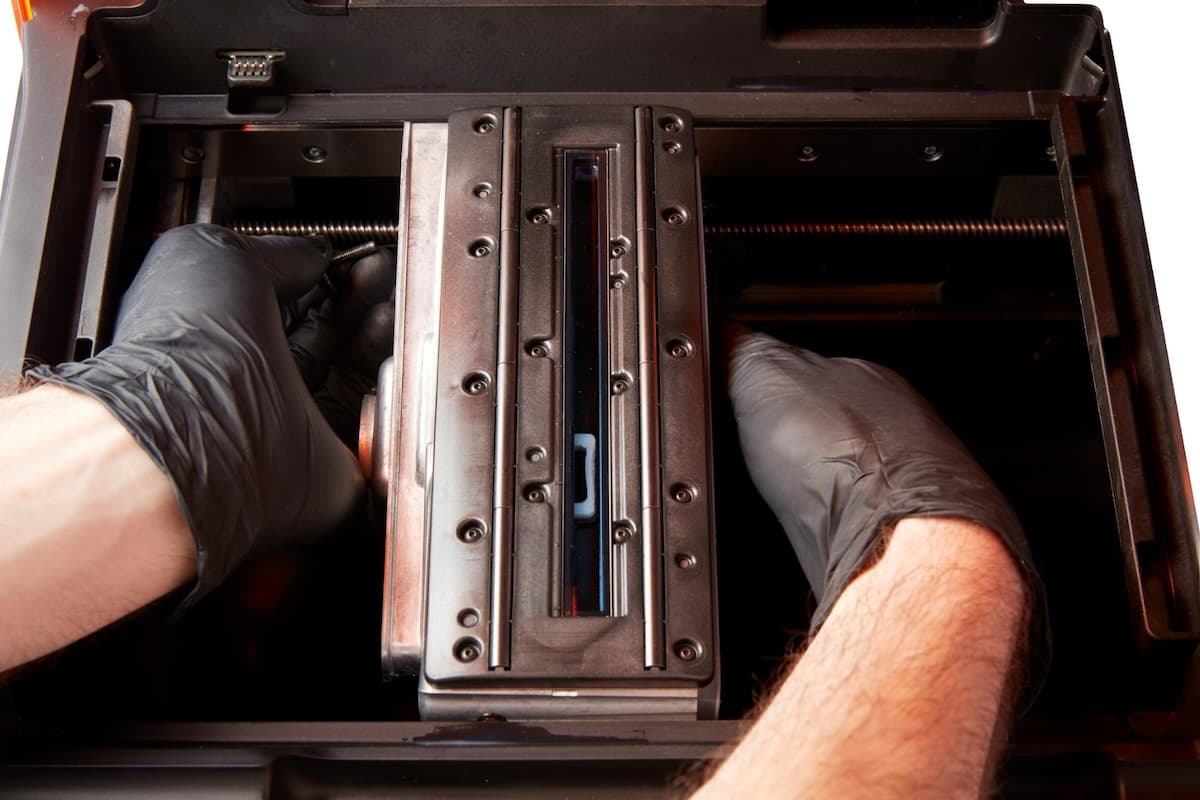
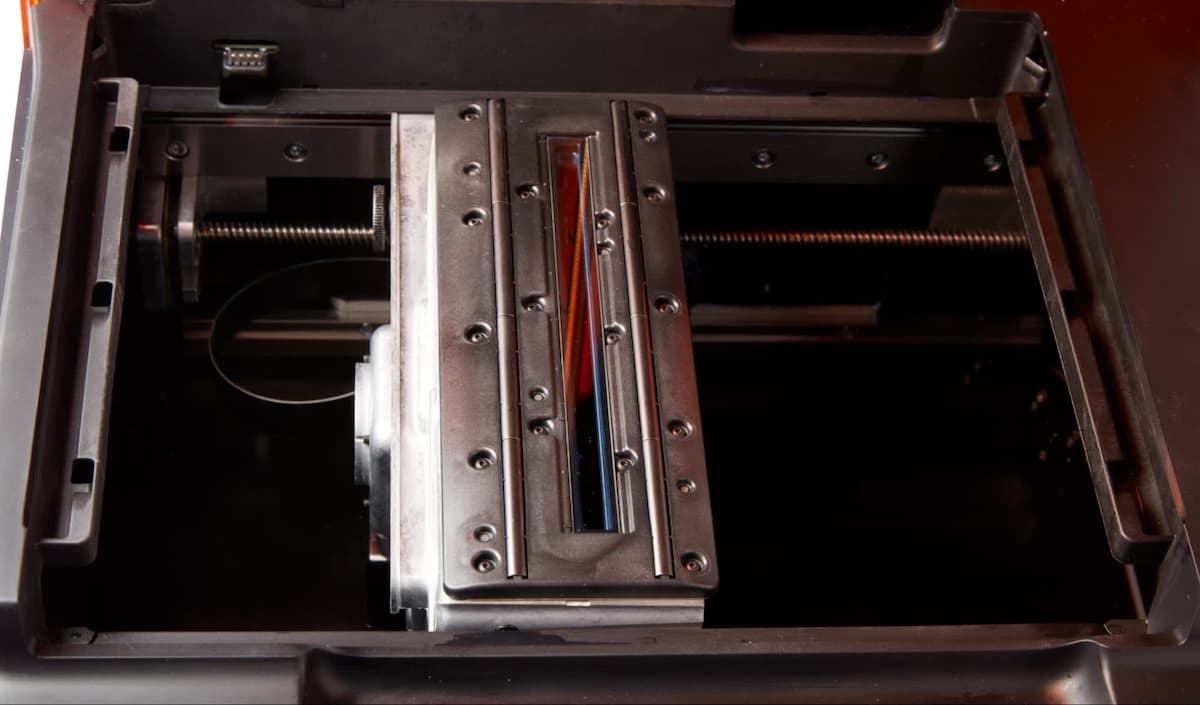
Hand tighten the three hex screws to ensure that they thread into the LPU properly. Finish tightening the hex screws using the provided hex driver until they are finger tight. Do not overtighten the screws.
Once you have tightened the hex screws, check and re-tighten the thumb screw if necessary.
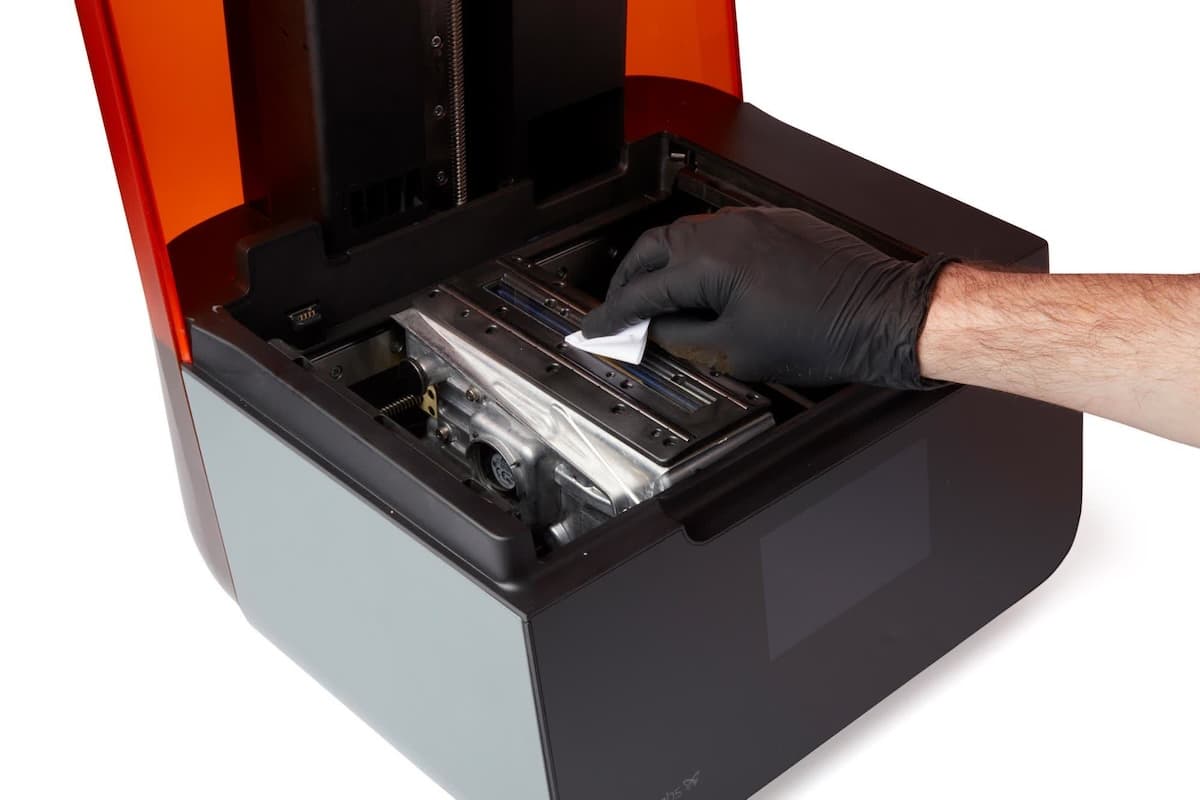
Check the optical window in the roller holder for debris or smudges. If the window is dirty, clean it with the included glass cleaning wipe. Starting from the far end of the window, wipe slowly, pulling the wipe toward you. Make multiple passes until the entire surface is clean.
Finalizing the repair
Overview: After installing the new LPU, power on the printer and perform final checks.
Step 1: Power on the printer
Close the printer cover and connect the power cable to the printer and the power supply. The printer will initialize. The LPU will move back to its home position and perform a calibration.
Step 2: Run a test print
Insert any missing consumables and upload and start a print. Check that the print starts normally and the parts print successfully. Contact Formlabs Support or your authorized reseller to share the results of the procedure.