
Required Supplies:
Formlabs:
- 2.5 mm hex driver (included in the Form 4 tool cap assembly)
- Flush cutters (included in Finish Kit)
Third-party:
- USB-C cable, 2 m long
- 2 mm hex driver
- Flathead screw driver
- 2.5 mm zip ties
- Pliers
- Nitrile gloves

The USB-C cable connects the Resin Pumping System to a Form 4 printer, powering the resin pump and carrying data between the two devices. A damaged or faulty USB-C cable may prevent the printer from recognizing the RPS and pumping resin properly.
Use this guide to replace the Form 4 Resin Pumping System USB-C cable.
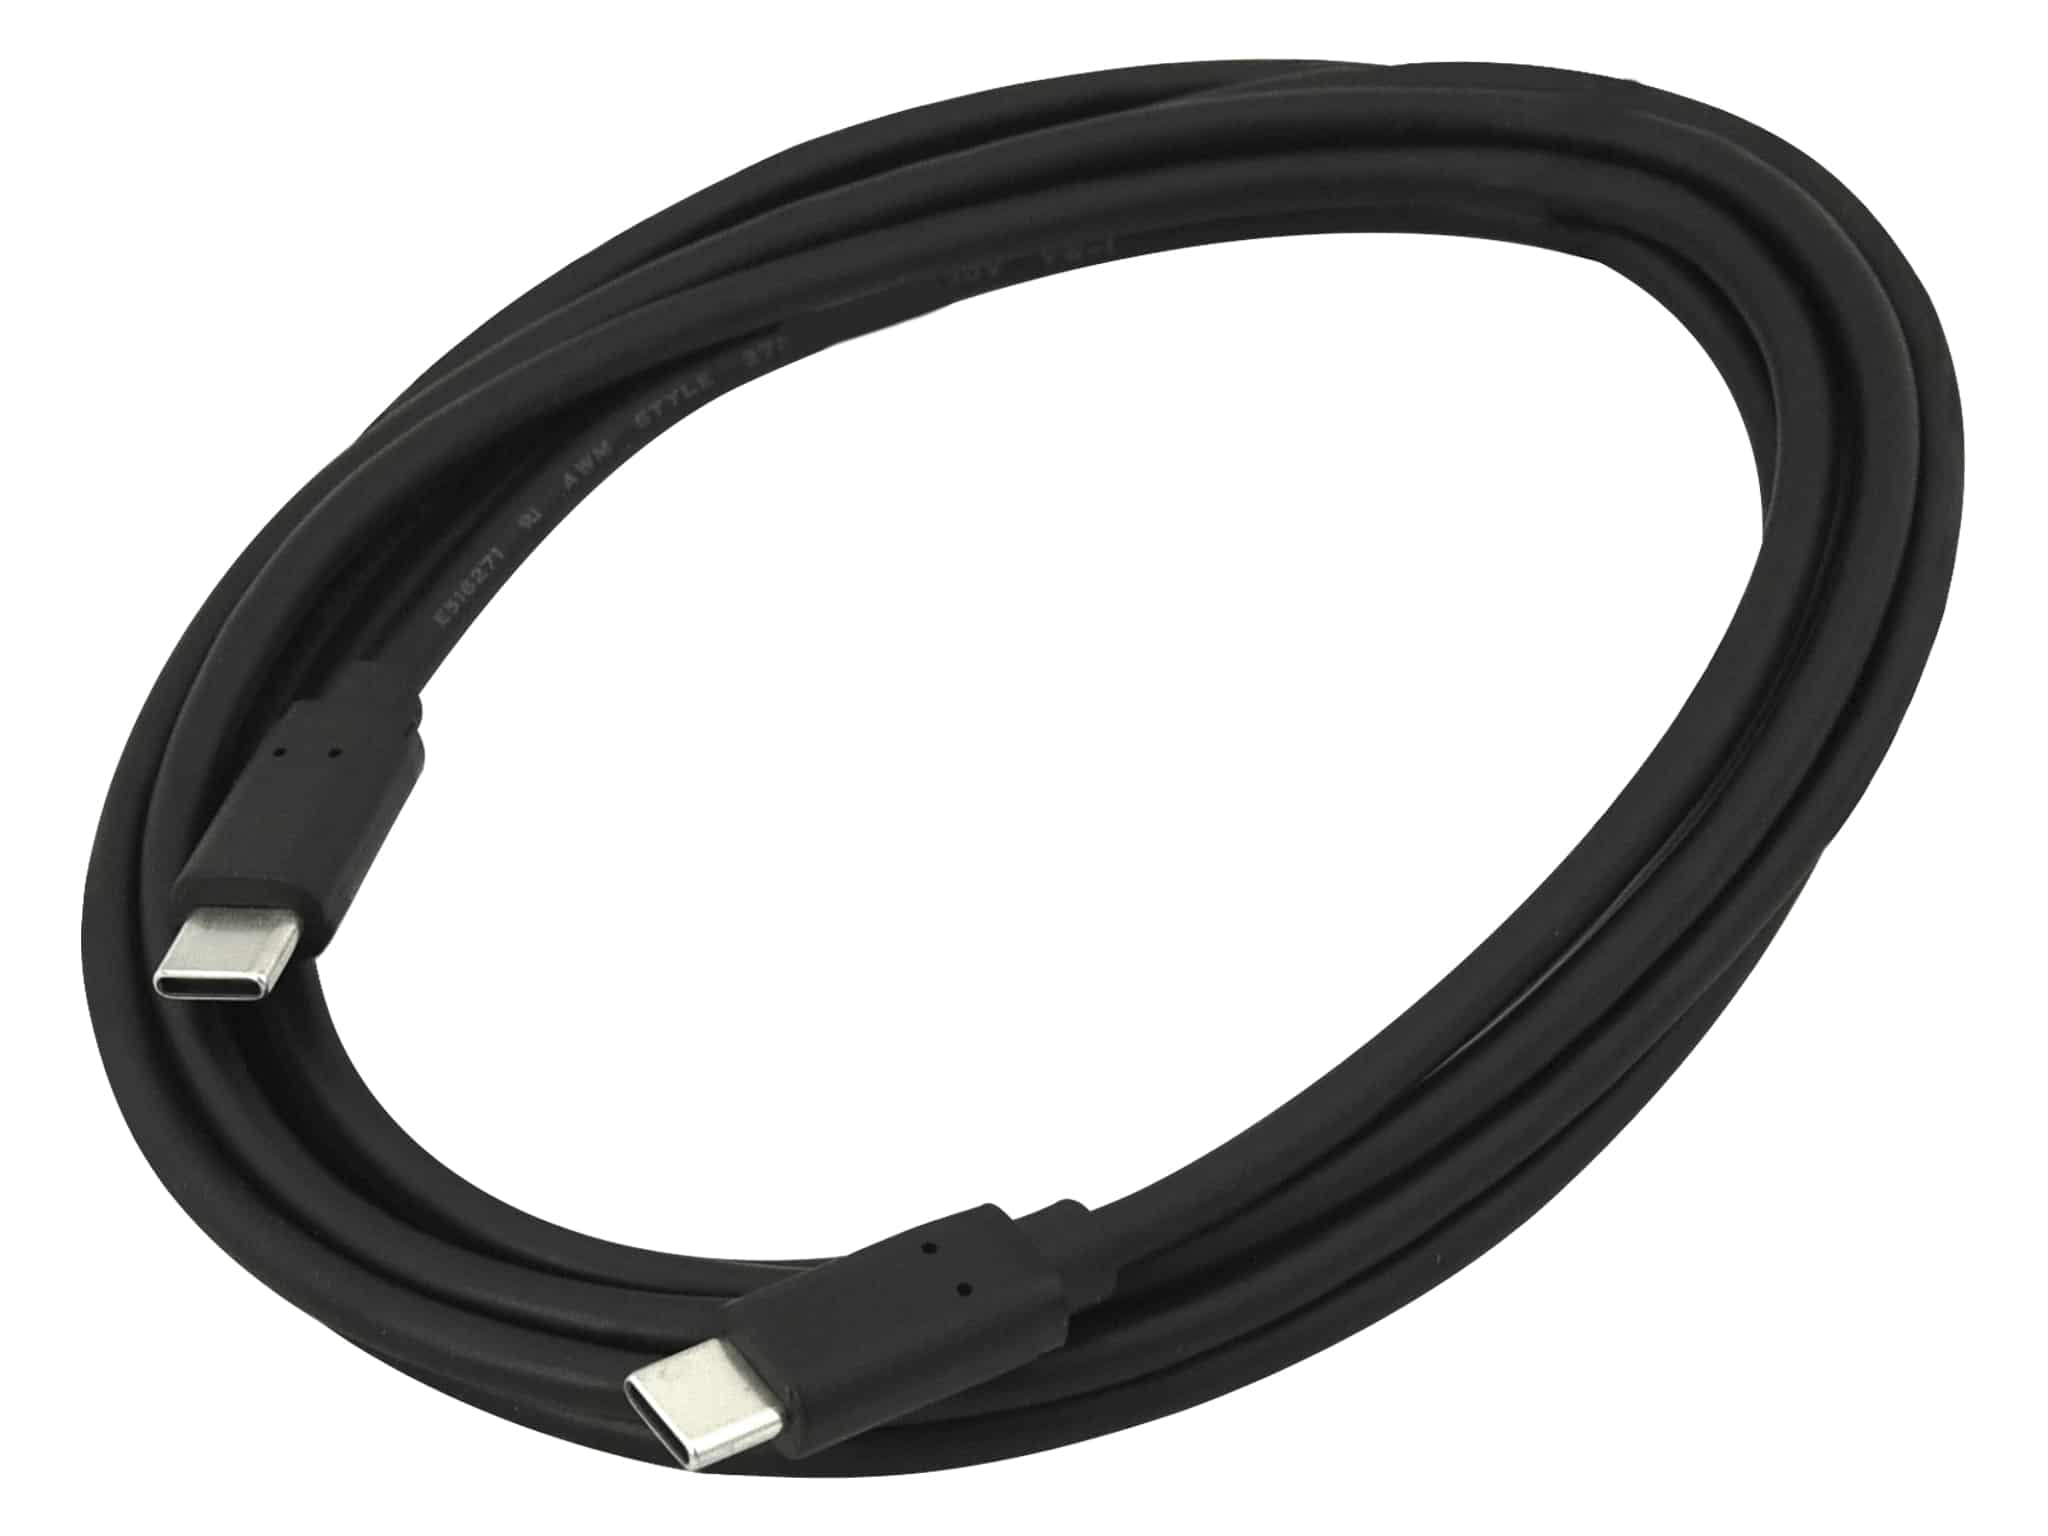
Required Supplies:
Formlabs:
Third-party:
Estimated time: 30 minutes
Preparing the workspace
Overview: Prepare the Resin Pumping System and a dust-free workspace for replacing the USB-C cable.
Step 1: Prepare the workspace
Clear a workspace. Ensure that the workspace is well-ventilated, level, and free of dust.
Step 2: Remove the resin pump from the printer
Unplug the USB-C cable from the printer. If the resin pump is currently inserted in the printer’s cartridge slot, remove it.
Step 3: Screw on cap
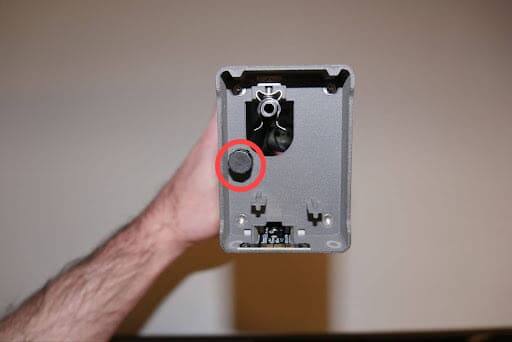
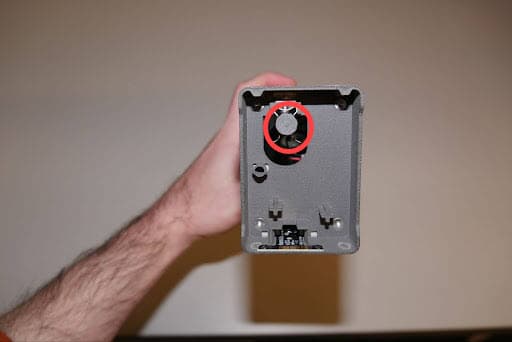
To prevent resin from dripping onto your work surface, unscrew the cap from the retention post on the bottom of the pump and screw it onto the outlet of the pump tube.
Step 4: Disconnect the transfer tube
Cut the zip tie securing the transfer tube to the resin pump and disconnect the transfer tube. Rest the free end of the transfer tube above the resin container to prevent resin from dripping onto your work surface.
Removing the outer shell
Overview: Remove the outer shell of the resin pump to access the USB-C cable.
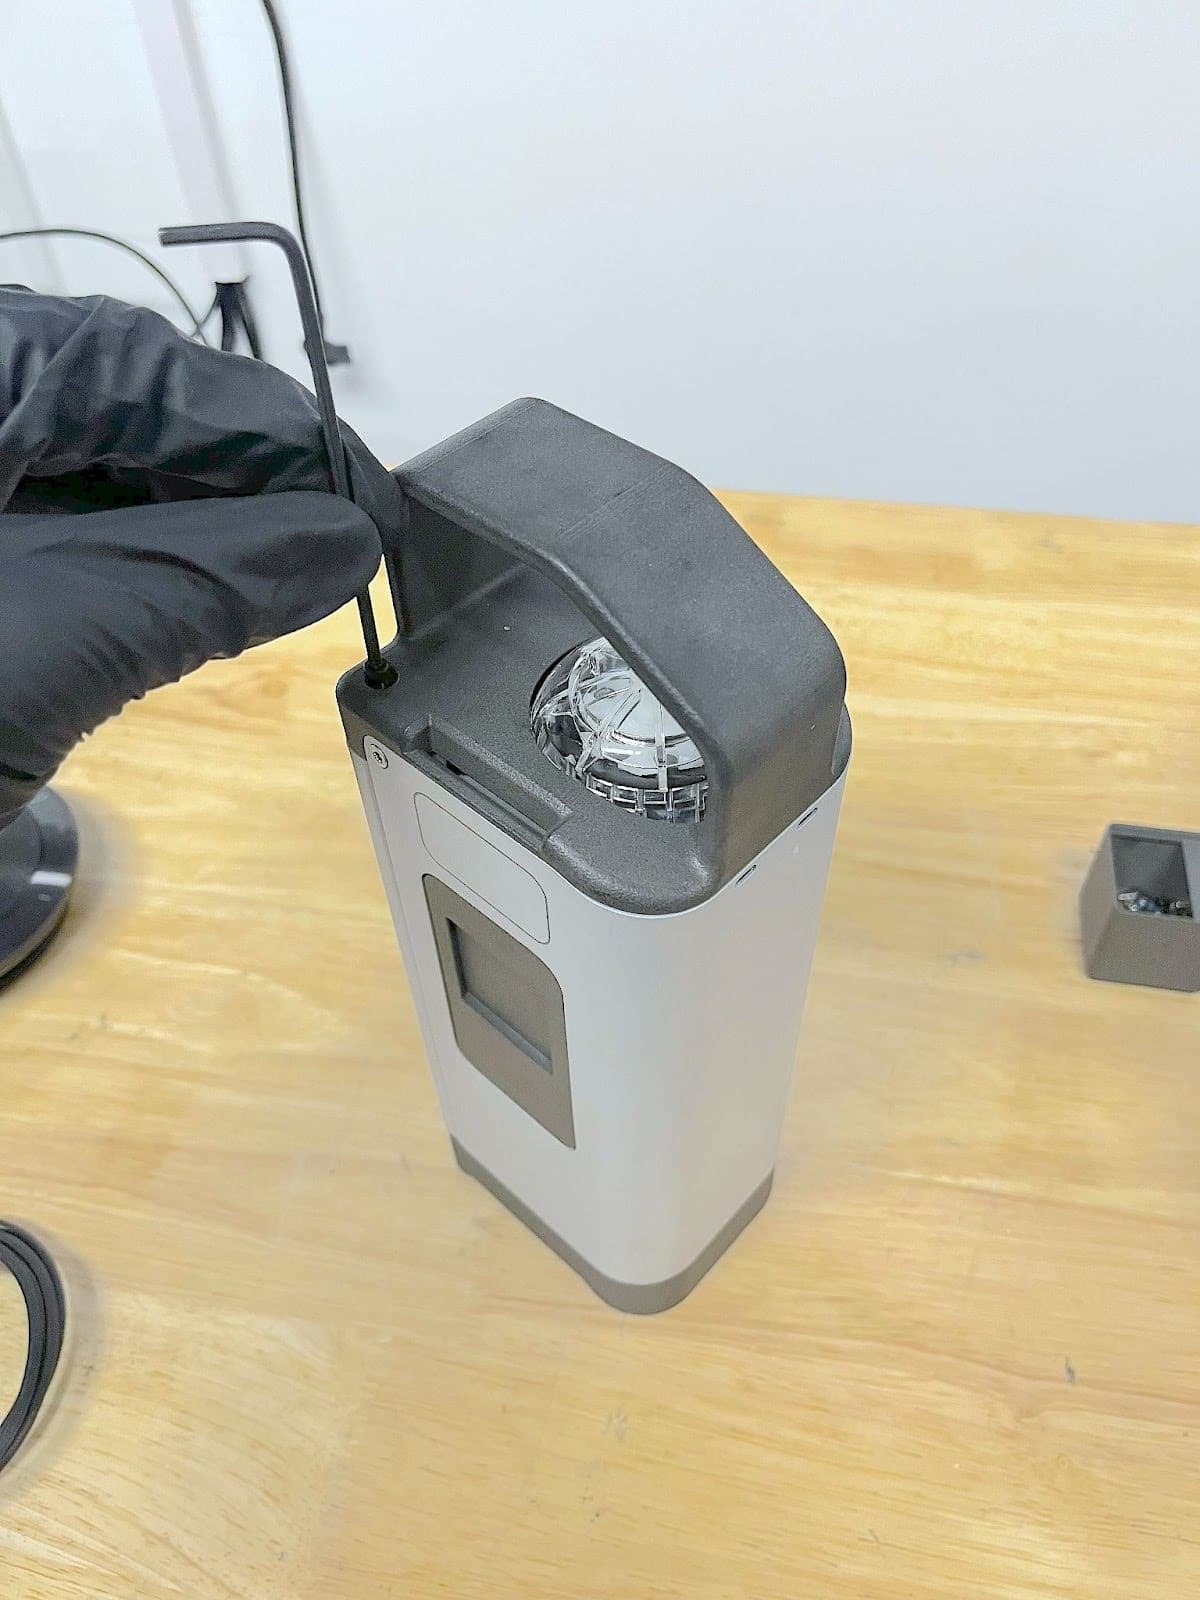
The resin pump shell is secured to the body of the pump with a single hex screw located at the top of the pump. Use a 2.5 mm hex driver to loosen and remove the screw. Set the screw aside.
Step 2: Uninstall the resin pump shell
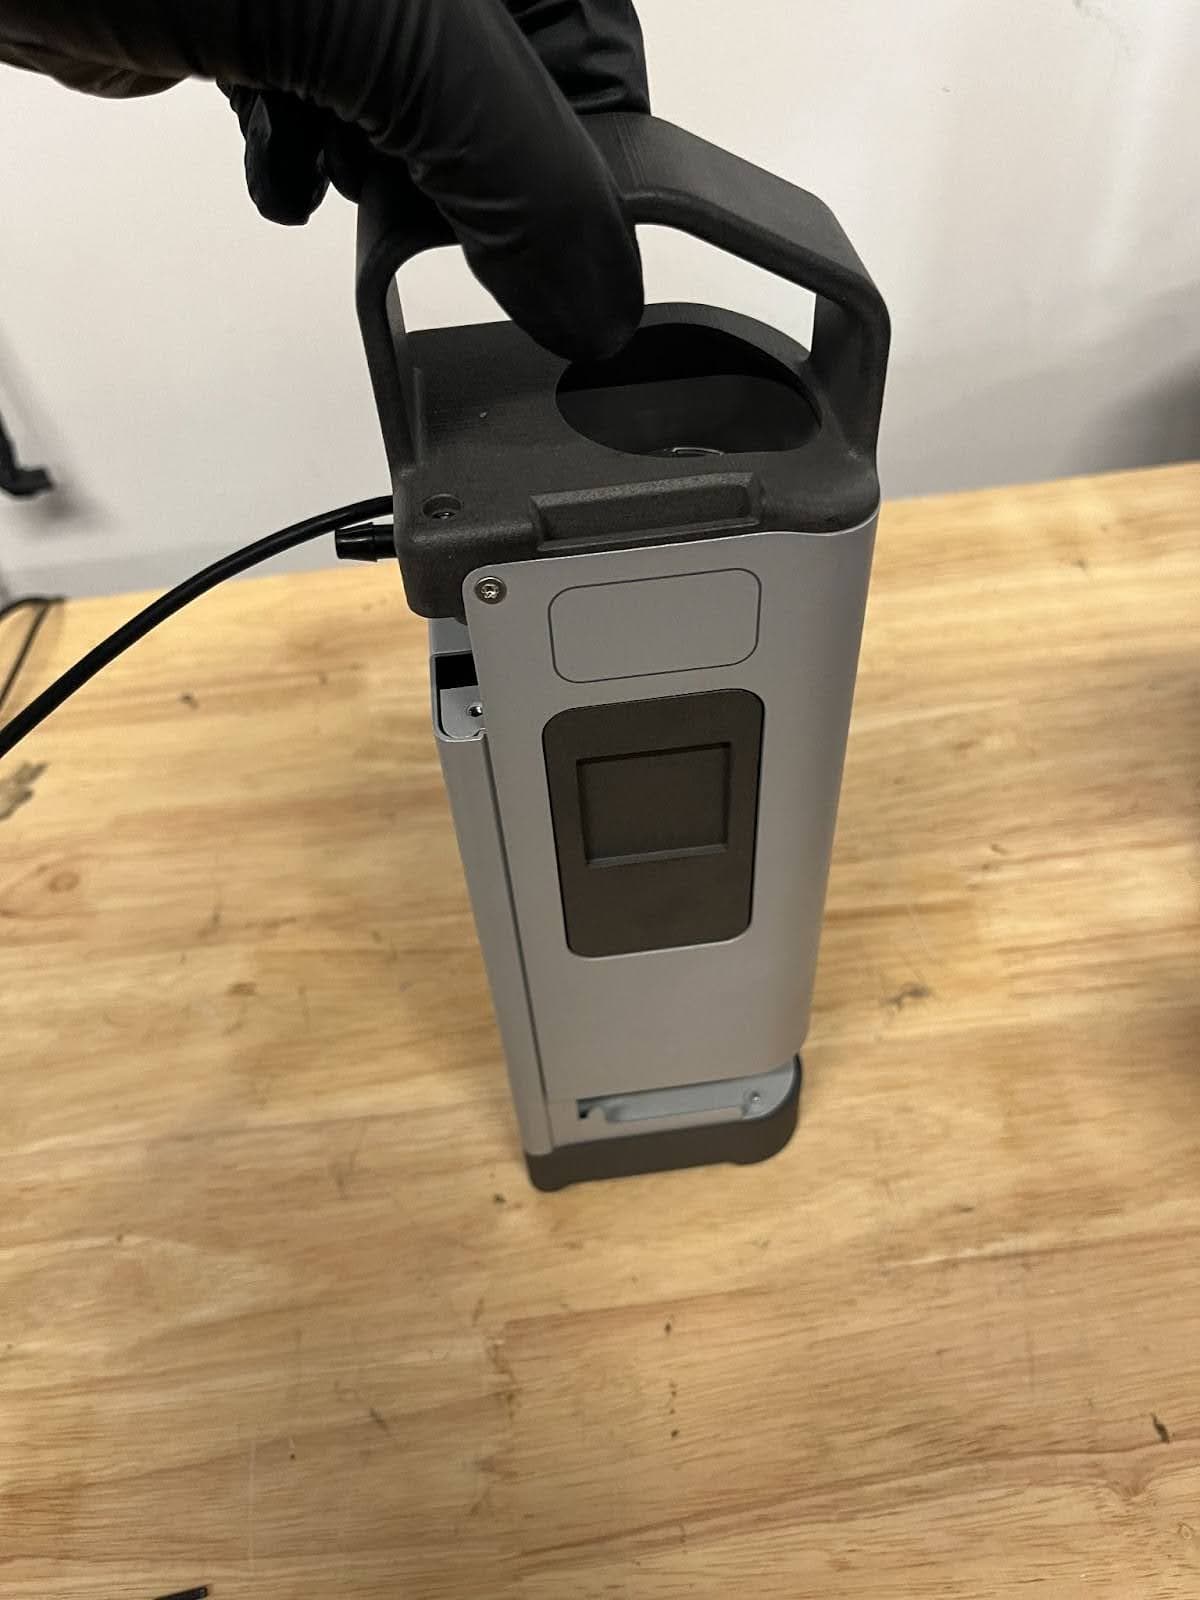
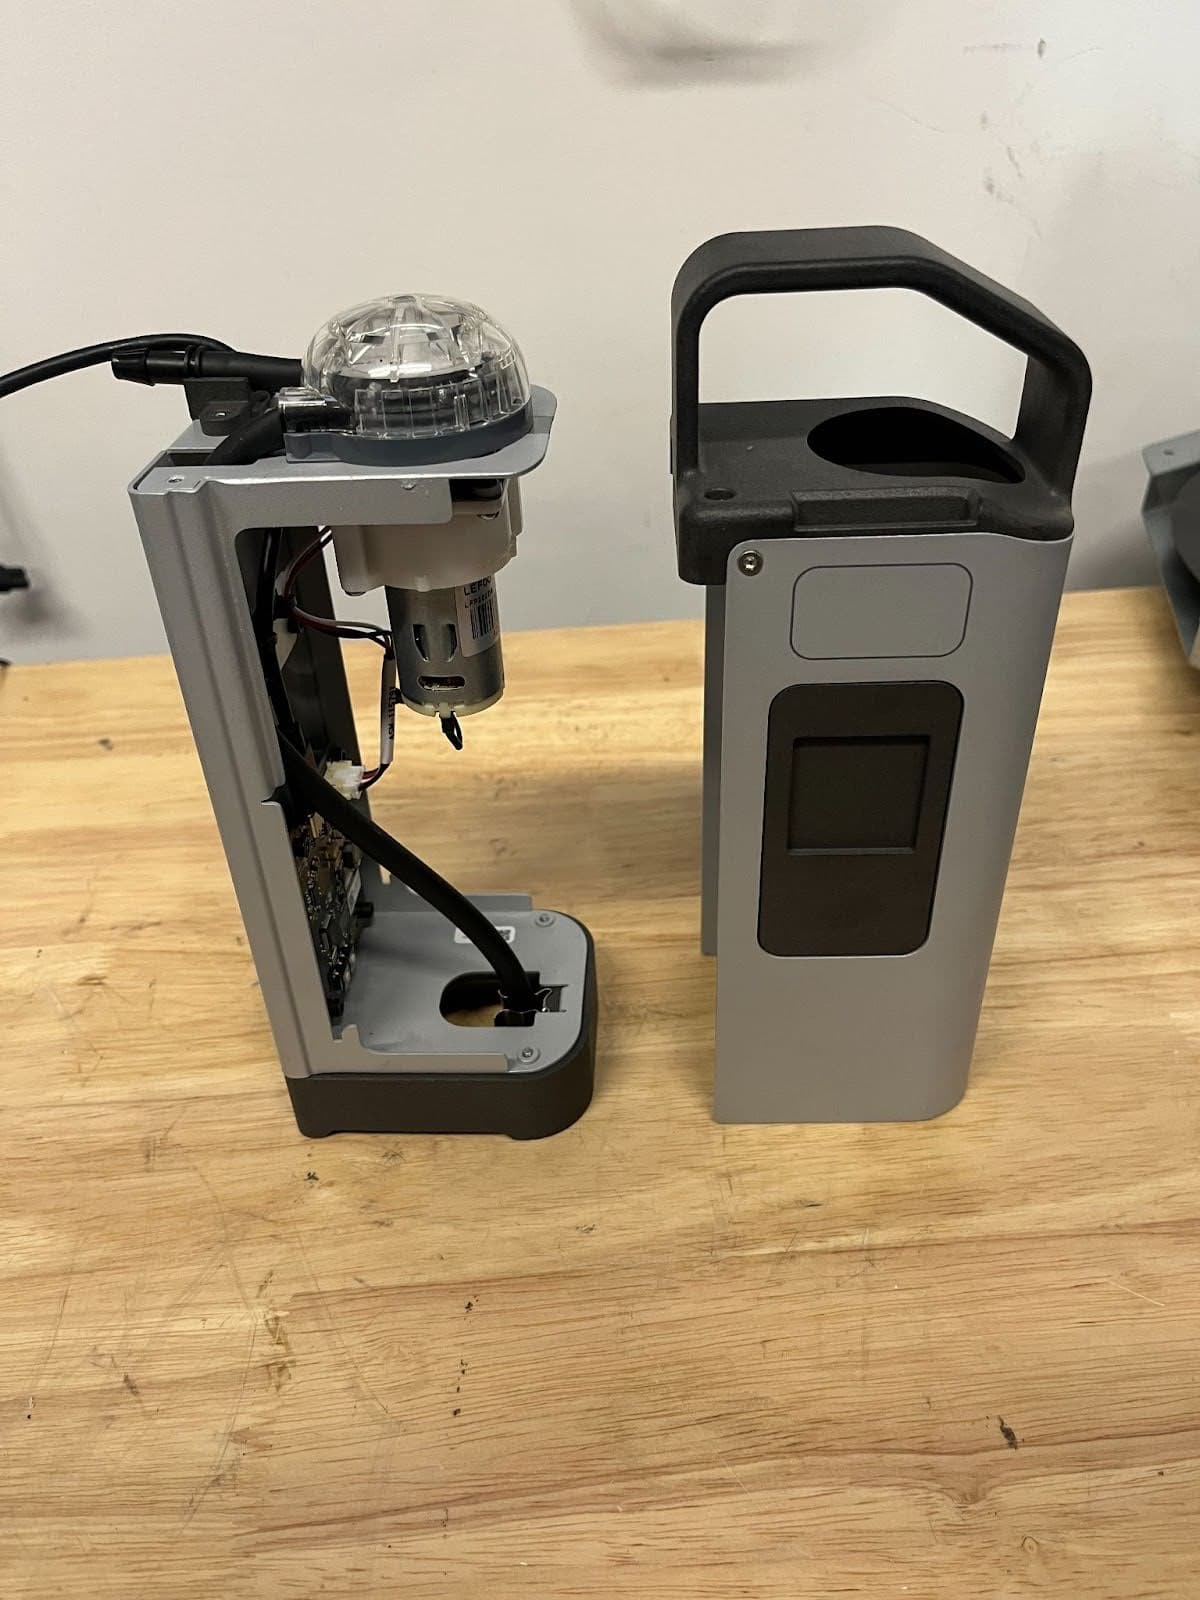
Grip the resin pump by the handle. Pull the handle straight up, away from the base of the resin pump, to separate the shell from the body. Set the shell aside.
Step 3: Remove the strain relief insert screw
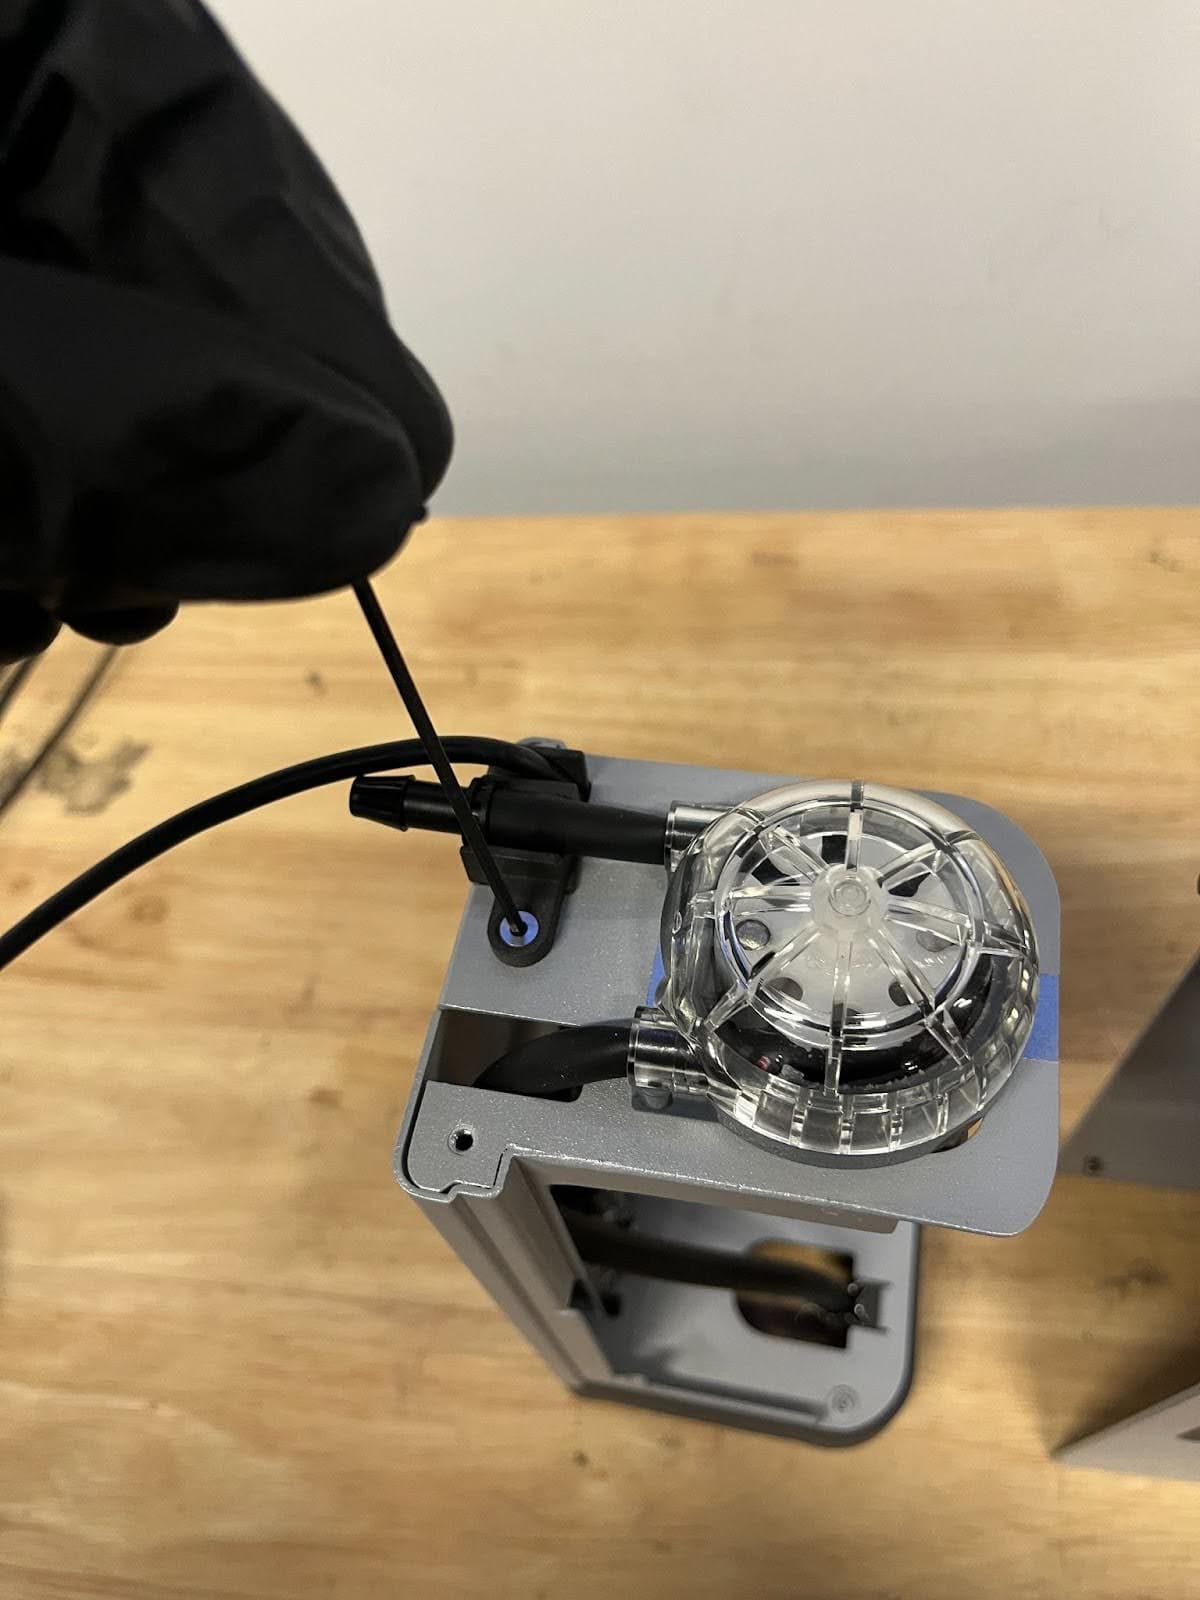
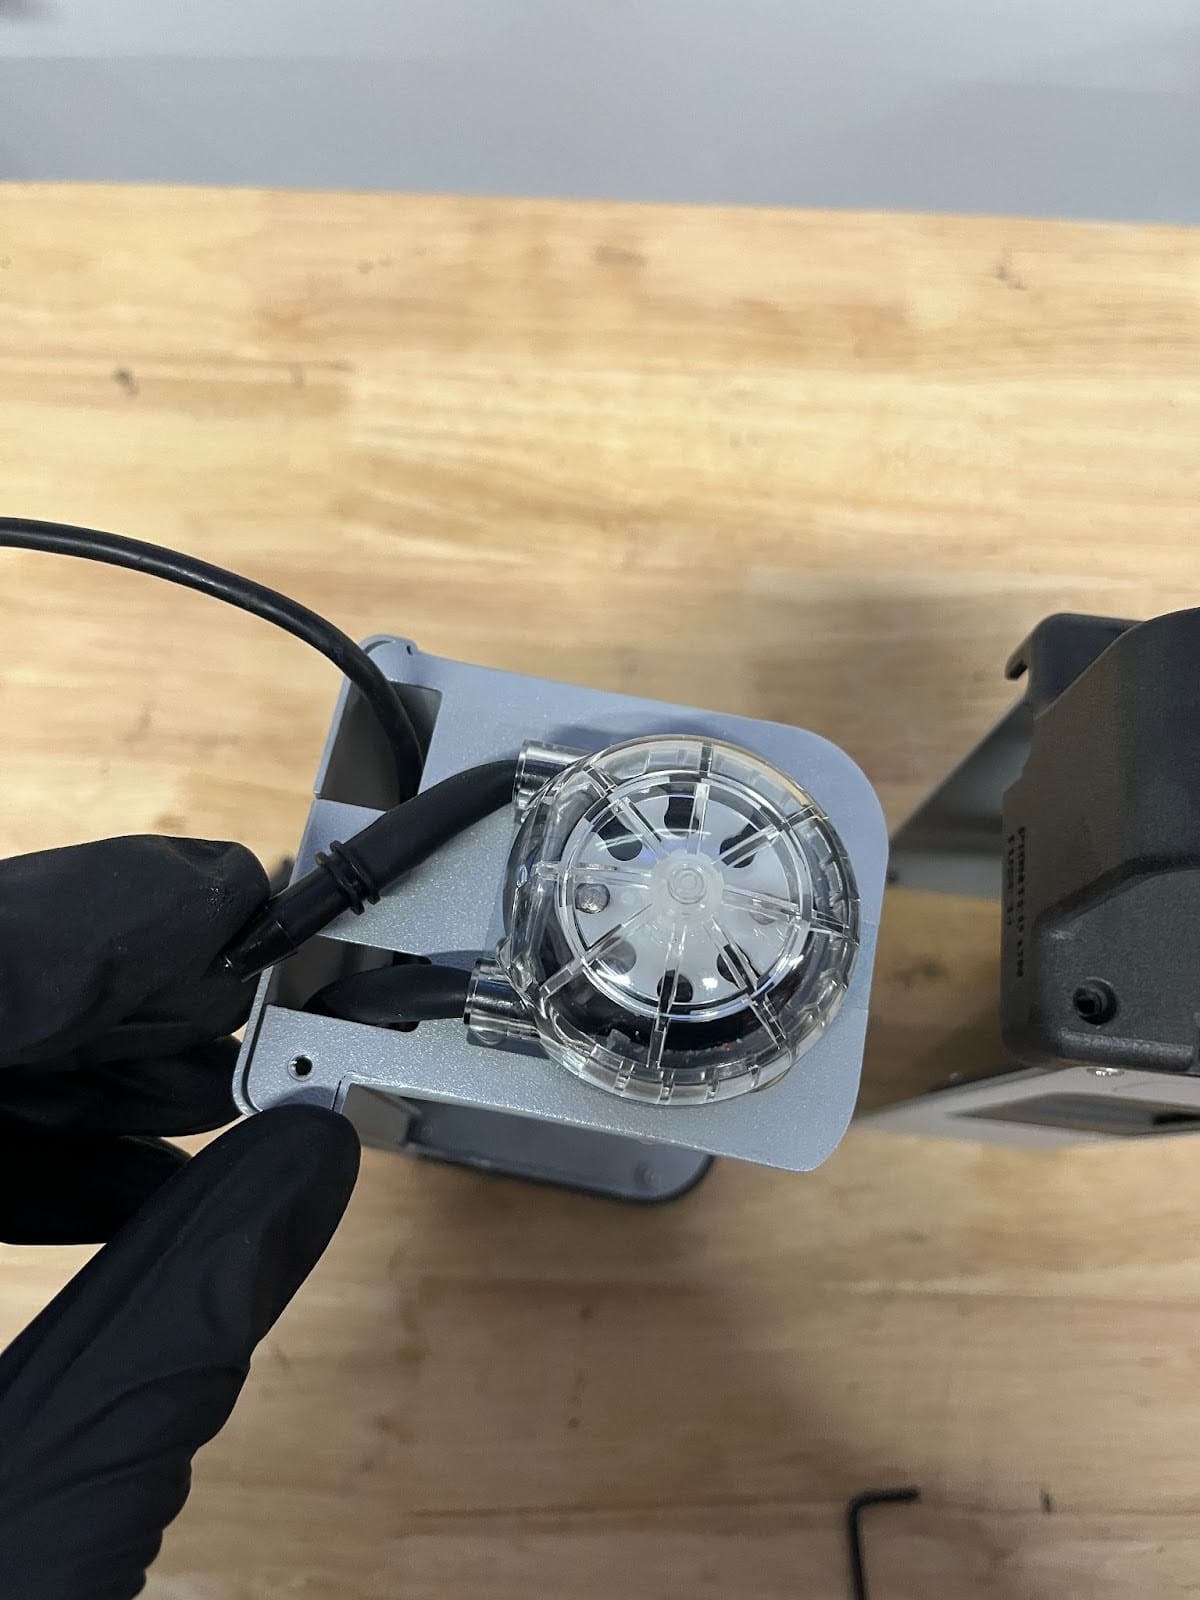
Using a flathead screw driver, remove the strain relief insert screw. Set the screw and the strain relief aside.
Removing the USB-C cable
Overview: Remove the USB-C cable from the resin pump housing.
Step 1: Cut the USB-C zip tie
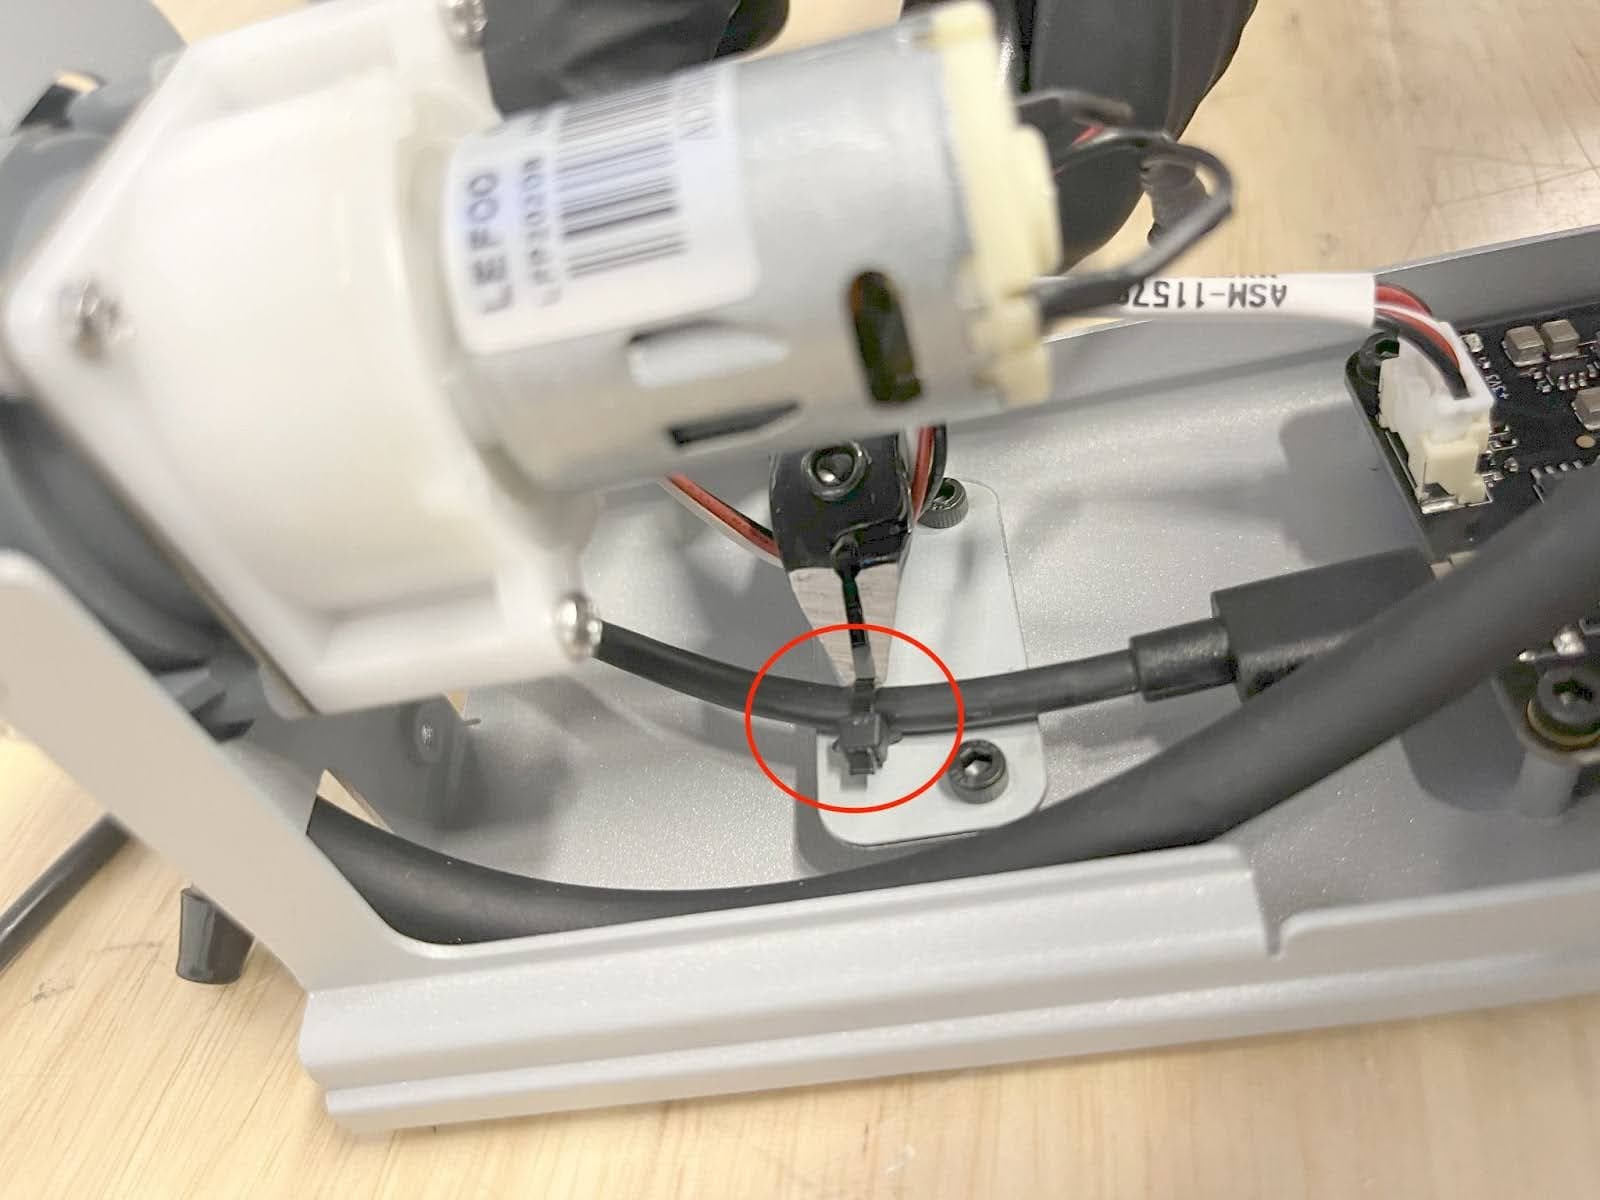
Using flush cutters, cut the zip tie holding the USB-C cable to the resin pump body. Remove the zip tie and set aside for disposal.
Step 2: Disconnect the USB-C cable
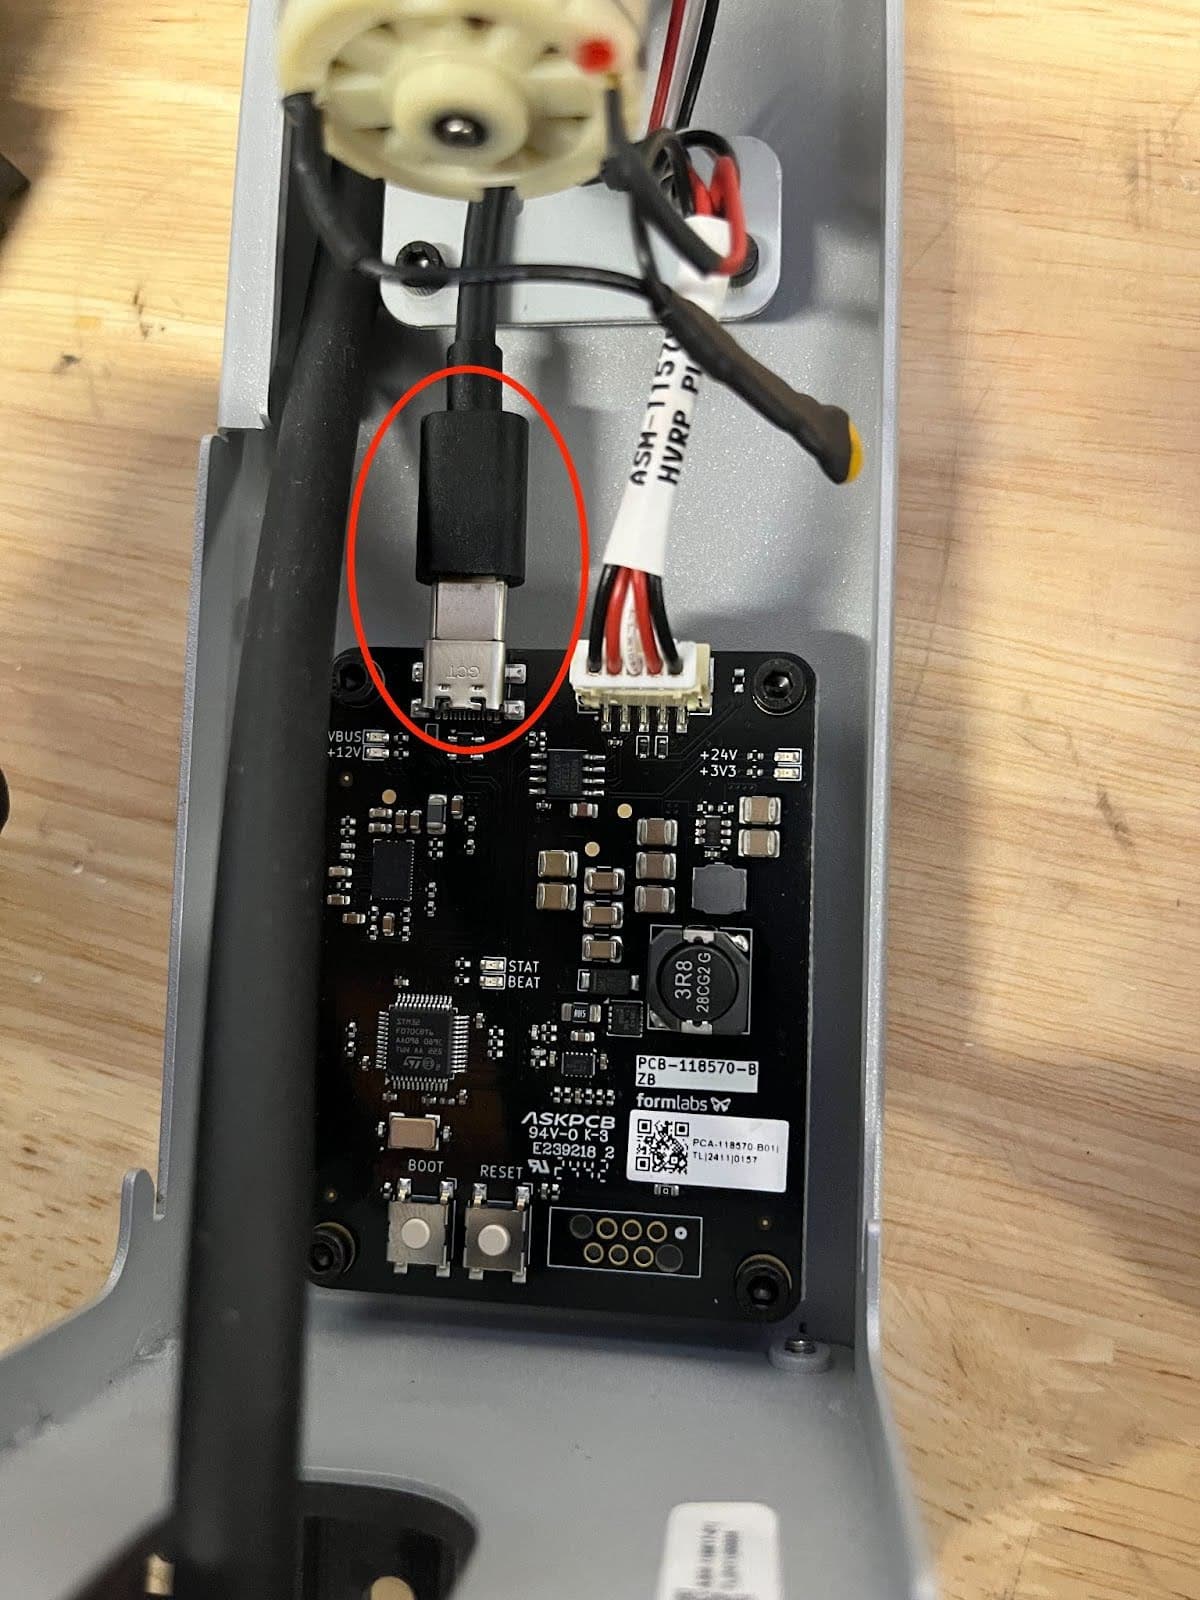
Unplug the USB-C connector from the control board. Thread the USB-C cable through the resin pump housing to remove and set it aside for disposal with electronic waste.
Installing the replacement USB-C cable
Overview: After removing the USB-C cable, install the replacement USB-C cable.
Step 1: Remove the mounting plate screws
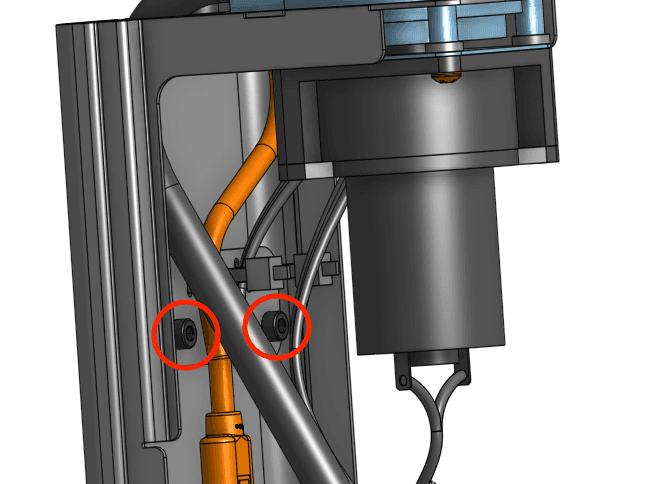
The USB-C cable attaches to the pump housing with a mounting plate. Using a 2.5 mm hex driver, unscrew the two screws securing the mounting plate to the pump housing.
Step 2: Thread the zip tie through the mounting plate
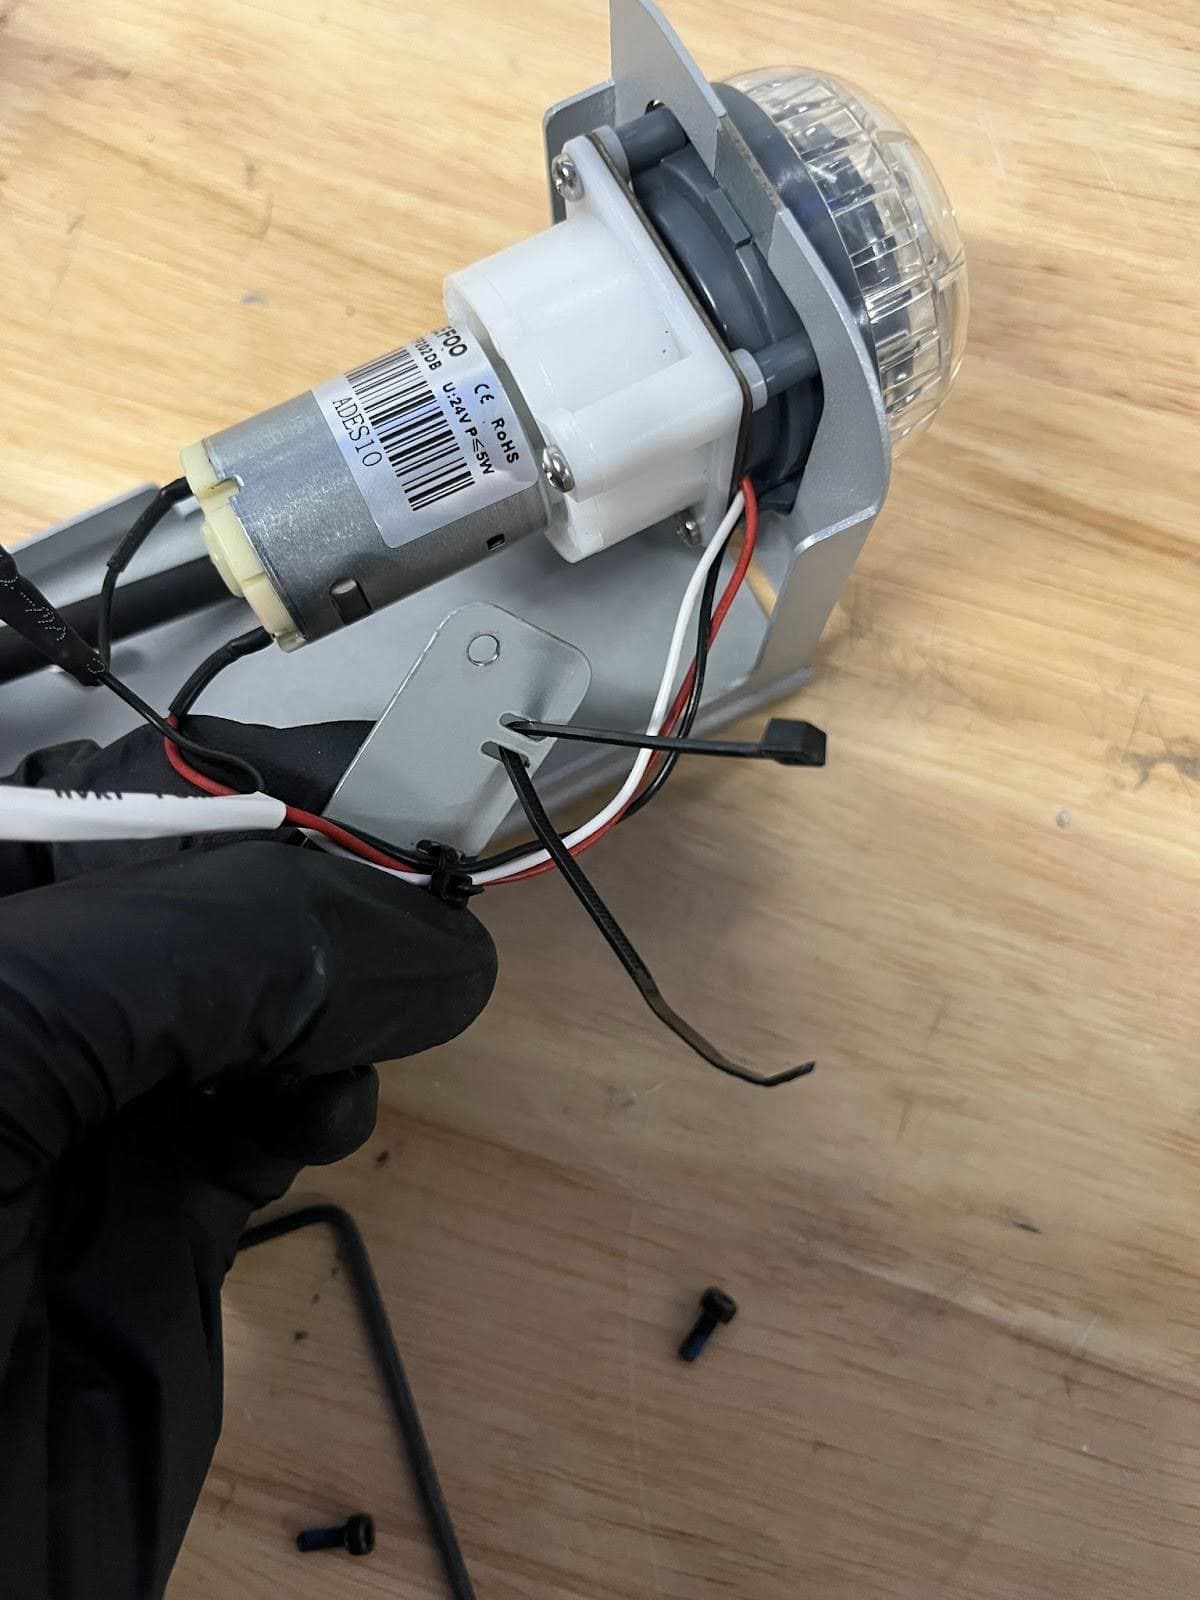
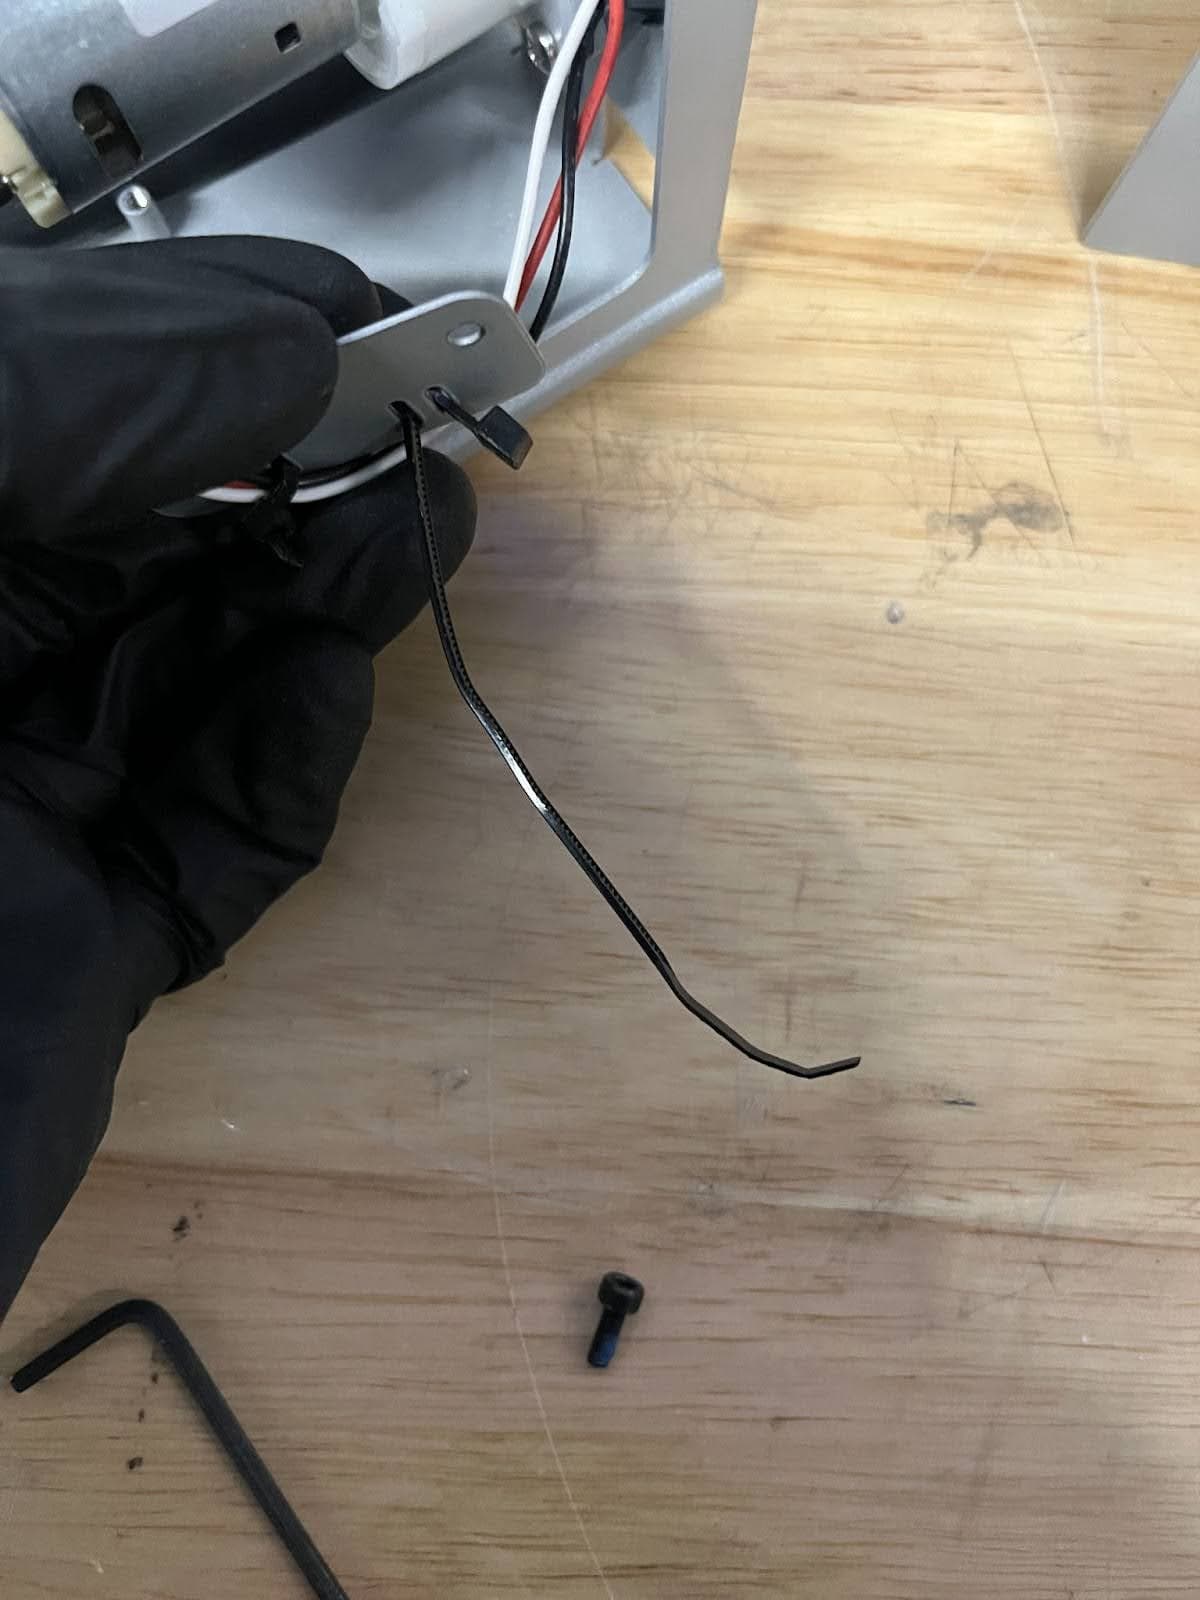
Thread a 2.5 mm zip tie through the empty slots of the mounting plate. Pull the zip tie so that the head is flush against the plate. Insert the tip of the zip tie into the head and pull until it engages, leaving a large loop in the zip tie.
Step 3: Secure the mounting plate
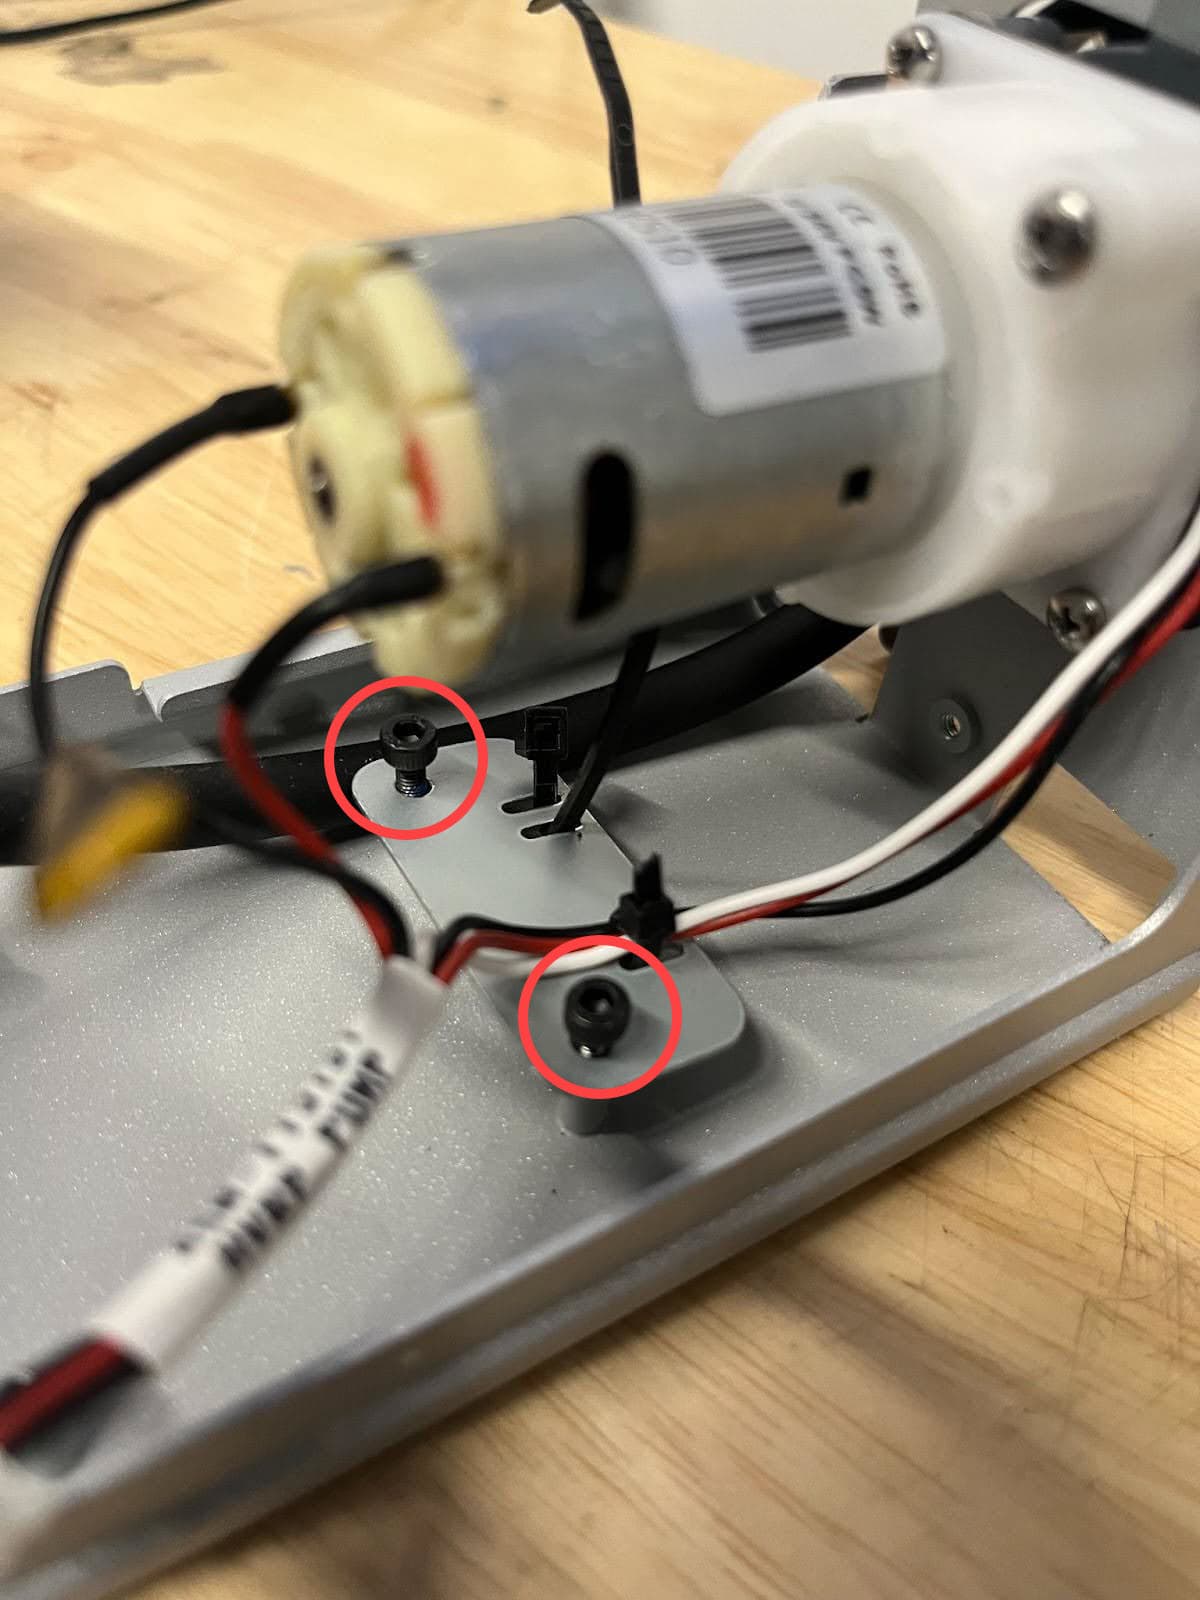
Align the mounting plate with the screw holes in the pump housing. Ensure that the zip tie cutouts are towards the top of the pump and the motor cables are above the plate. Use a 2.5 mm hex driver to tighten the screws until finger tight.
Step 4: Connect the replacement USB-C cable
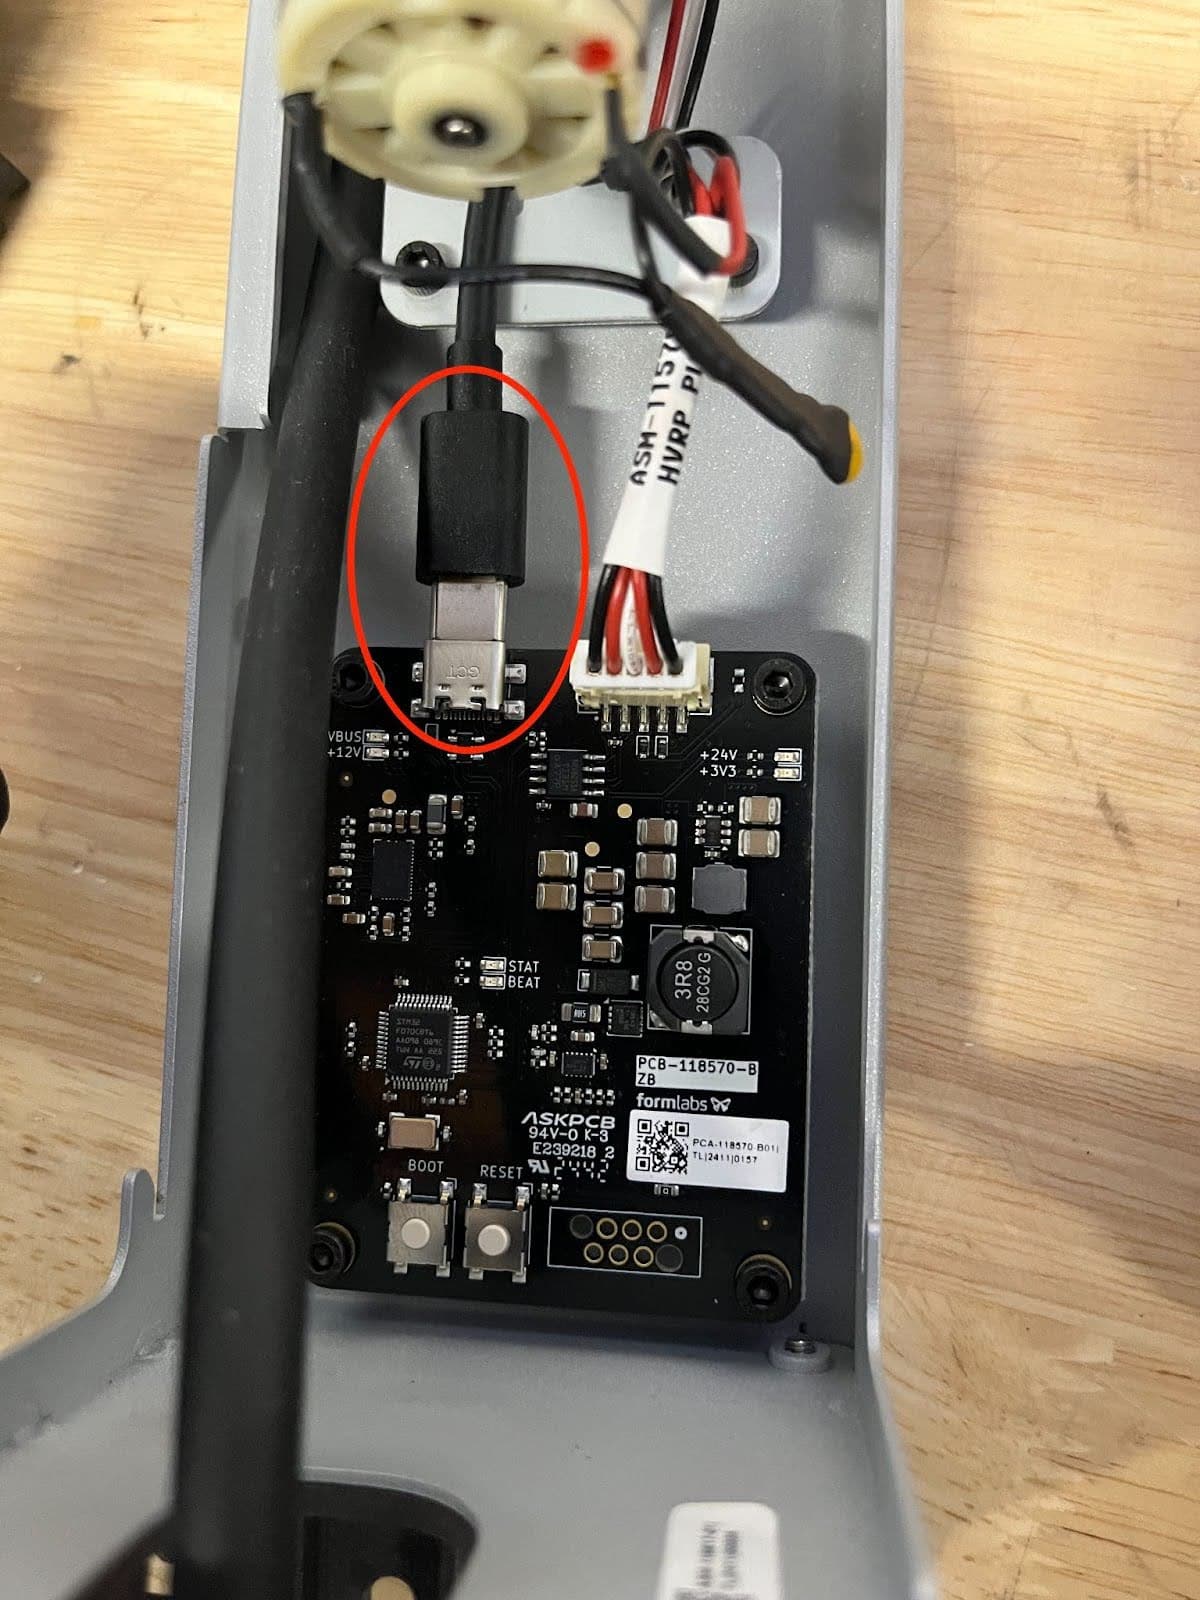
Thread one end of the replacement USB-C cable through the strain relief opening in the top of the resin pump housing and through the loop of the zip tie. Connect the USB-C cable to the control board, ensuring it is full seated.
Step 5: Secure the USB-C cable
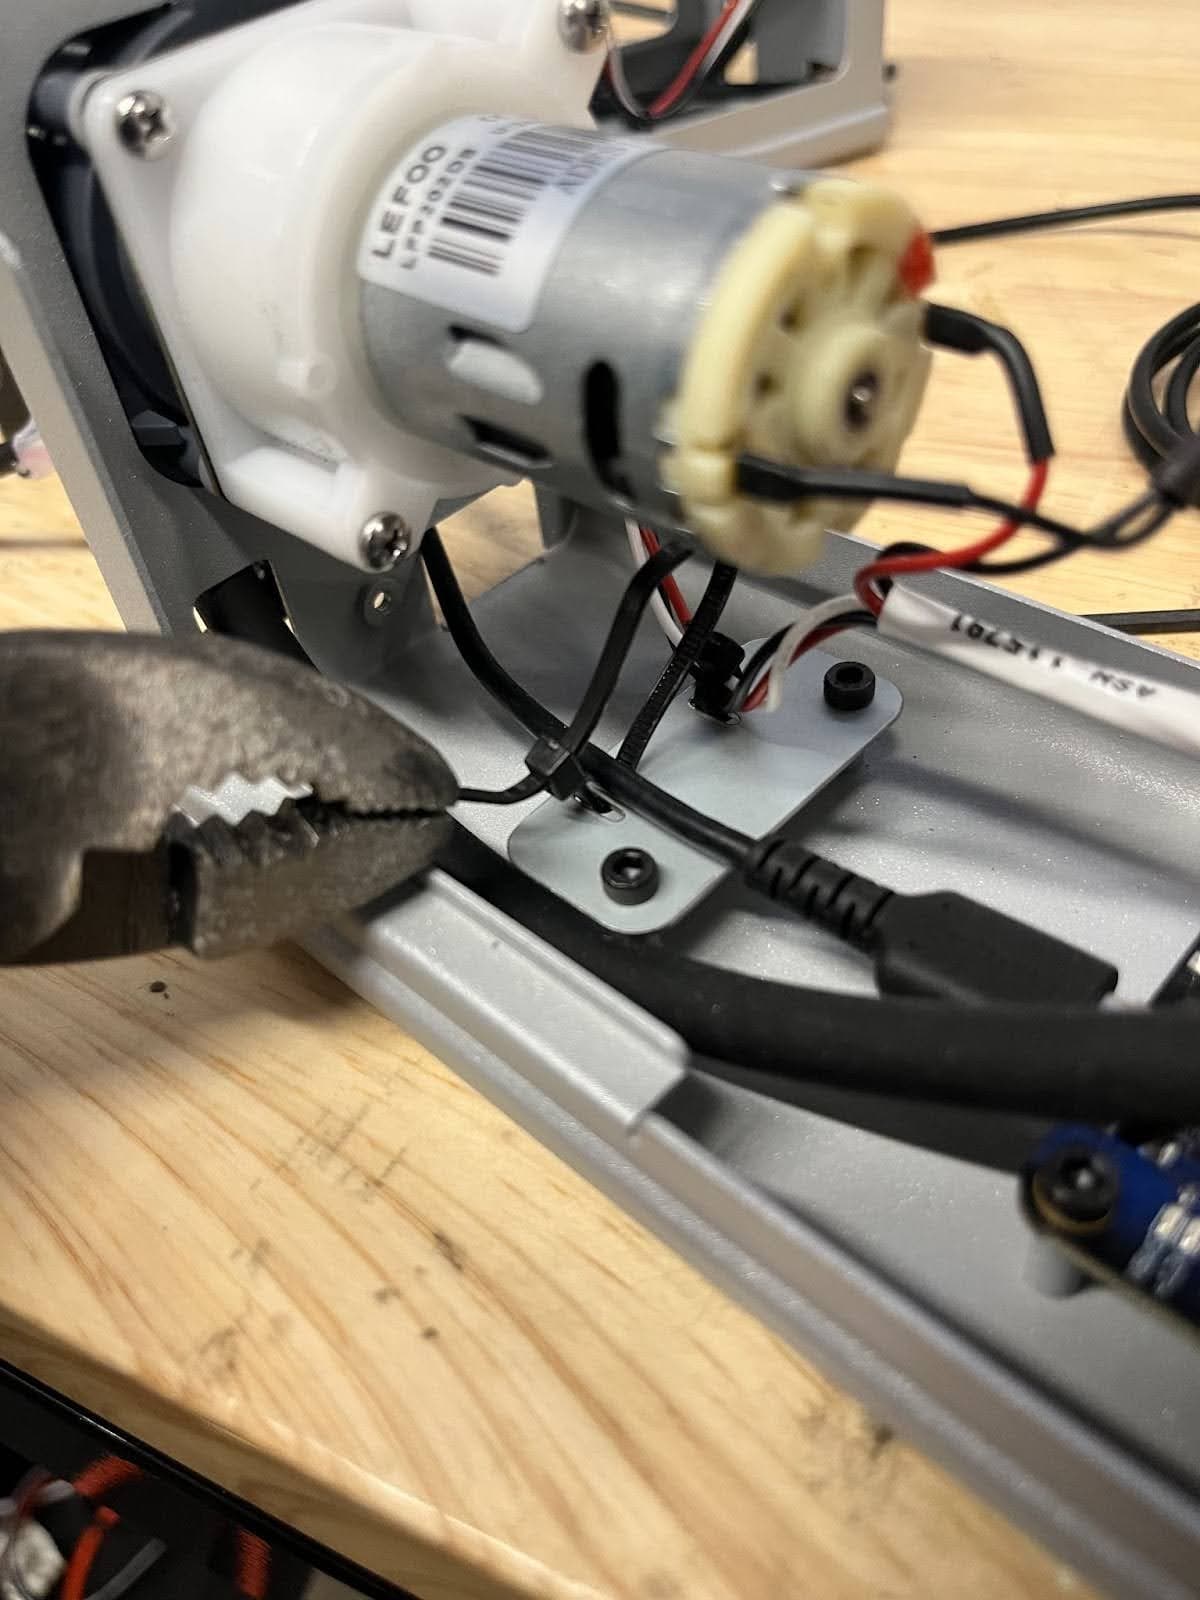
Ensure that there is slack in the USB-C cable between the zip tie and the connector to the control board. Using pliers, secure the USB-C cable to the pump housing with the zip tie. Do not overtighten, as it may crimp or damage the cable.
Step 6: Trim the zip tie
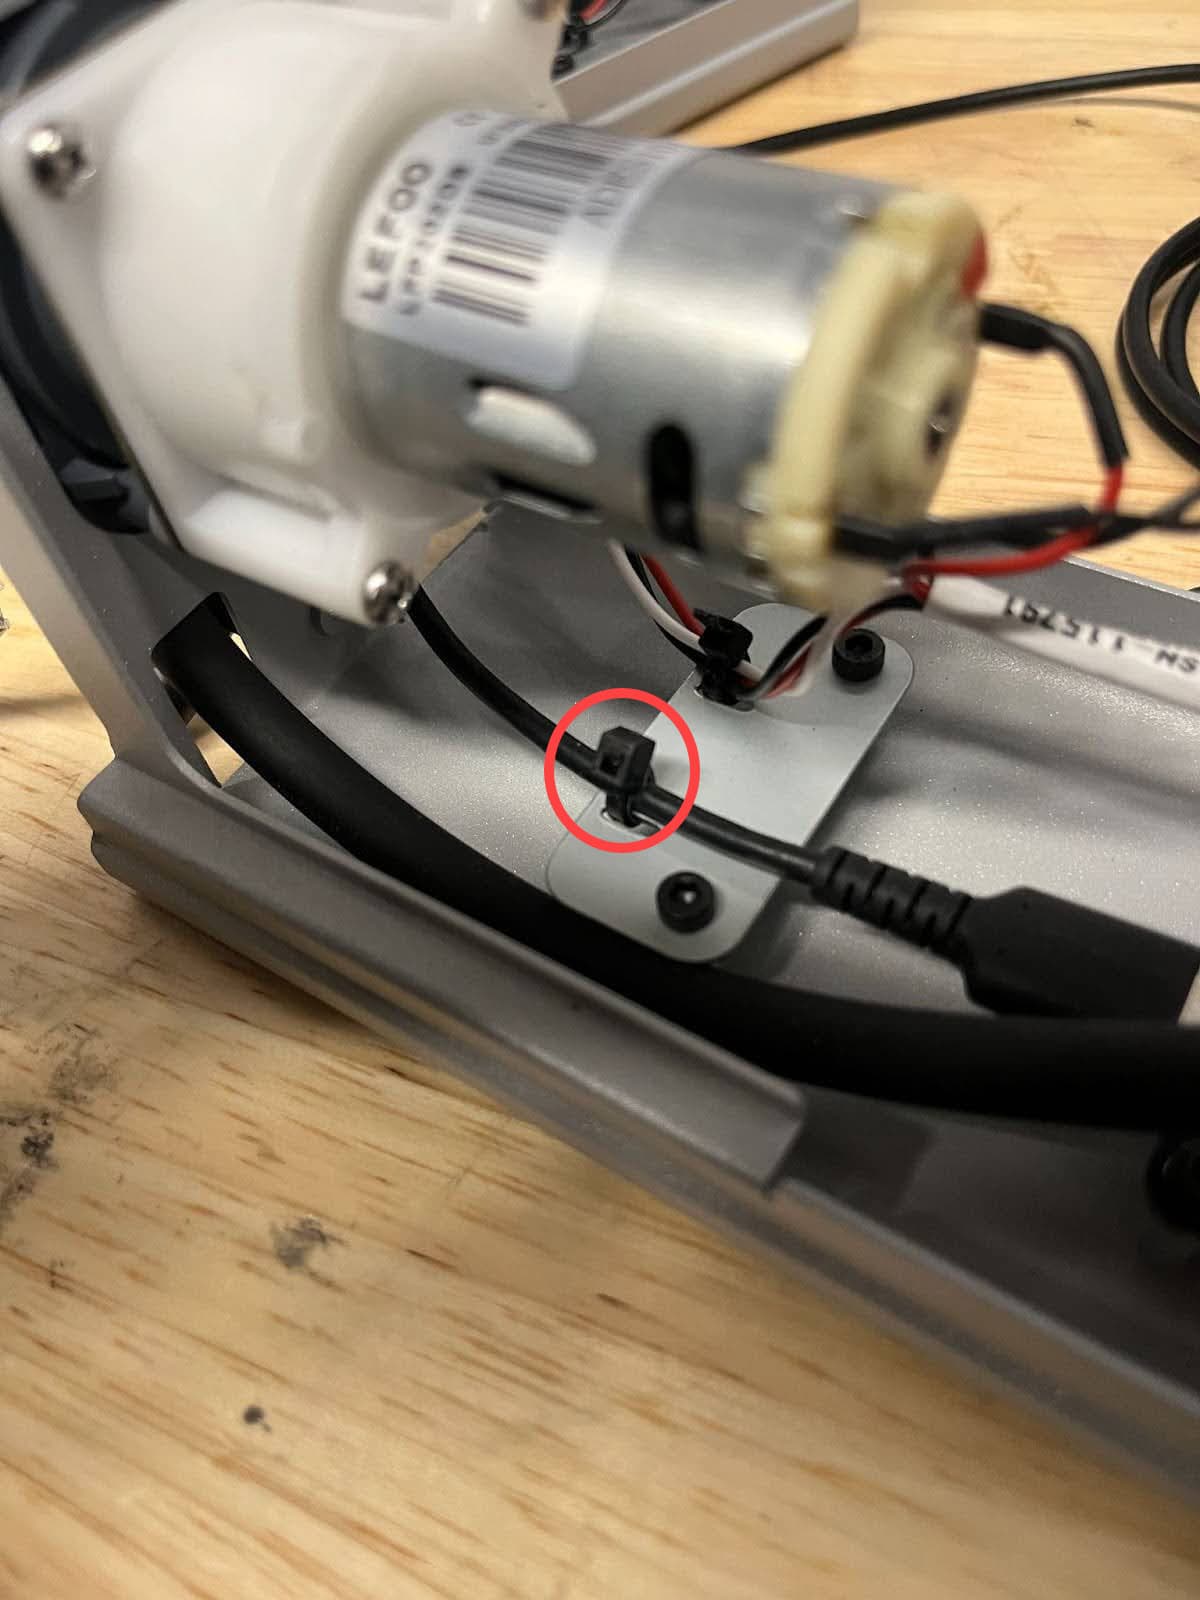
Using flush cutters, trim the excess tail of the zip tie to avoid interference with other components.
Reinstalling the pump shell
Overview: Reinstall the strain relief and outer shell.
Step 1: Secure the strain relief insert
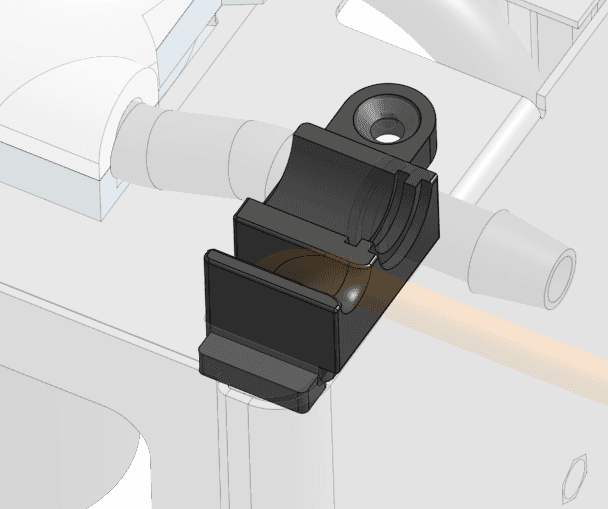
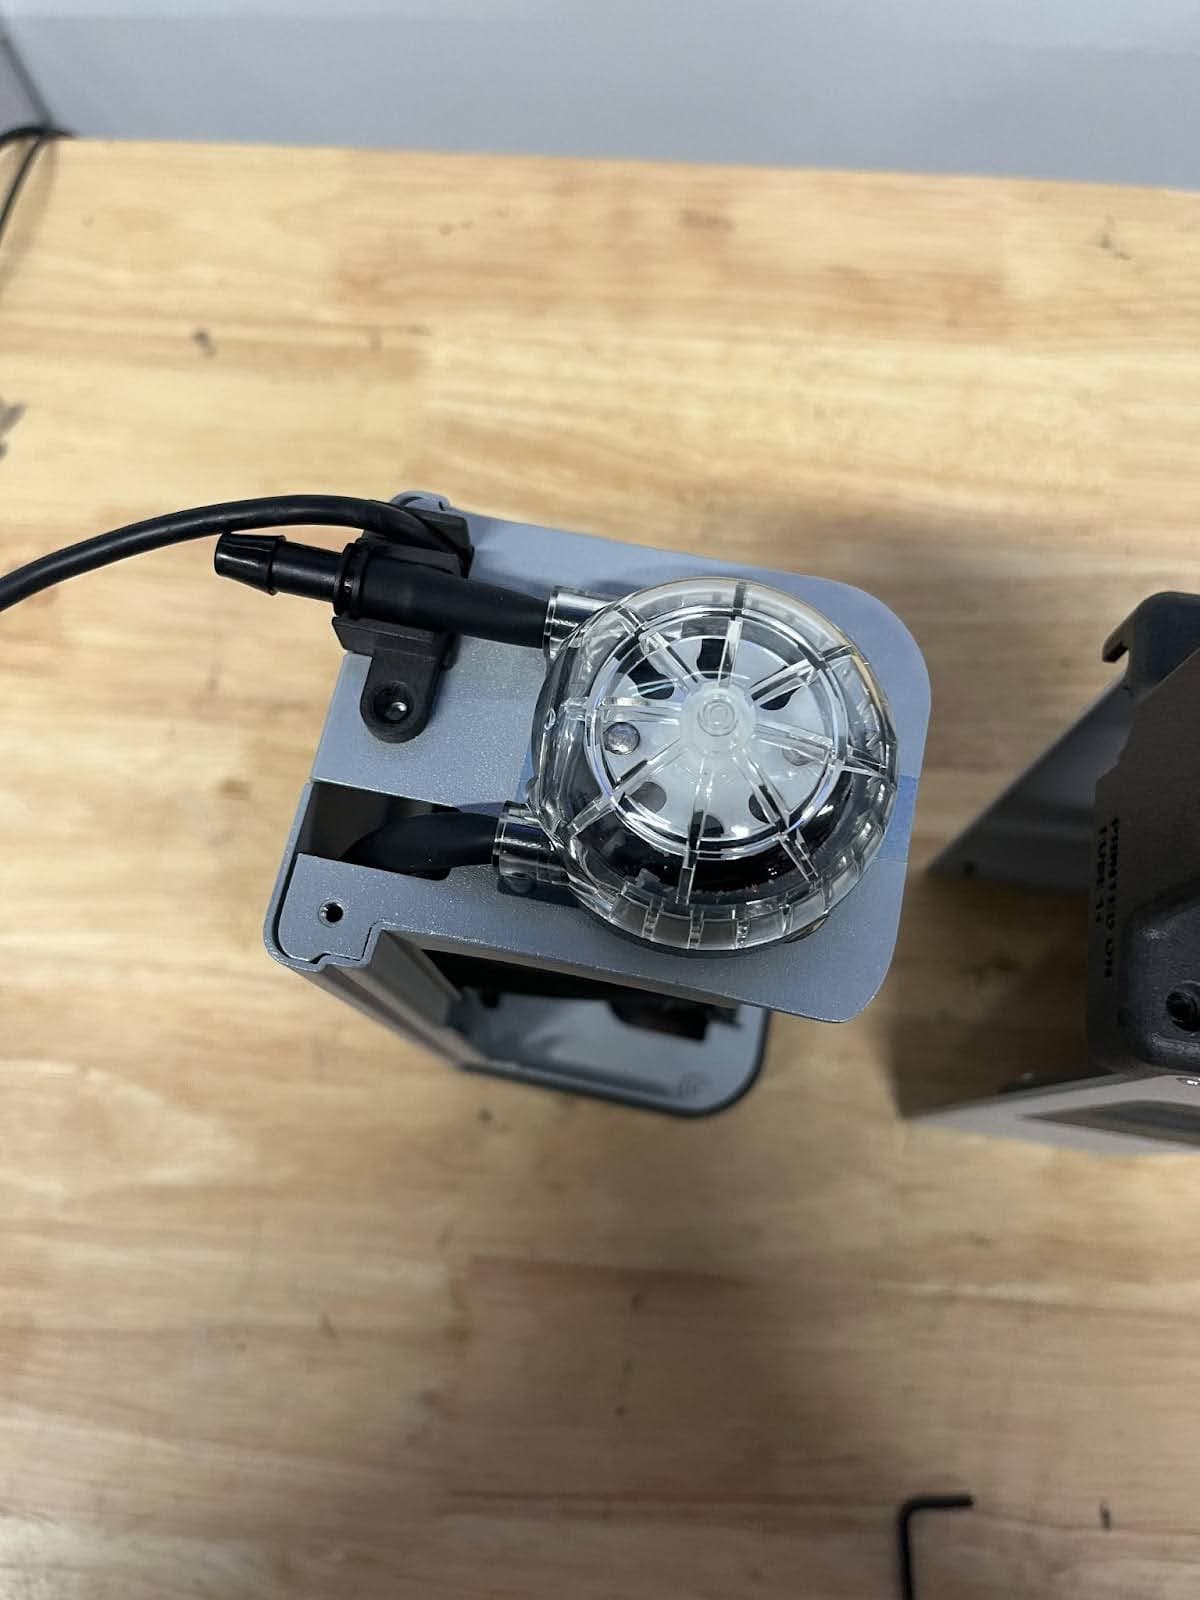
Position the strain relief insert at the top of the resin pump housing. Ensure that the tab fits underneath the housing and that the barb fitting and cable are routed in the proper channels and are fully seated. Using a 2 mm hex driver, tighten the screw until finger-tight.
Step 2: Reinstall the resin pump shell
Slide the resin pump shell onto the resin pump body. When properly installed, the shell sits flush against the base of the resin pump body.
Step 3: Secure the resin pump shell
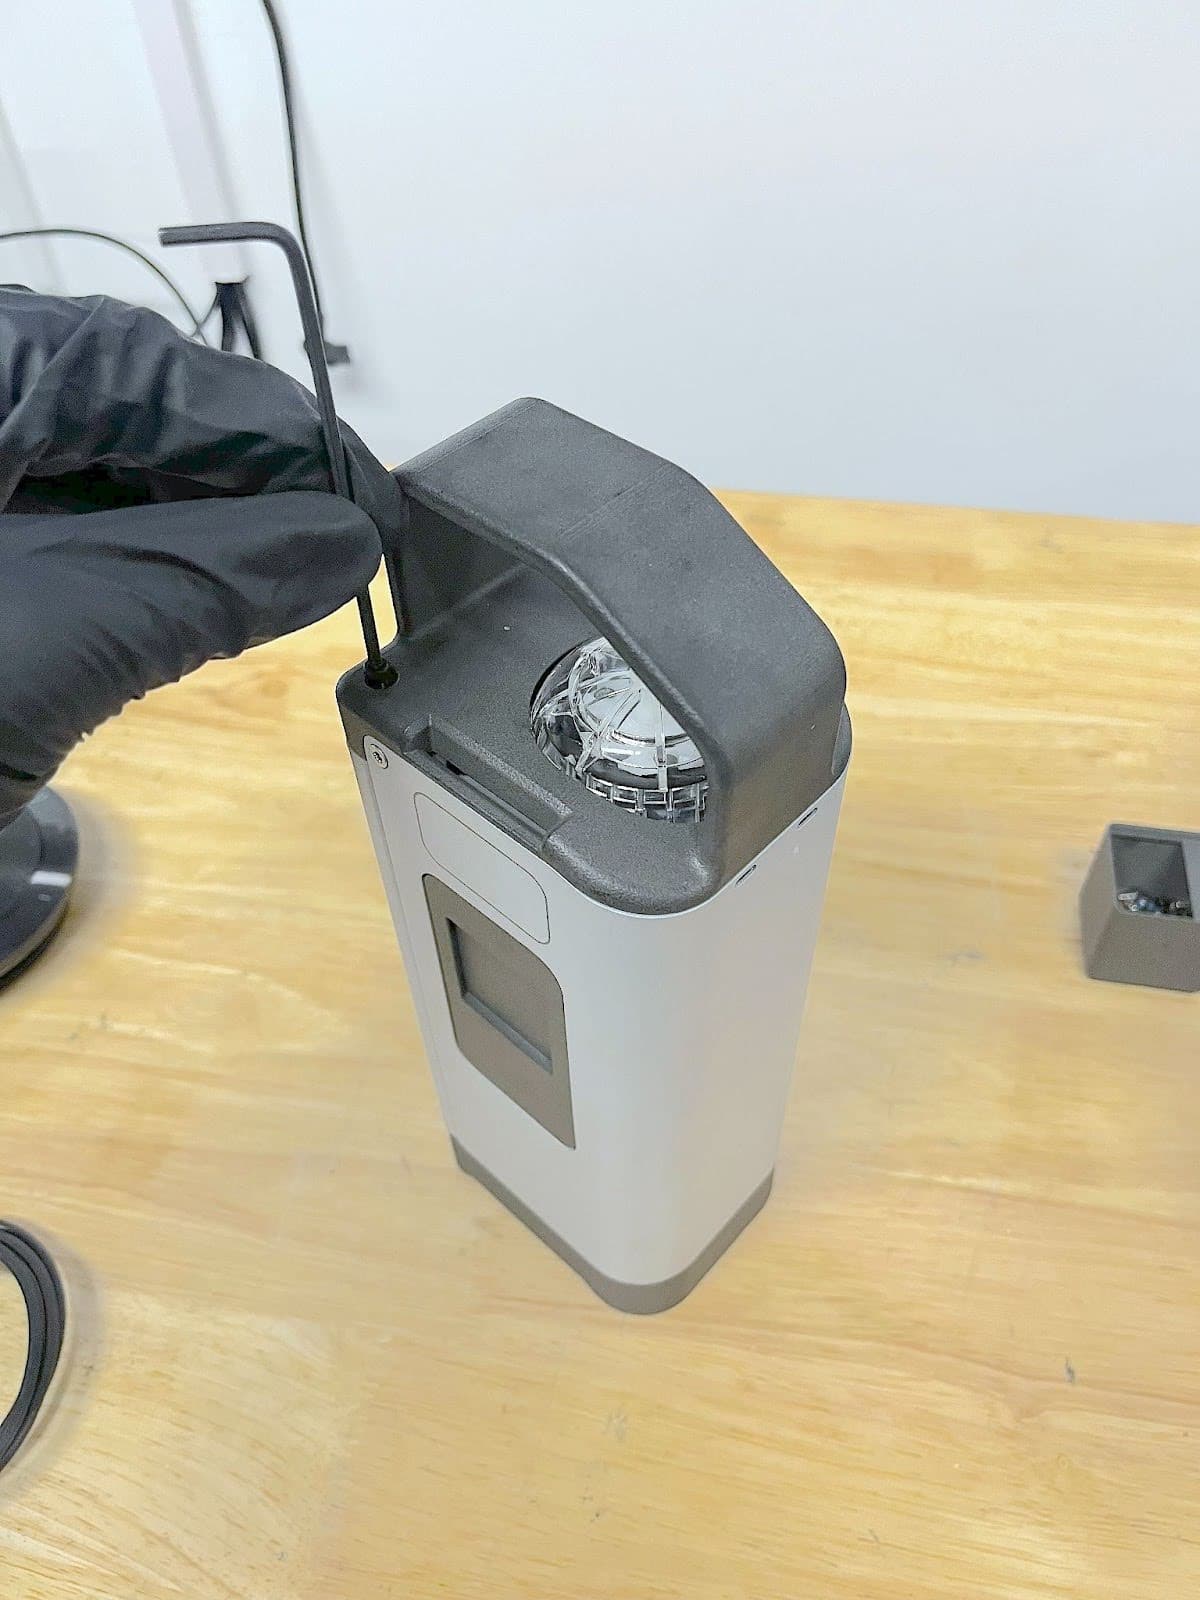
Thread the resin pump shell screw into the screw hole at the top of the pump. Use a 2.5 mm hex driver to tighten the screw until snug.
Finalizing the repair
Overview: After installing the replacement USB-C cable, insert the resin pump into a printer and perform final checks.
Step 1: Remove the luer cap from the pump tube
Unscrew the cap from the outlet of the pump tube. Screw the cap onto the retention post on the bottom of the pump for safekeeping.
Step 2: Connect the transfer tube
Press the transfer tube onto the barbed fitting at the top of the resin pump until the end of the tube sits flush against the base of the fitting and secure the transfer tube with a zip tie.
Step 3: Insert the resin pump into the printer
Insert the resin pump into the cartridge slot of your printer. Route the transfer tube so that it does not interfere with the printer cover or any other moving parts.
Step 4: Connect the resin pump cable to the printer
Connect the USB-C cable from the resin pump to the printer. The display shows that the printer detects the connection from the resin pump.
Step 5: Run a test print
Start a test print. Monitor the printer to ensure that the resin pump dispenses resin properly. Contact Formlabs Support or your authorized reseller to share the results of the procedure.