
Required Supplies:
- Printed pump skirt
- 2 mm hex driver (ball-end)
- Nitrile gloves

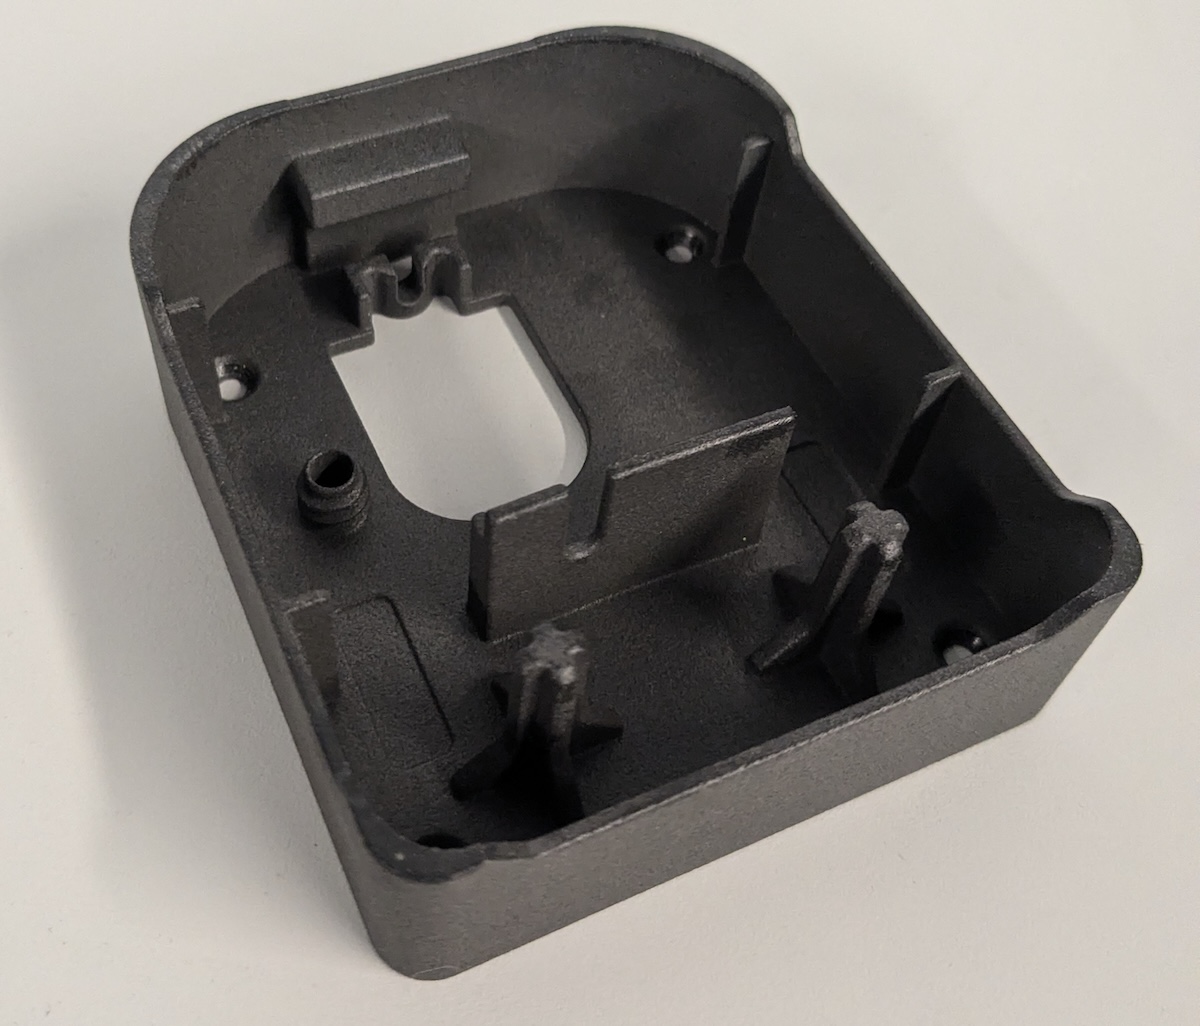
The Resin Pump skirt, also known as the locator base, helps position the pump on the cartridge floor so resin can be dispensed into the resin tank. If the skirt is damaged, the pump may not sit properly on the cartridge floor, leading to a resin spill.
Use this guide to replace the pump skirt on a Form 4 Resin Pumping System pump.
Required Supplies:
Estimated time: 10–20 minutes, plus time to print and post-process the replacement skirt
Preparing the workspace
Overview: Prepare the resin pump and a dust-free workspace for replacing the pump skirt.
Warning:
Resin may cause skin irritation or an allergic skin reaction. Wear gloves when handling liquid resin or resin-coated surfaces. Wash skin with plenty of soap and water.
Step 1: Print a replacement pump skirt
Print and post-process a replacement pump skirt. For best results, print this part in Tough 2000 Resin V2. Other resins will also work but the part may not be as impact-resistant.
Step 2: Prepare the workspace
Clear a workspace. Ensure that the workspace is well-ventilated and free of dust.
Step 3: Remove the resin pump from the printer
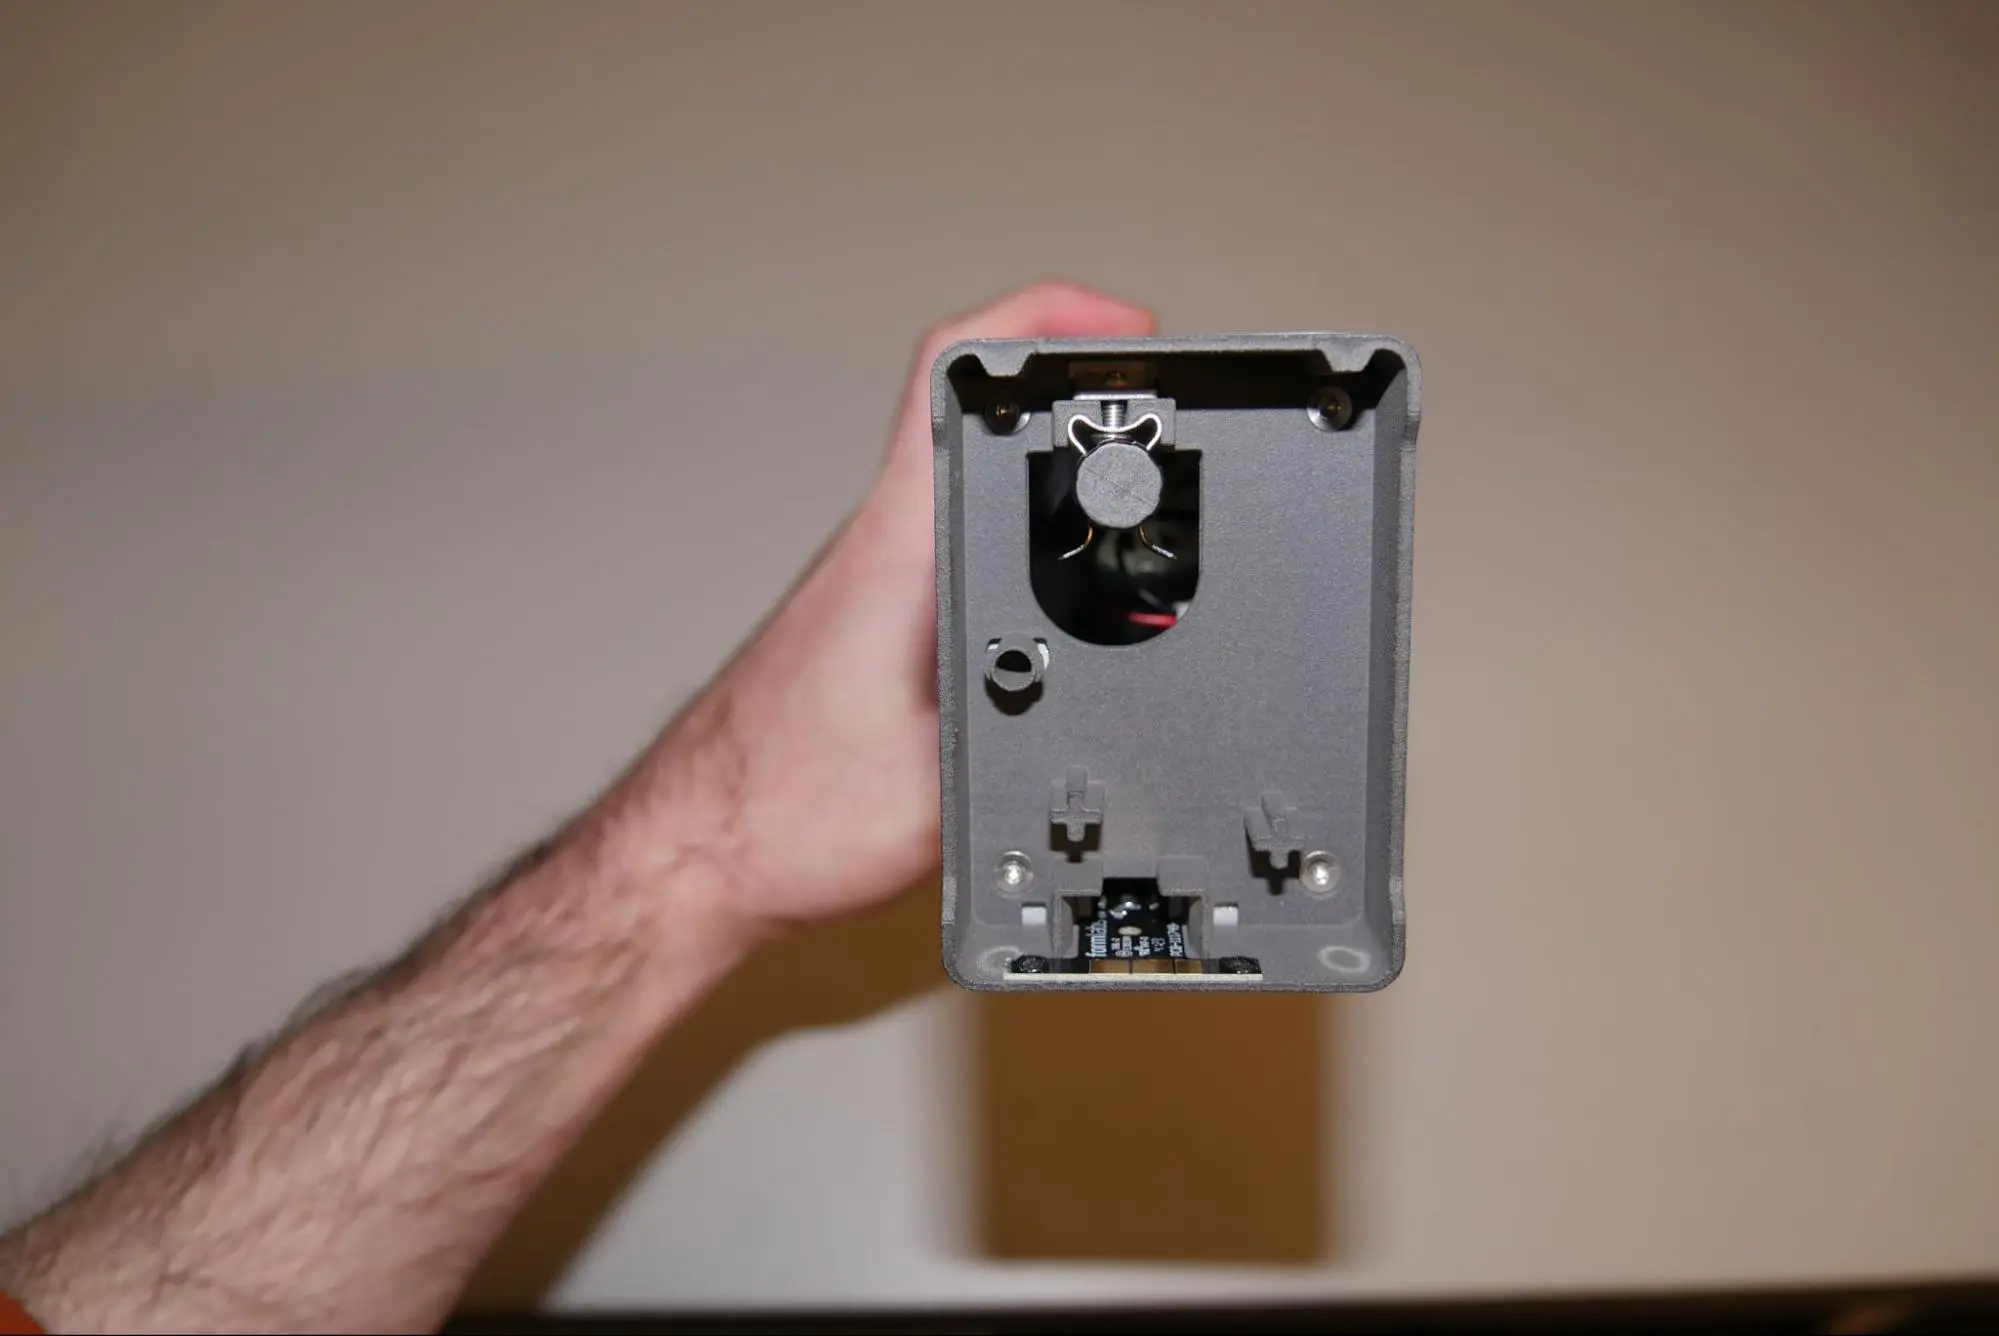
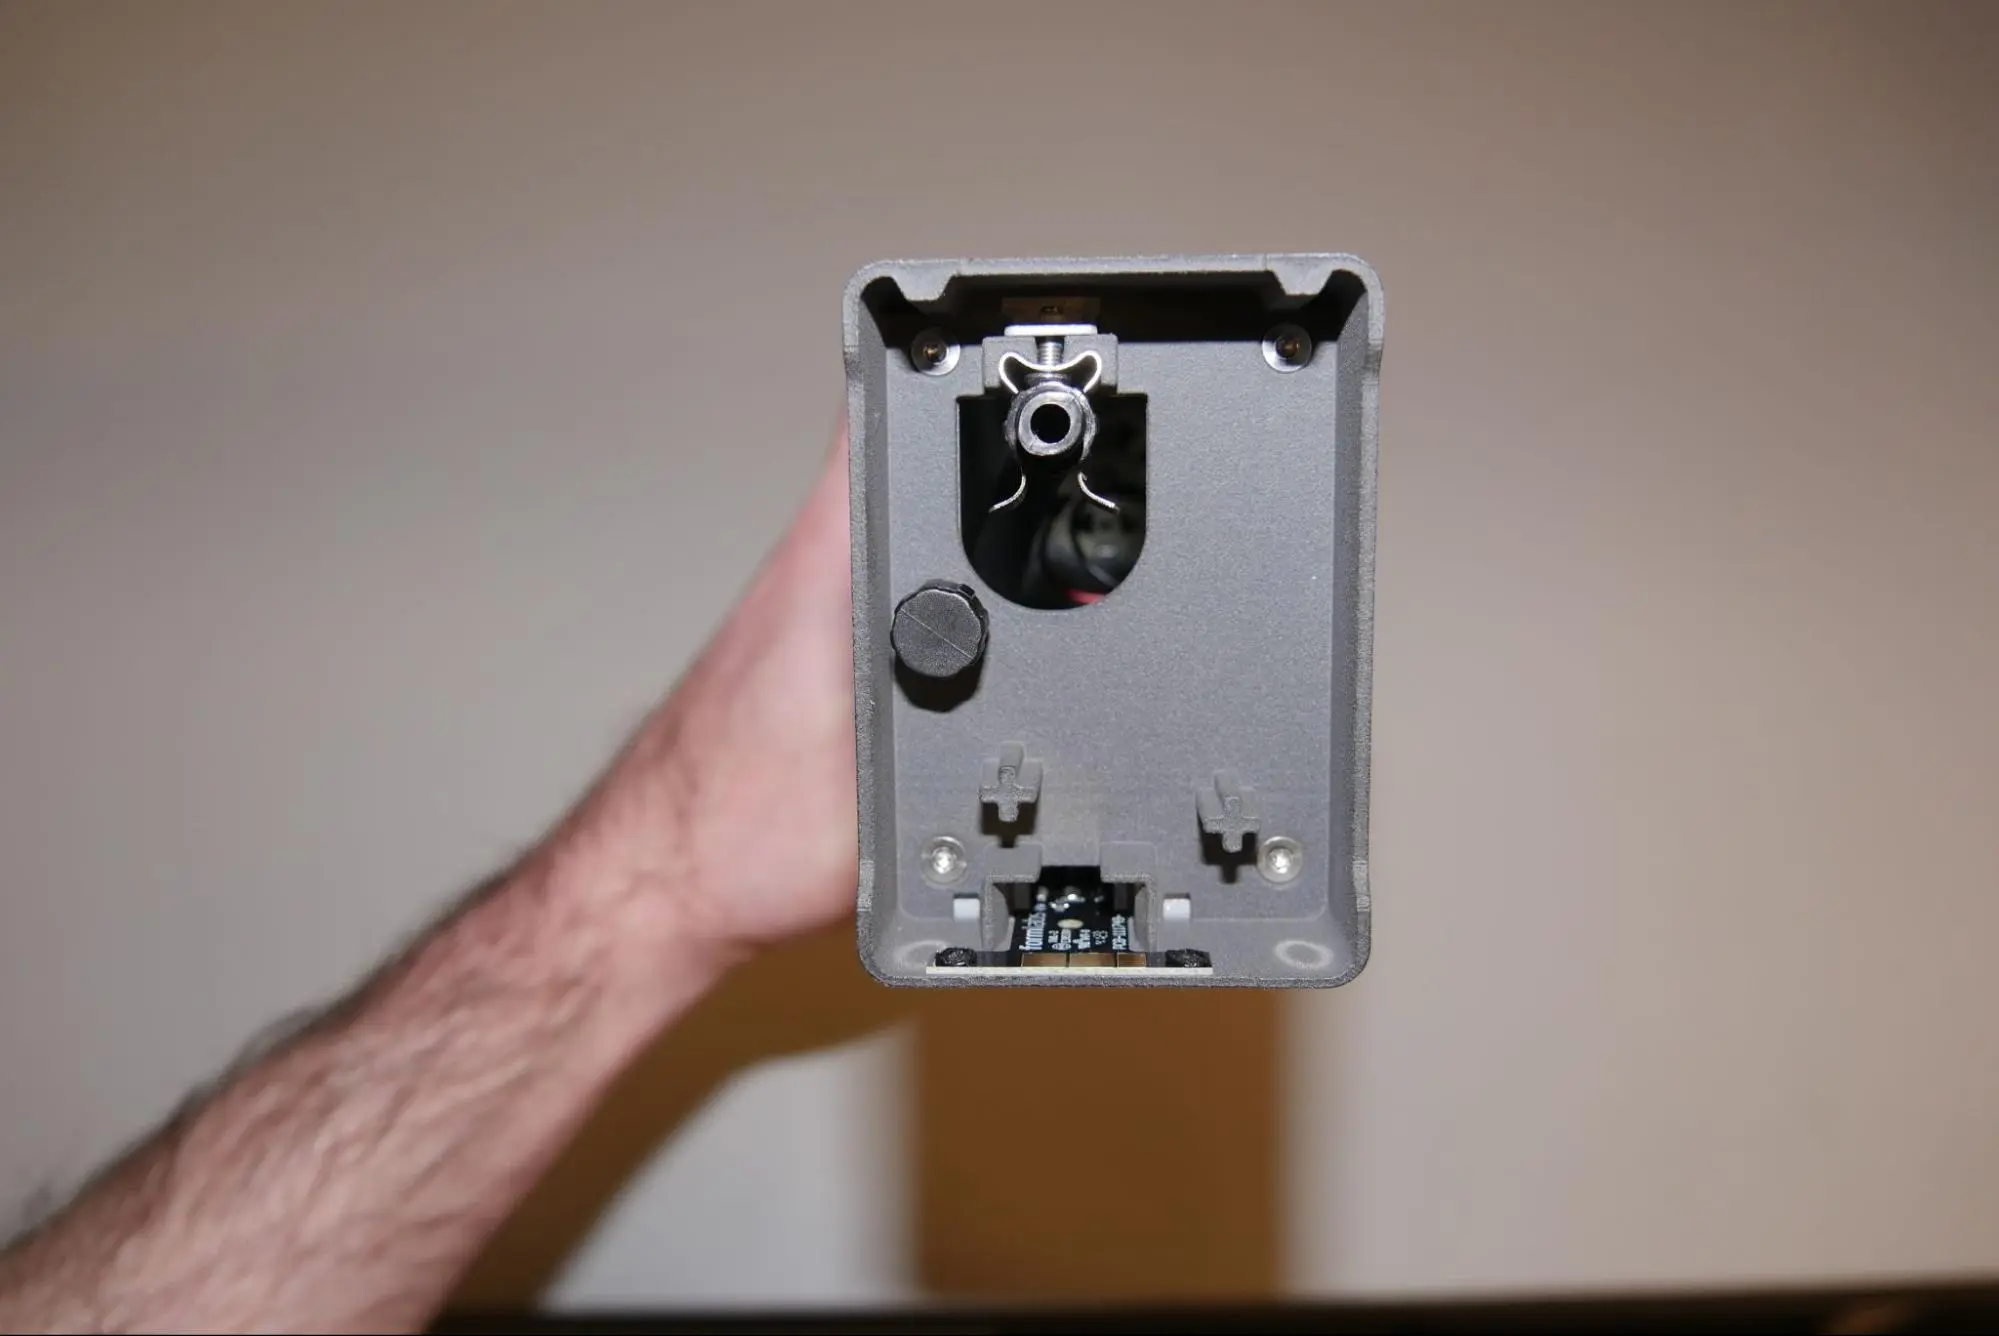
If the resin pump is currently installed in a printer, remove the resin pump.
To prevent resin from dripping onto your work surface, unscrew the cap from the retention post on the bottom of the pump and screw it onto the outlet of the pump tube.
Step 4: Disconnect the transfer tube
Cut the zip tie securing the transfer tube to the resin pump. Disconnect the transfer tube from the resin pump. Rest the free end of the transfer tube above the resin container to prevent resin from dripping onto your work surface.
Removing the pump skirt
Overview: Uninstall the original pump skirt.
Step 1: Remove the resin pump tube clip
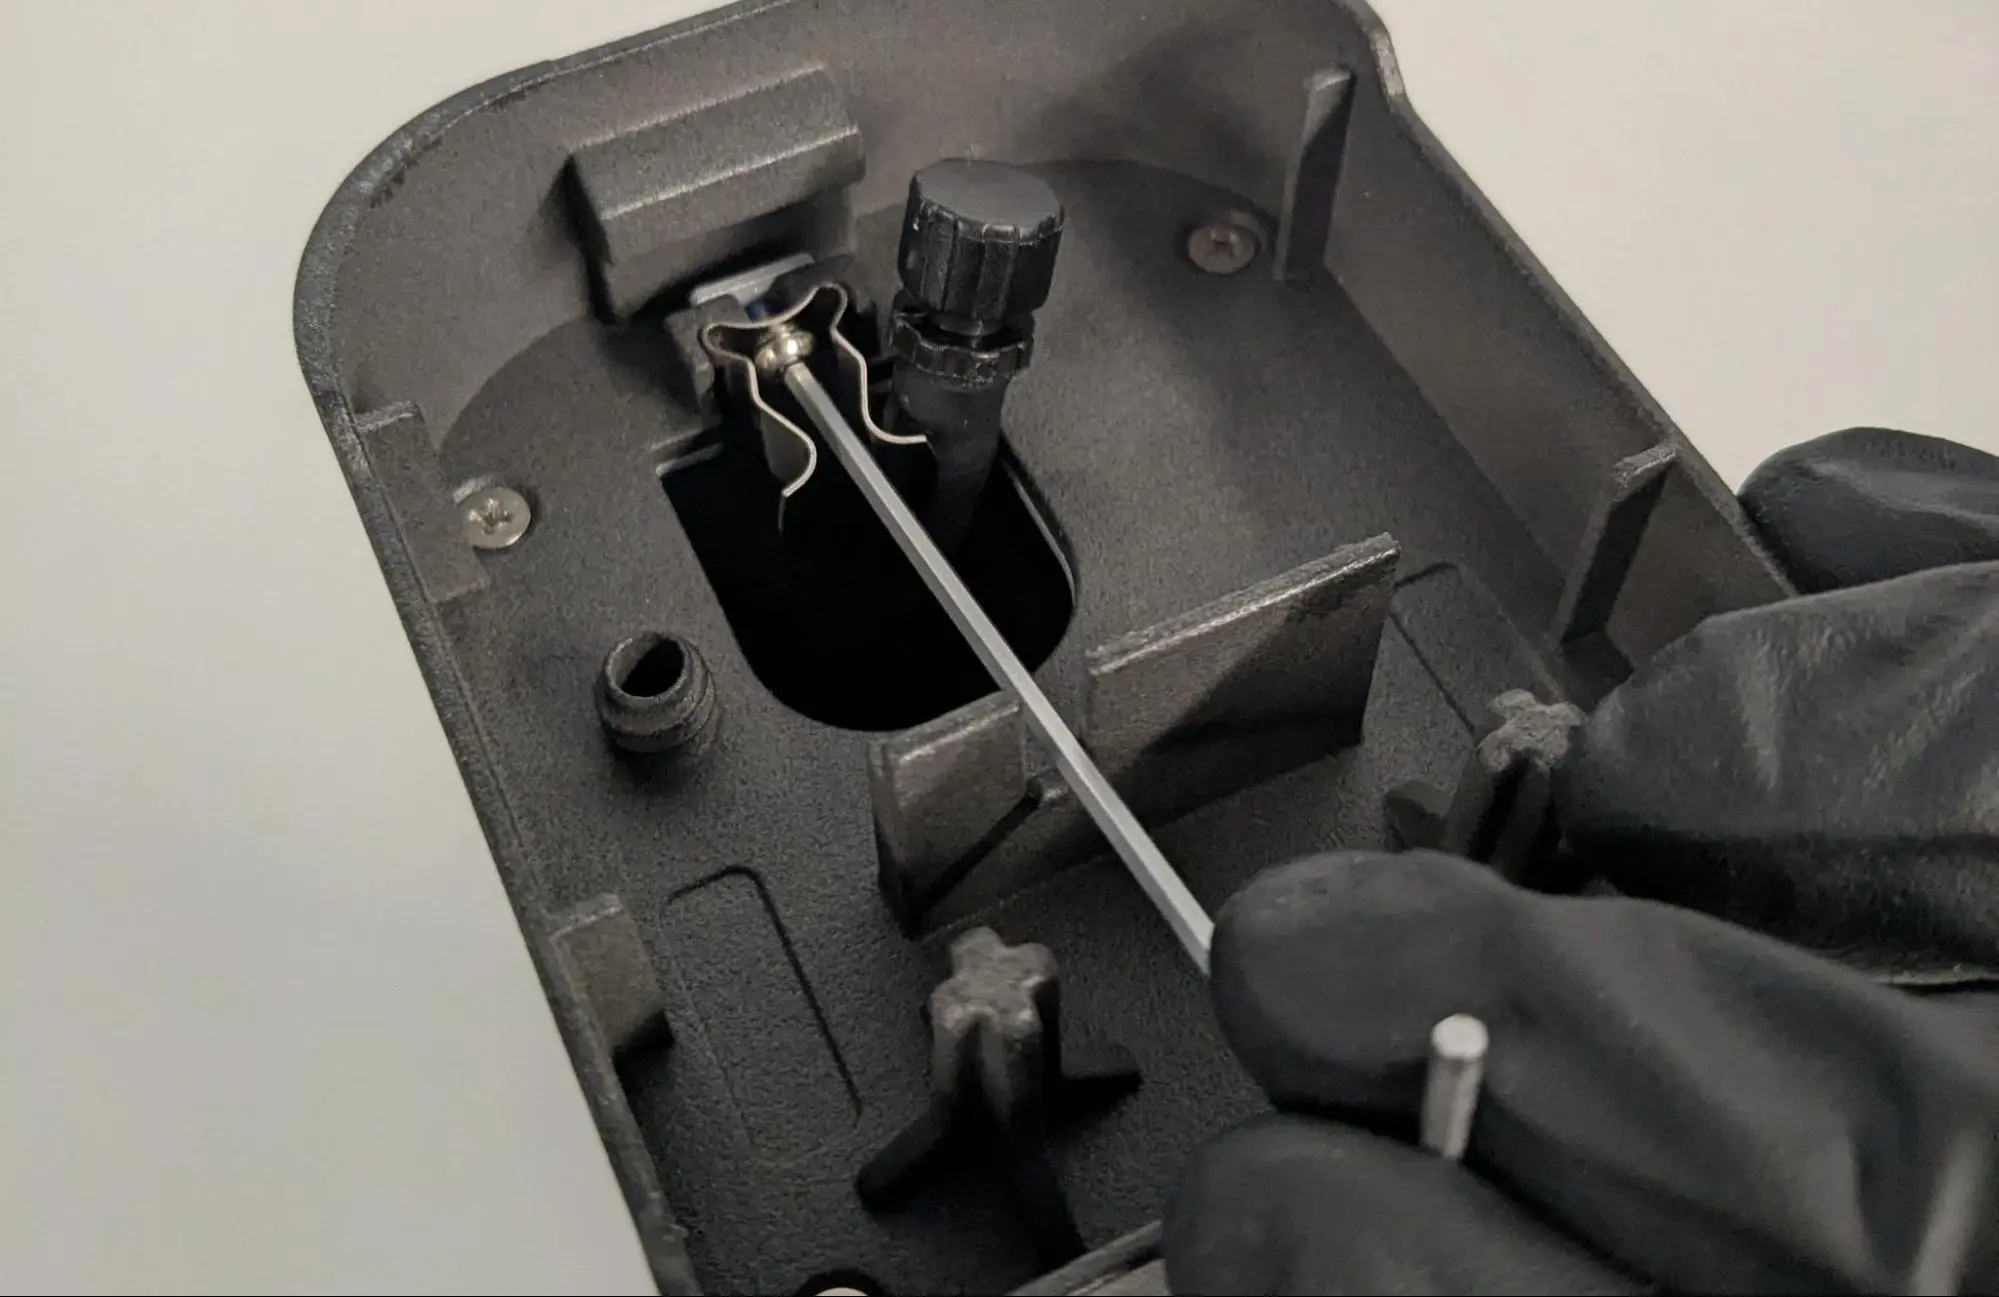
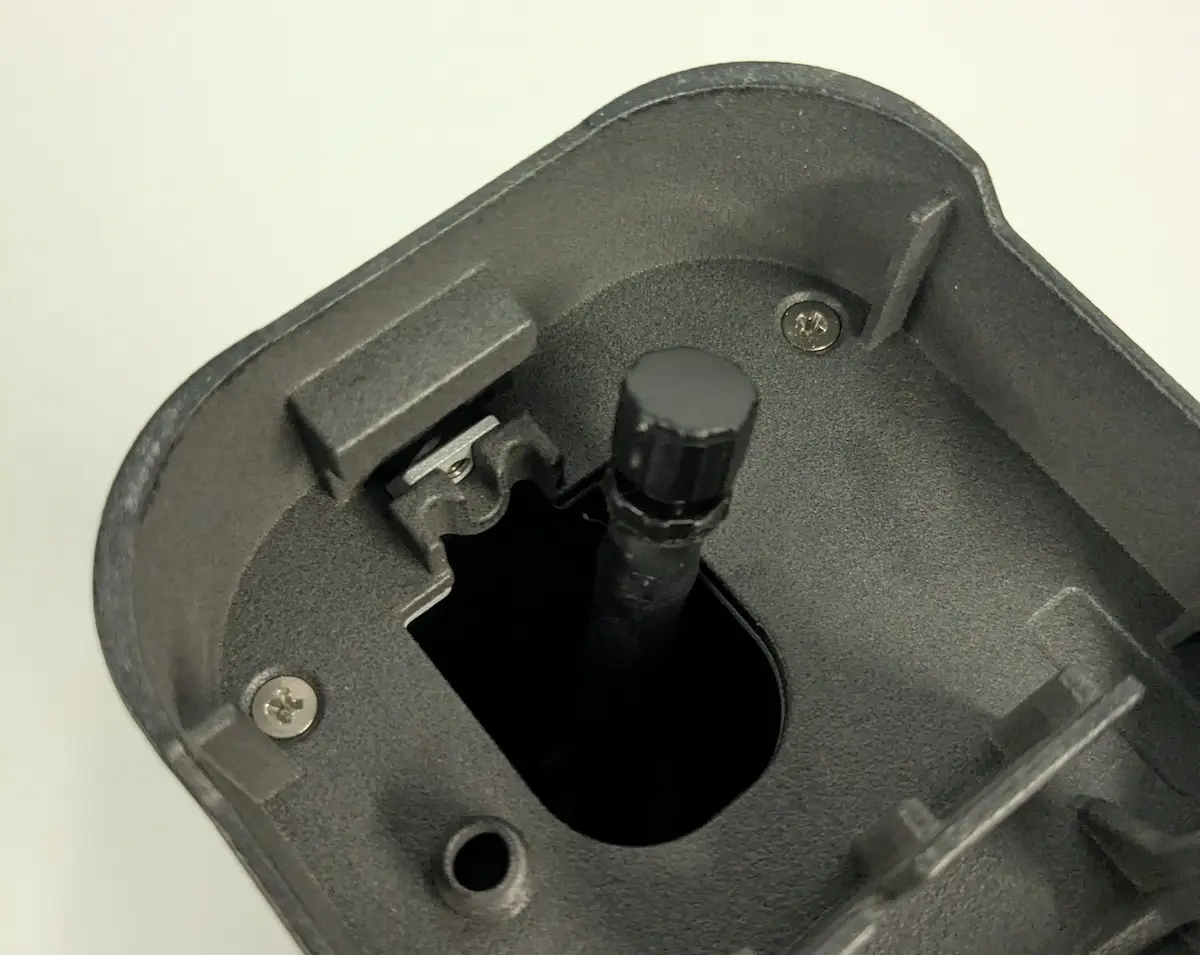
The pump tube is held in place with a clip, which is in turn secured to the body of the pump with an 8 mm M3 button head screw. Remove the pump tube from the clip and move it to the side. Using a ball-end 2 mm hex driver, loosen and remove the screw from the clip. Set the screw and clip aside.
Step 2: Unscrew the pump skirt mounting screws
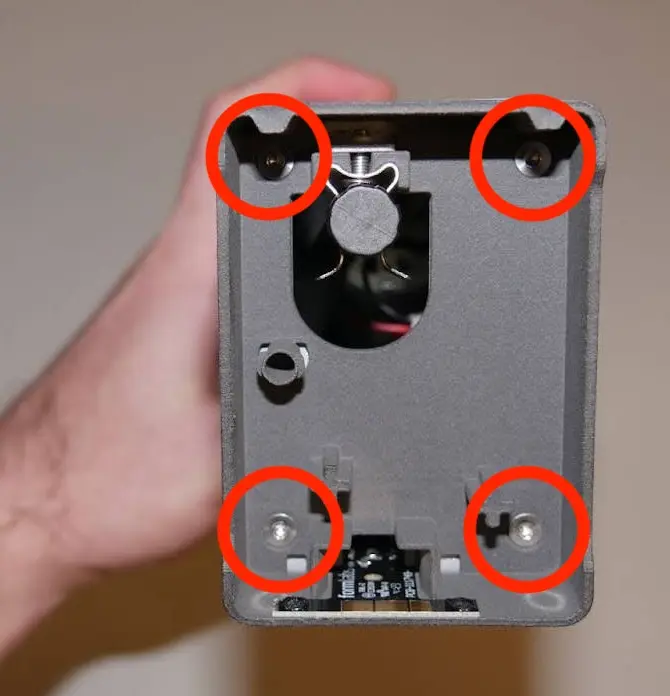
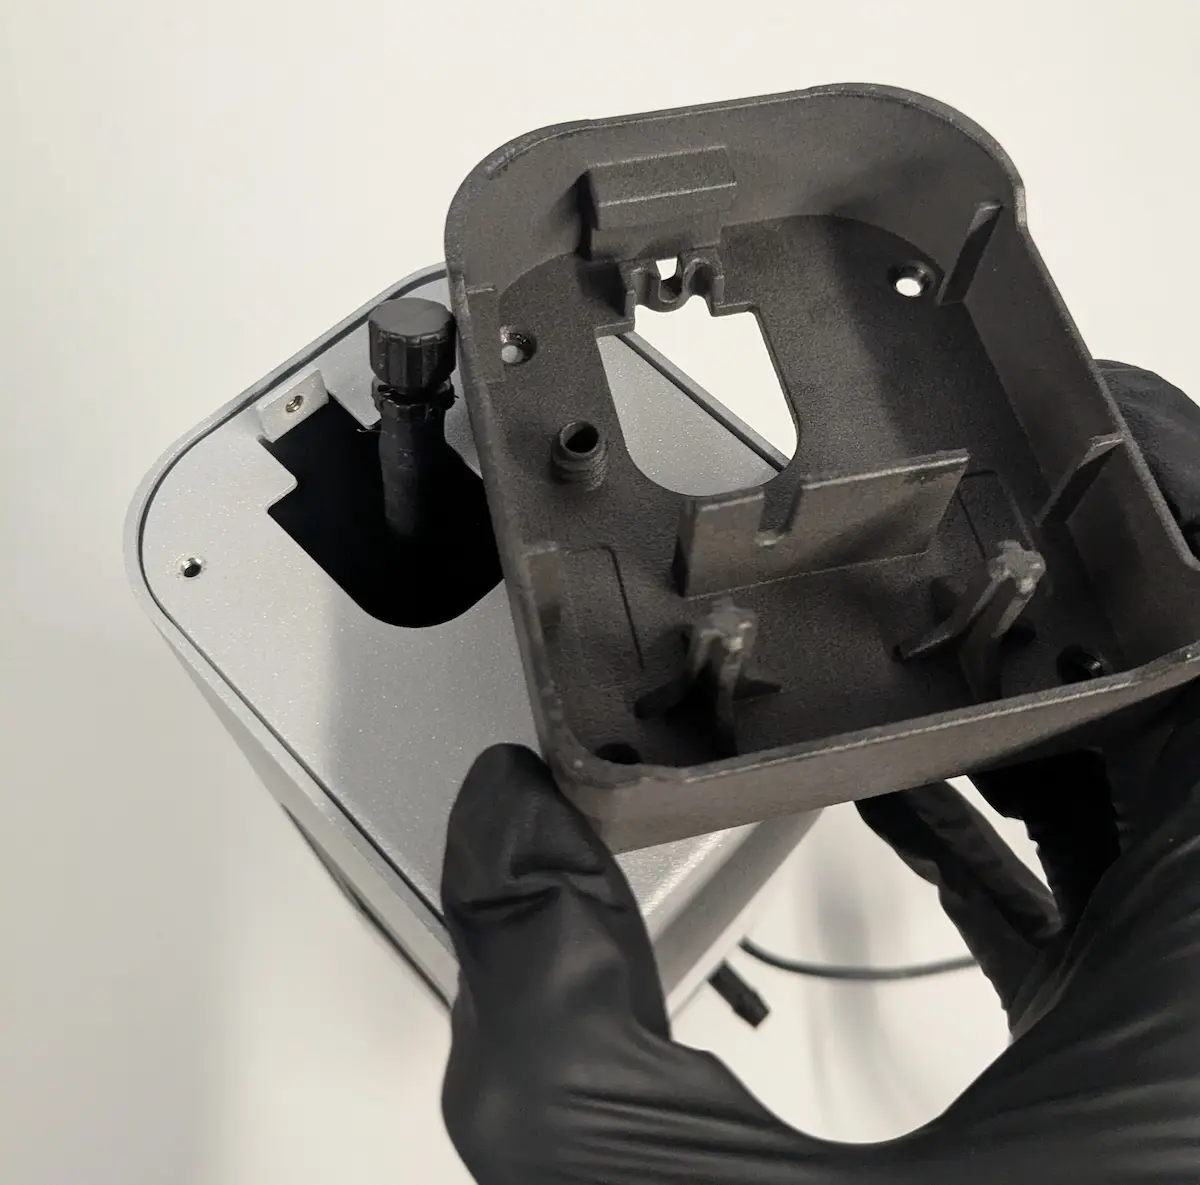
Using a 2 mm hex driver, loosen and remove the four 6 mm M3 flathead screws securing the pump skirt to the body of the pump. Set the screws aside. Pull the pump skirt off of the pump and set it aside for disposal.
Installing the replacement pump skirt
Overview: Mount and secure the replacement pump skirt.
Place the printed pump skirt against the base of the pump. Align the four screw holes in the printed skirt with the corresponding screw holes in the pump body.
Thread one 6 mm M3 flathead screw into each of the four screw holes at the corners of the pump skirt. Using a 2 mm hex driver, tighten until snug.
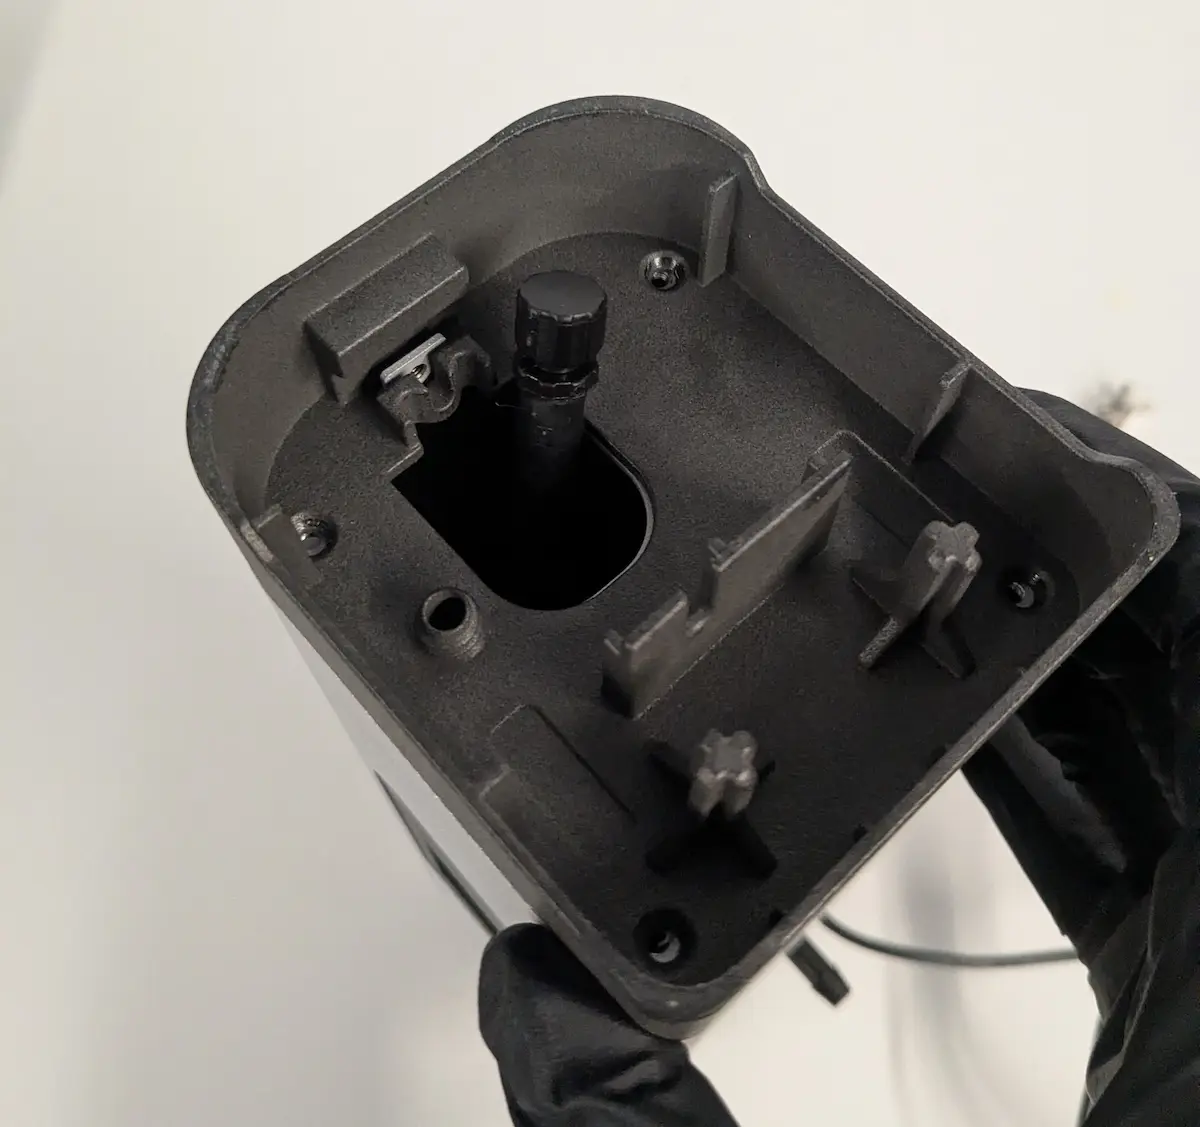
Step 3: Mount the pump tube clip
Slide the closed end of the pump tube clip into the matching contoured feature in the pump skirt.
Step 4: Secure the pump tube clip
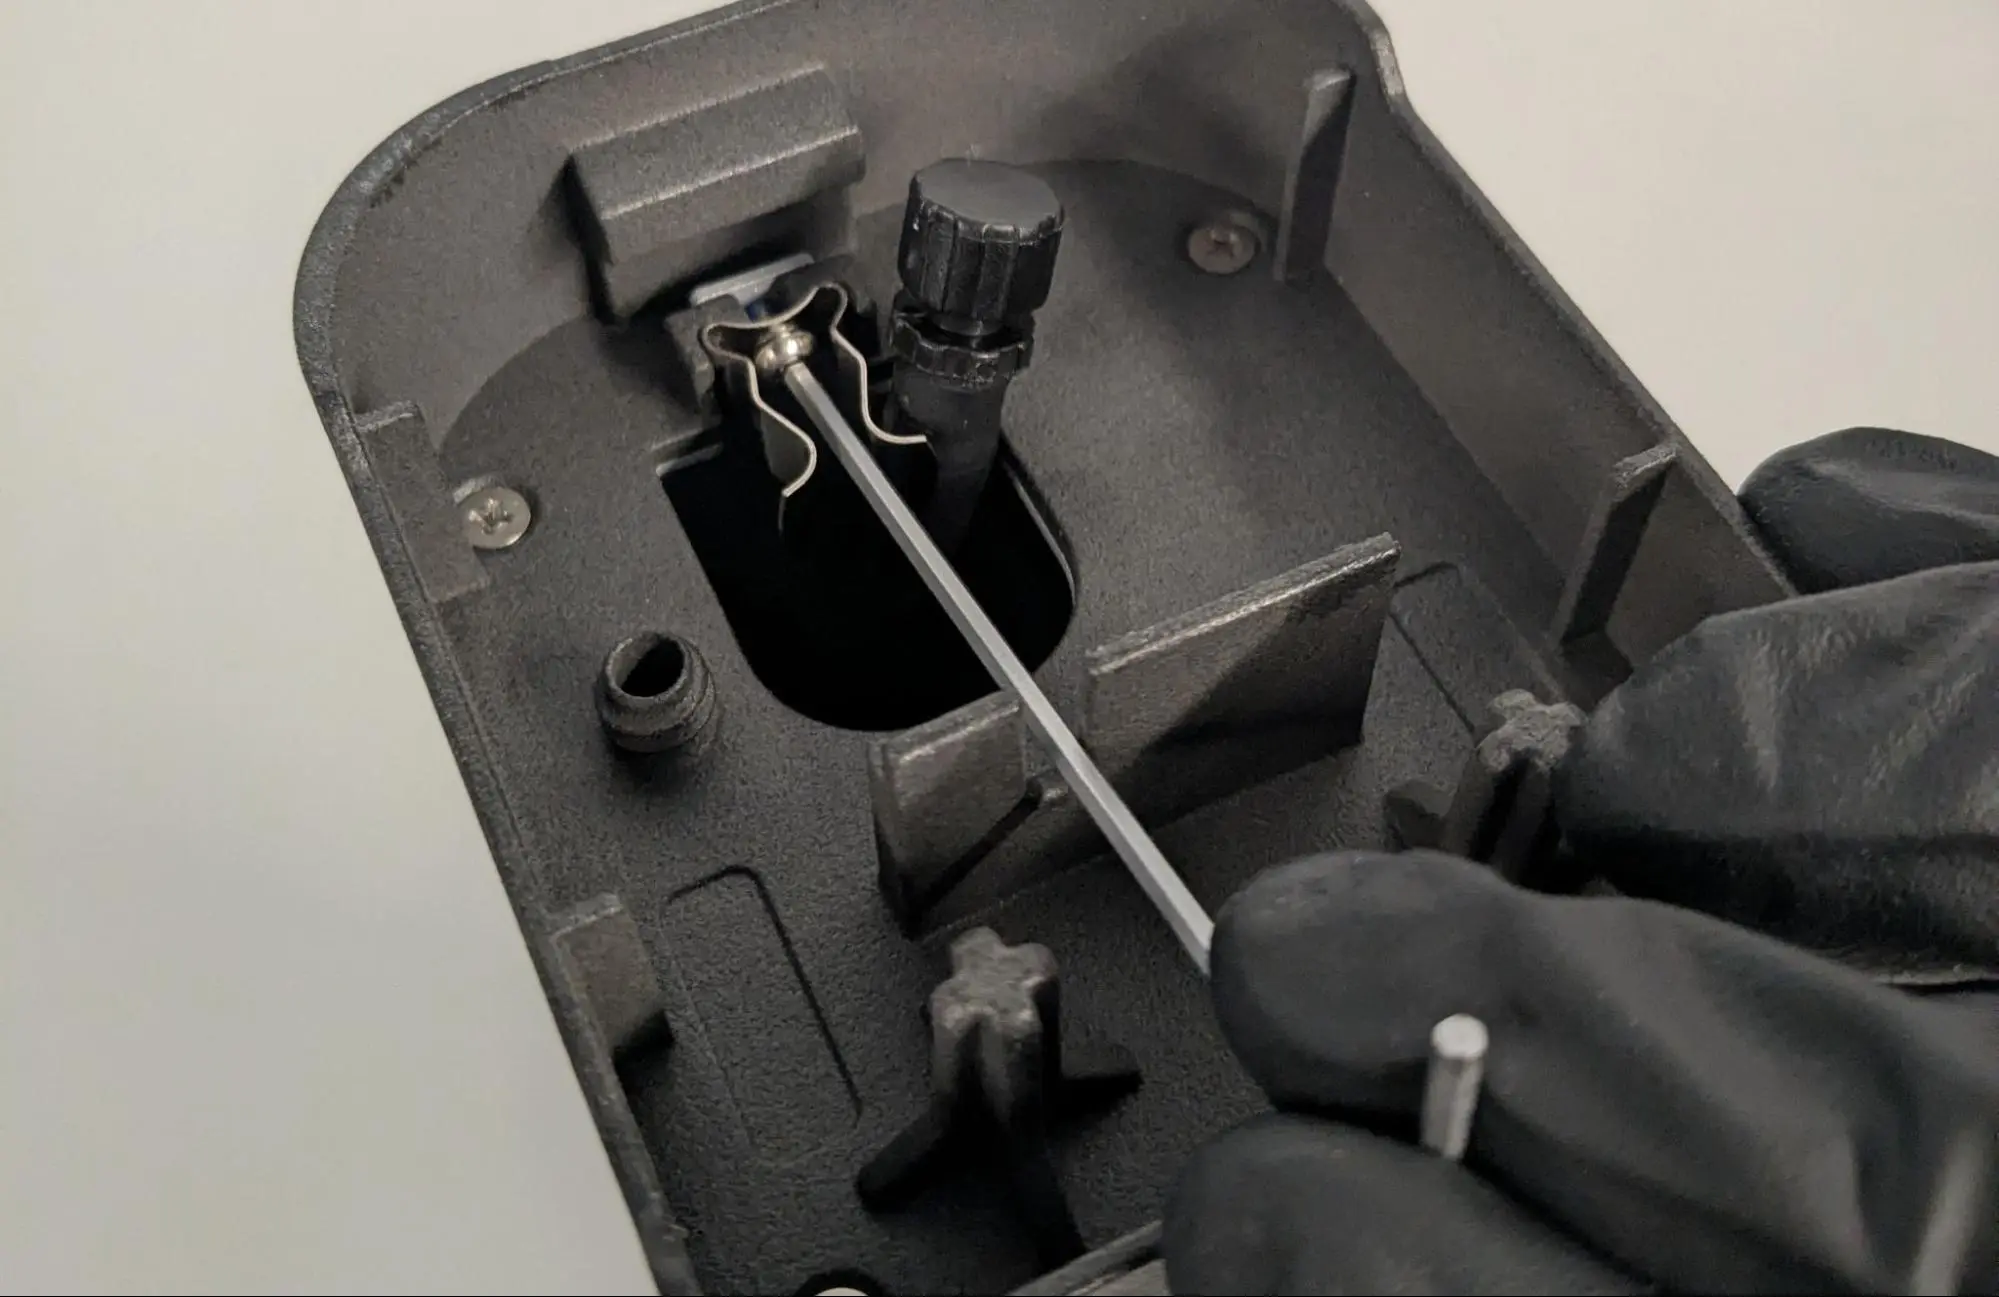
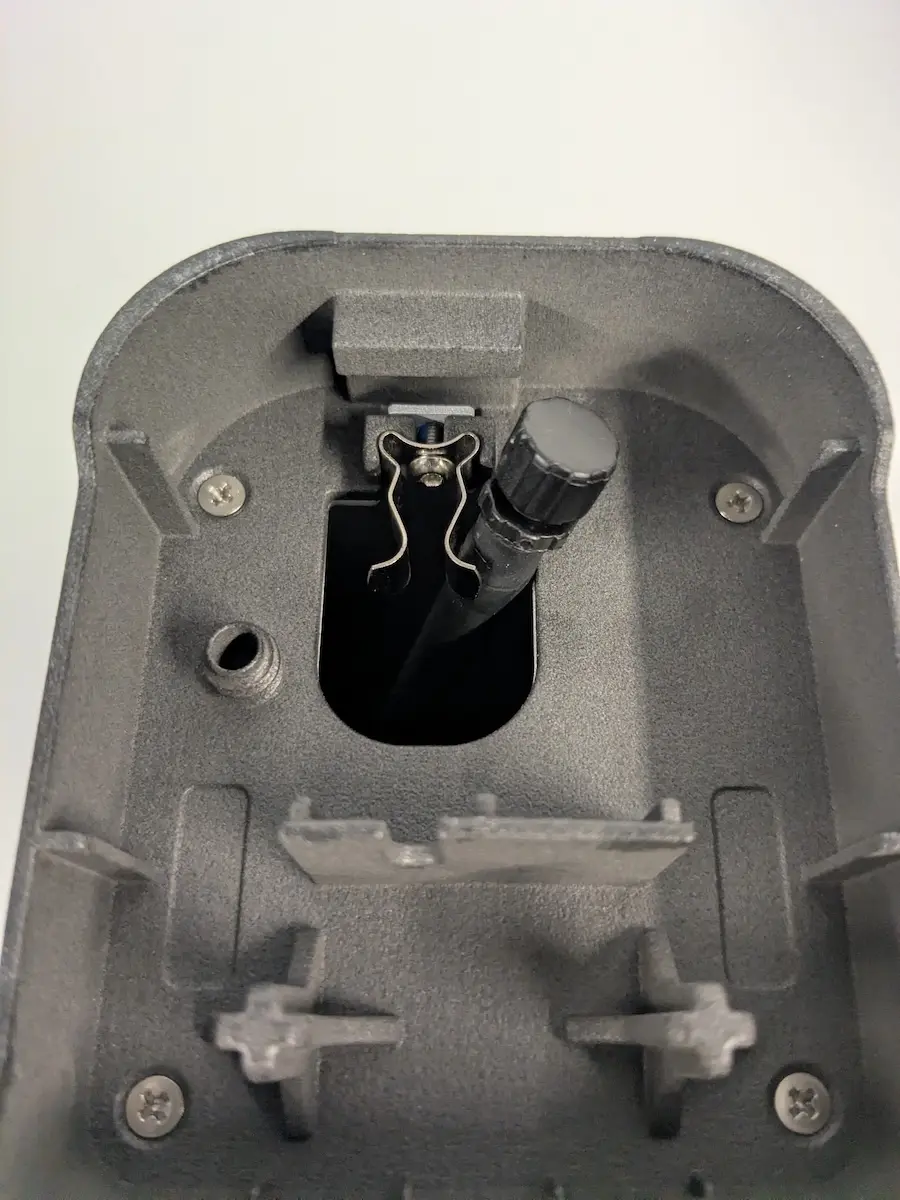
Thread the 8 mm M3 button head screw into the screw hole in the pump tube clip. Using a ball-end 2 mm hex driver, tighten until snug.
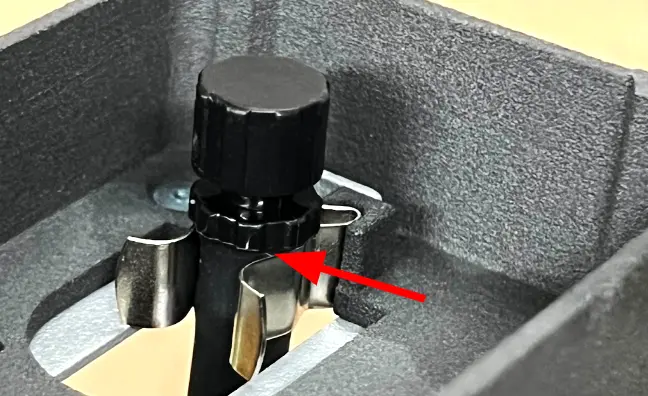
Press the pump tube into the retention clip. Ensure that the lip of the fitting at the end of the tube is flush against the bottom of the clip and that the pump tube does not extend beyond the bottom of the resin pump.
Finalizing the repair
Overview: After installing the new pump skirt, insert the resin pump into a printer and perform final checks.
Step 1: Remove the luer cap from the pump tube
Unscrew the cap from the outlet of the pump tube. Screw the cap onto the retention post on the bottom of the pump for safekeeping.
Step 2: Connect the transfer tube
Press the transfer tube onto the barbed fitting at the top of the resin pump until the end of the tube sits flush against the base of the fitting and secure the transfer tube with a zip tie.
Step 3: Insert the resin pump into the printer
Insert the resin pump into the cartridge slot of your printer. Route the transfer tube so that it does not interfere with the printer cover or any other moving parts.
Step 4: Run a test print
Start a test print. Monitor the printer to ensure that the resin pump dispenses resin properly. Contact Formlabs Support or your authorized reseller to share the results of the procedure.