
Required supplies:
Formlabs:
- Replacement turntable roller (RP-FHL-CU-RLR-01)
Third-party:
- 2 mm hex key or ball-end driver
- Nitrile gloves

The Form Cure L V1 turntable rides on three rollers. If any of the rollers are broken or missing, the turntable may not turn, so printed parts would not post-cure properly or reach their optimal mechanical properties.
Use this guide to remove and replace the Form Cure L V1 turntable rollers.
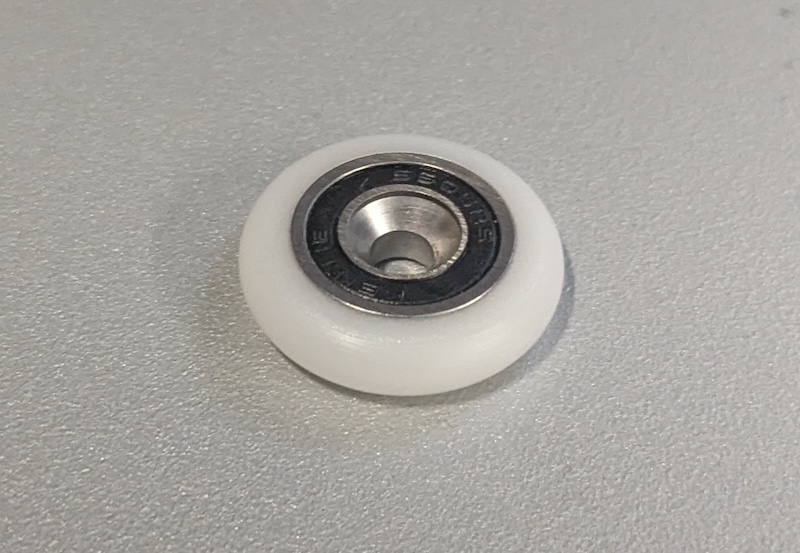
Required supplies:
Formlabs:
Third-party:
Estimated time: 5–10 minutes (additional time may be required to allow the post-cure chamber to cool if the machine was recently in use)
Preparing the workspace
Overview: Prepare the Form Cure L and a dust-free workspace for replacing the turntable rollers.
Step 1: Prepare the workspace
Clear a workspace around your machine. Ensure that the workspace is well-ventilated and free of dust.
Step 2: Clean the cure chamber
Warning:
Resin may cause skin irritation or an allergic skin reaction. Wear gloves when handling liquid resin or resin-coated surfaces. Wash skin with plenty of soap and water.
Open the Form Cure L door. Clean any resin that may have pooled or cured in the post-cure chamber with paper towels. Dampen the paper towels with isopropyl alcohol if necessary to fully remove the resin.
Danger:
Fire hazard. IPA is flammable. Keep containers closed, and keep out of the reach of children. Allow IPA to fully evaporate before starting a post-cure cycle.
Step 3: Remove the turntable
Lift the turntable out of the machine and set it aside.
Notice:
The Form Cure L turntable is made of glass. Handle with care.
Removing a turntable roller
Overview: Unscrew and remove the turntable roller that is being replaced.
Open the Form Cure L door and locate the turntable roller you are replacing. The Form Cure L has three rollers spaced evenly around the floor of the curing chamber.
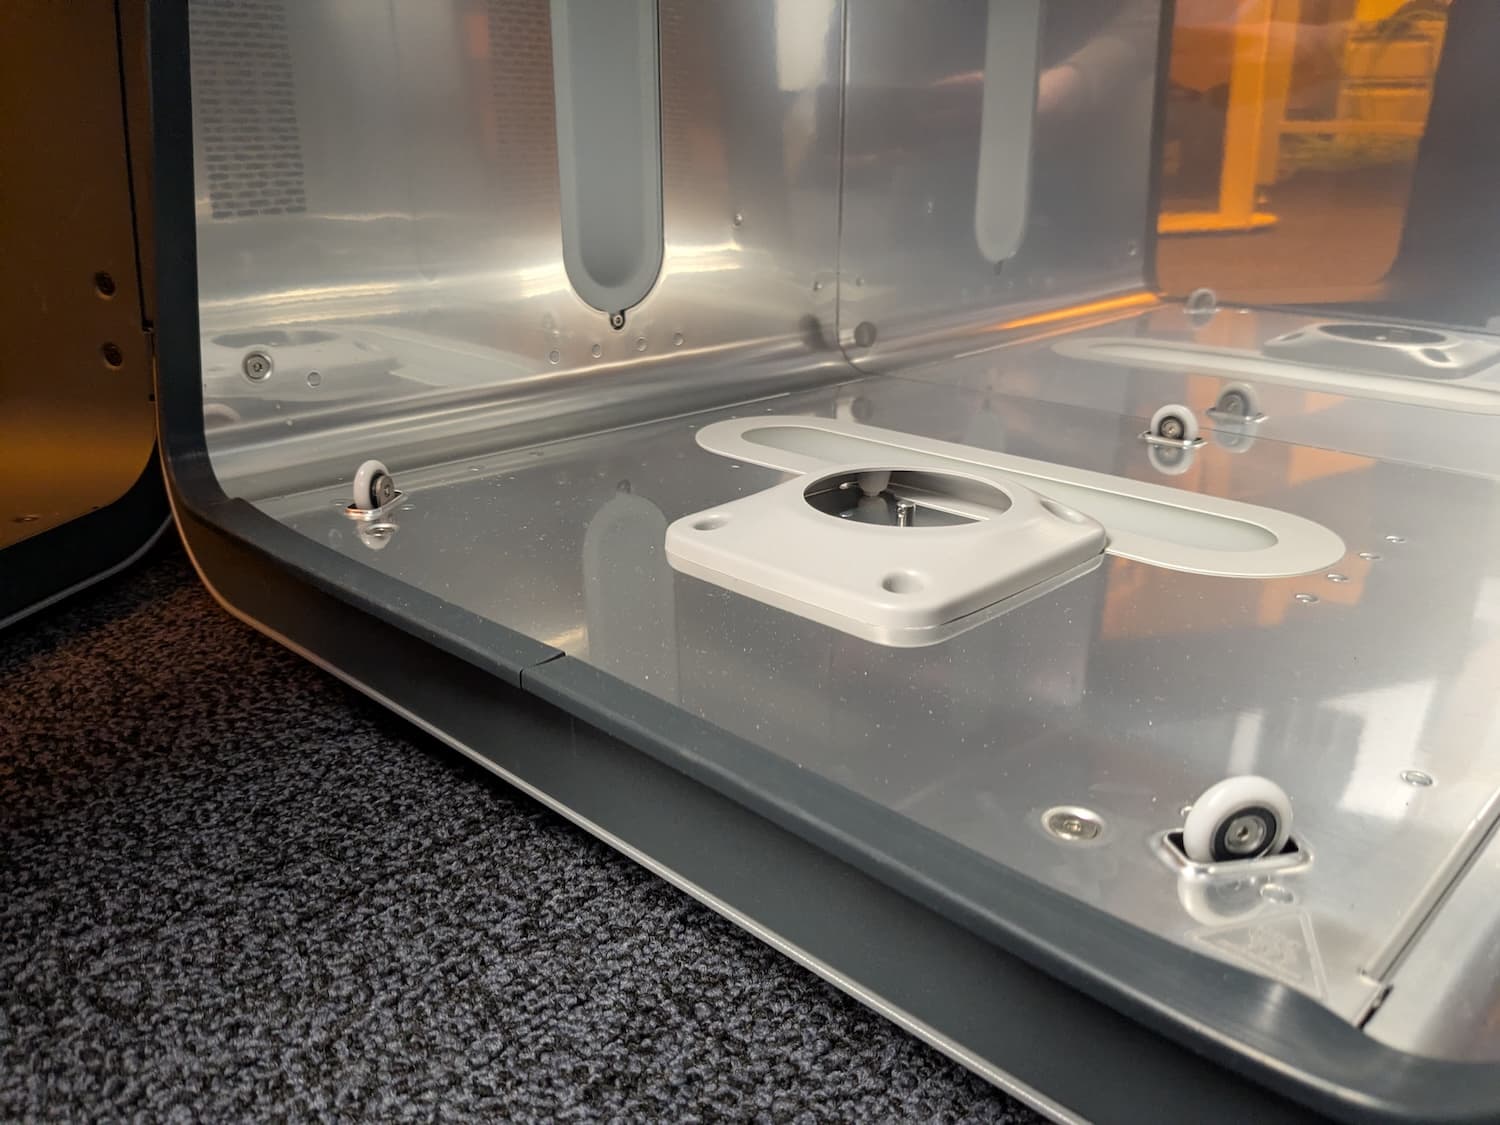
Step 2: Unscrew the turntable roller mounting screw
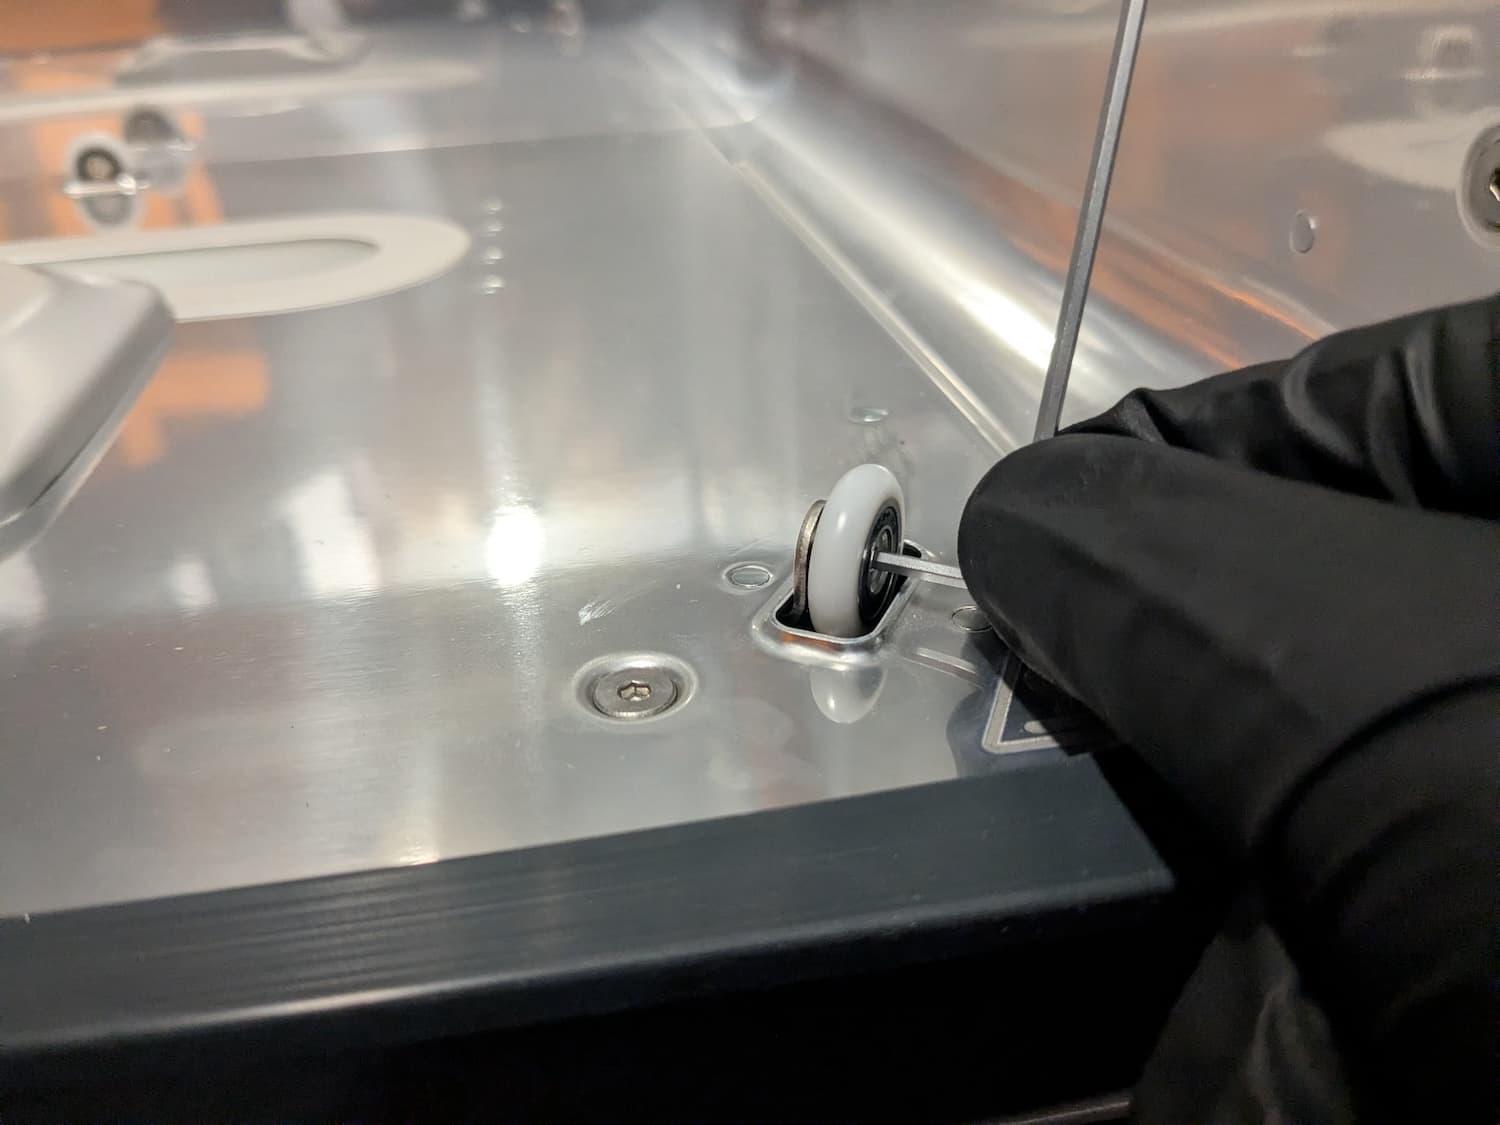
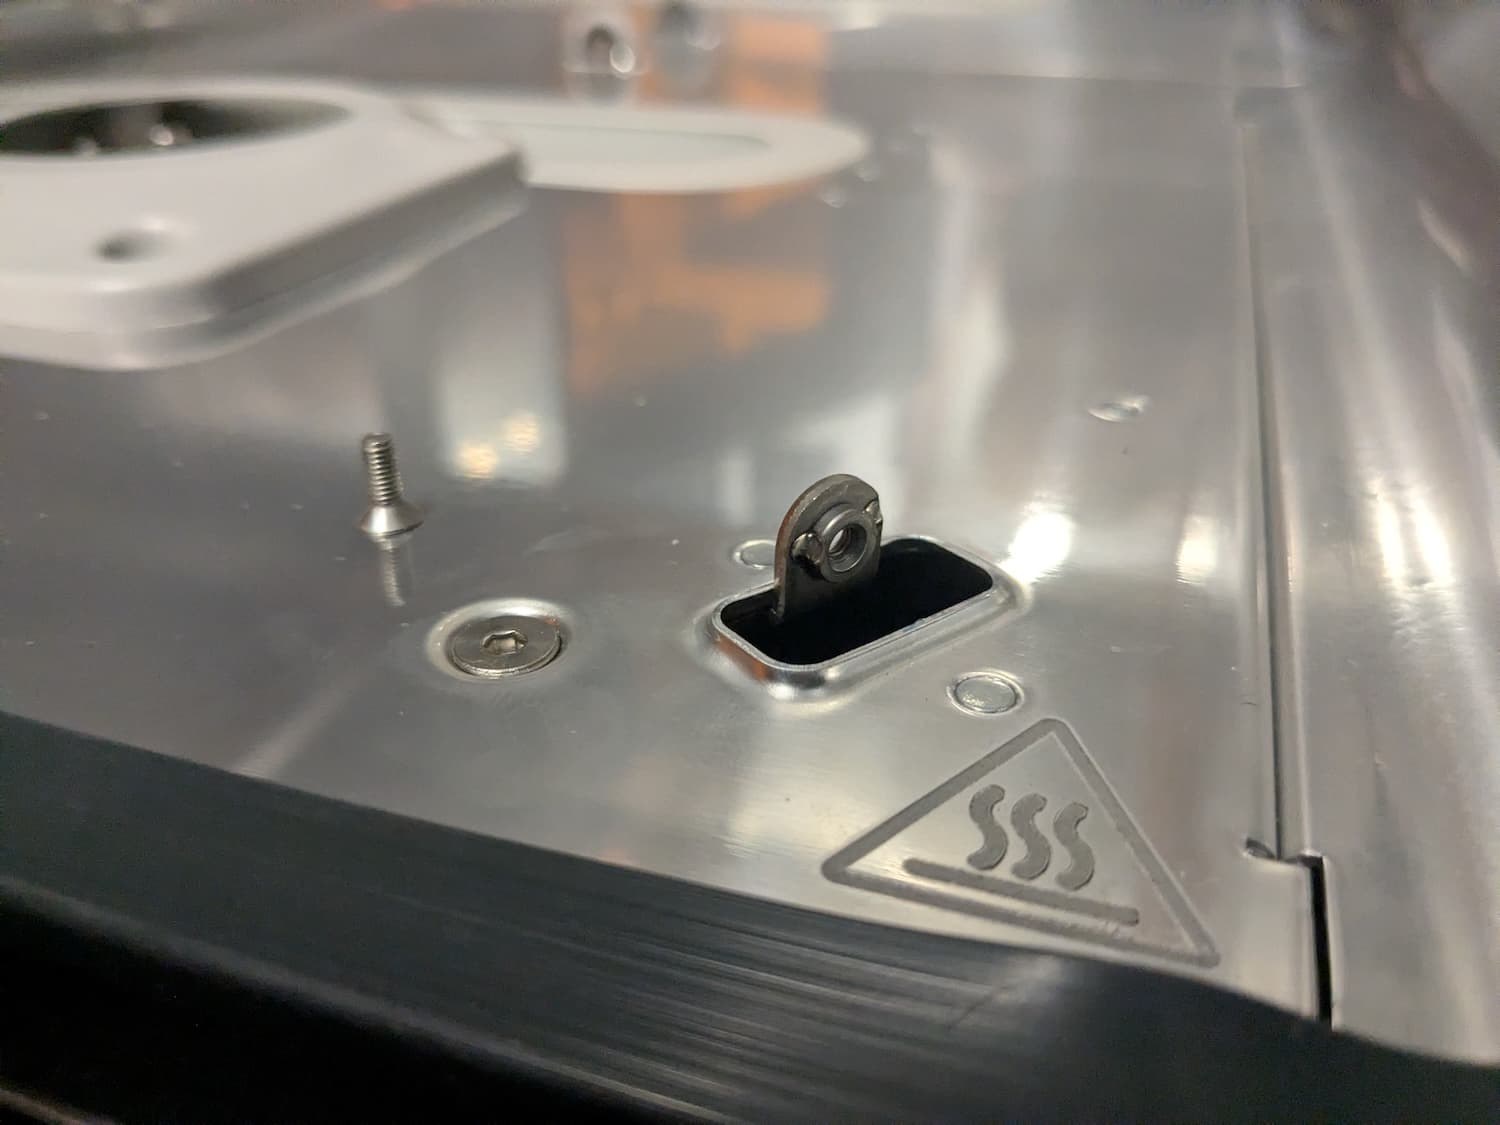
Each turntable roller is secured to its mount with a single screw. Using a 2 mm hex key or ball-end driver, loosen and remove the screw. Take care not to drop the screw or roller into the cavity below the floor or the curing chamber. Set the screw aside for reuse and set the roller aside for disposal.
Step 3: Remove the other rollers (optional)
Repeat steps 1–2 for any other turntable rollers you are replacing.
Installing the new turntable roller
Overview: Mount and secure the new turntable roller.
Step 1: Mount and secure the replacement turntable roller
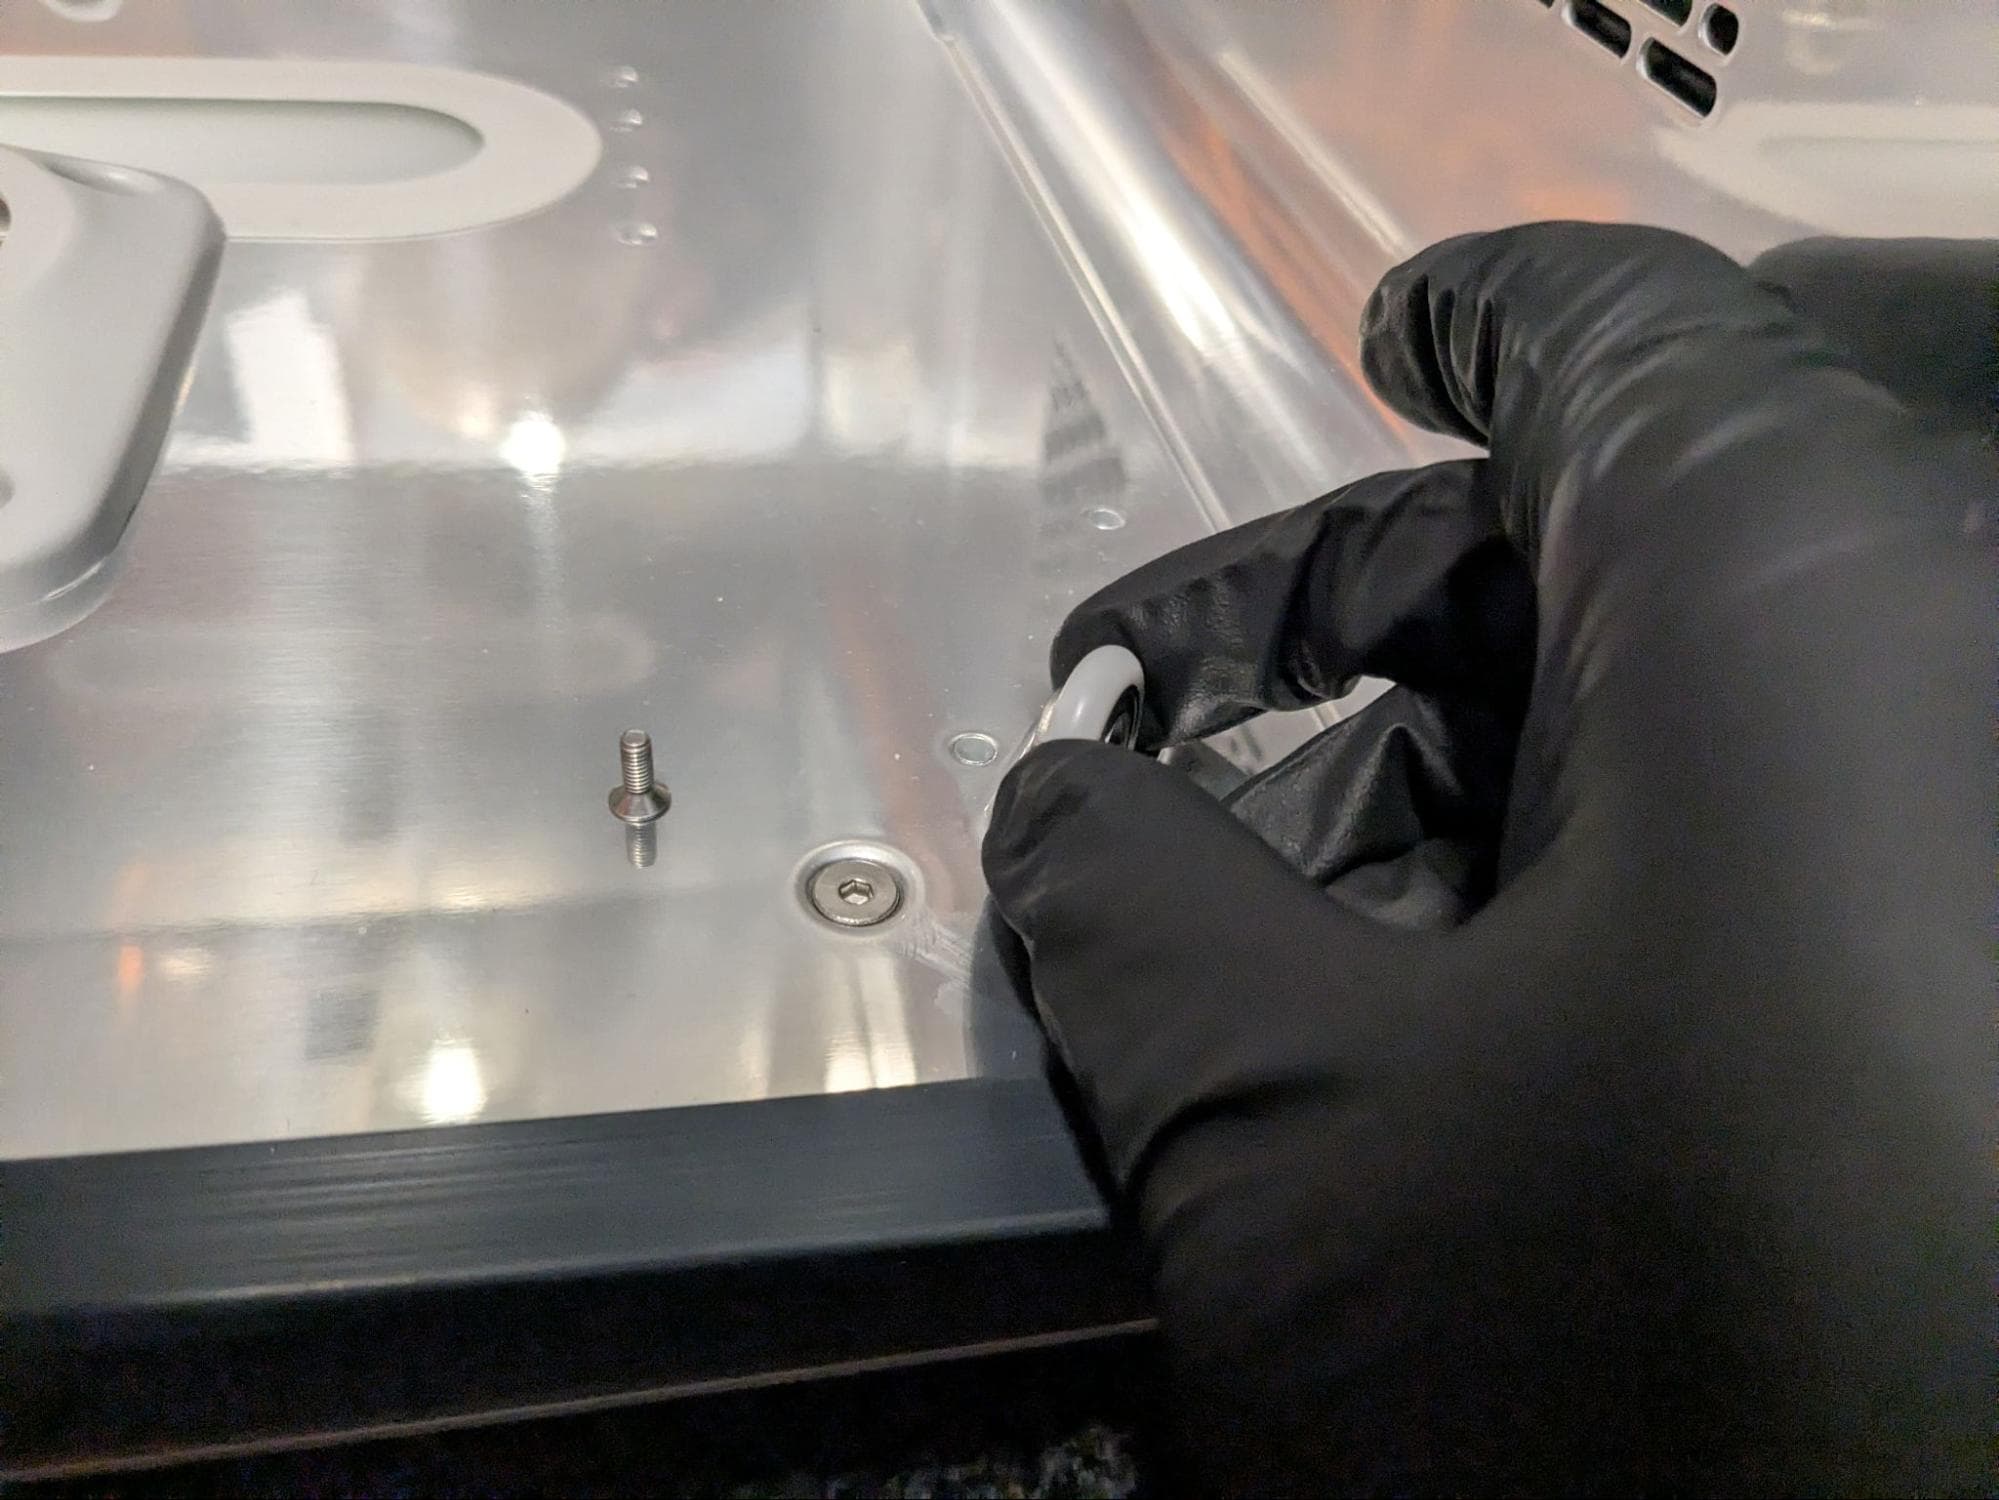
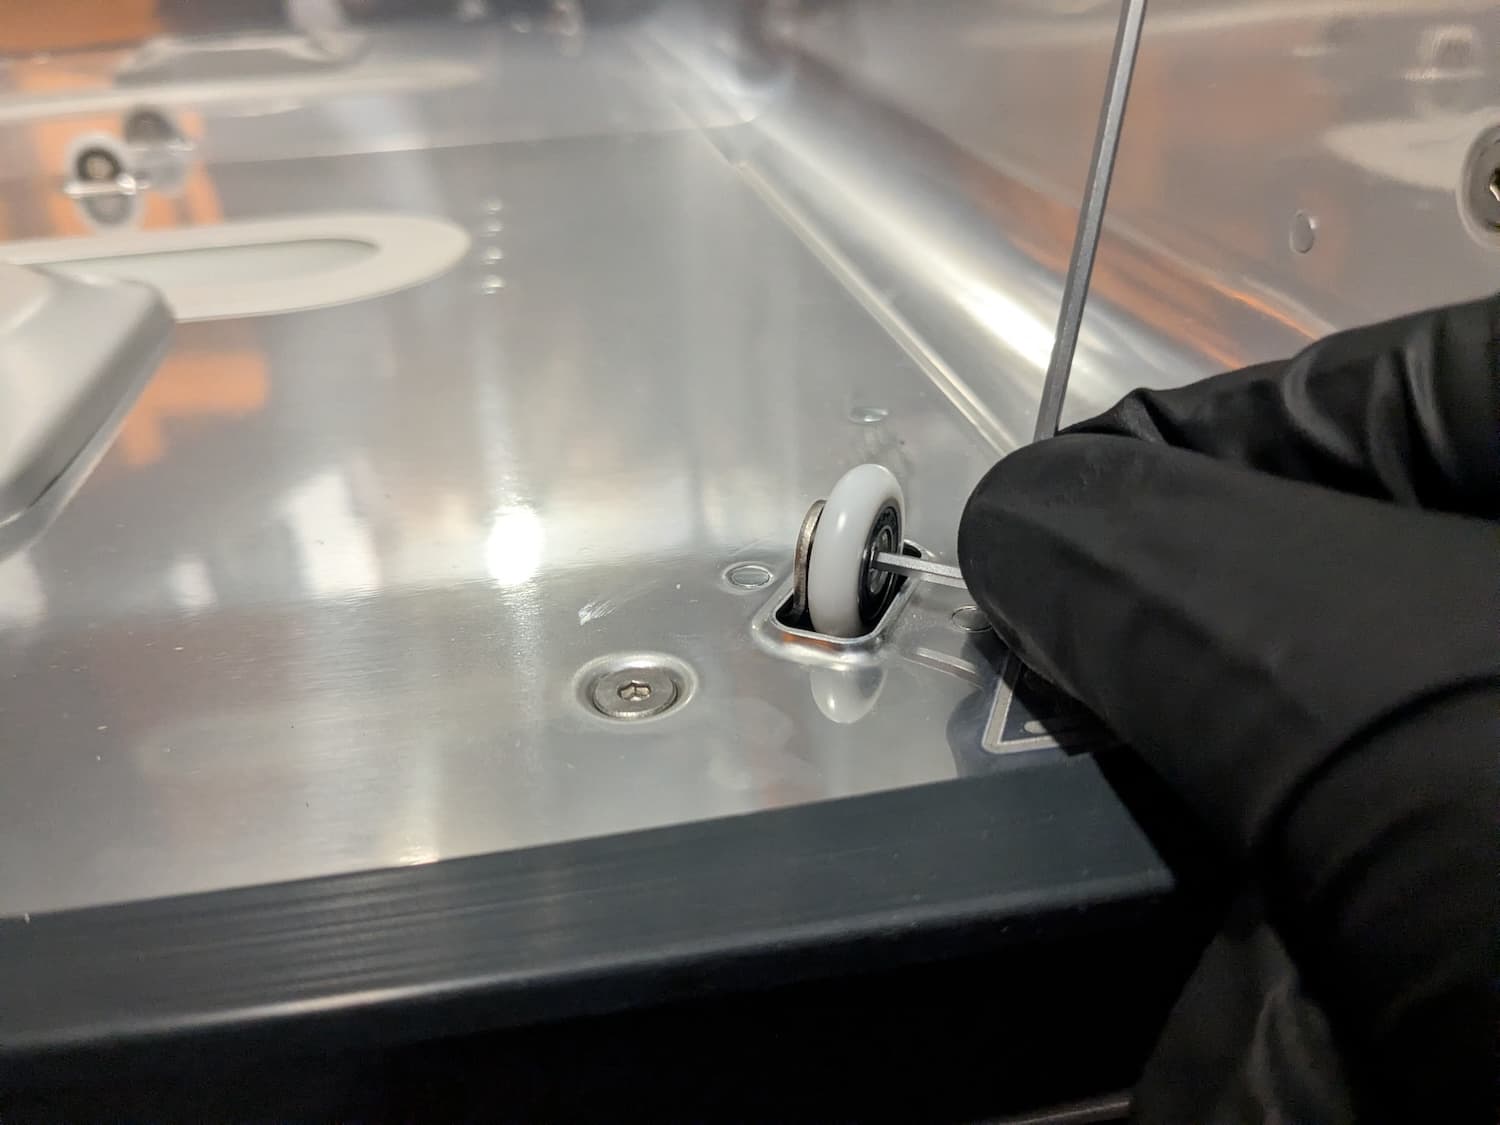
Orient the new turntable roller with the countersunk side of its screw hole facing away from the roller mount. Align the screw hole in the roller with the corresponding hole in the mount. Thread the mounting screw through the roller and use a 2 mm hex key or ball-end driver to tighten until snug. Take care not to drop the screw or roller into the cavity below the floor or the curing chamber.
Step 2: Replace the other rollers (optional)
Repeat step 1 for any other turntable rollers you are replacing.
Finalizing the repair
Overview: After installing the turntable roller, perform final checks.
Step 1: Insert the turntable
Place the turntable back on its mount.
Step 2: Power on the machine
Close the Form Cure L door. If you have powered off the machine, flip the breaker switch on the back of the unit to the ON position to turn it back on.
Step 3: Test the repair
Start a post-cure cycle. Monitor the Form Cure L to ensure the turntable rotates properly.