
Required supplies:
Formlabs:
- Replacement Fuse 1+ 30W build chamber latch spring (RP-FS1P-LTSPR-01)
Third-party:
- 2.0 mm hex driver (flat-end)
- Flat head screwdriver

Fuse 1+ 30W printers use a latch to help hold an inserted build chamber in place. This latch opens with the help of a spring. If this spring is broken or damaged, the latch may not open properly or the build chamber will not be fully secure and may move unexpectedly while you are using the printer.
Use this guide to the replace the build chamber latch spring on a Fuse 1+ 30W printer.
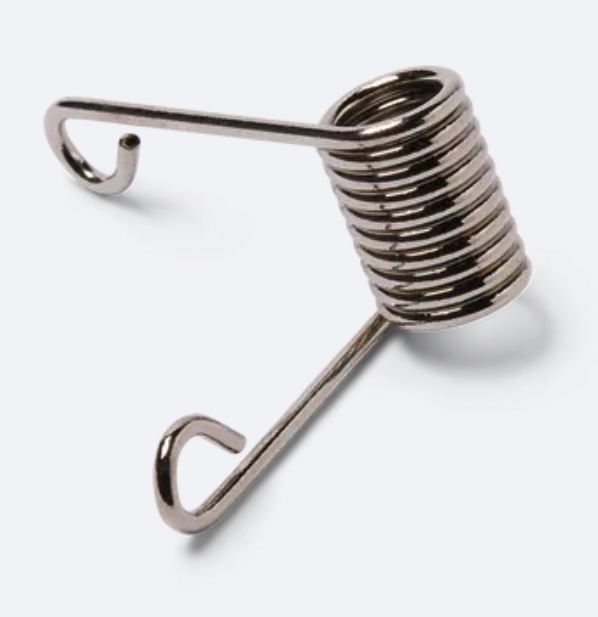
Required supplies:
Formlabs:
Third-party:
Estimated time: 10–15 minutes
Preparing the workspace
Step 1: Remove the build chamber
If a build chamber is inserted into the printer, unplug and remove it.
Step 2: Prepare a work surface
Prepare a flat, clean work surface on which you can lay the build chamber latch assembly and replace the spring.
Removing the build chamber latch spring
Overview: Separate the build chamber latch assembly from the printer, then remove the latch spring.
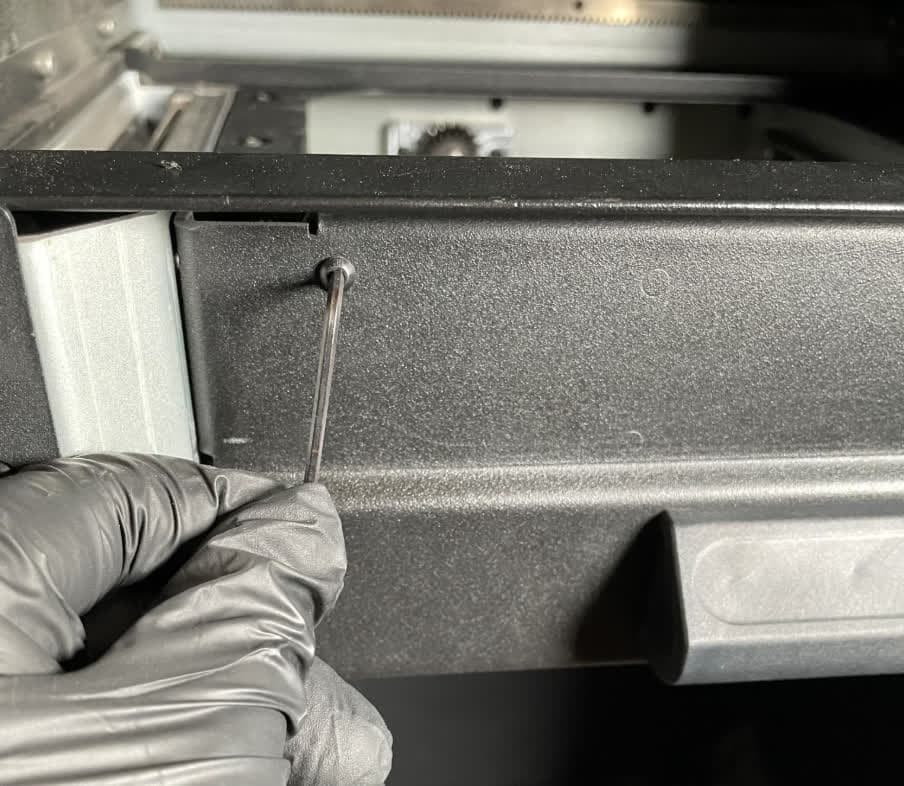
Using a 2.0 mm hex driver, loosen and remove the black 8.0 mm M4 button screw at the top-left of the latch. Set the screw aside.
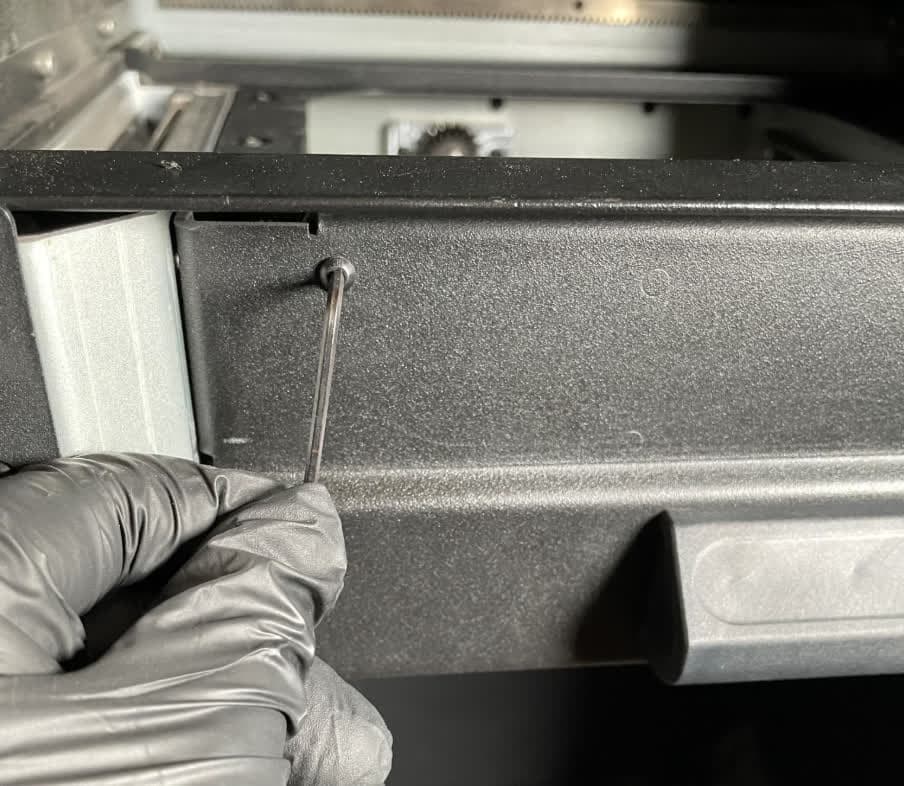
Squeeze and lift the latch. Locate the hinge pin on the left side of the latch assembly. Use a flathead screwdriver to slide the left hinge pin to the right until it comes free from the printer frame.
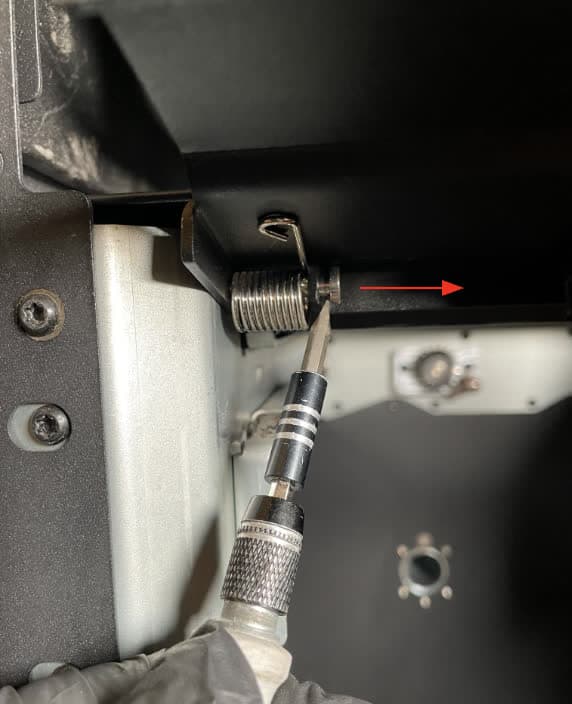
Pull the left side of the latch assembly towards yourself, then slide the assembly to the left to free the right hinge pin. Remove the left hinge followed by the right hinge. Slide the hinge assembly out of the printer and place it face down on your work surface.
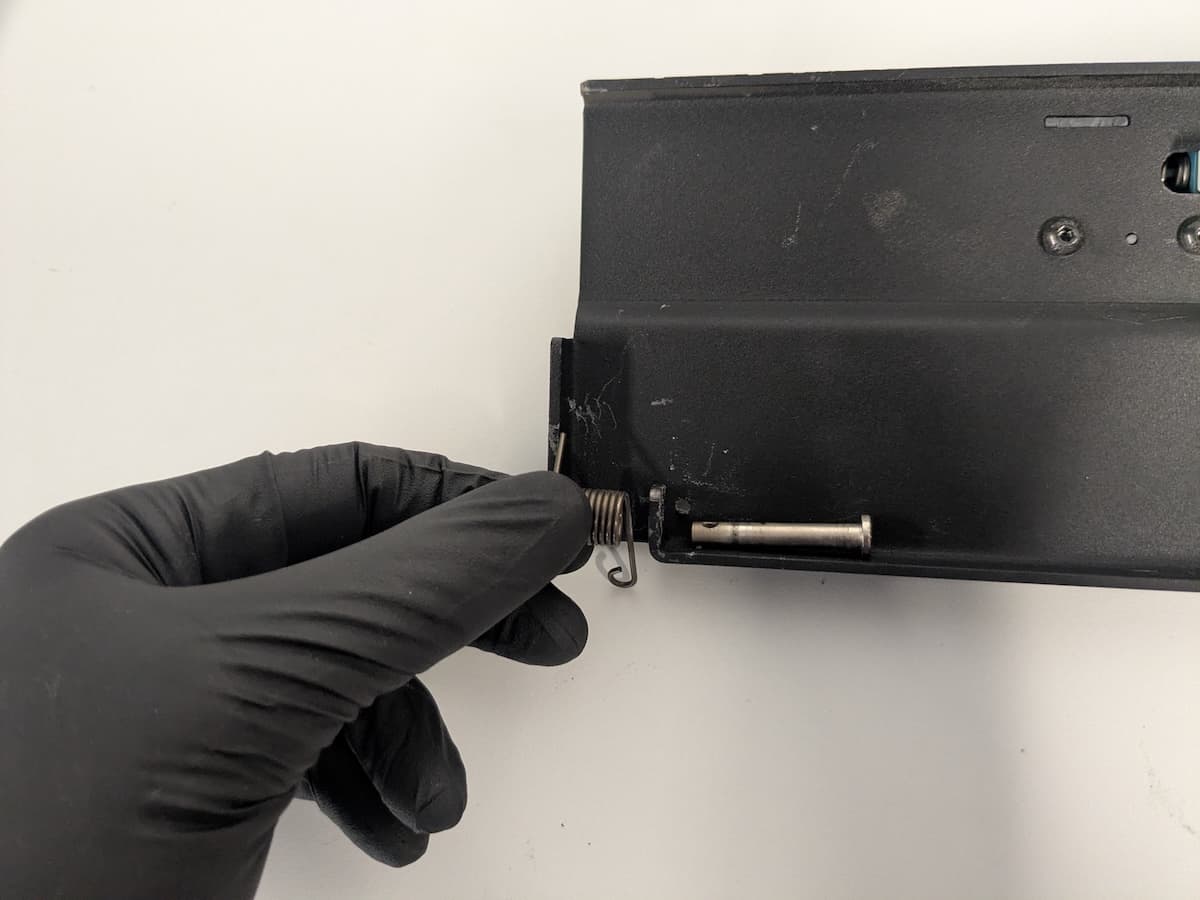
Fully remove the left-hand hinge pin, freeing the build chamber latch spring. Set the spring aside for disposal.
Installing the replacement build chamber latch spring
Overview: Mount and secure the replacement build chamber latch spring.
Step 1: Install the replacement latch spring
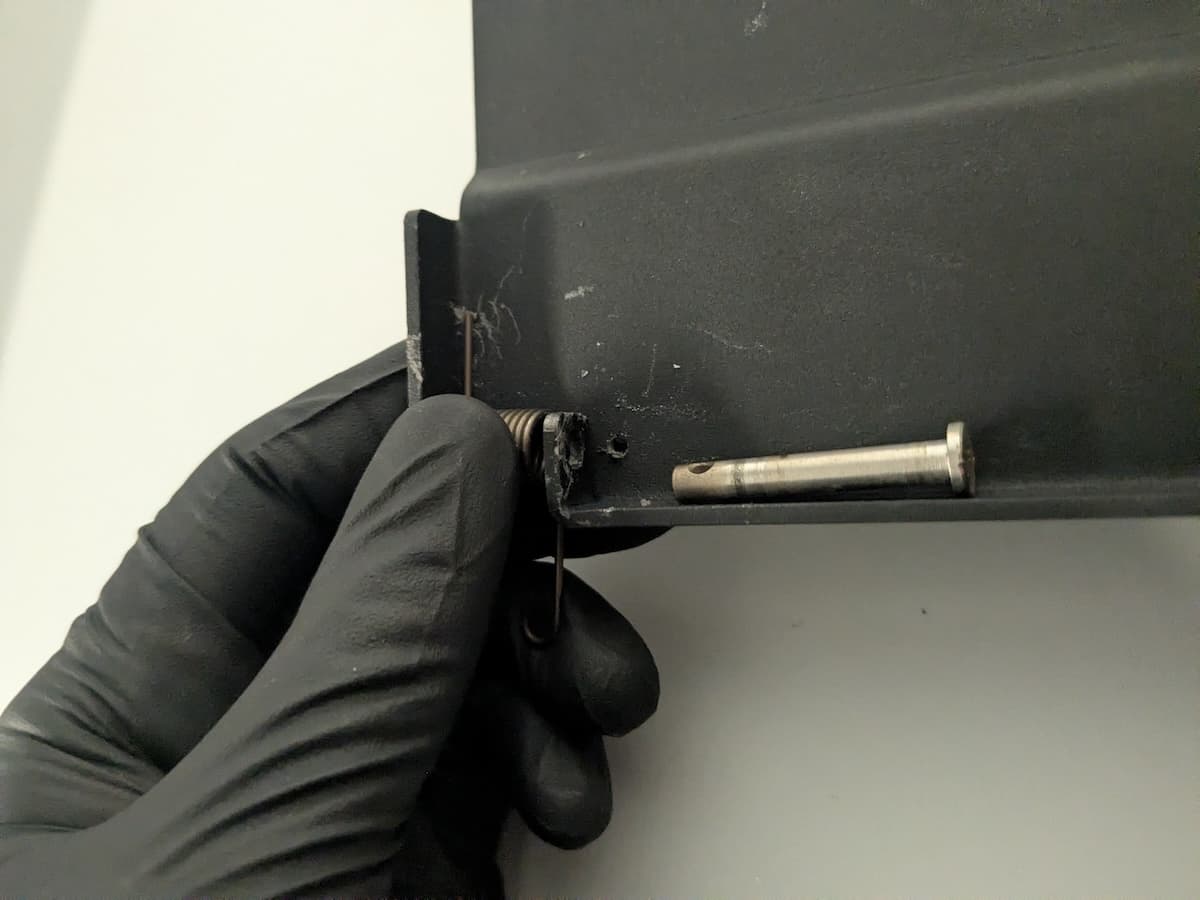
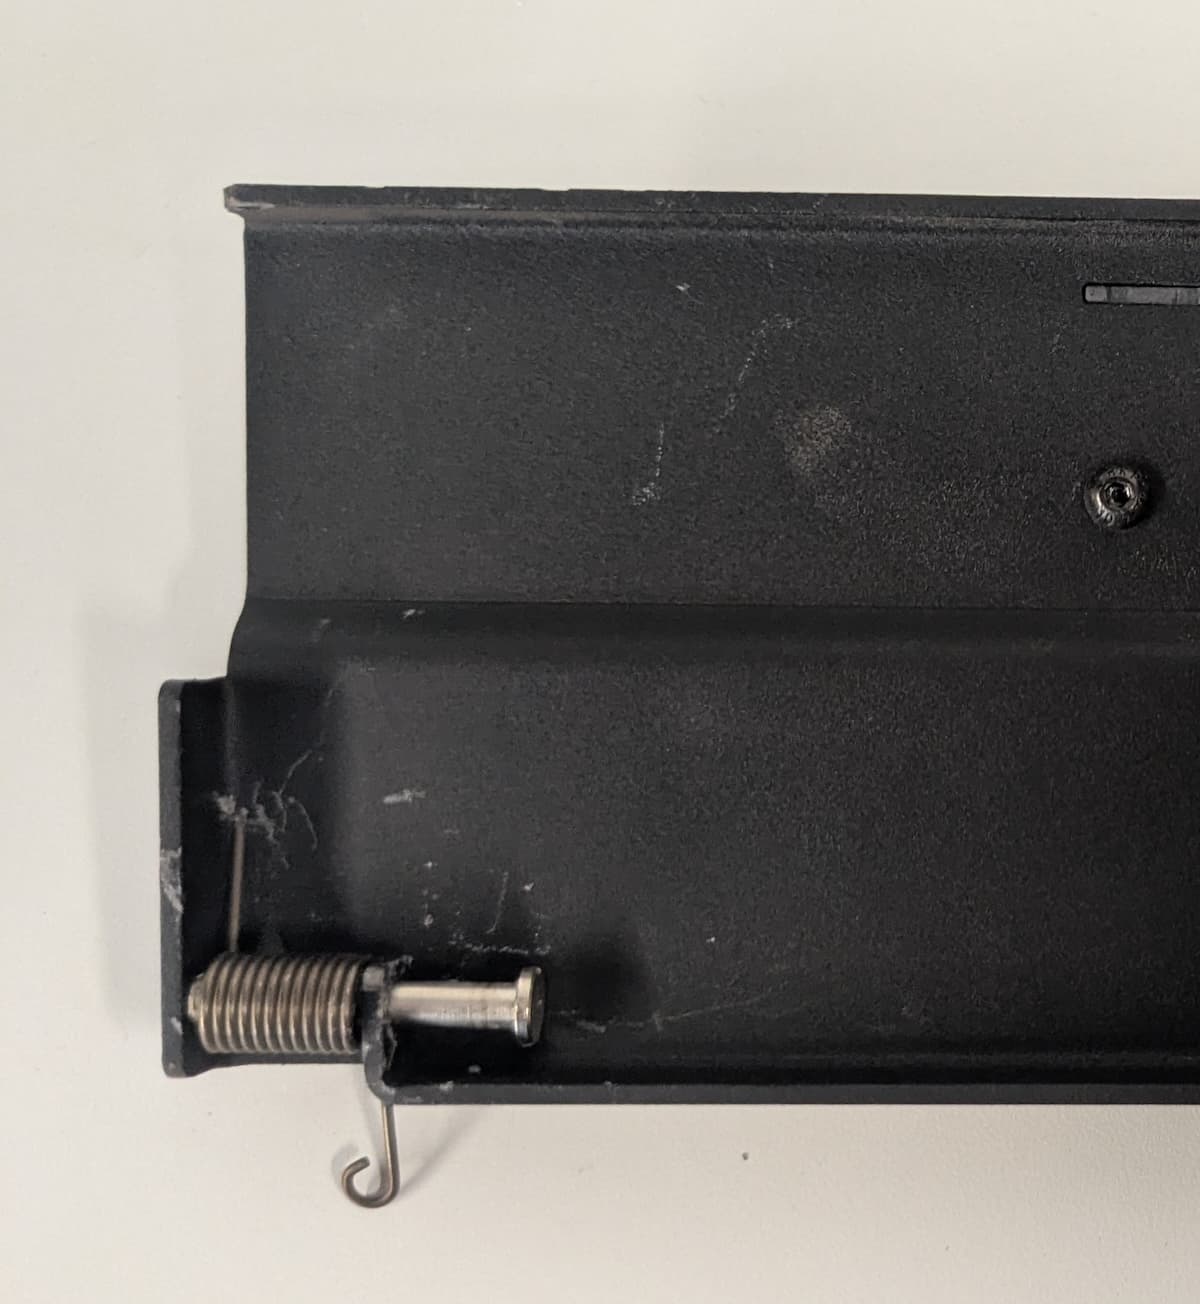
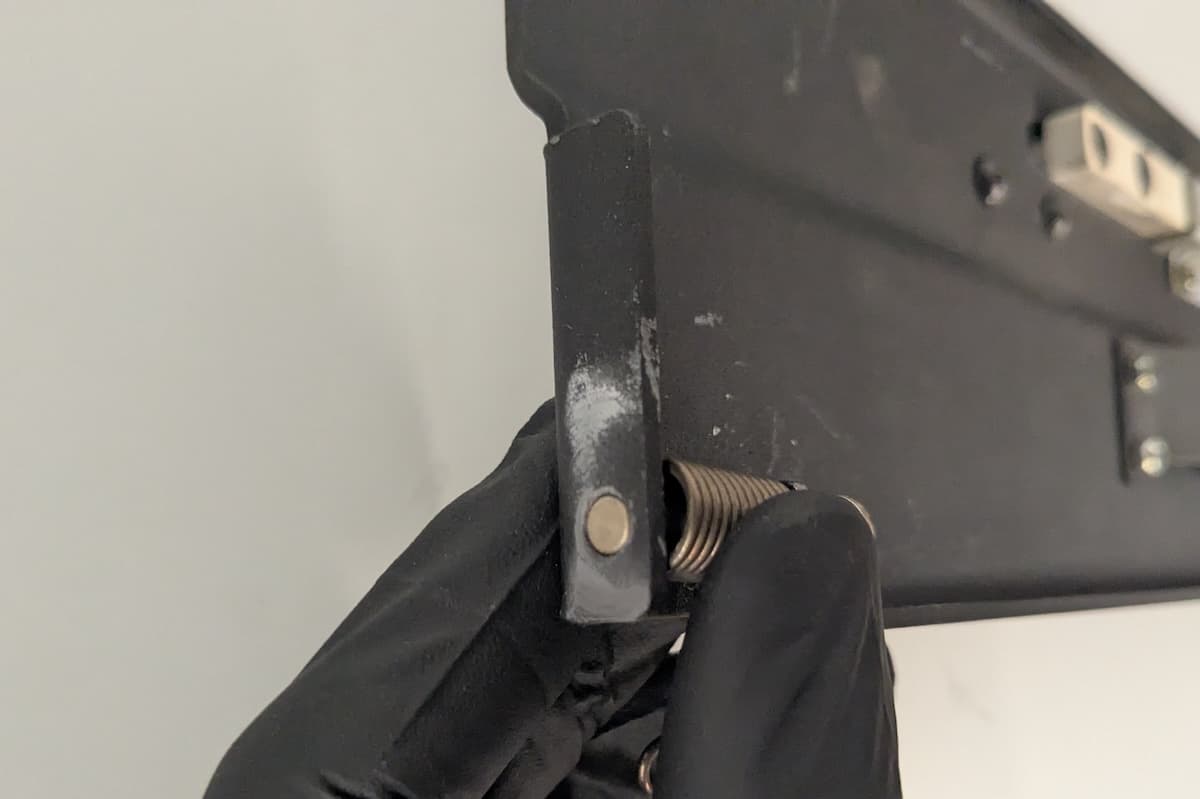
Orient the new latch spring with one leg on the top-left and the other on the bottom-right. Press the spring coil against the back of the build chamber latch, between the hinge pin mounting holes. Press until the center of the coil is aligned with the holes. Insert the hinge pin from the right until it is flush with the outer face of the latch assembly.
Insert the right hinge pin into the corresponding hole at the top-right of the build chamber enclosure.
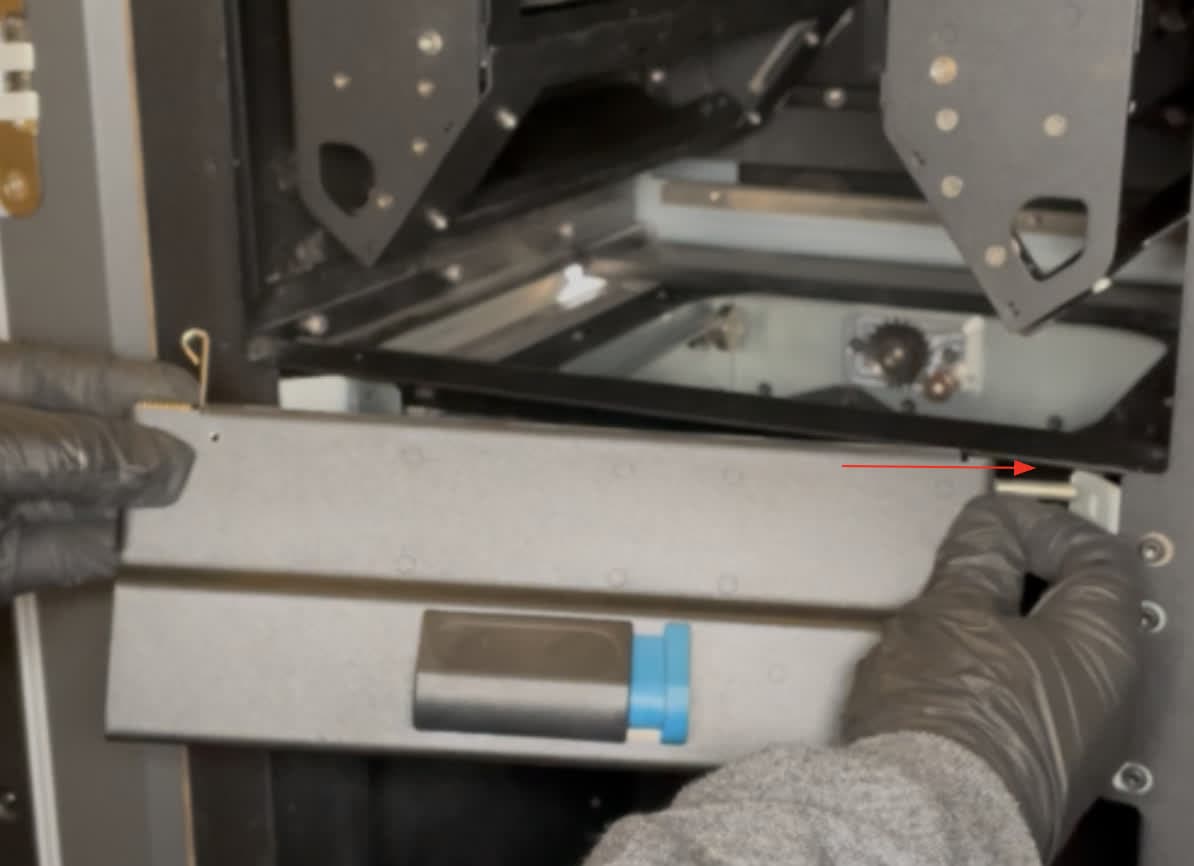
Tilt the latch assembly inwards and align the left hinge pin with the corresponding hole at the top-left of the build chamber enclosure. Slide the left hinge pin into its hole.
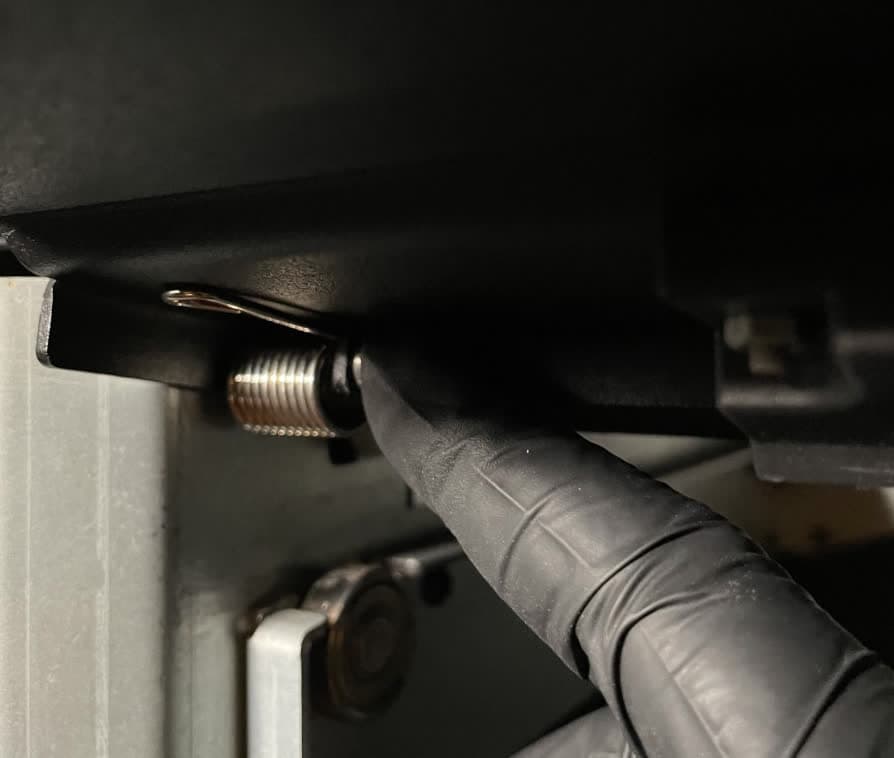
Lower the latch. Thread the one black 8.0 mm M4 button screw into the screw hole at the top-left of the latch assebmly. Using a 2.0 mm hex driver, tighten until snug.
Finalizing the repair
Overview: After installing the new build chamber latch spring, test the repair.
Step 1: Insert a build chamber
Slide a build chamber into the build chamber enclosure and close the latch. Check that the build chamber is securely held in place.