
Required supplies:
Formlabs:
- Fuse 1 generation door accessories kit (RP-FS1-DA-01)
Third-party:
- 2.5 mm hex driver (flat-end)
- 7 mm socket wrench
- Compliant vacuum with static dissipative components, such as a Class II, Division 2 vacuum

Fuse 1 generation printers have various interlocks to ensure that the printer is safe to use. One of these sensors detects two magnets mounted in the print enclosure door. If these magnets are missing or have fallen into the door, the sensor will not detect them and you will be unable to start or continue a print.
Use this guide to replace the print enclosure door interlock magnets on a Fuse 1 generation printer
Required supplies:
Formlabs:
Third-party:
Estimated time: 10 –15 minutes
Preparing the workspace
Overview: Prepare the printer and a dust-free workspace for cleaning and replacing the print enclosure interlock magnets.
Warning:
Do not perform this procedure if the printer was used for printing less than six hours prior. Failure to do so may result in serious burns. Allow the print enclosure to fully cool to room temperature before touching or inspecting any printer components.
Step 1: Open the print enclosure door
Open the print enclosure door, either by using the slider on the touchscreen or the manual release in the filter cabinet.
Step 2: Vacuum the inner face of the print enclosure door
If powder has built up on the inner face of the print enclosure door, vacuum it before continuing.
Step 3: Prepare the workspace
Clear a workspace around your printer. Ensure that the workspace is well-ventilated and free of dust.
Removing the interlock magnets
Overview: Remove the interlock magnet assembly from the print enclosure door.
Step 1: Remove the inner door panel mounting screws
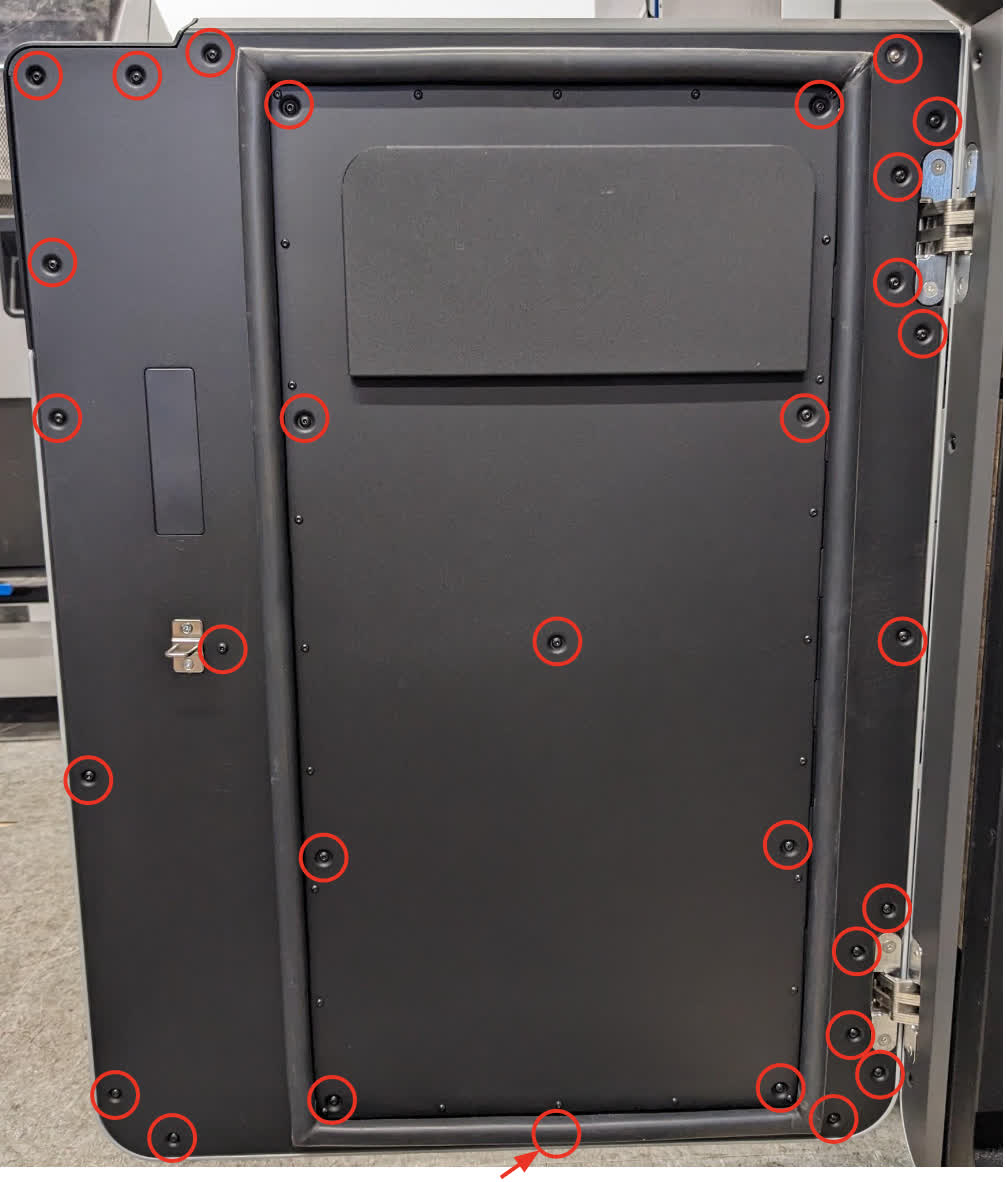
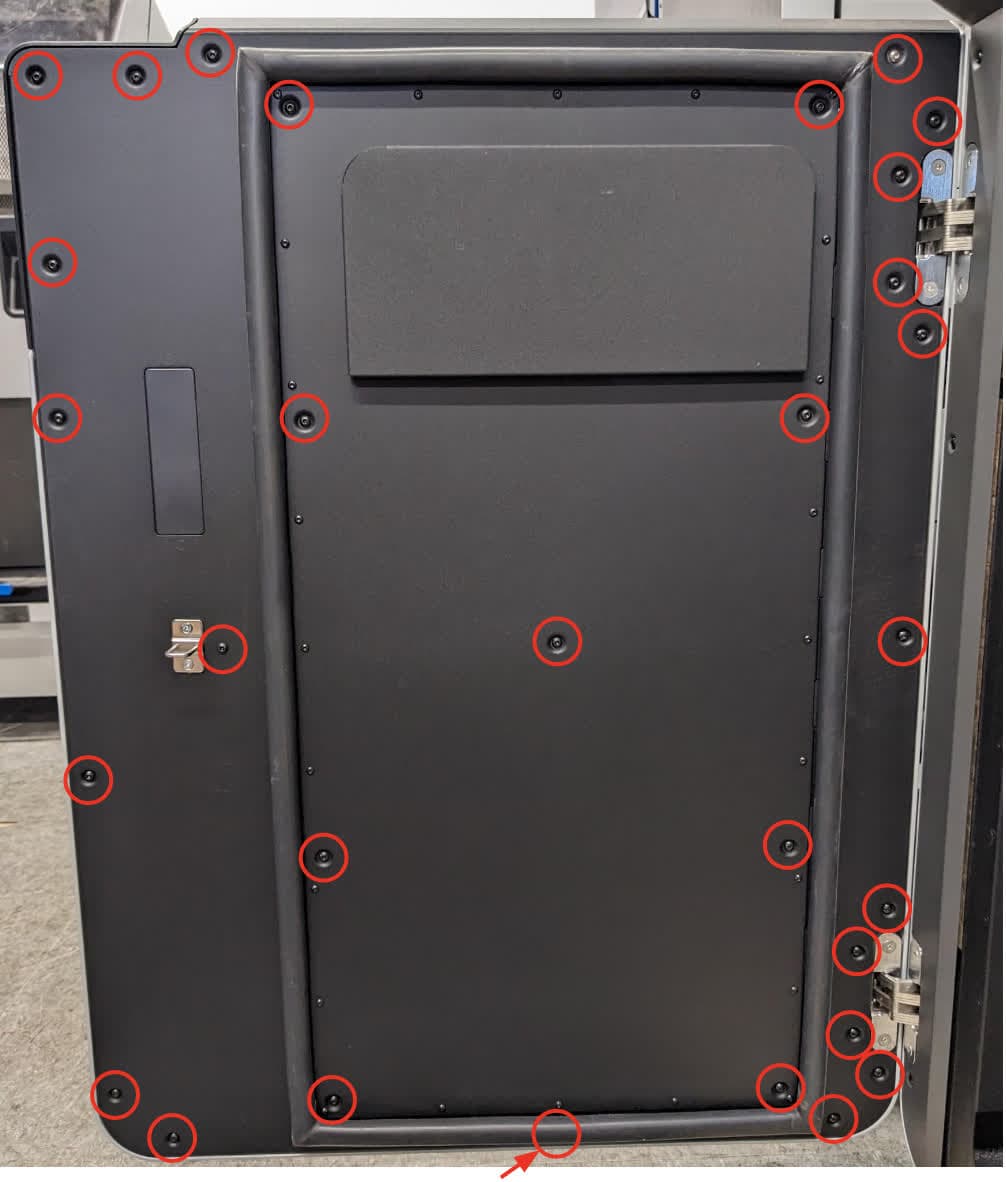
Using a 2.5 mm hex driver, loosen and remove the 30 M4 screws securing the inner door panel to the rest of the print enclosure door. You may need to move the door gasket to locate and remove the bottom-center screw.
Note:
The 10 screws inside the gasket are 10 mm long, while the 20 on the outside of the gasket are 6 mm long. The top-right screw is stainless steel, while the other 29 are black oxide-coated. Keep the sets of screws separate for easier reinstallation.
Step 2: Remove the inner door panel
Remove the inner door panel from the print enclosure door and place it gasket side down on a clean work surface.
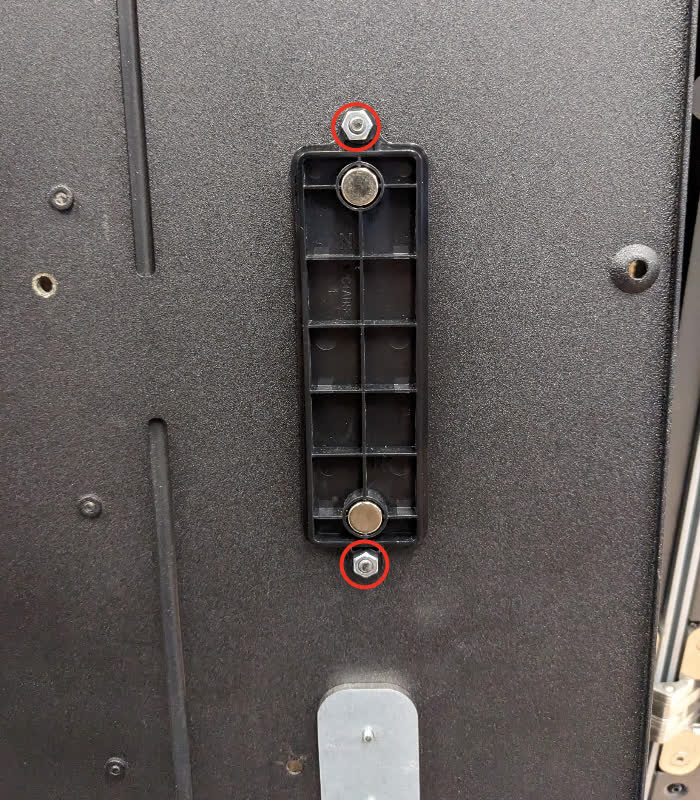
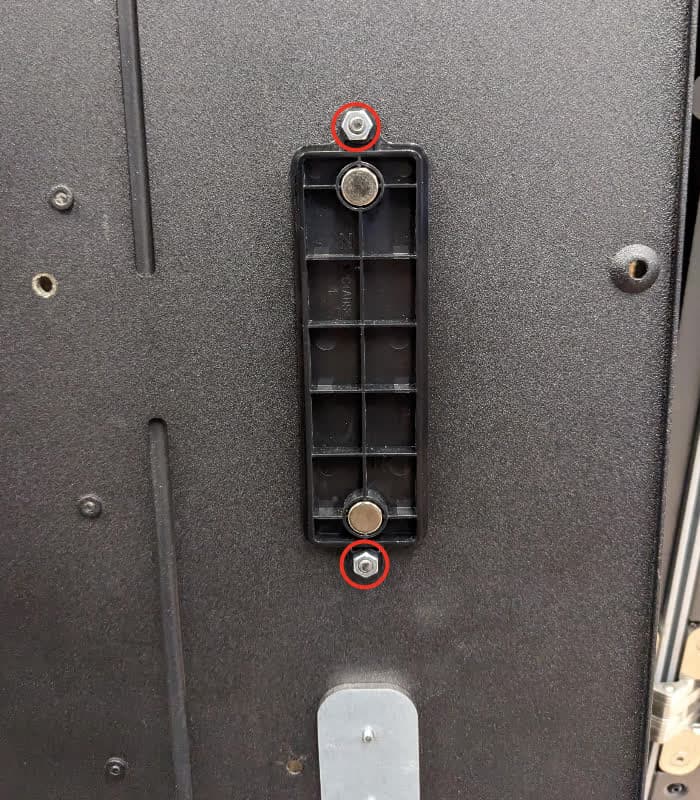
Using a 7 mm socket driver, loosen and remove the two nuts securing the interlock magnet assembly to the inner door panel. Set the nuts aside. Set the interlock magnet assembly aside for disposal.
Installing the replacement interlock magnet assembly
Overview: Mount and secure the replacement interlock magnet assembly to the inner door panel
Orient the interlock magnet assembly vertically, with the two magnets facing you. Place it on the two threaded studs in the inner door panel.
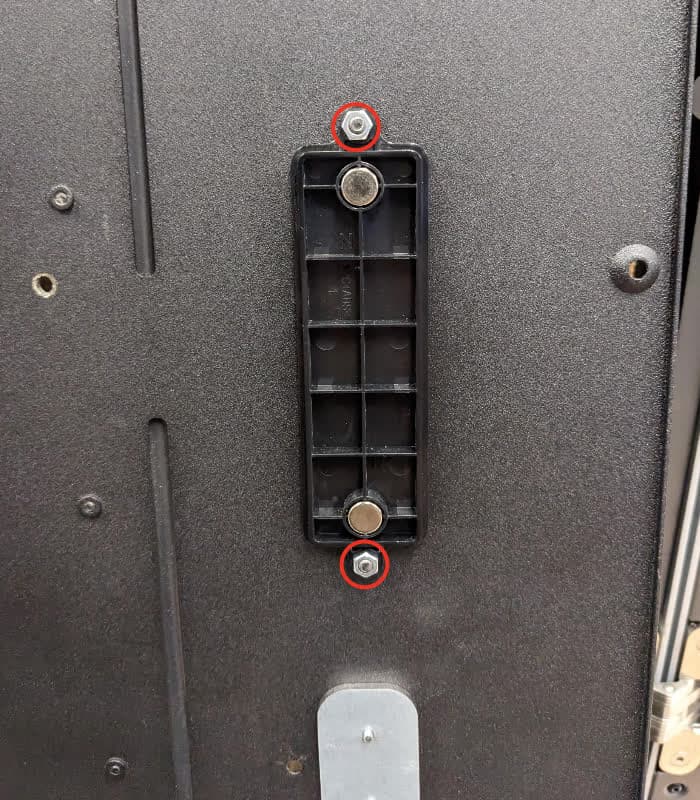
Thread one hex nut onto both of the threaded posts. Using a 7 mm socket wrench, tighten until snug.
Turn the inner door panel over so that the gasket faces you. Hold it against the inside of the print enclosure door, aligning the 30 screw holes in the inner door panel with the corresponding screw holes in the door itself.
Thread one M4 screw into each of the 30 screw holes in the inner door panel. As noted previously, the 10 screws inside the gasket are 10 mm long, while the 20 on the outside of the gasket are 6 mm long. The top-right screw is stainless steel, while the other 29 are black oxide-coated. Using a 2.5 mm hex driver, tighten all 30 screws until snug.
Finalizing the repair
Overview: After installing the new interlock magnets, and perform final checks.
Step 1: Test the interlock system
Insert a build chamber and optical cassette and fill the hopper with powder (if necessary). Close the print enclosure door and start a test print. Check that the printer recognizes when the door has been closed and the print runs normally. Contact Formlabs Support or your certified service provider to share the results of the procedure.