
Danger:
Read and follow all safety instructions and warnings in the operator manual. Replacement with incorrect parts can lead to burns, shock, fire, or explosion. Dispose of all parts in accordance with local regulations.

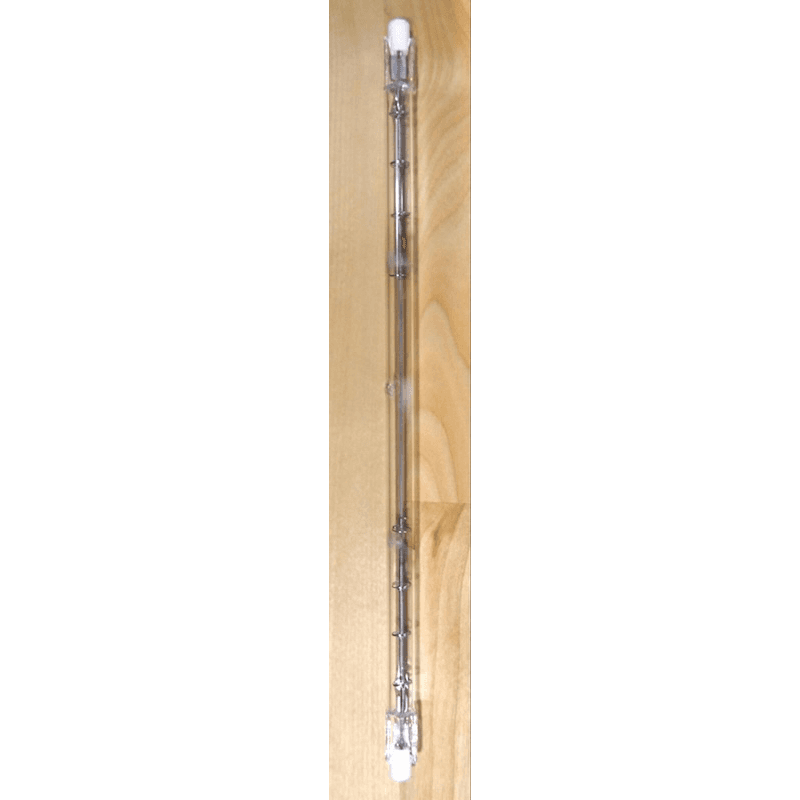
Fuse 1 generation printers use two quartz tube heaters, located at the top of the print enclosure, to evenly heat the print enclosure during a print. If one or both of those heaters are damaged or malfunctioning, the printer may not be able to reach the required temperature to print properly.
Follow this guide to replace the quartz tube heaters on a Fuse 1 generation printer.
Danger:
Read and follow all safety instructions and warnings in the operator manual. Replacement with incorrect parts can lead to burns, shock, fire, or explosion. Dispose of all parts in accordance with local regulations.
Required supplies:
Formlabs:
Third-party:
Estimated time: 10–20 minutes
Preparing the workspace
Overview: Prepare the build chamber and a dust-free workspace for replacing the quartz tube heater.
Step 1: Prepare the workspace
Clear a workspace around your printer. Ensure that the workspace is well-ventilated and free of dust.
Warning:
Do not perform this procedure if the printer was printing less than six hours prior. Allow the print enclosure to fully cool to room temperature before touching or inspecting any printer components. Failure to do so may result in serious burns or lacerations from broken quartz glass.
Prepare the personal protective equipment listed as required supplies for this procedure.
Warning:
Use appropriate personal protective equipment when handling loose or unsintered powder. Review the support article Safety with Formlabs SLS products for more information.
Step 2: Open the printer door
On the touchscreen, drag the Unlock Door slider. The print enclosure door unlocks. Open the print enclosure door.
Step 3: Remove the build chamber
If a build chamber is currently installed in the printer, remove it and set it aside.
Step 4: Unplug the printer
Disconnect the power cable before continuing with maintenance. Do not perform maintenance on the printer while it is connected to power. Wait five minutes after disconnecting the printer from power before proceeding.
Danger:
Performing maintenance on the printer while it is plugged in increases the risk of electric shock. Never remove the back panel of the printer while the printer is plugged in. Never reconnect the printer to power while the back panel is uninstalled.
Removing the spatial filter
Overview: Uninstall the spatial filter covering the quartz tube heater to be replaced.
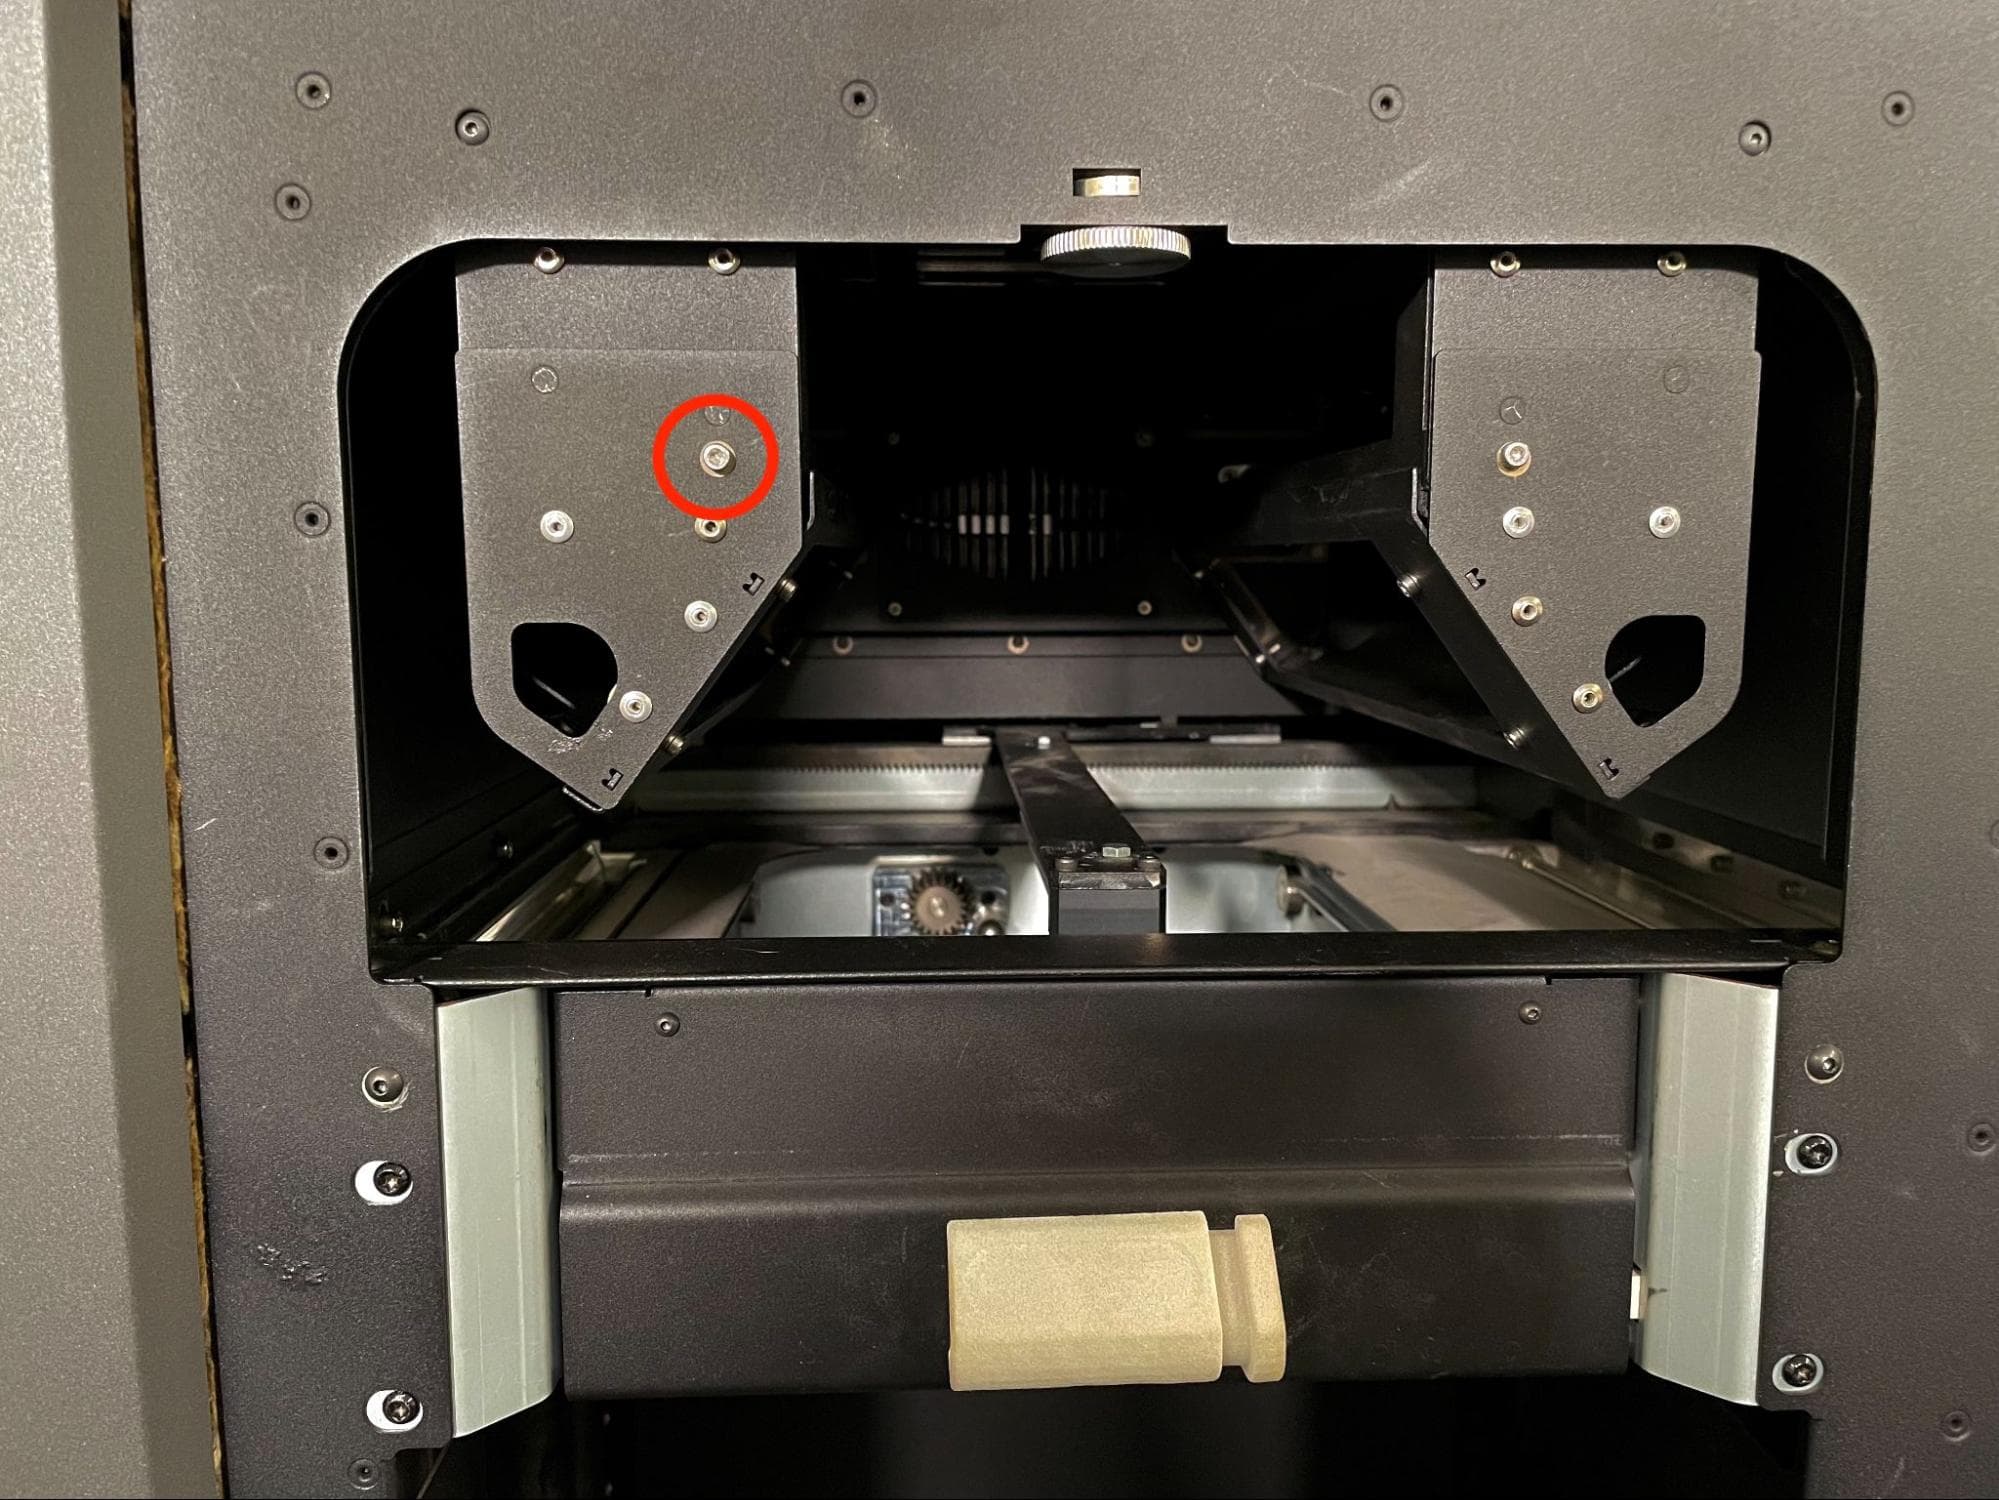
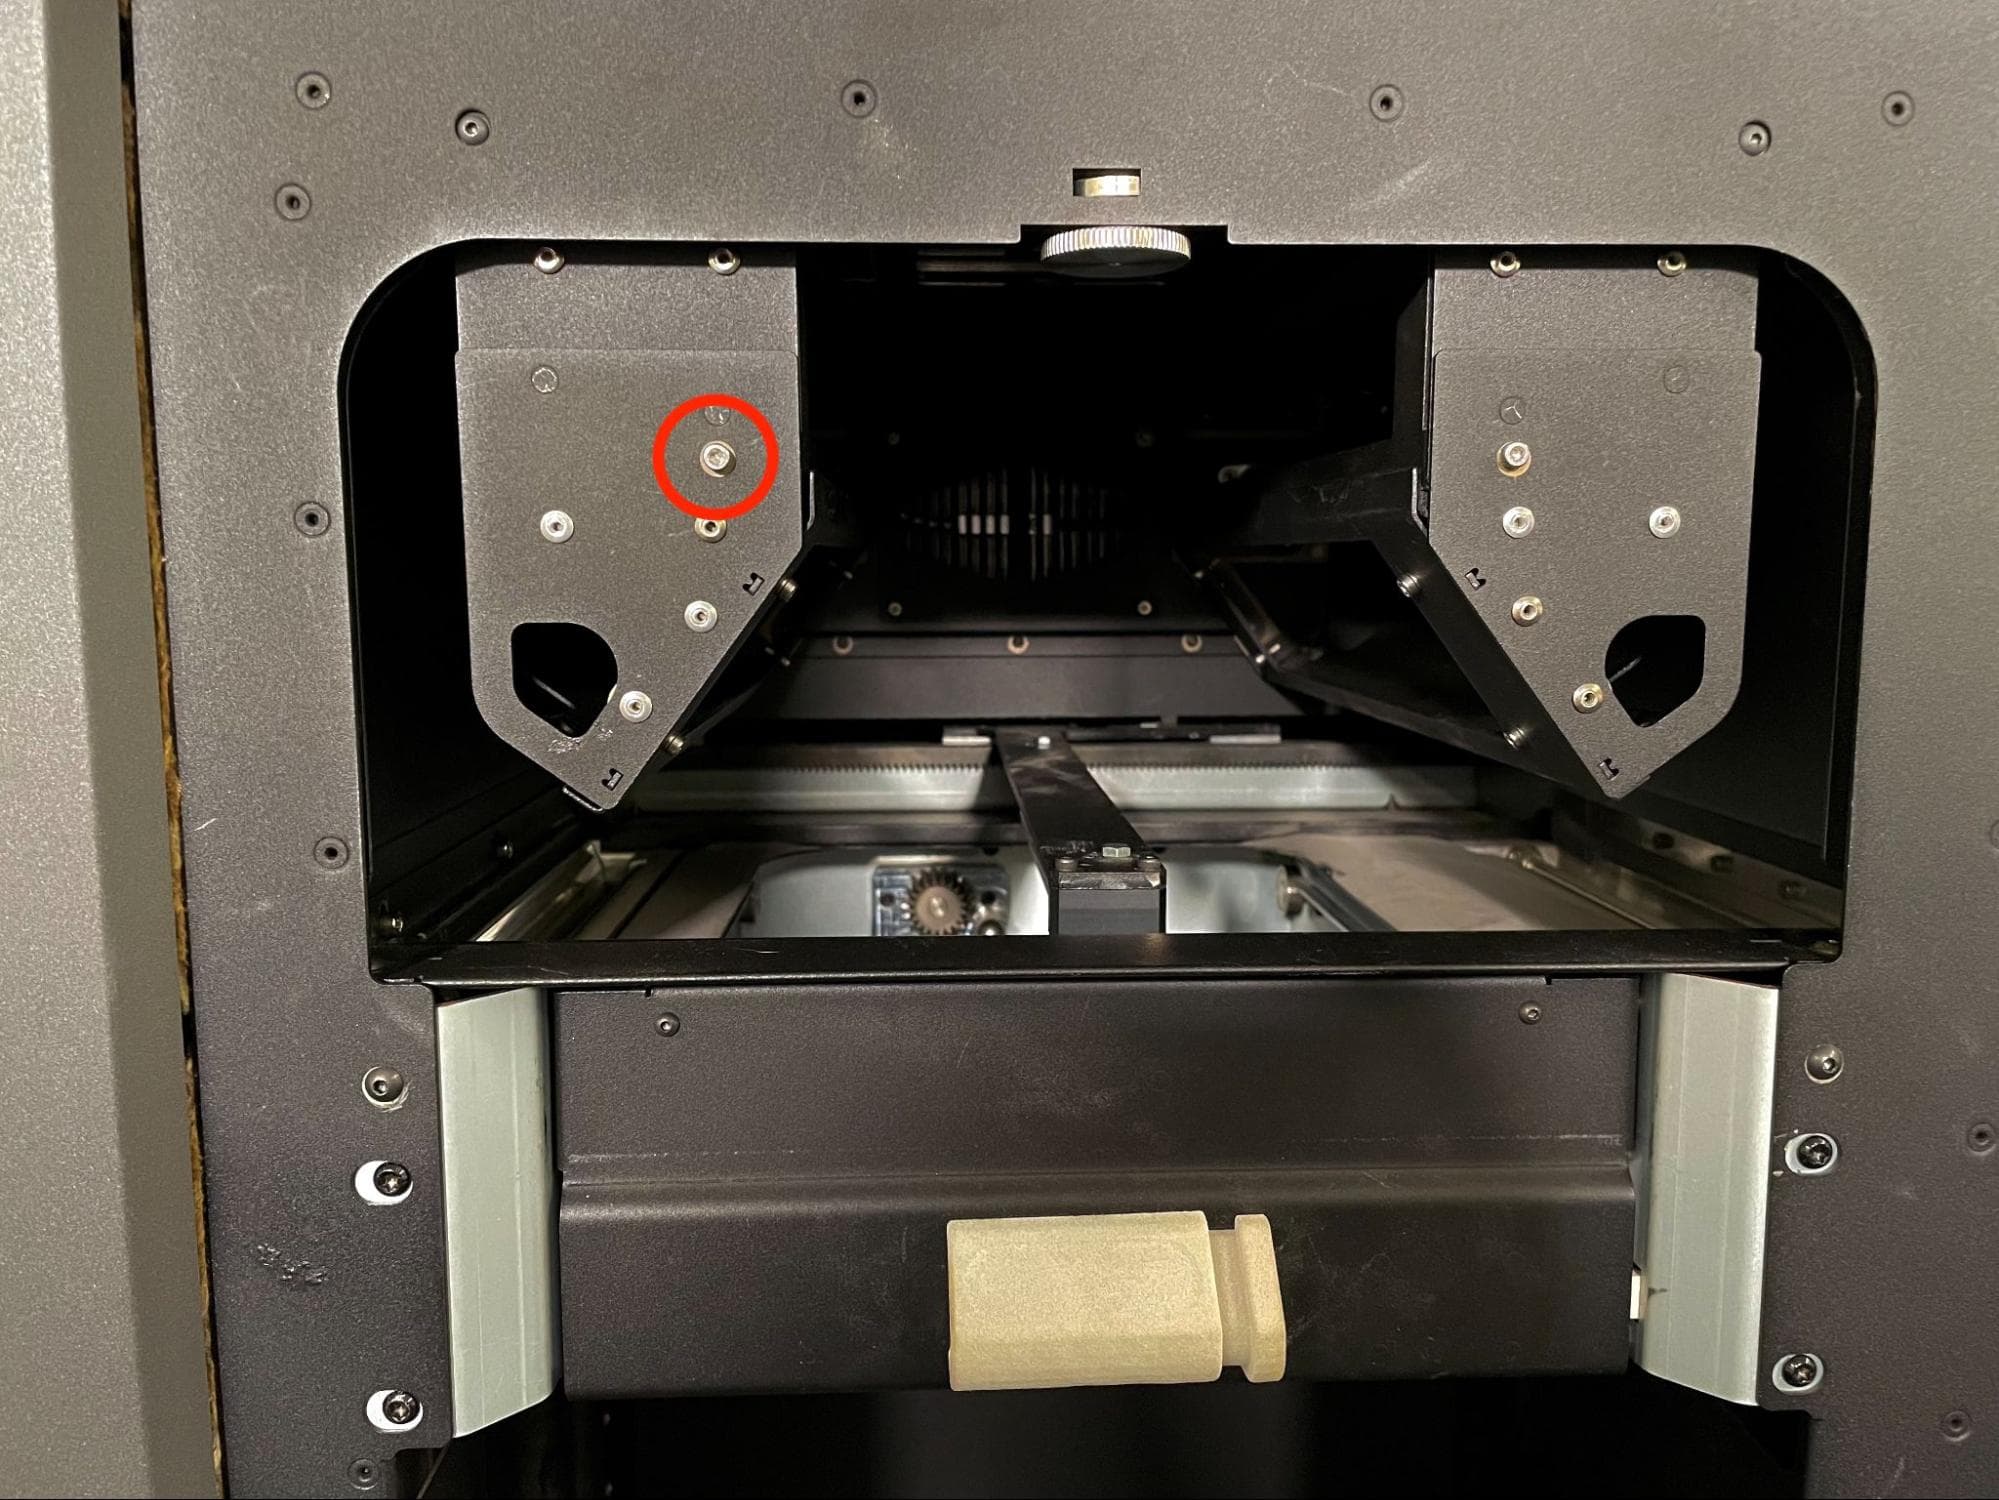
Step 1: Remove the spatial filter retention screw
Use a 2.5 mm hex driver to remove the 8.0 mm M3 cap screw holding the quartz tube heater’s spatial filter to the lamp frame.
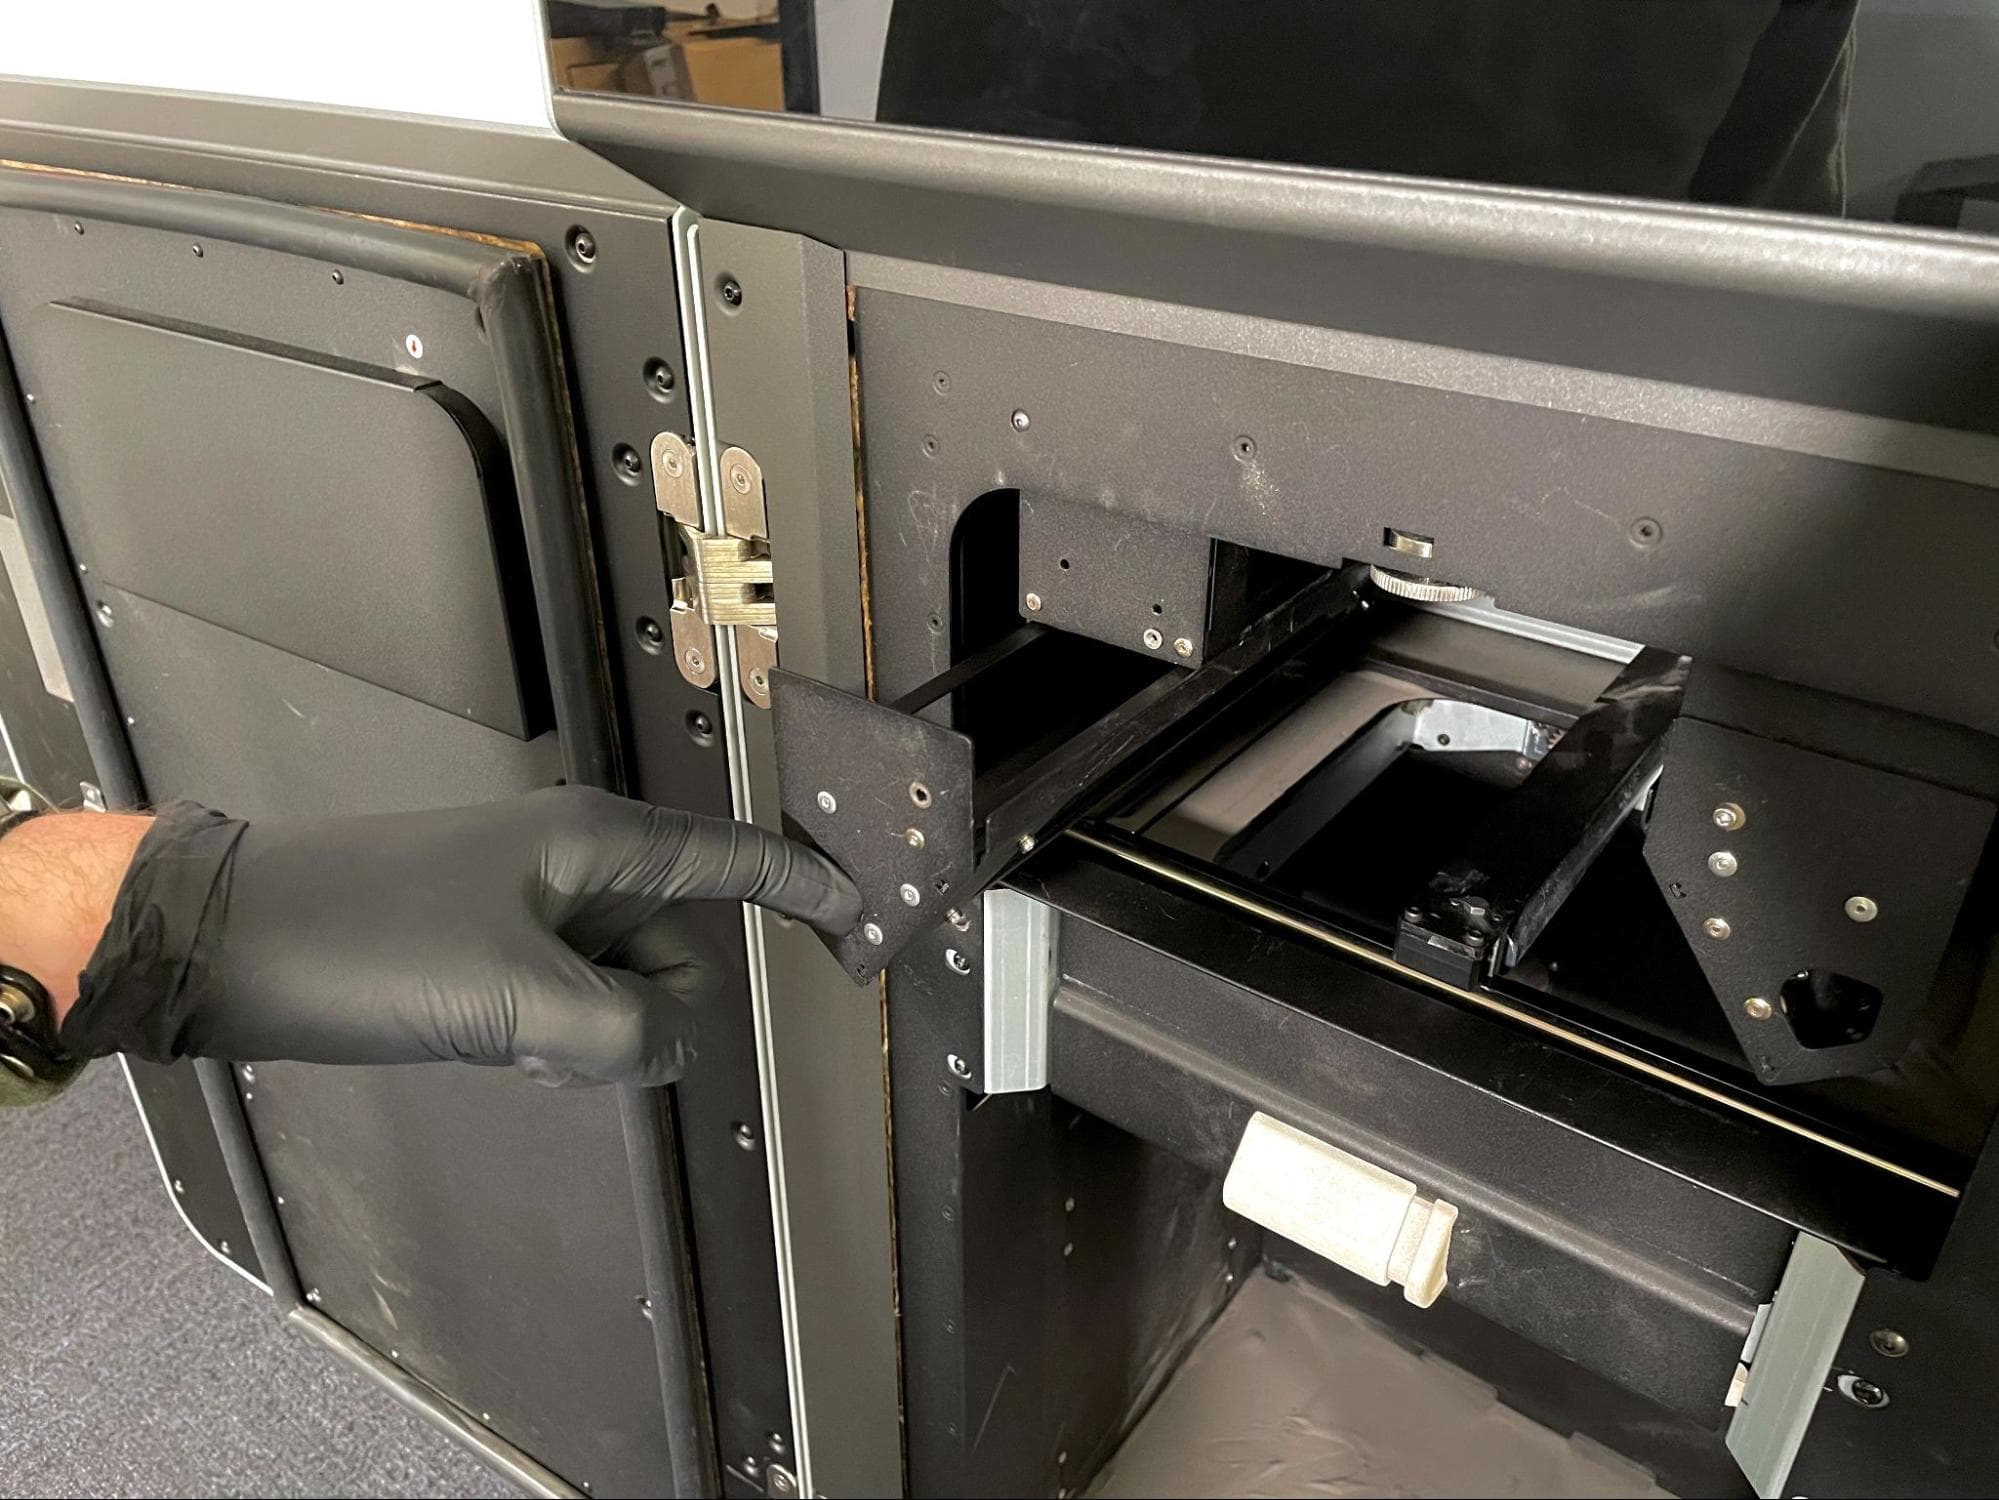
Step 2: Remove the spatial filter
Insert your finger into the slot on the spatial filter and pull it away from the printer to remove it from the print enclosure. Set the spatial filter aside.
Removing the quartz tube heater
Overview: Uninstall the quartz tube heater to be replaced.
Notice:
Exercise caution when handling the quartz tubes. They can chip, crack, or break if handled roughly. Any damage to the tube’s quartz glass will cause it to explode when turned on. Never handle a quartz tube without wearing nitrile gloves. If your bare skin contacts the quartz glass at any point during this procedure, thoroughly clean the tube with a PEC*PAD and ethanol.
Step 1: Unseat the quartz tube heater from the front socket
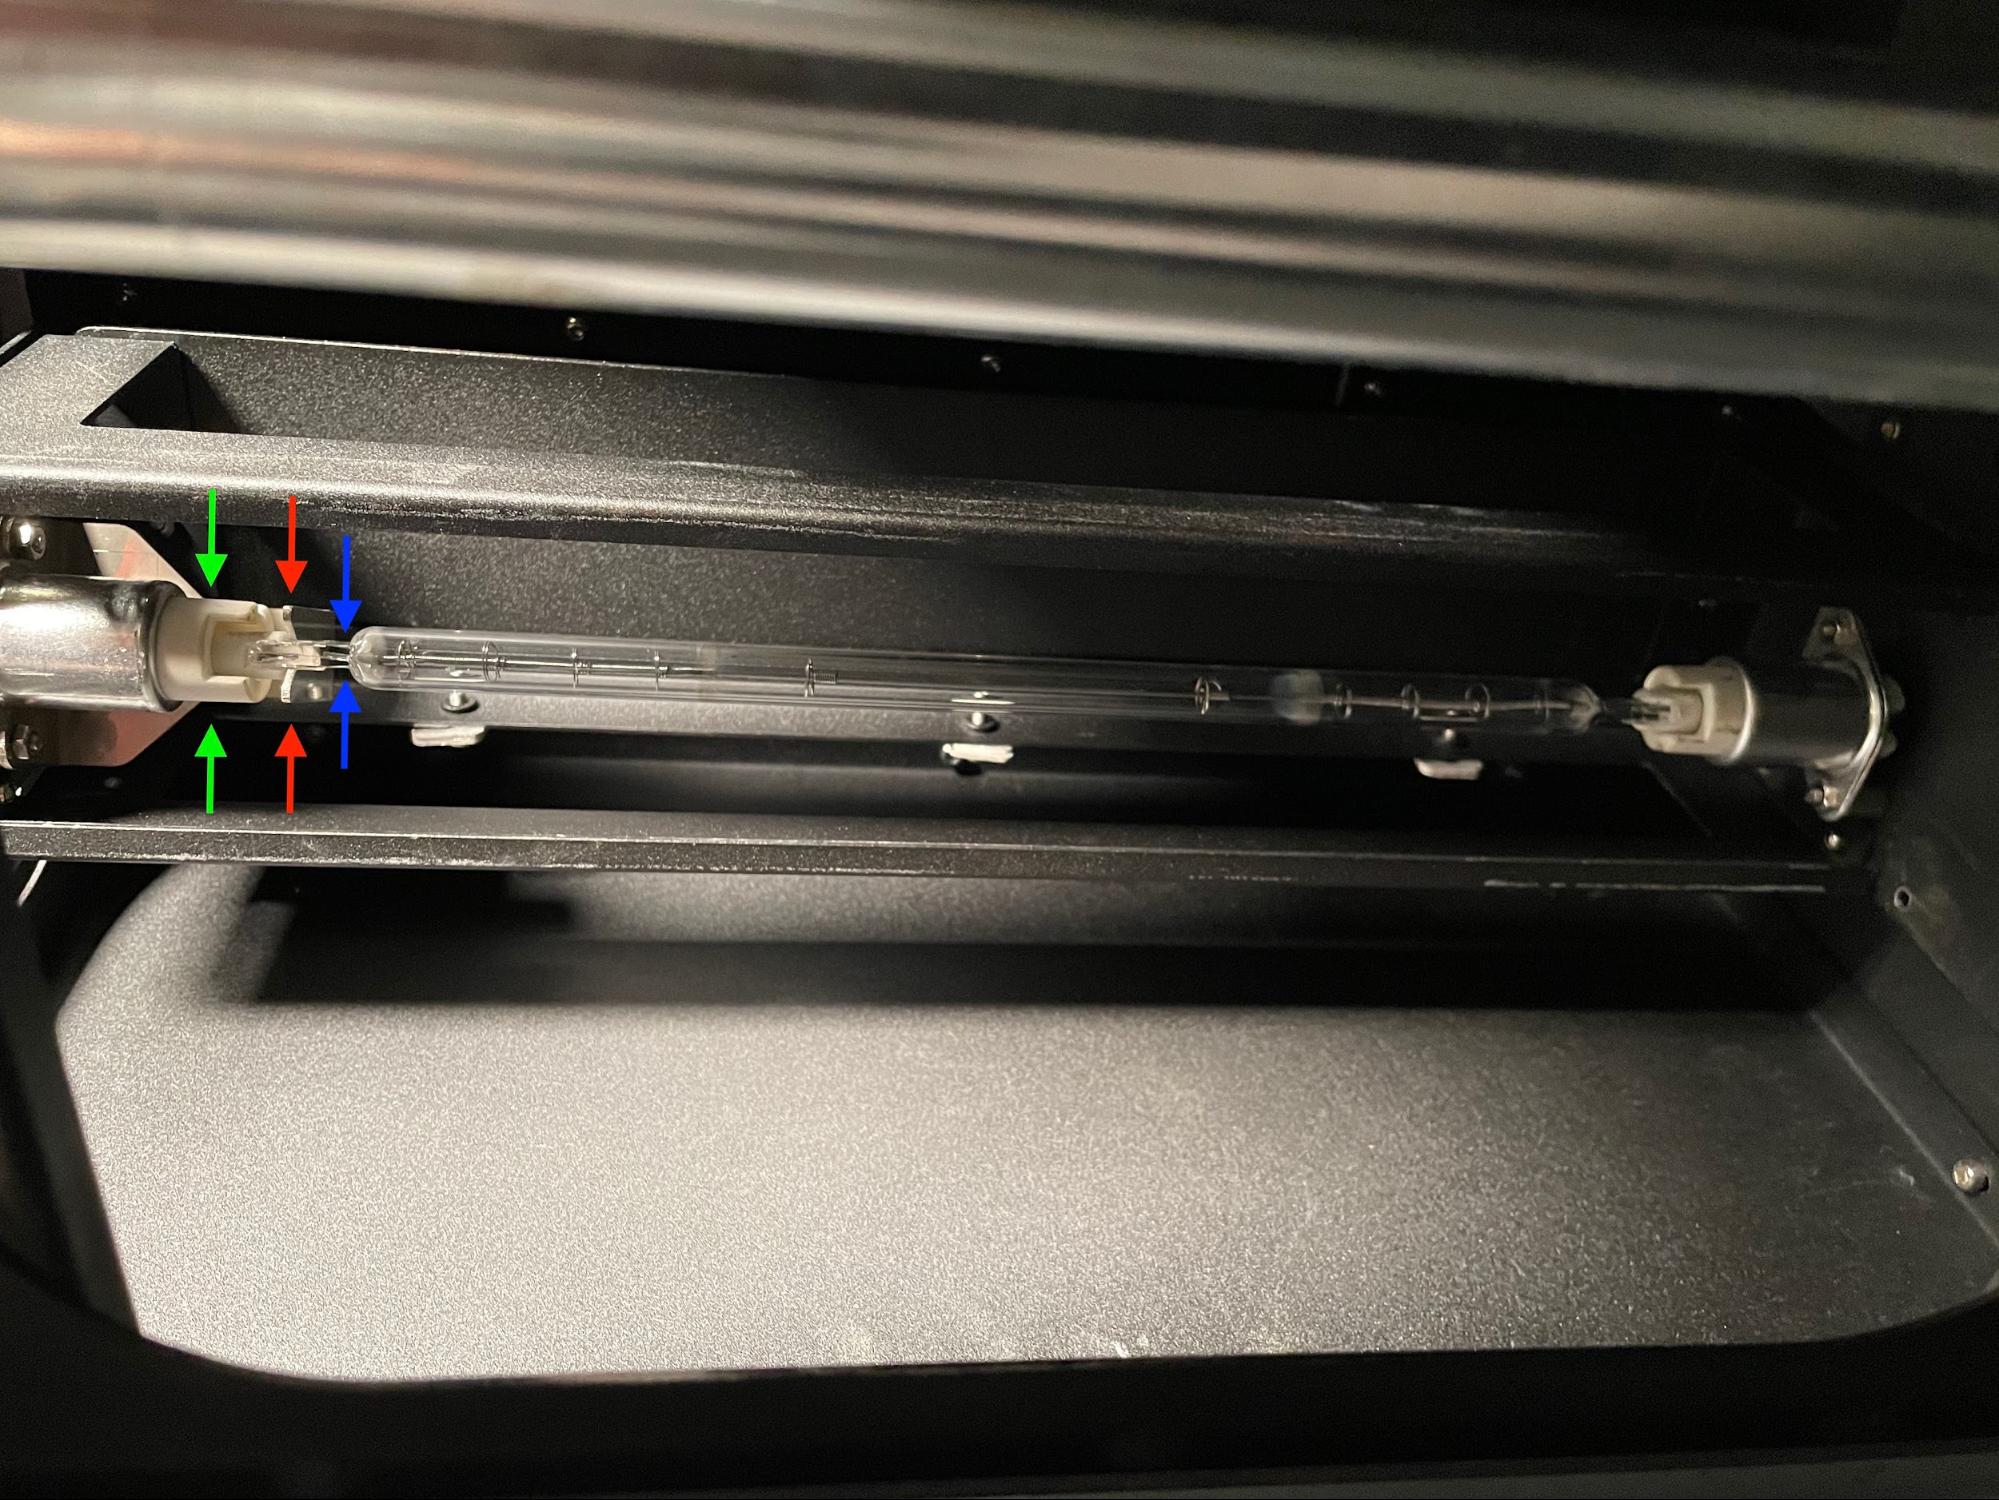
Locate the quartz tube heater’s rear ceramic socket at the back of the print enclosure. Gently grip the front of the quartz tube heater with two fingers. Push the quartz tube heater towards the rear ceramic socket.
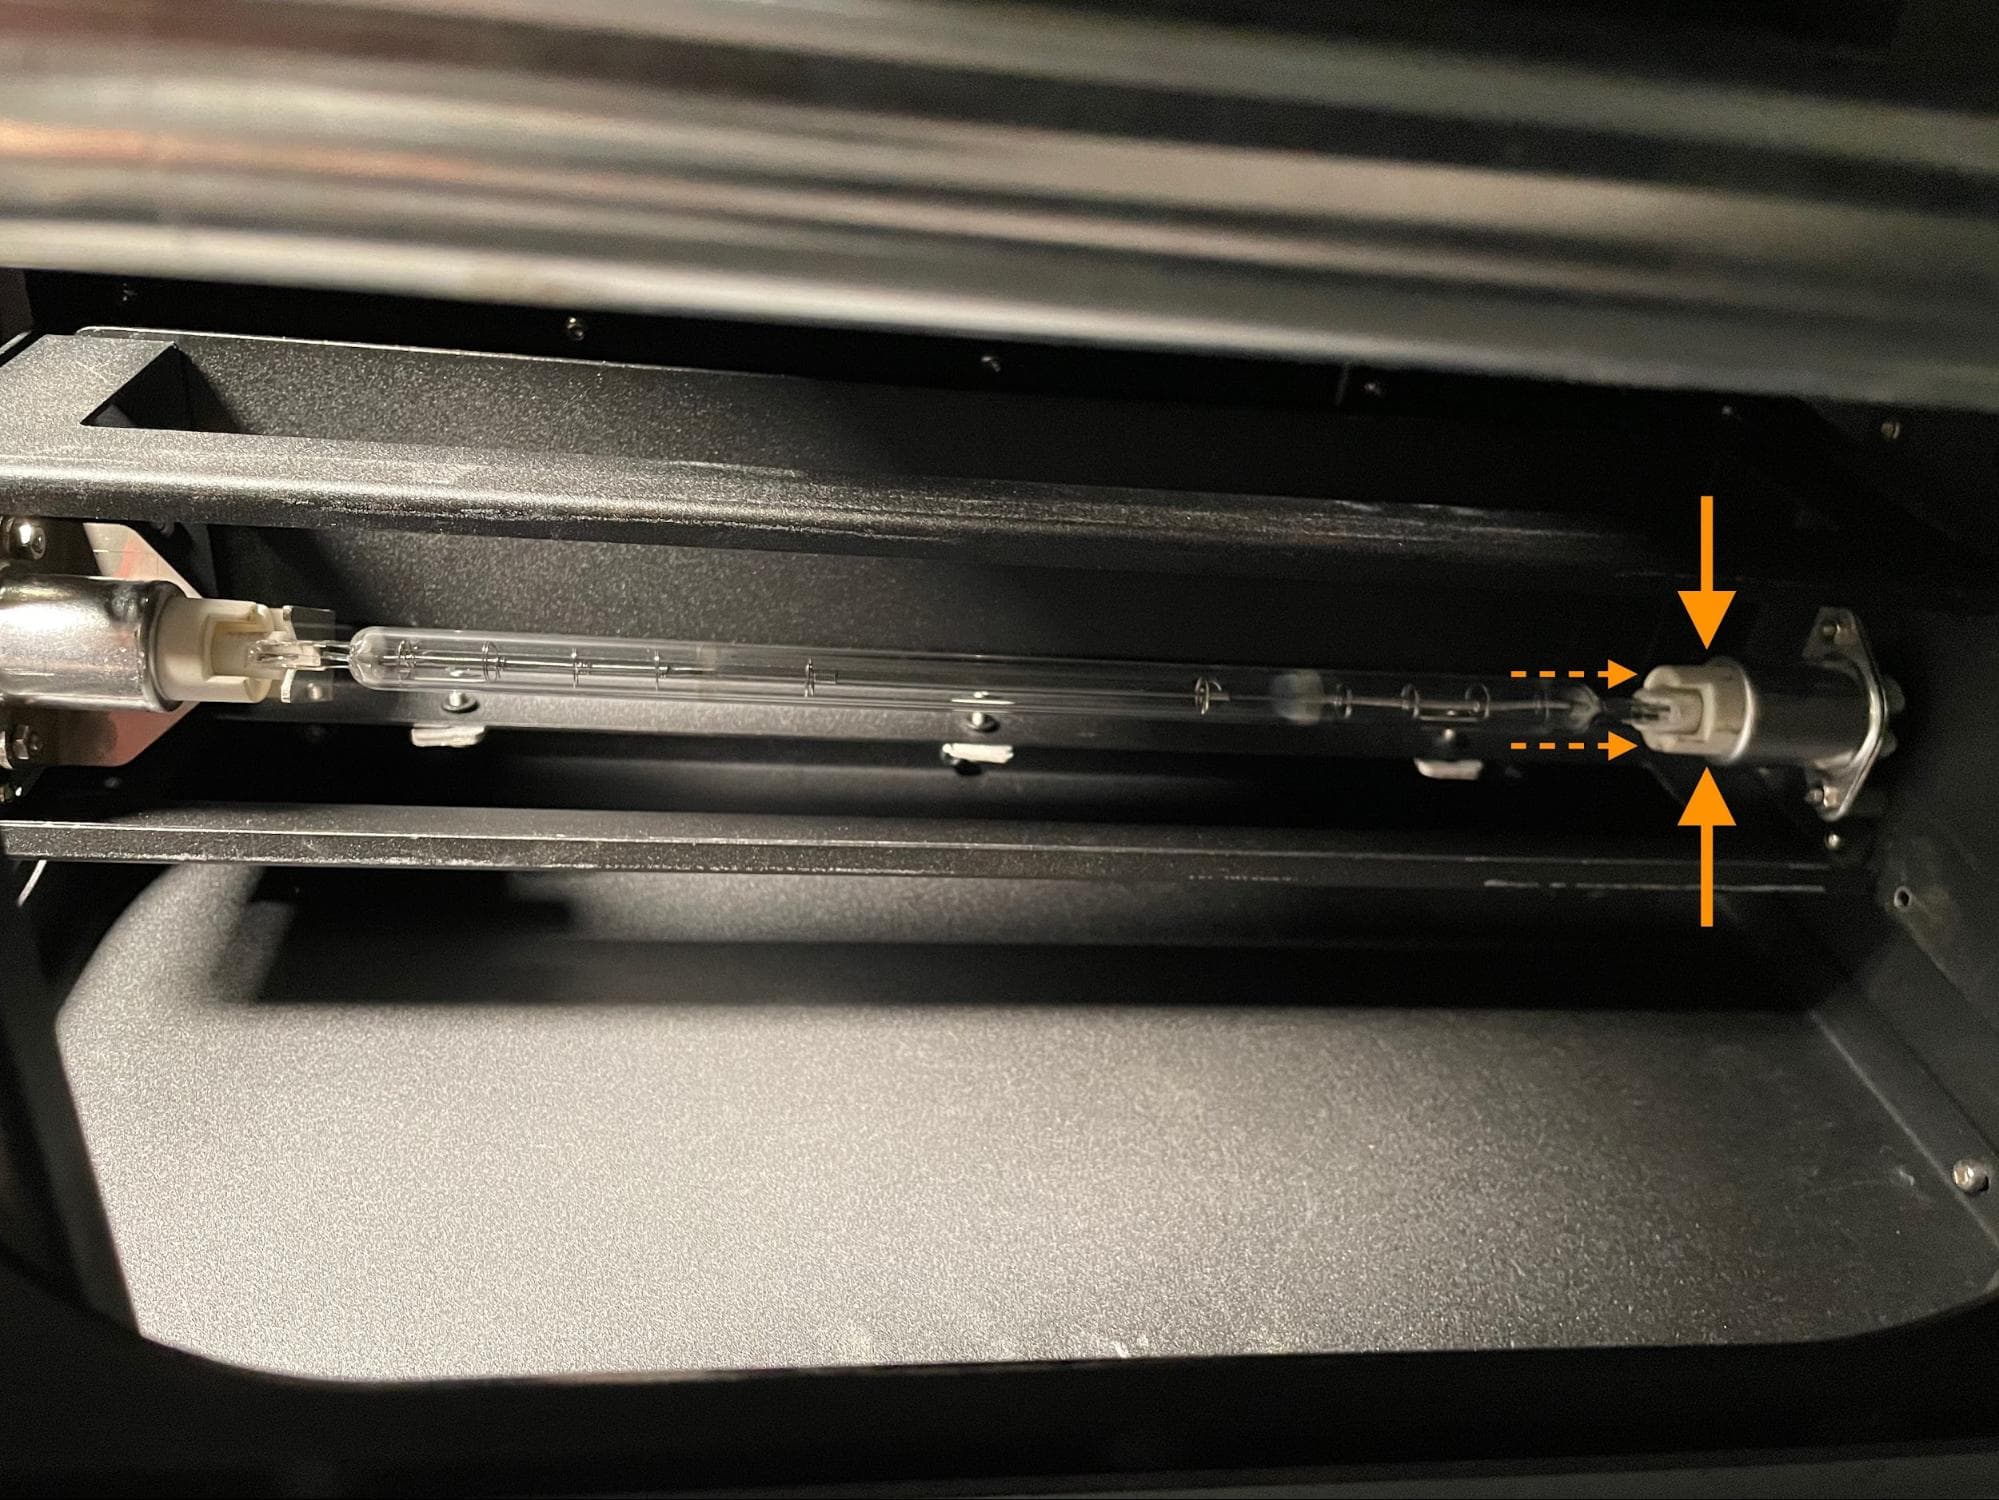
Step 2: Separate the quartz tube heater from the front socket
While still pushing the quartz tube heater towards the rear ceramic socket, carefully guide the tube’s front neck through the alignment tab until it is no longer constrained and the ceramic base is free from the front socket.
Notice:
It is possible to chip or crack the tube’s neck by scraping it against the alignment tab. If the neck does not slide through the alignment tab with minimal resistance, carefully rotate the tube while pushing it backwards until the neck easily slides through the tab.
Step 3: Remove the quartz tube heater
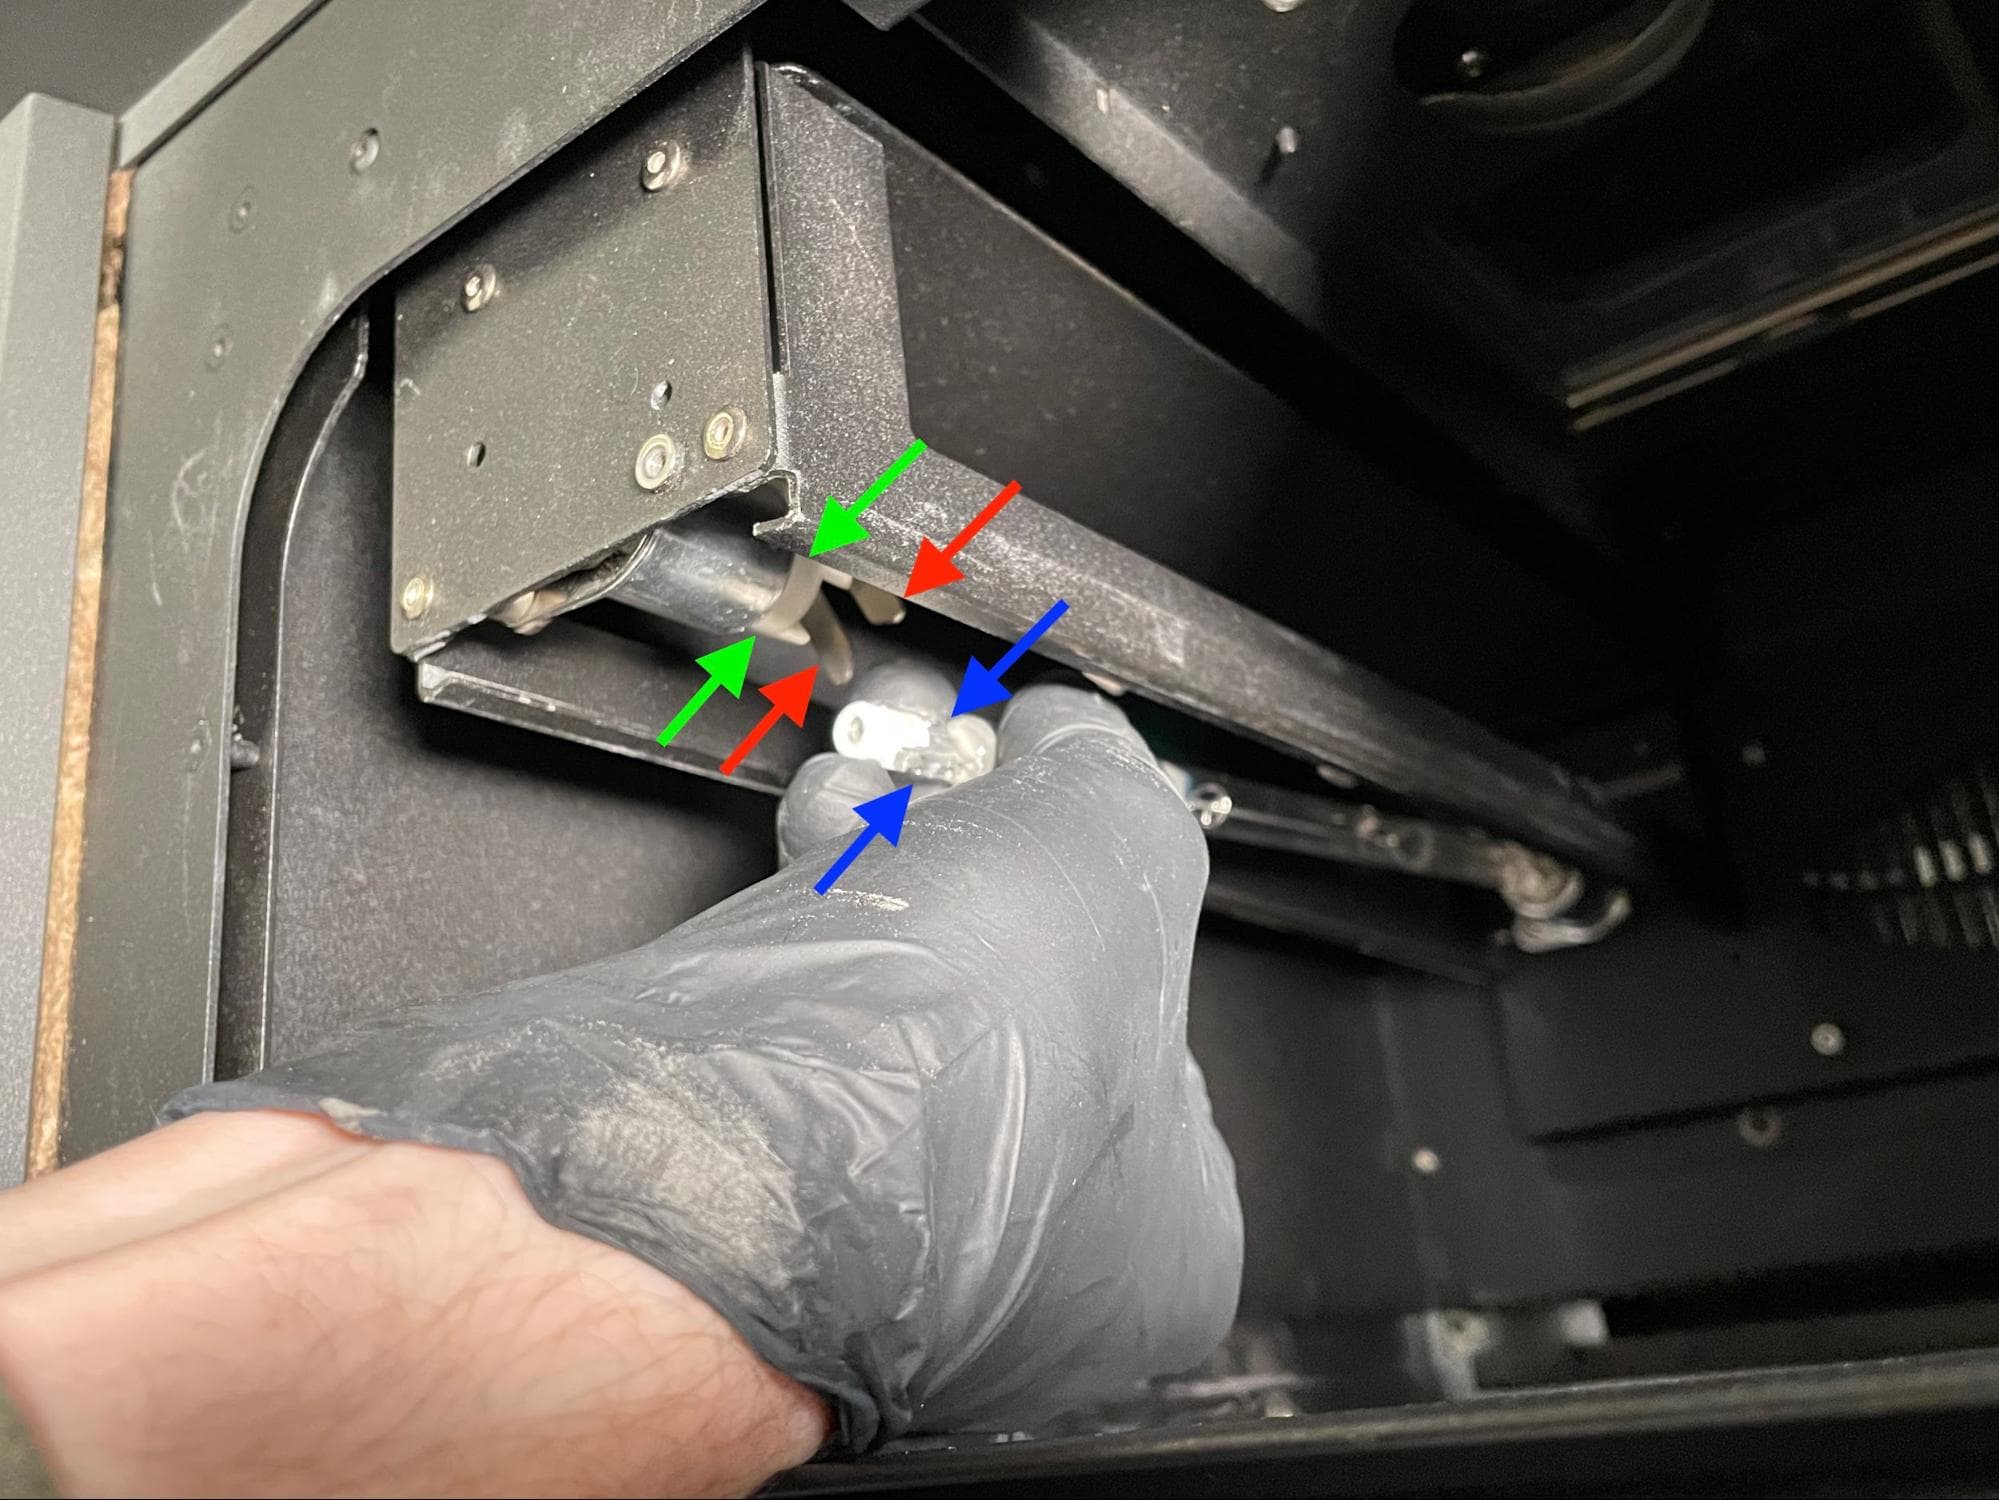
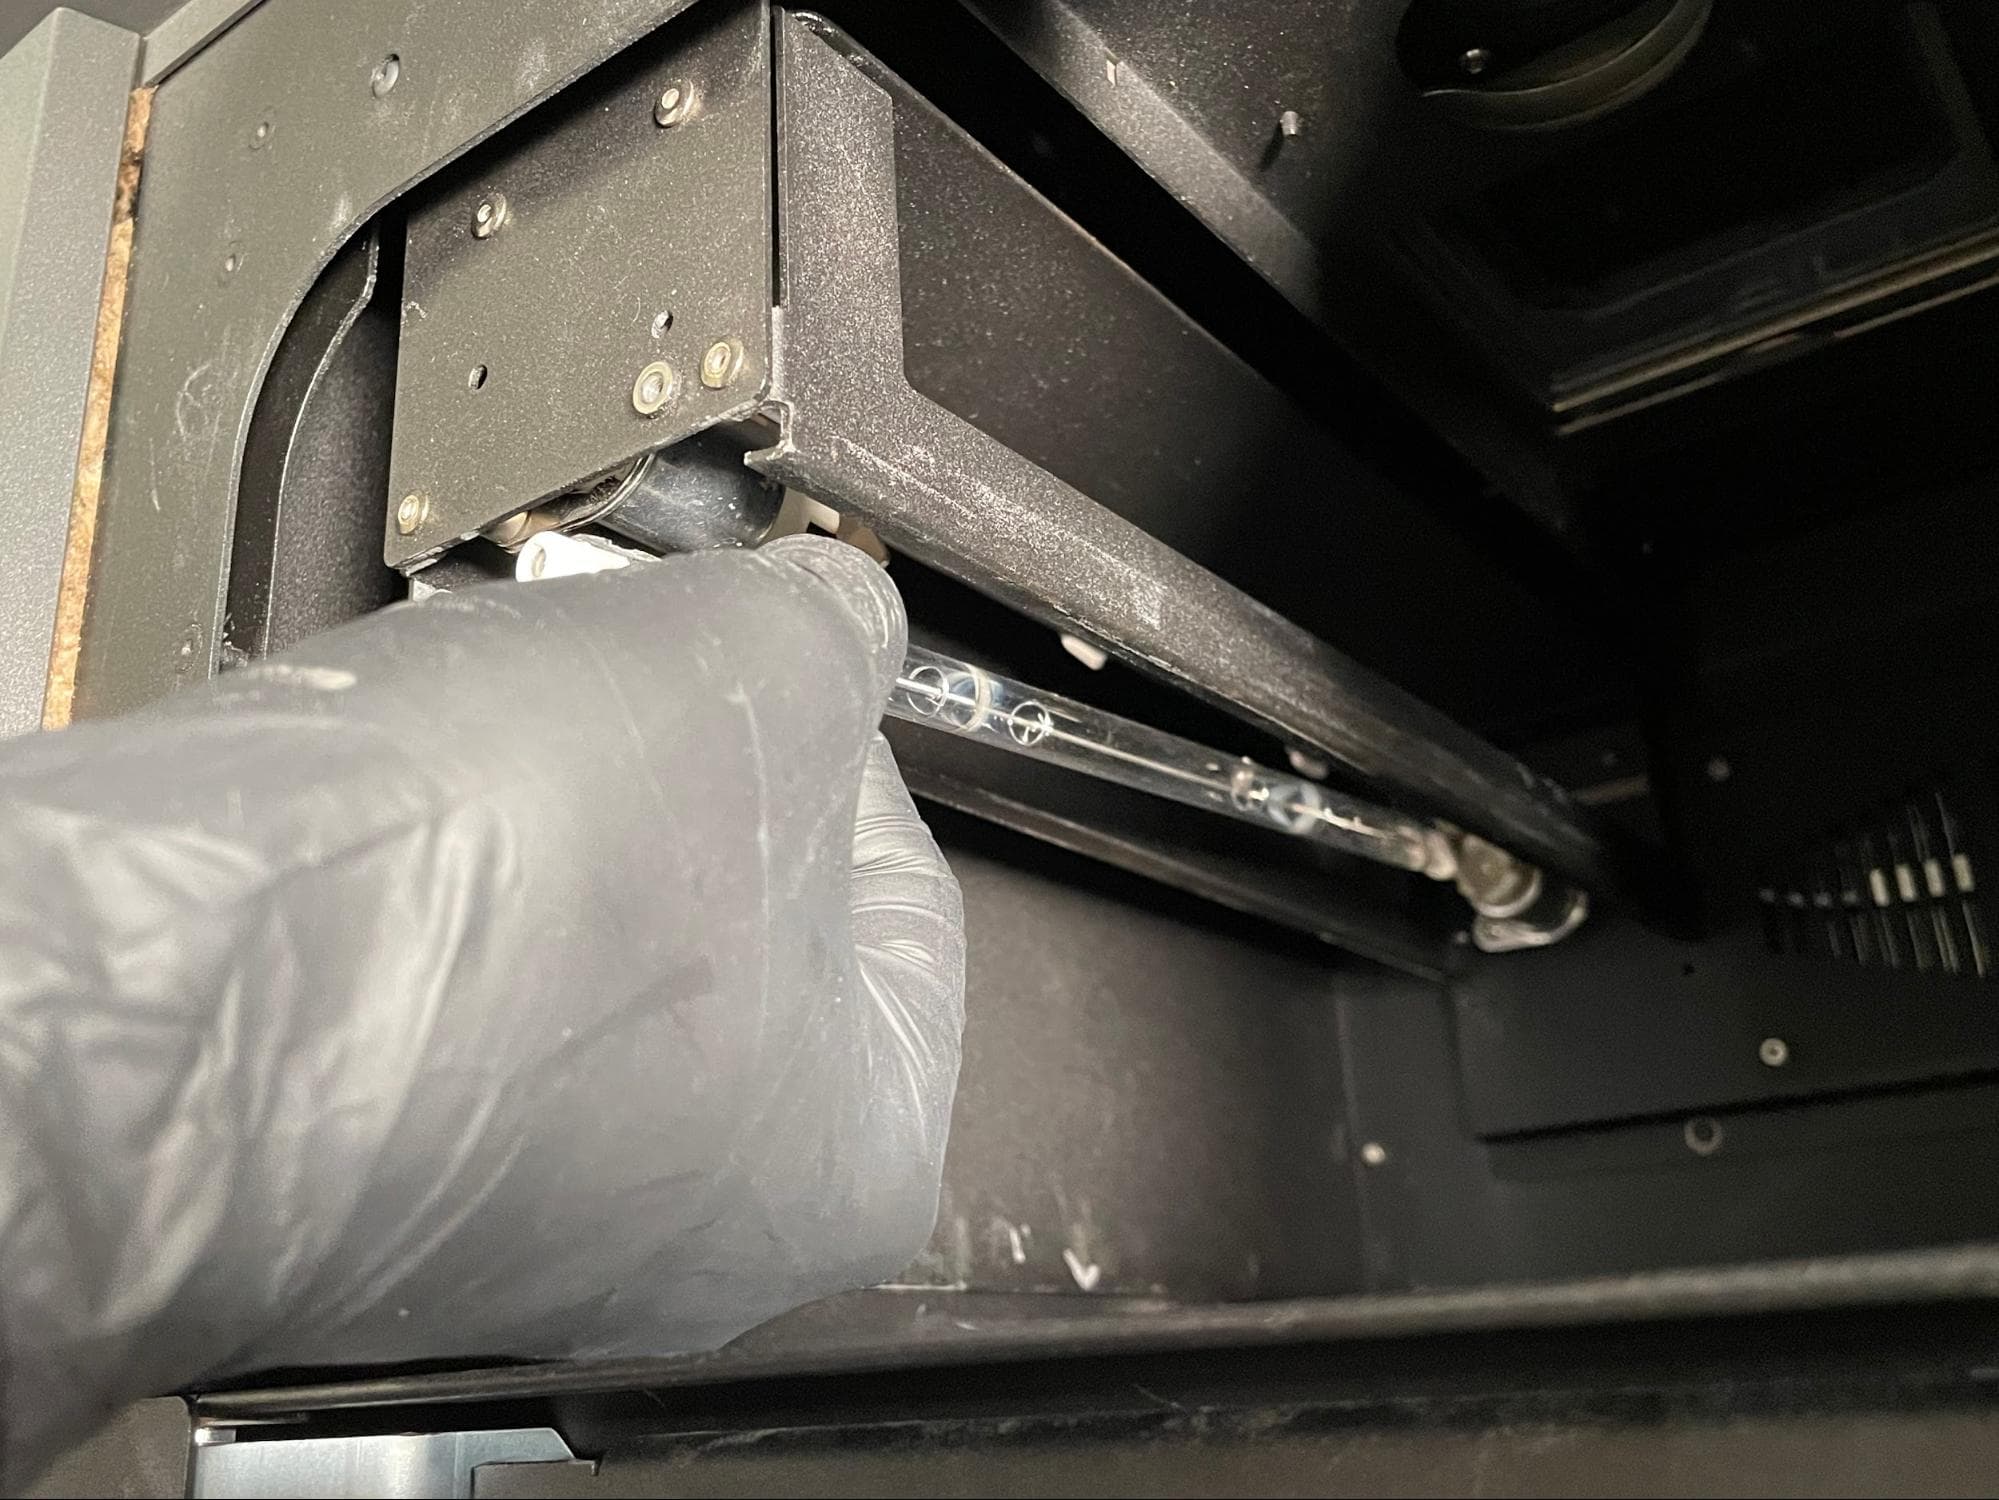
Once the quartz tube heater’s ceramic base and neck are clear of the front ceramic socket and alignment tab, release your pressure on the tube. Carefully maneuver the tube away from the lamp housing and out of the print enclosure.
Installing the replacement quartz tube heater
Overview: Align and install the new quartz tube heater.
Step 1: Prepare the quartz tube heater
Check your nitrile gloves. Replace them with a new pair if either have any tears or cuts.
While wearing nitrile gloves, remove the new quartz tube from its packaging. If you are replacing both quartz tube heaters, only remove one tube from its packaging at a time.
Notice:
Exercise caution when handling the quartz tubes. They can chip, crack, or break if handled roughly. Any damage to the tube’s quartz glass will cause it to explode when turned on. Never handle a quartz tube without wearing nitrile gloves. If your bare skin contacts the quartz glass at any point during this procedure, thoroughly clean the tube with a PEC*PAD and ethanol.
Locate the rear ceramic socket at the back of the print enclosure. Maneuver the new quartz tube heater into the printer and align the ceramic base at one end with the rear socket. Insert the ceramic base into the socket.
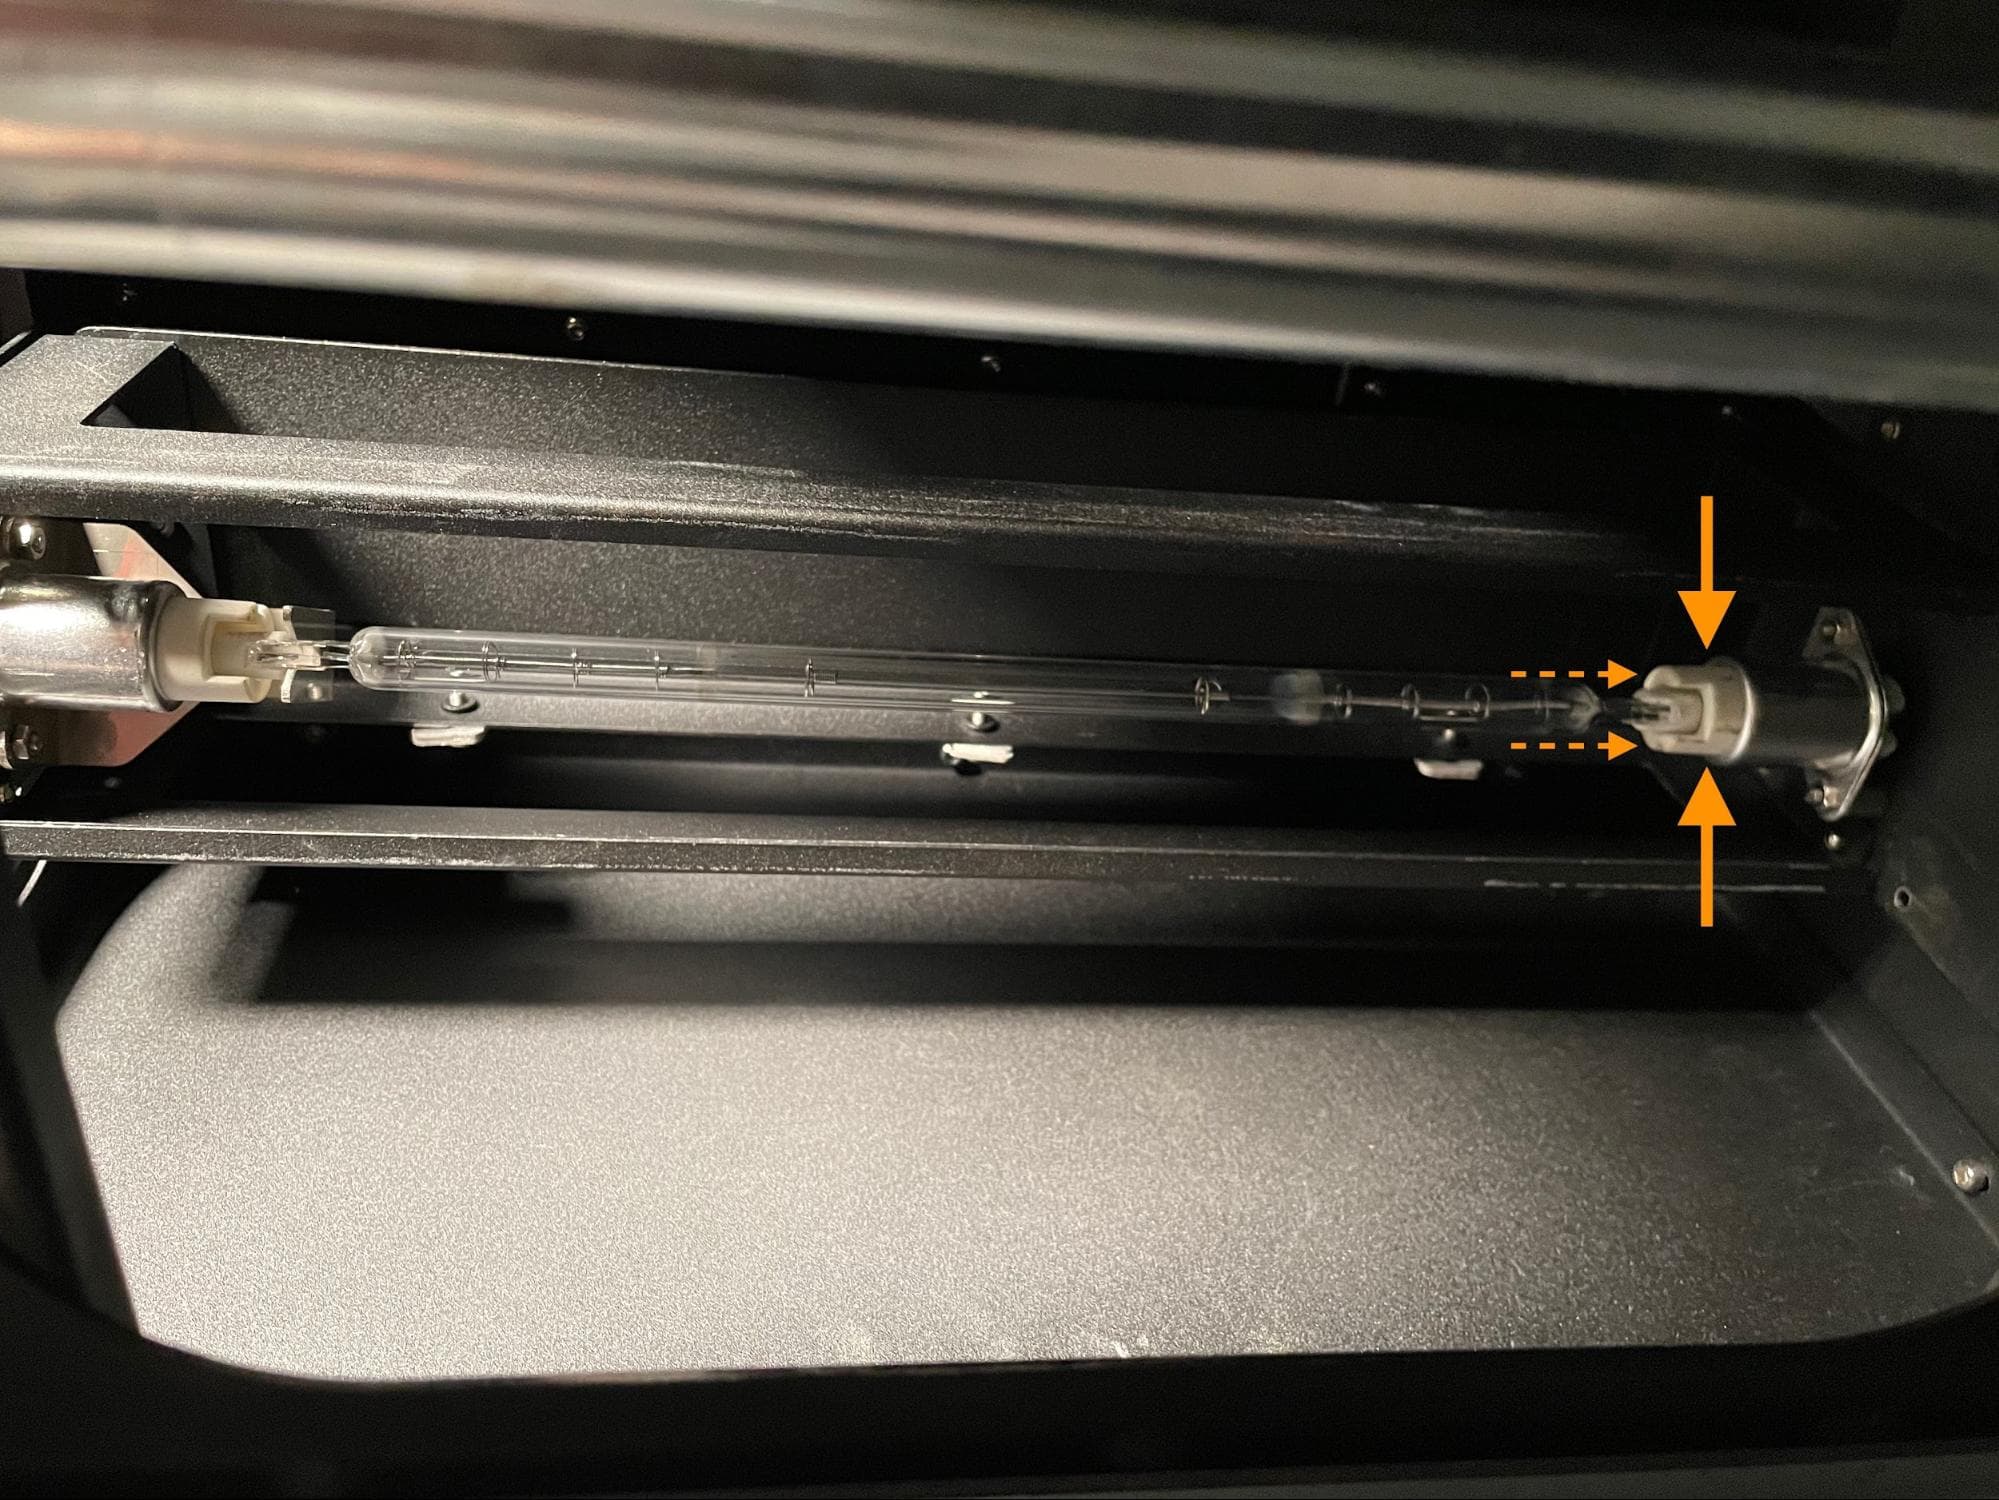
Gently grip the front of the quartz tube heater with two fingers. Push the quartz tube heater towards the rear ceramic socket. Carefully guide the tube’s front neck into the alignment tab until the ceramic base is aligned with the front socket.
If the quartz tube heater is not pushed far enough into the rear socket, the front ceramic base cannot clear the front socket. Similarly, if it is pushed too far into the rear socket, the front ceramic base may hit the alignment tab. Adjust your pressure on the quartz tube heater as needed until the tube’s neck passes easily into the alignment tab.
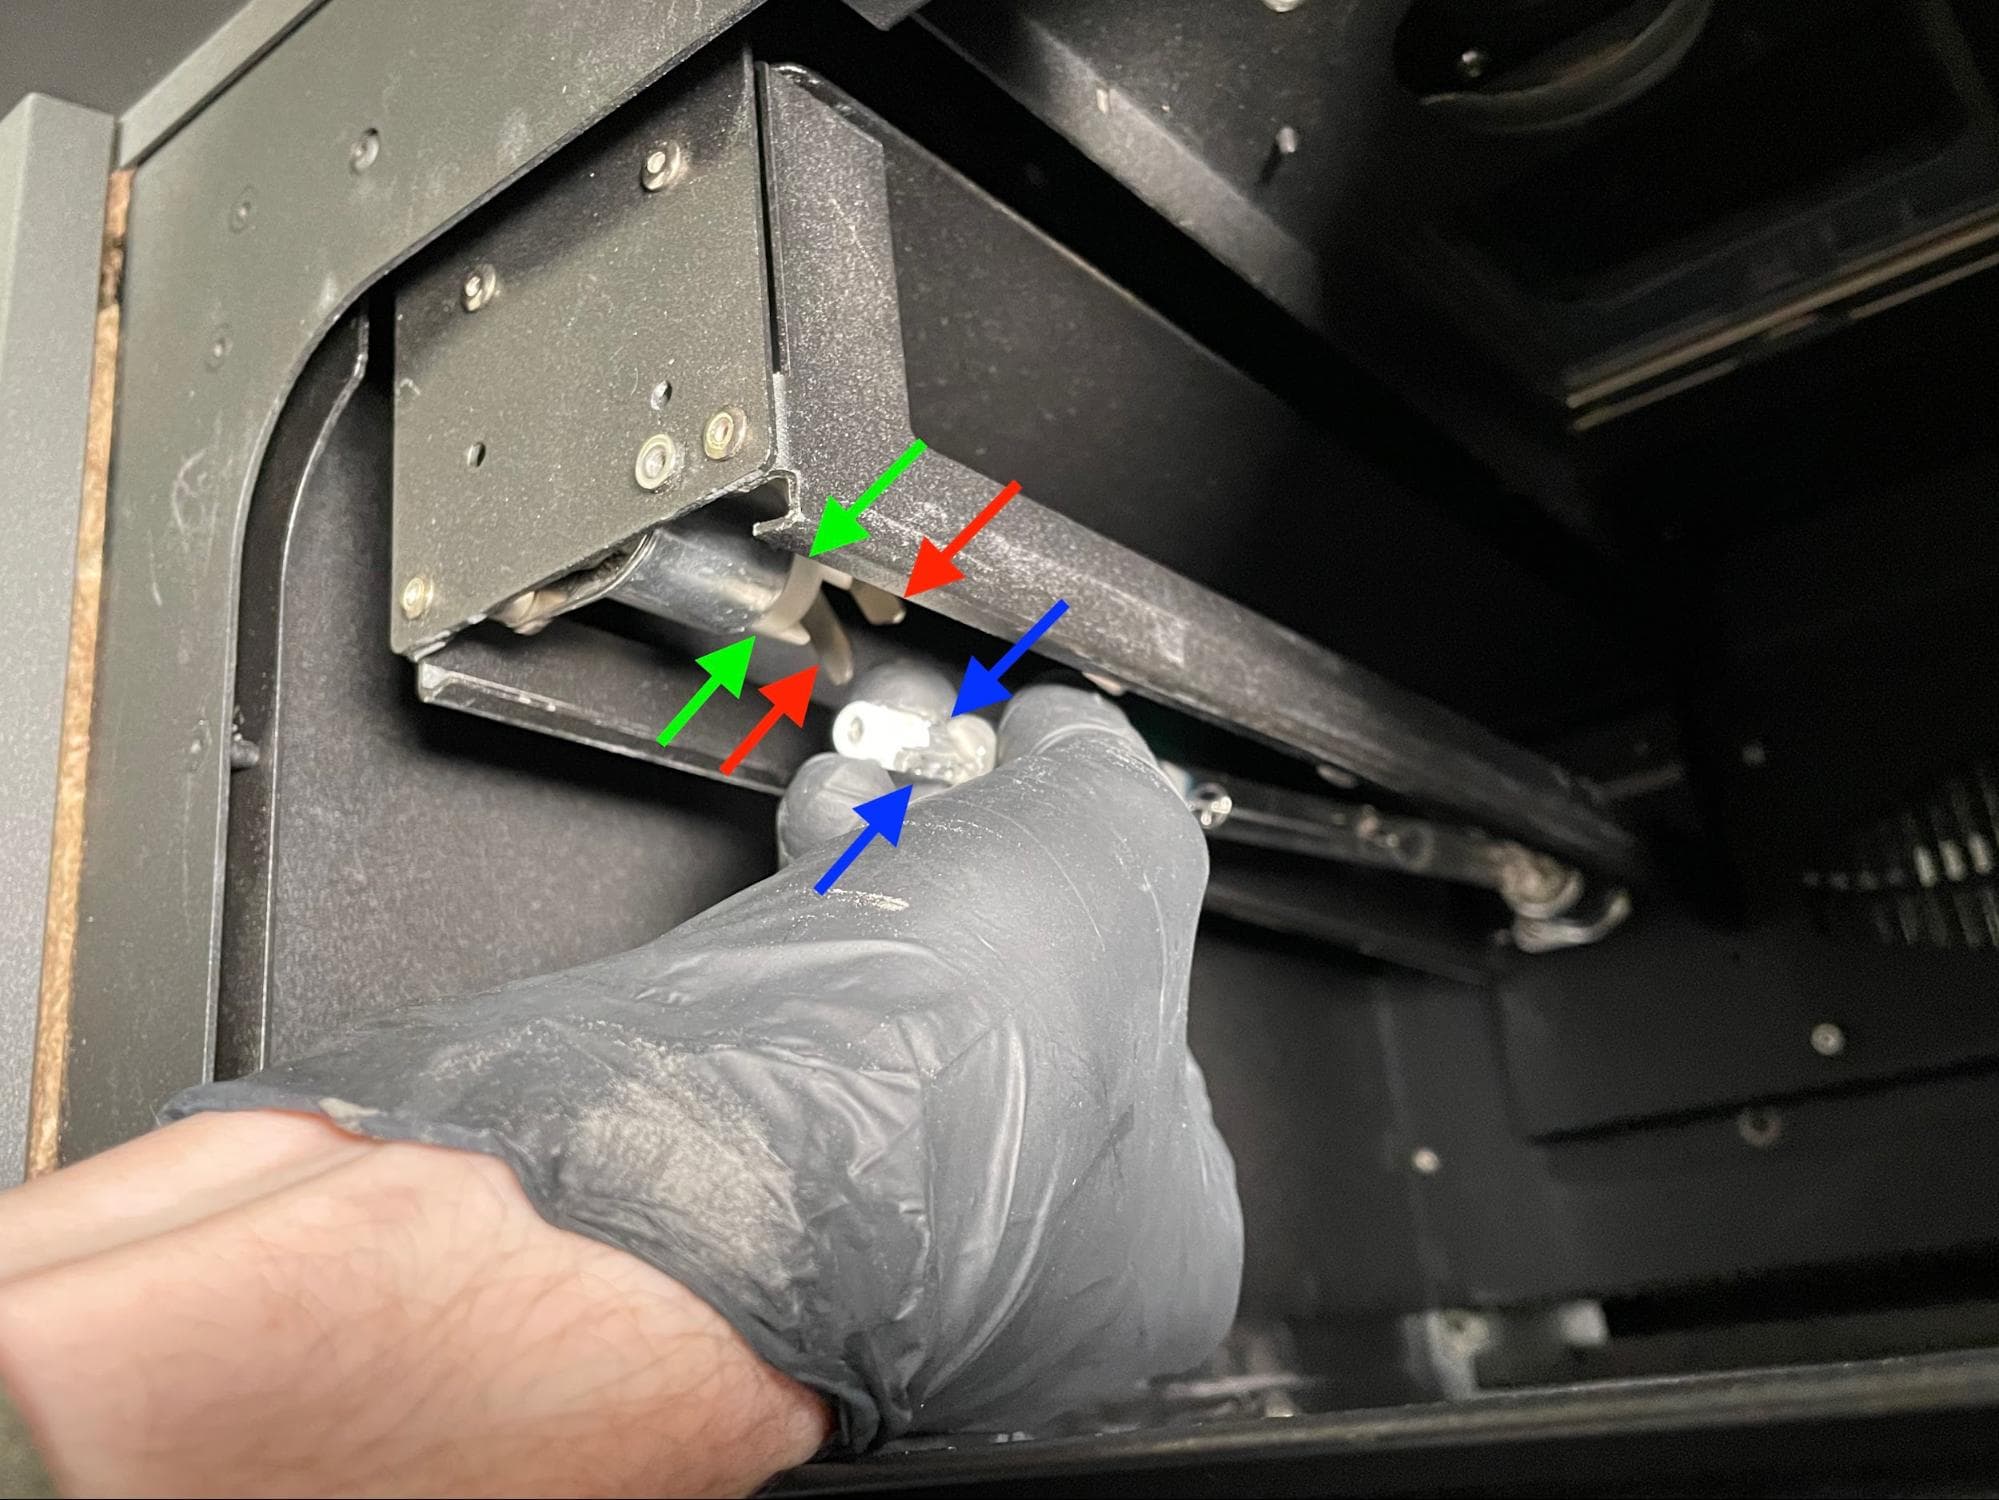
Notice:
It is possible to chip or crack the tube’s neck by scraping it against the alignment tab. If the neck does not slide through the alignment tab with minimal resistance, carefully rotate the tube while pushing it backwards until the neck easily slides through the tab.
Check that the tube’s neck is fully seated into the alignment tab and the front ceramic base is concentrically aligned with the front socket. Slowly release your pressure on the quartz tube heater to allow the front ceramic base to seat itself into the front socket.
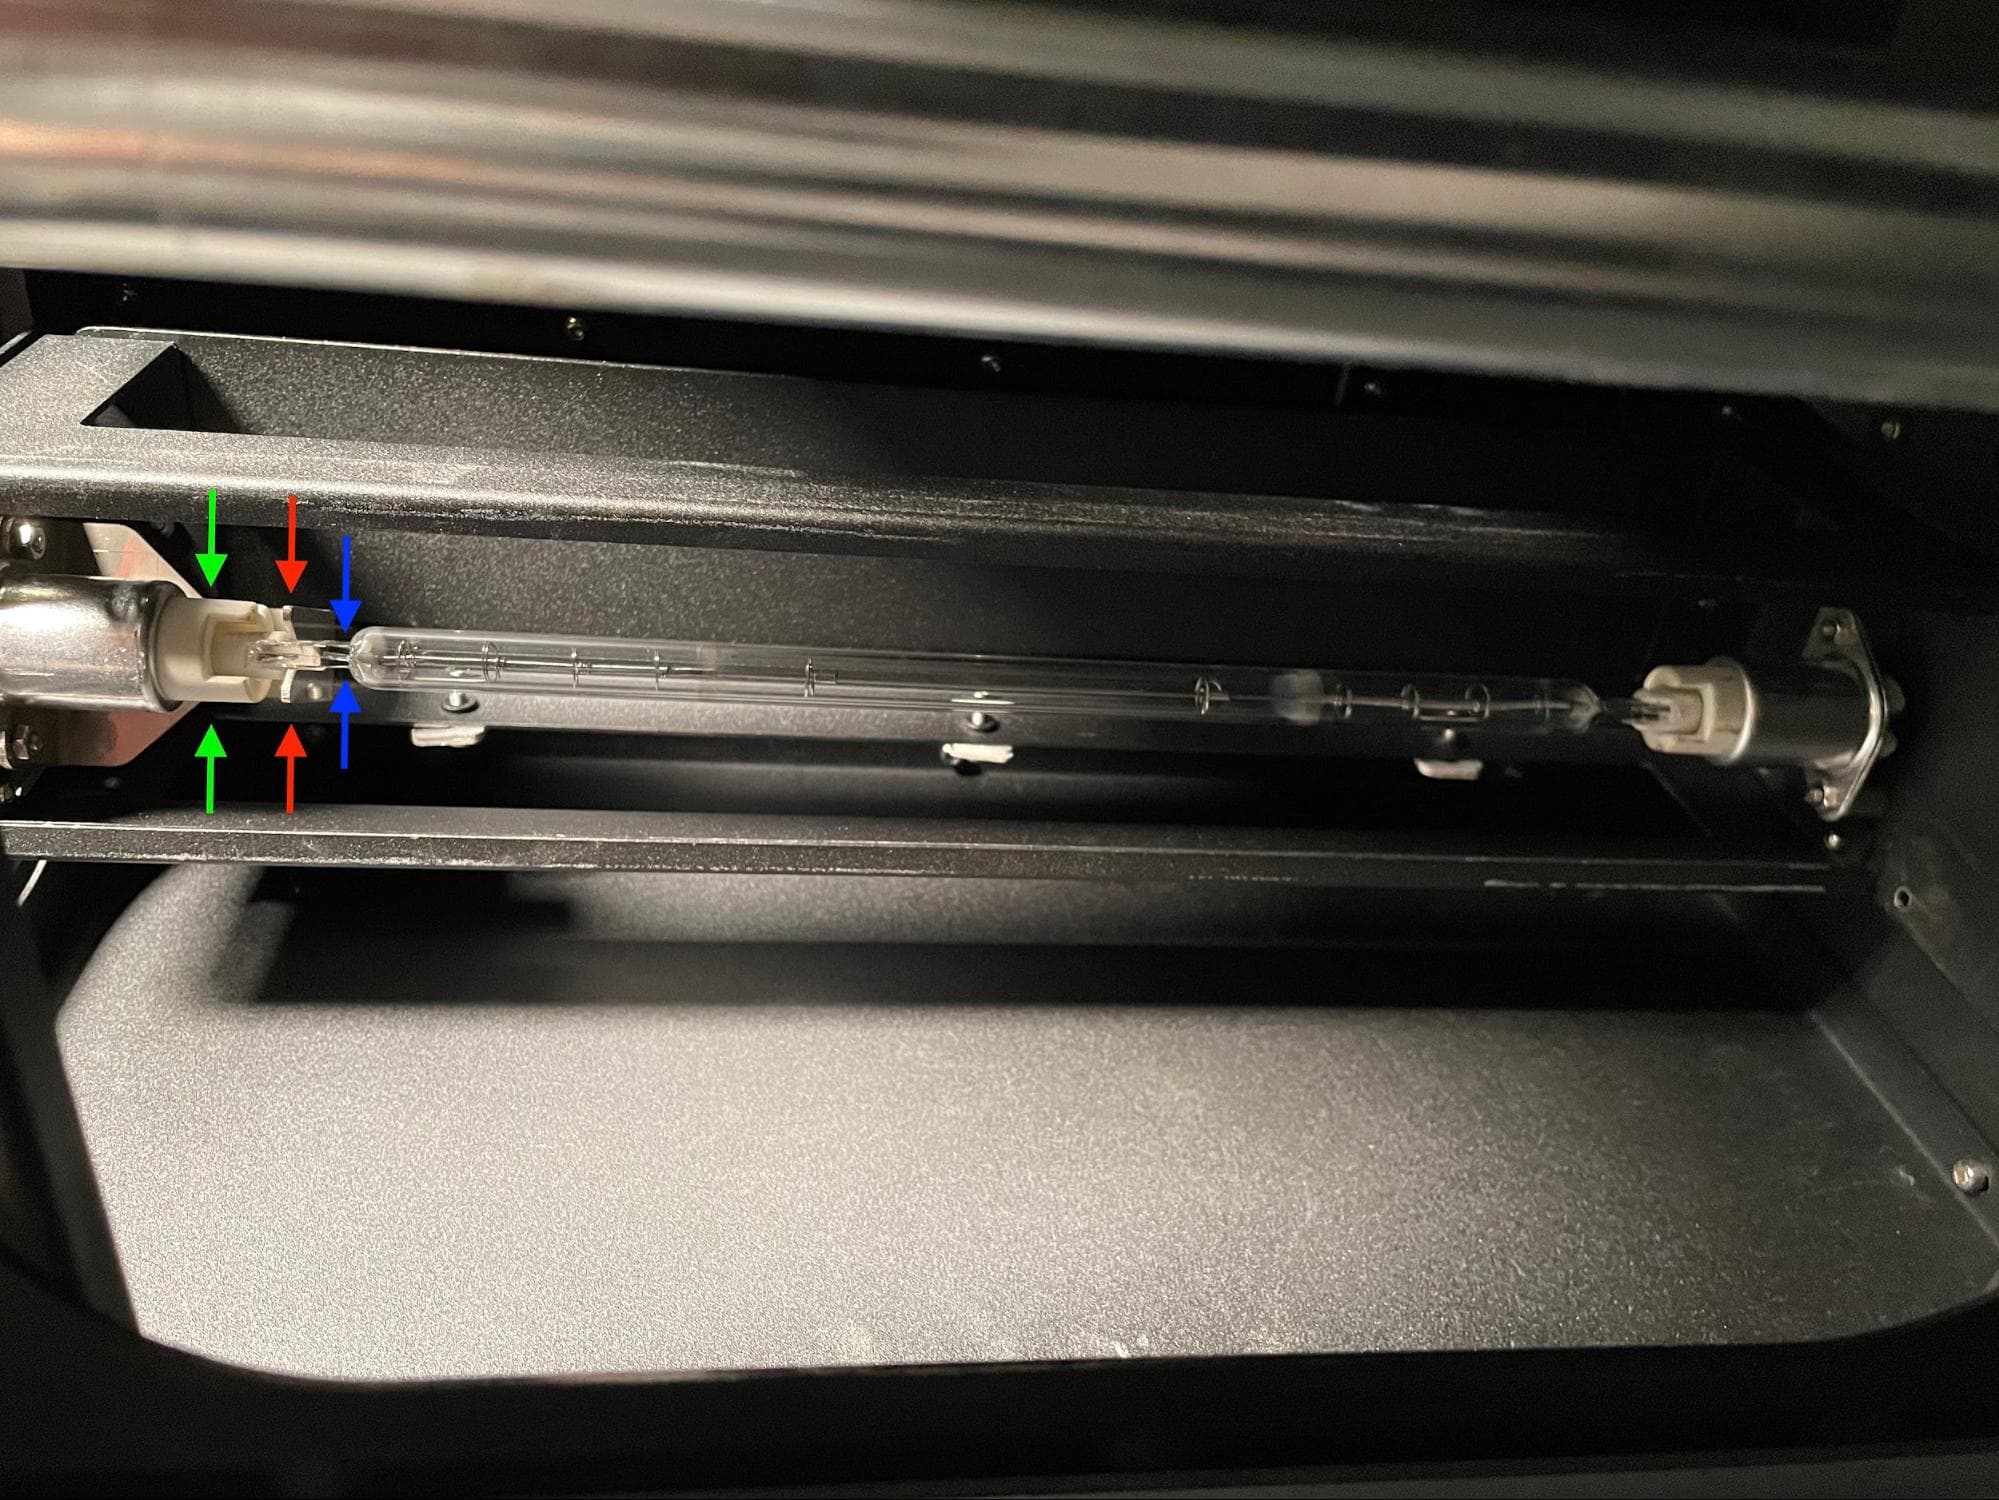
Step 5: Check the quartz tube heater installation
Gently grip the quartz tube heater near its front neck with two fingers. Carefully check for any movement—the tube should not easily move or rotate.
Reinstalling the spatial filter
Overview: Align and reinstall the spatial filter.
Step 1: Align the spatial filter with the lamp frame
Align the slots on the spatial filter with the rails on the lamp frame.
Step 2: Install the spatial filter
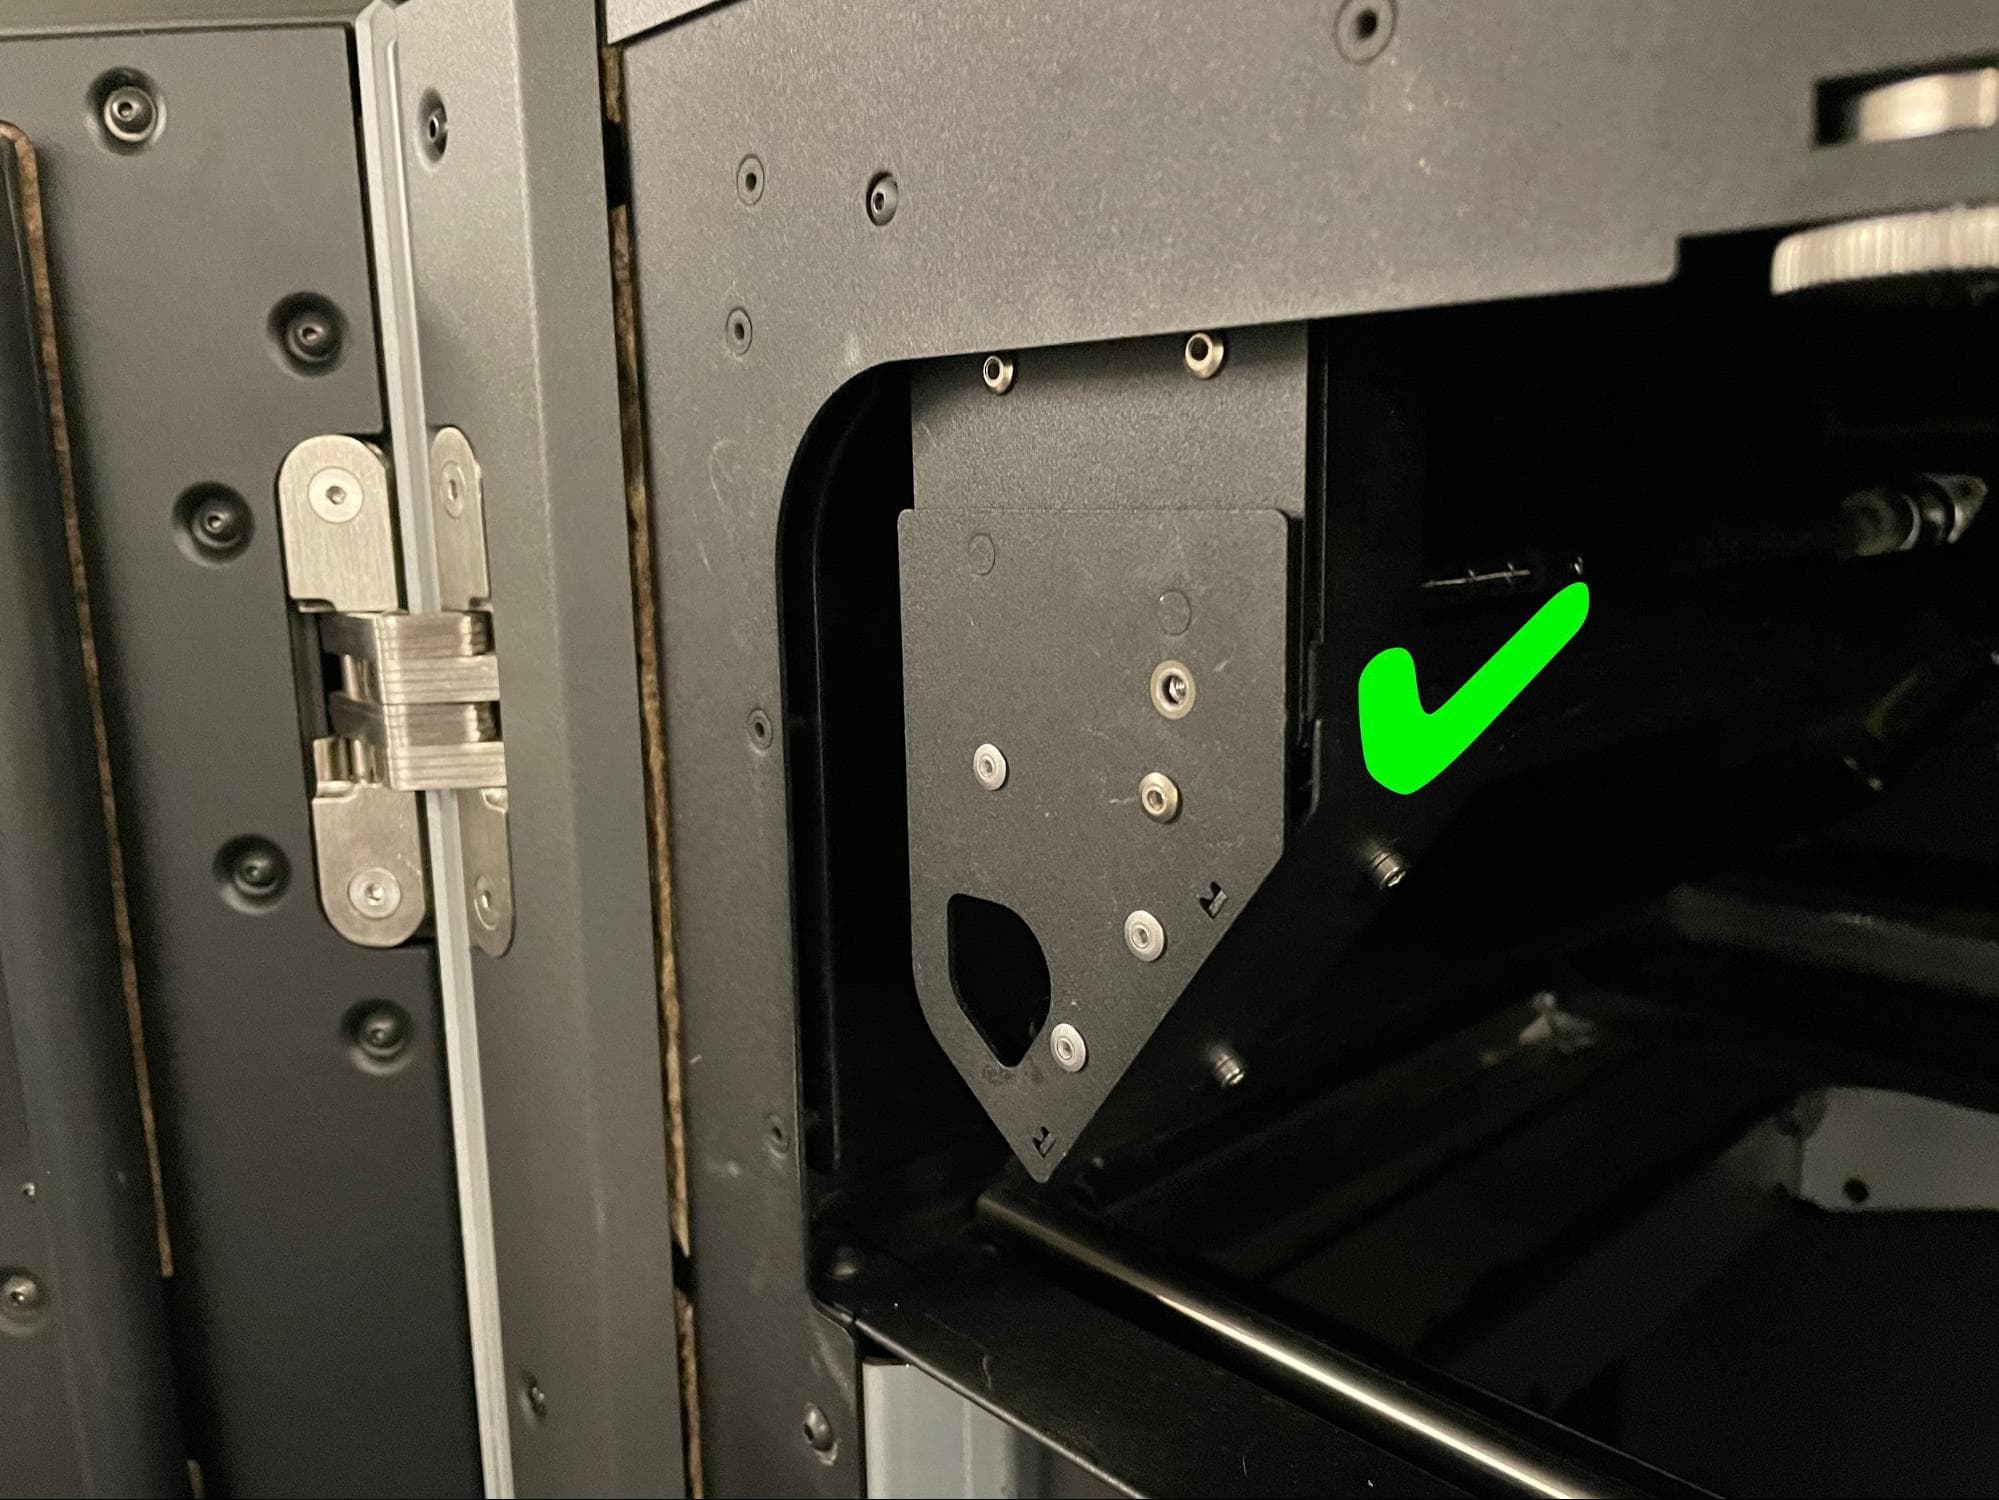
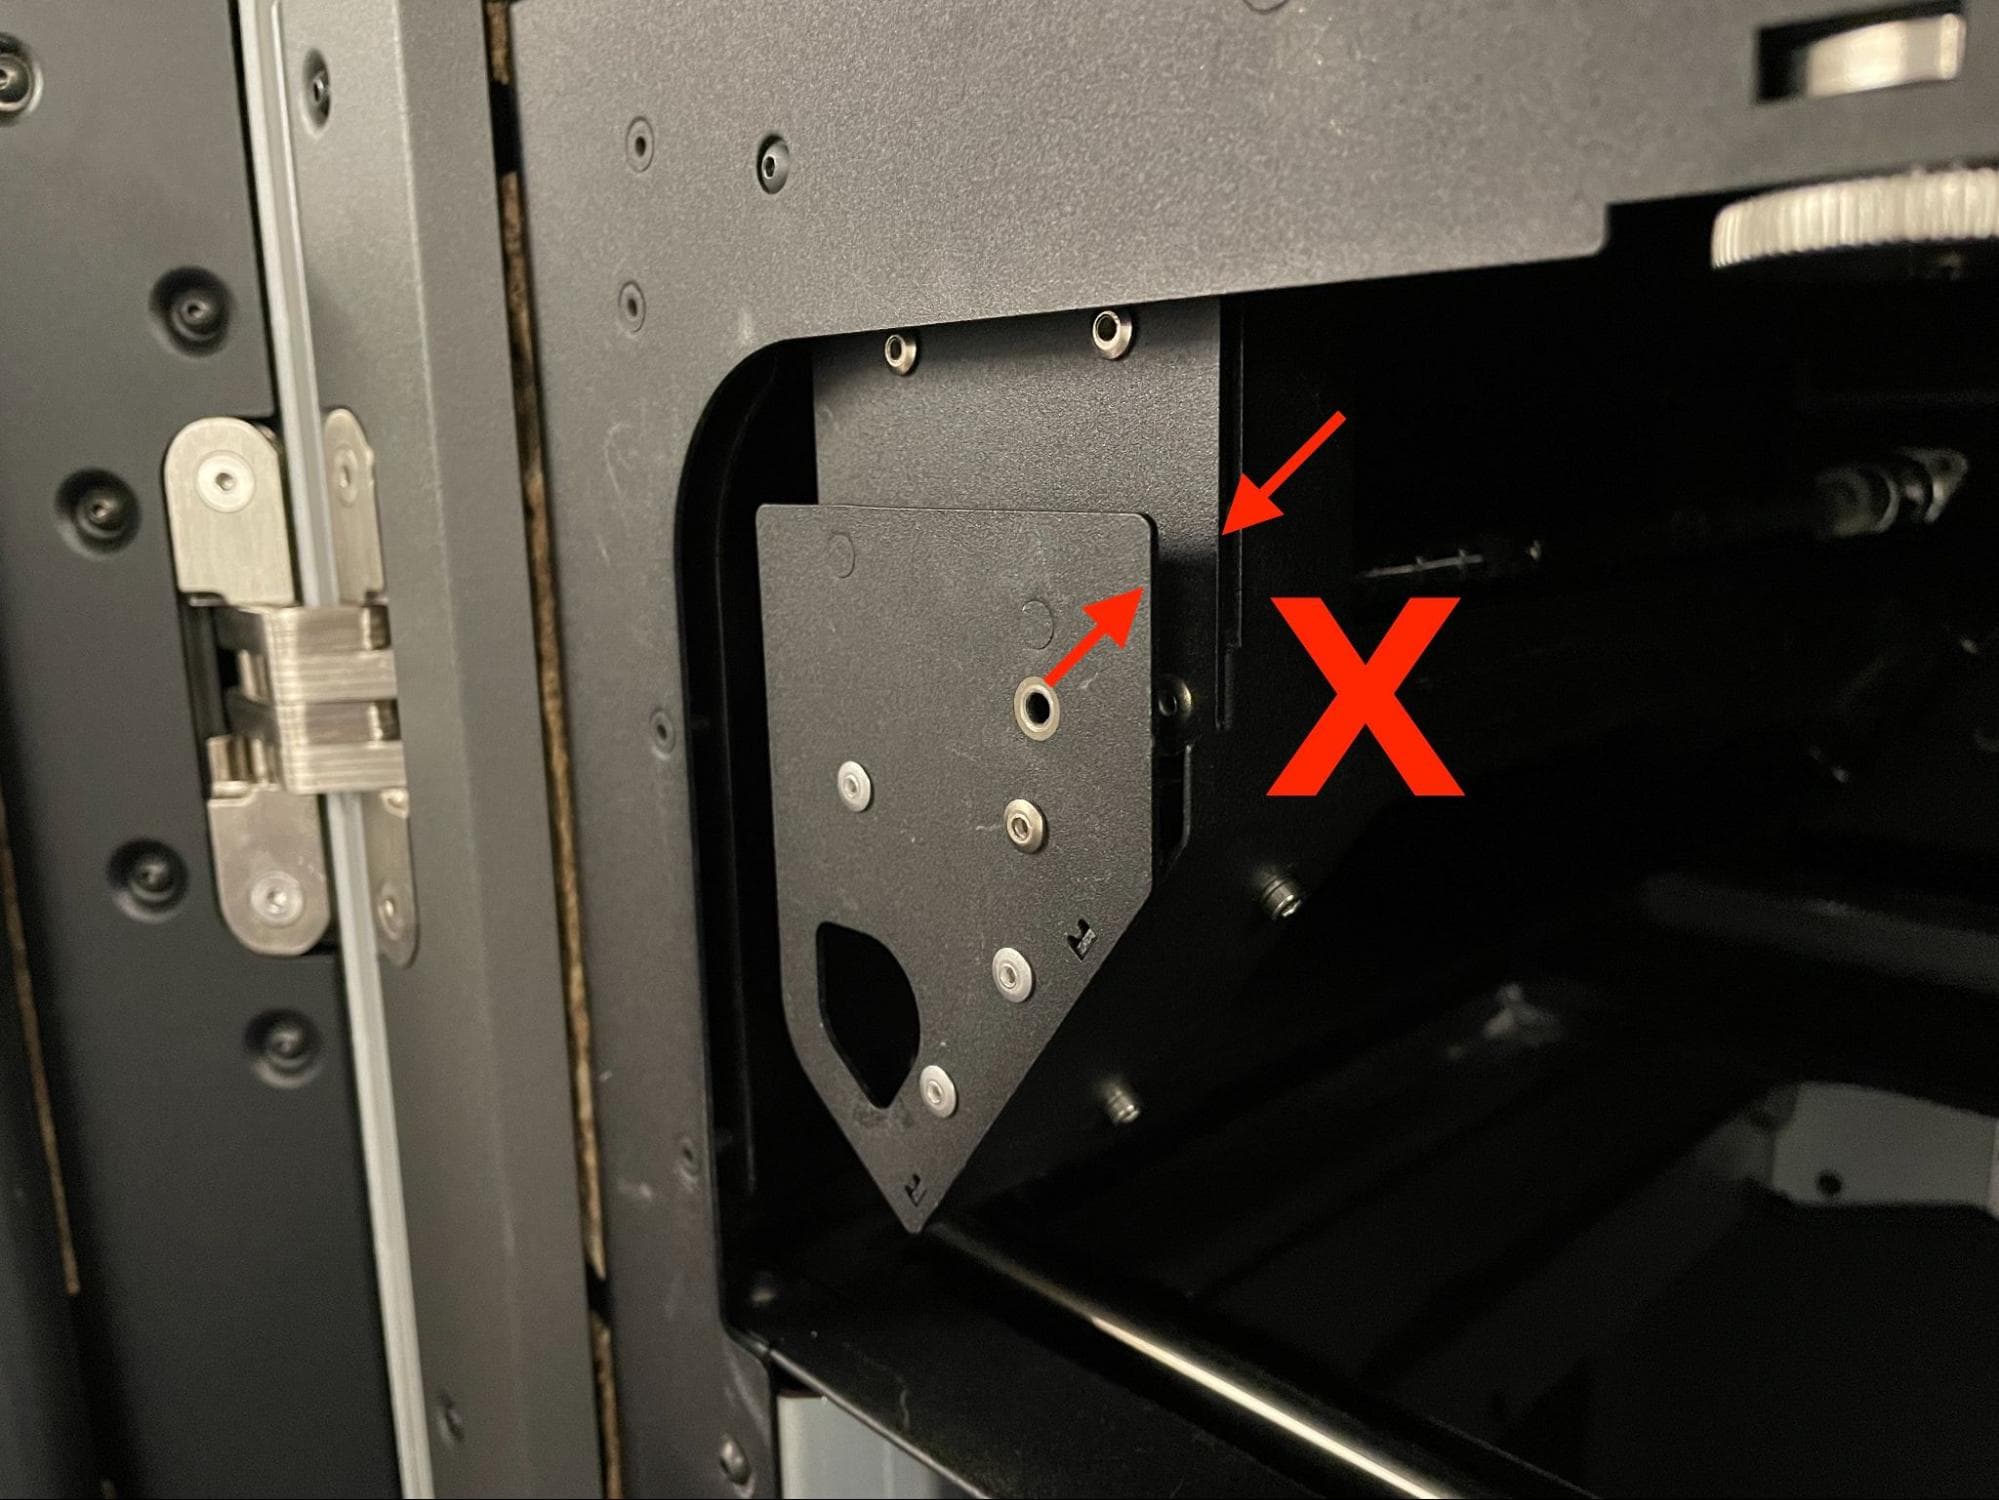
Push the spatial filter along the rails towards the back of the printer. Ensure that the alignment pins on the back of the front face of the spatial filter go into the corresponding holes in the lamp frame. The front of the spatial filter sits flush against the front of the lamp frame when it is properly installed.
Thread the 8.0 mm M3 cap screw into the screw hole in the front of the spatial filter. Tighten the screw with a 2.5 mm hex driver until finger tight.
Finalizing the repair
Overview: After replacing the quartz tube heater, perform final checks.
Step 1: Insert the build chamber
Insert the build chamber into the printer. Close the build chamber latch and connect the build chamber plug to the machine. Close the print er door.
Step 2: Power on the printer
Connect the power cable to the printer and the power supply. The printer initializes.
Step 3: Test the repair
Start a print. Monitor the printer to ensure that it reaches its target temperature successfully. Contact Formlabs Support or your certified service provider to share the results of the procedure.