
Required supplies:
Formlabs:
- Replacement Fuse Blast door window (RP-FB-WIND-01)
- T20 Torx driver (provided with the Fuse Blast)
- 7 mm nut driver (provided with the Fuse Blast)
Third-party:
- Foot stool or step ladder (recommended)

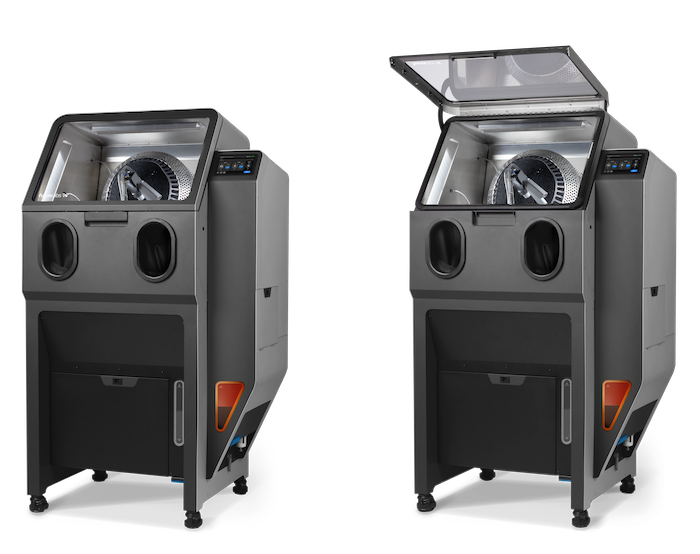
Required supplies:
Formlabs:
Third-party:
Estimated time: 20 minutes
Warning:
The Fuse Blast is designed to contain fine particulate matter from media blasting and SLS 3D printing. Always wear an N95 respiratory mask when performing maintenance on a Fuse Blast unit.
Preparing the workspace
Overview: Prepare the Fuse Blast and a clean workspace for replacing the door window.
Step 1: Prepare the workspace
Clear a workspace. Ensure that the workspace is well-ventilated, level, and clean.
Step 2: Turn the chamber light on
Turn on the chamber light to improve visibility.
Removing the outer door window panel
Overview: Remove the outer door window panel that secures the window to the door drame.
Step 1: Remove the outer door window panel mounting screws
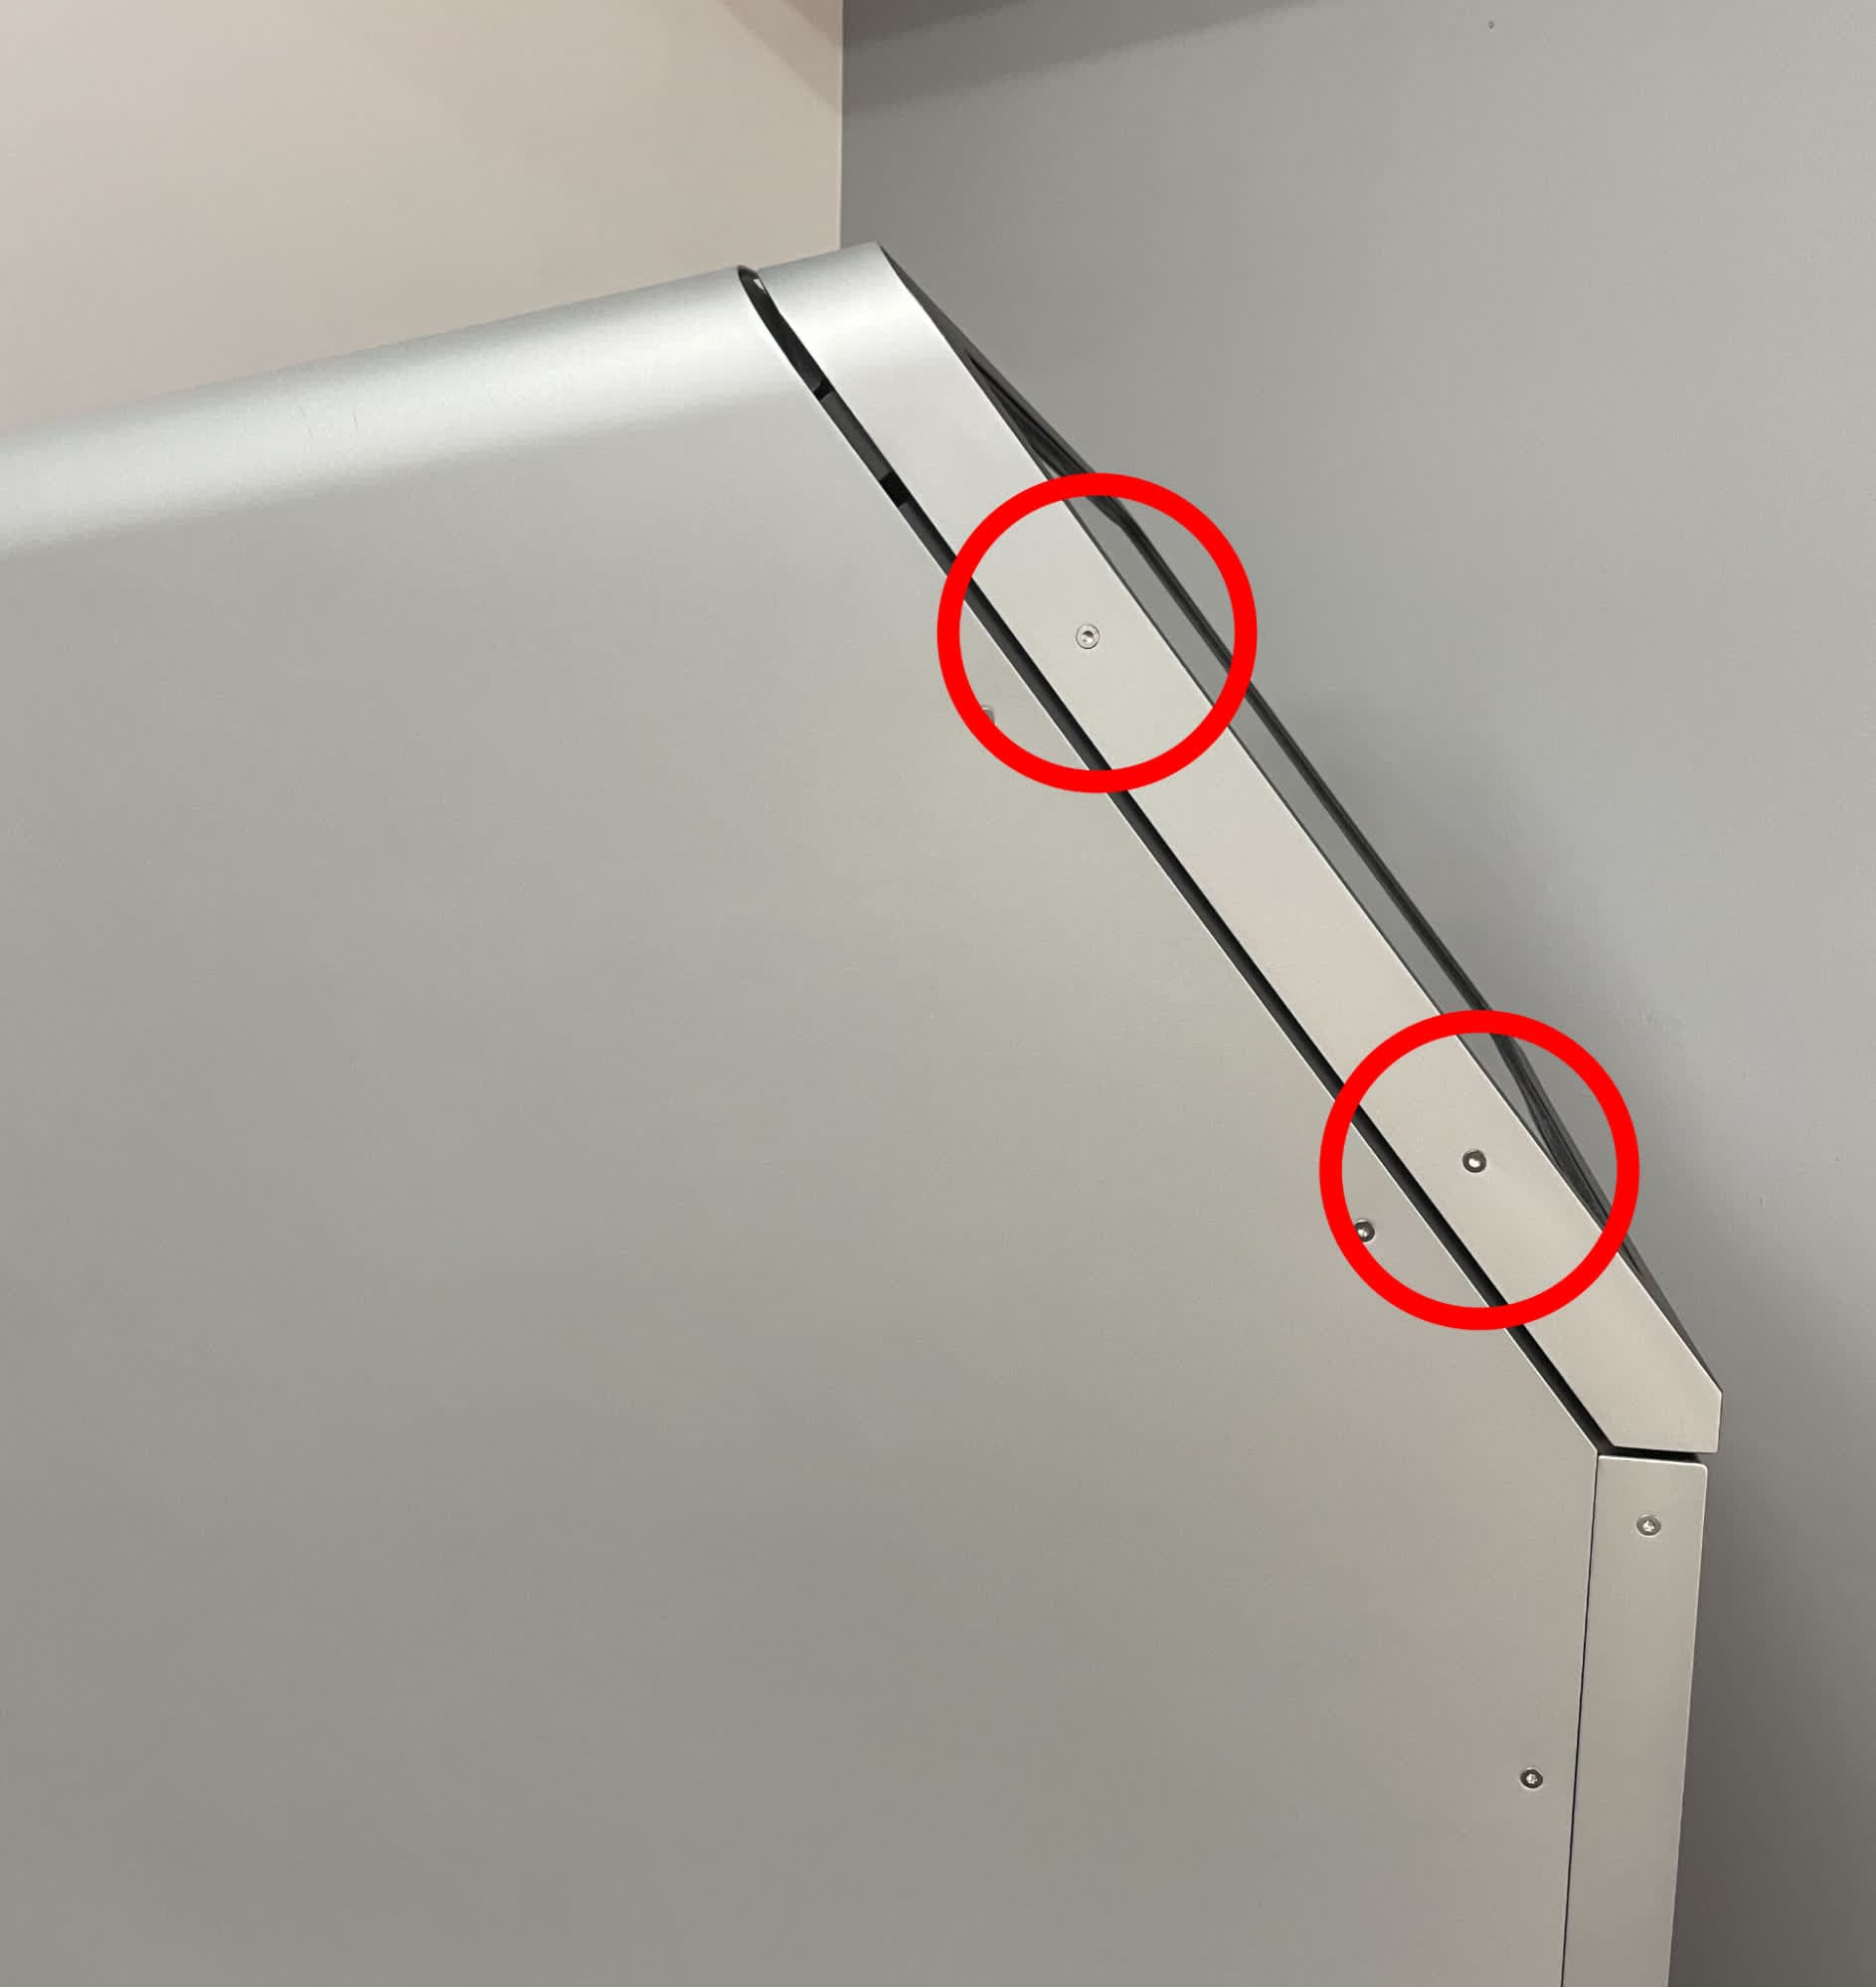
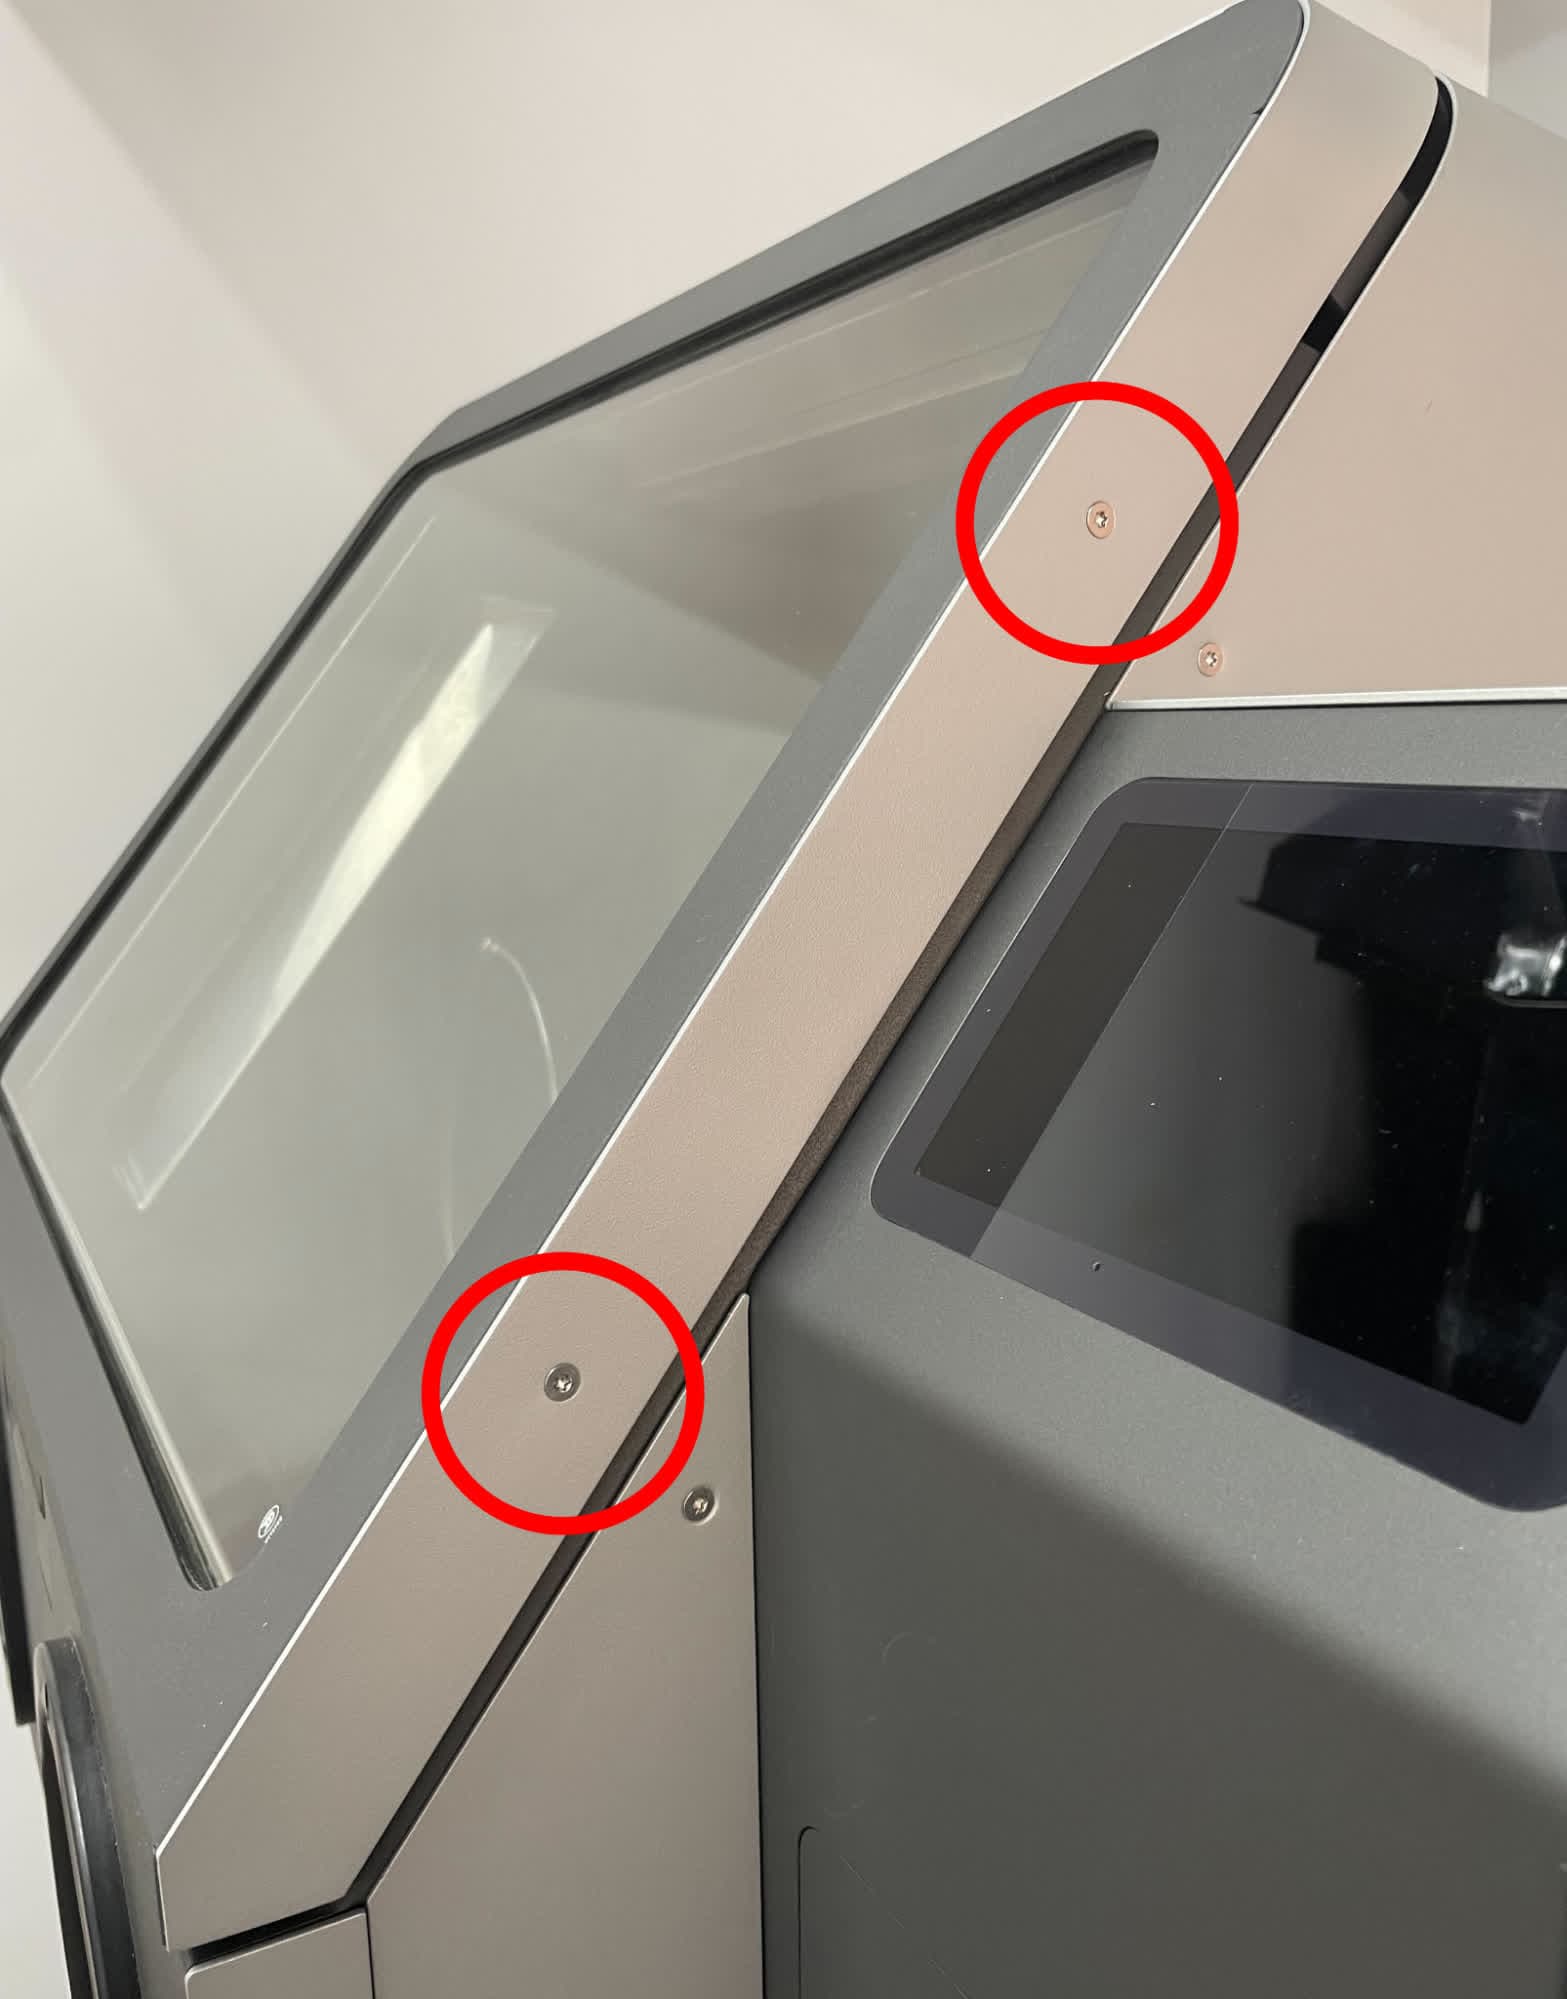
The outer door window panel is partially secured to the door frame with four screws: two on the left side of the door and two on the right. Using a T20 Torx driver, loosen and remove the four T20 screws from the blast chamber door. Set the screws aside.
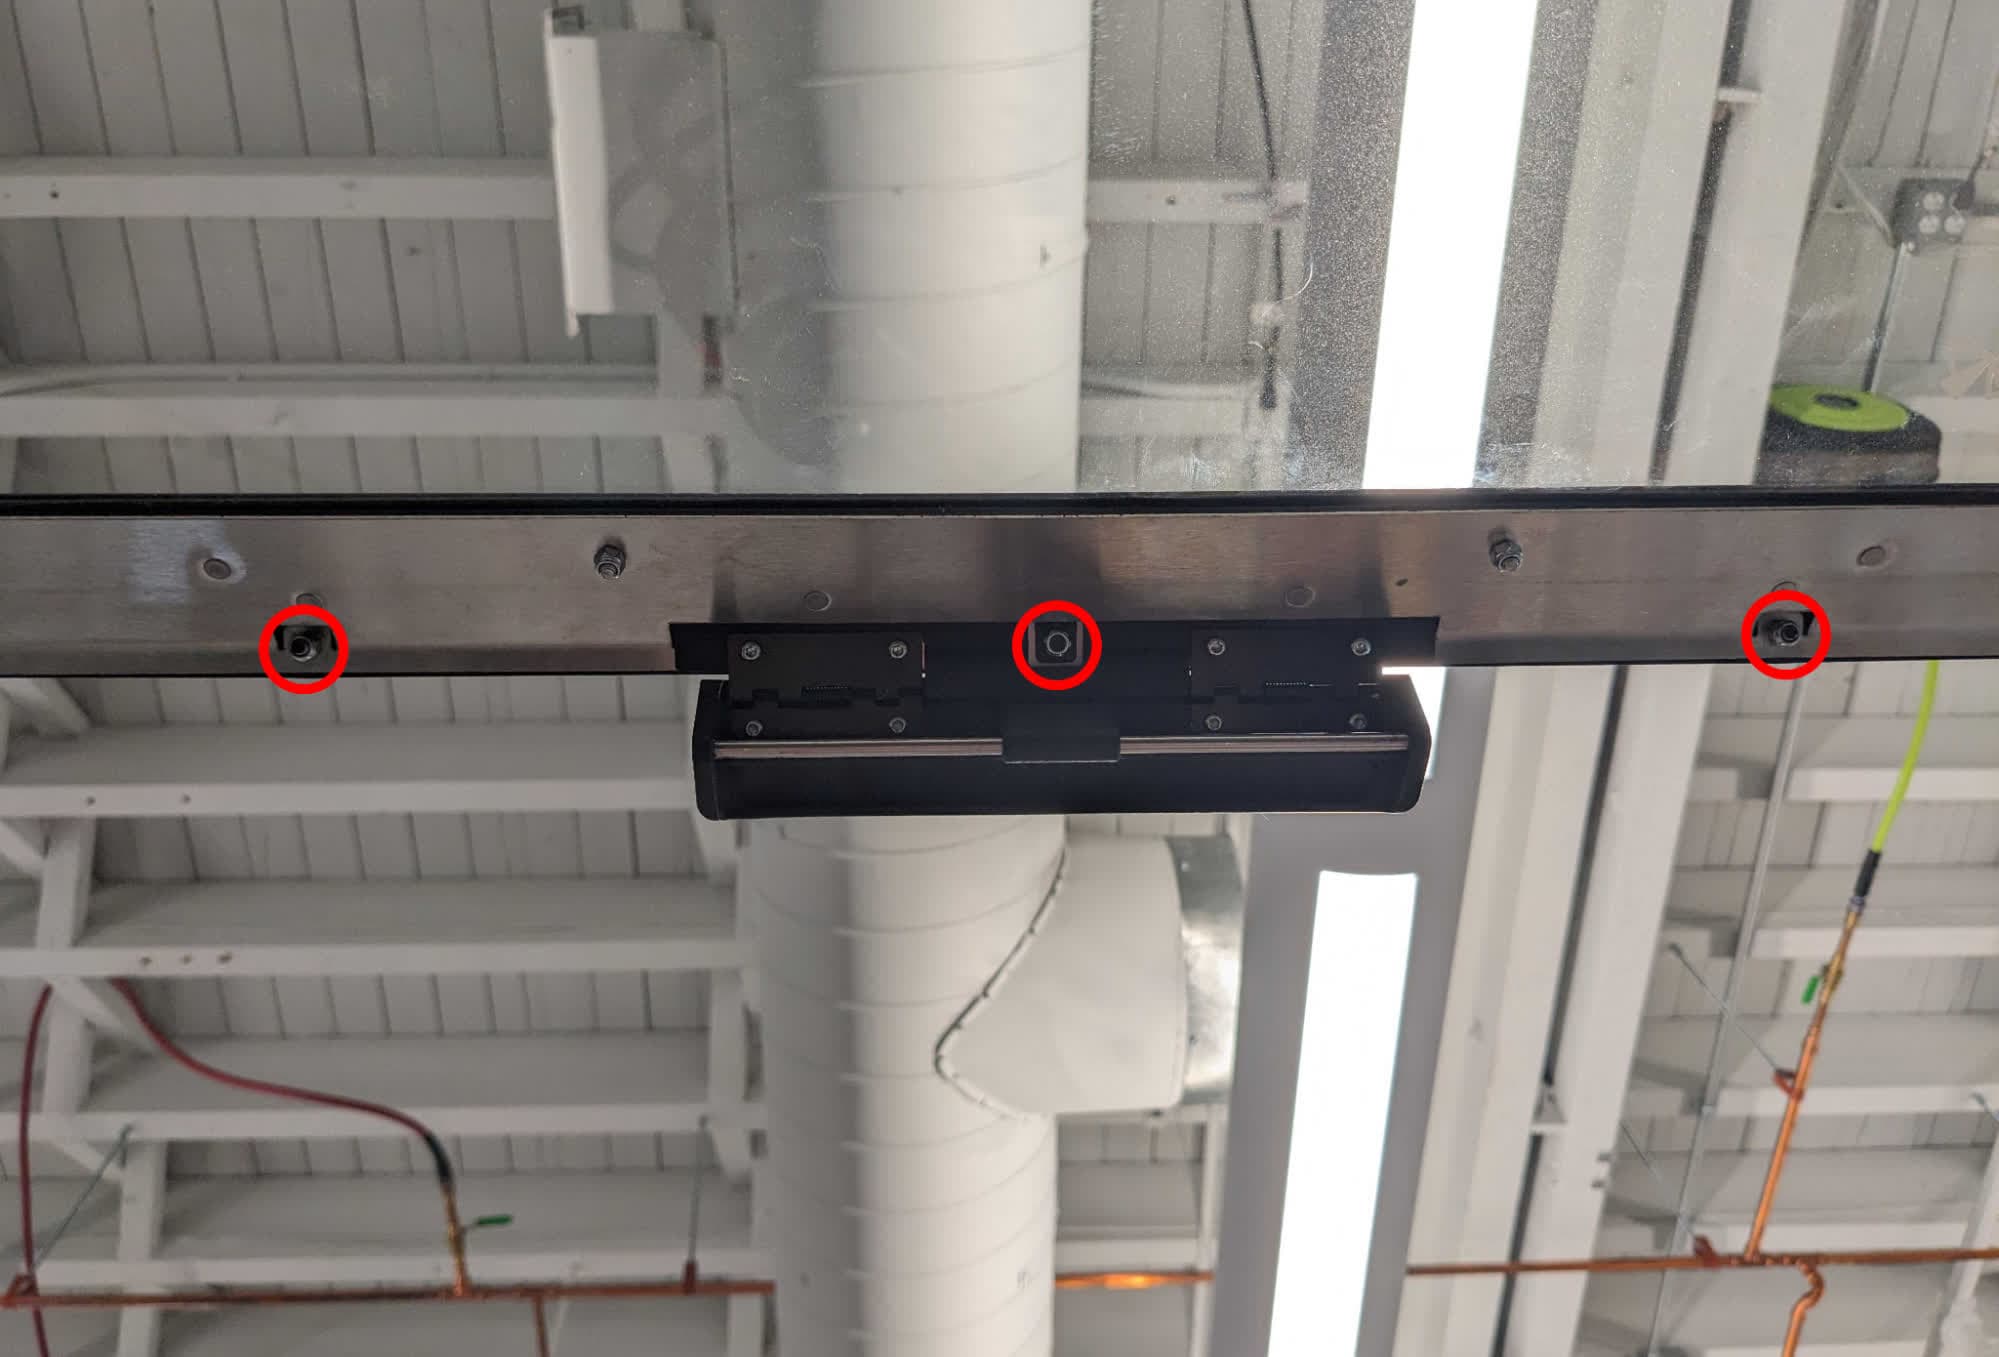
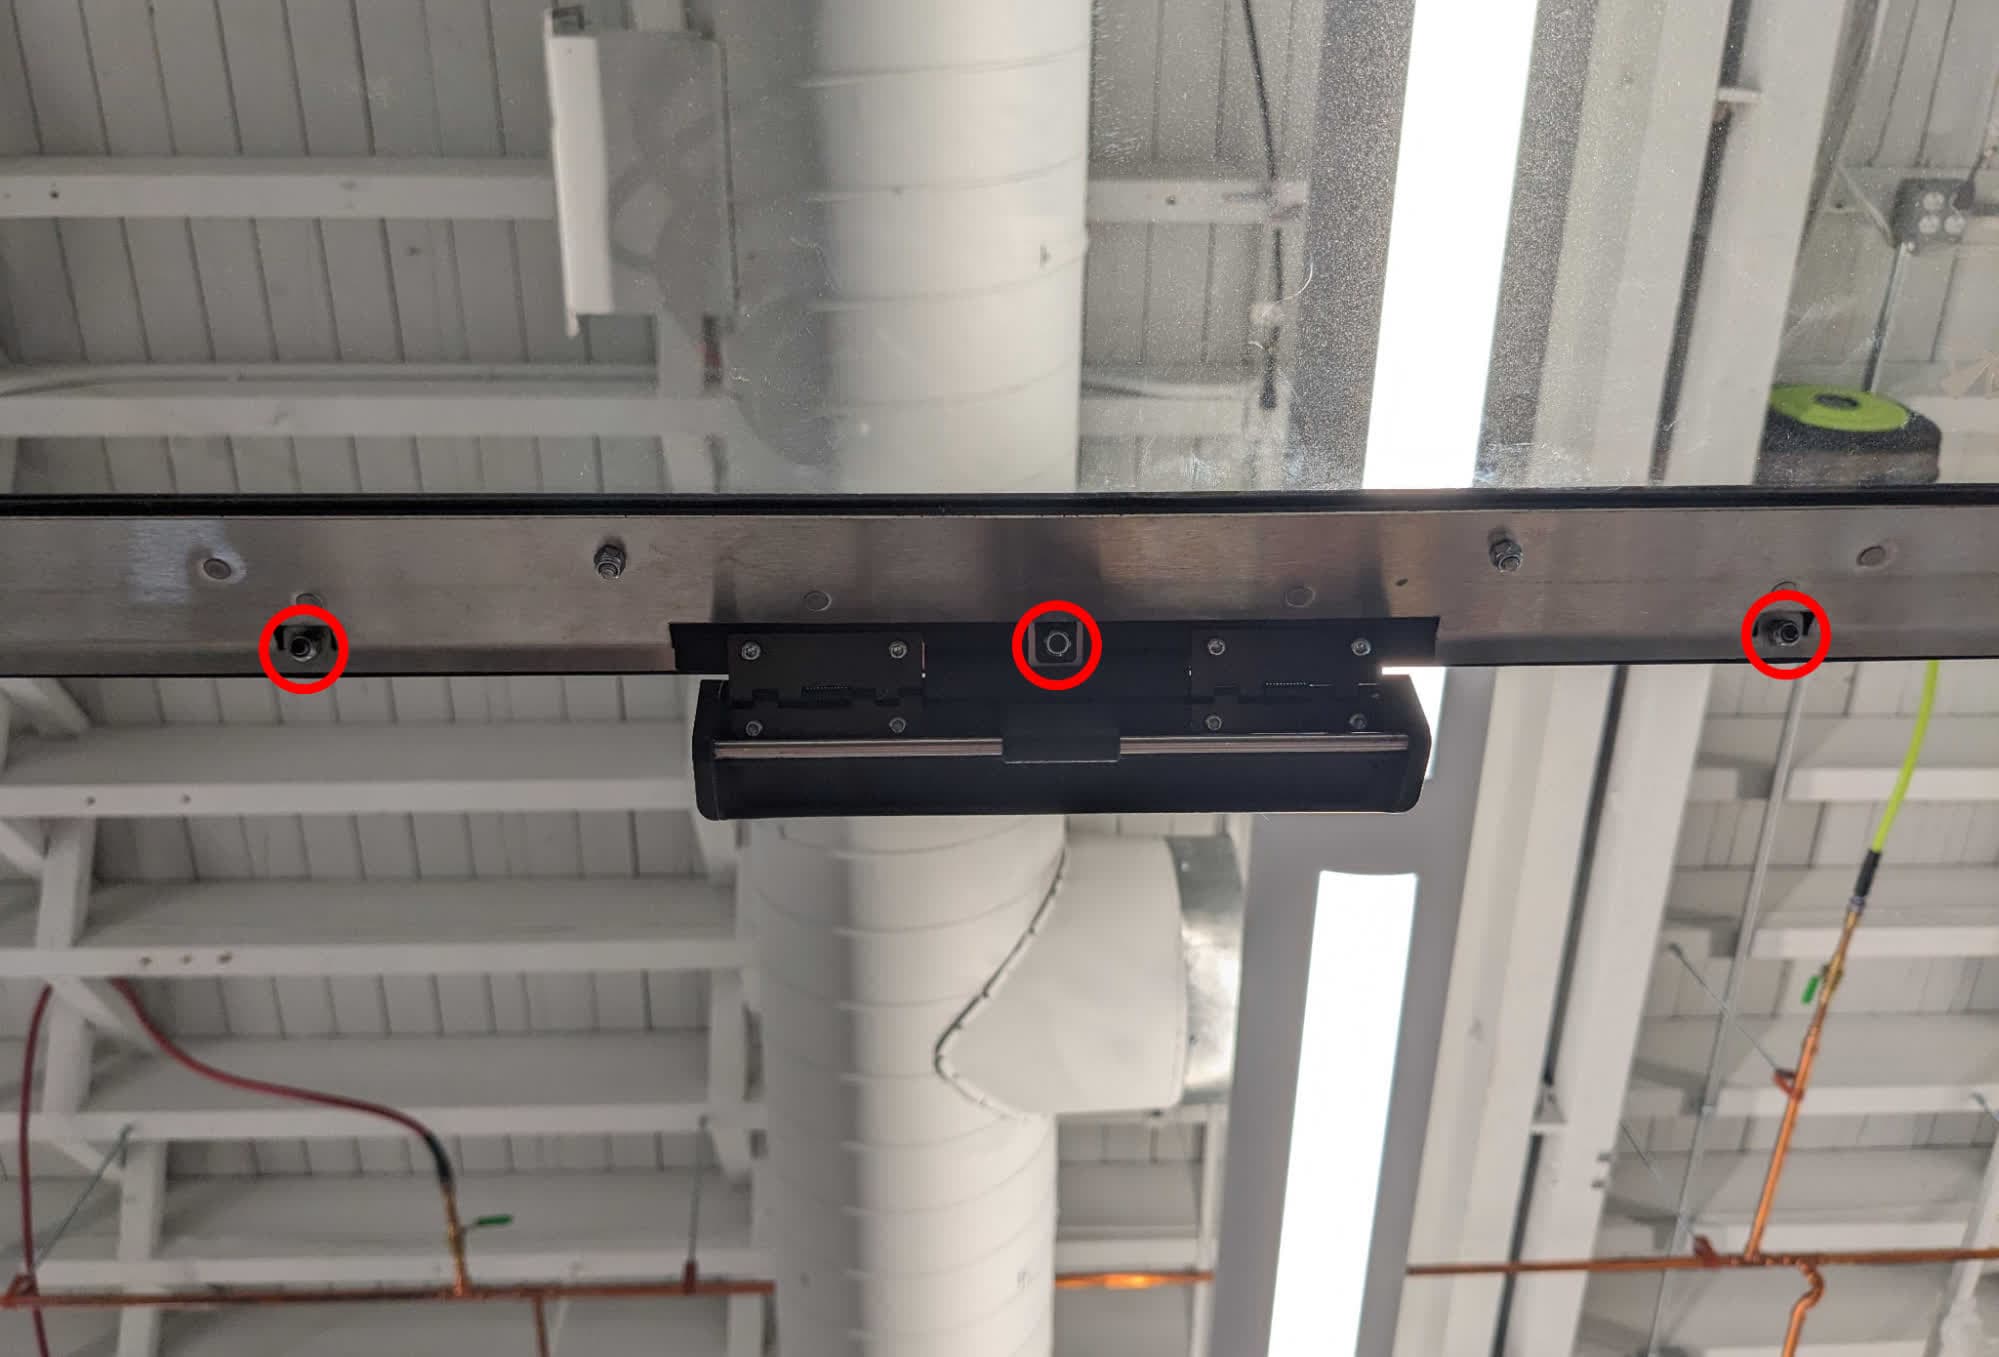
The outer door window panel is also secured to the door frame with three nuts on the inside of the door, near the latch. Open the chamber door. Using a 7mm nut driver, remove the three 7 mm hex nuts from the inside of the door frame.
Step 3: Remove the outer door window panel
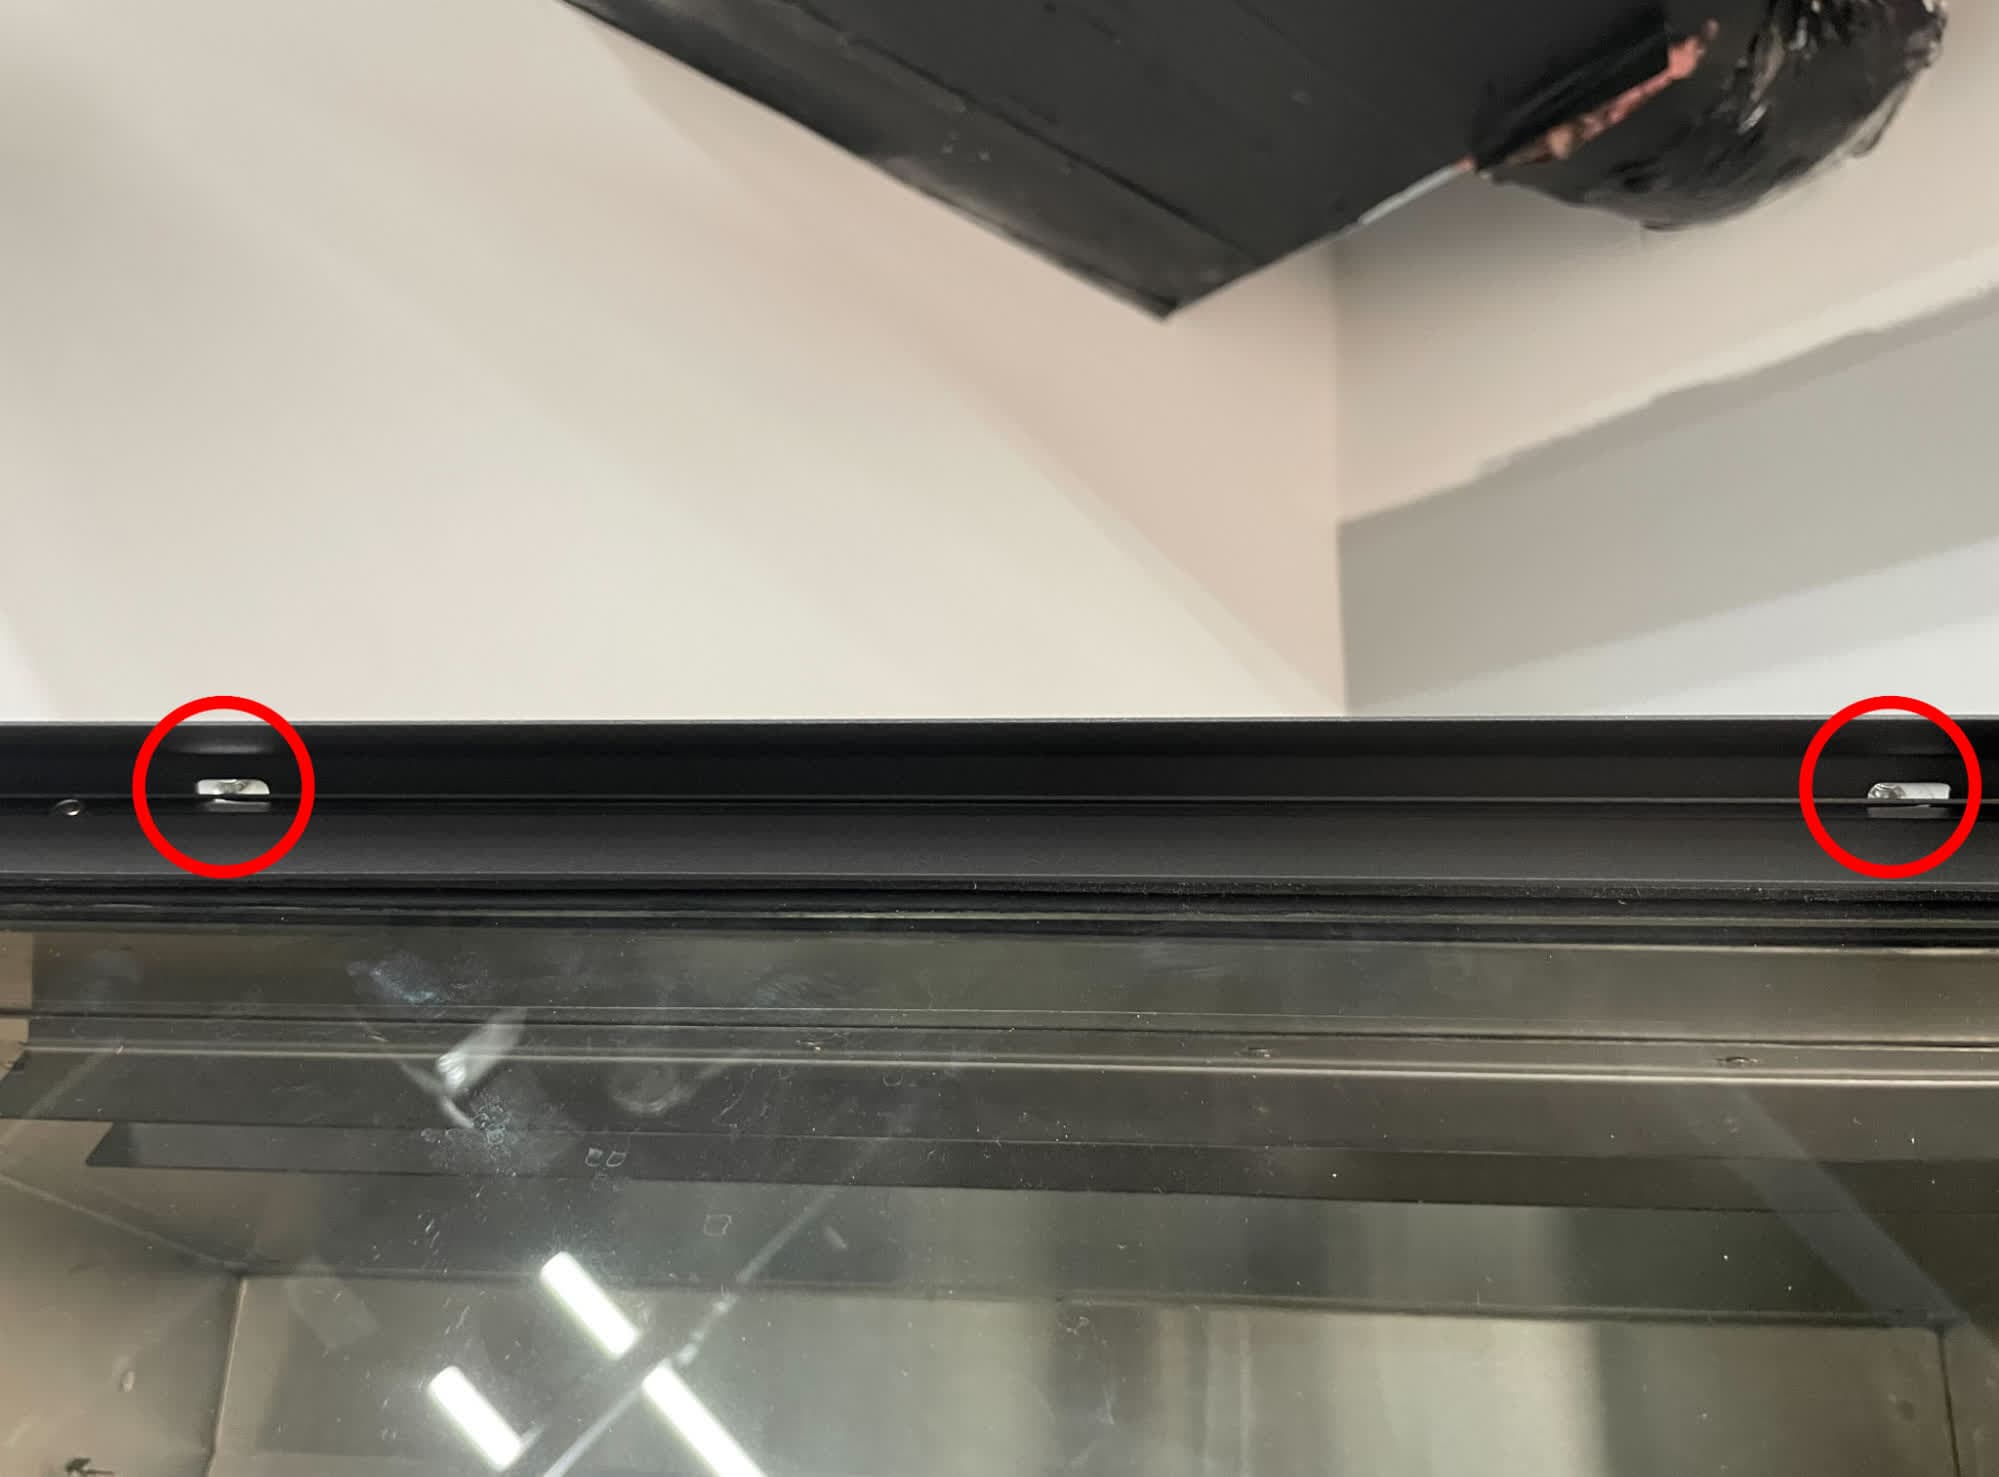
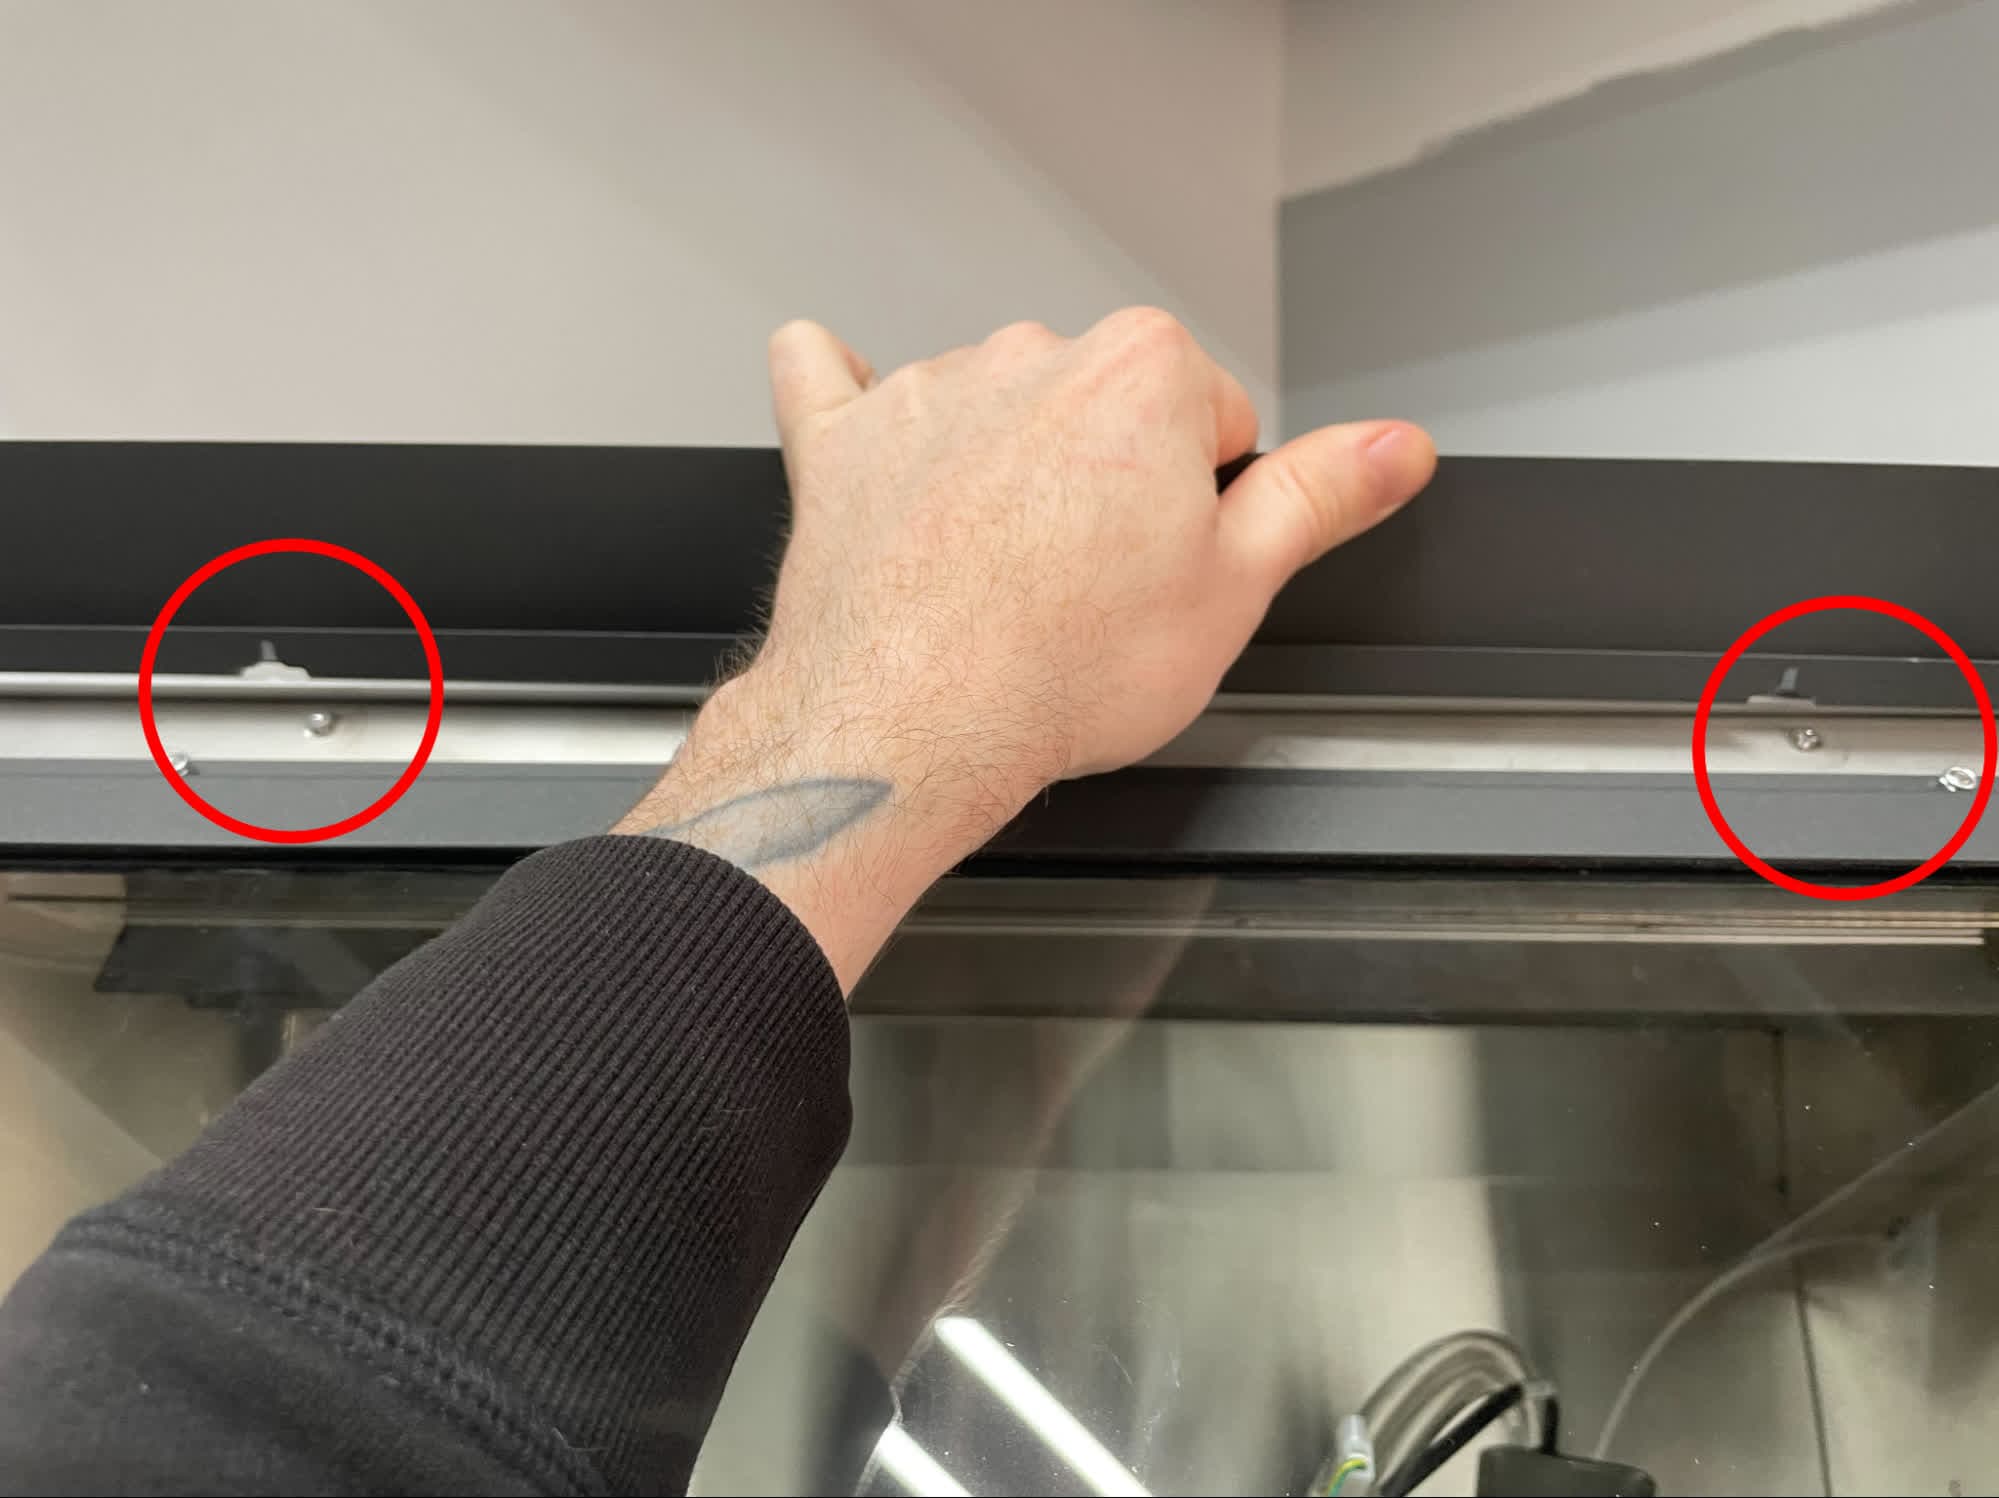
With the chamber door still open, tilt the outer door window panel upwards. It should come free from the front studs first, then the locating features on top. Remove the panel from the Fuse Blast and set it aside.
Removing the inner door window panel and door window
Overview: After removing the outer door window panel, remove the original inner panel and window.
Step 1: Remove the inner door window panel mounting nuts
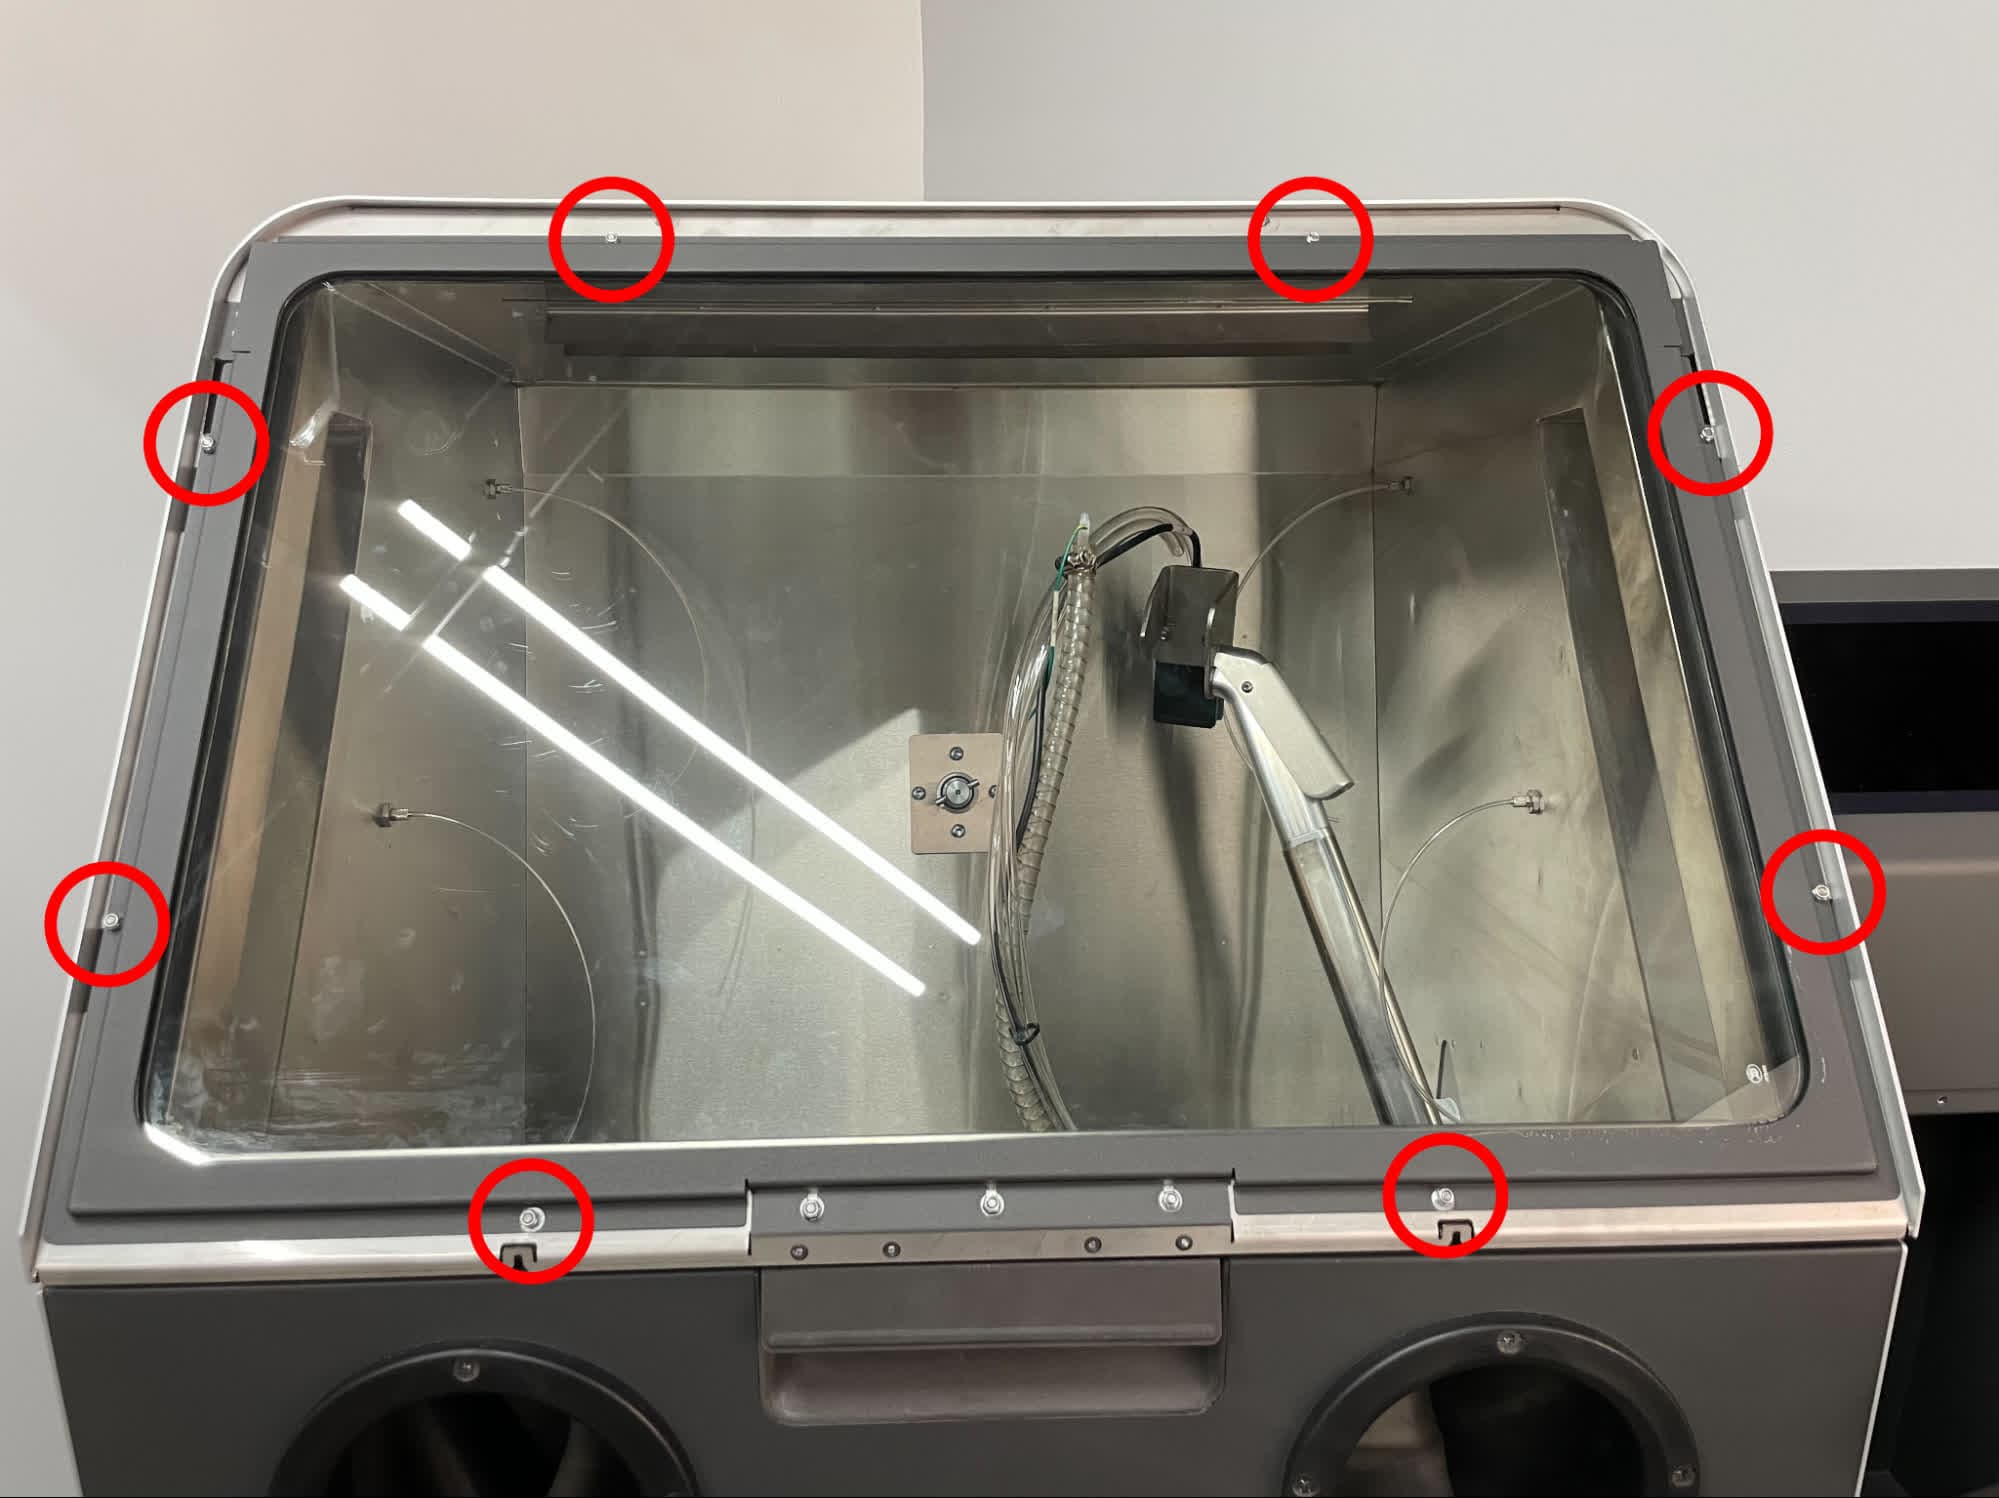
Close the chamber door. Using a 7 mm nut driver, remove the eight 7 mm hex nuts securing the inner door window panel to the window frame.
Step 2: Remove the inner door window panel
Remove the inner door window panel and set aside.
Step 3: Remove the door window
Remove the door window and set aside for disposal. The door window is very fragile. Take care when removing and replacing.
Installing the replacement door window and inner door window panel
Overview: Mount and secure the replacement door window and inner door window panel.
Step 1: Mount the new door window
Ensure the window gasket is clean and undamaged. If necessary, wipe any powder or media off of the window gasket.
Place the replacement door window in the door frame, between the locating pins around the edge of the window. There will be excess space between the pins; the window can be set anywhere between the pins.
Step 2: Mount the inner door window panel
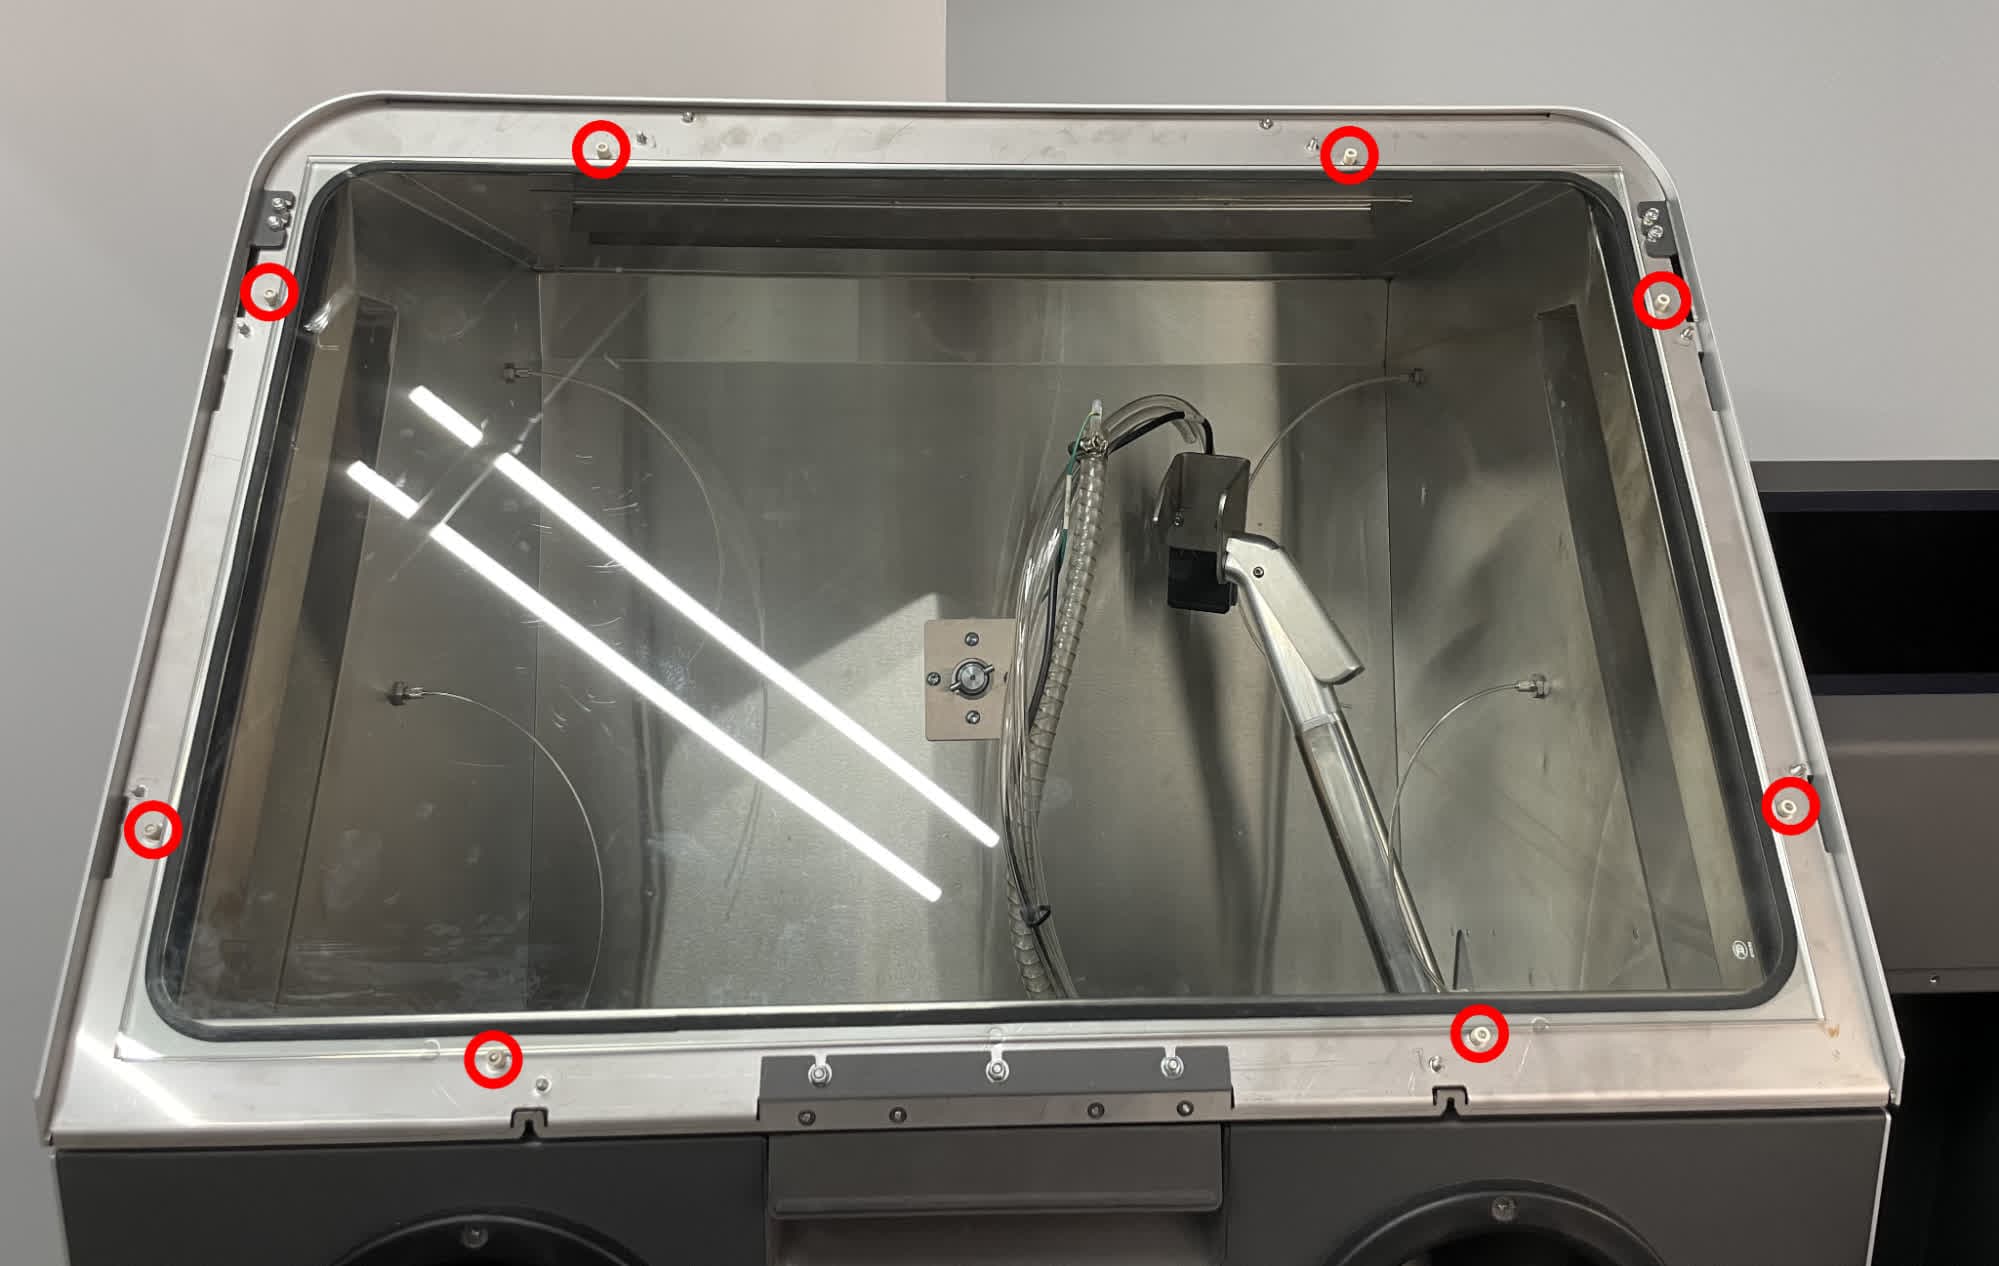
Place the inner door window panel over the window, aligning the holes in the panel with the threaded posts protruding from the door frame. Thread one 7 mm hex nut onto each of the eight posts, but do not tighten.
Step 3: Secure the inner door window panel
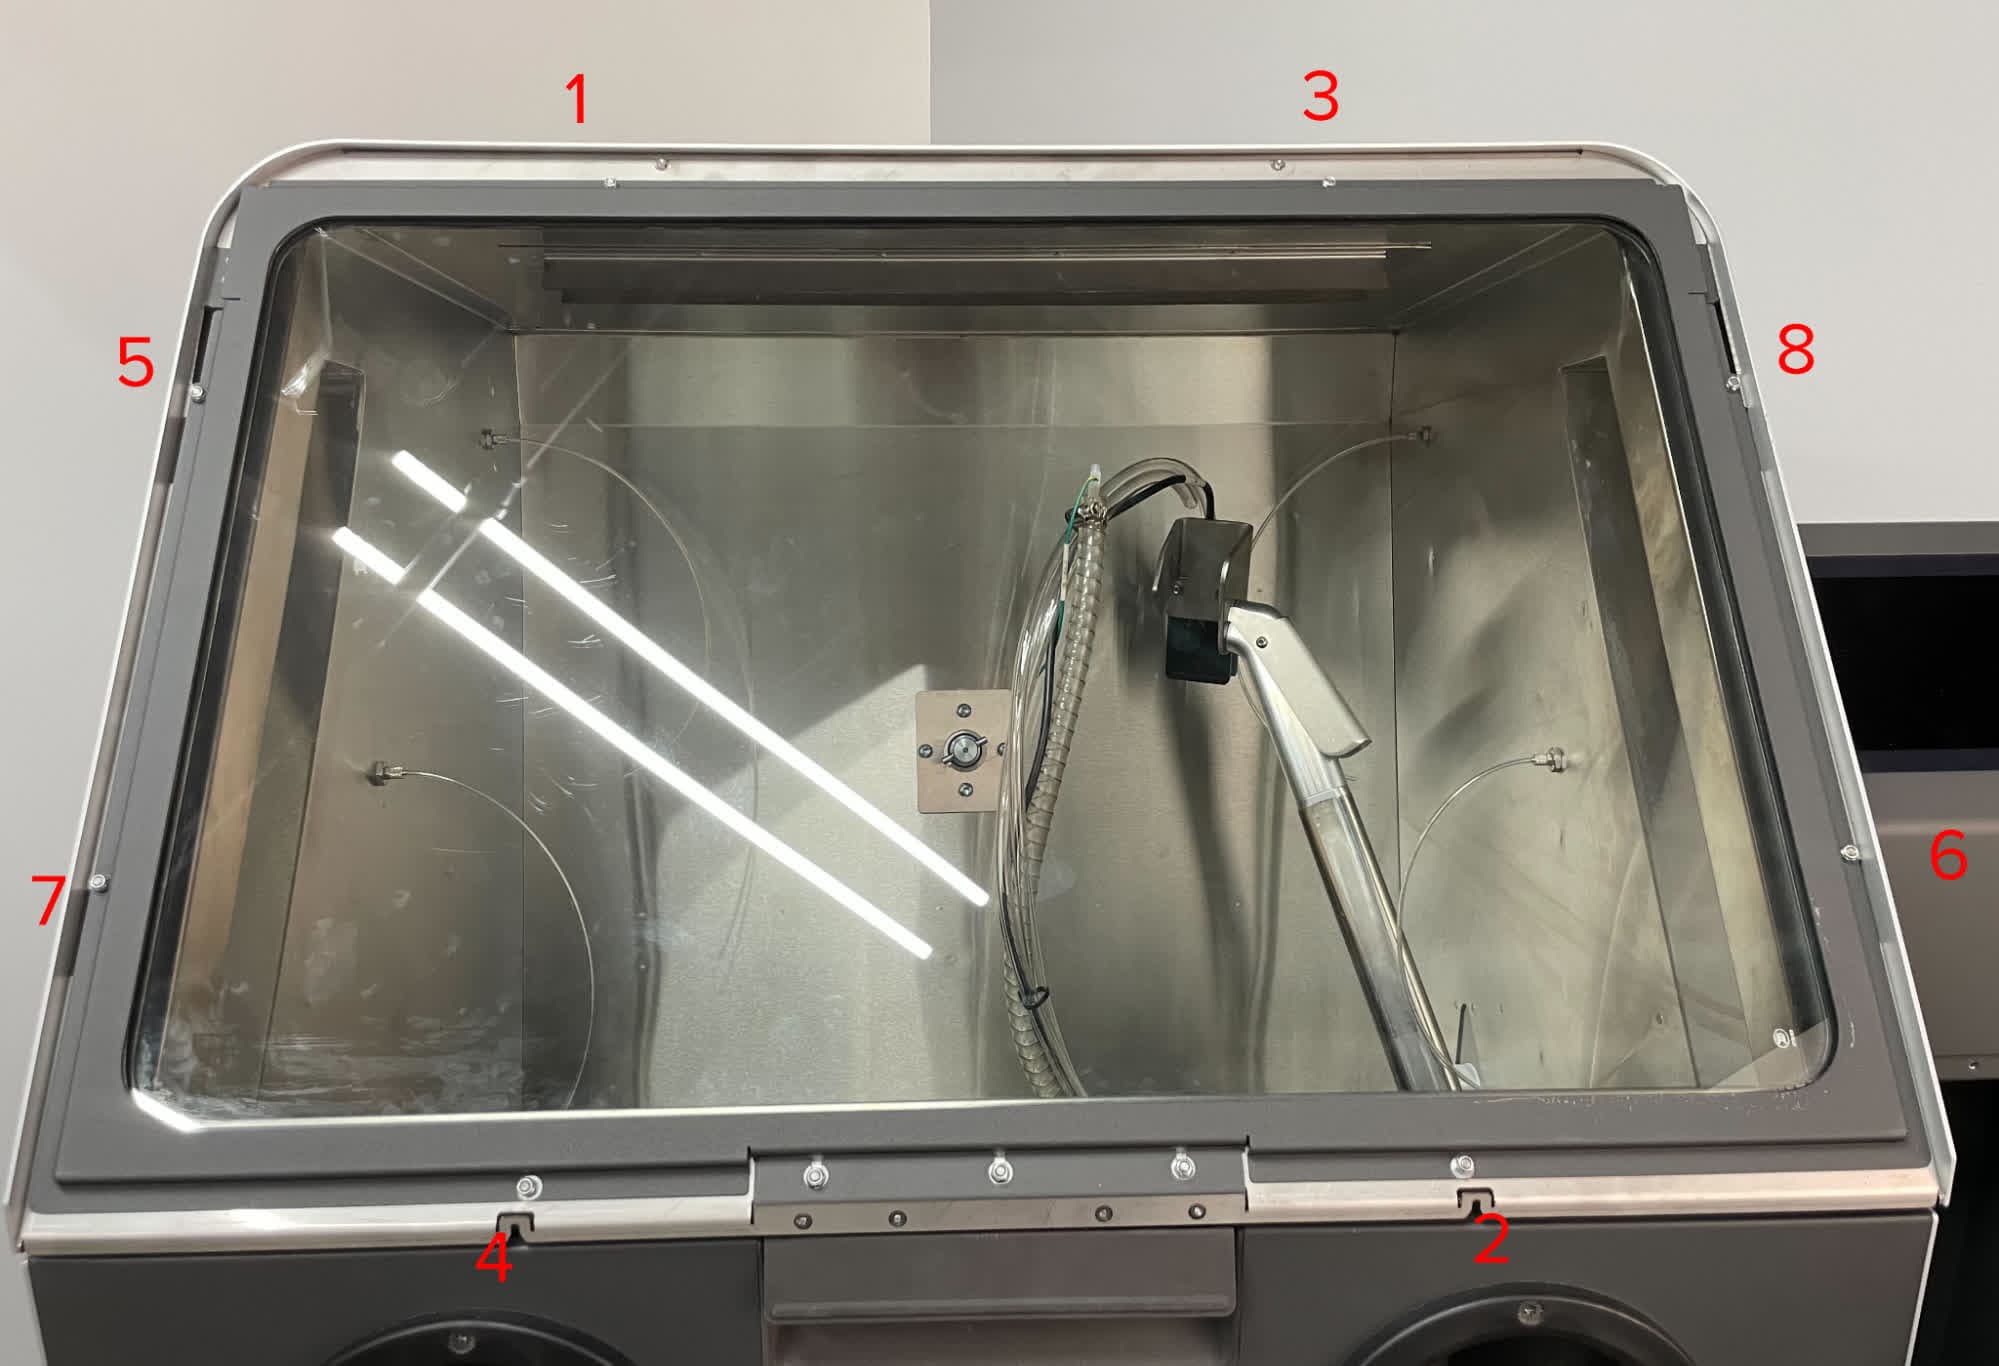
In order to apply even pressure to the door window, tighten the eight hex nuts a quarter turn at a time in a star pattern as shown here until firmly and evenly tightened.
Reinstalling the outer door window panel
Overview: After mounting and securing the new window, reinstall the outer door window panel over it.
Step 1: Mount the outer door window panel
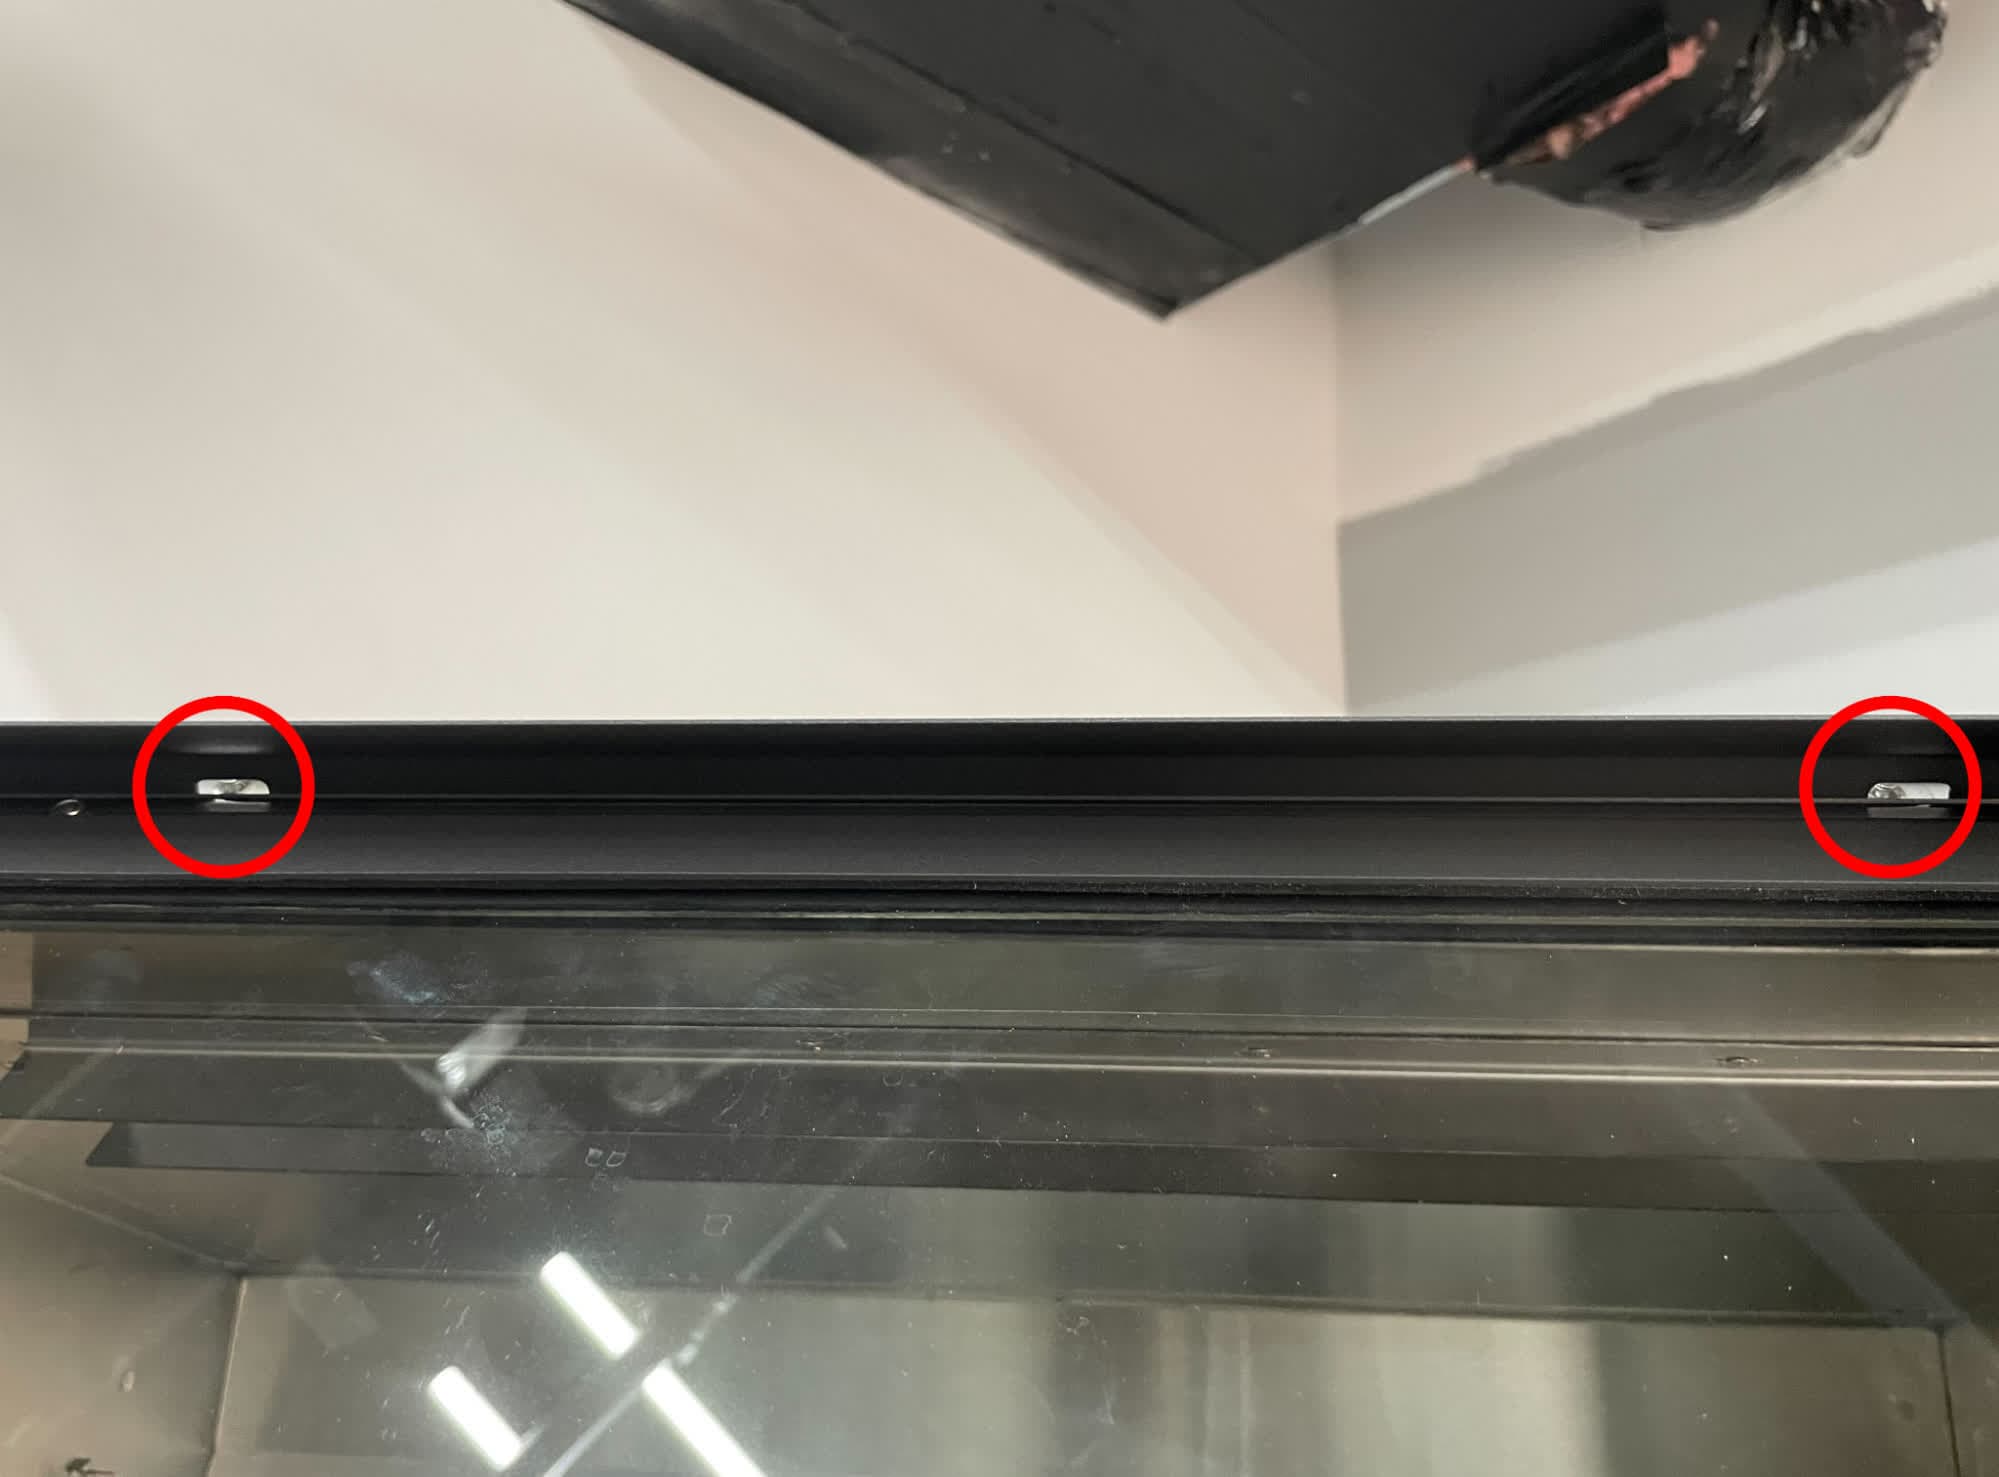
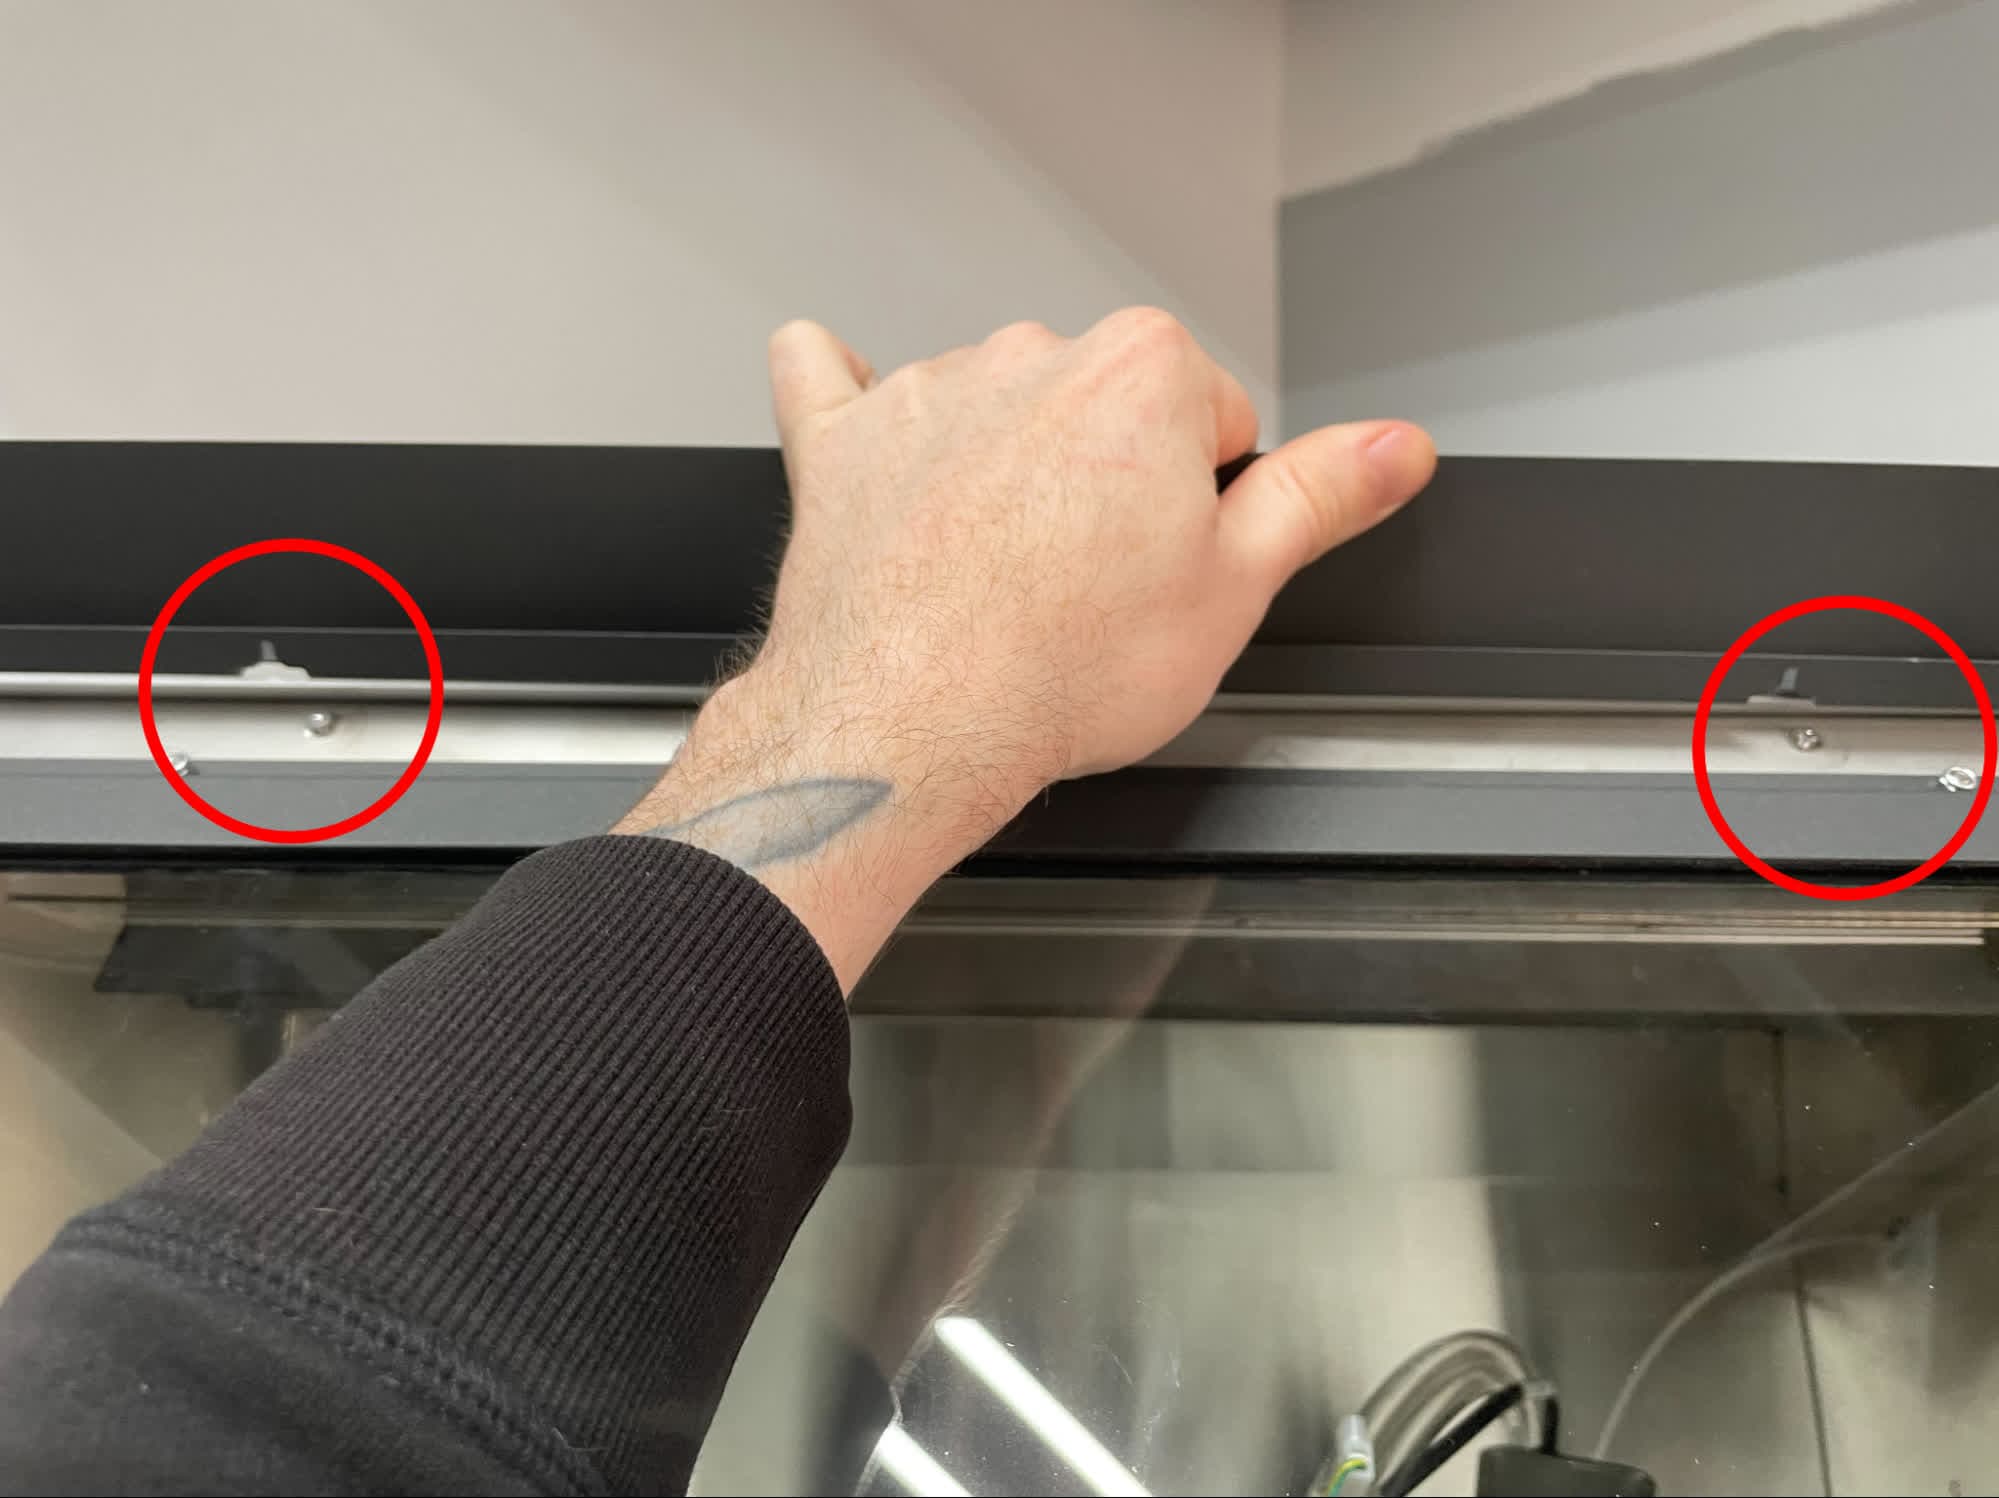
Place the outer door window panel around the edge of the door. Make sure that the locating features slide into the slots as shown. Guide the front studs in the outer door window panel into place.
Take care not to force the panel when replacing the panel. The panel should slide easily into the locating features on top, then the front studs should go into place.
Step 2: Begin securing the outer door window panel
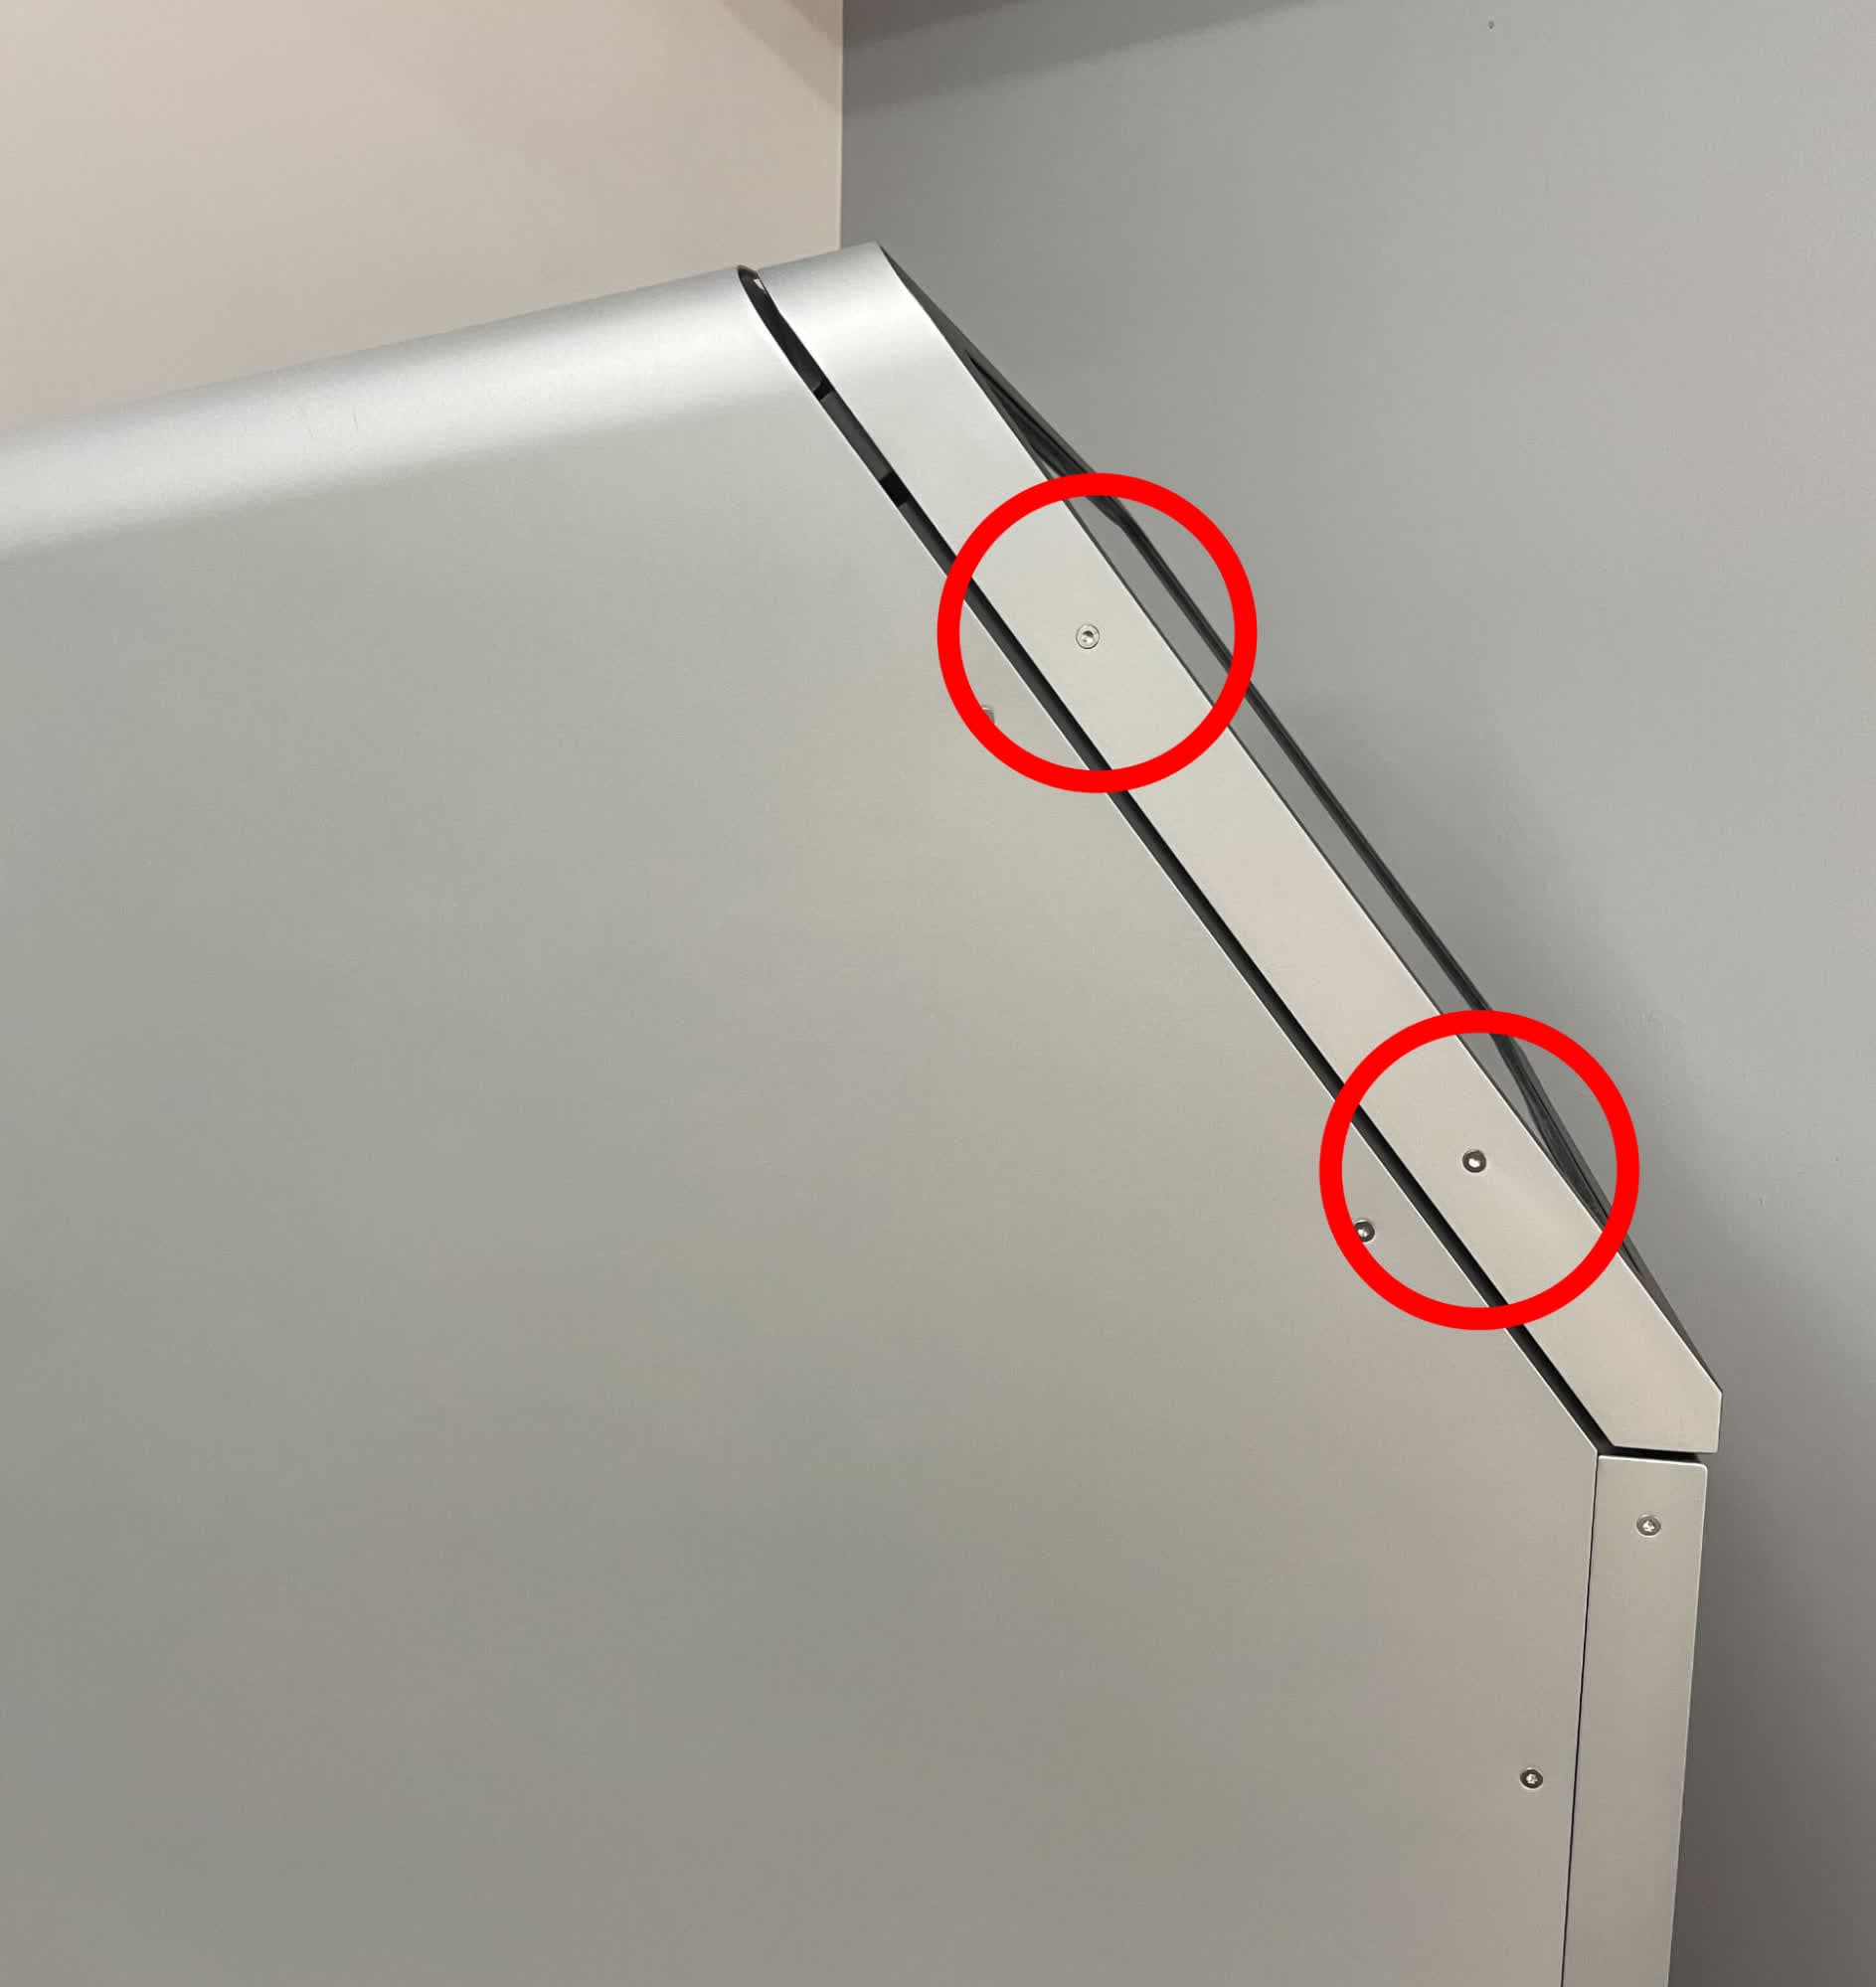
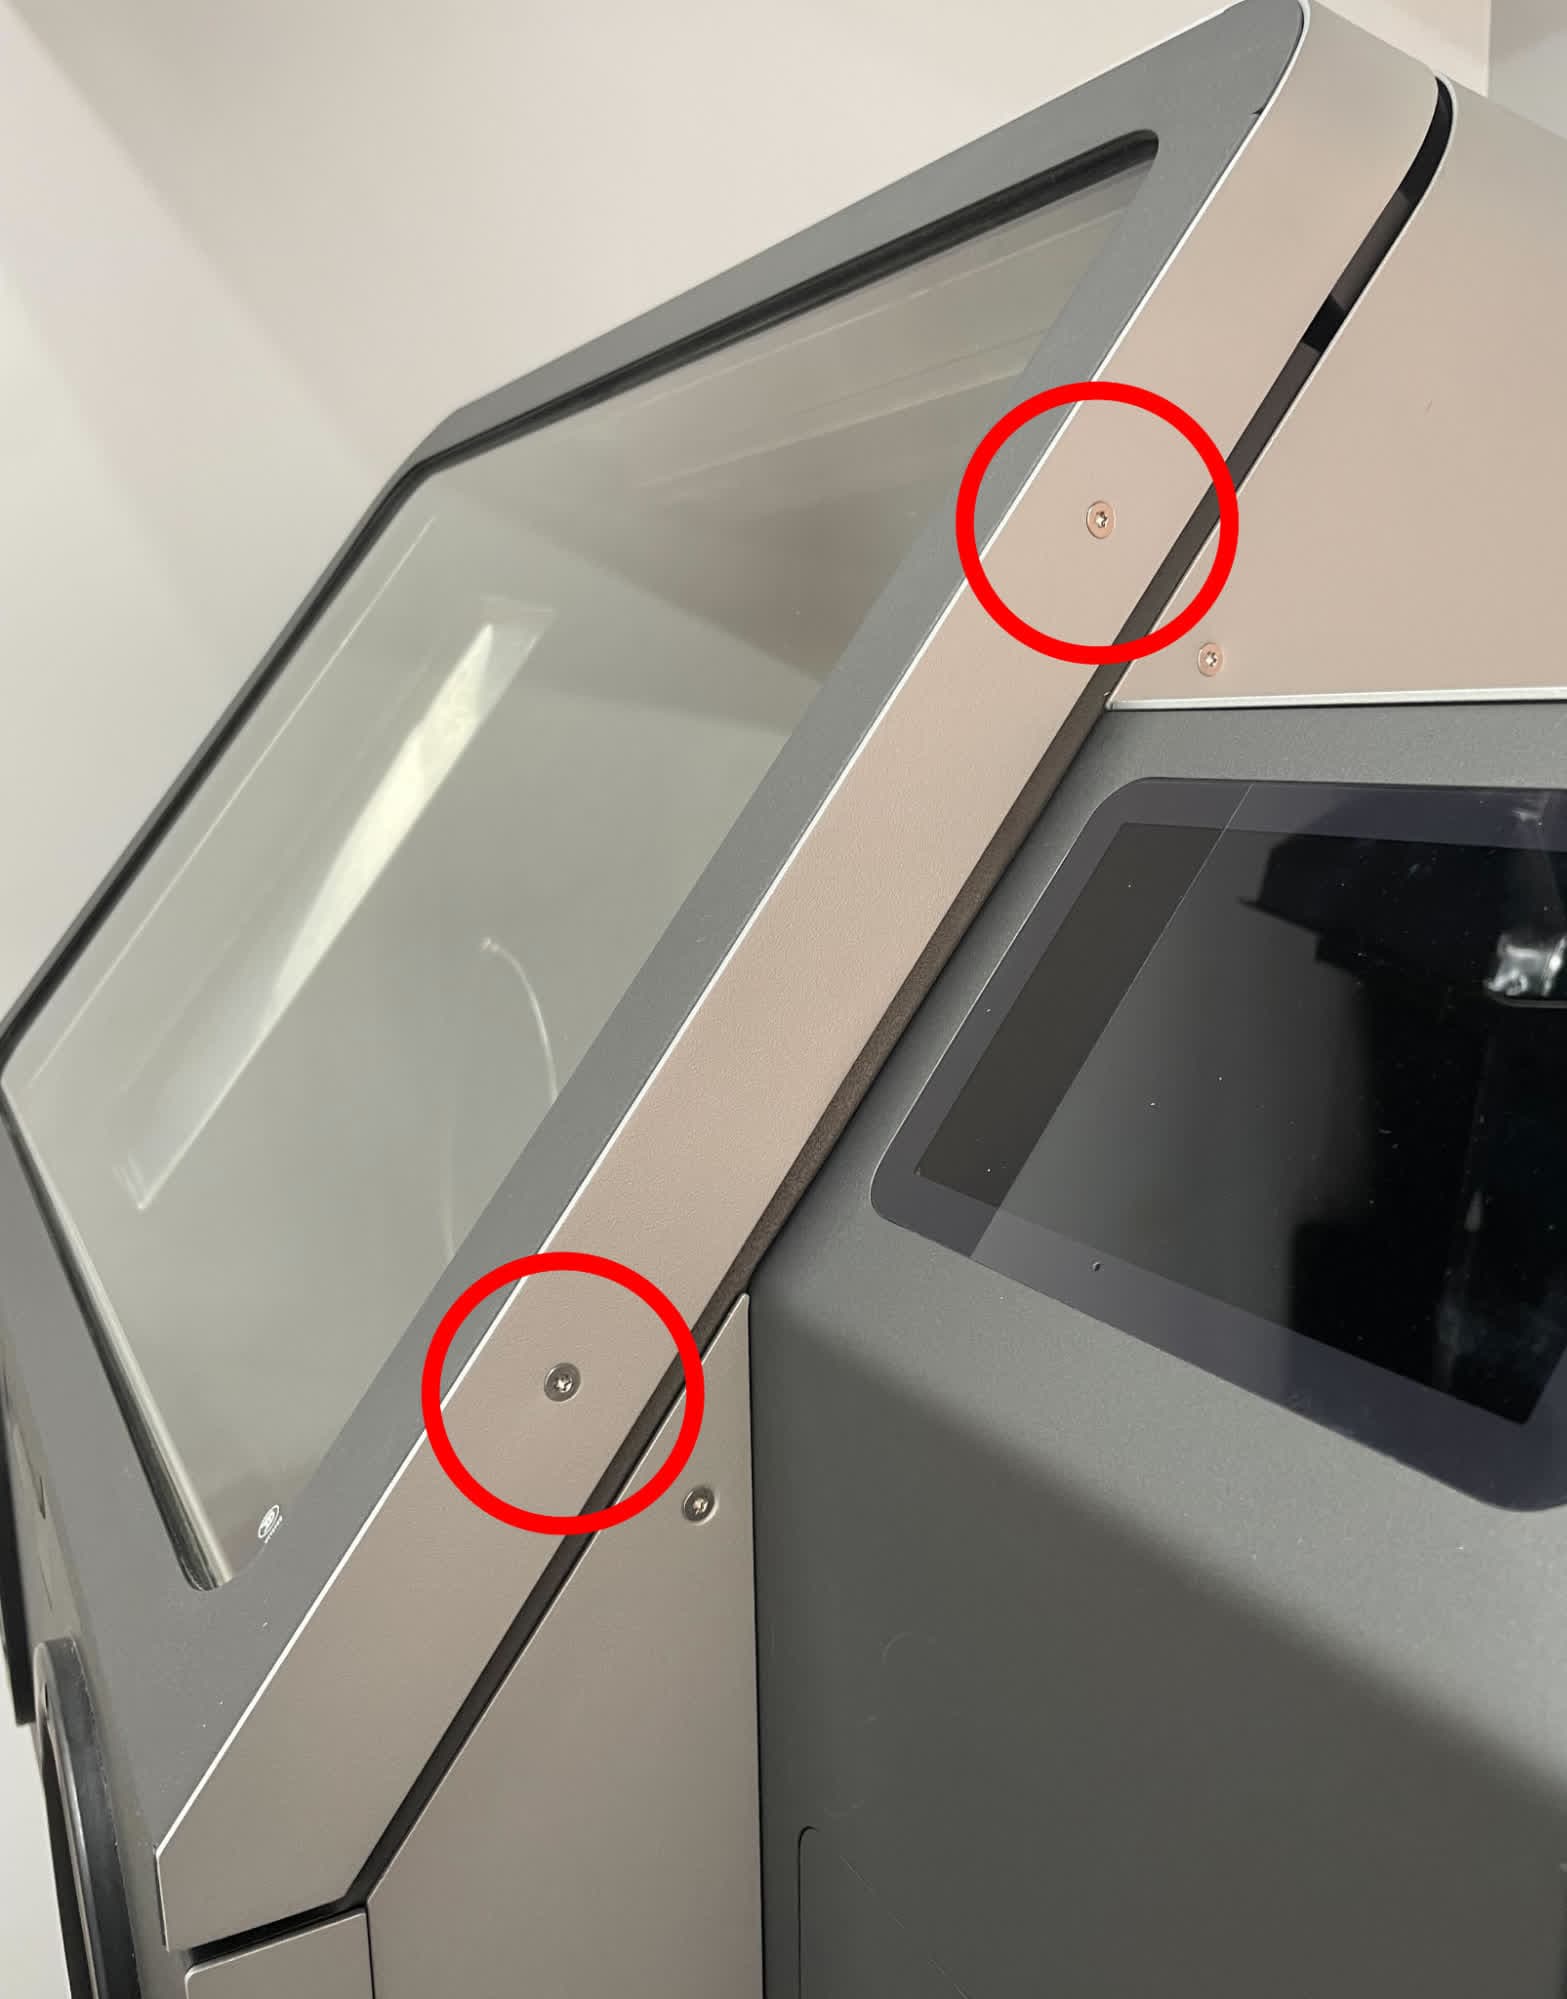
Close the chamber door. Thread one T20 Torx screw into each of the four screw holes on the left and right side of the door. Using a T20 Torx driver, tighten screws until snug.
Reopen the chamber door. Thread one 7 mm nut onto each of the three threaded posts on the inside edge of the door. Using a 7 mm nut driver, tighten until snug.
Finalizing the repair
Overview: After replacing the door window, check that it is fully secured.
Step 1: Test the door and window
Open and close the chamber door several times and check that the window is satisfactorily secure. Start a blasting cycle and check that visibility is adequate.