
Required Supplies:
Formlabs:
- Replacement pump tube
- Resin Pumping System pump lubricant
Third-party:
- 2.5 mm hex driver
- Nitrile gloves
- Scissors
- Zip tie

The Resin Pumping System uses a peristaltic pump to draw resin from the container and dispense it into the resin tank in a Formlabs printer. If the tubing that runs through the pump is damaged, the pump may not dispense resin properly. Be sure to change the pump tube after six months of use or whenever you use a new resin type with the same resin pump, whichever comes first.
Use this guide to replace the pump tube in a Resin Pumping System resin pump.
Required Supplies:
Formlabs:
Third-party:
Estimated time: 10–20 minutes
Preparing the workspace
Overview: Prepare the resin pump and a dust-free workspace for replacing the pump tube.
Warning:
Resin may cause skin irritation or an allergic skin reaction. Wear gloves when handling liquid resin or resin-coated surfaces. Wash skin with plenty of soap and water.
Step 1: Prepare the workspace
Clear a workspace. Ensure that the workspace is well-ventilated and free of dust.
Step 2: Remove the resin pump from the printer
If the resin pump is currently installed in a printer, remove the resin pump.
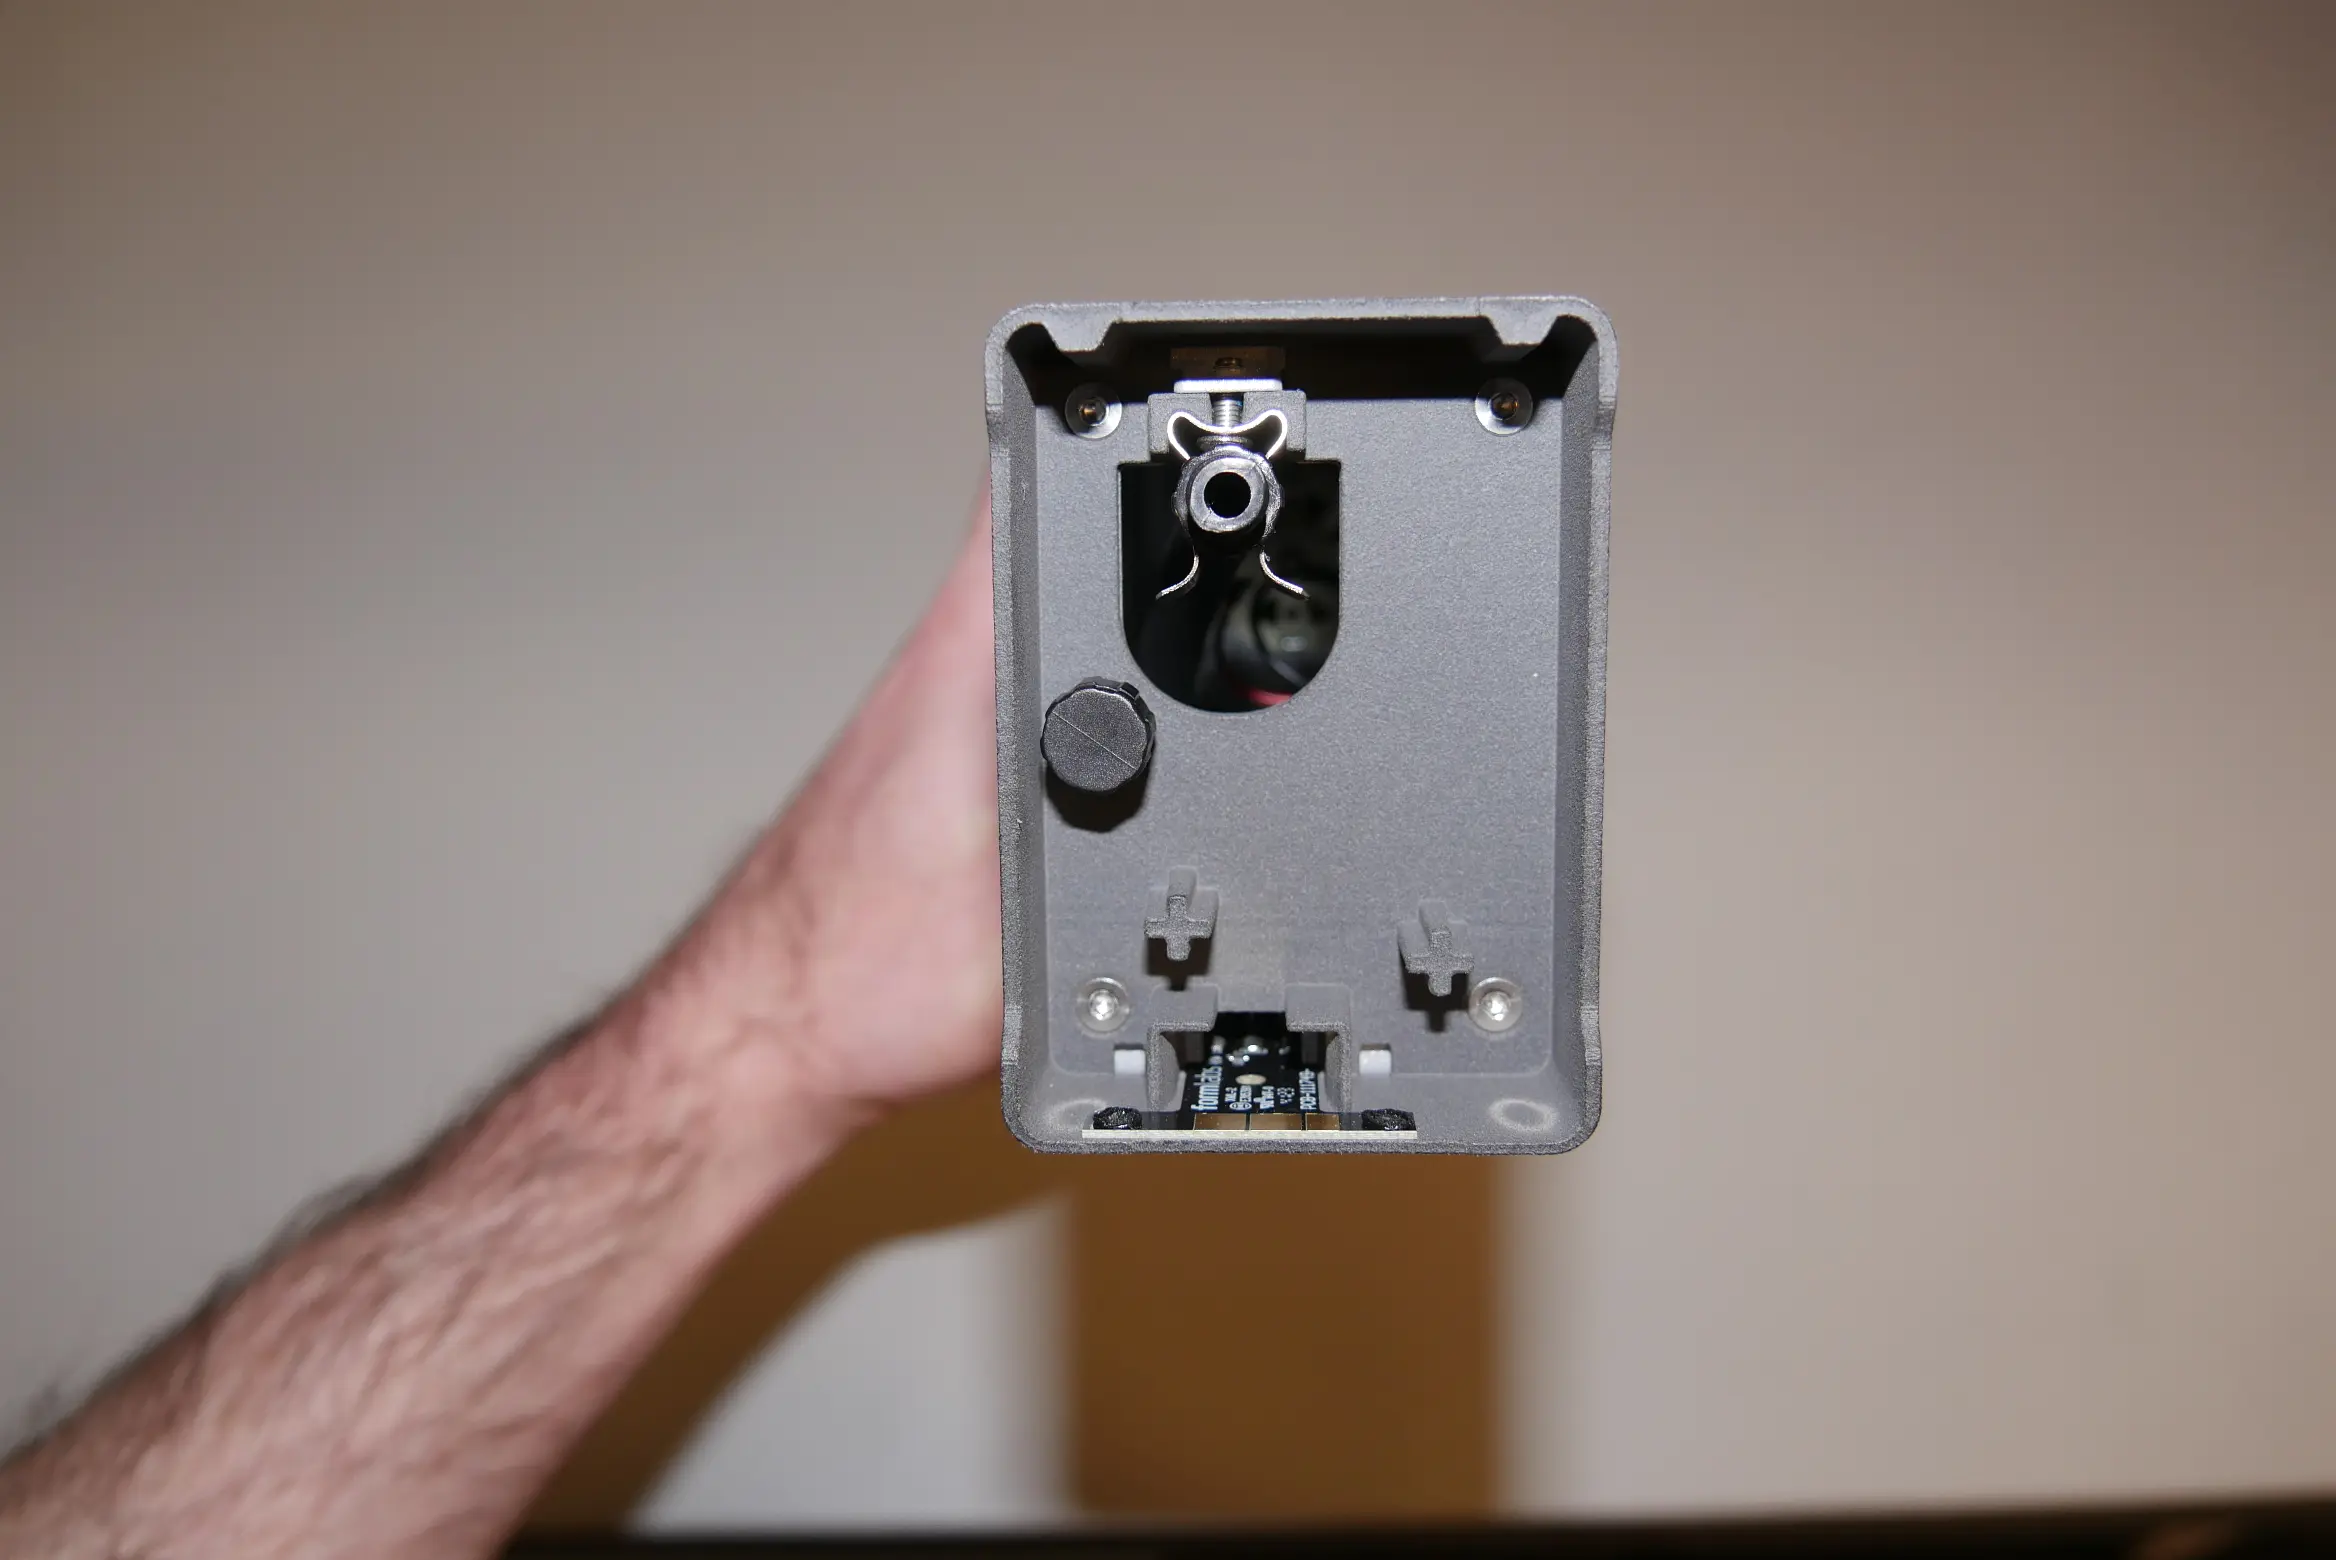
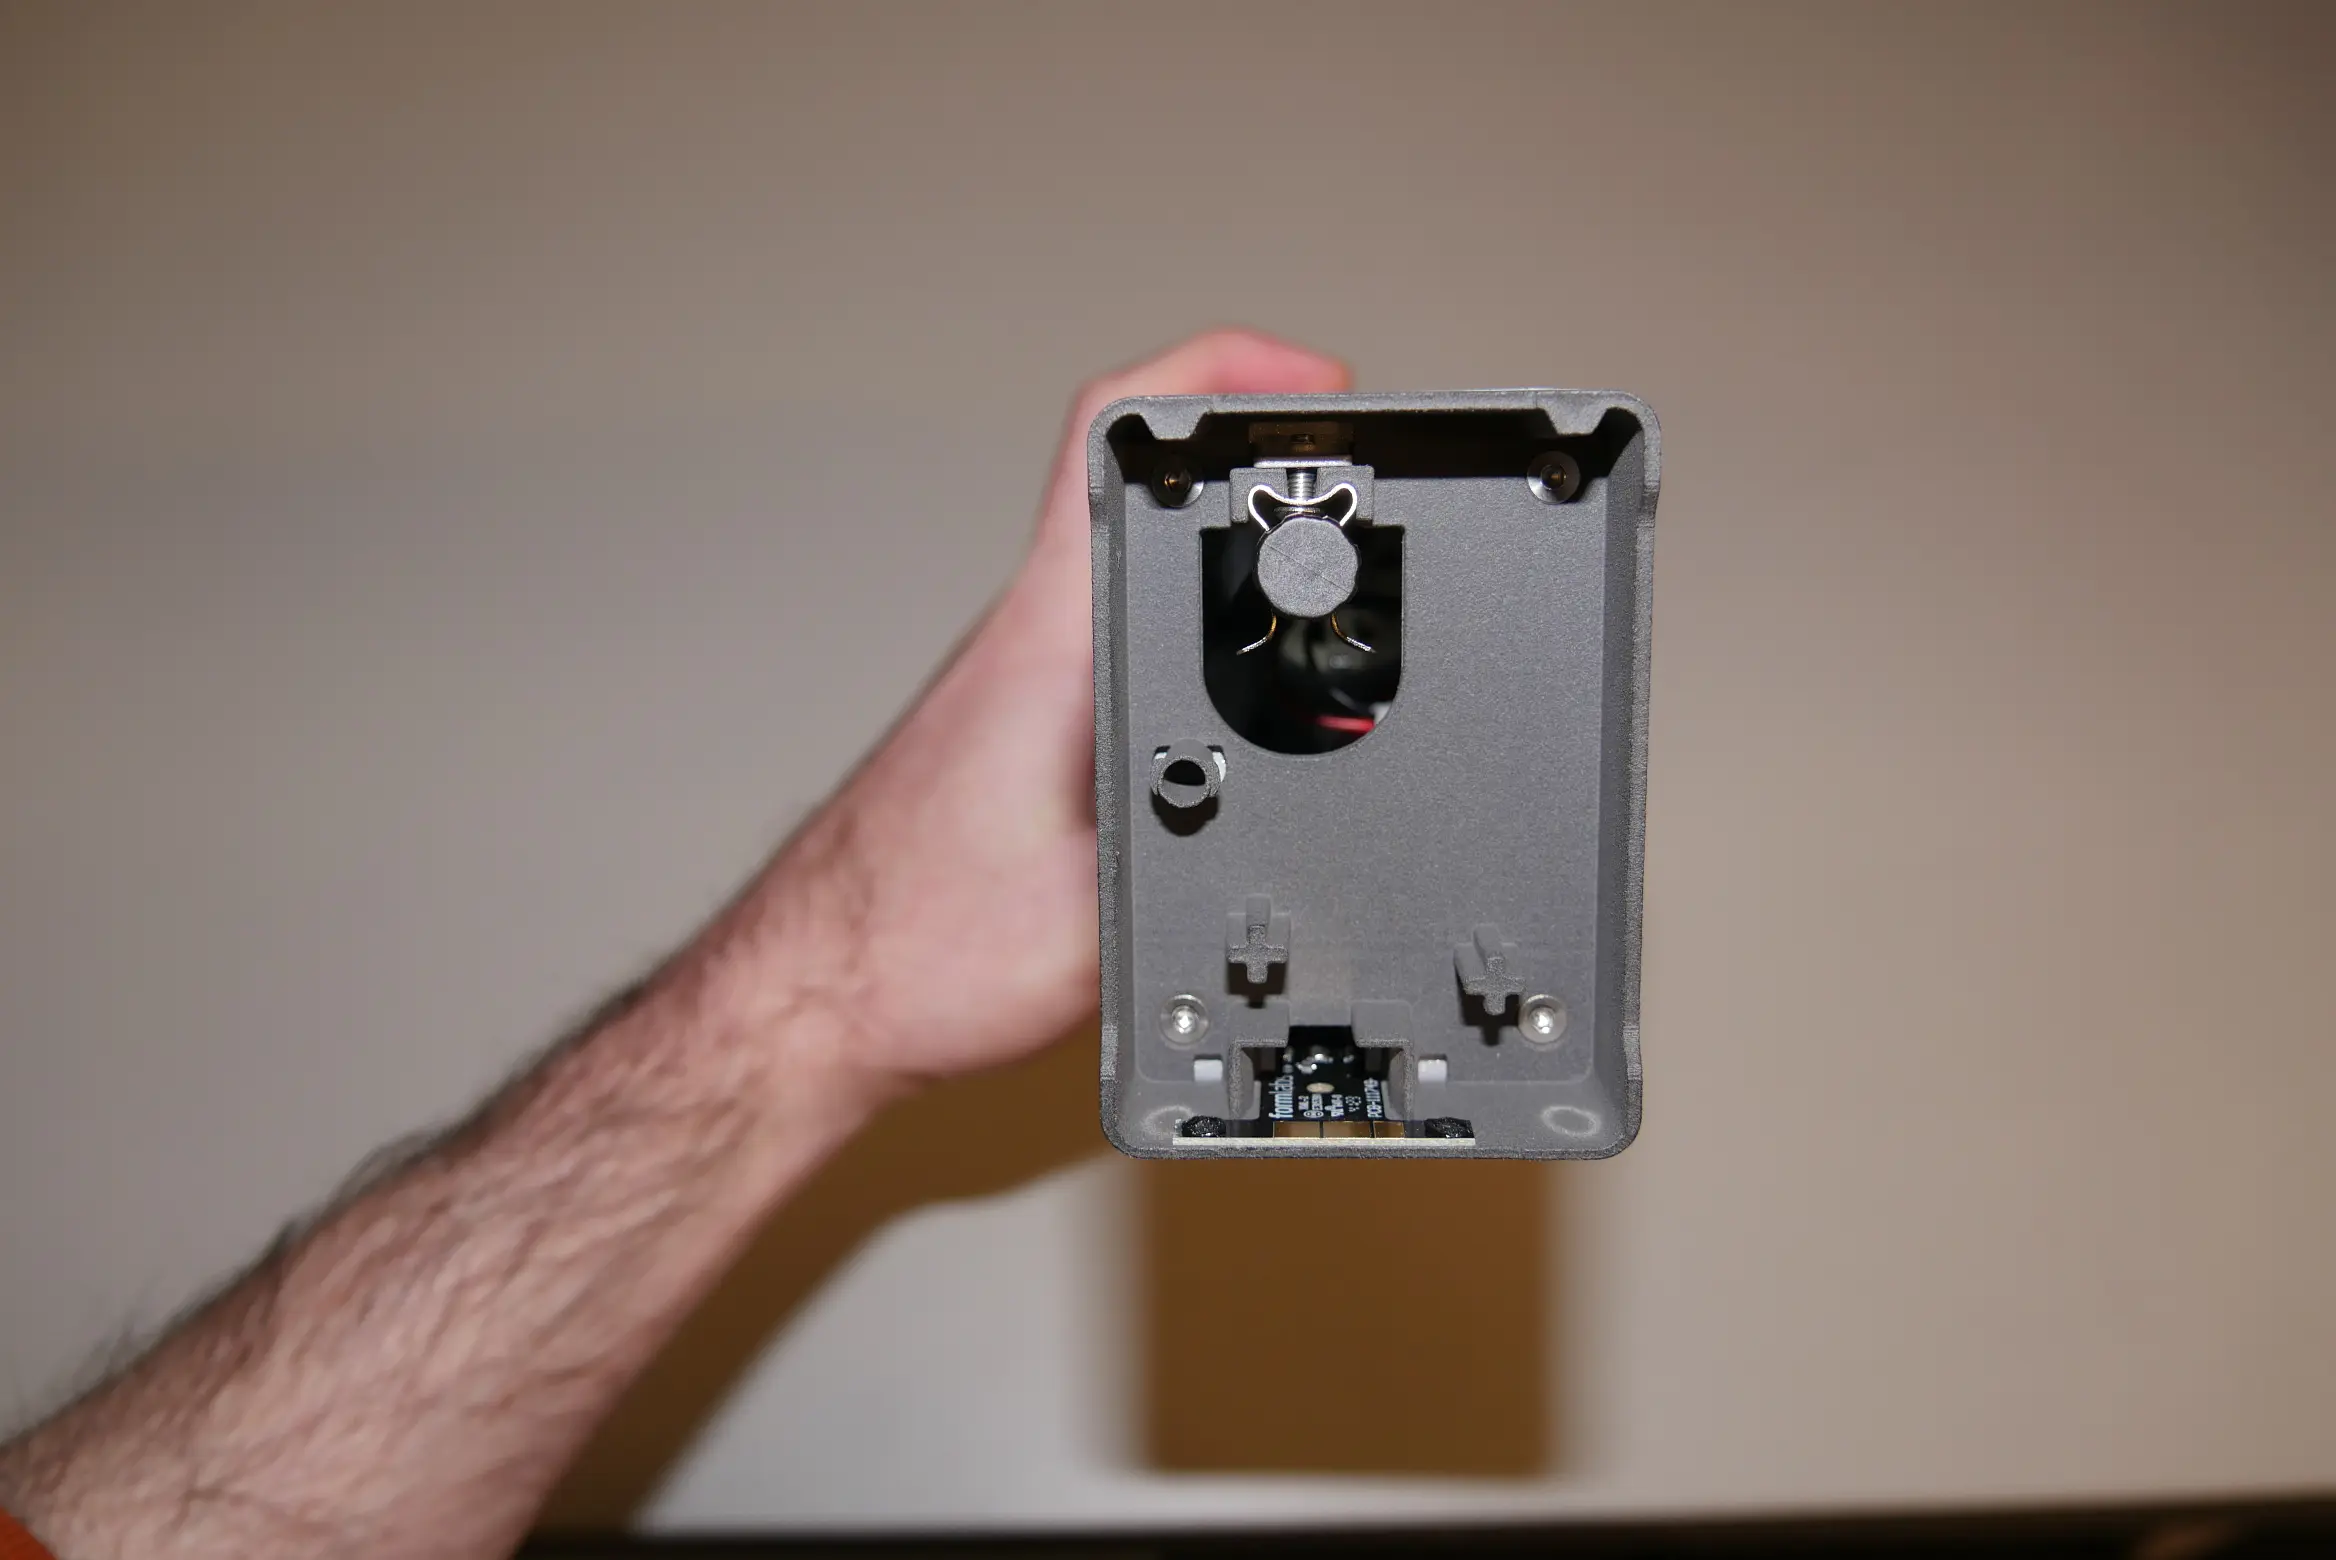
To prevent resin from dripping onto your work surface, unscrew the cap from the retention post on the bottom of the pump and screw it onto the outlet of the pump tube.
Step 3: Disconnect the transfer tube
Cut the zip tie securing the transfer tube to the resin pump. Disconnect the transfer tube from the resin pump. Rest the free end of the transfer tube above the resin container to prevent resin from dripping onto your work surface.
Removing the pump tube
Overview: Open the resin pump and remove the pump tube.
Step 1: Remove the resin pump shell screw
The resin pump shell is secured to the body of the pump with a single hex screw located at the top of the pump. Use a 2.5 mm hex driver to loosen and remove the screw. Set the screw aside.
Step 2: Uninstall the resin pump shell
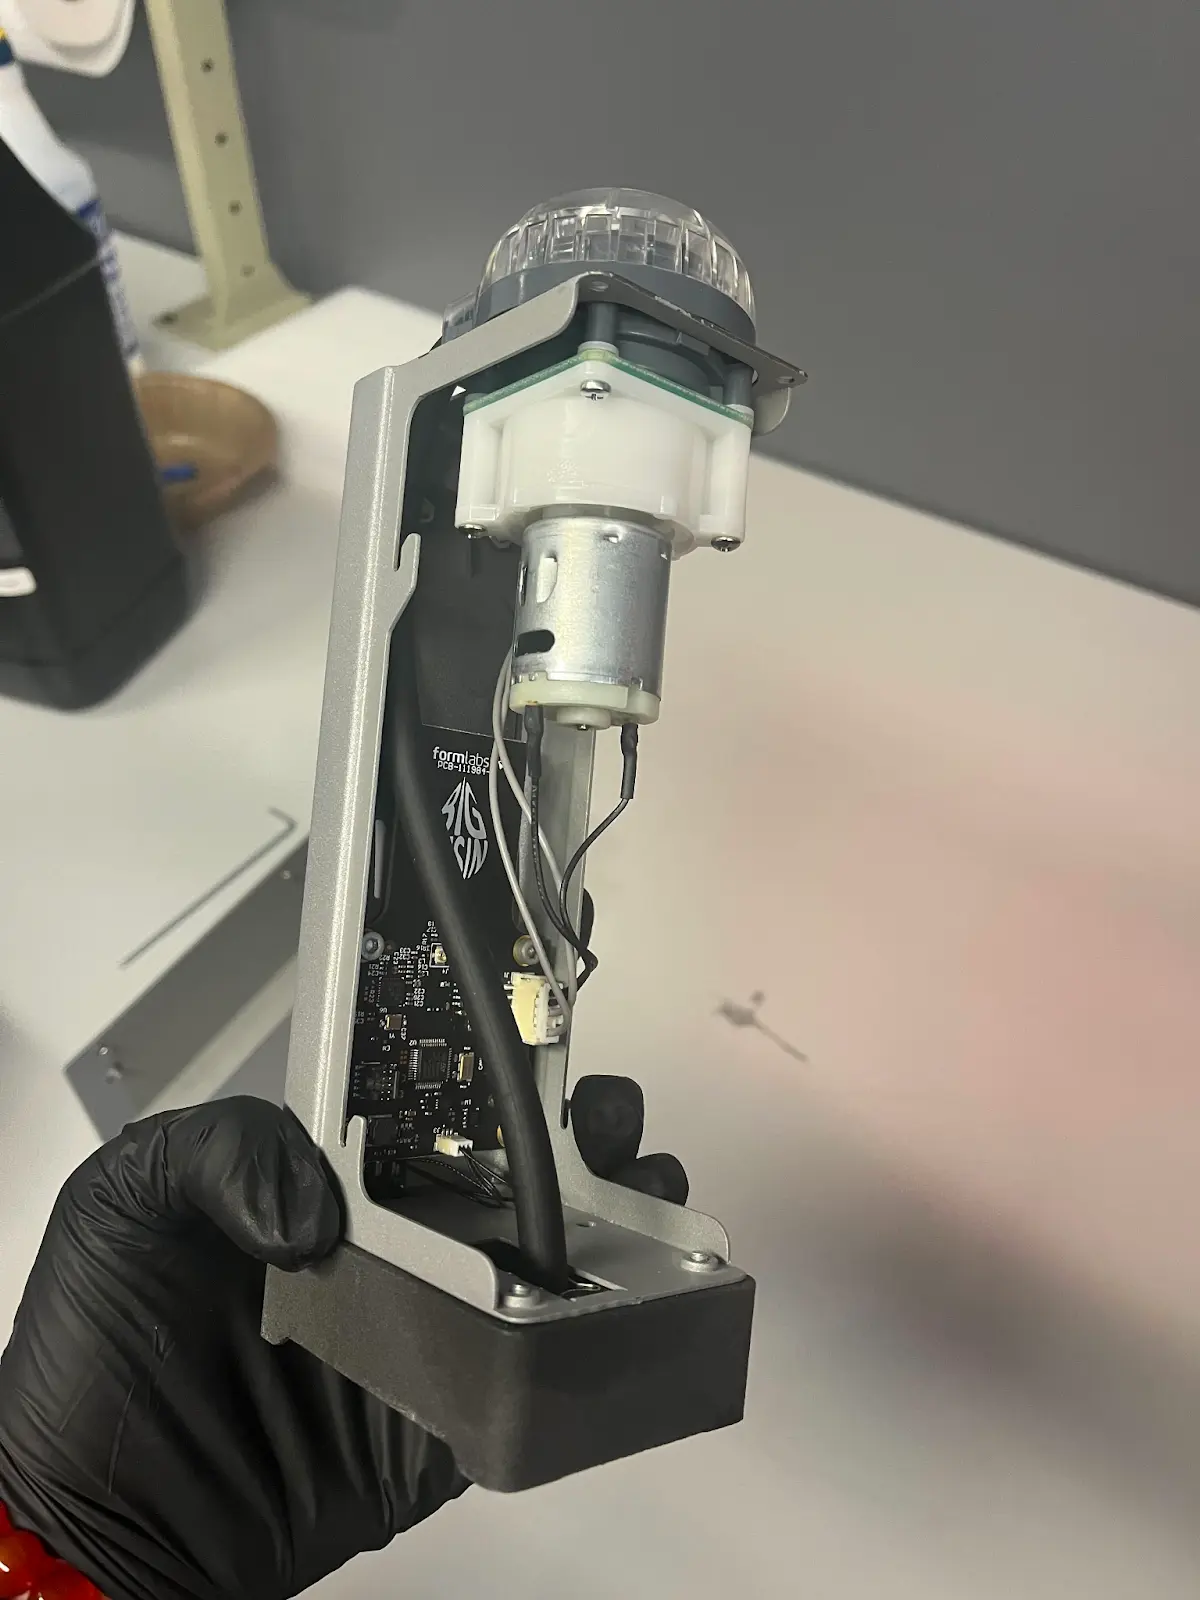
Grip the resin pump by the handle. Pull the handle straight up, away from the base of the resin pump, to separate the shell from the body. Set the shell aside.
Step 3: Remove the resin pump cap
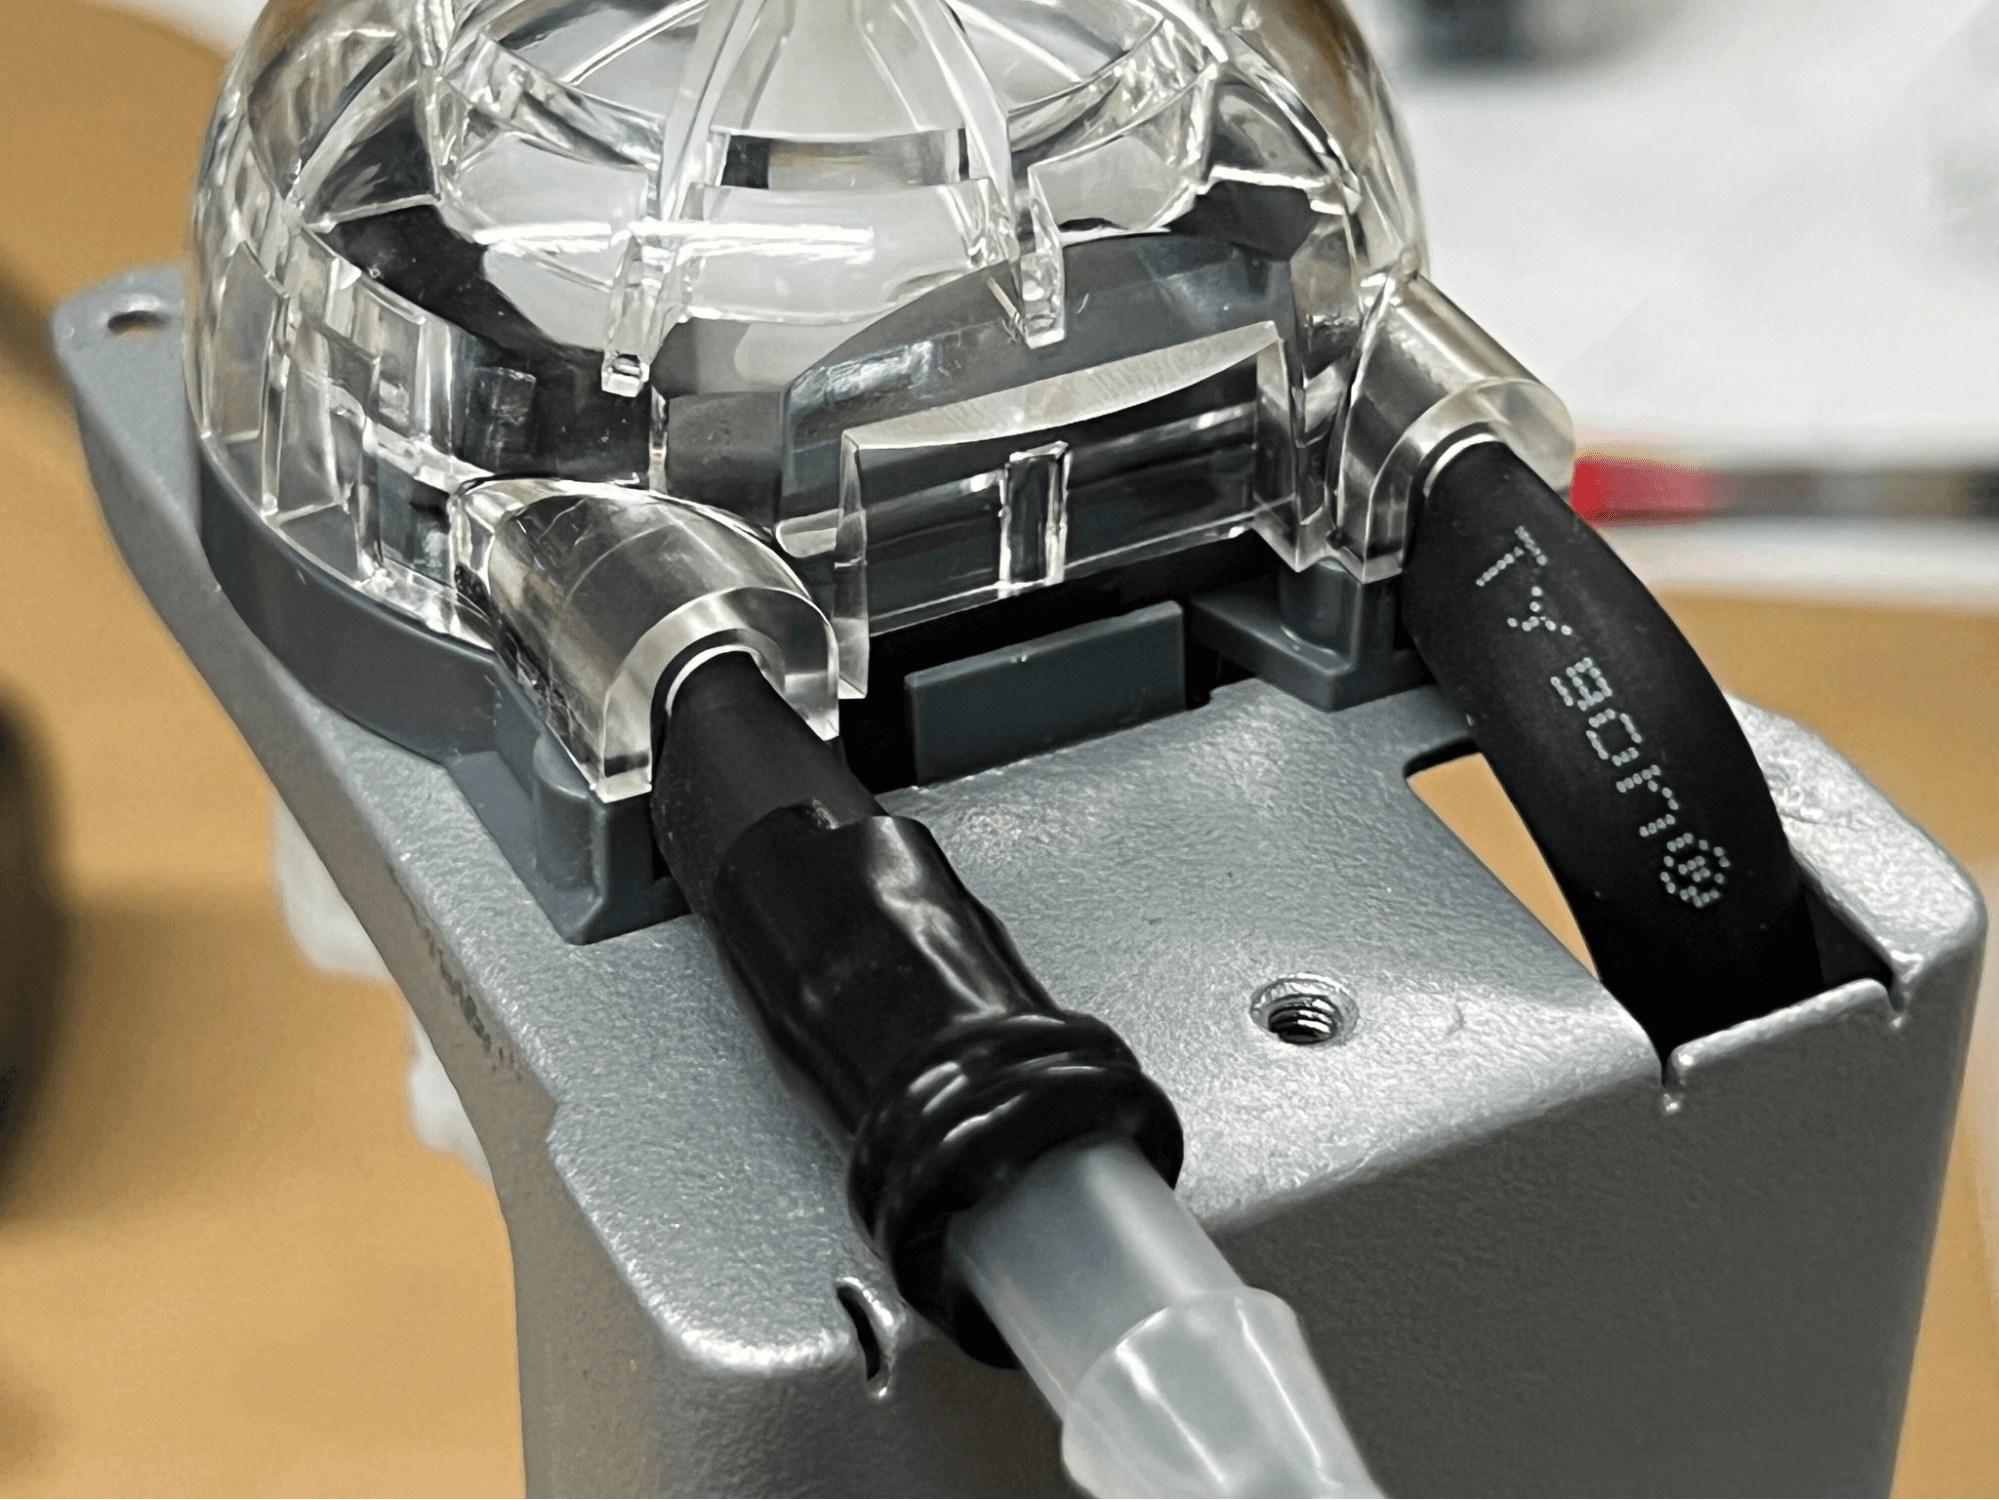
Gently pry the clear plastic cap off the top of the pump motor. Set the cap aside.
Step 4: Remove the pump rotor
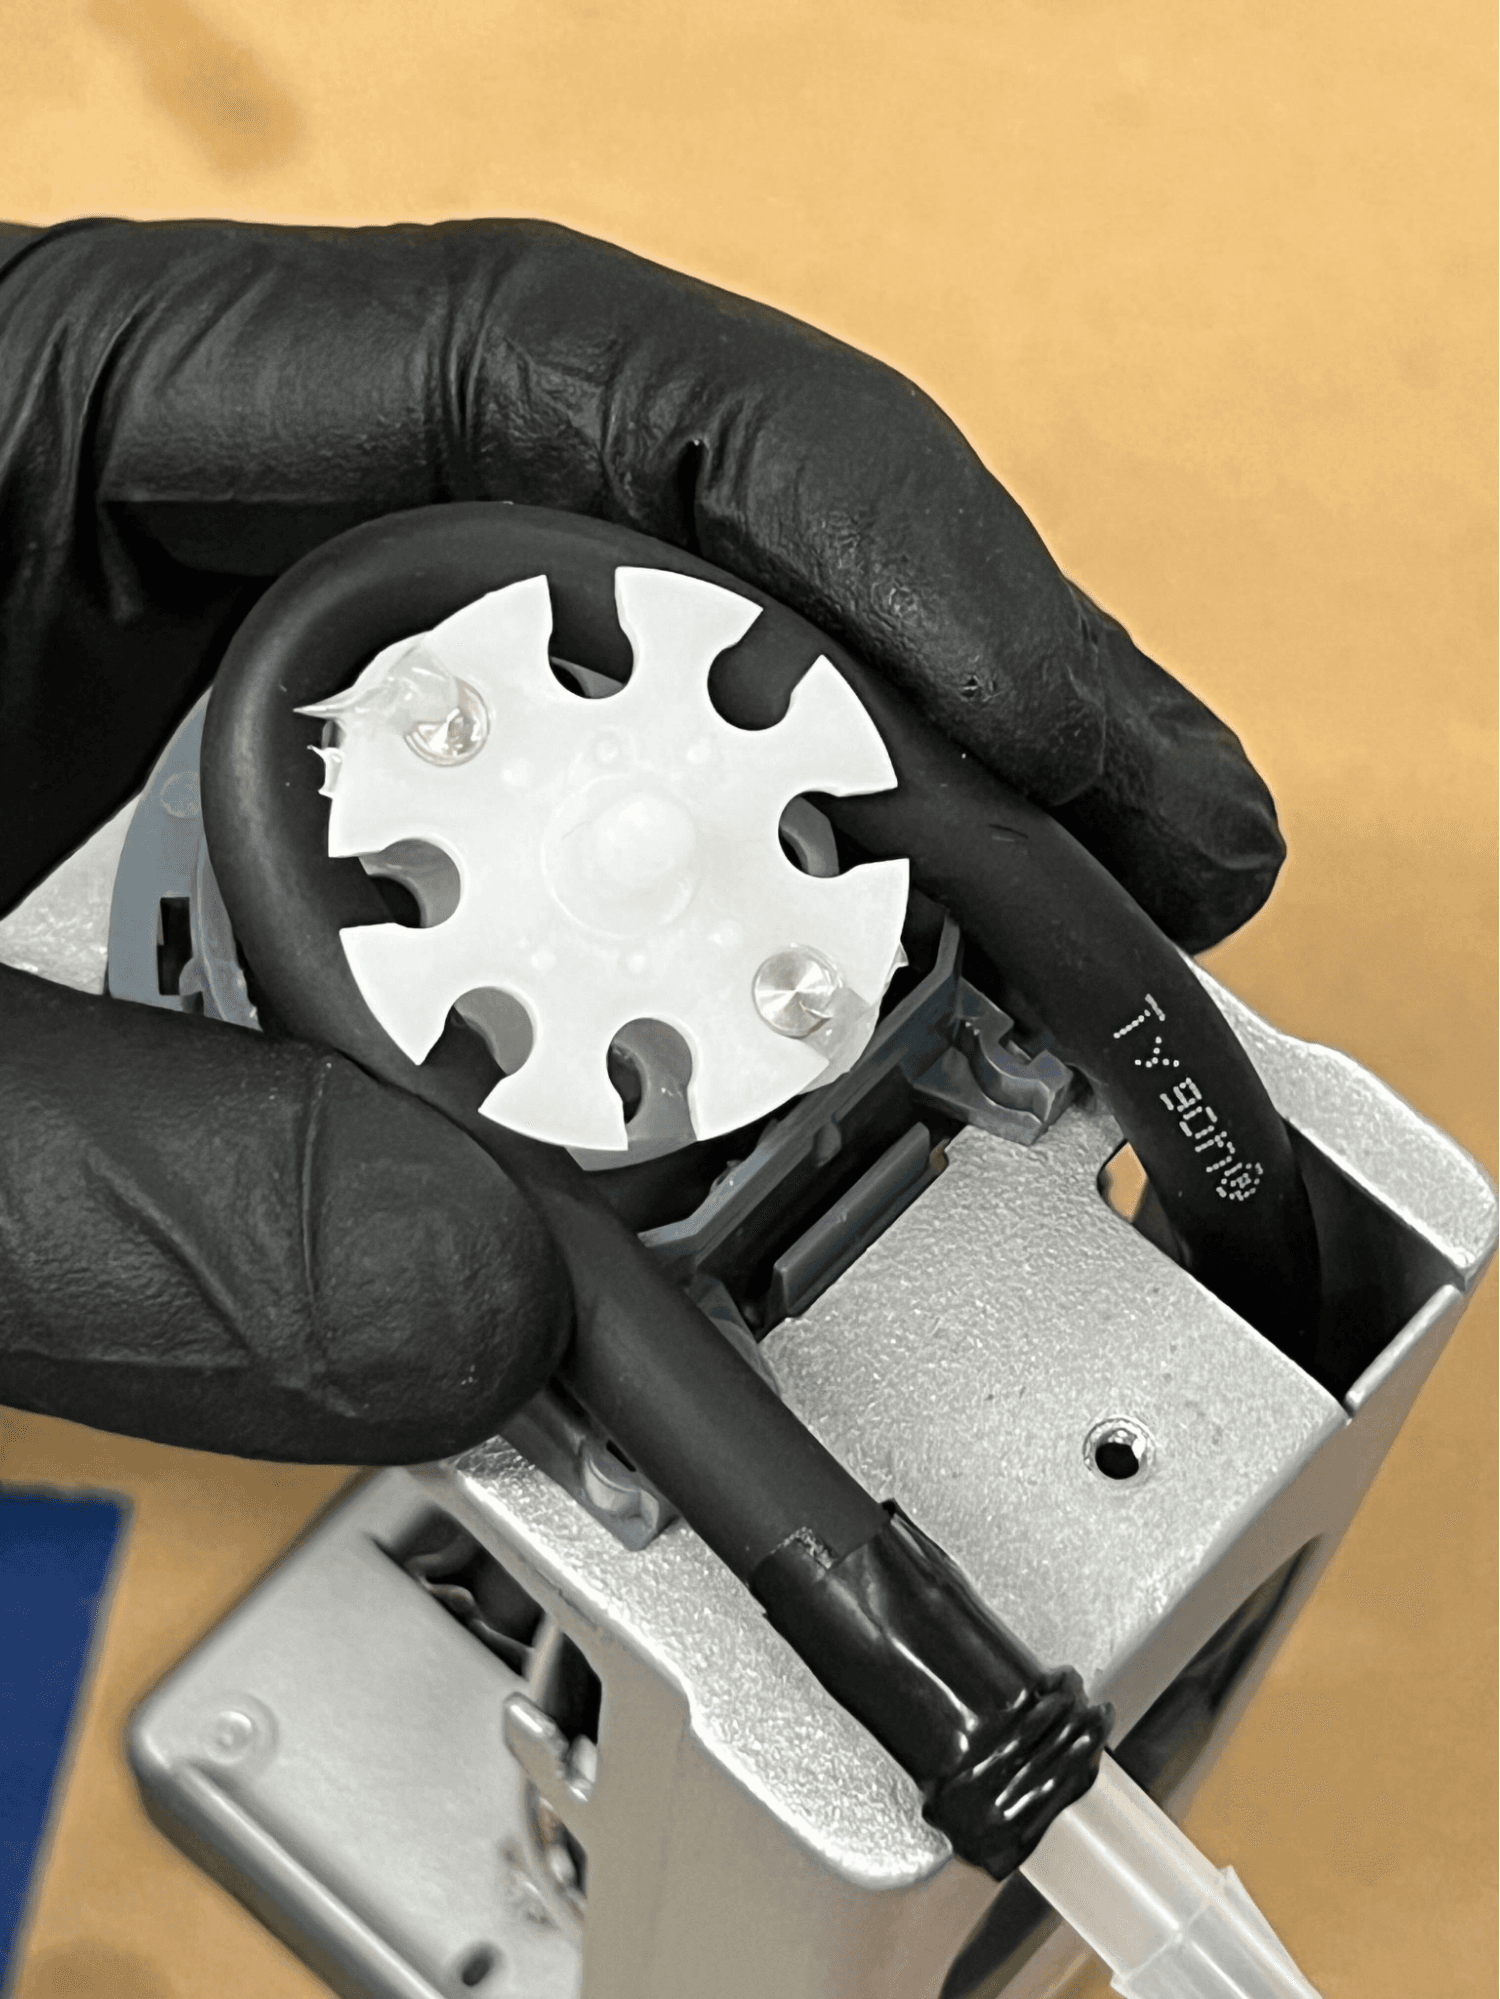
Lift the rotor out of the motor assembly. Set the rotor aside.
Step 5: Unclip the pump tube
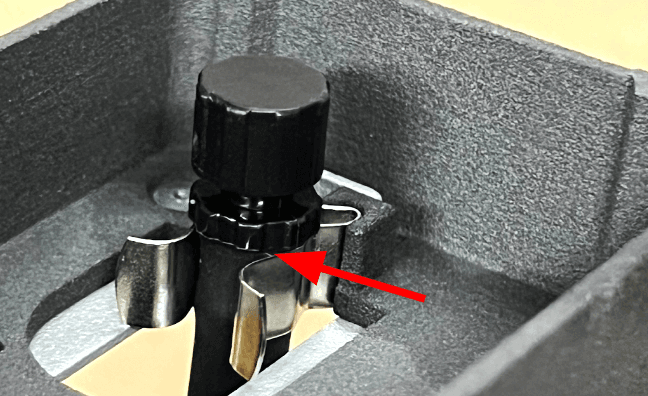
Unclip the pump tube from the retention clip at the bottom of the resin pump.
Step 6: Remove the pump tube
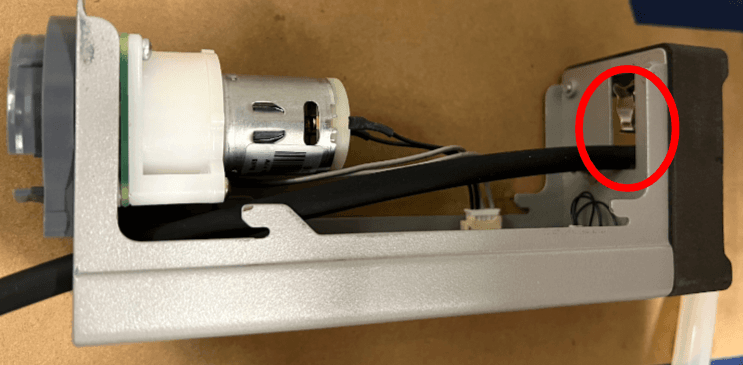
Pull the pump tube out of the resin pump. Rinse any liquid resin out of the pump tube using isopropyl alcohol or another Formlabs-approved solvent before disposing of it.
Installing the replacement pump tube
Overview: After removing the pump tube, install the replacement pump tube.
Step 1: Prepare the replacement tube for installation
Newer replacement kits have a sticker attached to the replacement pump tube. Remove the sticker or cut the pump tube at the line indicated by the sticker to prepare it for installation:
Step 2: Press the output barb into the replacement pump tube
Press the output barb fully into the replacement pump tube.
Step 3: Route the pump tube through the resin pump
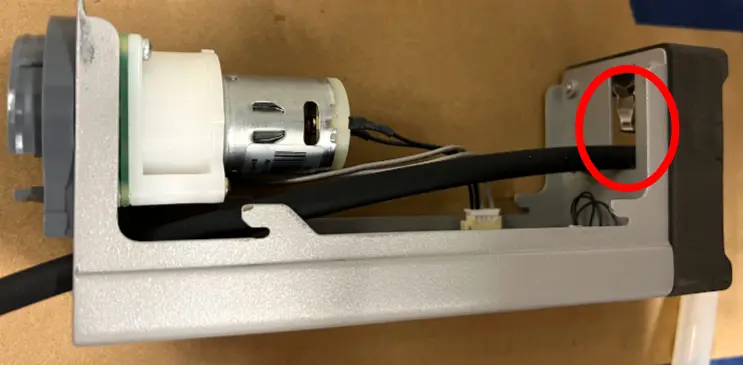
Insert the capped end of the replacement pump tube through the top of the resin pump. Route it out through the bottom of the resin pump, next to the retention clip.
Step 4: Clip the pump tube to the resin pump
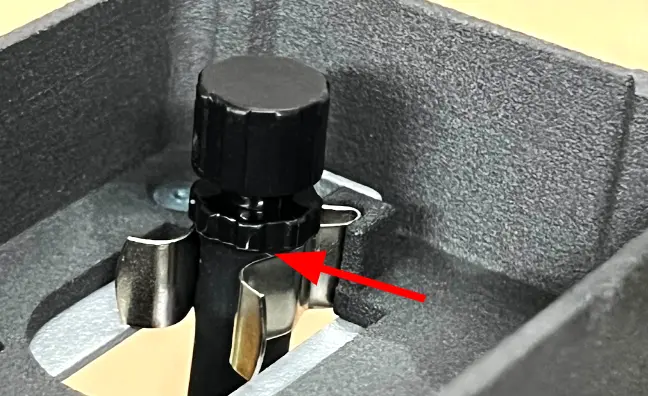
Press the pump tube into the retention clip. Ensure that the lip of the fitting at the end of the tube is flush against the bottom of the clip and that the pump tube does not extend beyond the bottom of the resin pump.
Step 5: Lubricate the resin pump
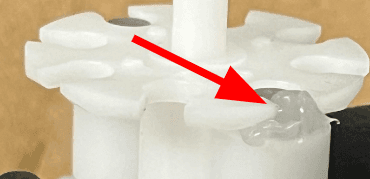
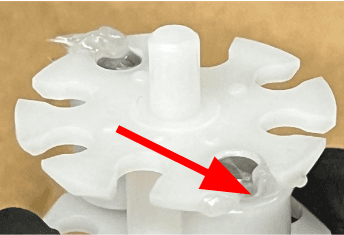
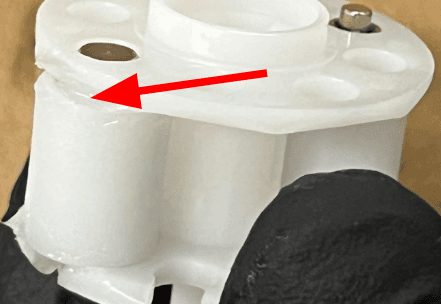
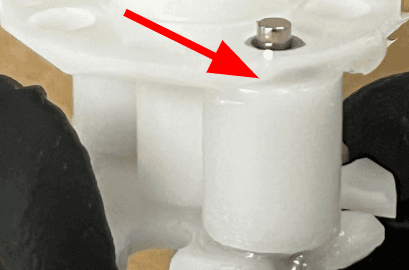
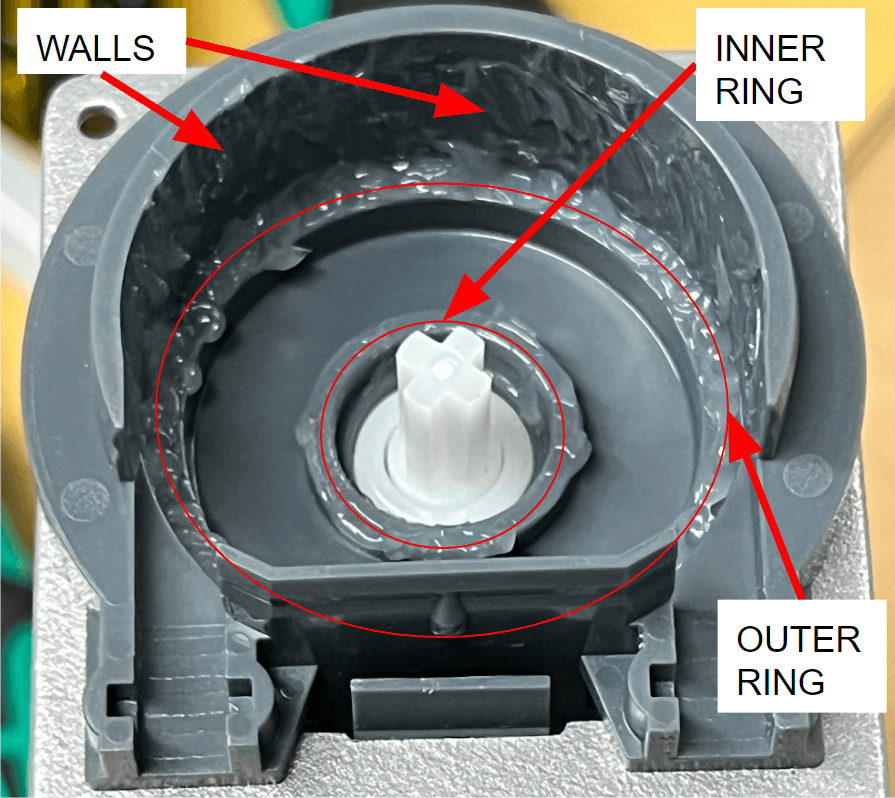
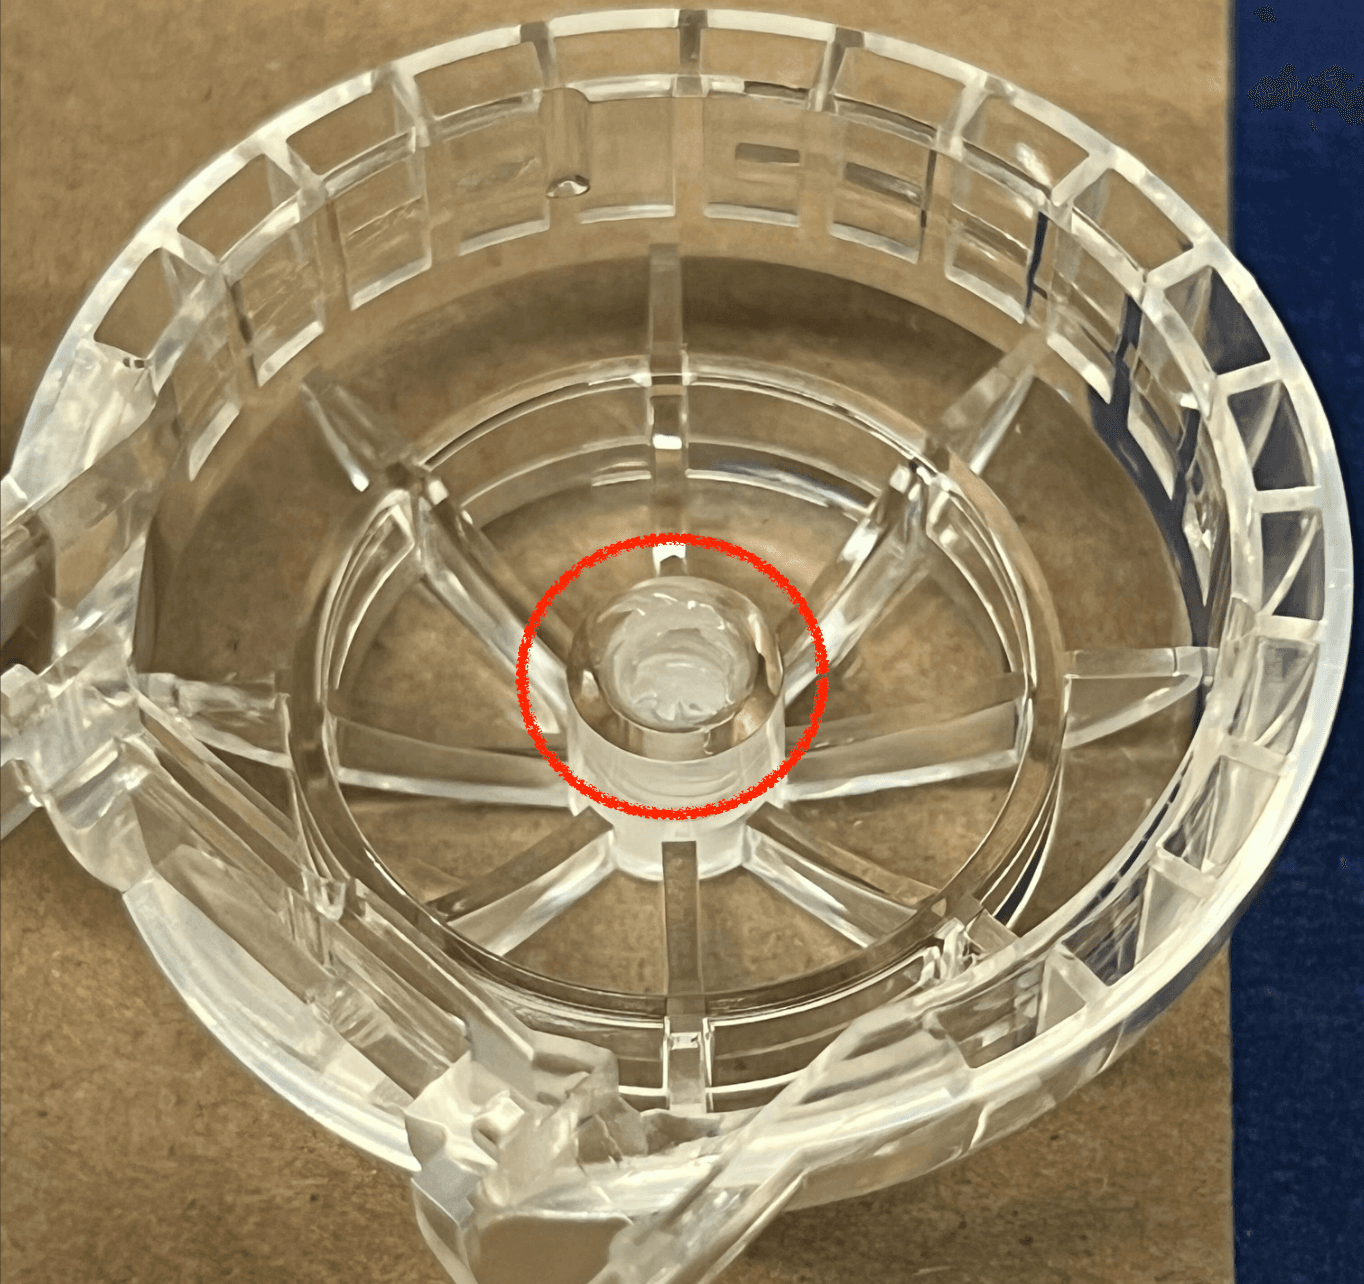
Squeeze a small amount of lubricant into the relief holes in the rotor, the walls of the pump that come into contact with the pump tube, and into the axle bearing surface in the resin pump cap.
Step 6: Reinstall the pump rotor and pump tube
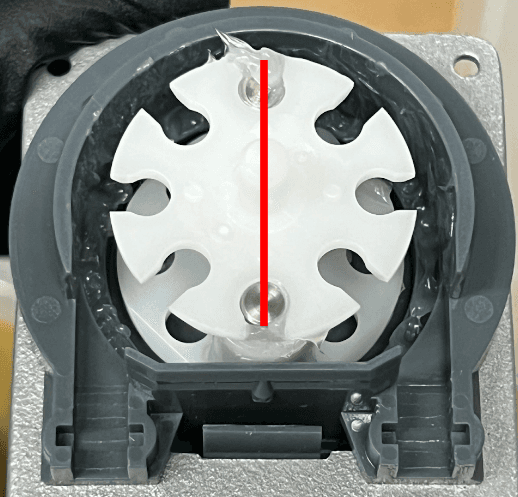
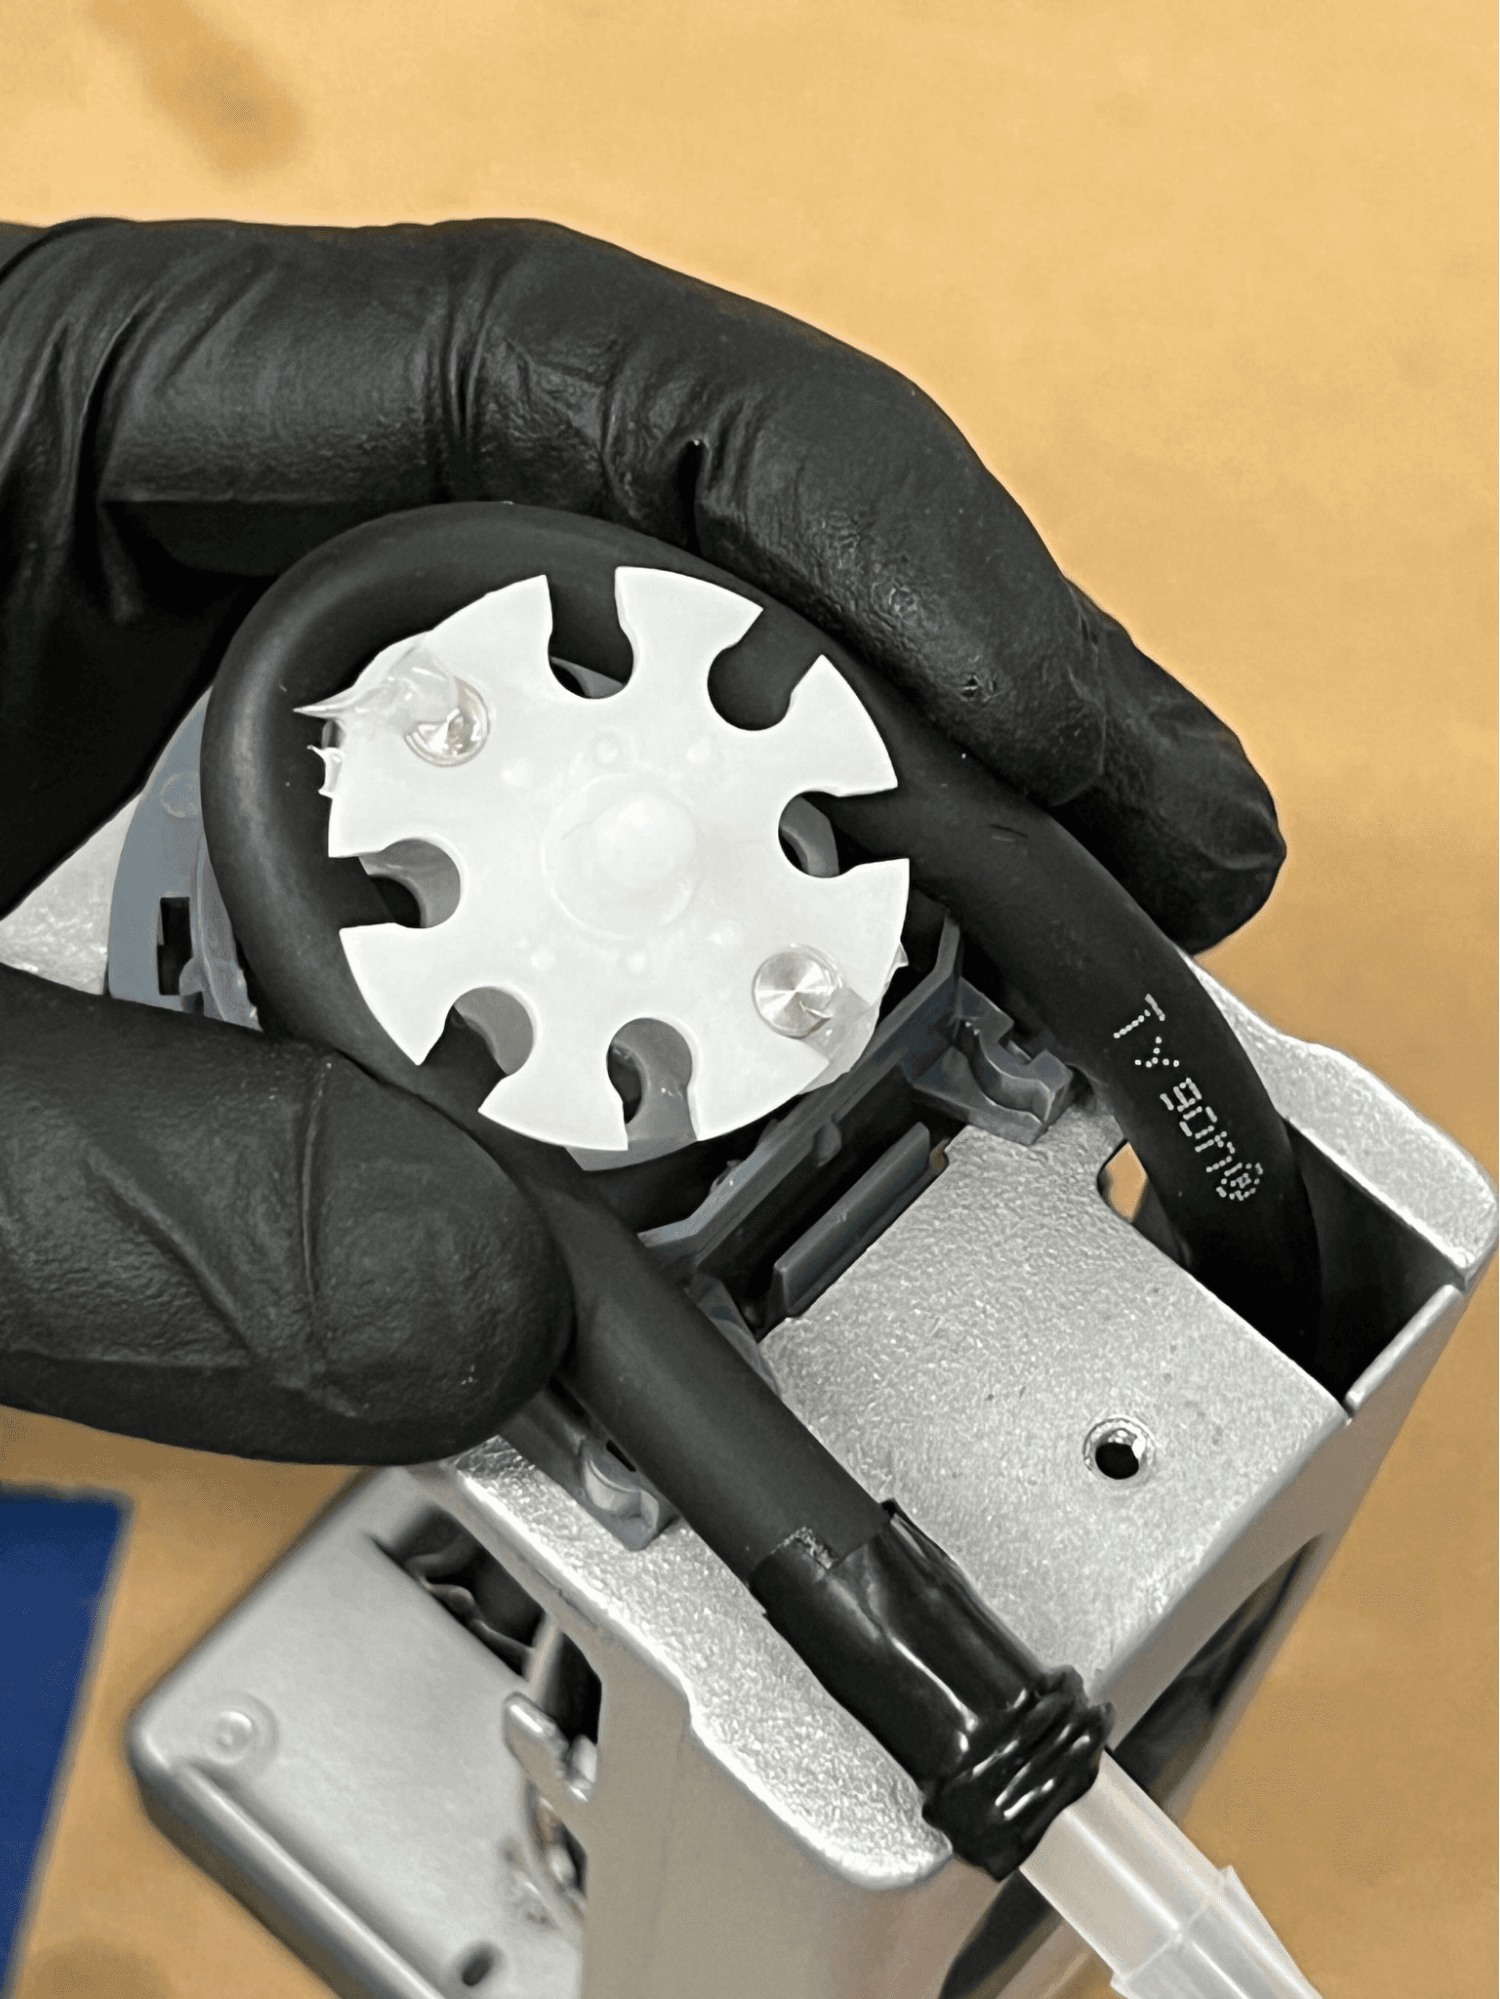
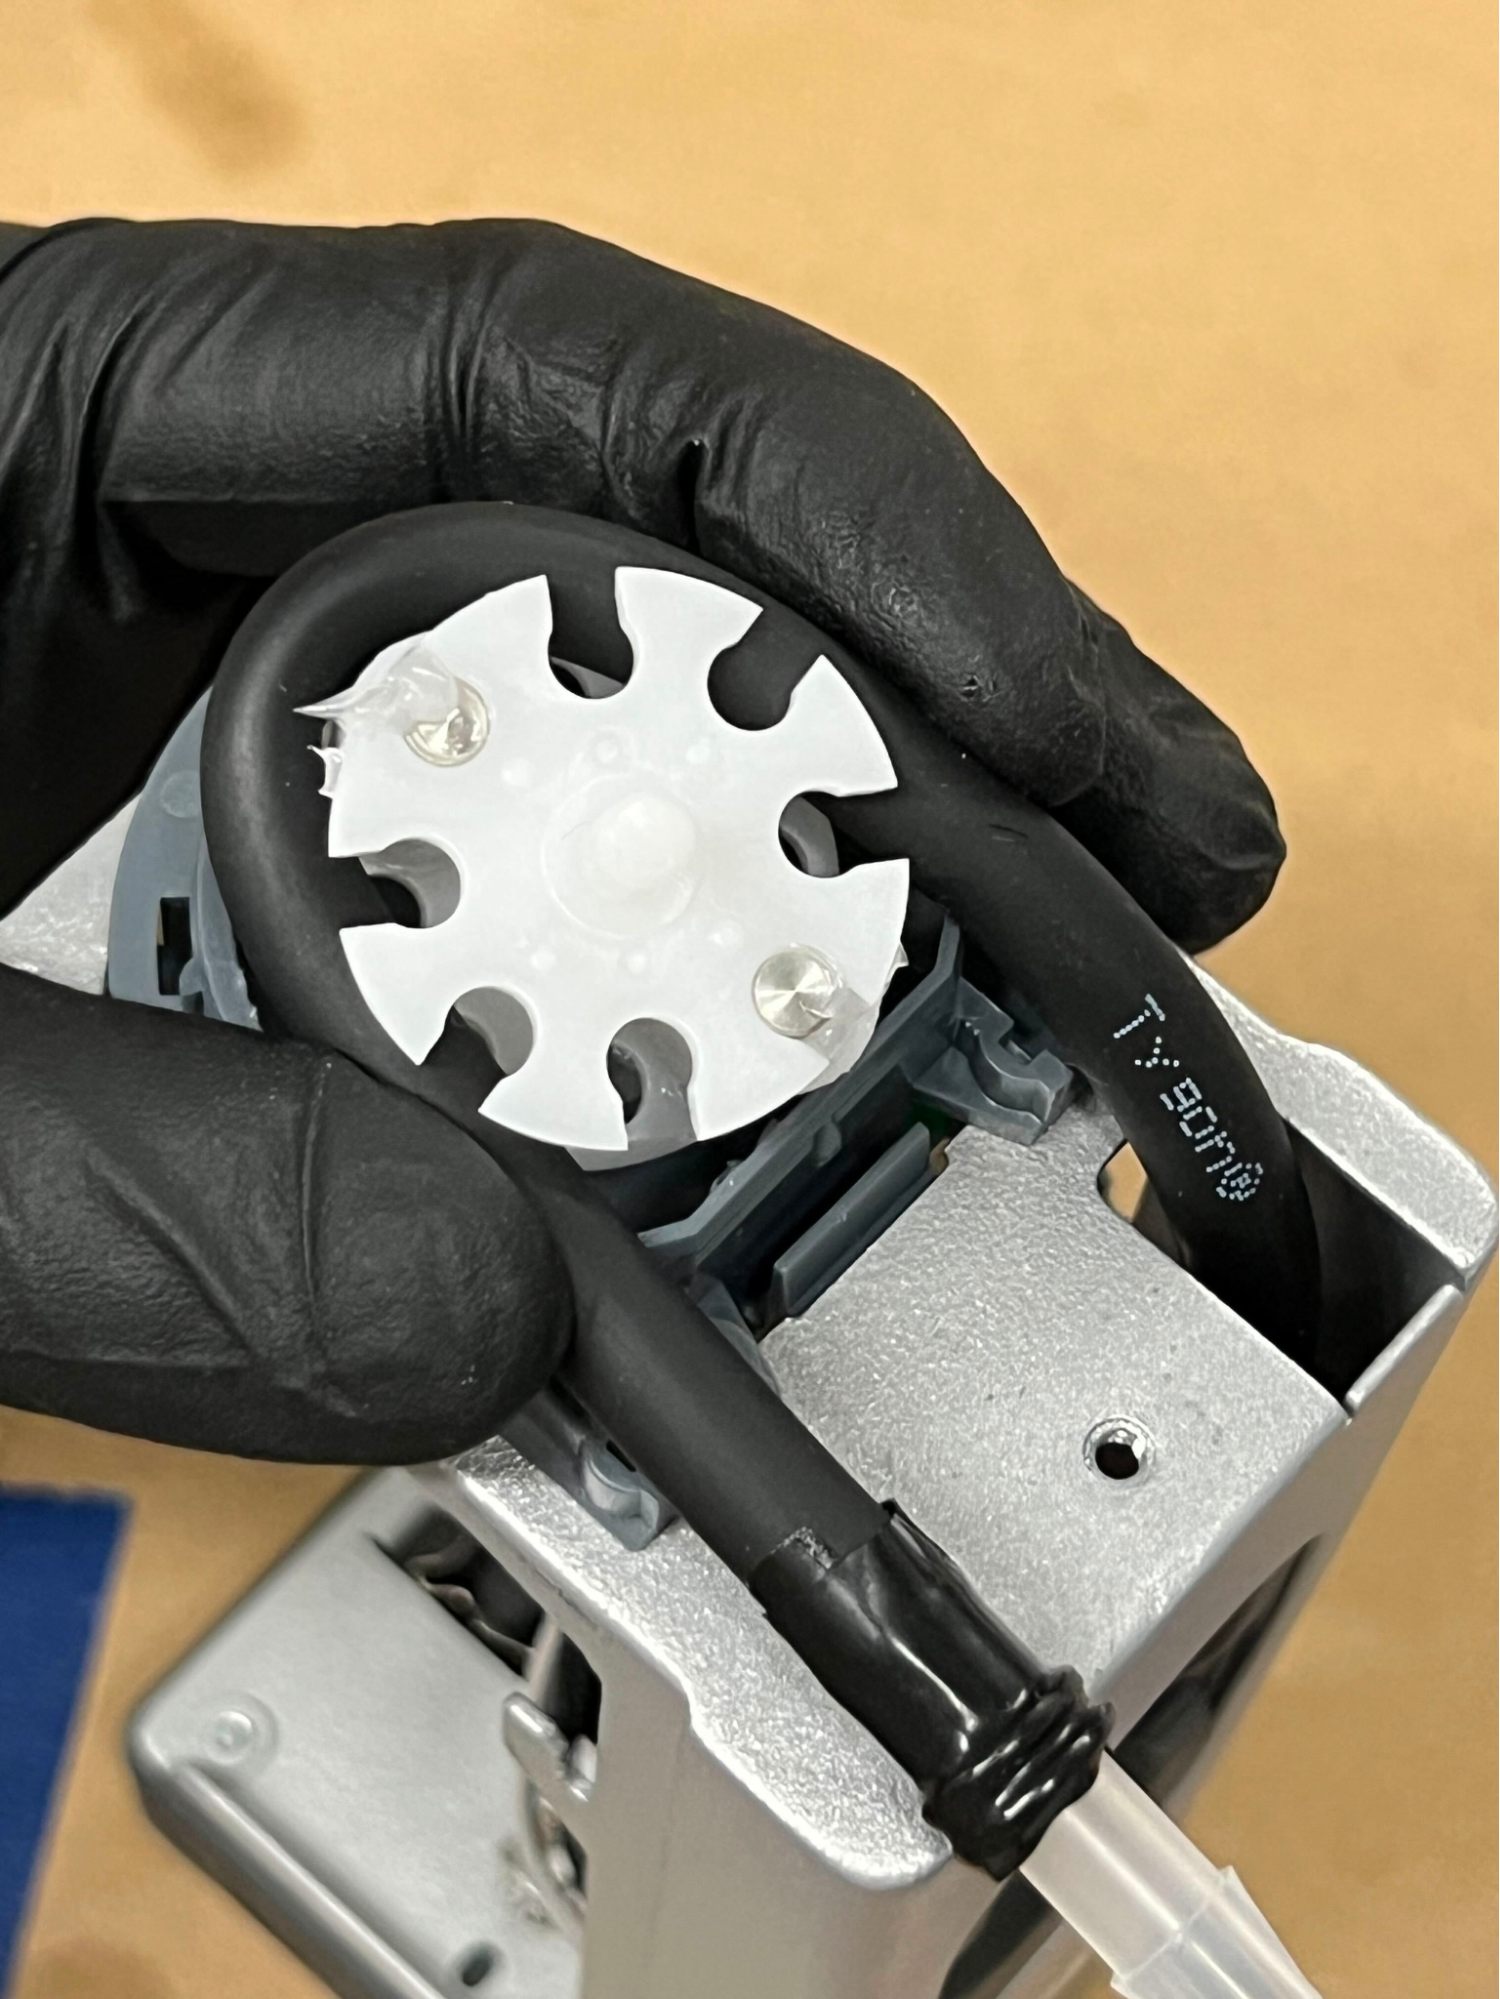
Orient the rotor with the rollers positioned as shown. Looking at the rotor from the top, wrap the free end of the pump tube around the rotor from the right to the left. Place the rotor and pump tube into the motor housing at the top of the resin pump.
Notice:
When installed, the pump tube should be squeezed against the motor housing by only one of the two rollers. Installing the rotor so that both rollers compress the pump tube can damage or deform the pump tube over time.
Step 7: Route the pump tube through the clamp points
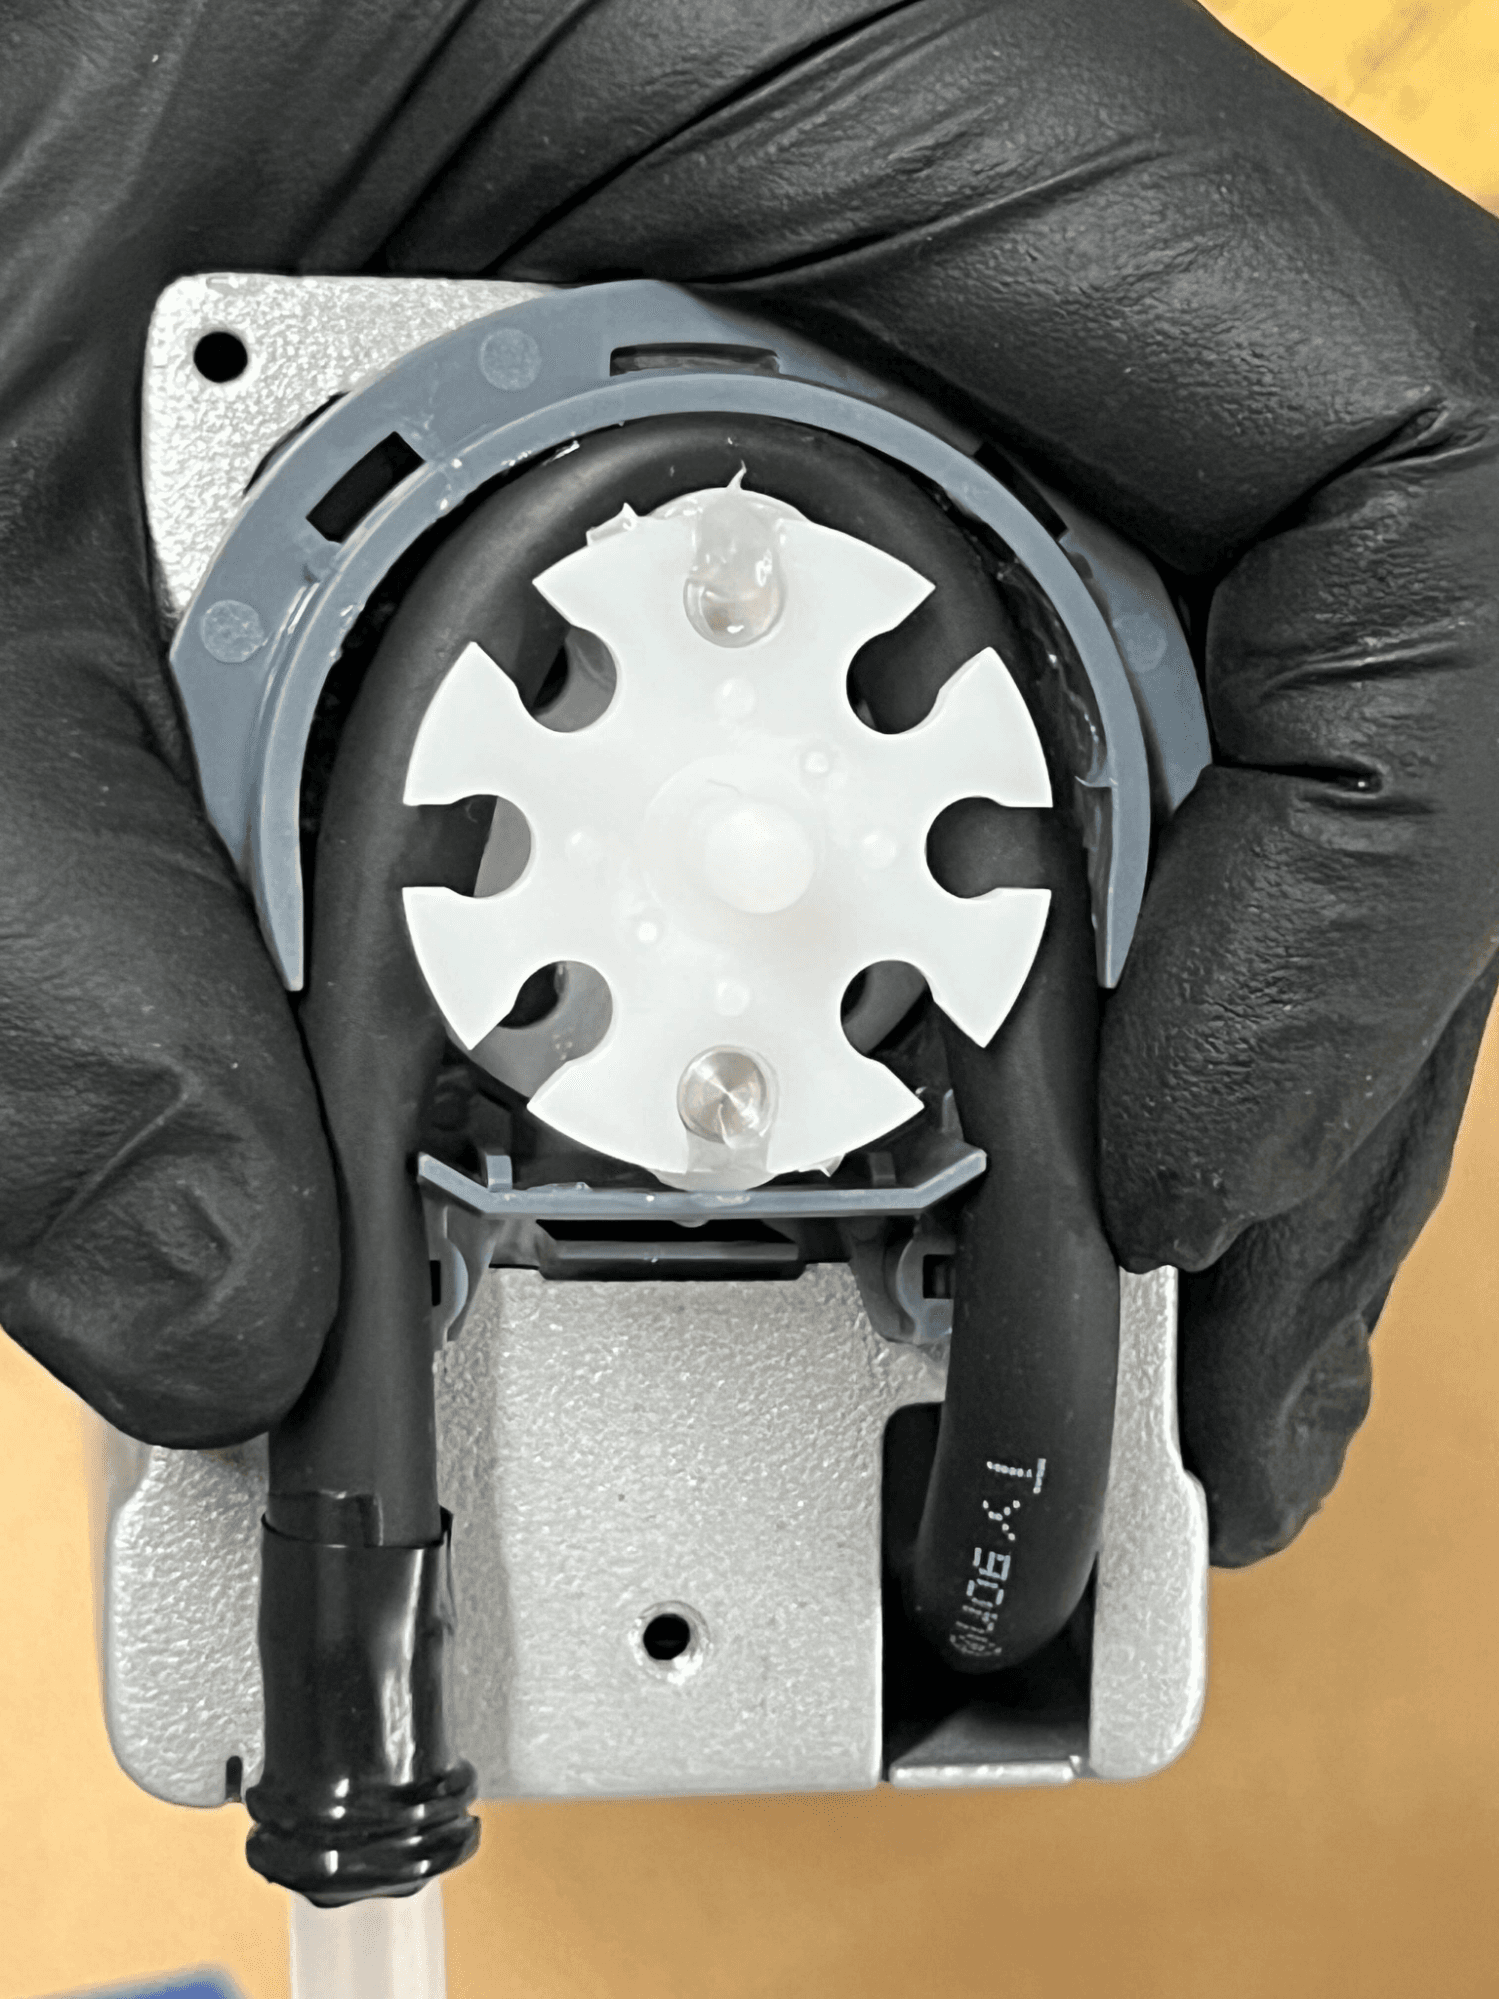
Press the pump tube into the clamp points at the entry and exit of the motor housing.
Step 8: Adjust the pump tube
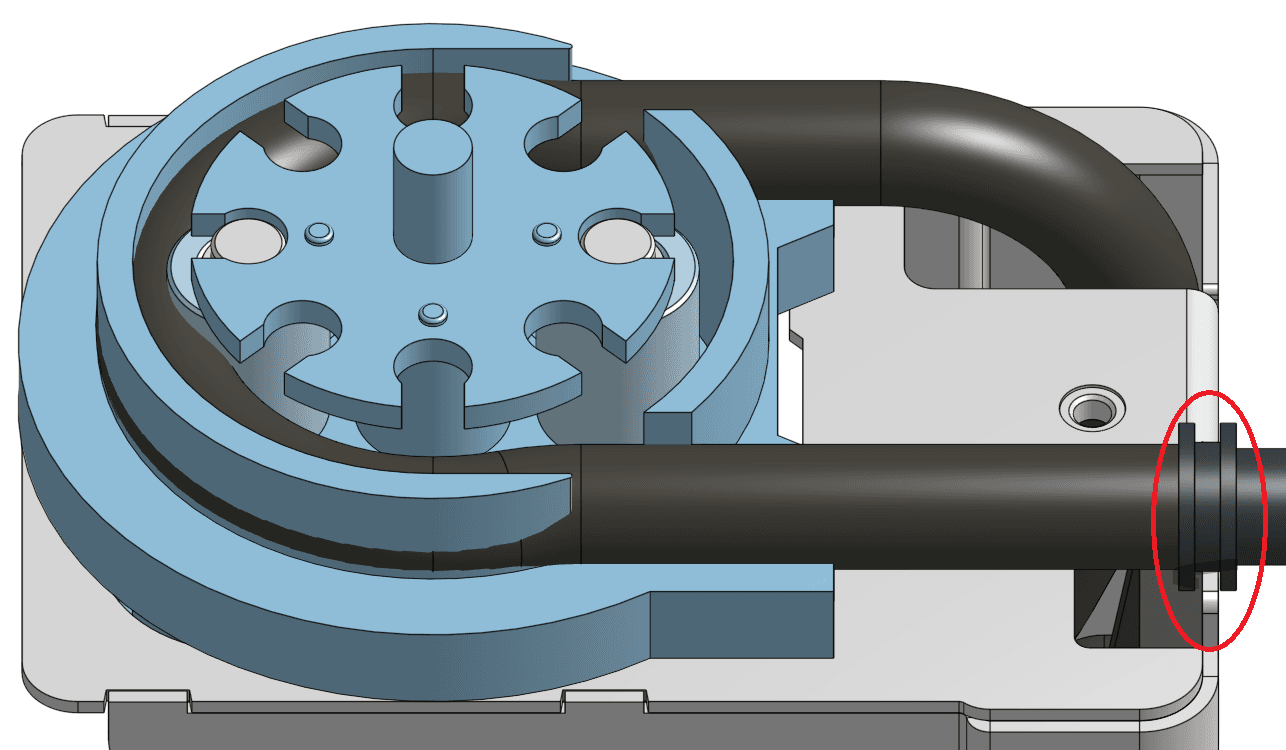
Adjust the pump tube as needed so that it sits fully beneath the edge of the motor housing. Push any extra slack into the pump so that the retention groove on the barbed fitting at the end of the pump tube lines up with the lip of the pump body.
Step 9: Reinstall the resin pump
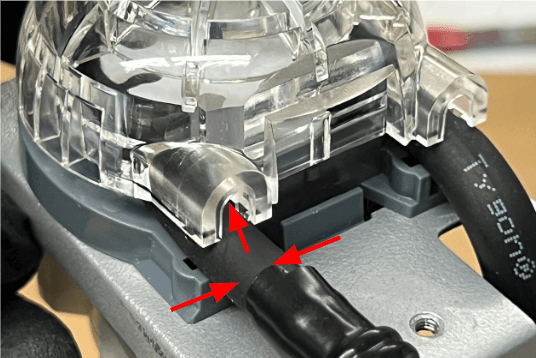
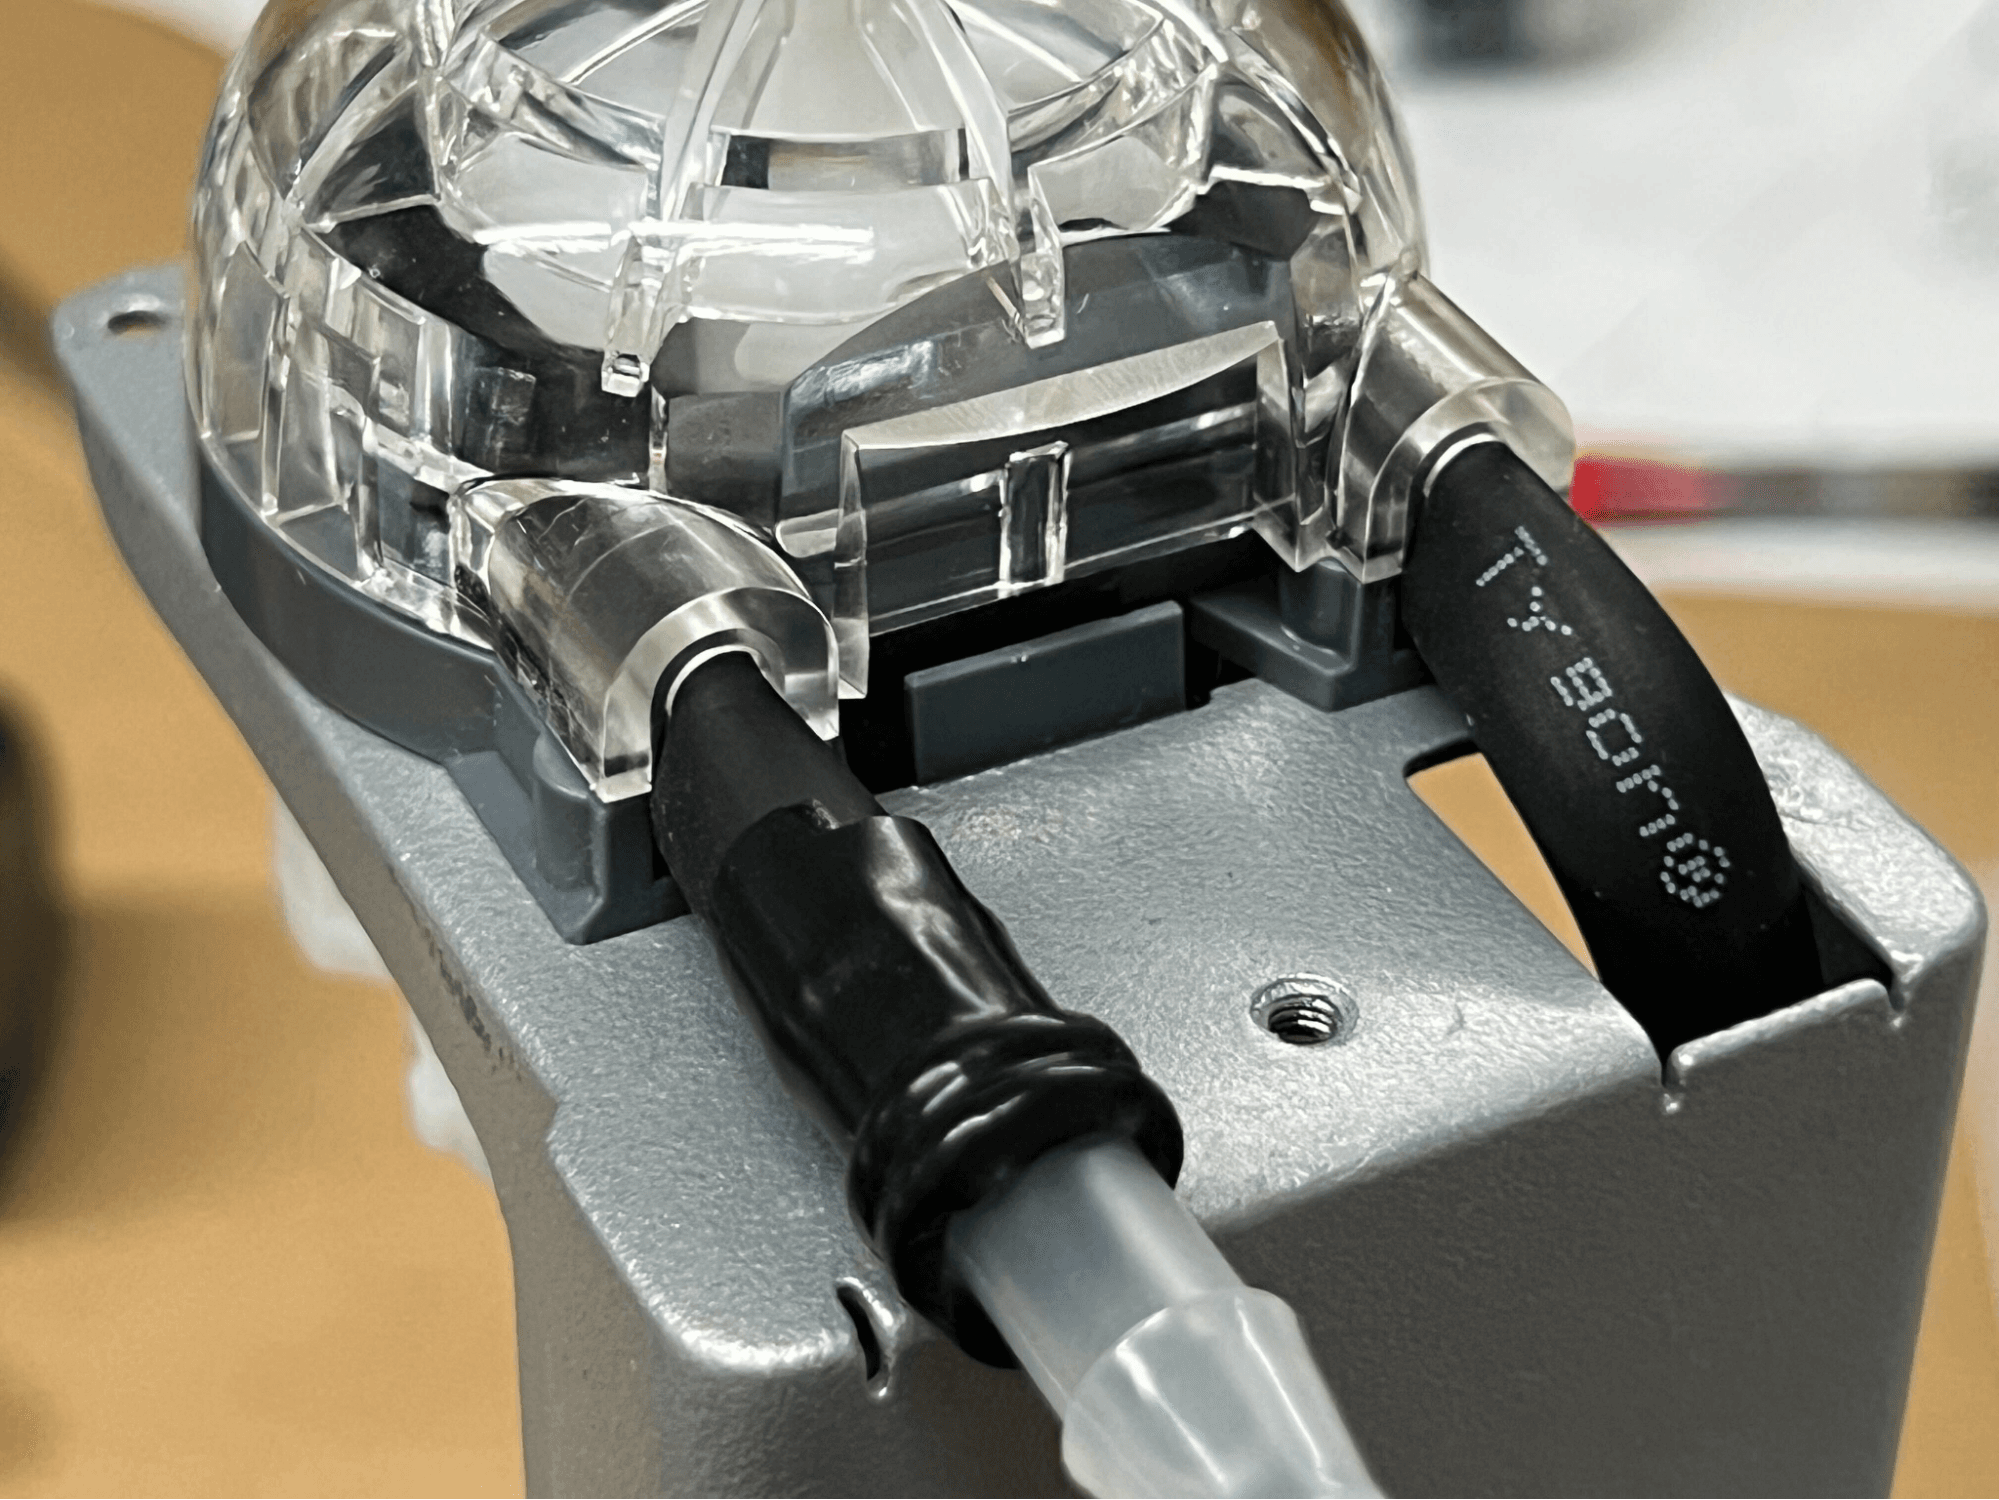
Press the resin pump cap onto the top of the resin pump until it clicks into place. Ensure that the pump tube is not pinched between the pump cap and the pump body. The pump cap should sit flush against the pump body.
Step 10: Reinstall the resin pump shell
Slide the resin pump shell onto the resin pump body. When properly installed, the shell sits flush against the base of the resin pump body.
Step 11: Secure the resin pump shell
Thread the resin pump shell screw into the screw hole at the top of the pump. Use a 2.5 mm hex driver to tighten the screw until snug.
Finalizing the repair
Overview: After installing the new pump tube, insert the resin pump into a printer and perform final checks.
Step 1: Remove the luer cap from the pump tube
Unscrew the cap from the outlet of the pump tube. Screw the cap onto the retention post on the bottom of the pump for safekeeping.
Step 2: Connect the transfer tube
Press the transfer tube onto the barbed fitting at the top of the resin pump until the end of the tube sits flush against the base of the fitting and secure the transfer tube with a zip tie.
Step 3: Insert the resin pump into the printer
Insert the resin pump into the cartridge slot of your printer. Route the transfer tube so that it does not interfere with the printer cover or any other moving parts.
Step 4: Run a test print
Start a test print. Monitor the printer to ensure that the resin pump dispenses resin properly. Contact Formlabs Support or your authorized reseller to share the results of the procedure.