
Required supplies:
Formlabs:
- LevelSense, camera, and resin tank RFID assembly
- 2.5 mm hex key (included in the tool caddy)
Third-party:
- Nitrile gloves

On Form Studio 1 printers, the resin level sensor (known as LevelSense), camera, and resin tank RFID sensor are part of the same assembly. The LevelSense system measures the amount of resin in the resin tank, triggering resin dispensing from the cartridge as needed. The camera facilitates timelapse recordings, print photography, and the monitoring of potential part defects. The resin tank RFID sensor is used to identify the resin type and confirm the tank's presence in the printer. If any one of these components malfunction, it may prevent the printer from functioning properly.
Use this guide to replace the LevelSense, camera, and resin tank RFID assembly.
Required supplies:
Formlabs:
Third-party:
Estimated time: 10–20 minutes
Preparing the workspace
Overview: Prepare the machine and a dust-free workspace for replacing the LevelSense, camera, and resin tank RFID assembly.
Step 1: Wear gloves and prepare your workspace
Put on gloves. Clear a workspace around your printer. Ensure that the workspace is well-ventilated and free of dust.
Step 2: Remove the build platform
Remove the build platform first to avoid dripping resin onto the optical surfaces.
Step 3: Remove the resin cartridge
Remove the resin cartridge and close the vent cap to prevent resin from dripping off of the bite valve and into the printer.
Step 4: Remove and store the resin tank
Remove the resin tank and cover it with its lid. Set the tank aside on a clean, flat surface.
Notice:
Wear gloves and hold the resin tank by the tank grips on either side to avoid contamination or damage to the underside of the tank.
Step 5: Power down and unplug the printer
Disconnect the power cable before continuing with maintenance. Do not perform maintenance on the printer while it is connected to power. Wait five minutes after disconnecting the printer from power before proceeding.
Removing the back panel and top halo panel
Overview: Remove the back panel and top halo panel to access the LevelSense, camera, and resin tank RFID assembly.
Step 1: Remove the rear panel retention screws
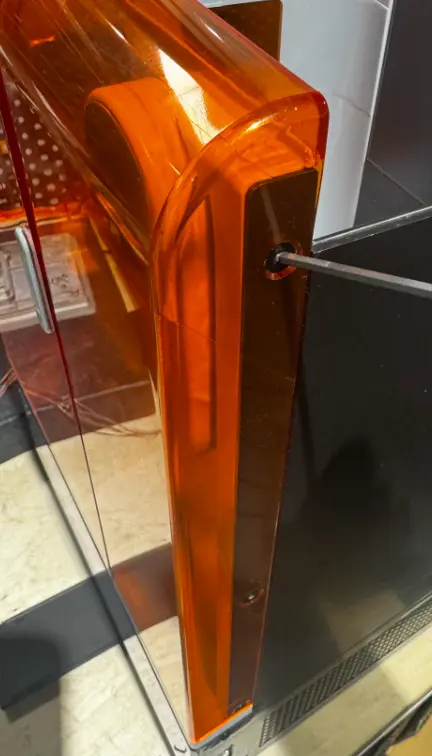
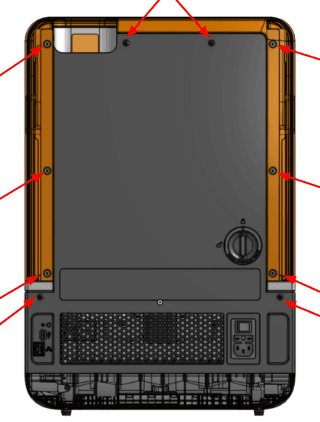
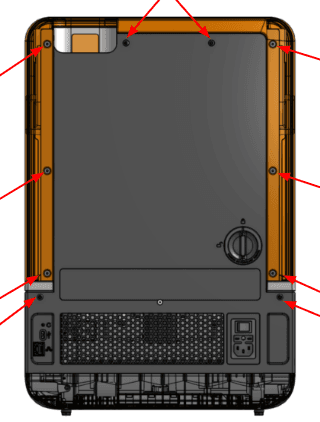
Rotate the printer so you can access its rear. Using the 2.5 mm hex key provided in the tool caddy, loosen and remove the 10 screws securing the back panel to the printer. Set the screws aside.
Step 2: Remove the top halo panel and back panel
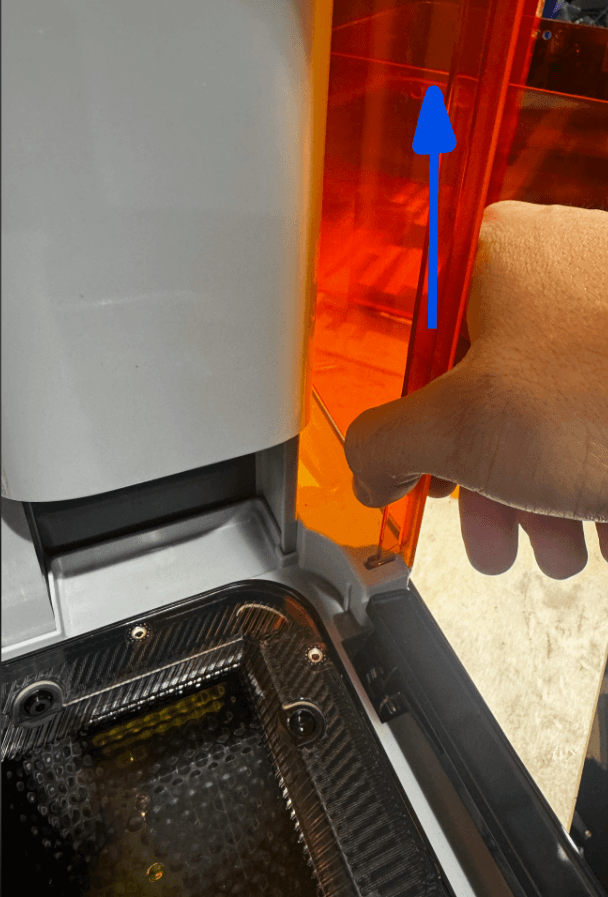
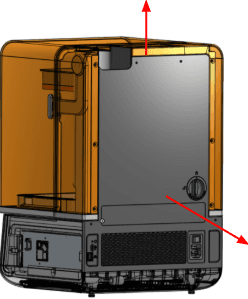
The halo panel encircles the top of the printer. Open the printer cover. Unclip the halo panel from the left and right sides of the printer by pulling up on the front edges. Lift the halo panel up and away from the printer and set it aside. Remove the back panel and set it aside.
Removing the LevelSense, camera, and resin tank RFID assembly
Overview: With the panels removed, unplug and uninstall the LevelSense, camera, and resin tank RFID assembly.
Step 1: Unplug the cables from the assembly
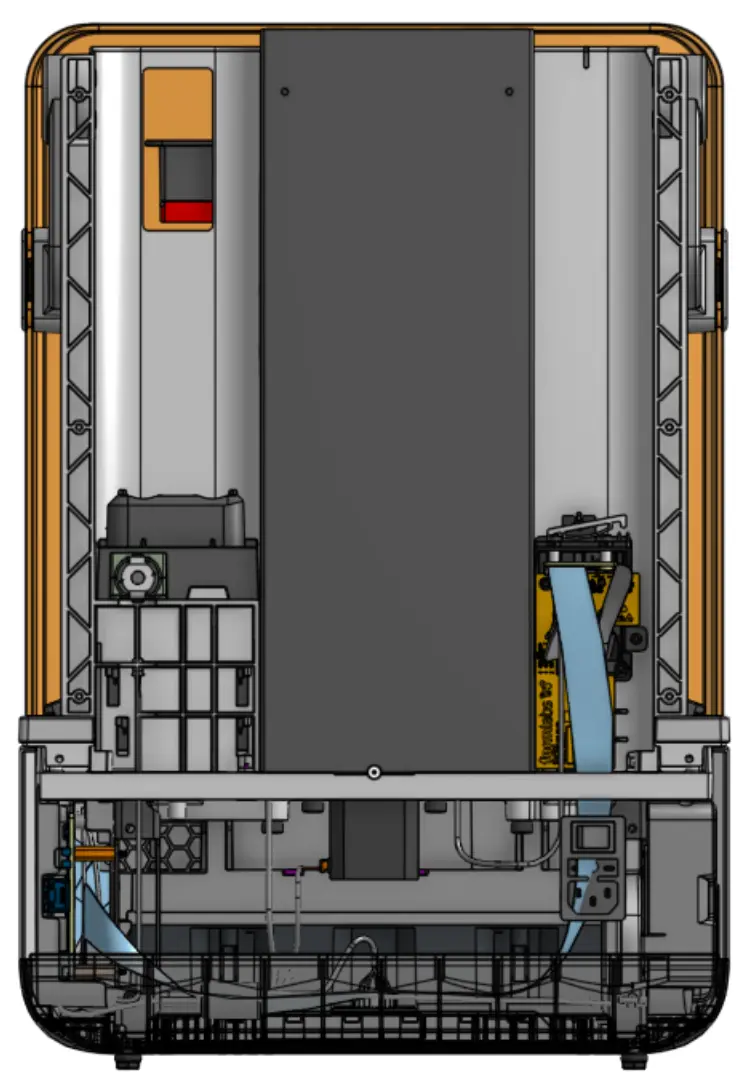
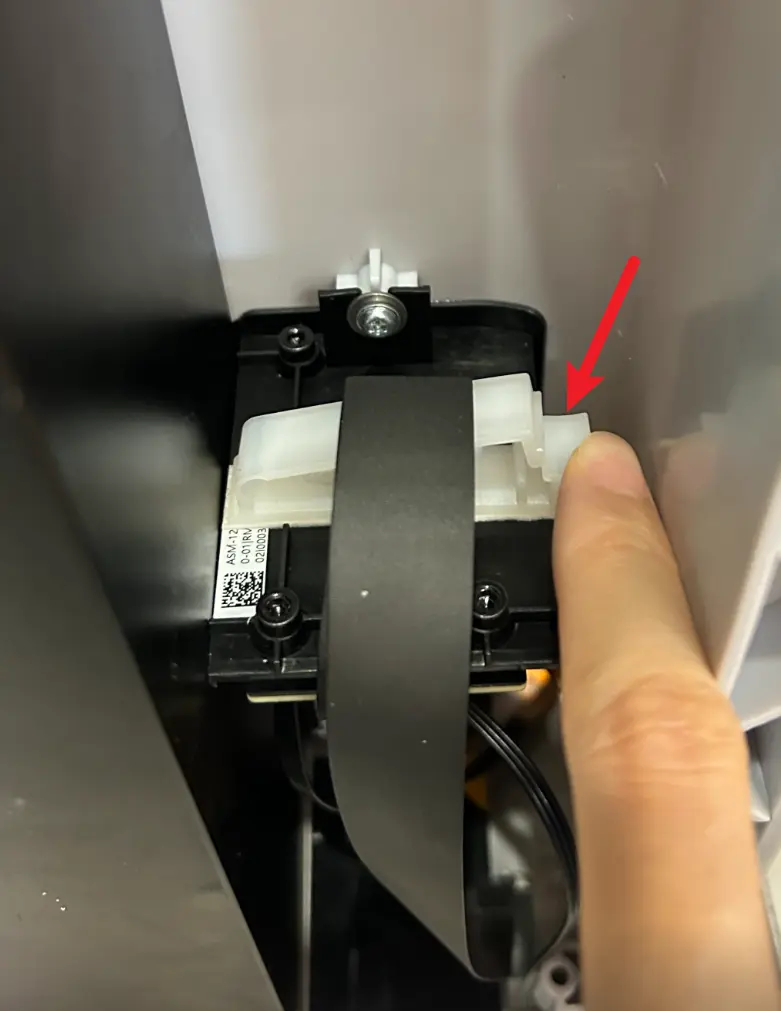
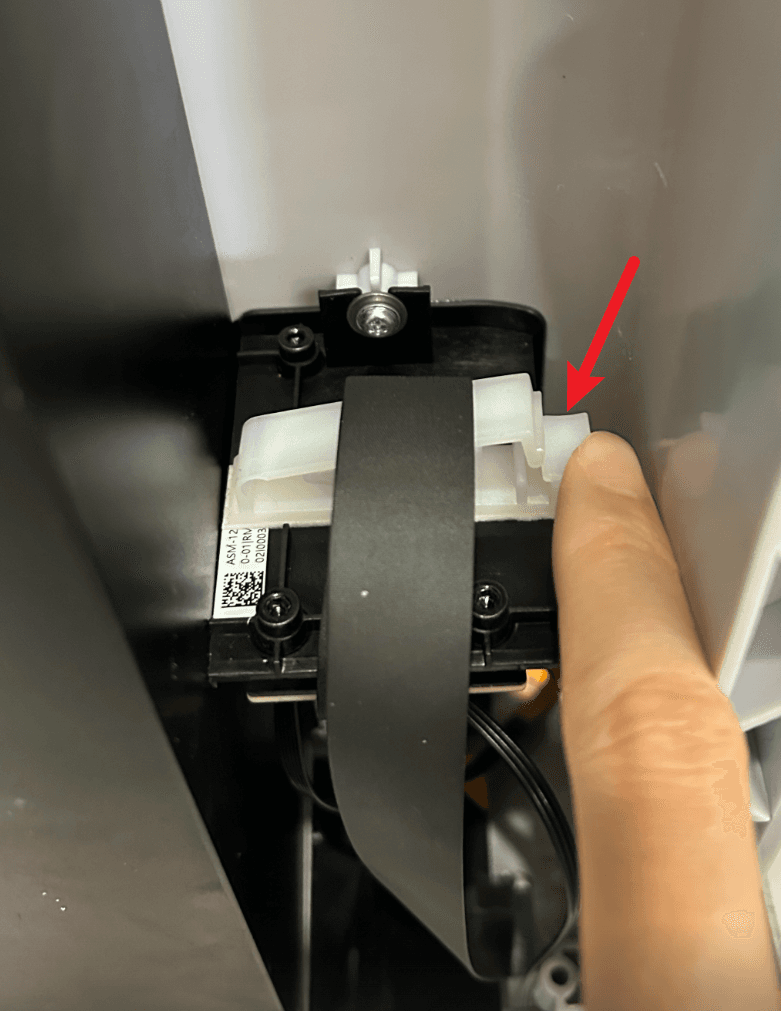
Locate the LevelSense, camera, and resin tank RFID assembly, positioned on the right side of the printer (when viewed from the back). Open the cable clip at the top of the assembly and free the ribbon cable it secures.
Unplug the three cables from the assembly. Take note of the orientation of the ribbon cables in their connectors.
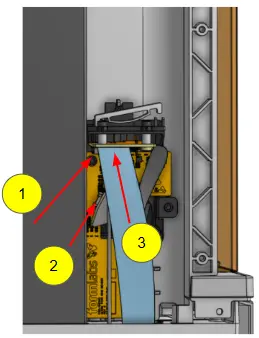
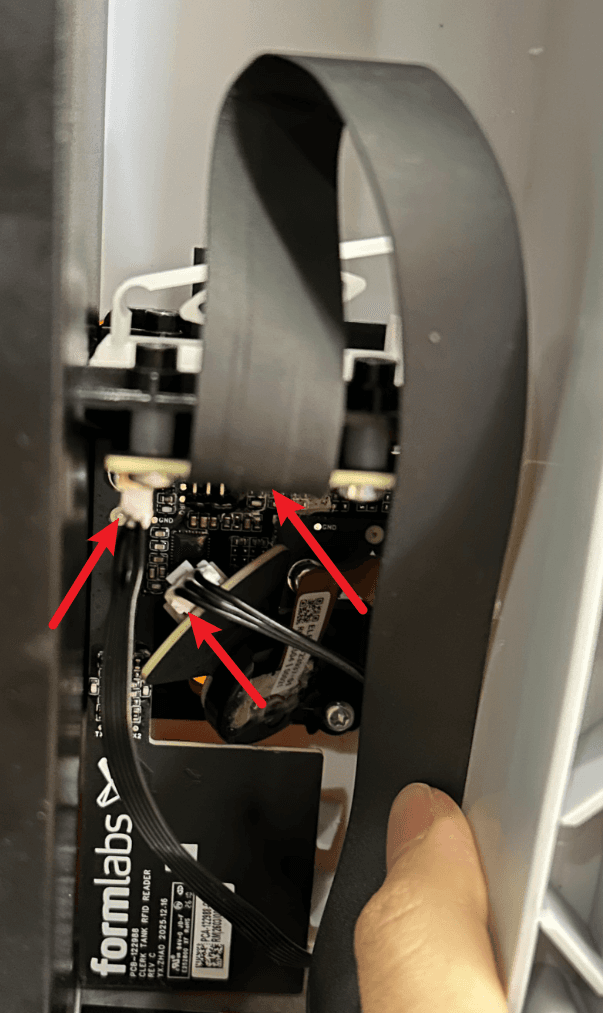
Step 2: Uninstall the LevelSense, camera, and resin tank RFID assembly
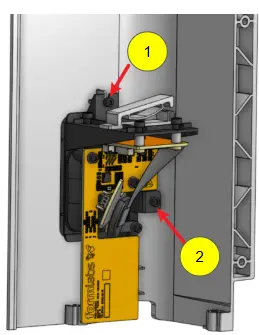
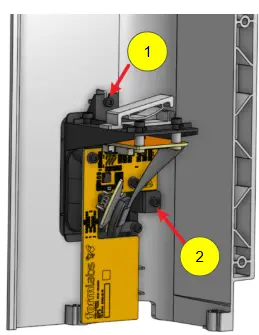
The LevelSense, camera, and resin tank RFID assembly is secured to the printer with two screws. Using the 2.5 mm hex key, loosen and remove the screws and set them aside. Note that the top screw has a washer; set that aside as well.
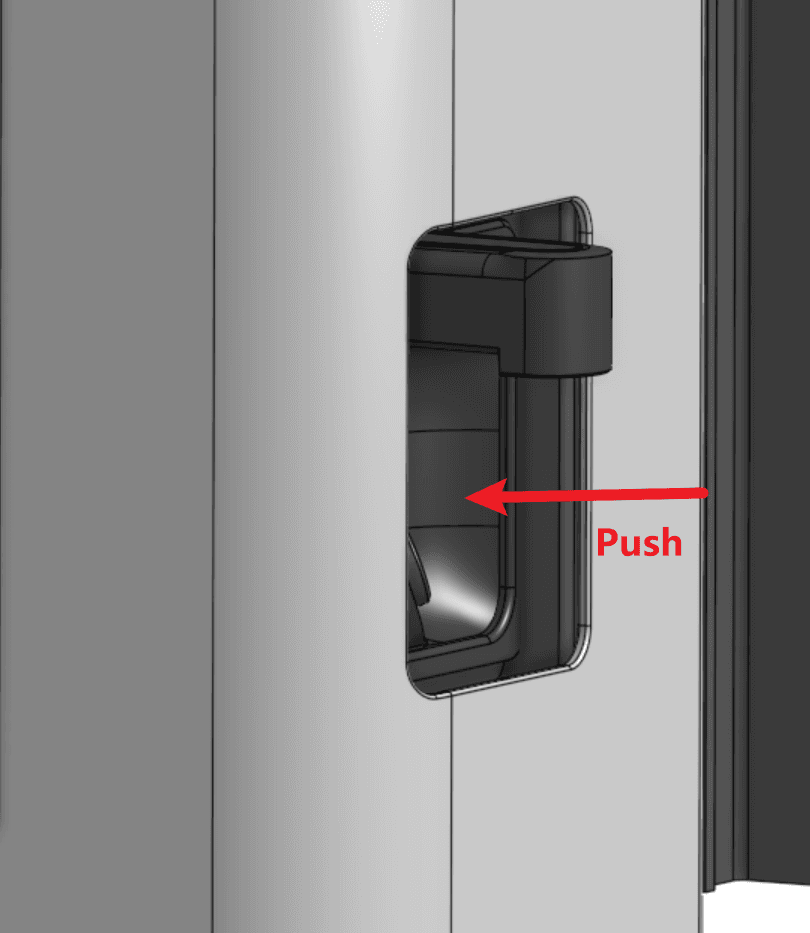
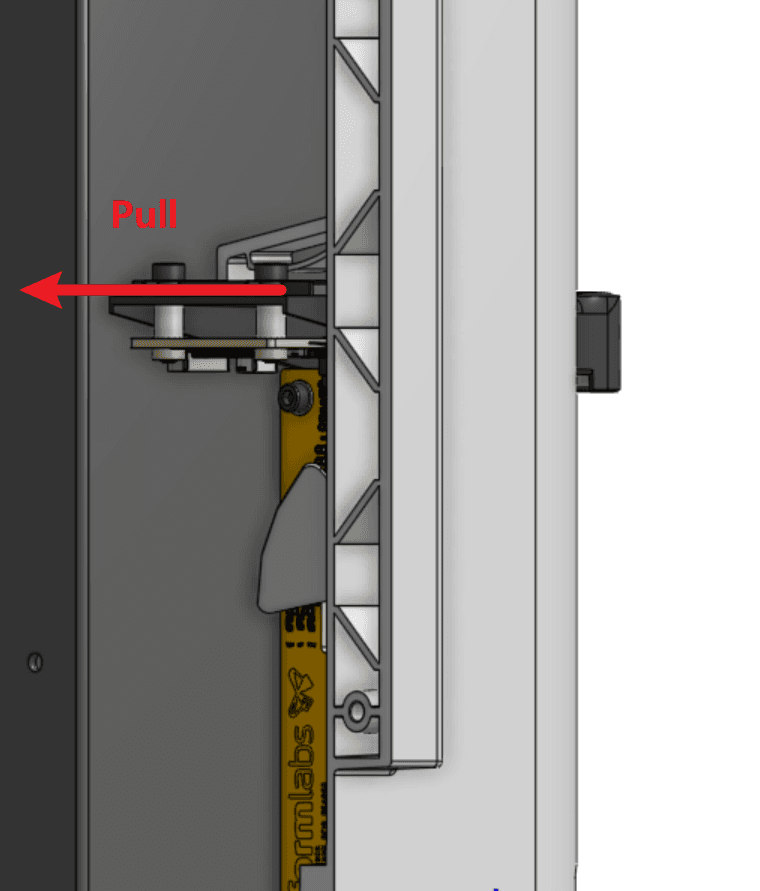
Pull on the back of the assembly while pushing it from inside the printer cavity to unmount it. Set the LevelSense, camera, and resin tank RFID assembly aside for disposal with electronic waste.
Installing the replacement LevelSense, camera, and resin tank RFID assembly
Overview: After uninstalling the original LevelSense, camera, and resin tank RFID assembly, mount and secure the replacement component.
Step 1: Connect the cables to the replacement assembly
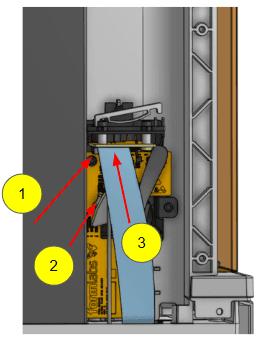
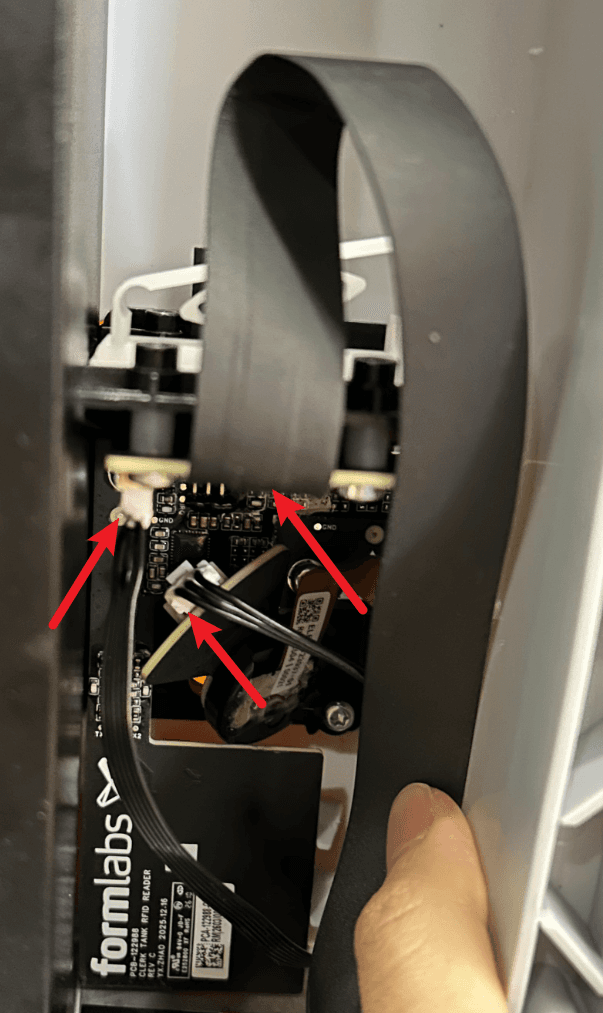
Before mounting the new LevelSense, camera, and resin tank RFID assembly, connect the three cables. The JST connector snaps in place with an audible and tactile click when fully connected. For the ribbon cables, be sure to insert the cables into their connectors in their original orientation. Rotate the latch towards the circuit board to lock the ribbon cable in place. The latch is locked when it is parallel to the connector.
Step 2: Mount the replacement assembly
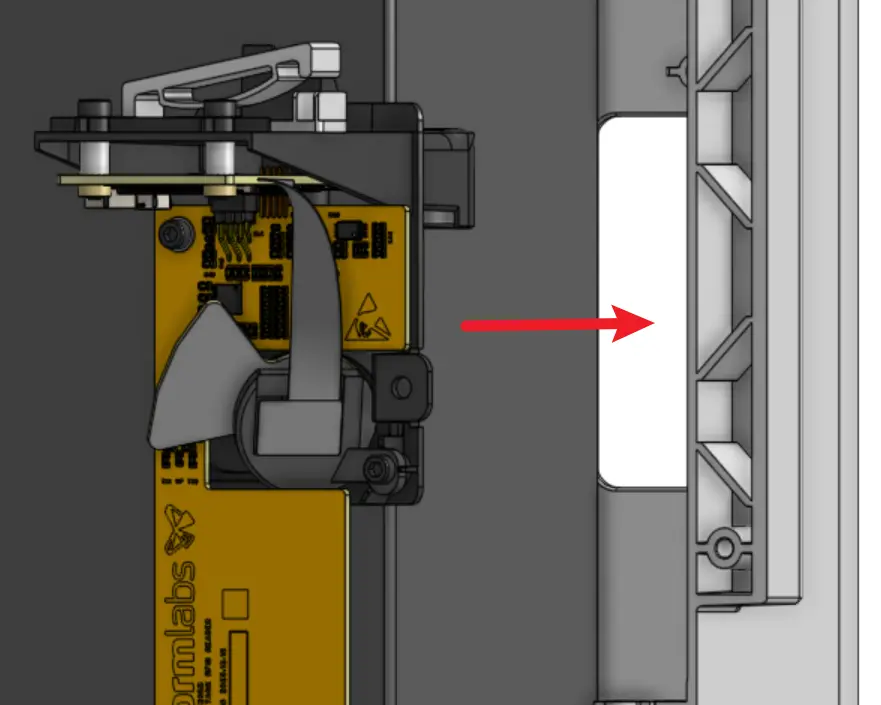
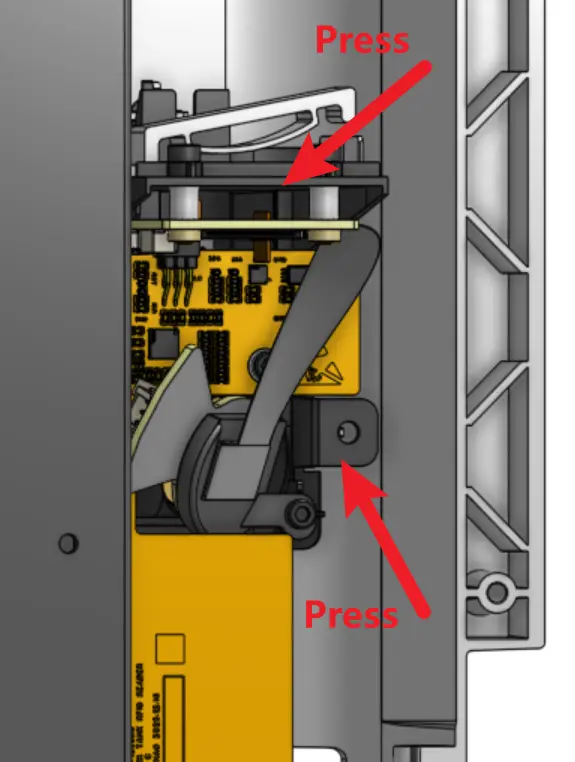
Align the LevelSense, camera, and resin tank RFID assembly with the cutout in the tower shell. Press it forward and down until it clicks into place.
Step 3: Secure the replacement assembly
Place the washer on one of the two LevelSense, camera, and resin tank RFID assembly retention screws. Thread that screw into the upper screw hole in the assembly. Thread the remaining screw (without a washer) into the lower screw hole. Using the 2.5 mm hex key, tighten until snug.
Route the long ribbon cable extending towards you through the cable clip on the top of the assembly. Close the cable clip to secure the cable in place.
Reinstalling the back panel and top halo panel
Overview: After replacing the LevelSense, camera, and resin tank RFID assembly, reinstall the printer panels.
Step 1: Mount the back panel and top halo panel
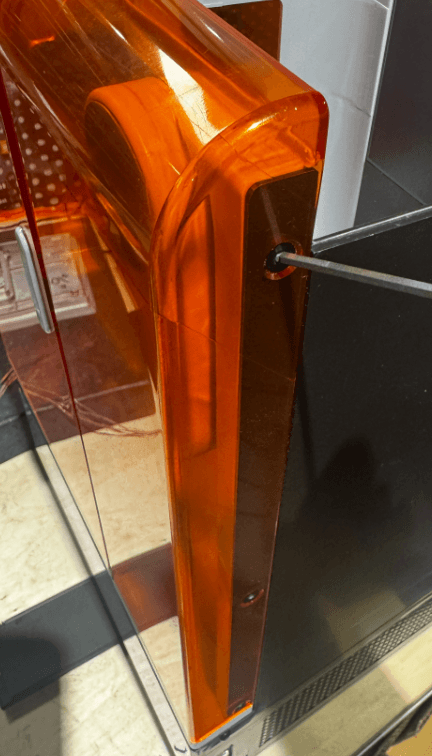
Place the back panel on the back of the printer, aligning the ten screw holes in the panel with the corresponding screw holes in the printer frame. Lower the halo panel over the back panel and the top of the printer. Press it down so it clicks into place. Check that the screw holes along the back of the halo align with those in the back panel.
Step 2: Secure the back panel and top halo panel
Thread one back panel retention screw into each of the 10 screw holes in the halo and back panels. Using the 2.5 mm hex key, tighten until snug.
Finalizing the repair
Overview: After installing the new LevelSense, camera, and resin tank RFID assembly, power on the printer and perform final checks.
Step 1: Power on the printer
Close the printer cover and connect the power cable to the printer and the power supply. Turn on the switch at the back of the printer. The printer will turn on and initialize.
Step 2: Calibrate the resin level sensor
Calibrate the resin level sensor using the on-screen tool:
Step 3: Check the resin tank RFID sensor
Insert a resin tank and verify that the printer correctly identifies it.
Step 4: Check the camera
Open PreForm and select your printer on the Job Setup screen. Click Camera Snapshot in the right-hand panel and check that an image appears.