
Required supplies:
Formlabs:
- Replacement Form Studio 1 Light Processing Unit
Third-party:
- 2 mm hex driver Nitrile gloves

In Form Studio 1 printers, the printer’s backlight shines through a component called the Light Processing Unit (LPU) to print. The LPU contains an LCD panel and the resin tank heater, and is a key part of the printer’s optical system. The LPU mounts to the printer’s top plate and sits under the resin tank. A malfunctioning LPU can prevent the printer from printing properly.
Use this guide to replace the Light Processing Unit.
Required supplies:
Formlabs:
Third-party:
Estimated time: 30 minutes
Preparing the workspace
Overview: Prepare the printer and a dust-free workspace for replacing the Light Processing Unit.
Step 1: Wear gloves and prepare your workspace
Put on gloves. Clear a well-ventilated and dust-free workspace around your printer.
Step 2: Remove the build platform
Remove the build platform first to avoid dripping resin onto the optical surfaces.
Step 3: Remove the resin cartridge
Remove the resin cartridge and close the vent cap to prevent resin from dripping off of the bite valve and into the printer.
Step 4: Remove and store the resin tank
Remove the resin tank and cover it with its lid. Set the tank aside on a clean, flat surface.
Notice:
Wear gloves and hold the resin tank by the tank grips on either side to avoid contamination or damage to the underside of the tank.
Step 5: Clean the printer
Warning:
Wear gloves and hold the resin tank by the tank grips on either side to avoid contamination or damage to the underside of the tank.
Open the printer cover and clean any resin pooled on and around the LCD module with paper towels. Dampen the paper towels with isopropyl alcohol if necessary to fully remove the resin.
Danger:
Fire hazard. IPA is flammable. Keep containers closed, and keep out of the reach of children.
Step 6: Unplug the printer
Disconnect the power cable before continuing with maintenance. Do not perform maintenance on the printer while it is connected to power. Wait five minutes after disconnecting the printer from power before proceeding.
Removing the Light Processing Unit
Overview: After preparing a clean workspace, remove the Light Processing Unit.
Warning:
This step involves removing the LPU, which exposes the Form Studio 1 optical system. While the LPU is removed from the printer, ensure that no dust or debris falls into the optical cavity.
Step 1: Loosen and remove the LPU retention screws
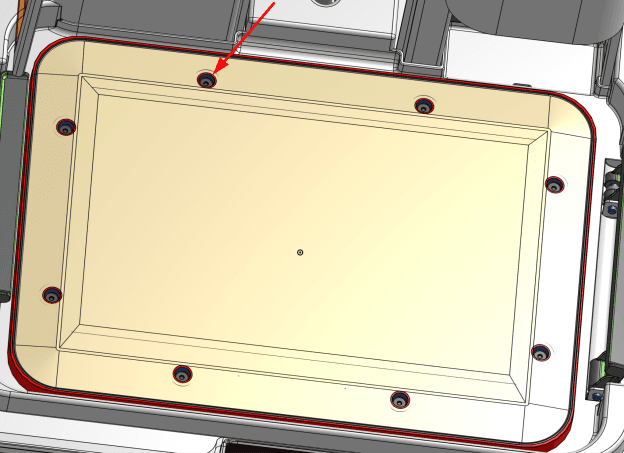
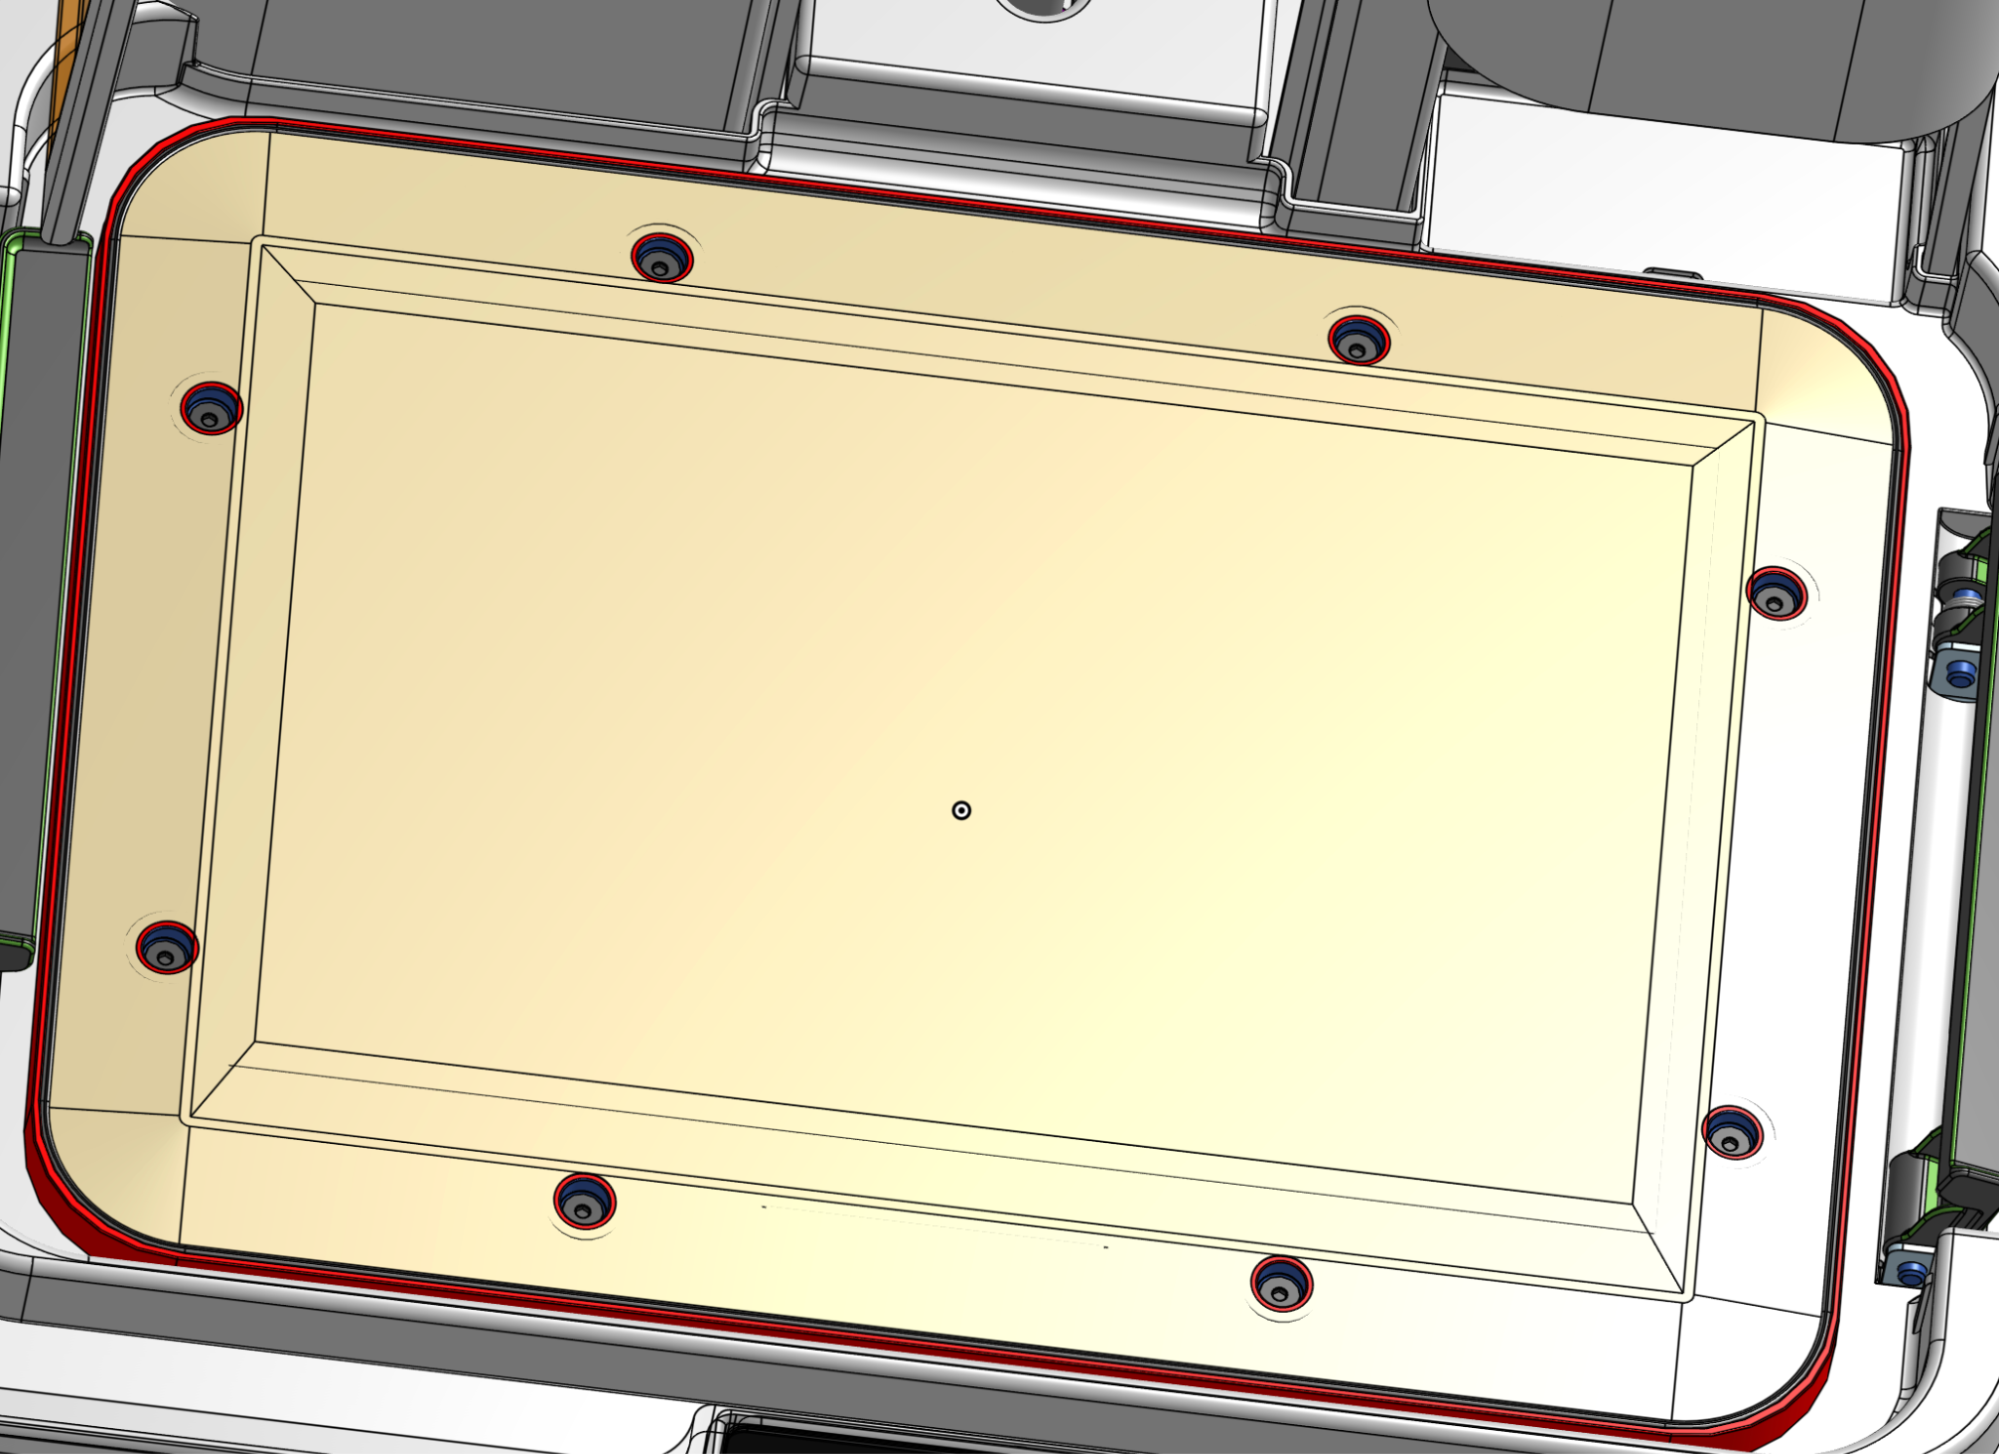
The LPU is secured to the printer with eight screws. Using a 2 mm hex driver, loosen and remove the eight screws.
Step 2: Unplug the heater cable
Release the tank heater cable by squeezing the tab on the connector and pulling directly away from the LPU. Do not pull on the cable itself.
Step 3: Unplug the LCD cable
The LCD ribbon cable on the Form Studio 1 runs from the LPU to a breakout board, then from the board to the printer. When replacing the LPU, you will also replace this breakout board, so you will disconnect the printer-side cable from the board.
Depending on the date of manufacture of your machine, that ribbon cable connector may be visible or covered by tape. If the printer-side connector on the breakout board is covered:


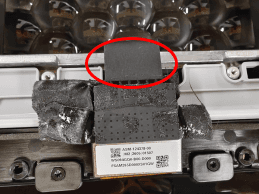


Once the lower connector on the breakout board is visible, tilt the latch away from the board to free the ribbon cable. Once the latch is perpendicular to the board, in the unlocked position, the ribbon can be easily removed.
Step 4: Remove the LPU
Remove the LPU from the printer and set it aside for disposal with electronic waste.
Installing the replacement Light Processing Unit
Overview: After removing the old LPU, connect and install the replacement.
Step 1: Prepare the replacement LPU


Remove the replacement LPU from its packaging. Carefully remove the protective film from both sides of the LPU.
Step 2: Connect the LCD and heater cables

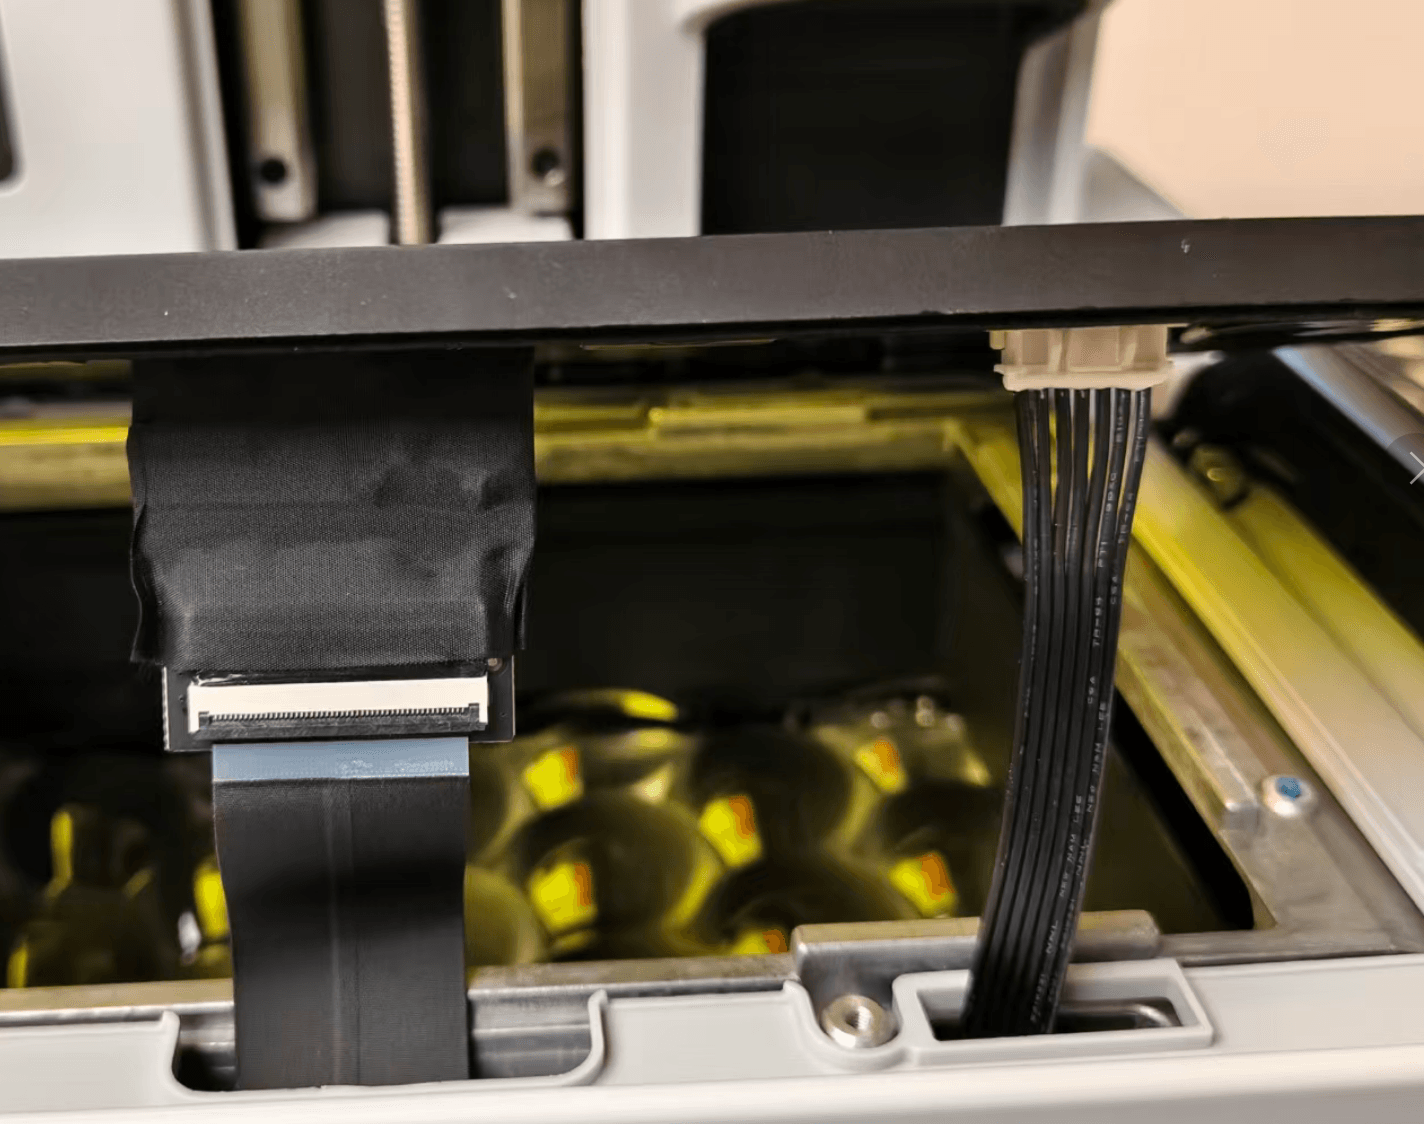
Position the LPU so the connectors are oriented towards the front of the printer. Insert the ribbon cable on the new LPU into the open port on the connector port. Ensure that the ribbon cable is not twisted or folded. Rotate the latch downwards to lock the ribbon cable in place.
Plug the tank heater cable into the connector on the LPU. The plastic tab should click into place to secure the cable.
Step 3: Mount the LPU
Slowly lower the LPU into place on the printer’s top plate. Make sure that the LCD and heater cables feed into their corresponding holes in the top plate and are not pinched underneath the LPU.

Step 4: Check the alignment of the LPU

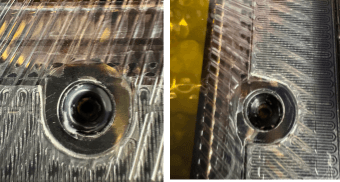
Check that the gap around the edge of the LPU is even around the component and that the screw holes in the LPU align with the corresponding screw holes in the top plate. When the LPU is seated properly, it should not move more than 3 mm in any direction when pushed.
Step 5: Check the printer optics
Before securing the LPU in place, check that it is functioning properly and nothing is blocking the optical path.
Dim the lights in your workspace. This will make it easier to see the light from the Backlight Unit and determine if it is working properly. Place a sheet of paper on the LPU to protect your eyes from UV damage. Leave the printer cover open after placing the sheet of paper on the LPU.
On the touchscreen, go to Settings > Tools > Inspect optics. Follow the on-screen instructions. Inspect the paper. If the Backlight Unit and LPU are functioning normally, the paper should be uniformly dimly lit. If the paper does not appear to light up at all, the environment may be too bright. Turn down the lights or use thinner paper, then inspect the backlight again.
Tap Done to turn off the Backlight Unit and LPU and finish the test.

Step 6: Secure the LPU
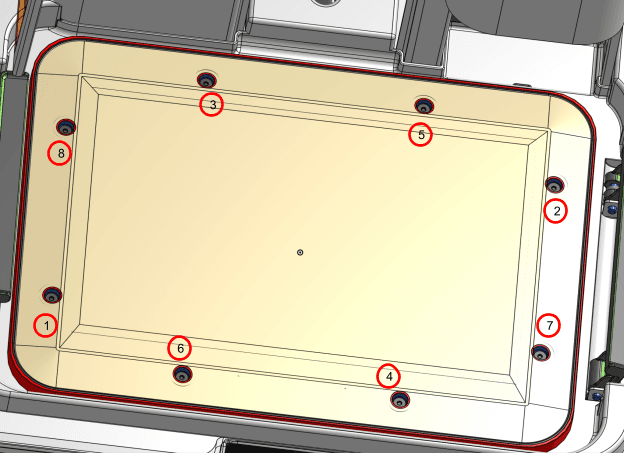
Insert one LPU screw into each of the eight screw holes in the component. Using a 2 mm hex driver, tighten the screws in the order shown until snug.
Finalizing the repair
Overview: After installing the replacement LPU, perform final calibrations and resume printing.
Step 1: Align the build platform
On the touchscreen, tap Settings > Tools > Align build platform. Follow the on-screen instructions.
Step 2: Run a test print
Insert any missing consumables and upload and start a print. Check that the print starts normally and the parts print successfully. Contact Formlabs Support to share the results of the procedure.