

Replacing the Fuse X1 exhaust filter
Replacing the Fuse X1 exhaust filter
When disposing of a damaged or clogged exhaust filter, remove it from the printer and clean off any laurolactam and powder. Once cleaned, the filter can be disposed of with standard waste. Replace the exhuast filter bianually.
-
Using an 8 mm hex driver, unlatch and open the air handling access door, on the right side of the printer.
-
Unlatch and open the exhaust filter box.
-
Using a 4 mm hex driver, loosen and remove the four screws securing the filter cover. Set the screws and cover aside.
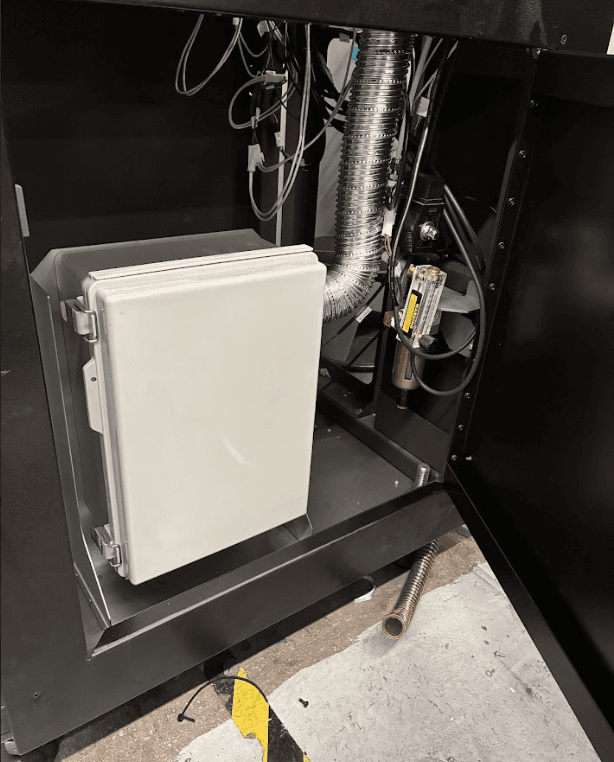
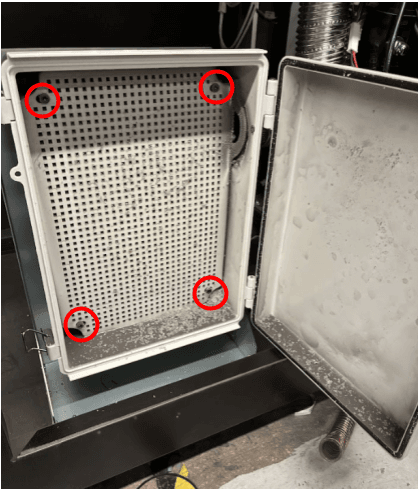
-
Remove the exhaust filter and set it aside for disposal.
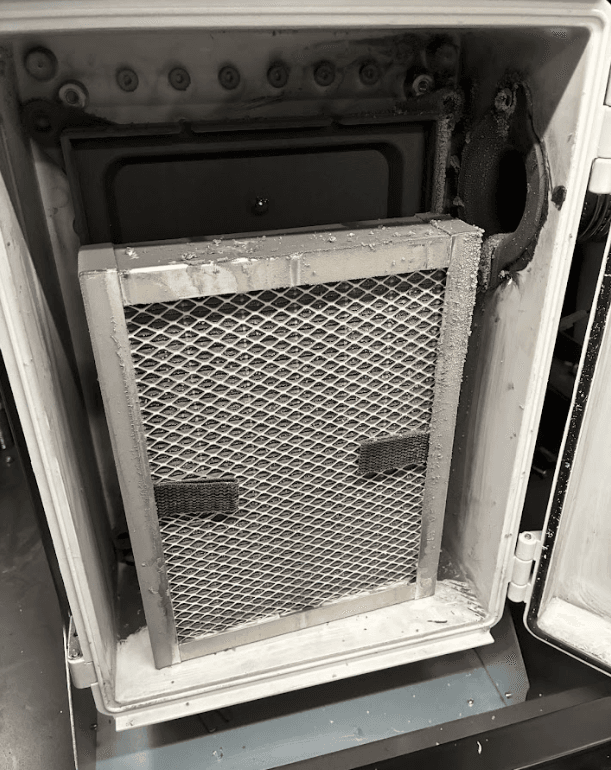
-
Install the new exhaust filter.
-
Mount the exhaust filter cover, aligning the four screw holes in the filter with the corresponding screw holes in its mount. Thread one mounting screw into each of the four screw holes. Using a 4 mm hex driver, tighten until snug.
-
Close and latch the filter box.
-
Close the air handling access door. Latch it shut using an 8 mm hex driver.