

Fuse 1 generation error messages: PrinterWatcher aborts (Error 112, 113, 114, 216, 217)
Fuse 1 generation error messages: PrinterWatcher aborts (Error 112, 113, 114, 216, 217)
PrinterWatcher is smart camera vision software that monitors the print area for disruptions during printing. If PrinterWatcher identifies a large enough disruption, it aborts the print. Use this article to identify the most common causes of these issues based on print images.
This article refers to PrinterWatcher failures that result in:
- Error 112 PR_ERROR_PRINTERWATCHER_PRINT_FAILURE
- Error 113 PR_ERROR_PRINTERWATCHER_TOO_DARK
- Error 114 PR_ERROR_PRINTERWATCHER_TOO_BRIGHT
- Error 216 PR_ERROR_CAMERA_CHECK_TOO_DARK
- Error 217 PR_ERROR_CAMERA_CHECK_TOO_BRIGHT
PrinterWatcher is not enabled for Nylon 11 CF or TPU 90A Powder.
Symptoms
- Printer aborts and the printer touchscreen displays the error message Error 112, Error 113, Error 114, Error 216, or Error 217
- The print area at the top of an unpacked build shows a disruption in the print area, such as:
- Exposed sintered material from a previous layer
- Melted powder
- Powder contamination
- Underdosing
- Voids in the powder cake
Common causes
- Insufficient powder reaching the print plane
- Print defects catching on the recoater
- Powder melting
- Voids forming in the print area
- Powder contamination
- Contamination on the camera lens or the optical cassette camera window
- Software issues interfering with processing camera images
Gathering print failure photos for troubleshooting
Before troubleshooting the cause of the PrinterWatcher error, use the Download History feature in PreForm to collect images of the print failure.
- In PreForm, select the printer that experienced the error.
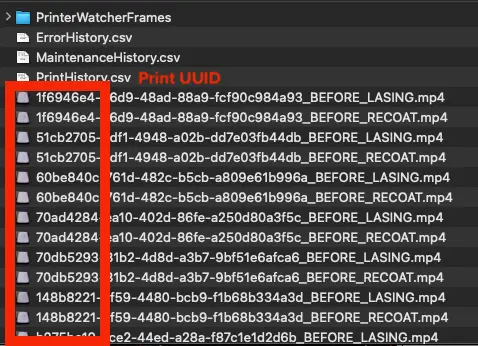
- Click Download History (CSV) in the Job Setup panel. An archive containing three CSV files and a folder of images is downloaded to youro computer.
- Unpack the downloaded archive.
- Open ErrorHistory.csv and locate the error by searching in the Time of Occurrence column.
- Note the Event UUID and Print UUID code corresponding to the error event.
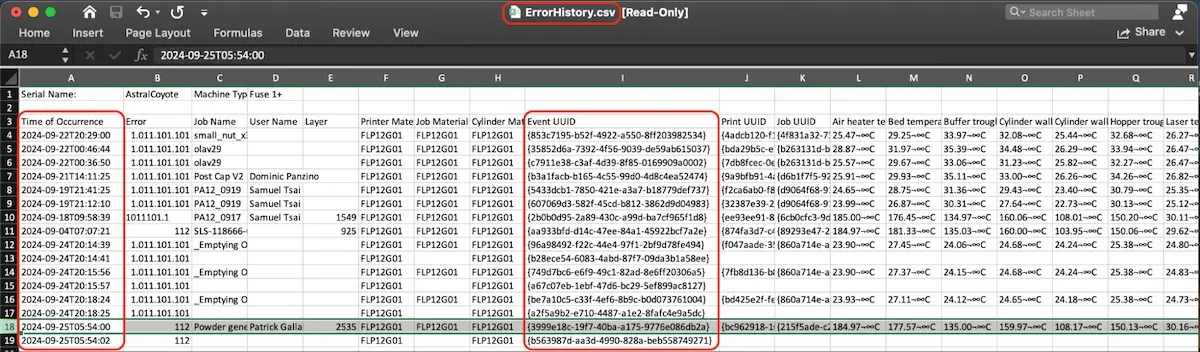
- Open the PrinterWatcherFrames folder. Locate the subfolder whose name matches the Event UUID from the previous step.
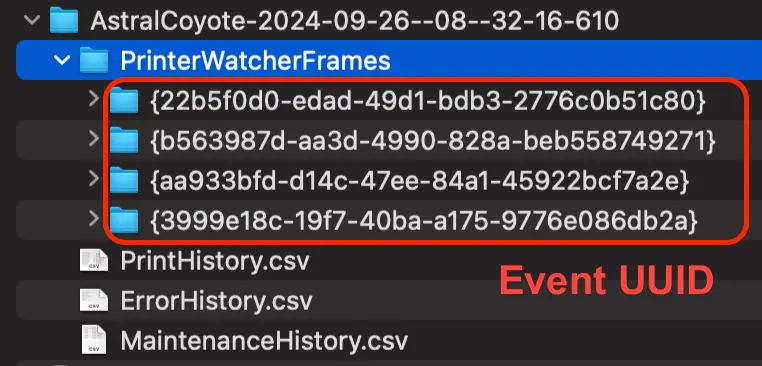
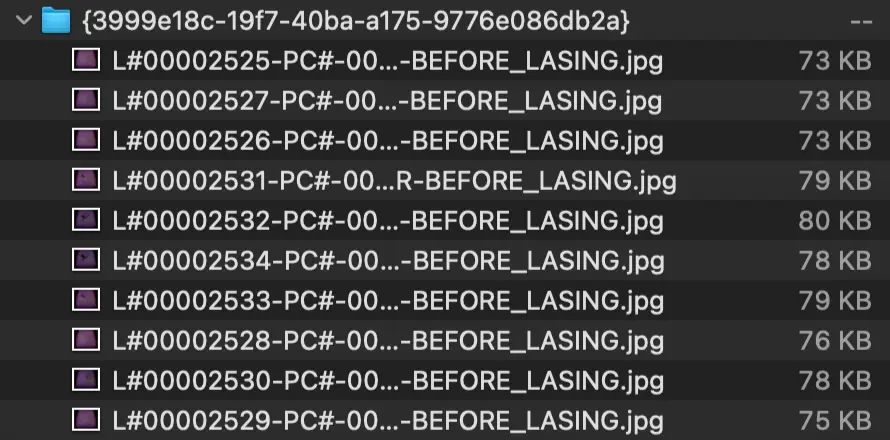
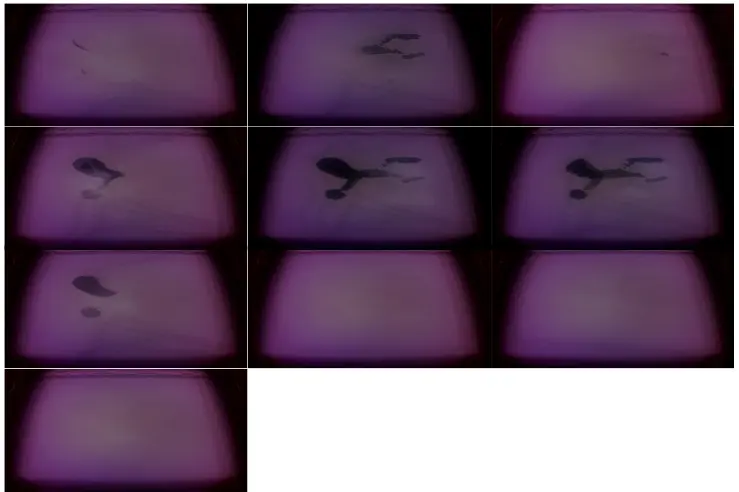
- Open the event subfolder. It contains the last ten frames recorded by PrinterWatcher before the error occurred.
- Cross-reference these images and videos against the examples below.
- Alternatively, locate the two MP4 video files whose names match the Print UUID from step 5. One video is made from photos taken before each layer was lased, while the other video is made from photos taken after lasing but before recoating powder for the next layer.
Troubleshooting steps
Using the images downloaded from PreForm, identify the cause of the PrinterWatcher abort using the table below, then follow this link for the individual failure mode:
Underdosing
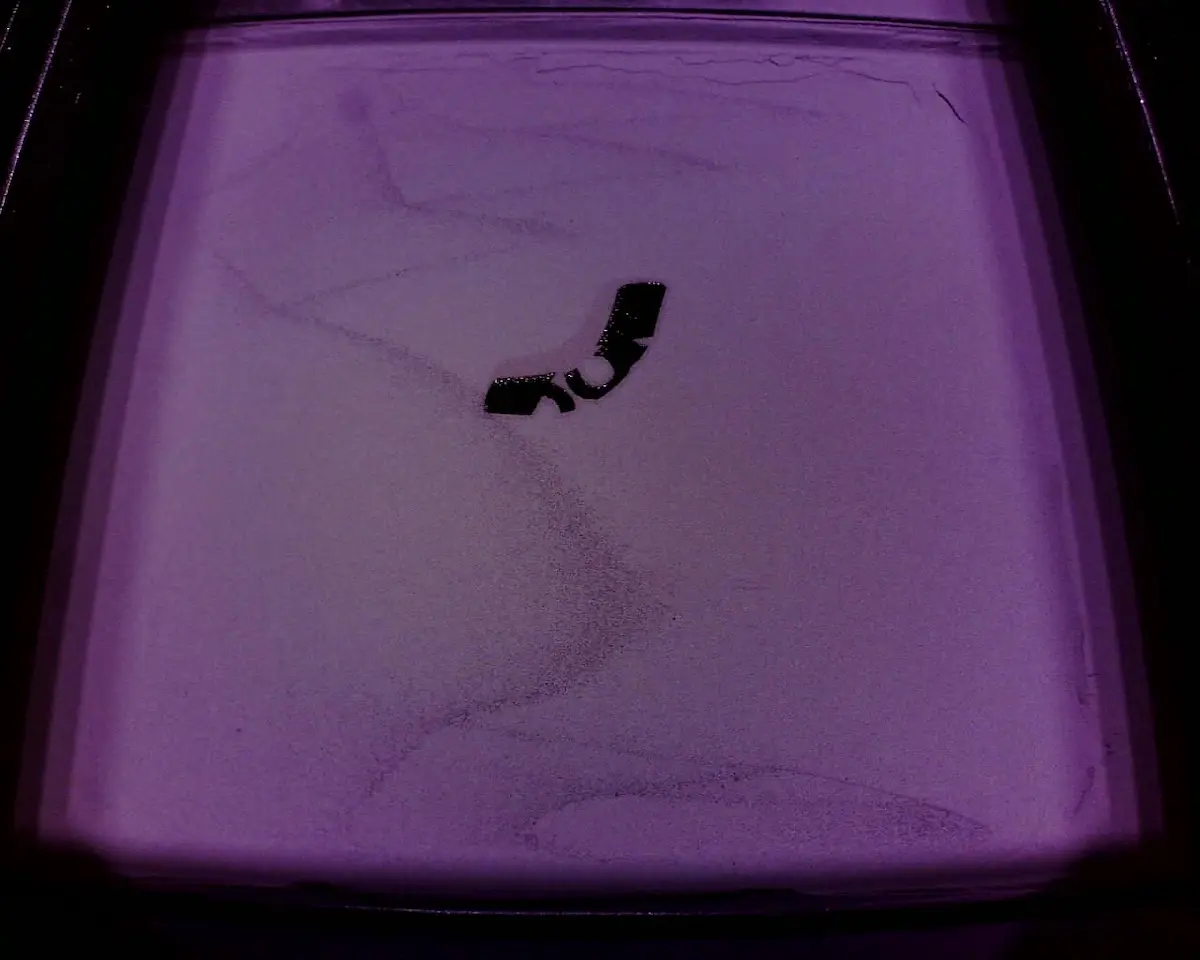
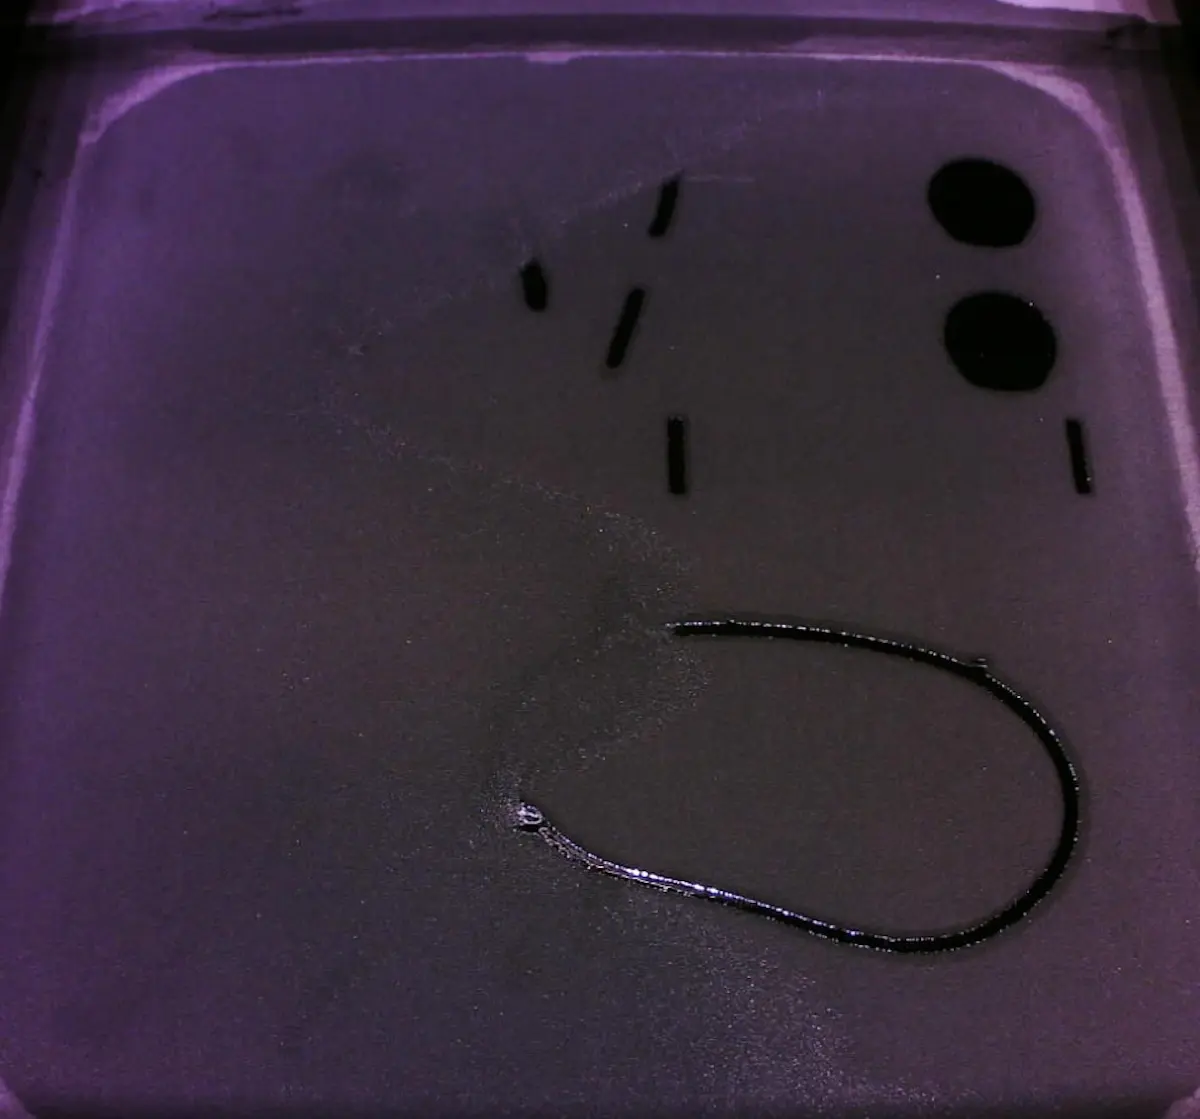
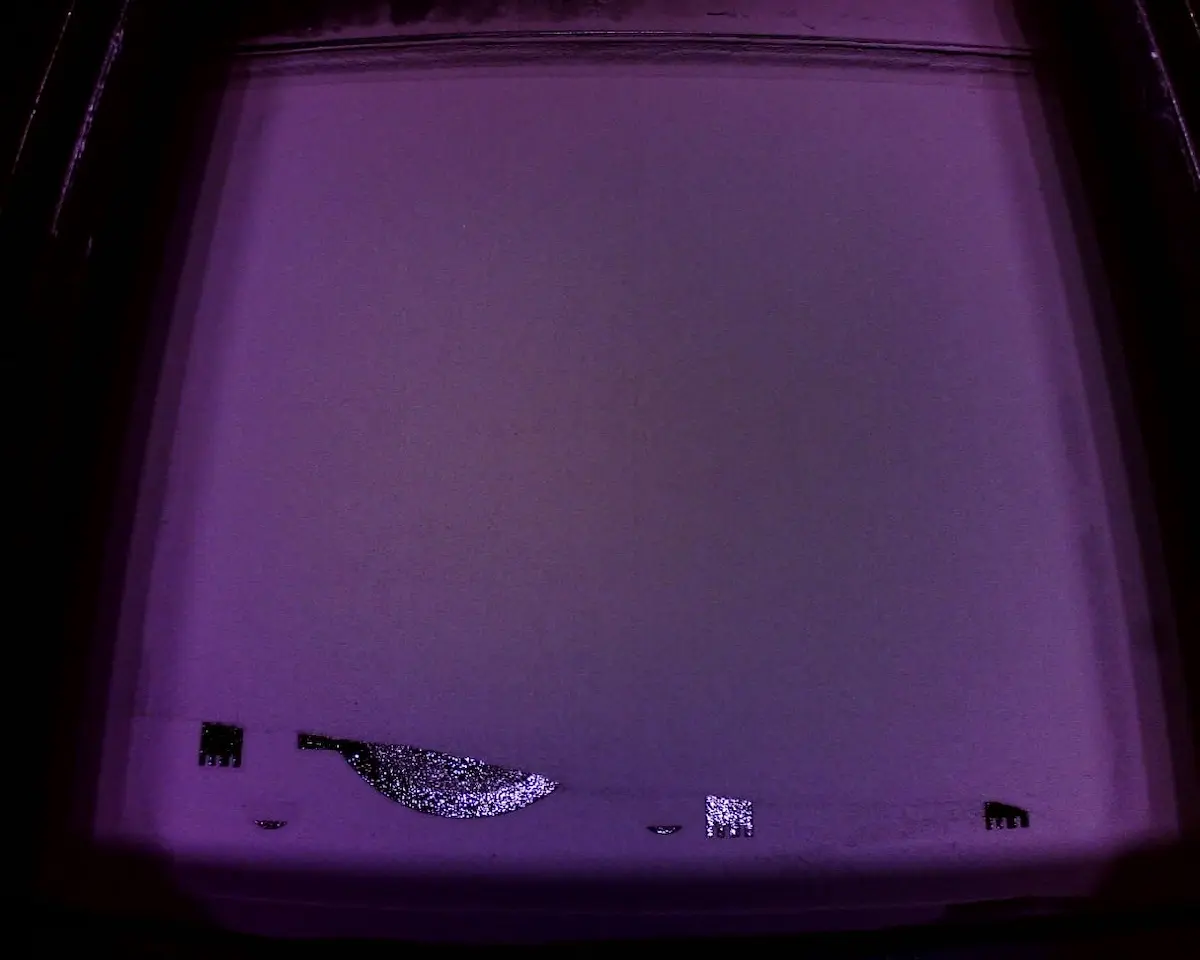
Refer to support article Underdosing (SLS)
Perimeter melting
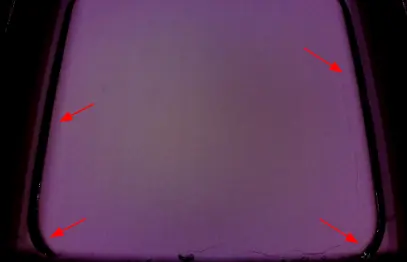
The outer edge of the print area melts but the center of the print area does not.
Refer to the troubleshooting steps for perimeter melting in the support article Melting.
Global melting
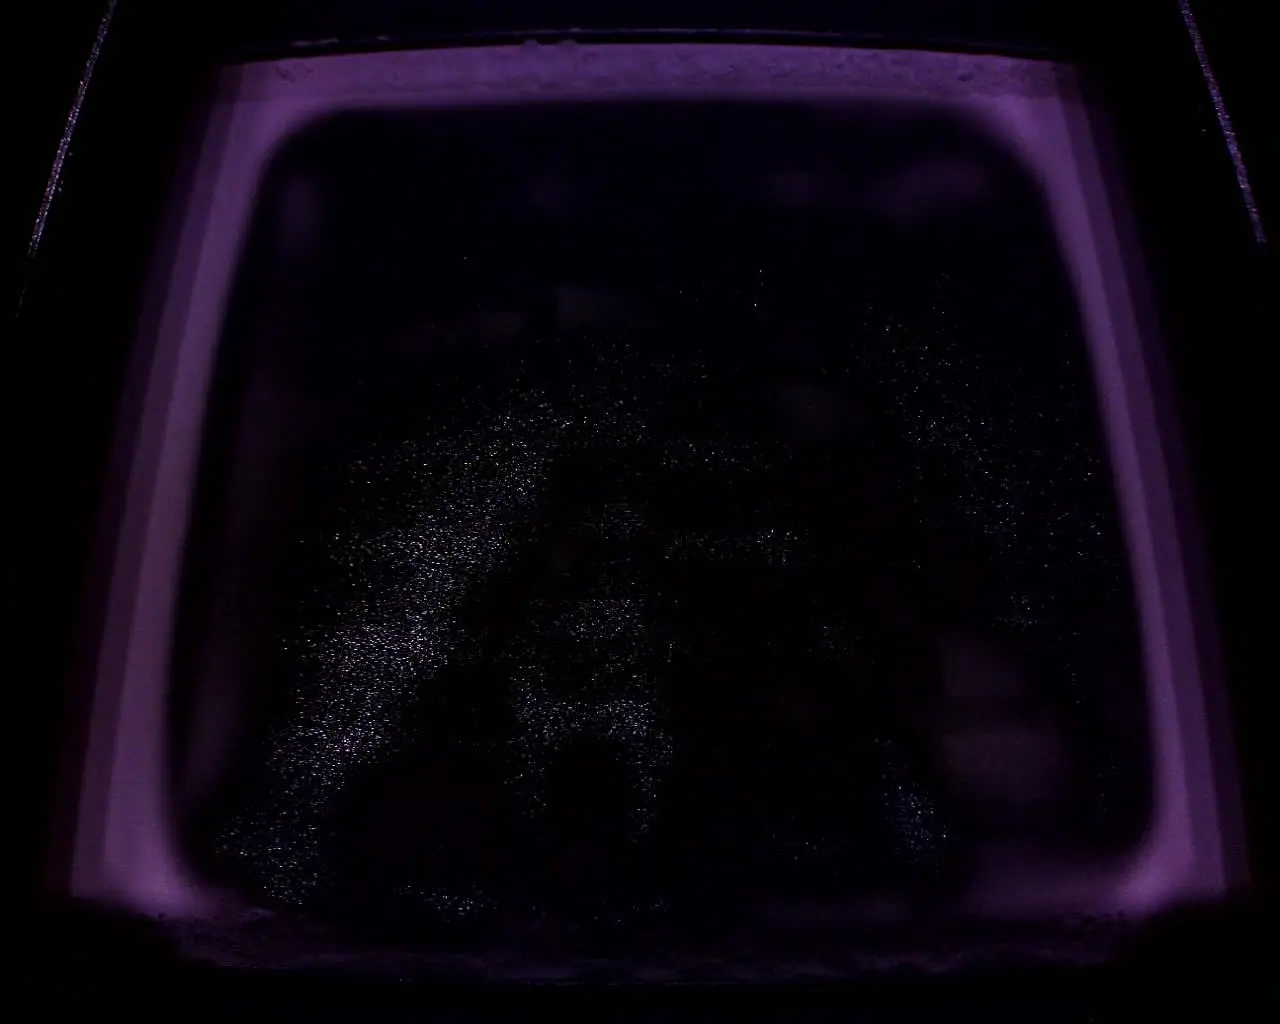
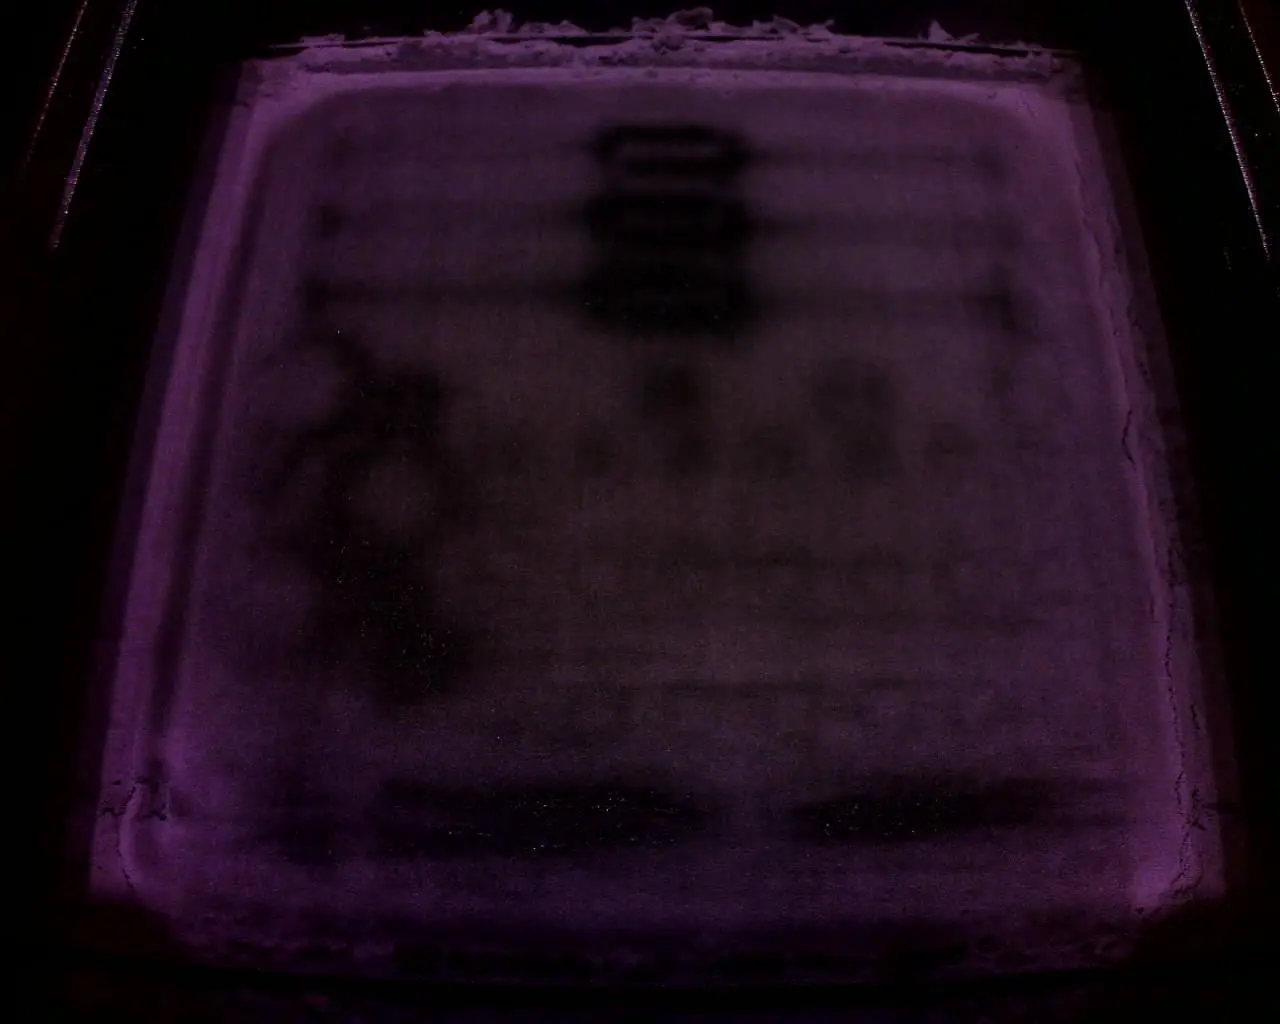
The entire print bed is melted.
Refer to the troubleshooting steps for global melting in the support article Melting.
Localized melting
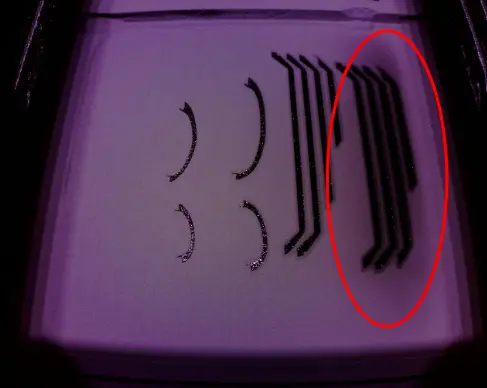
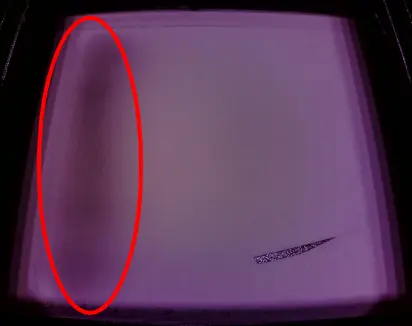
A large section of the print area melts, generally one side of the build.
Refer to the troubleshooting steps for localized melting in the support article Melting.
Curling
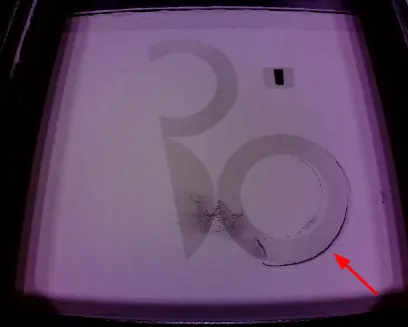
Edges of the sintered area lift off the bed. The part may or may not be snagged by the recoater, causing Error 112.
Refer to the troubleshooting steps in the support article Curling (SLS).
Bed tearing
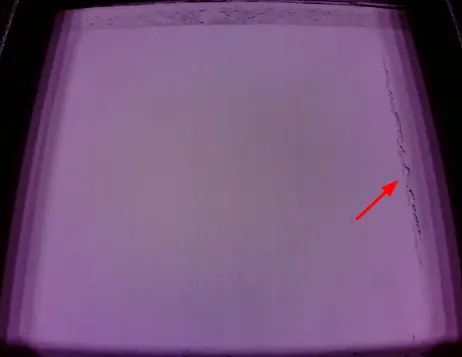
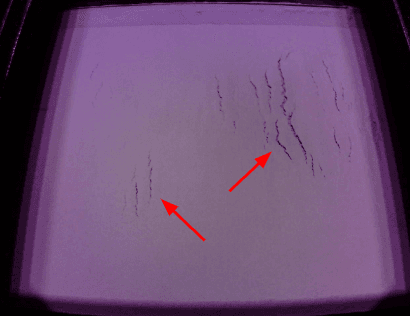
Cracks in the build sheet that appear after the recoater completes a pass, typically visible as 1-2 mm jagged fractures parallel to the Y-axis.
Alternatively, tearing or cracks along the perimeter of the build sheet may develop before a recoat pass.
Refer to the troubleshooting steps in the support article Bed tearing (SLS).
Powder contamination
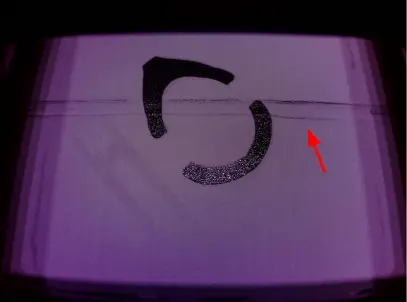
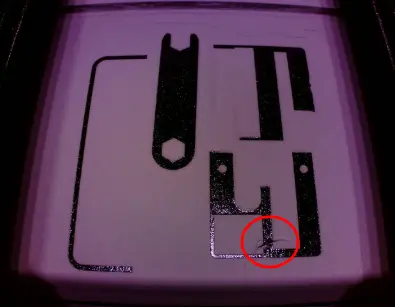
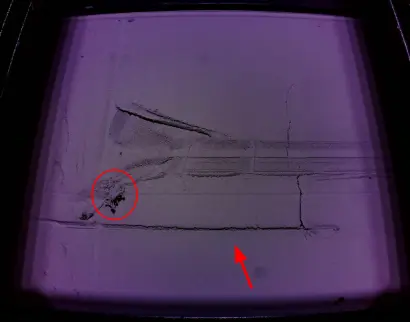
Artifacts from fiber/hair contamination are usually visible as subtle markings in the build sheet.
Right after a recoat pass, a groove might form across part or all of the build sheet. A small clump of powder may appear at the groove's end, along with minor bed cracking or shifting of a sintered layer.
- Thoroughly clean the print area, powder troughs, and recoater roller. Use the Motor Moves menu as necessary to access all areas.
- Confirm you are following all recommended procedures for the printer and material in question:
- Fuse 1: The print area should be vacuumed between prints for all materials other than Nylon 12.
- Fuse 1+ 30W: The print area should be vacuumed between prints for all materials.
- Determine if the issue is persistent; material/debris dragging is common after other PrinterWatcher failures from powder contamination or curling.
Nylon 11 whitening
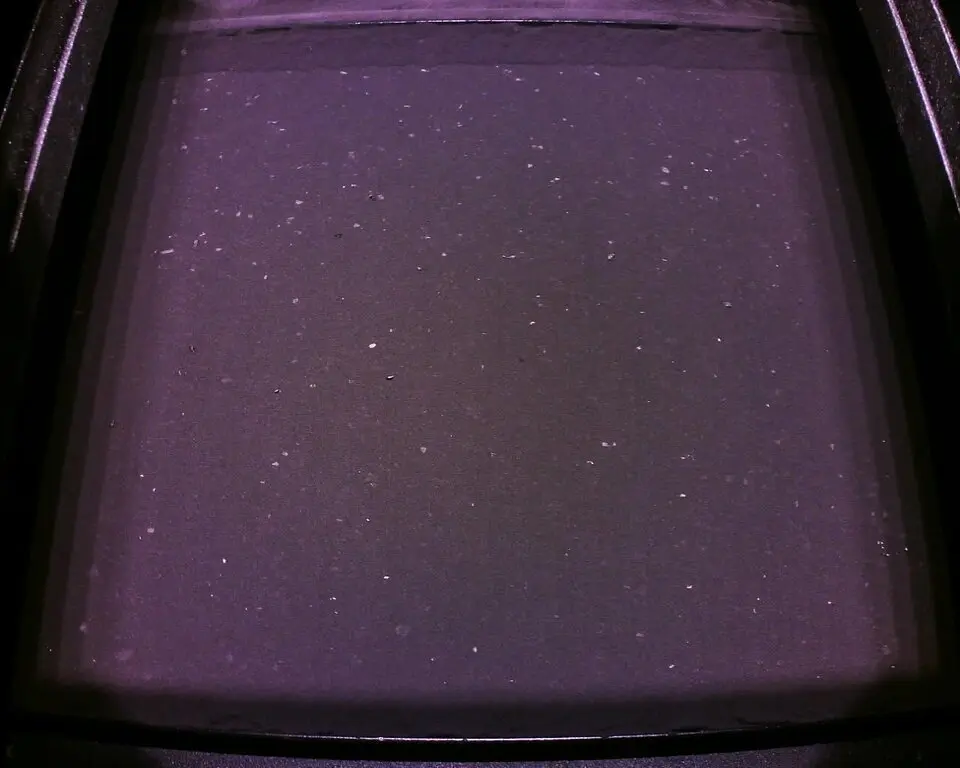
Picture shows whitened pieces of Nylon 11 powder from improper print workflow, such as not vacuuming the print bed between prints.
Refer to the powder contamination section above for troubleshooting steps.
Mismatched material settings, or mixed powder types
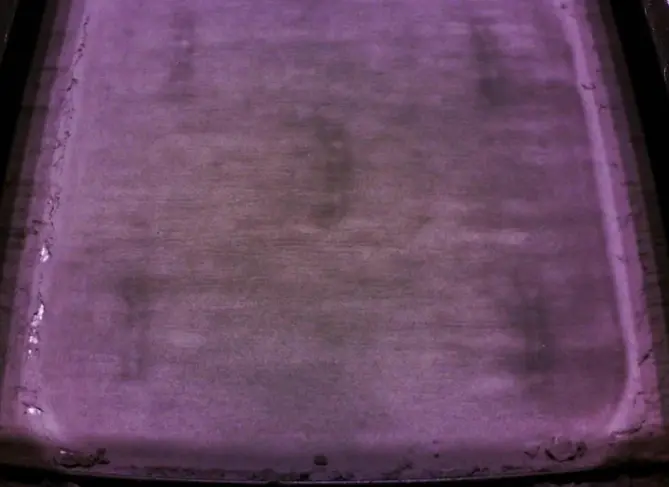
Picture shows Nylon 12 and Nylon 11 powder mixed together and printed with Nylon 11 print settings. All mixed powder must be disposed of.
Printing with the wrong powder, even uncontaminated, can cause PrinterWatcher errors. For example, printing Nylon 12 Tough Powder with Nylon 12 Powder settings can cause an error, as Nylon 12 Tough Powder is darker-colored.
Optical contamination
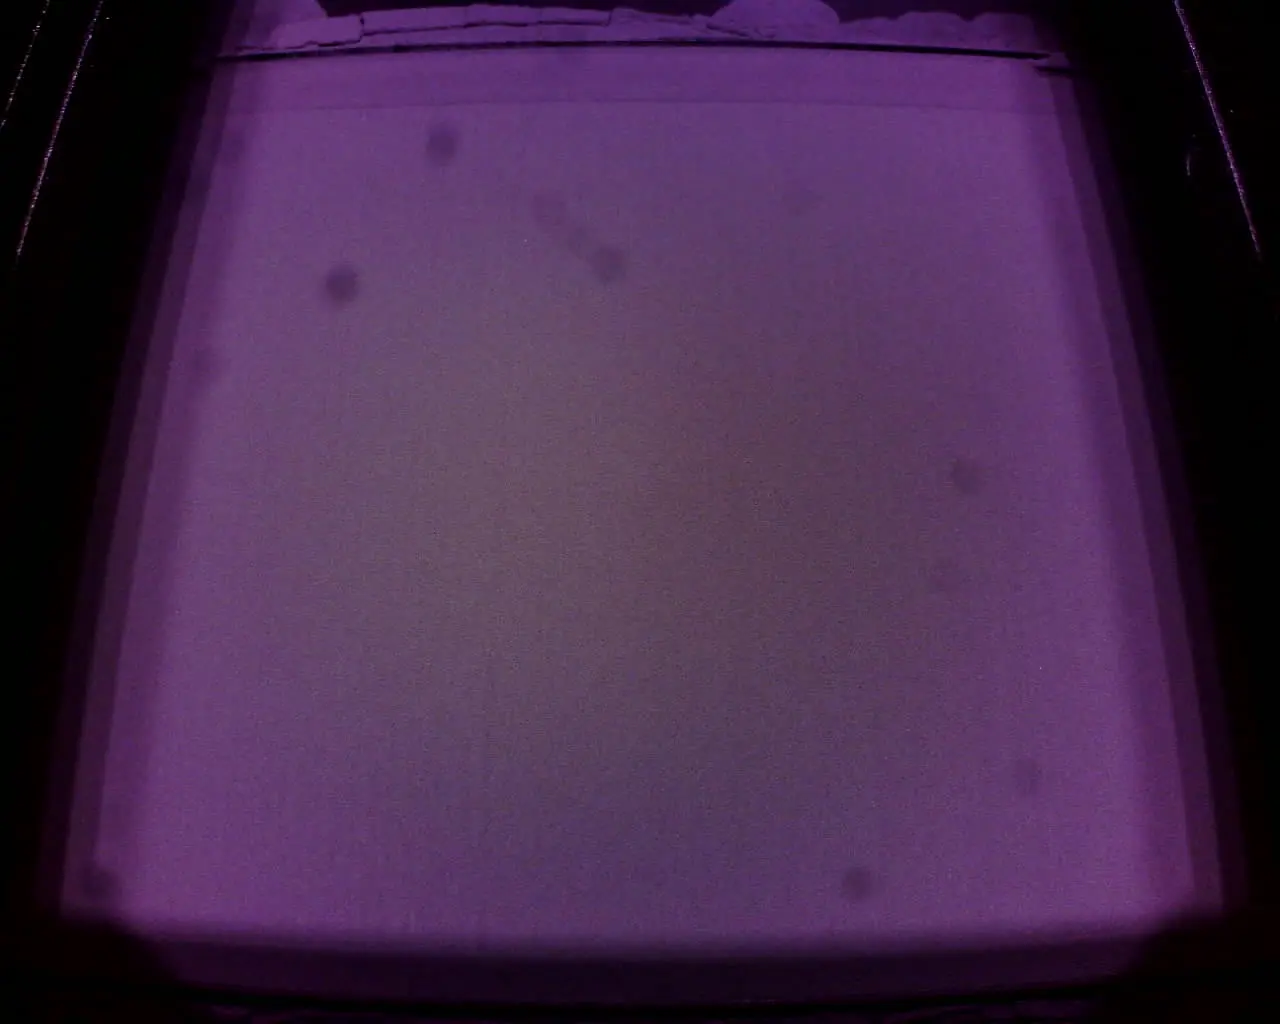
Spots in the camera feed that do not move or change.
- Look for spots in the camera feed that do not move or change over time. These usually signify contamination or damage to a component in the optical path.
- Clean the optical cassette’s camera window and the camera lens.
- If the optical cassette cannot be cleaned, it may need to be replaced.
Camera glitch
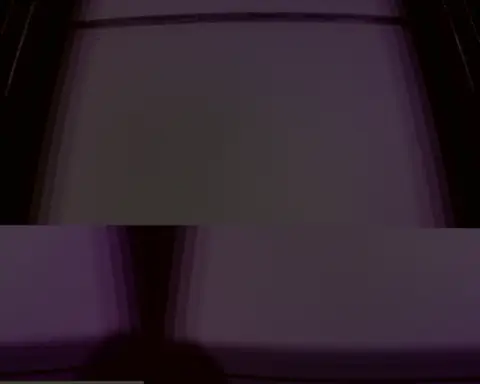
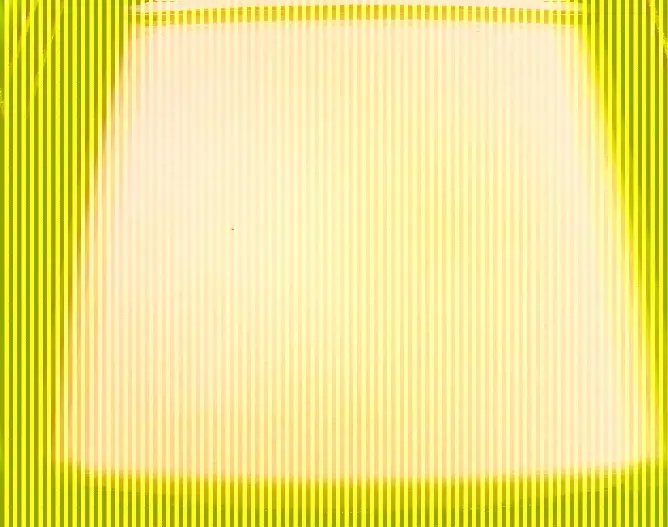
Images are distorted, glitched, or missing.
- Camera errors, such as the one shown in the identification table above, are uncommon. Update your printer’s firmware, then power cycle the printer and attempt another print
- If the issue reoccurs, perform a factory reset.
- If the issue returns, contact Formlabs Support or a certified service provider for potential camera replacement.