WHITE PAPER
Formlabs Logo

Replacing a Form 3L leveling foot

Replacing a Form 3L leveling foot

The Form 3L has four adjustable feet that raise the printer off the work surface and allow it to be leveled before printing. If one or more of the leveling feet is damaged or missing, it may be difficult to keep the printer level. Unleveled printers may cause print failures.

Use this guide to replace a leveling foot on your Form 3L.

Required supplies:

Formlabs:

  • Replacement leveling foot
  • Leveling disc

Third-party:

  • 13 mm nut driver or ratcheting socket wrench
  • Box cutter, knife, or other sharp tool capable of cutting through plastic drip tray
  • T8 or T10 Torx driver for accessing rear leveling feet
  • Nitrile gloves
  • Duct tape or other similar adhesive tape
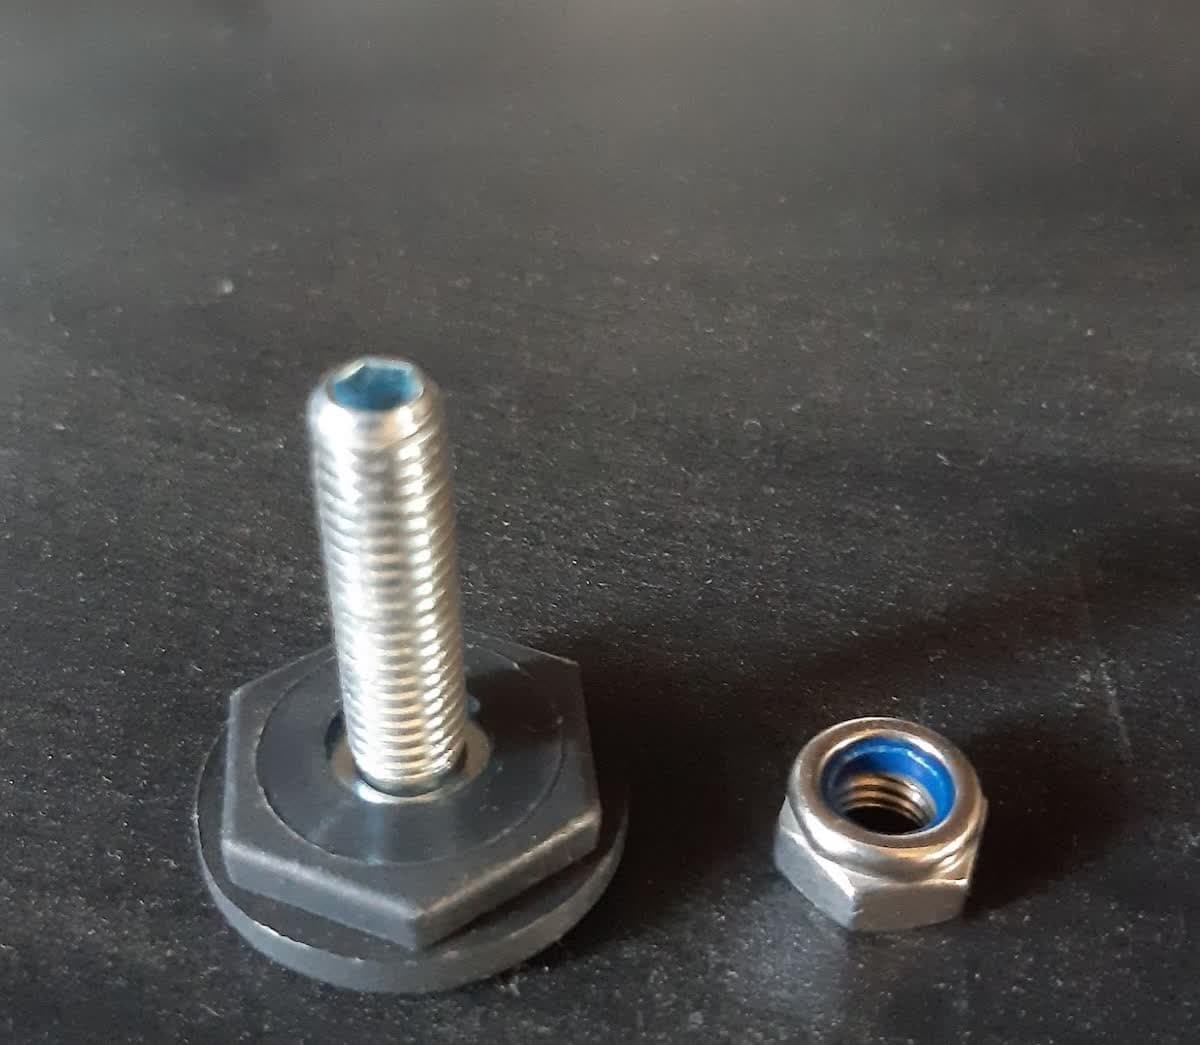
Form 3L leveling foot replacement part

Estimated time: 15–30 minutes

Preparing the workspace

Overview: Prepare the Form 3L and a dust-free workspace for replacing the leveling foot.

Warning:

Resin may cause skin irritation or an allergic skin reaction. Wear gloves when handling liquid resin or resin-coated surfaces. Wash skin with plenty of soap and water.

Step 1: Remove the build platform

Remove the build platform first to avoid dripping resin onto the LPU or into the printer cavity.

Step 2: Remove the resin cartridges

Remove the resin cartridges and close the vent caps to prevent resin from dripping off the bite valves and into the printer.

Step 3: Remove and store the resin tank

Remove the resin tank, place it in the resin tank case, and cover it with its lid. Set the case and tank aside on a clean, flat surface.

Notice:

Wear gloves and hold the resin tank by the tank grips on either side to avoid contamination or damage to the underside of the tank.

Step 4: Unplug the printer

Disconnect the power cable, Ethernet cable, and USB cable before continuing with maintenance. Do not perform maintenance on the printer while it is connected to power.

Step 5: Prepare the workspace

Clear a workspace around your printer. Ensure that the workspace is well-ventilated and free of dust.

Accessing the leveling foot

Overview: Identify the leveling foot you wish to replace. Each leveling foot requires different access instructions. Proceed to the step that is most relevant for your repair needs and remove the leveling foot.

Step 1: Identify the leveling foot in need of replacement

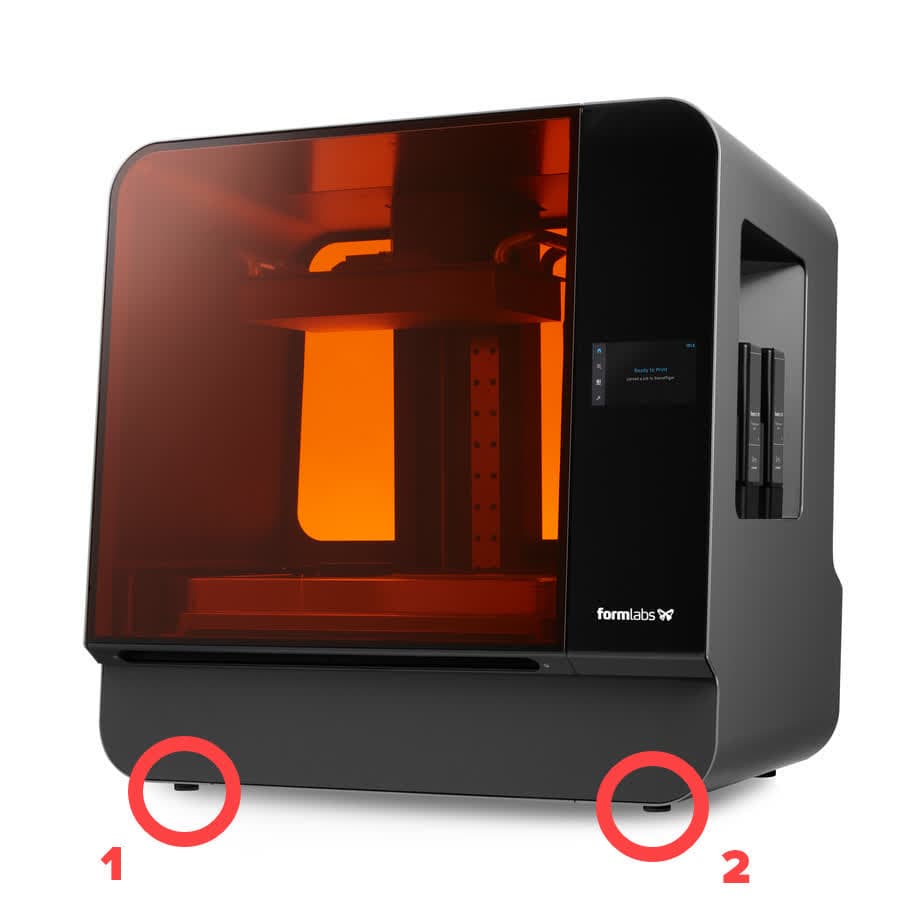
Front-left and front-right leveling feet on the Form 3L
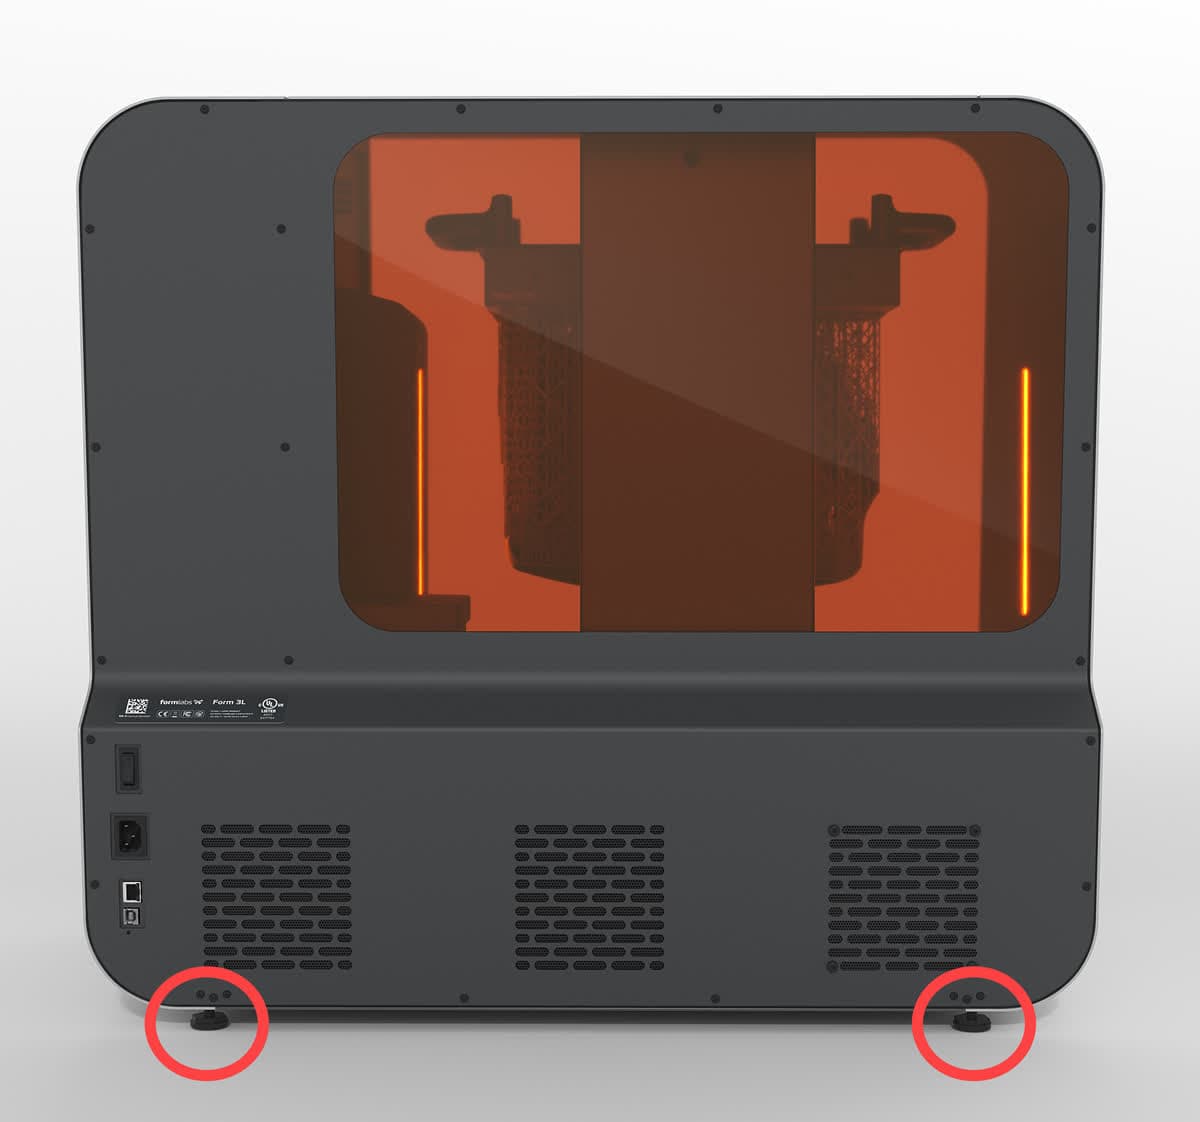
Rear leveling feet on the Form 3L

Front-left (1) and front-right (2) leveling feet

Rear leveling feet

Identify the leveling foot you wish to replace. Each leveling foot requires different access instructions. Proceed to the step that is most relevant for your repair needs.

Accessing the front-left leveling foot

Open the Form 3L to access the front-left leveling foot.

Step 1: Inspect the printer cavity floor

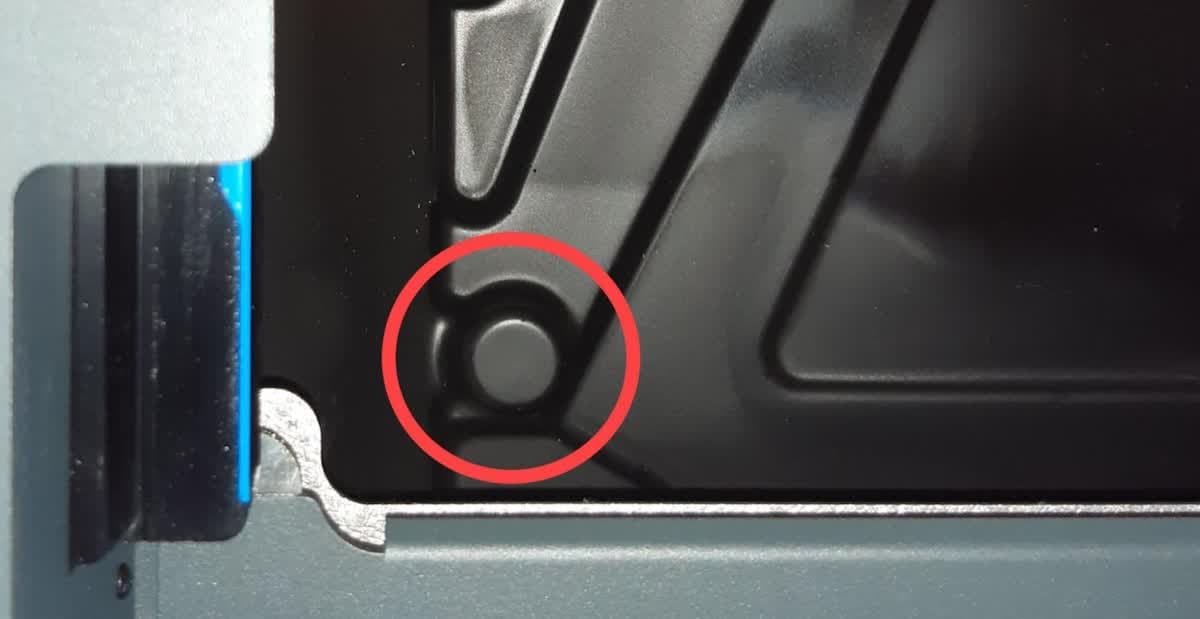
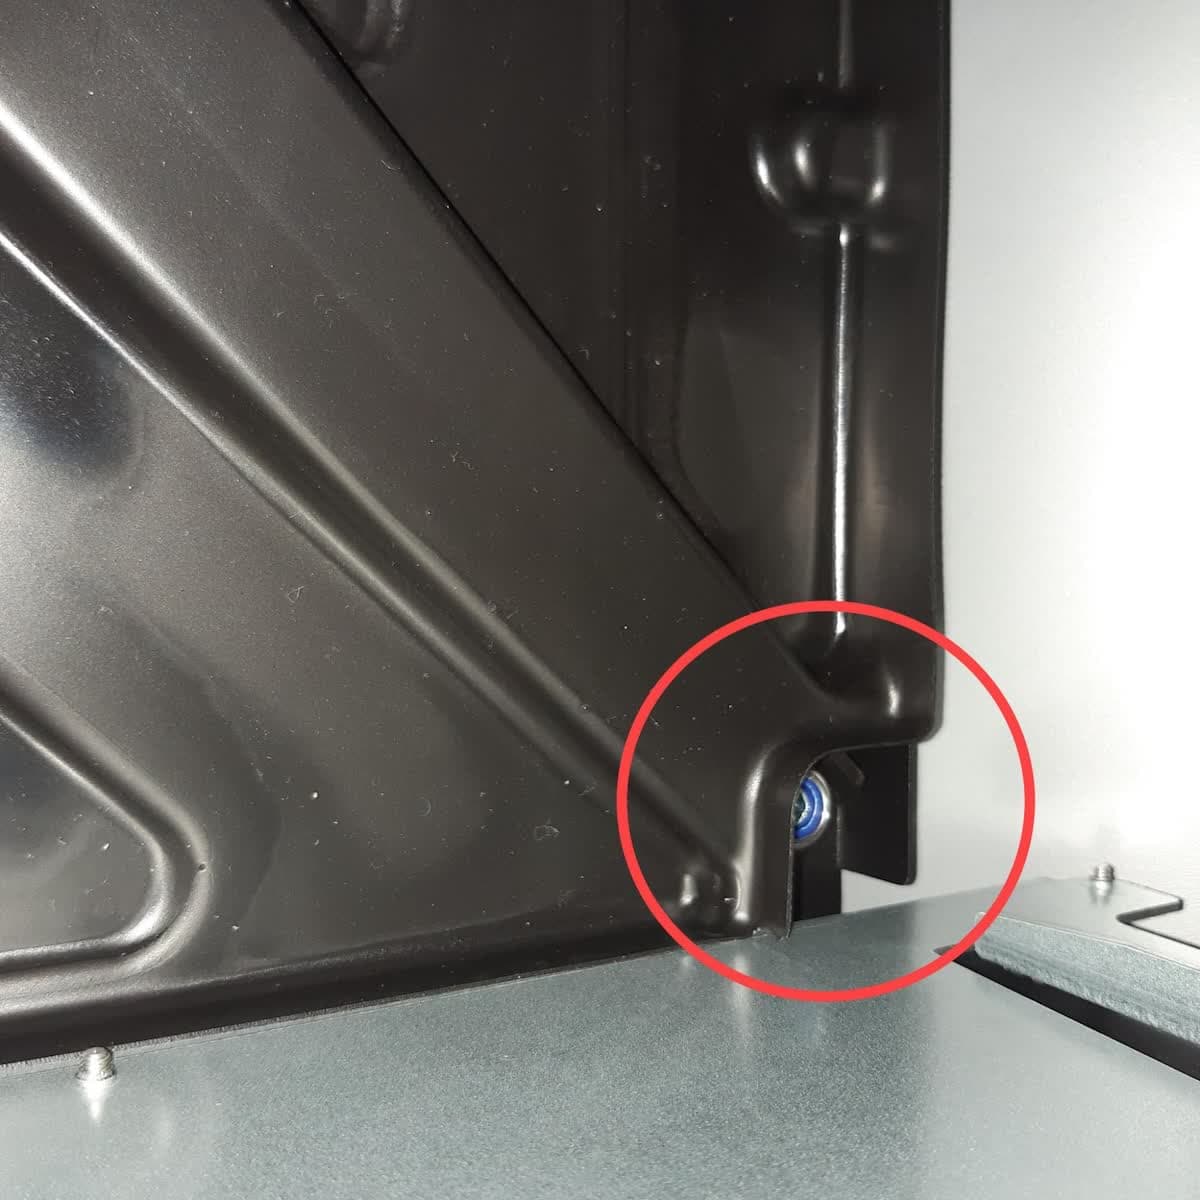
Inspect the front-left side of the printer cavity floor. Some machines may have a hole in the drip tray that allows access to the locknut for the front-left leveling foot. If not, you may need to make a hole in the plastic drip tray in order to access the locknut through the floor of the printer cavity.

Front-left leveling foot access hole in the Form 3L drip tray

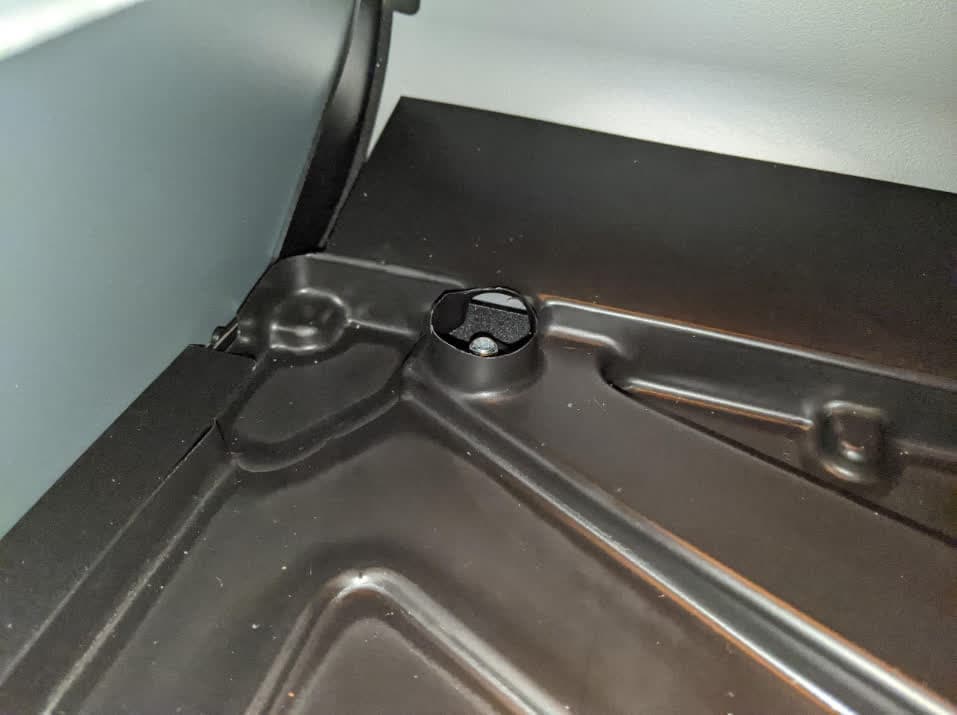
Step 2: Cut a hole in the plastic drip tray above the front-left leveling foot

Cutting the Form 3L drip tray for front-left foot access step 1
Cutting the Form 3L drip tray for front-left foot access step 2

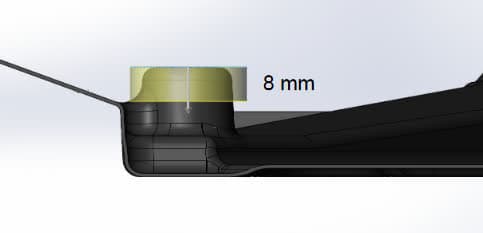
Use a sharp knife or razor blade to cut off the formed dome on the drip tray. The cut should remove approximately 8 mm from the top. Skip to the next section, Removing the leveling foot.

Caution:

To avoid injury, face the edges of tools away from you and direct the force away from you.

Accessing the front-right leveling foot

Move the LPU unit to its maintenance position to access the front-right leveling foot.

Step 1: Plug in the printer

Reconnect the power cable.

Step 2: Move the LPU housing to its maintenance position

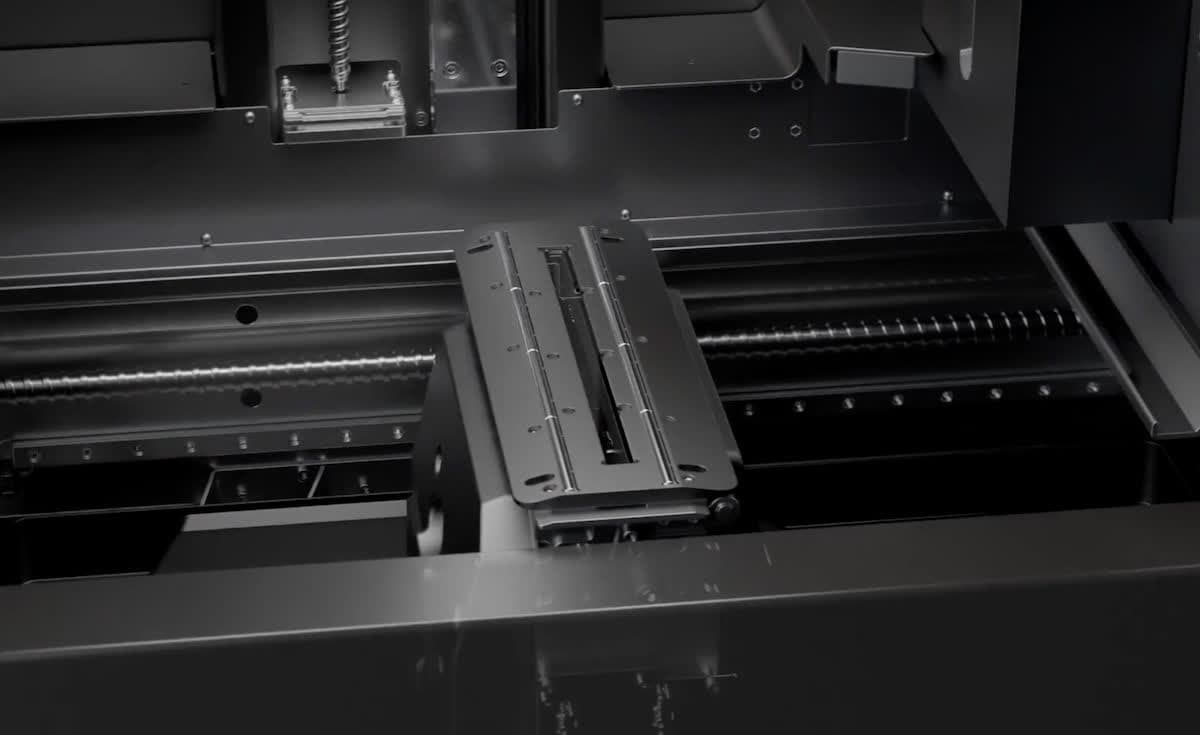
Tap the wrench icon to access the Settings screen, then tap Maintenance > Motor Moves. The Motor Moves screen appears. Tap and hold Left (<) to move the LPU housing to the middle of the printer cavity. Other controls on this screen fully sweep the LPU housing across the printer cavity and control the build platform carriage.

Form 3L LPU in maintenance position for front-right foot access

Step 3: Unplug the printer

When prompted by the touchscreen, disconnect the power cable before continuing with maintenance. Do not perform maintenance on the printer while it is connected to power.

Warning:

Moving parts and lead/ball screws present crushing and tangling hazards. Be sure that the printer is unplugged from its power source and powered down before performing further maintenance.

Step 4: Inspect the plastic drip tray

Open the Form 3L cover and look into the LPU garage to the right of the printer cavity. Inspect the plastic drip tray for the access hole to the front-right leveling foot internal locknut. Skip to the next section, Removing the leveling foot.

Front-right leveling foot access hole in the Form 3L drip tray

Accessing the rear leveling feet

Remove the rear shell to access and remove the rear leveling feet.

Notice:

The Form 3L contains sensitive electronic components. Ground yourself before touching any electronics in the printer by using a grounding strap or touching a grounded piece of metal.

Step 1: Remove the Wi-Fi antenna nut

Unscrew and remove the nut from the base of the Wi-Fi connector. The Wi-Fi connector is attached to the printer's motherboard and remains in place when the rear shell is removed.

Step 2: Remove the rear shell screws

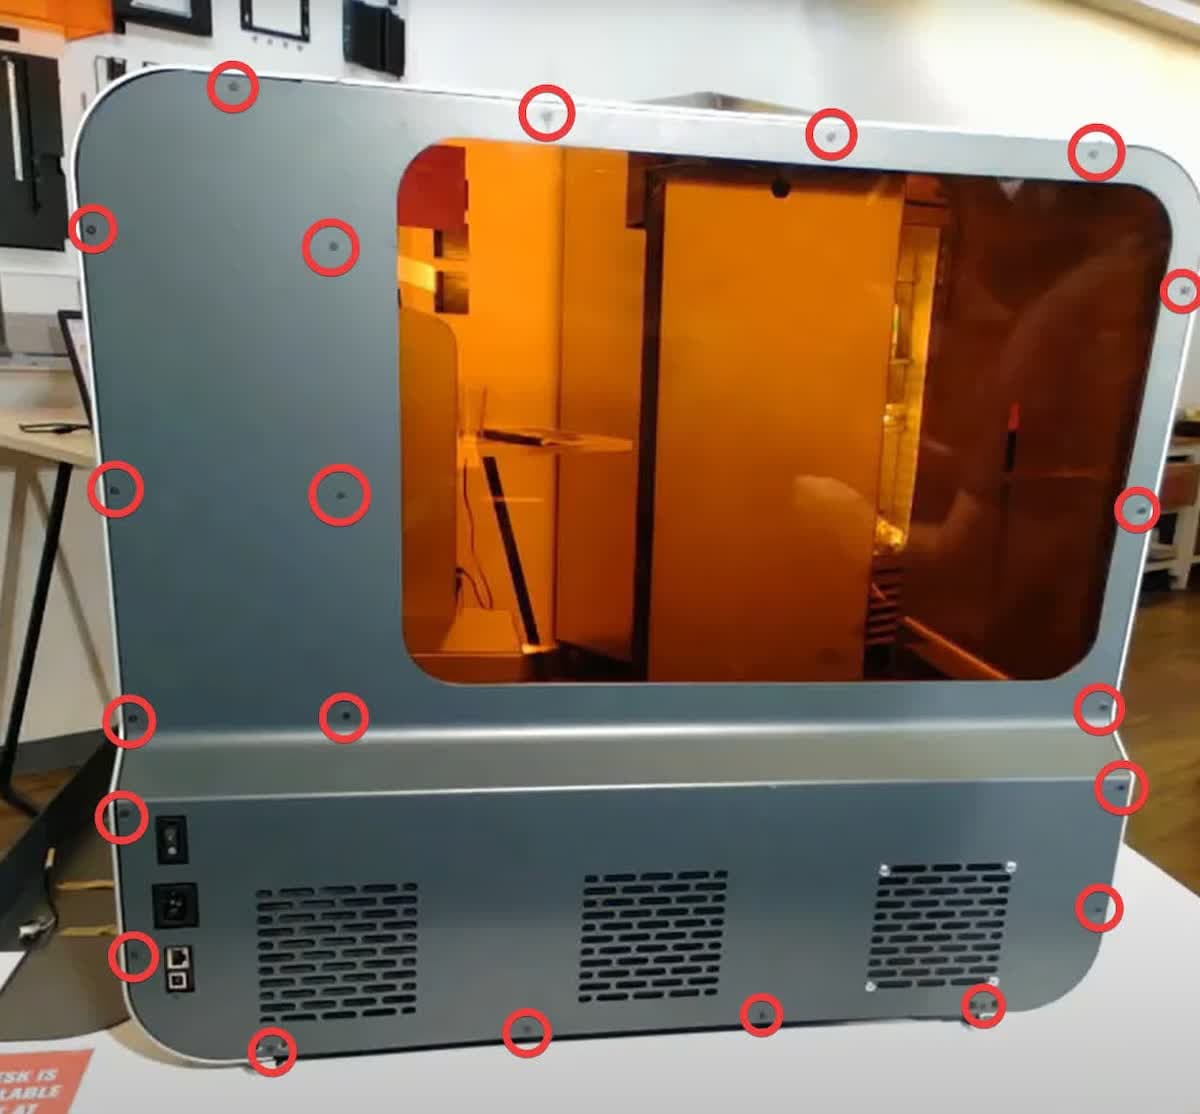
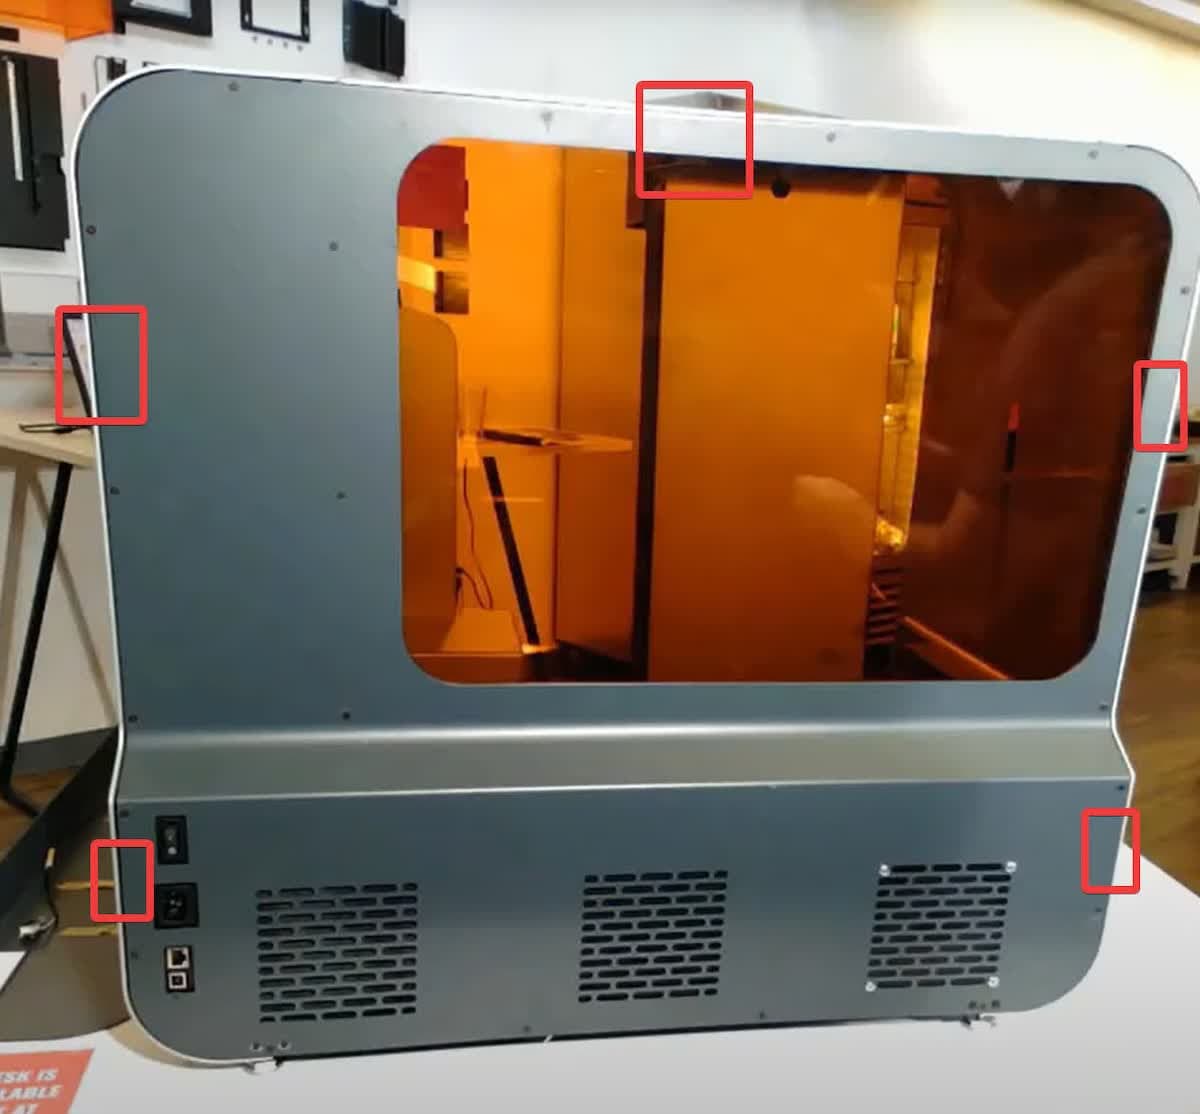
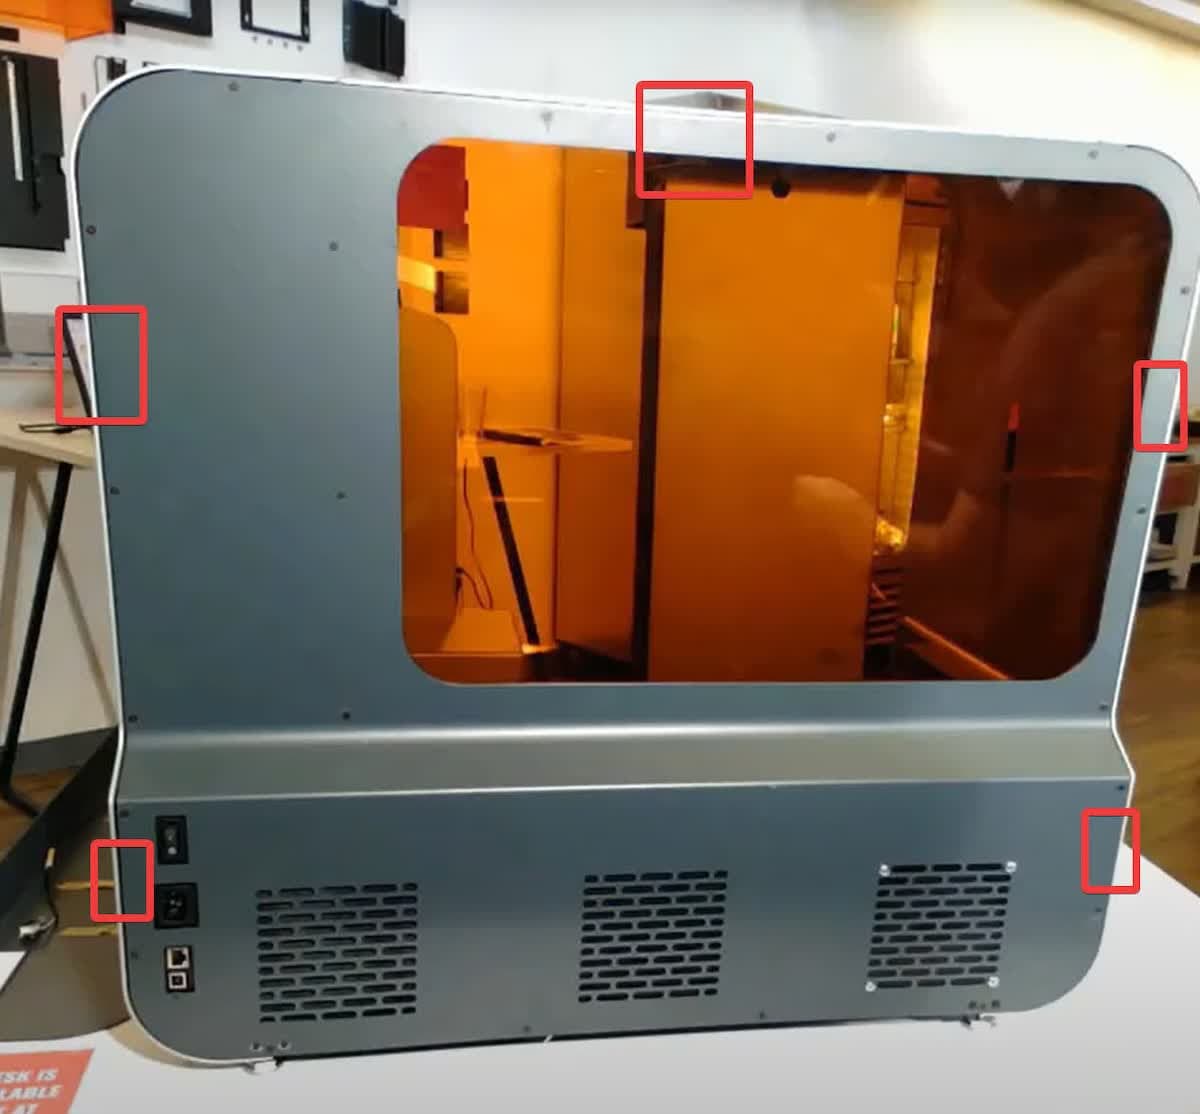
Use a T10 or T8 Torx driver to loosen and remove the 21 screws on the rear shell. Early models may use all T8 screws, while later models use all T10 screws. Start at the bottom of the panel and work your way up to the top.

Form 3L rear shell screw locations

Step 3: Remove the rear shell

Remove the rear shell by pulling it away from the printer. There are five pins that hold the panel in place, so it may require moderate force to separate from the printer. Be careful not to damage the rear fan cable, which is still attached to the rear shell. Lay the rear shell down next to the printer.

Form 3L rear shell pins

Step 4: Disconnect the rear fan

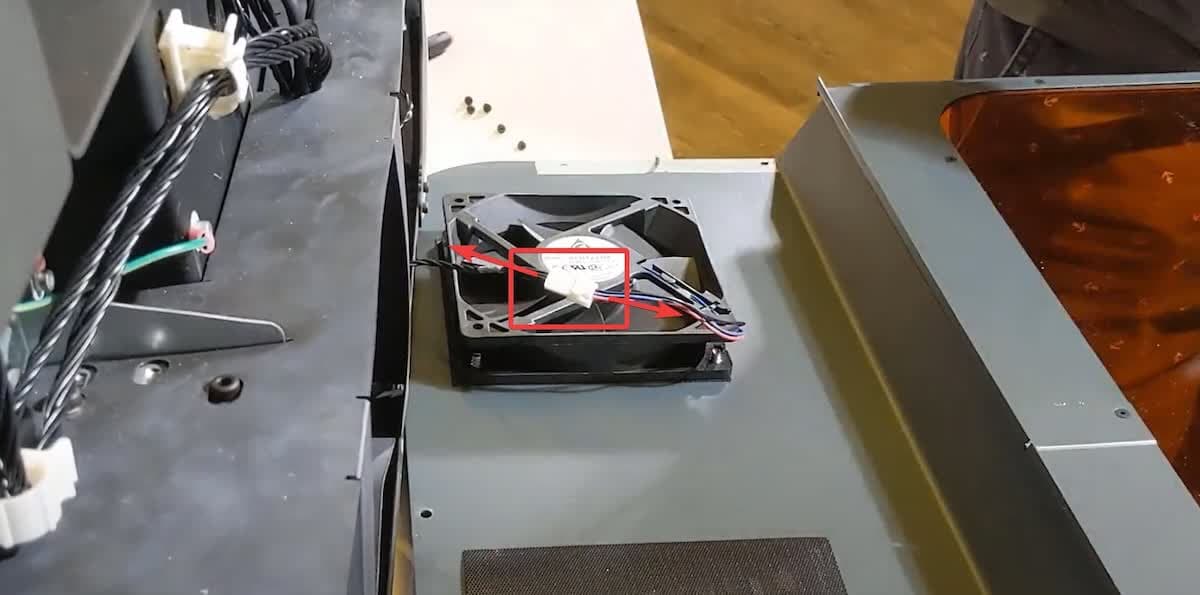
Disconnect the rear fan cable harness by gripping the plugs and gently pulling them away from each other. Do not pull on the wires themselves.

Disconnecting the Form 3L rear fan cable

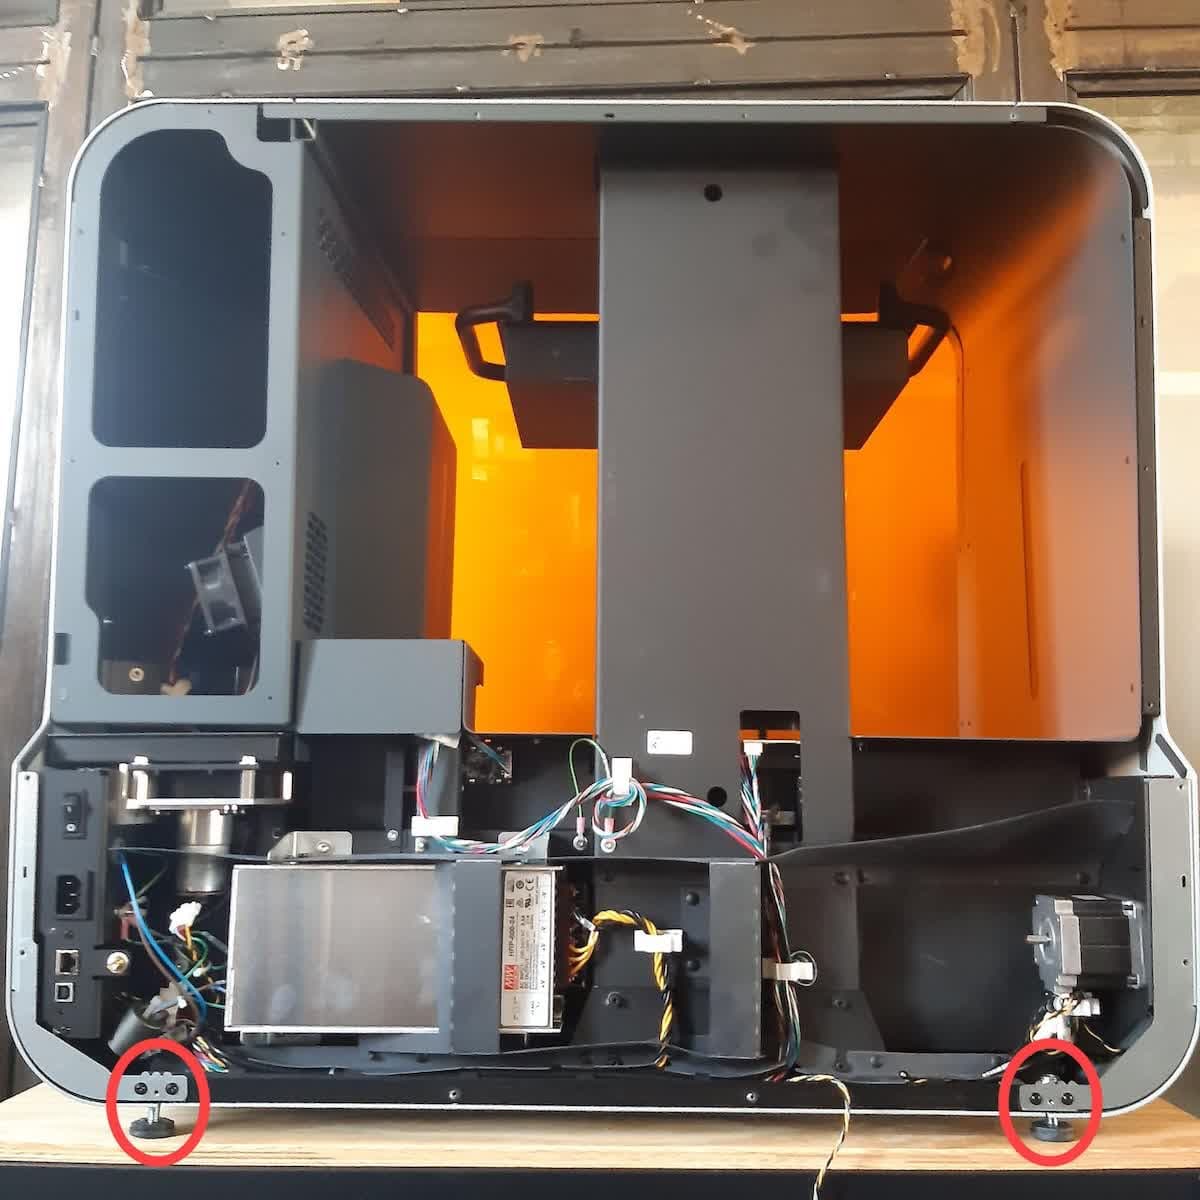
Step 5: Locate the rear leveling feet

The rear leveling feet are located on the backside of the machine.

Form 3L rear leveling feet location after rear shell removal

Removing the leveling foot

Overview: Remove the leveling foot. If you are replacing multiple leveling feet, complete the replacement process for each individual leveling foot before starting the next.

Step 1: Move the Form 3L

With a second person, carefully slide the leveling foot that you plan to replace off the work surface so you can access it freely. Ensure that the other three leveling feet remain firmly on the work surface and that the printer is not in danger of tipping or falling.

Caution:

The Form 3L is a heavy object. Have a second person hold the machine upright while the leveling foot is replaced. Removing the leveling foot unbalances the machine and may lead to injuries or property damage.

Step 2: Remove the leveling foot

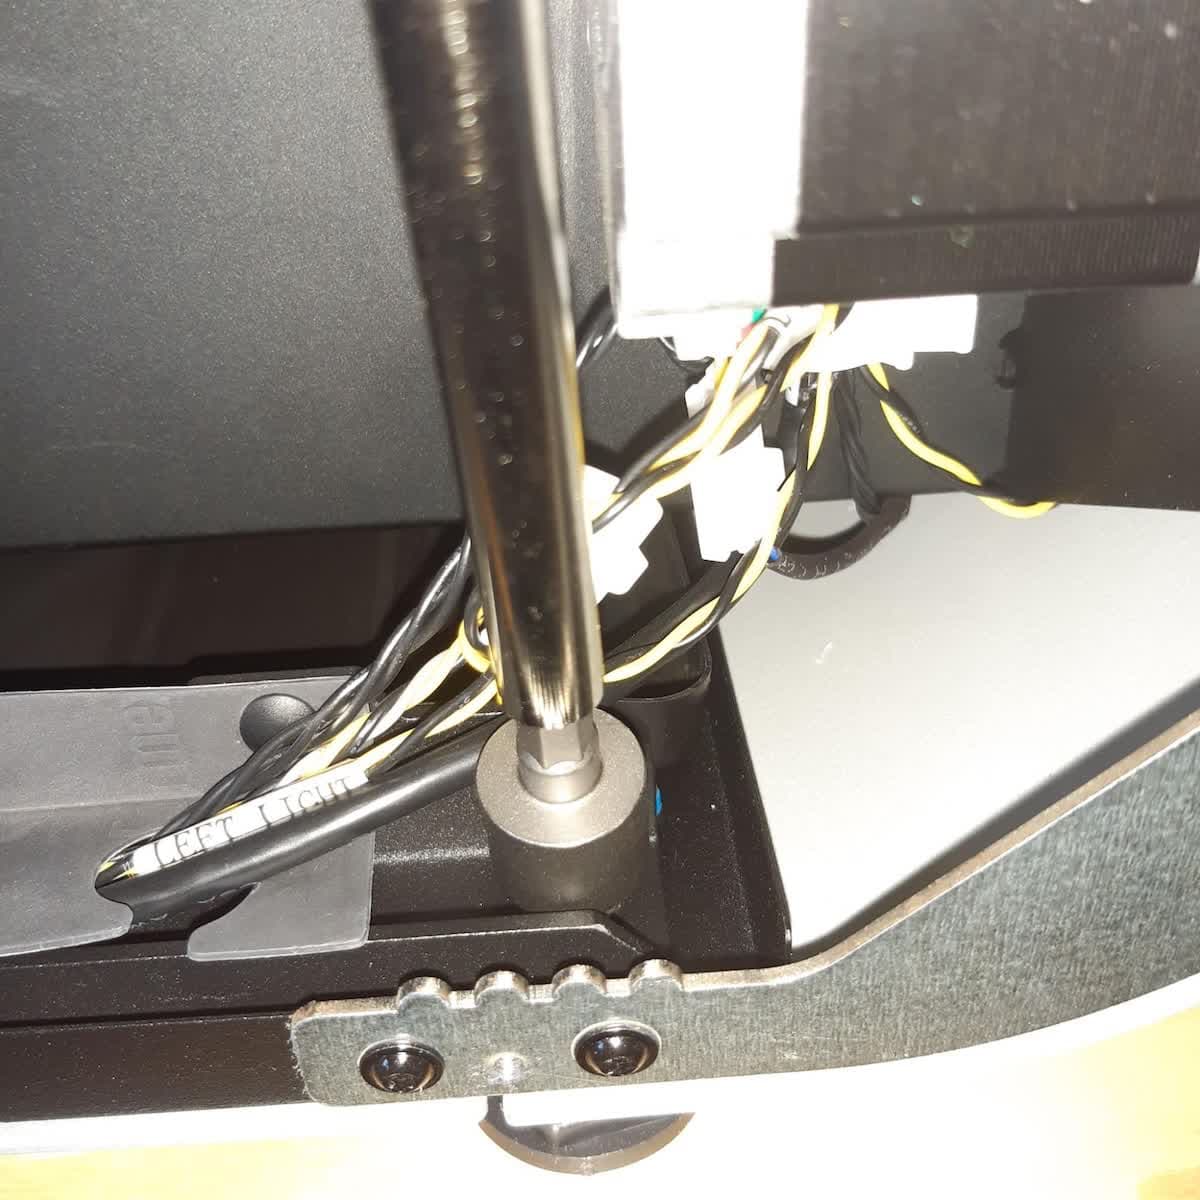
Removing the Form 3L leveling foot step 1
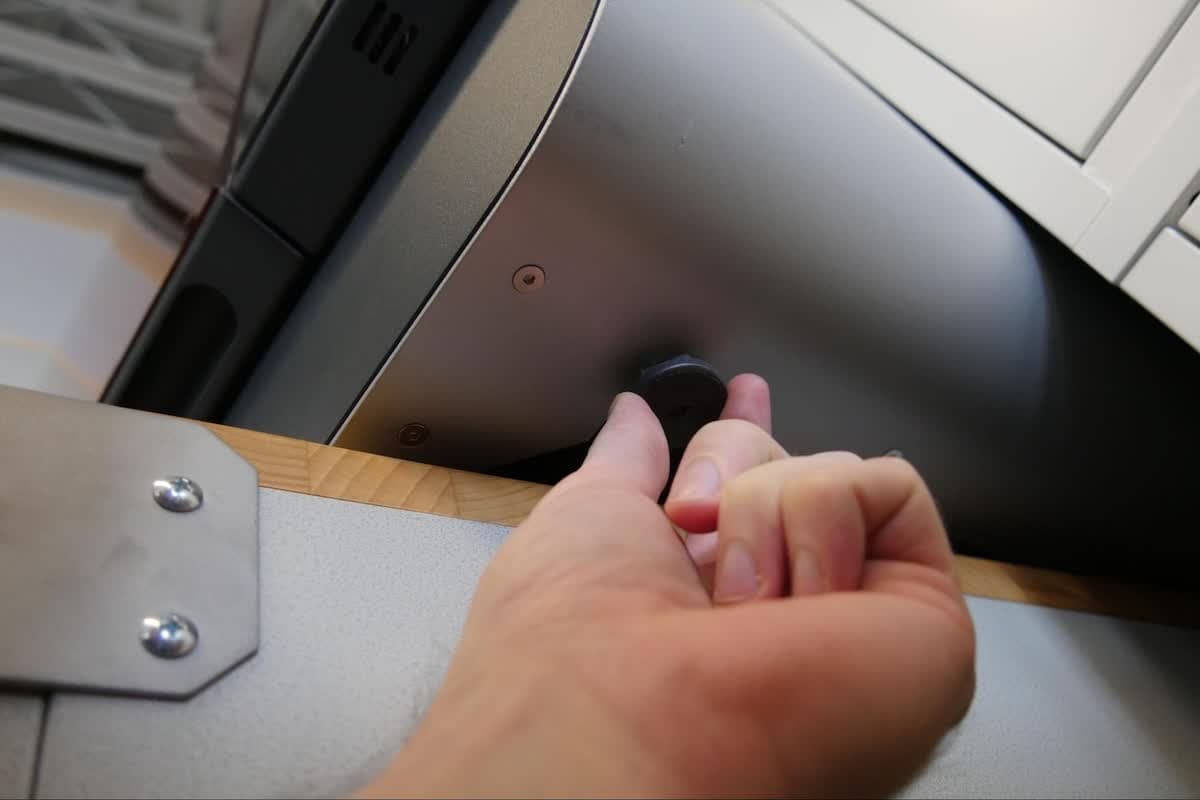
Removing the Form 3L leveling foot step 2

Using the 13 mm nut driver or ratcheting socket wrench to hold the locknut inside the printer in place, unscrew and remove the leveling foot. Place the leveling foot aside. Set the locknut aside for later use.

If you are replacing multiple leveling feet, complete the replacement process for each individual leveling foot before starting the next.

Installing the replacement leveling foot

Overview: Screw the replacement leveling foot into the printer.

Step 1: Install the replacement leveling foot

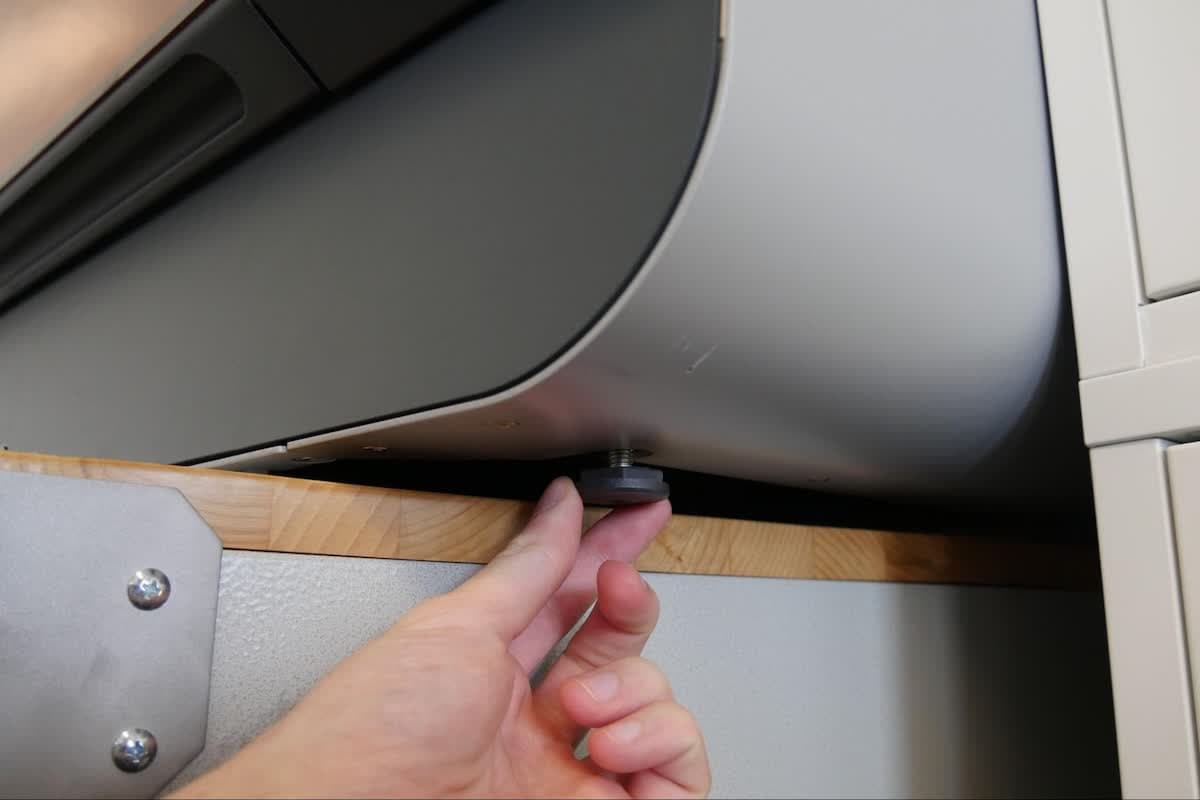
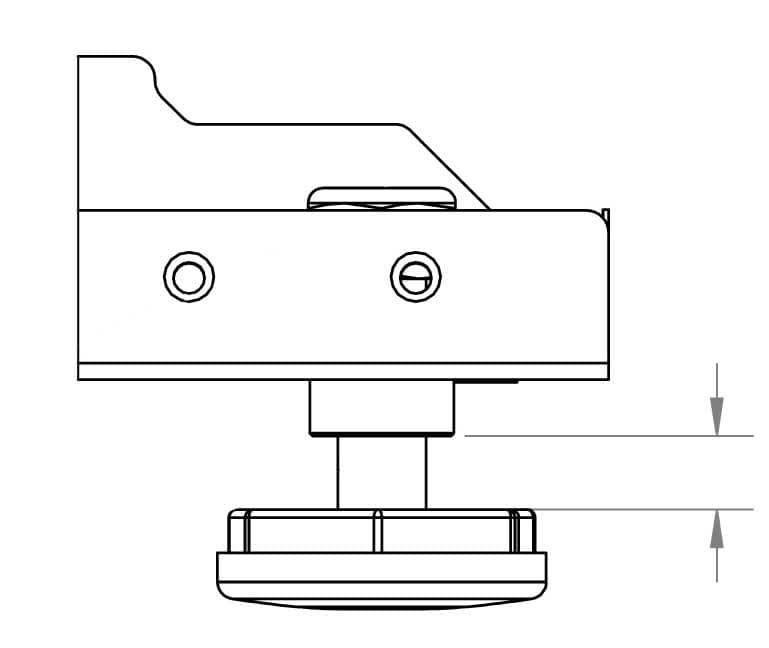
Installing the Form 3L replacement leveling foot step 1
Installing the Form 3L replacement leveling foot step 2

Thread the replacement leveling foot into the threaded insert in the bottom of the printer. Hand tighten the leveling foot until it is secure. Leave a 6.5 mm (0.25 in) gap between the leveling foot and the bottom of the printer. The leveling foot should not be completely flush with the printer.

Note:

You will level the printer after the repair procedure is complete, using the prompts on the touchscreen. The printer does not need to be level at this time.

Step 2: Secure the locknut on the replacement leveling foot

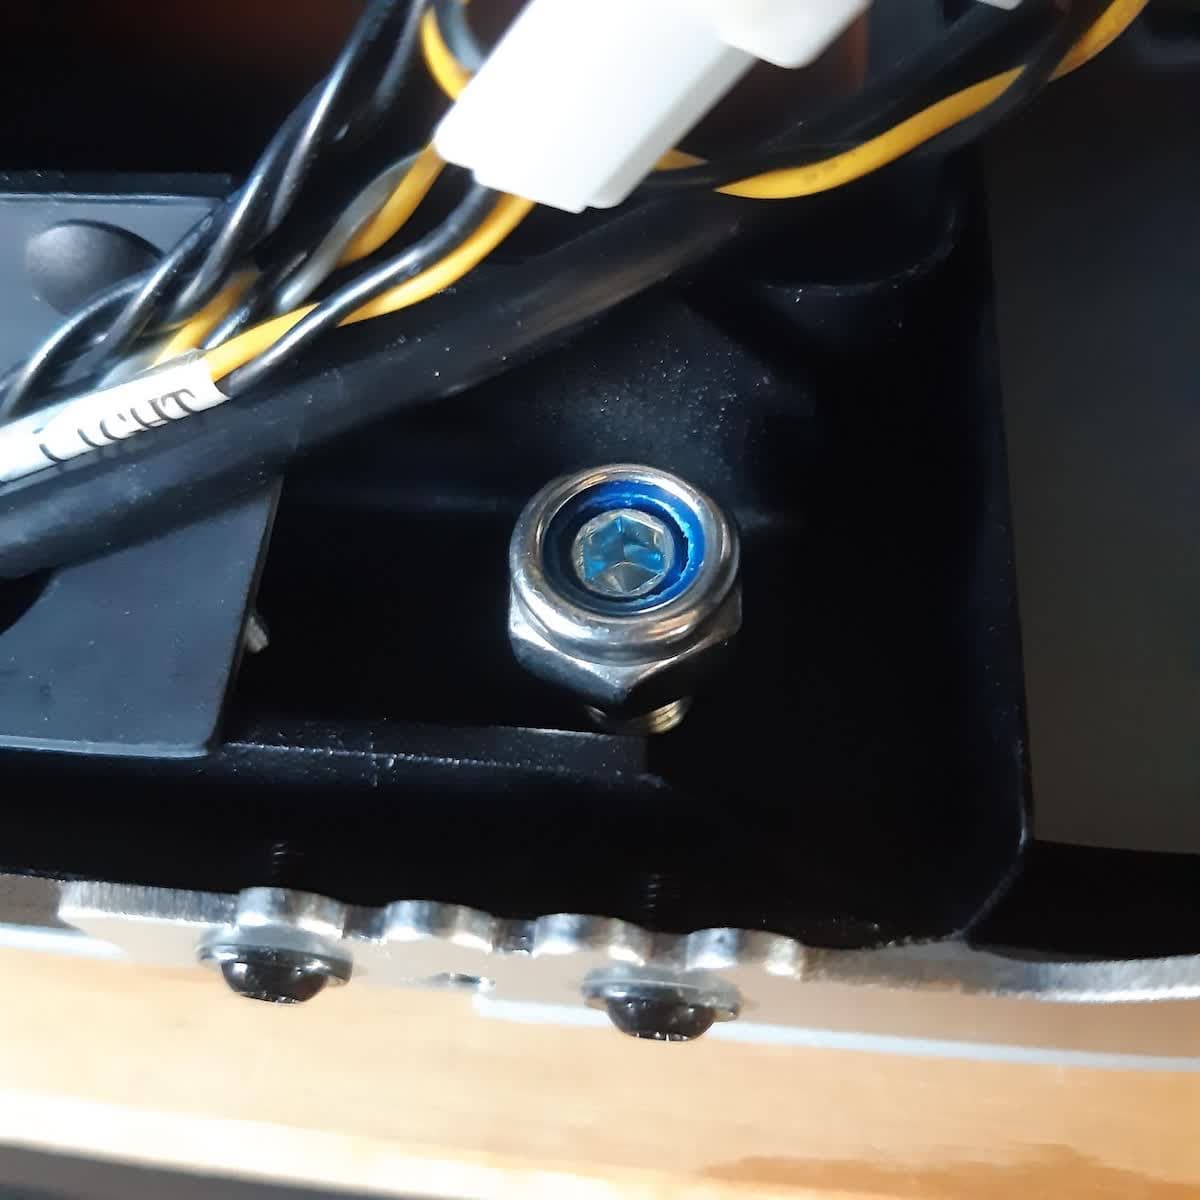
Thread the locknut onto the replacement leveling foot. Hand tighten the locknut until the top of the bolt is level with the top of the locknut.

Step 3: Reposition the printer

Slide the printer back onto the work surface so that it sits on all four leveling feet. If you are replacing multiple leveling feet, continue with the next leveling foot.

Step 4: Tape access hole closed for front-left leveling foot

If you replaced the front-left leveling foot, use duct tape to close the access hole to prevent any resin spillage.

Securing the locknut on the Form 3L replacement leveling foot

Step 5: Reinstall the rear shell for rear leveling feet

Lay the rear shell down behind the printer. Reconnect the two ends of the rear fan cable. Secure the fan cable to the rear shell with a strip of polyimide tape.

Place the rear shell back onto the printer, taking care to align the five pins on the shell with their respective holes. Press it towards the front of the printer to ensure that it fully seats in place. There should be no gaps between the rear shell and the side or bottom shells.

Using a T8 or T10 Torx driver, screw the 21 screws into the rear of the printer.

Reinstalling the Form 3L rear shell

Leveling the printer

Overview: After replacing the leveling foot, ensure the printer is level.

Step 1: Power on the printer

Connect the power cable to the printer and the power supply. The printer initializes. If you replaced the front-right leveling foot, allow the printer to complete the LPU maintenance routine.

Step 2: Level the printer

Form 3L leveling screen on touchscreen step 1
Form 3L leveling screen on touchscreen step 2

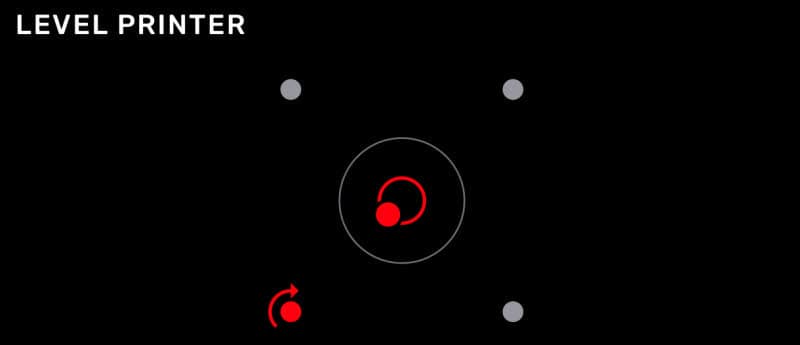
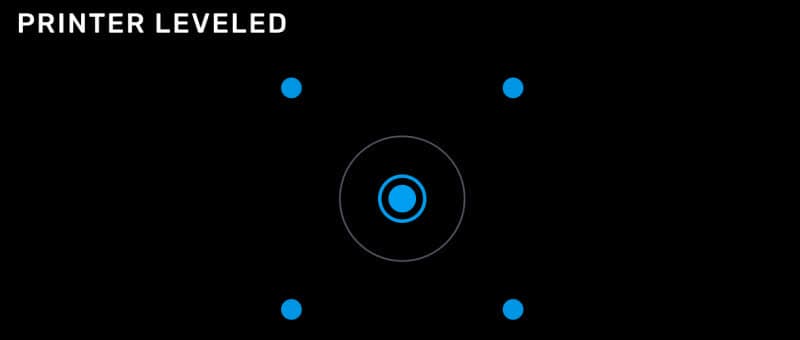
On the touchscreen, tap the wrench icon. The Settings screen appears. Tap Maintenance > Printer Leveling. Follow the instructions on the touchscreen to adjust the leveling feet with the leveling disc until the printer is level.

Step 3: Test the repair

Start a print to test the repair. Inspect the finished part to ensure the machine prints evenly. Contact Formlabs Support or your authorized reseller to share the results of the procedure.