Required tools:
-
30 mm open ended or adjustable wrench
-
24 mm open ended or adjustable wrench
-
Bubble level
-
Tape measure

After unboxing the printer, roll the Fuse X1 to its intended installation location. The printer is sized to fit through standard doors without modification.
Connecting the machine to power
The Fuse X1 must be wired to an electrical source at the installation site by a qualified electrician. A portable cord with appropriate plug or hard-wired connection to an appropriate disconnect switch may be used.
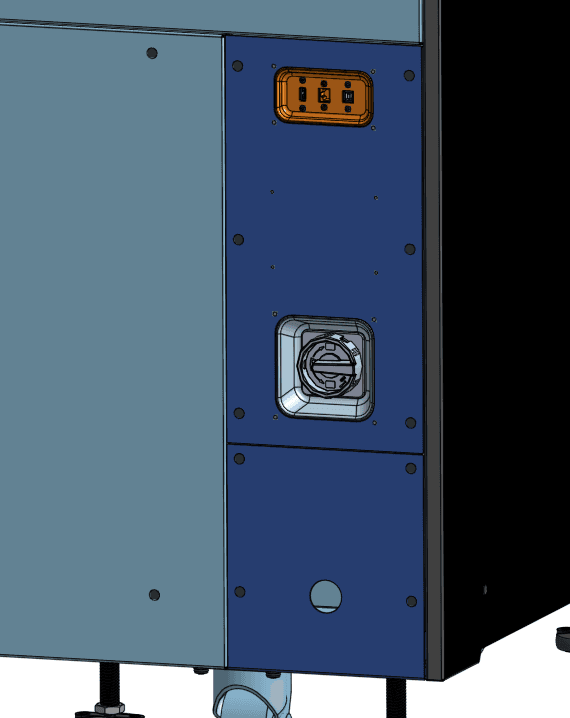
To wire the machine, remove the lower-right panel on the back of the machine to access the terminal block, optionally, install a cable gland.
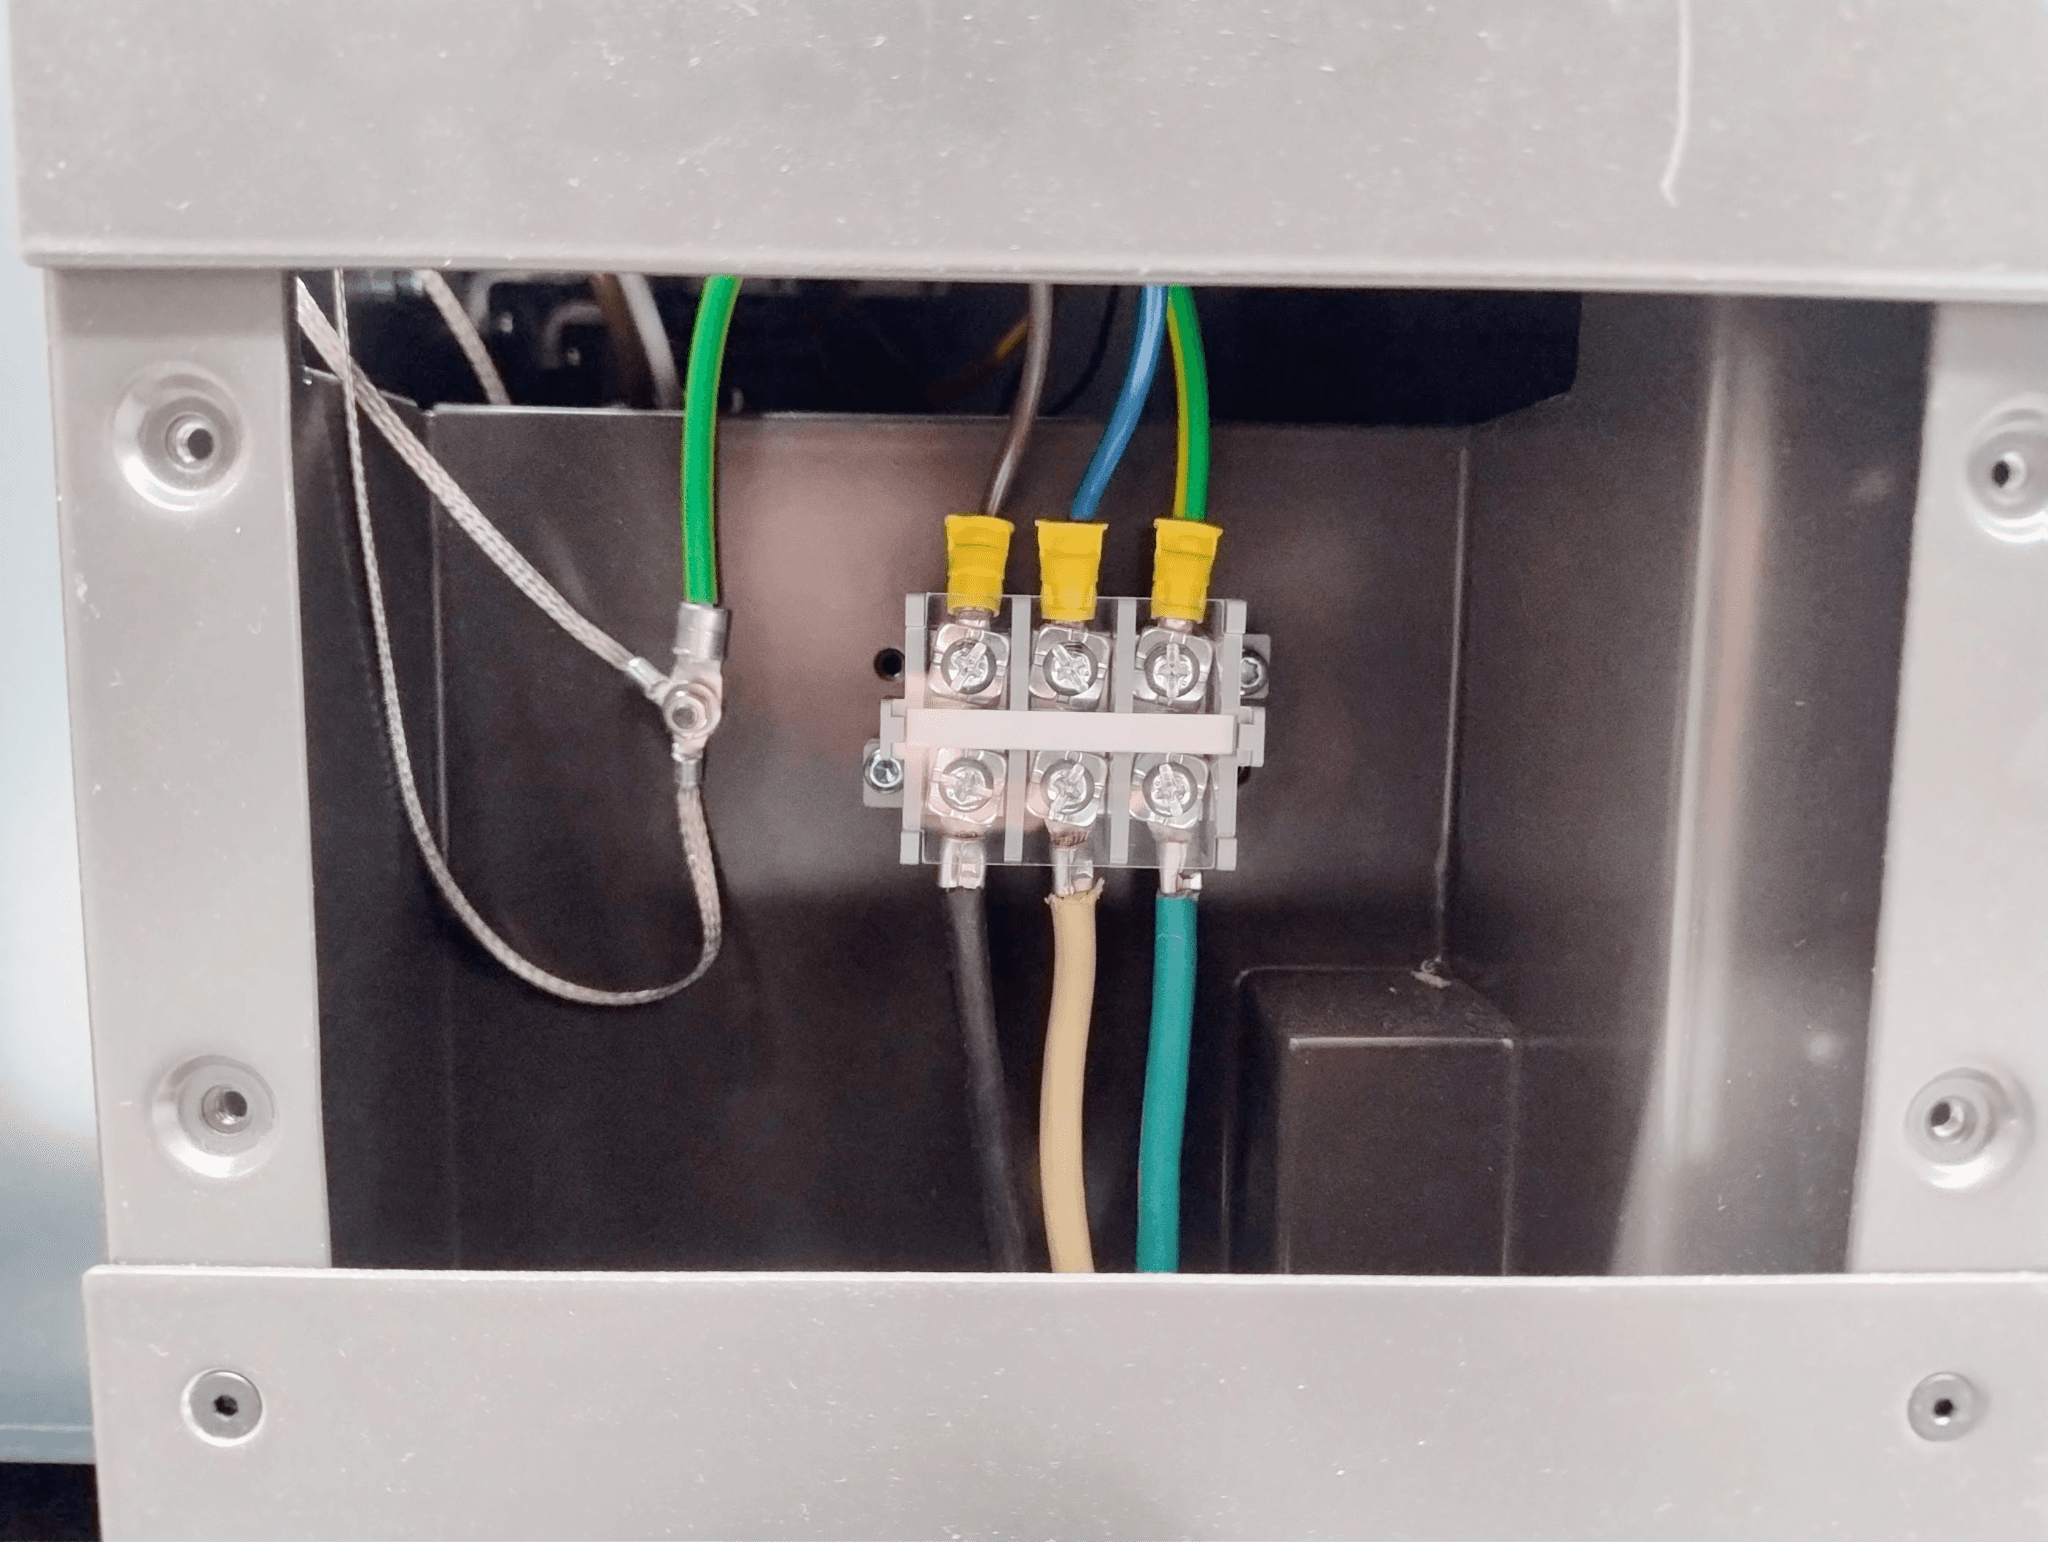
Make wiring connections to the bottom row of three terminals (L1: brown, L2: blue, PE: green/yellow) using appropriate wire and crimp terminals according to local electrical codes. Torque terminal screws to 2–3 N-m (18–26 in-lb).
Leveling
The printer must be completely level before the build unit can be inserted and printing can begin. This process does not require power or other utilities, so the printer should be powered off.
Required tools:
30 mm open ended or adjustable wrench
24 mm open ended or adjustable wrench
Bubble level
Tape measure
To level the printer:
Use a 30 mm wrench to loosen the uppermost nut on each of the eight feet to free them from the chassis.
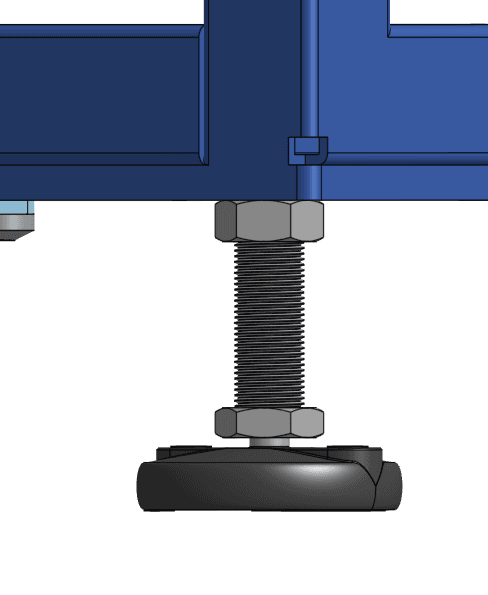
Use a 24 mm wrench to rotate the lower nut on each of the innermost four feet until they come into contact with the floor. Do not touch the outermost feet yet.
Rotate the four innermost feet incrementally until all four printer wheels are no longer contacting the floor.
Using a tape measure, check the height from the floor to each inner edge of the build sheet (item 21 in 2.3 Product components). It must be 1049 ± 5 mm. Adjust the innermost feet as needed for the build sheet to sit at this height.
Place the bubble level on the build sheet running left-to-right. Adjust the feet accordingly until level in this axis. Recheck that the edges of the build sheet sit 1049 ± 5 mm above the floor.
Rotate the bubble level so it is running front-to-back. Adjust the feet accordingly until level in this axis. Recheck that the edges of the build sheet sit 1049 ± 5 mm above the floor.
Double-check that the machine is still level left-to-right and adjust accordingly.
Use a wrench to lock the upper nut of the four inner feet to the chassis.
On the four outer feet, use a wrench to lower them until they just contact the floor. Make sure the foot is flat and fully in contact. Once you achieve full contact, rotate ¼ turn further.,
Lock the upper nut to the chassis.

Installing the build unit
After leveling, the build unit can be installed into the printer. Roll the build unit into the opening in the printer and push firmly until it is completely seated. If the printer is leveled correctly, the build unit will ramp in smoothly and its wheels will not be in contact with the floor when fully installed.
If the printer is too high, the build unit will not be able to engage with the guide bearings to ramp it into place.
If the printer is too low, the build unit will not be able to fully roll into place without interference.
Installing the vacuum conveyor
To install the vacuum conveyer onto the hopper:
Remove the vacuum conveyor from its packaging.
Using a ladder or stepstool, lift the vacuum conveyor to the top of the printer’s hopper.
Place the outlet onto the corresponding flange.
Fasten the split clamp to ensure a tight fit. Tighten the screw if needed.
Connect the vacuum conveyor to power using the included power cable.
Connect the vacuum conveyor to a compressed air source. Formlabs recommends an air source capable of delivering at least 10 SCFM at 100 psi. Installing a regulator before the inlet of the vacuum conveyor may be necessary as air supplied should not exceed 100 psi. The same supply feeding the nitrogen generator may be used for this purpose. The vacuum conveyor on the powder mixer may be daisy-chained into the same line for convenience.
Connecting a nitrogen source
Connect a nitrogen source to the printer. Formlabs recommends using a nitrogen generator. Do not power on the printer before connecting the nitrogen source, as it is used to keep the camera, IR sensor, and laser windows at the top of the print chamber clean.
Powering on the machine
To turn on the printer:
Plug the newly-wired power cable into its outlet.
Turn the breaker switch on the back of the unit to the ON position to turn on the machine.
As the machine initiates, the Formlabs logo with a progress bar appears on the touchscreen.