WHITE PAPER
Formlabs Logo

Fuse 1 generation error message: Error 194, Optical cassette not detected

Fuse 1 generation error message: Error 194, Optical cassette not detected

The touchscreen on Fuse 1 generation printers displays the error message Error 194 or Optical cassette not detected when it cannot detect the optical cassette. Powder contamination, obstructions, or an incorrectly seated optical cassette may lead to repeated warnings on the printer’s touchscreen. The Optical cassette not detected error message may also be caused by a software bug.

Symptoms

  • Optical Cassette not detected error message

Common causes

  • Dirty or obstructed optical cassette
  • Incorrectly seated optical cassette
  • Dirty window detection tab under the laser window
  • Dirty or obstructed upper laser window
  • Software bug

Troubleshooting steps

Required supplies:

  • Nitrile gloves
  • Polyester cloth swab
  • PEC*PADs
  • Telescoping mirror
  • Alconox
  • Distilled water
  • Ethanol
  • 1.5 mm hex driver

Step 1: Update printer firmware

Update the printer’s firmware to version 1.19.0 or later. This error was removed in firmware 1.19.0 and later and replaced with a reminder to install the optical cassette prior to starting a print. If you are unable to update your printer’s firmware, continue with the troubleshooting steps below.

Step 2: Remove and clean the optical cassette

Remove the optical cassette from the printer. Inspect the optical cassette for signs of loose powder, dust, condensed outgassed compounds, or other contaminants. Clean the optical cassette with ethanol and a PEC*PAD.

Step 3: Clean the window detection tab

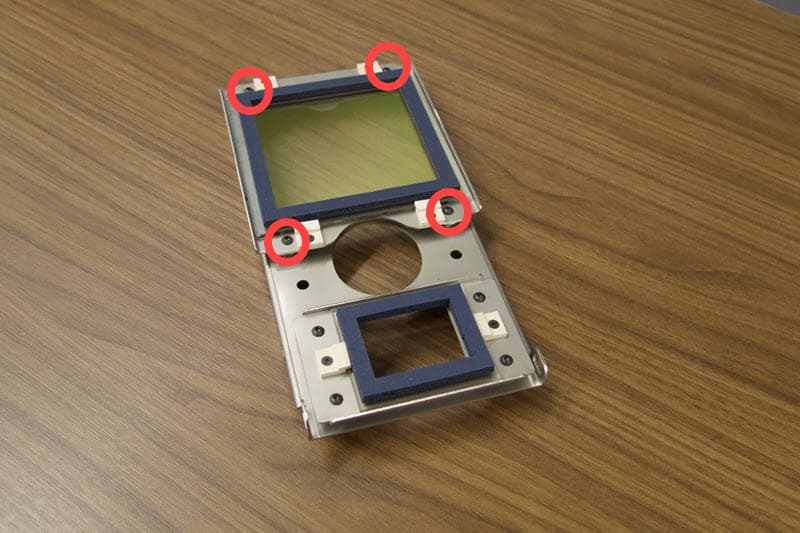
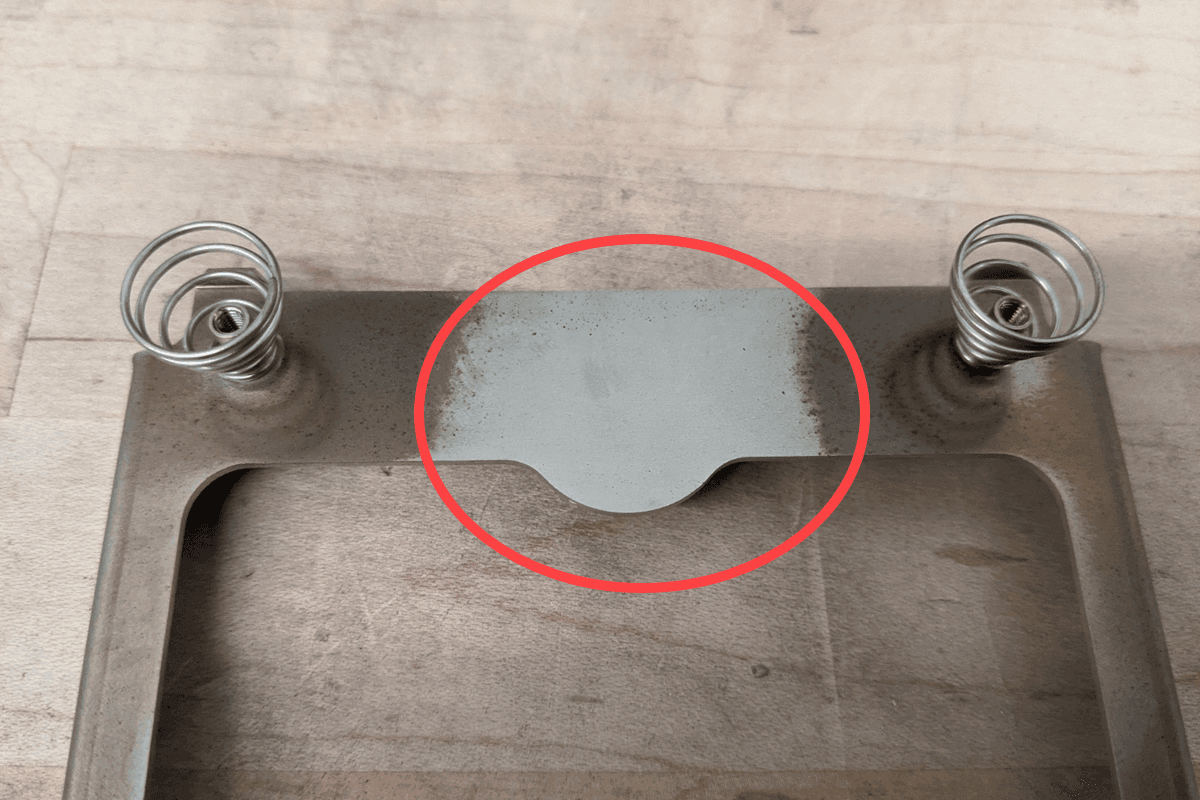
Inspect the detection tab that protrudes into the laser window for any accumulation of printing byproducts, such as charred plastic or laurolactam. The detection tab is located on the optical cassette frame, underneath the laser window. The laser window is secured to the frame using four 1.5 mm hex screws. Use a 1.5 mm hex driver to unscrew and remove the four screws. Set the screws and the laser window aside.


Optical cassette with annotated screw holes.
Laser window tab on the optical cassette.

Clean the window detection tab on the cassette with Alconox and a paper towel or PEC*PAD. Do a cleaning pass with distilled water afterwards to remove any residue.

If Alconox is not available, clean the window detection tab with distilled water or a household cleaning agent. Ethanol, acetone, or IPA should not be used to clean the window detection tab.

Notice:

Only mix Alconox powder with distilled water. Do not clean any optical components with Alconox that has been mixed with tap, bottled, filtered, or any other source of water that is not distilled. Contaminants from water that is not distilled collect on optical surfaces, adversely affecting print quality and the operating life of optical components.

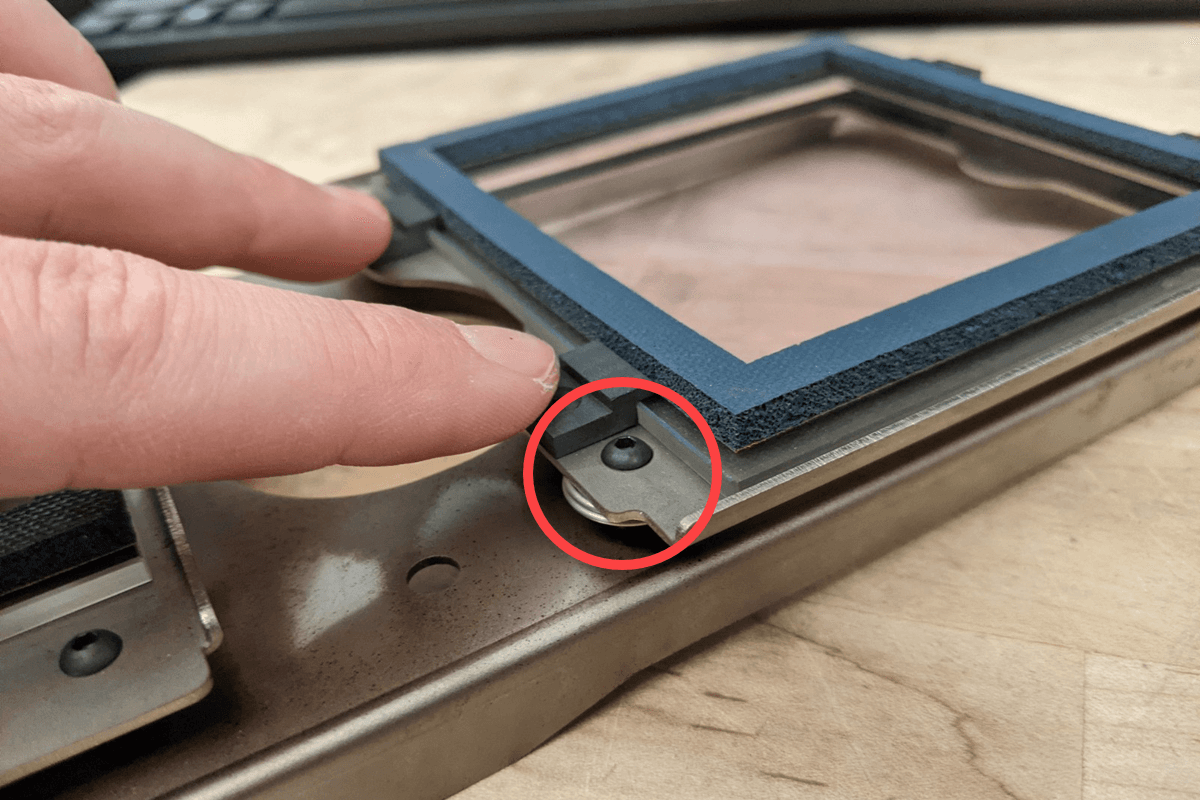
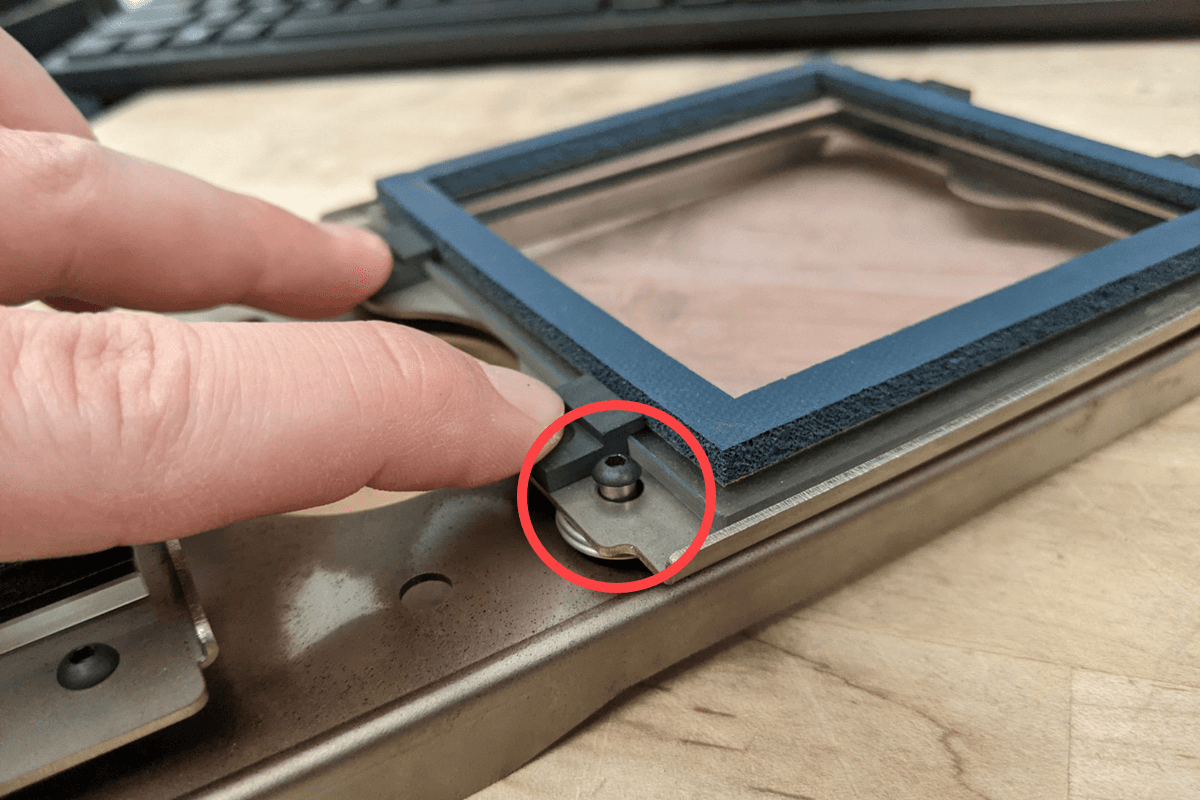
When re-assembling the cassette, ensure that the window carrier is not bound between the standoffs and the screw heads. Tighten the screws until finger tight, while still leaving enough space for the springs to compress without significant force after installation.

Optical cassette laser window screw.
Optical cassette laser window screw press.

Step 4: Inspect and clean the upper laser window

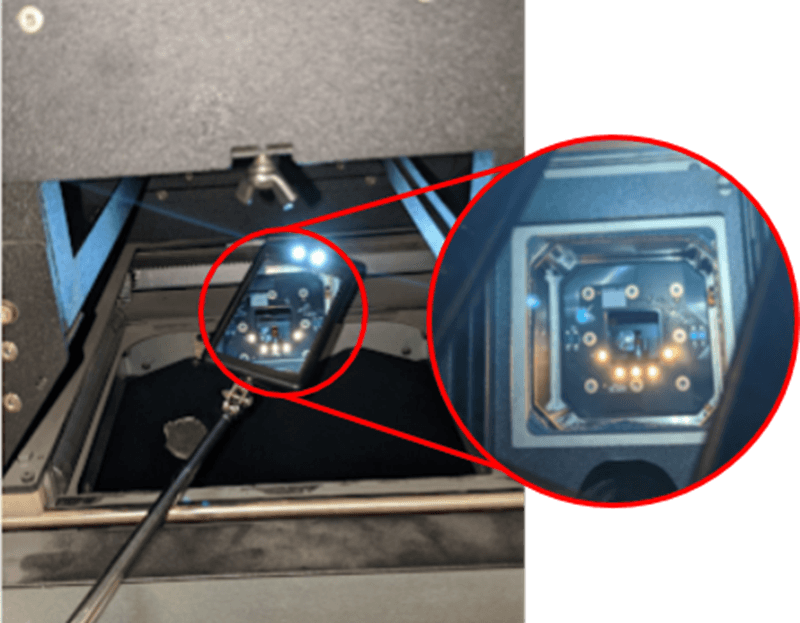
Return the cassette tray to its closed position without an optical cassette. This provides easier access to the upper laser window. Tighten the thumb screw to lock the cassette tray in place. Use the telescoping mirror to inspect the upper laser window for any contamination such as offgas stains, powder, smudges, or debris that may obstruct the optical path from the galvo block into the print enclosure. Clean the upper laser window.

Telescoping mirror inspecting the upper laser window.

Step 5: Confirm the optical cassette is seated properly

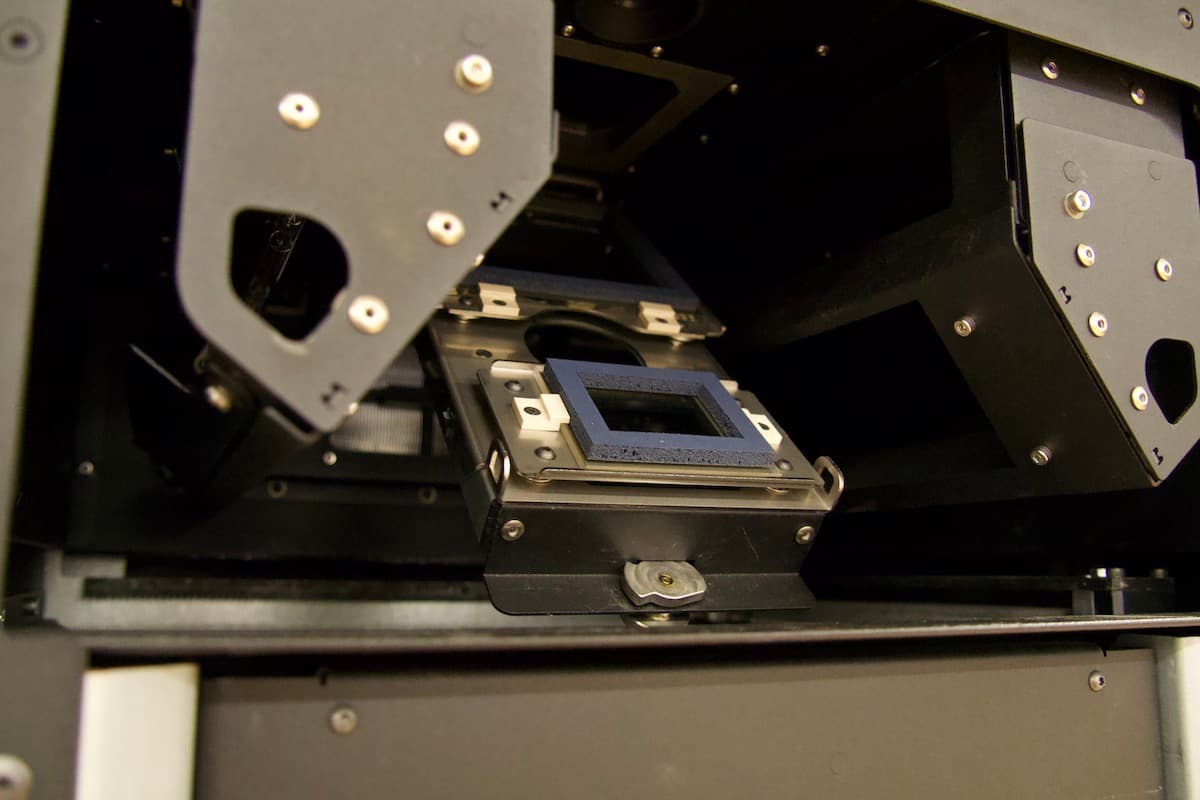
Open the cassette tray and place the optical cassette into the tray. Ensure that the optical cassette slides firmly down into place on the tray. Confirm that the tray tabs properly engage the bayonet catches on both sides of the optical cassette, and that the cassette is not sliding too far backwards when the tray is closed. Try another print.

Properly inserted optical cassette.

Step 6: Contact Formlabs Support

If you are still experiencing the Optical cassette not detected error message, please contact Formlabs Support or your authorized reseller. Include your printer’s diagnostic logs with other relevant observations and details when contacting Formlabs Support or your certified service provider to speed up resolution.