
警告:
ルースパウダーまたは未焼結パウダーを扱う作業をする時は、適切な個人用保護具を着用して作業してください。詳しくは、Formlabs SLS製品の安全性に関するサポート記事をご参照ください。

Before transporting your Fuse 1 generation printer or using a different material, thoroughly clean all powder out of the machine. This includes cleaning powder out of the hopper, print enclosure, air filters, and off sensitive components such as the optical cassette and heater tubes. It is critical to fully clean all powder out of the machine before using it with a different material. You may need to perform this cleaning multiple times.
In most cases, when switching between two materials, you will need to thoroughly and comprehensively clean your printer, Fuse Sift, and build chamber. If you are switching between Nylon 12 Powder and Nylon 12 GF Powder or between Nylon 11 Powder and Nylon 11 CF Powder, you can follow a simplified cleaning procedure. Clean the hoppers and dosing assemblies of your printer and Fuse Sift. In most cases, repeated cleaning passes and detailed cleaning of optical surfaces, heaters, and filters are not necessary. You do not need to clean your build chamber when switching between these pairs of materials.

備考:
材料を切り替える前にマシン内に残っているパウダーをすべてきれいに除去しないと、その残存パウダーがプリントの失敗やマシンの永久的な損傷の原因になる恐れがあります。この記事に記載されている指示内容や注意事項をすべて熟読し、十分理解した上で作業を進めてください。
必要な備品
所要時間の目安:2~3時間
Supplies:
備考:
以下のアイテムは使用する各材料だけに使う専用のものをご用意ください。洗浄した後に別の種類の素材に再利用しないでください。
ヒント:
掃除機用のアタッチメントには静電気防止用のものを使用し、電気ショックを受けるリスクを回避するようにしてください。3Dプリントしたアタッチメント(ホッパーアタッチメントなど)には、3Dプリント後に静電防止スプレーをかけてください。
クリーニング前:
クリーニング工程を開始する前に、対象となるマシン本体と埃のない作業環境を準備してください。
警告:
過去24時間以内にプリントを行った場合は、この手順を実行しないでください。この警告を無視して実行すると、大きな火傷または割れた石英ガラスで裂傷を負う恐れがあります。プリンタの部品に触れたり点検したりする前に、プリント筐体を室温まで完全に冷却してください。
Step 1: Print the vacuum cleaning attachment
Download and print the STL file for the cleaning attachment in advance of this procedure. Use your Fuse printer to print this attachment, then wait 24 hours for the quartz heaters to fully cool.
You can also optionally print a set of nozzles to help reach into tight spaces within the printer:
Mount the base nozzle on your vacuum hose, then use the bayonet fitting to quickly swap between the default tip (good for general usage), hook tip (for reaching into Fuse 1 generation powder troughs), and precision tip (for reaching into tight spaces, such as between the blades of the use 1+ 30W hopper agitator.
Step 2: Collect tools
Collect the required cleaning tools and put on your personal protective equipment (respiratory protection, gloves, and safety glasses).
Step 3: Insert an optical cassette
Before vacuuming any powder, install an optical cassette in the printer.
備考:
プリンタ内に残っているパウダーをすべて除去する作業を開始する前にオプティカルカセットを取り付けておかないと、光学部品や上部レーザーウィンドウが汚れてしまう恐れがあります。
ホッパーのクリーニング
Fuse 1世代プリンタ内に残っているパウダーを除去する際、表面を拭いたり、より精密なコンポーネントを掃除したりする前に、ホッパーとプリント筐体に溜まっている大部分のパウダーを先に取り除いてください。
備考:
プリンタから大部分のパウダーを取り除くには、同じ箇所を複数回掃除する必要がある場合があります。必要に応じて繰り返し、ホッパーと3Dプリント筐体を交互に掃除してください。
ステップ1:空のビルドチャンバーを挿入する
空のビルドチャンバーを挿入し、プラグを差し込みます。プリント筐体のドアを閉じます。
ステップ2:ホッパーを空にする
プリンターのタッチスクリーンで、Settings(設定)> Tools(ツール)> Empty Hopper(ホッパーを空にする)をタップします。Empty Hopper(ホッパーを空にする)画面に表示される指示に従って、ホッパーからビルドチェンバーにパウダーを移します。この作業には1時間ほどかかることがあります。
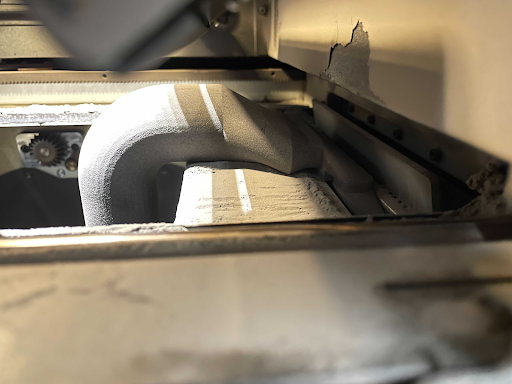
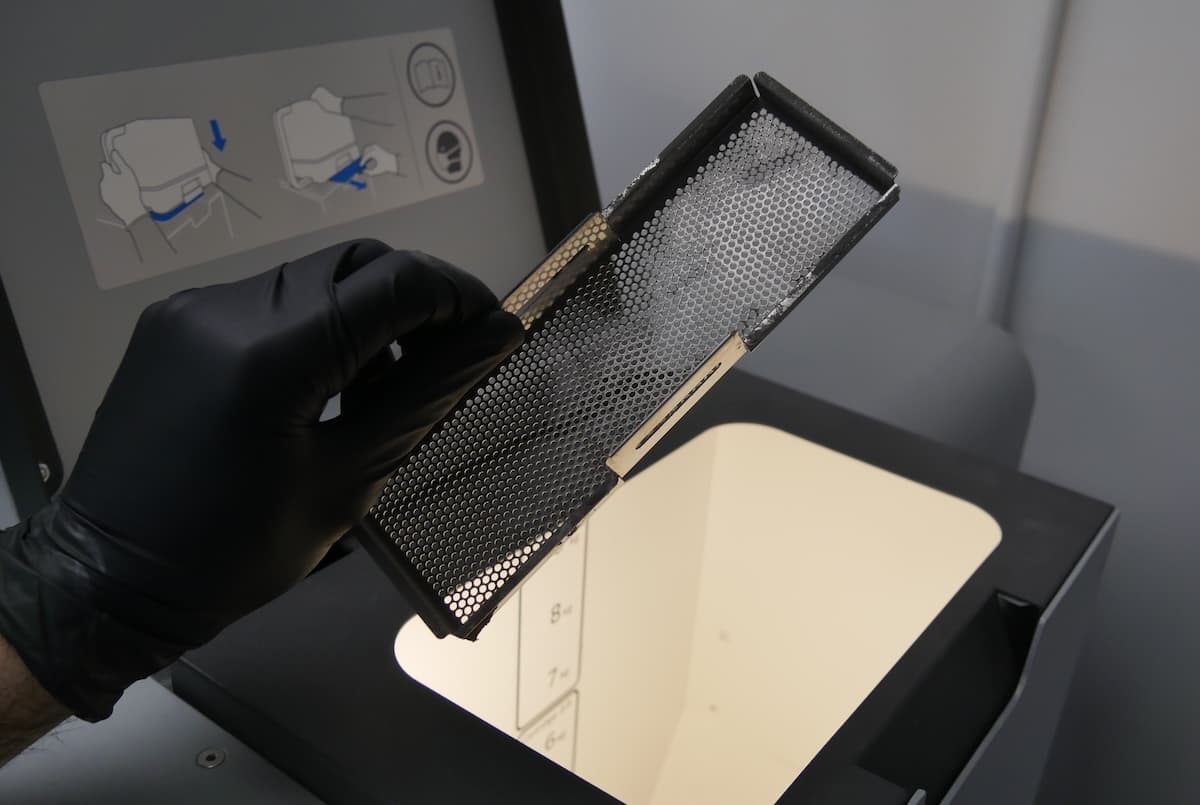
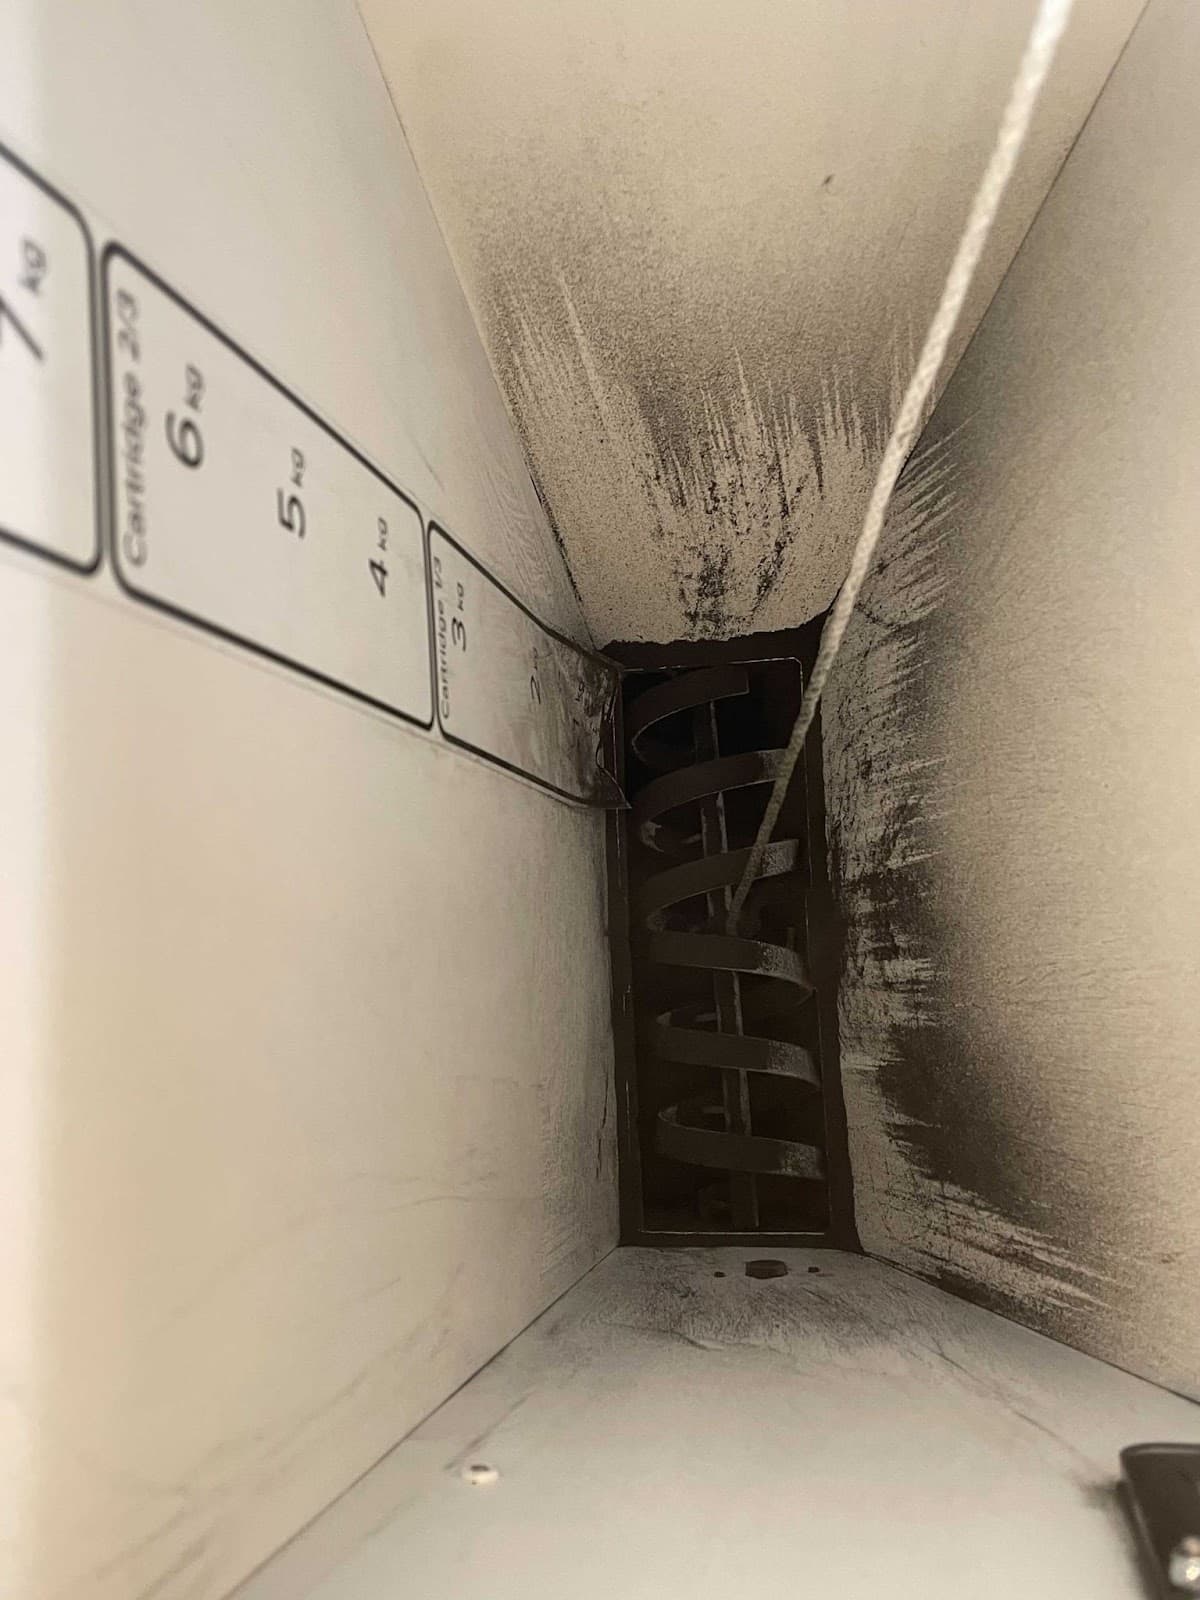
ステップ3:ホッパー内の残留パウダーを吸引する
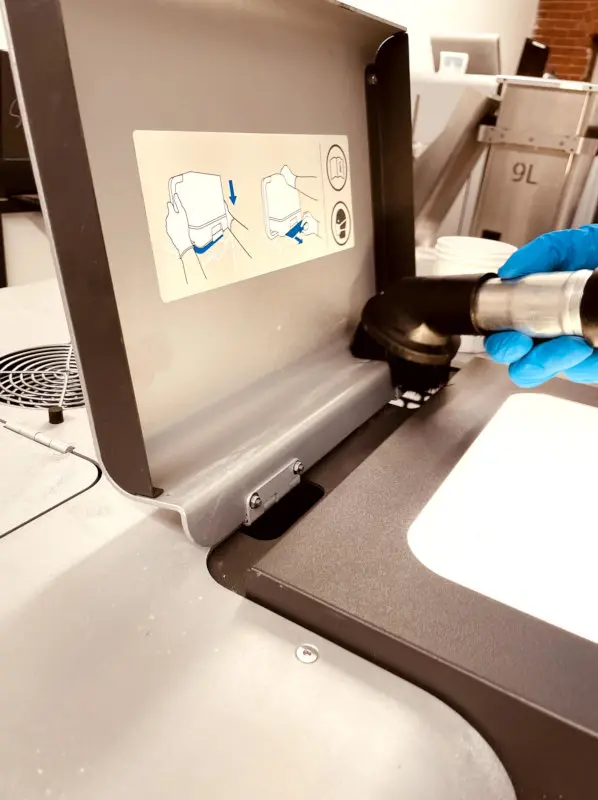
残留パウダーを吸引する前に、ホッパーにアクセスしやすくするためにグレーチングを取り外します。
|  |
|  |
|  |
|  |
|  |
|
ステップ4:ドーザーアセンブリのクリーニング
ホッパー内のドーザーを動かしてパウダーを取り除く間、アタッチメントをトラフ内に挿入したままにしておきます。
備考:
プリント筐体のクリーニング
ホッパーのクリーニングを完了したら、プリント筐体のクリーニングに移ります。まずはメインの開放部に溜まっているパウダーを吸い取り、次にプリント筐体の上部にあるパウダー取り扱い機構のクリーニングに移ります。
ステップ1:プリンター筐体を掃除機で吸引する
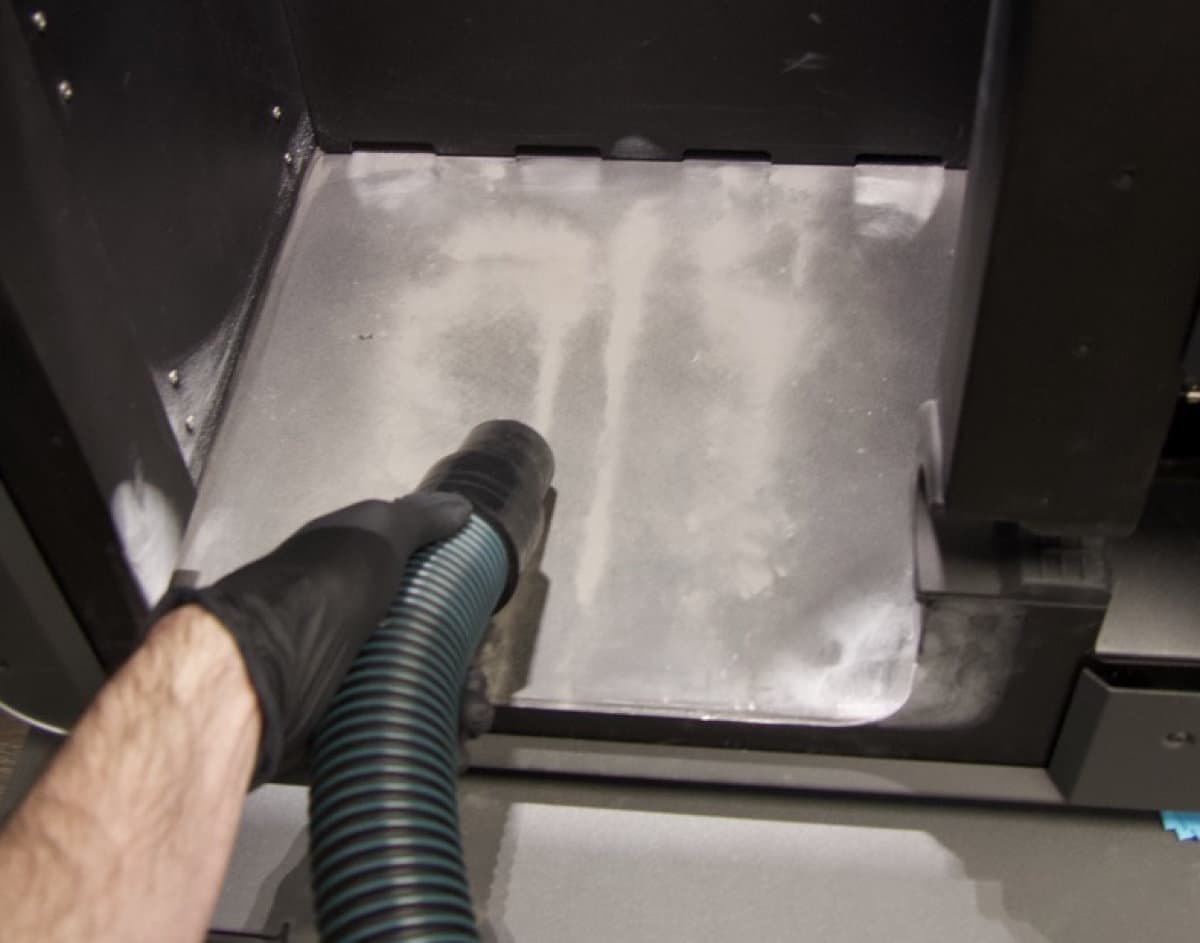
プリンター筐体のドアを開けます。プリント筐体内に残っているパウダーを掃除機で隈なく吸い取ります。手の届かないところに残っているパウダーは、必要に応じて圧縮空気やガスダスターを使って除去してください。
Step 2: Clean the powder troughs
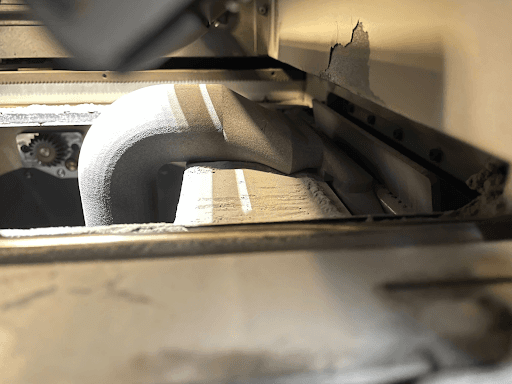
Two troughs run from the front to the back of the printer at the top of the print enclosure. The troughs store powder to be dispensed into the build chamber. Use the vacuum, fitted with a small brush attachment or the flexible hose attachment, to clean all powder out of the troughs. Use compressed air or a gas duster as necessary to remove powder from hard-to-reach areas. Check in particular for powder buildup along the inner walls and corners of the troughs.
If you previously printed the nozzle set, you can use the hook tip to reach into the troughs.
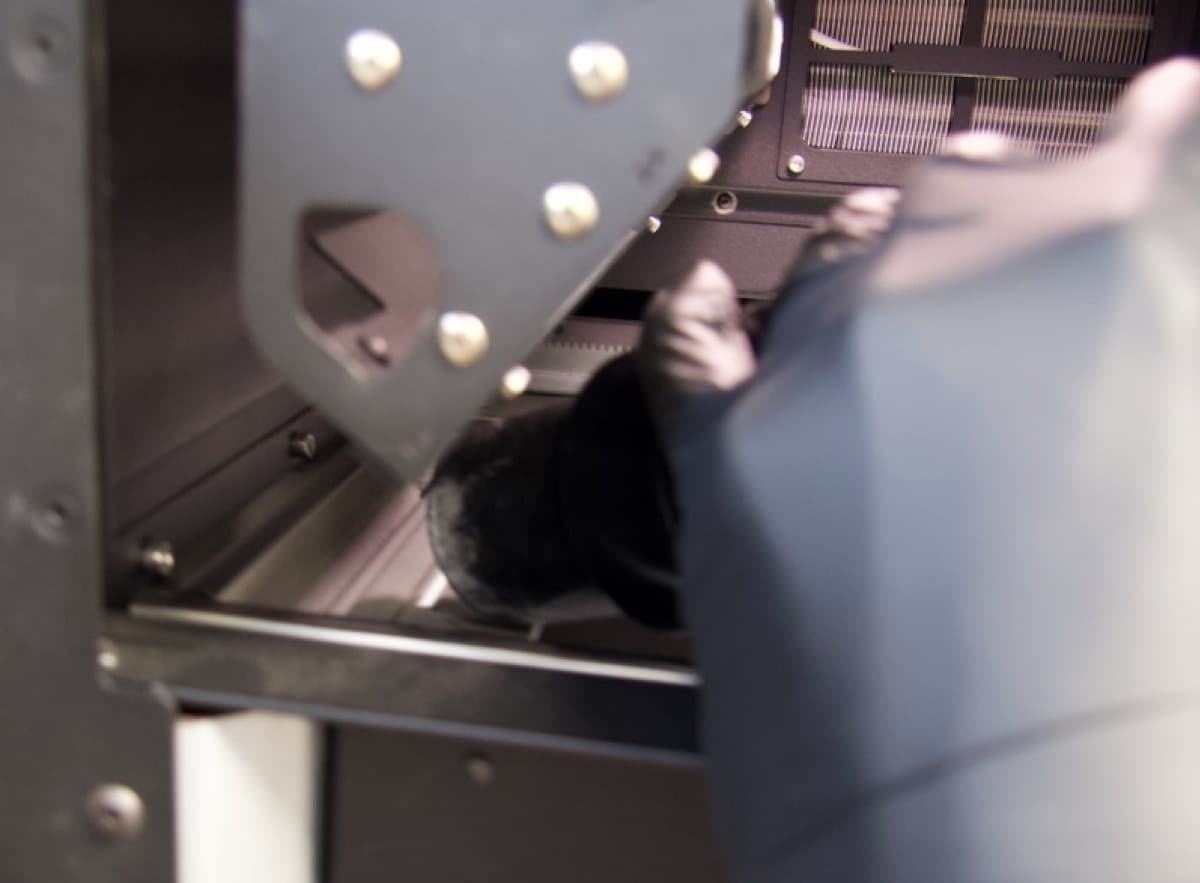
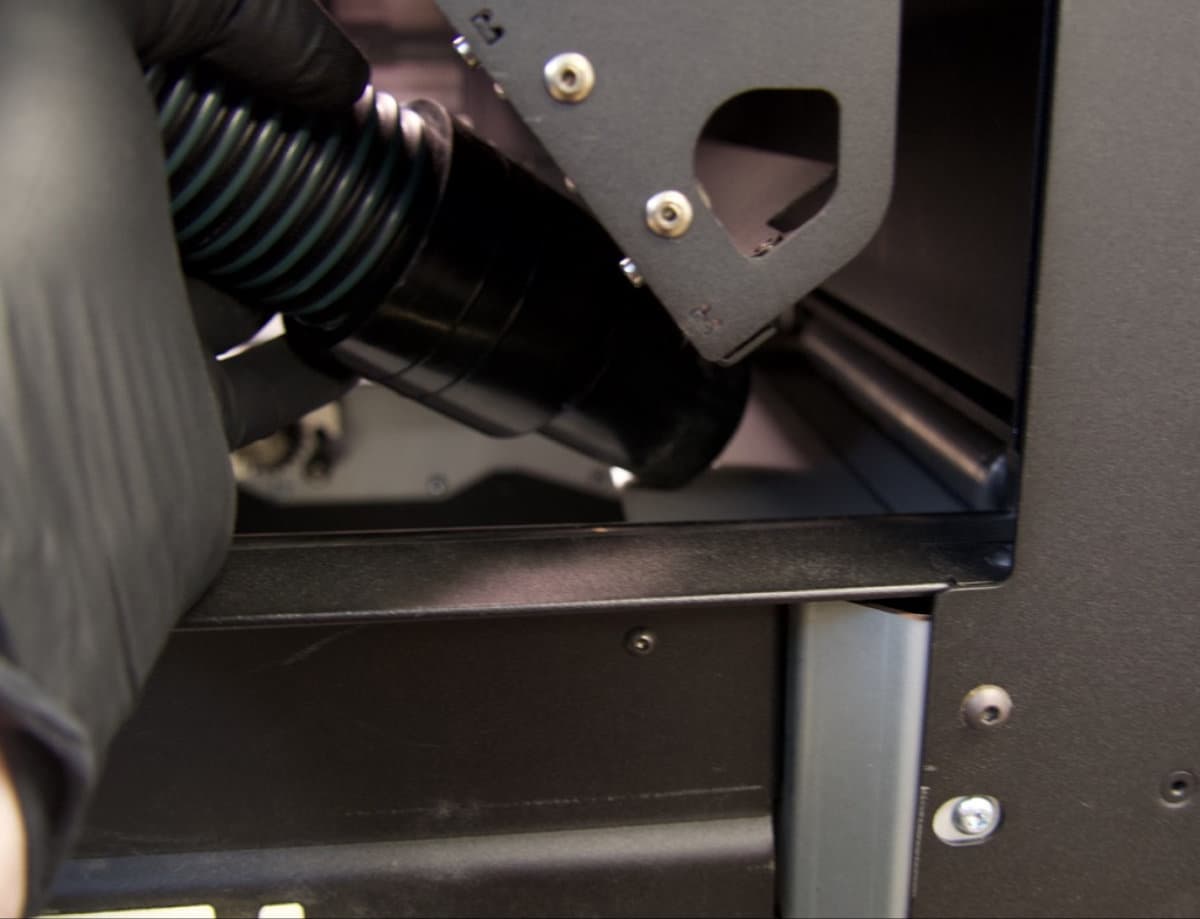
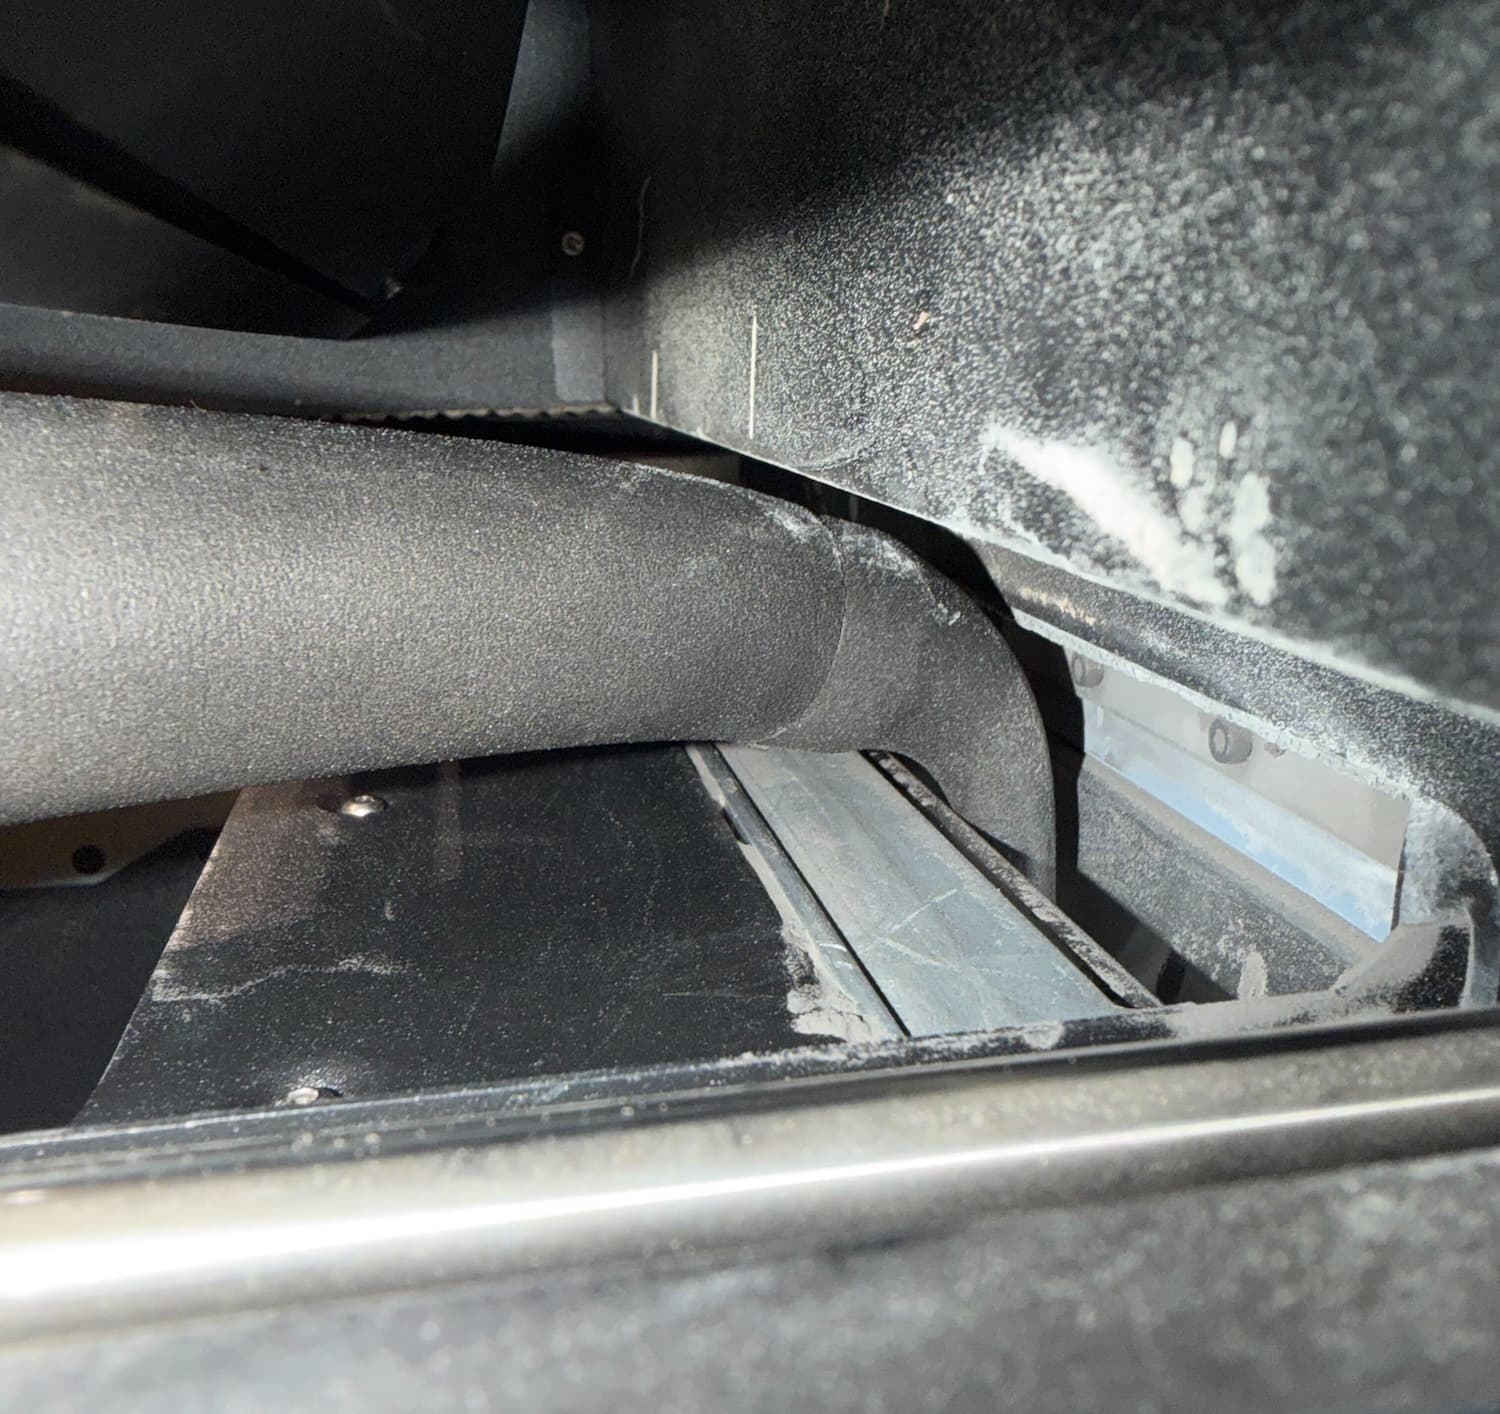
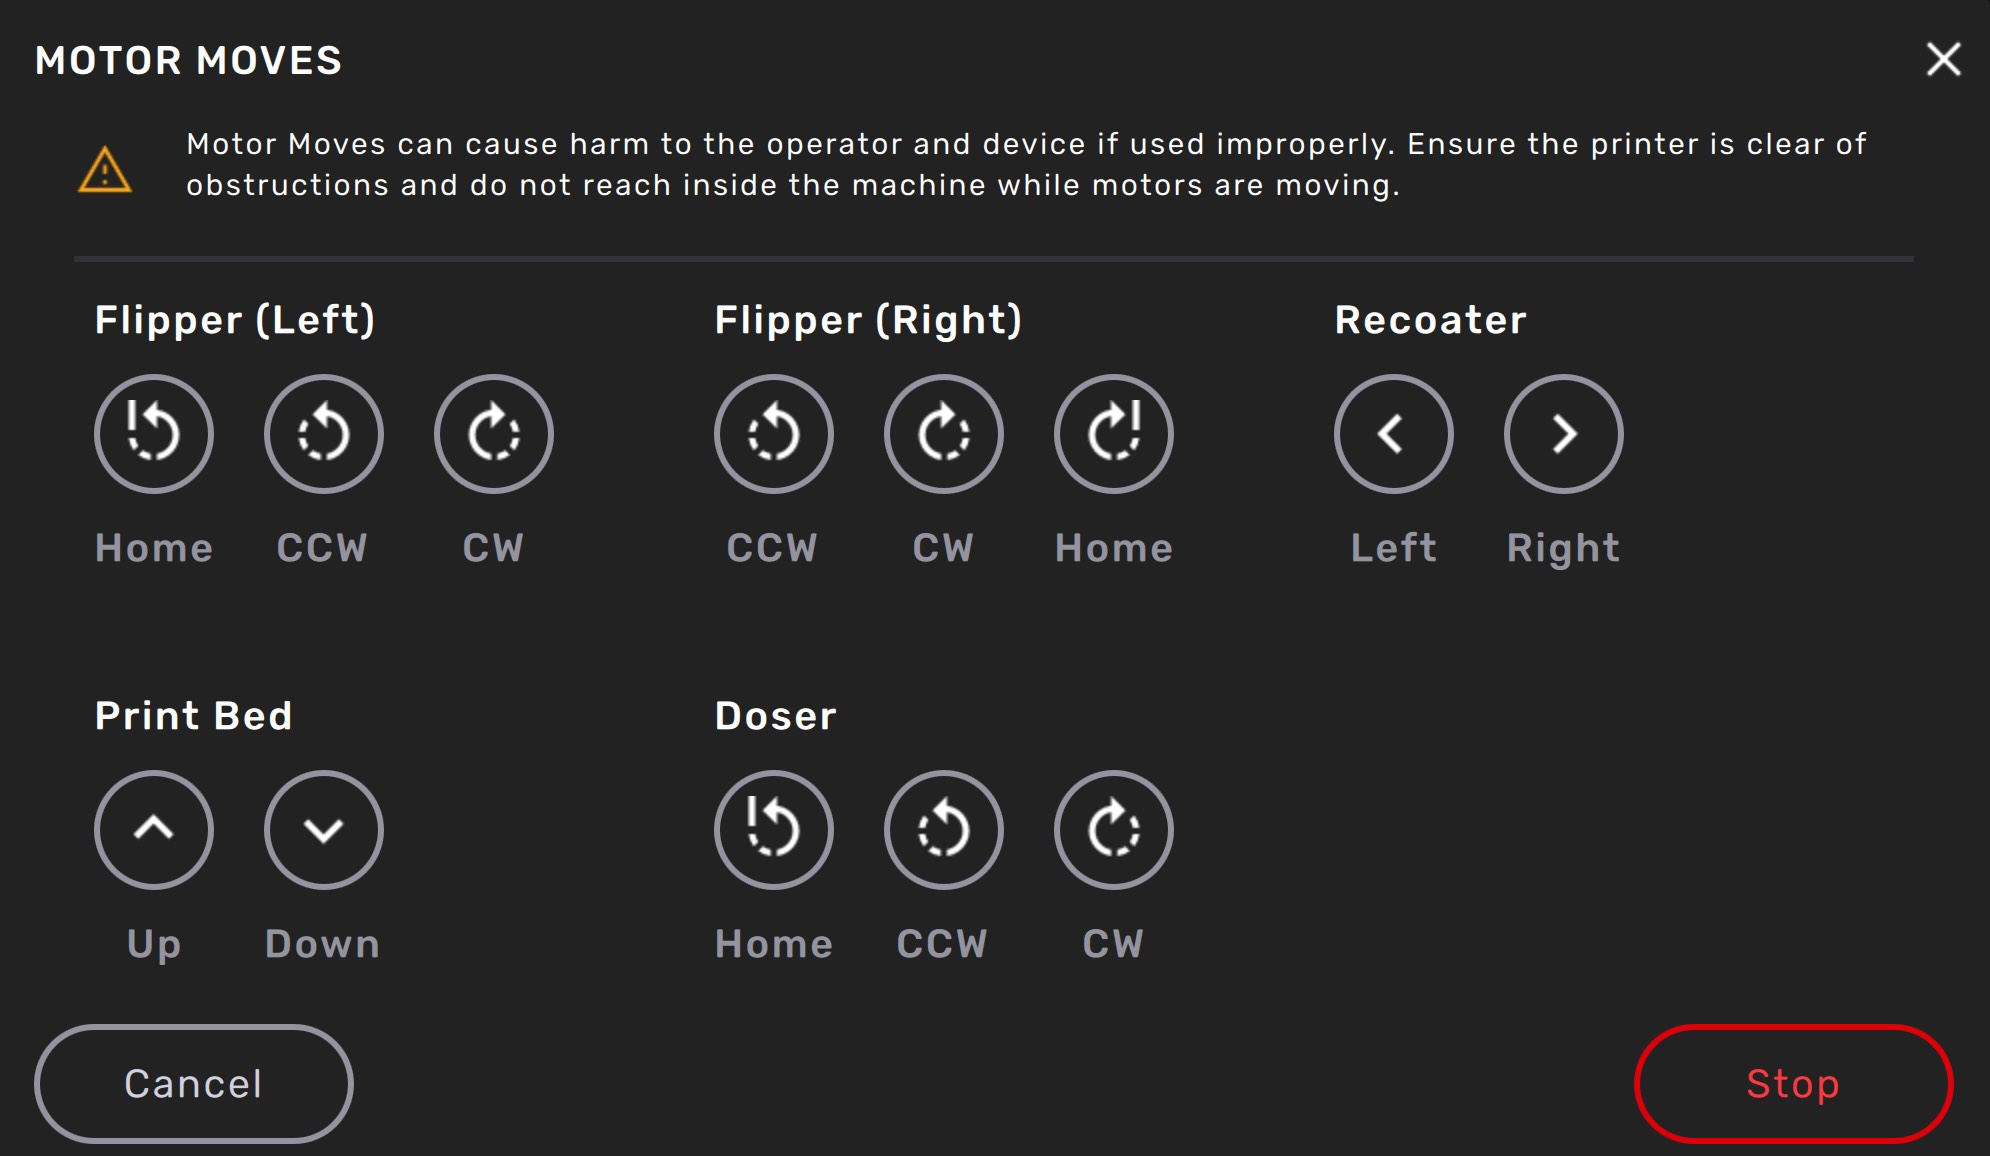
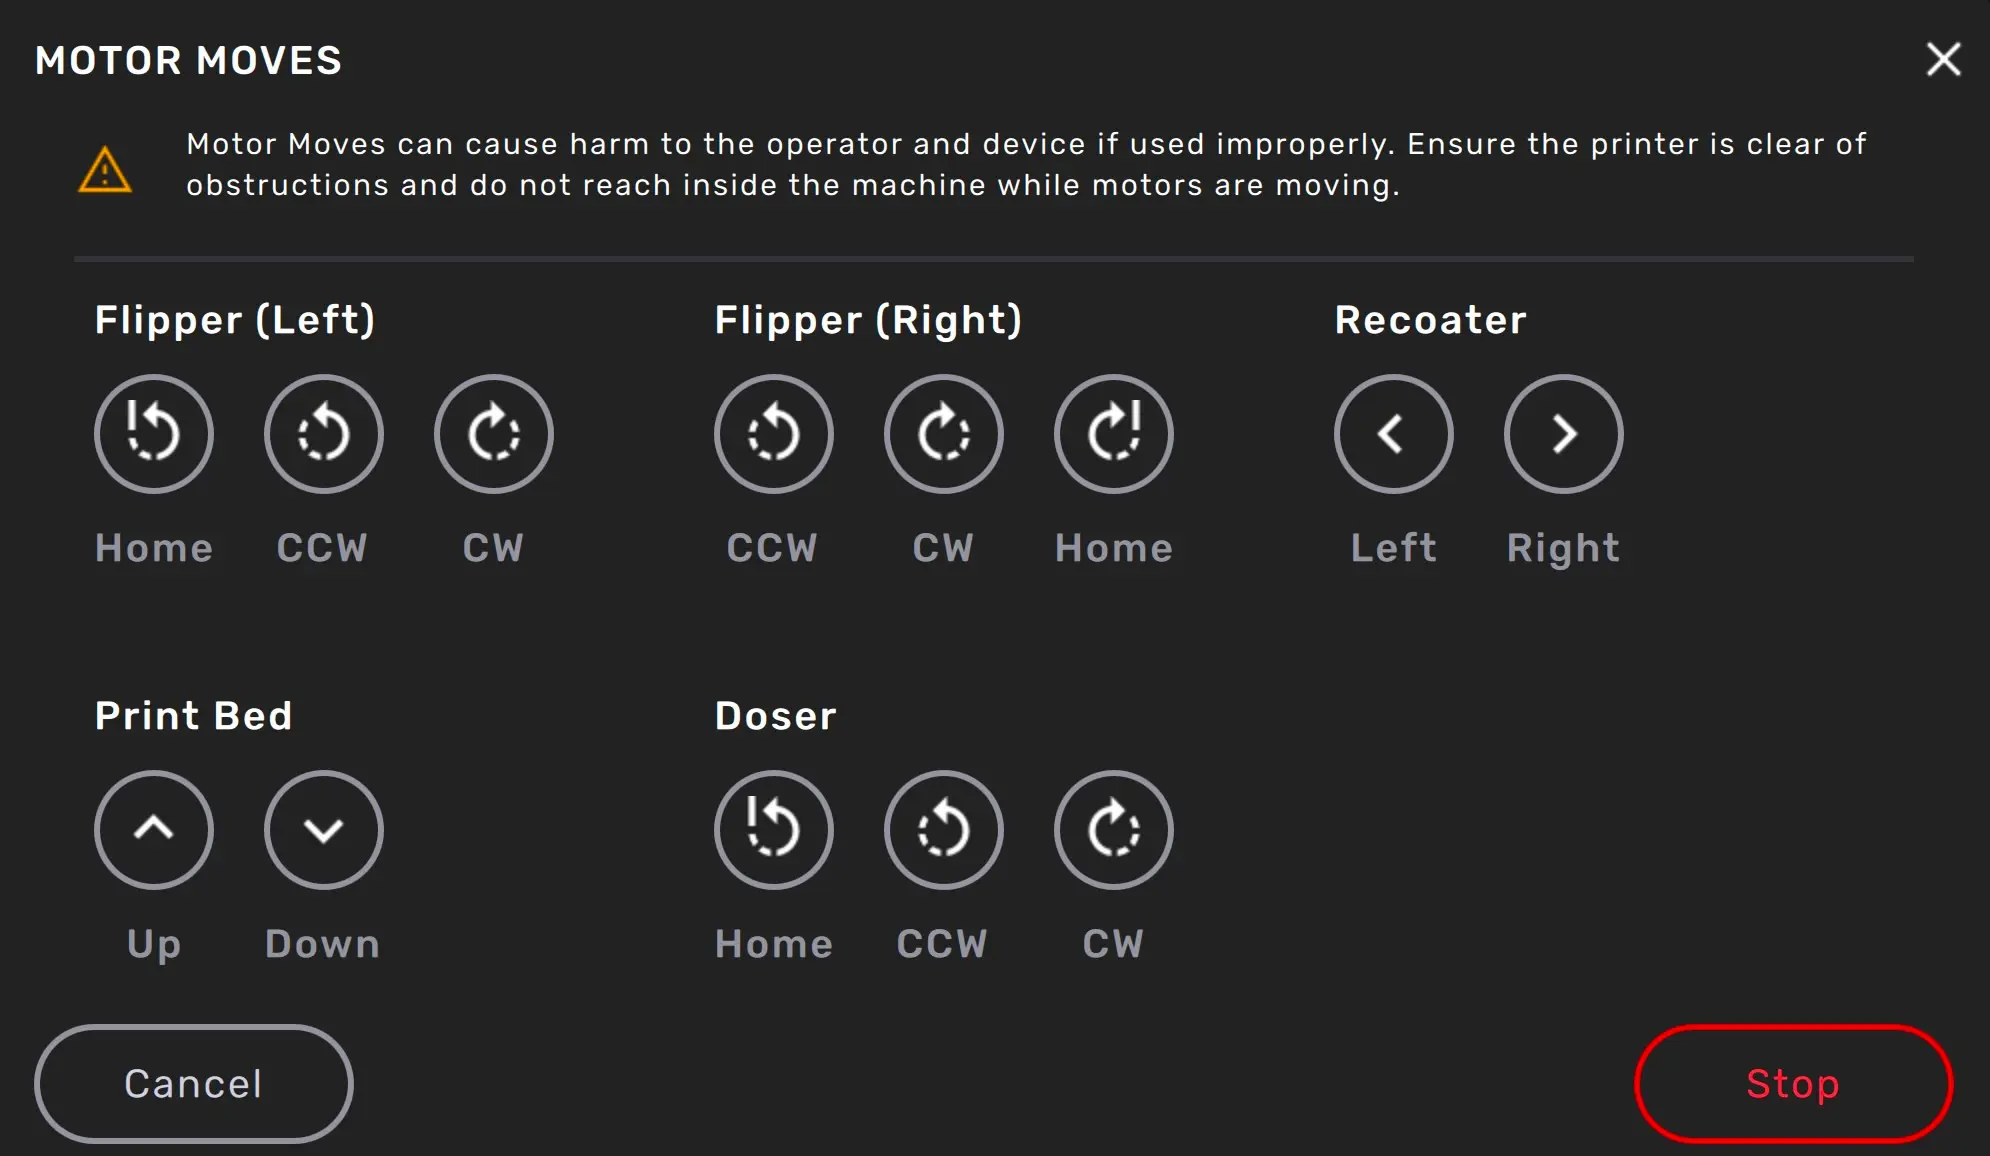
ステップ3:パウダートラフのモーターを動かす
プリント筐体のドアを閉め、フリッパーのモーターを動かしてパウダーを取り除き、クリーニングします。
フリッパーモーターを動かすには:
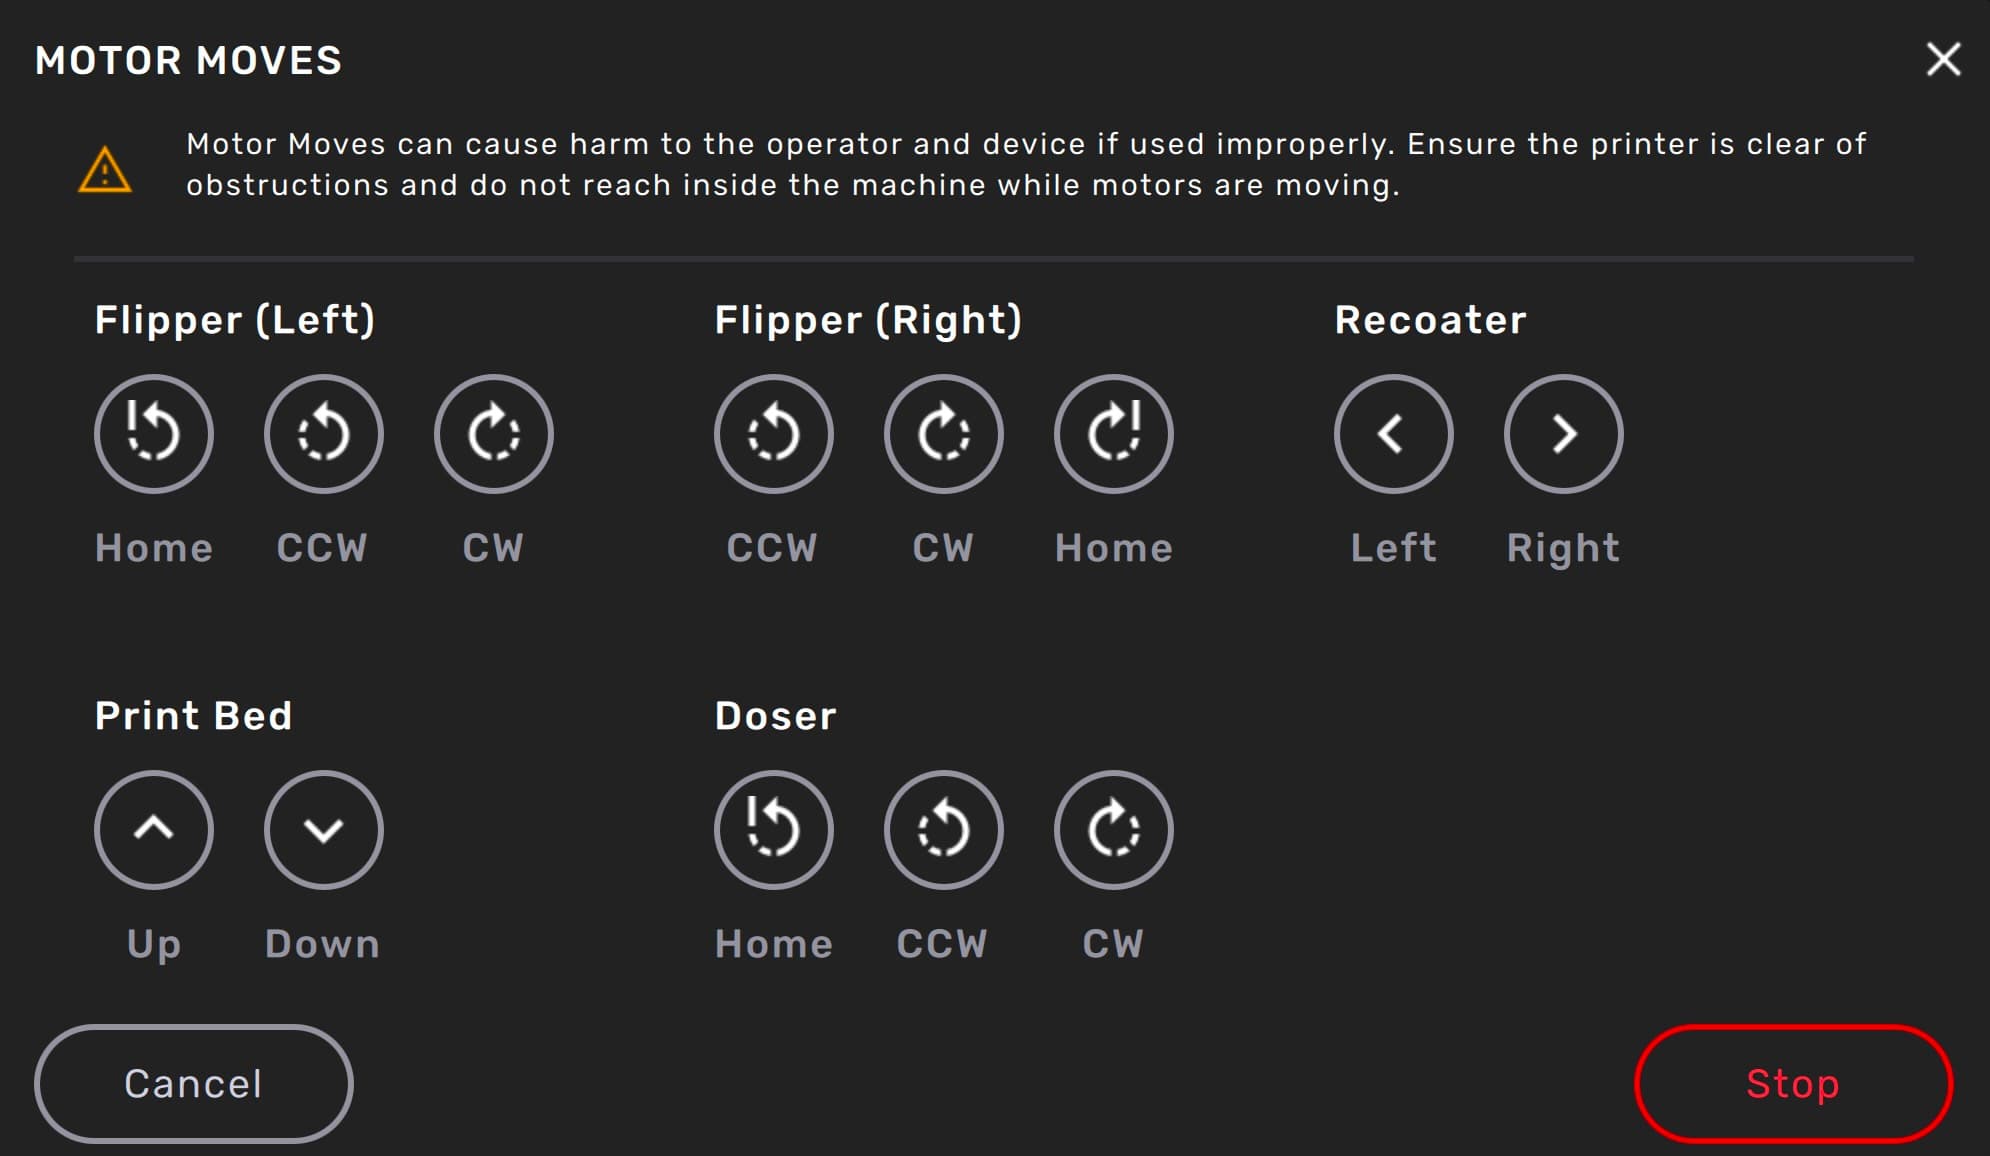
注:
特に指示がない限り、プリント筐体の扉を開放した状態、あるいは本体上部にあるパウダー関連の動作経路に障害物がある状態で Motor Moves(モーター移動)メニューのオプションを選択しないでください。可動部には押しつぶしや絡まりの危険があります。必要に応じて、タッチスクリーンのStop(停止)ボタンをタップしてモーターの動作を止めてください。
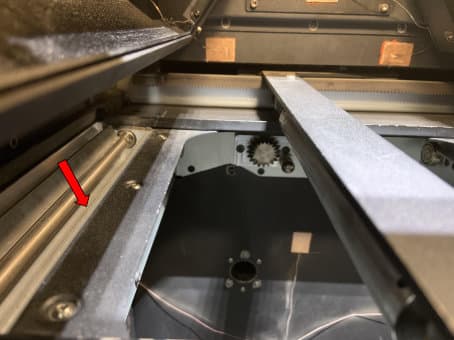
ステップ4:ホッパーガスケットを点検する
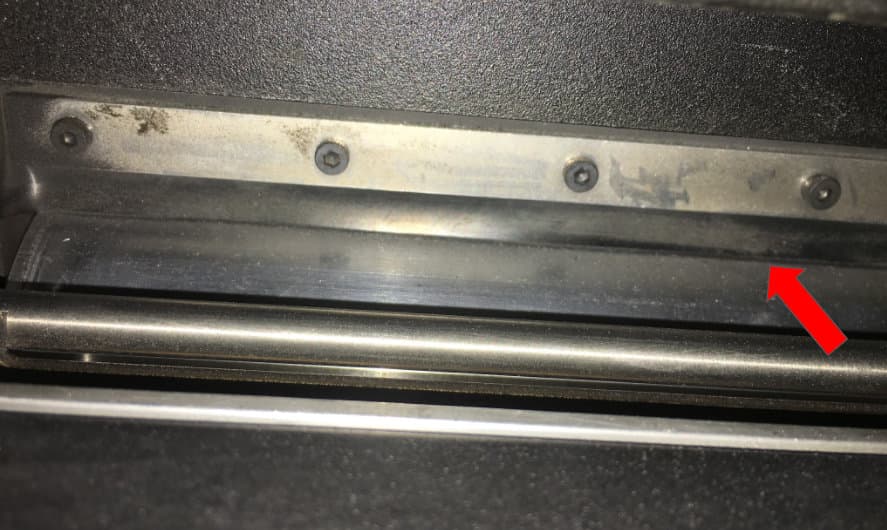
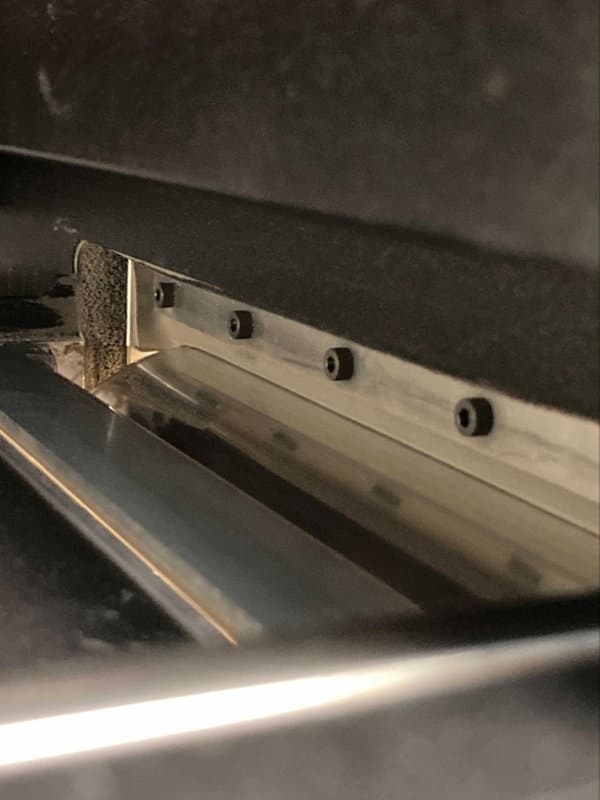
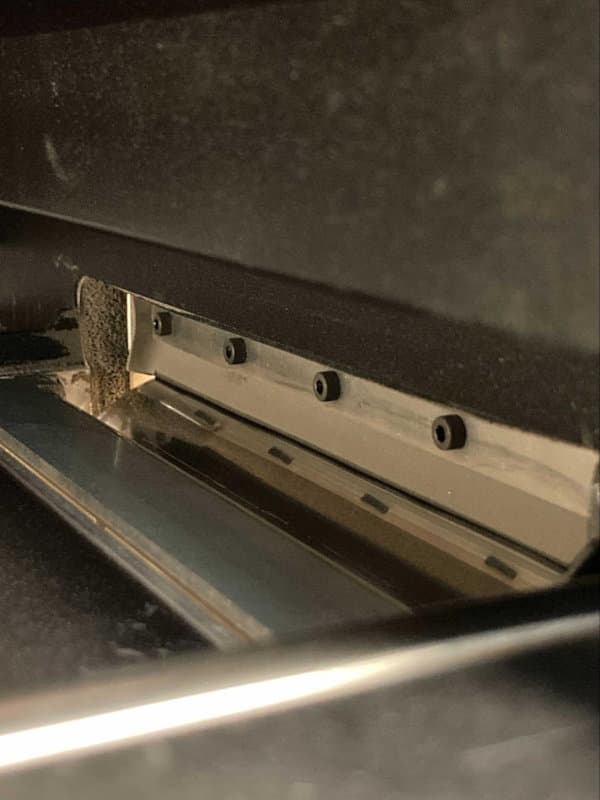
パウダートラフの清掃後、プリンター右側のトラフを点検します。溝の外縁に沿って走るガスケットの位置を確認します。圧縮空気をホッパーに吹き付けると、ガスケットが押し出され、リコーターの通り道に移ってしまう恐れがあります。そうなった時は、細い道具や手袋をした指でガスケットを押して、溝の縁の後ろの所定の位置に戻します。
ステップ5:プリント筐体を拭く
プリント筐体を清潔なマイクロファイバー布で拭き、残留パウダーを取り除きます。
ステップ6:リコーターを拭く
リコーターは、プリント筐体の上部を左右に移動し、プリント面にパウダーを広げて新しいプリント層を形成するバーです。
リコーターをクリーニング位置に移動するには:
注:
特に指示がない限り、プリント筐体の扉を開放した状態、あるいは本体上部にあるパウダー関連の動作経路に障害物がある状態で Motor Moves(モーター移動)メニューのオプションを選択しないでください。可動部には押しつぶしや絡まりの危険があります。必要に応じて、タッチスクリーンのStop(停止)ボタンをタップしてモーターの動作を止めてください。
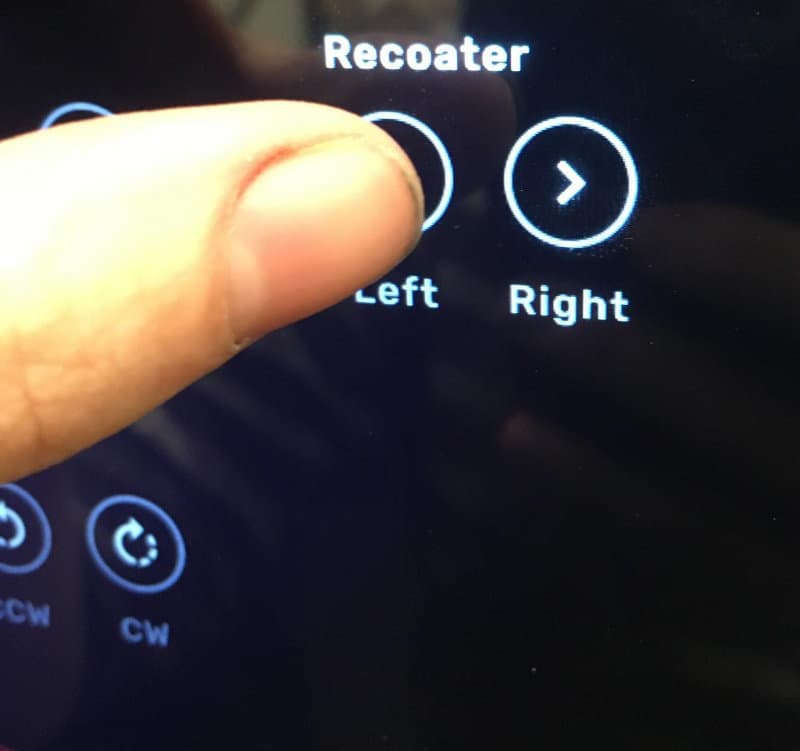
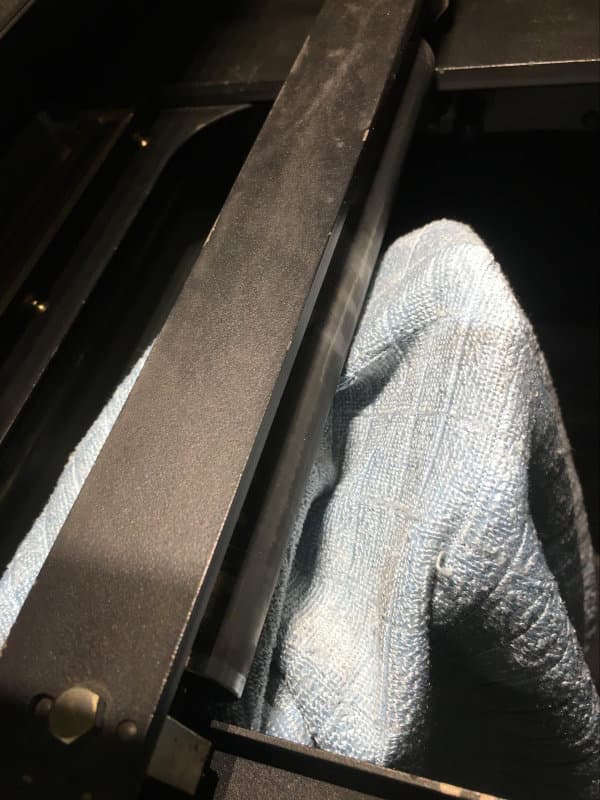
備考:
Nylon 12パウダーとNylon 12 GFパウダー、またはNylon 11パウダーとNylon 11 CFパウダーの間で切り替える場合は、ここで停止してください。その他の材料に切り替える場合は、以下のクリーニング手順に従ってください。
ステップ7:必要に応じて繰り返す
ホッパーのクリーニングとプリント筐体のクリーニングの手順を、凹んだ部分にパウダーがなくなり、すべての表面がきれいになるまで繰り返します。ホッパーとプリント筐体のクリーニングを交互に行います。
備考:
すべての面がきれいになるまで、この手順を複数回繰り返す必要が出てくるかもしれません。
各面や精密なコンポーネントのクリーニング
プリンタからパウダーの大部分を取り除いたら、各面の拭き取りと精密なコンポーネントのクリーニングに移ります。
備考:
プリンタの表面や精密なコンポーネントに付着しているパウダーをすべて取り除くには、クリーニングの手順を複数回繰り返す必要が出てくるかもしれません。必要に応じて以下の手順を、すべての表面が完全にきれいになるまで繰り返してください。
プリント筐体ドアのクリーニング
プリント筐体のドアの内側、特にガスケットの後ろや周りに付着しているパウダーを取り除きます。
ステップ1:プリンター筐体のドアを掃除する
バキュームホースにブラシアタッチメントを取り付けます。プリント筐体のドアの内側に付着しているパウダーを掃除機で吸い取ります。
ステップ2:ドアガスケットの裏側を清掃する
プリント筐体のドアの内側には、大きな長方形のガスケットが付いています。圧縮空気やガスダスターを使って、ガスケットの周囲や裏側に付着しているパウダーを取り除きます。

Notice:

When using compressed air or a gas duster to clean the machine, always keep the vacuum running to catch any mobilized powder.
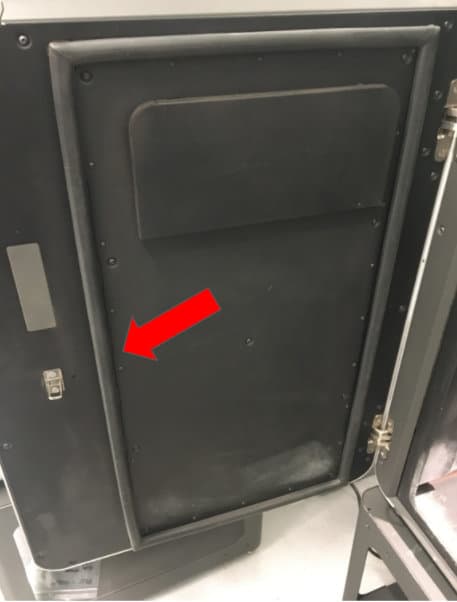
クオーツヒーターのクリーニング
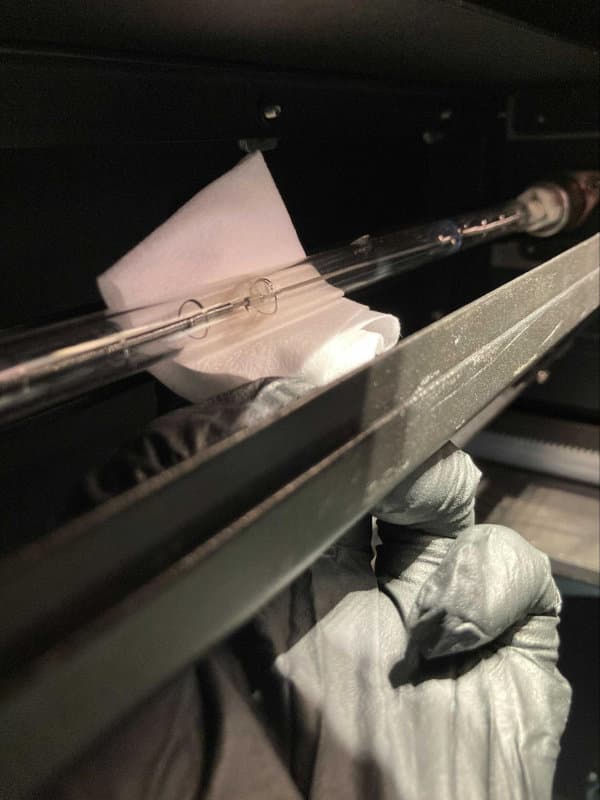
新しい清潔なニトリル手袋を着用します。清潔で乾いたPEC*PADで、クオーツヒーターのチューブを丁寧に拭きます。
警告:
ヒーターのチューブは壊れやすく、損傷や皮脂による汚れに非常に敏感です。破損または汚れてしまったヒーターのチューブは、加熱すると爆発する恐れがあります。ヒーターのチューブが破損または汚れてしまった時は、マシンの電源を入れないでください。
ステップ1:ヒーターチューブを拭く
2本の石英ヒーターチューブが、プリンター筐体の上部で前面から背面に向かって伸びています。乾いた清潔なPEC*PADでヒーターの片方のチューブを優しく拭き、付着しているパウダーがあれば、すべて取り除きます。ヒーターのもう一方のチューブでも、新しいPEC*PADを使って同じように拭き掃除を実施します。

Notice:

Never handle the heater tubes with your bare hands. If at any point bare skin contacts the quartz glass, thoroughly clean the tube with a clean PEC*PAD wetted with ethanol.
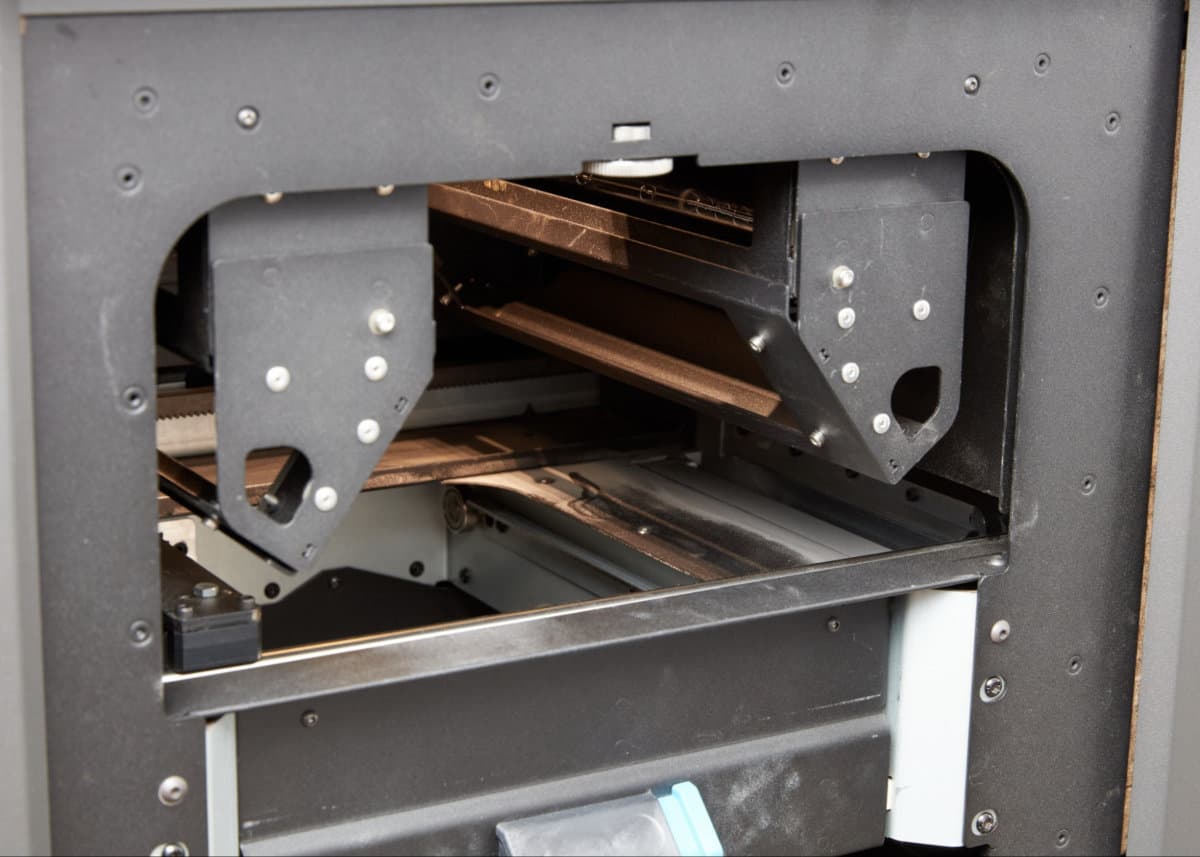
光学面やセンサーのクリーニング
クリーニングの対象となる光学面やセンサーの表面は、光学カセット、IRセンサーと上部レーザーの窓です。こうしたコンポーネントのクリーニングは、通常のメンテナンス時と同様の手順に従って実施してください。
ステップ1:オプティカルカセットのクリーニング
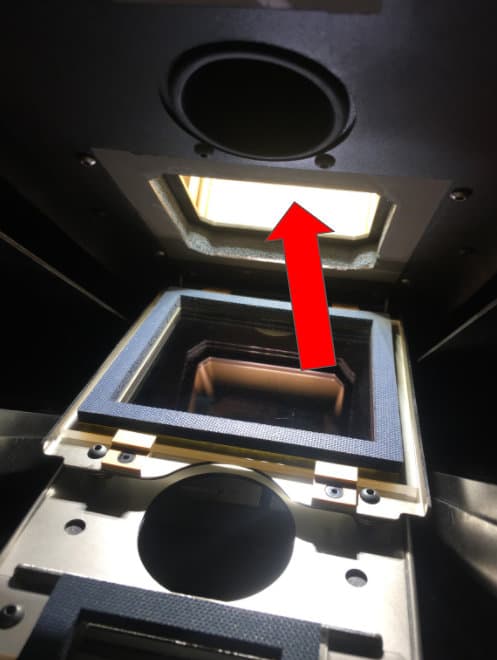
装着されているオプティカルカセットを取り外し、クリーニング中に付着した可能性のあるパウダーを取り除きます。
ステップ2:上部レーザーウィンドウのクリーニング
上部レーザーウィンドウを点検し、クリーニングします。光学カセットを再装着します。
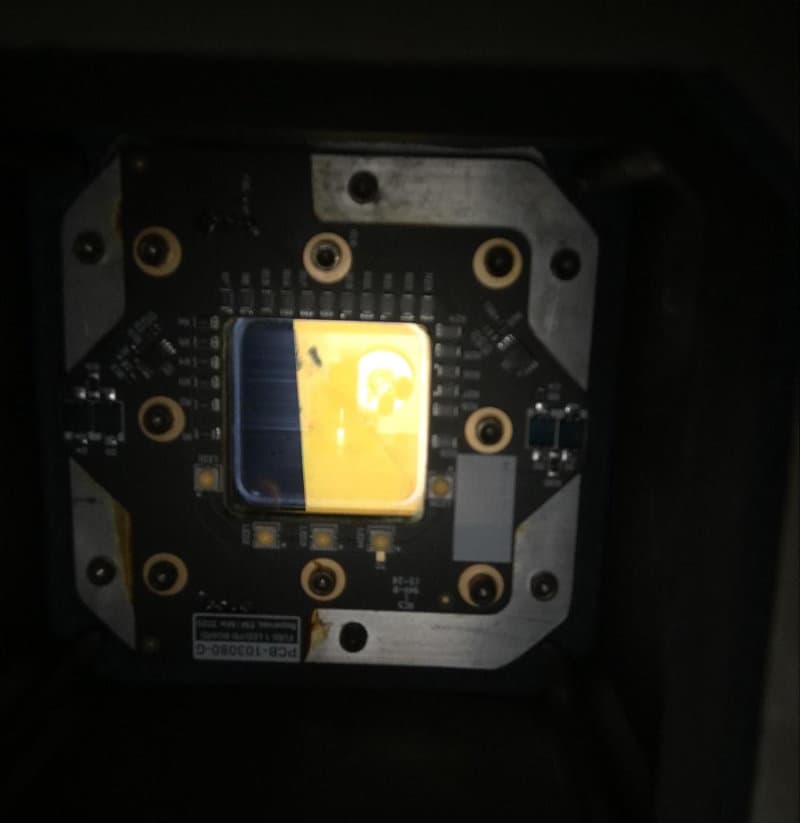
ステップ3:IRセンサーを清掃する
プリンター上部のIRセンサードアを開きます。IRセンサーをクリーニングします。センサーを再度取り付け、IRセンサーのドアを閉じます。
エアフィルタのクリーニング
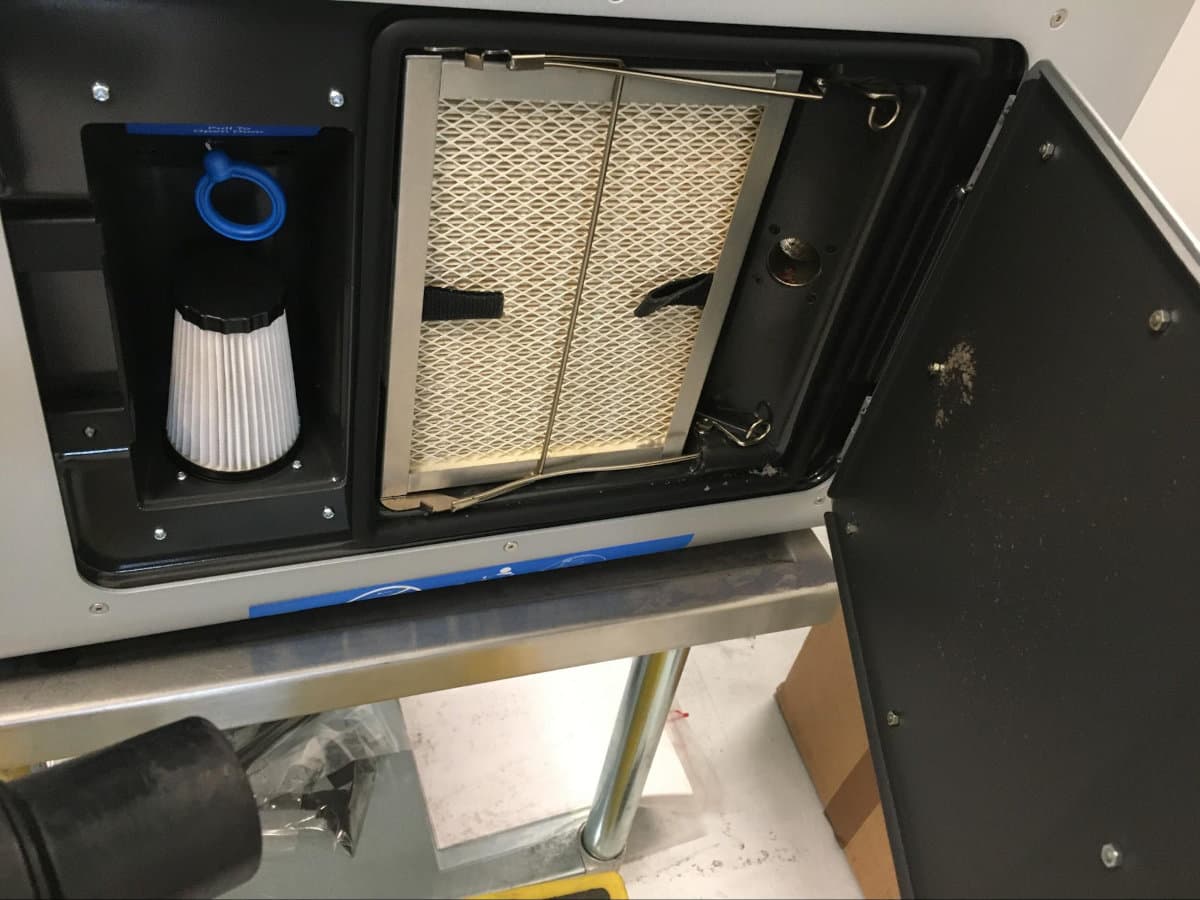
エアフィルタを掃除または交換し、関連する空気系統のハードウェアのクリーニングを行います。フィルタを掃除または交換している間に舞い上がるパウダーも外部に飛び散る前に捕獲してください。
ステップ1:エアフィルタを掃除機で清掃または交換する
プリンタ右側のフィルタキャビネットの扉を開けます。エアフィルタ、排気ライン、換気扇をクリーニングします。別の方法としては、吸気フィルタと排気フィルタを両方交換します。
ヒント:
圧縮空気、ガスダスターまたは柔らかいブラシを使って、フィルタに付着しているルースパウダーを優しく取り除いていくようにします。
ステップ2:エアフィルタを再装着する
フィルタを再装着し、フィルタキャビネットのドアを閉じます。
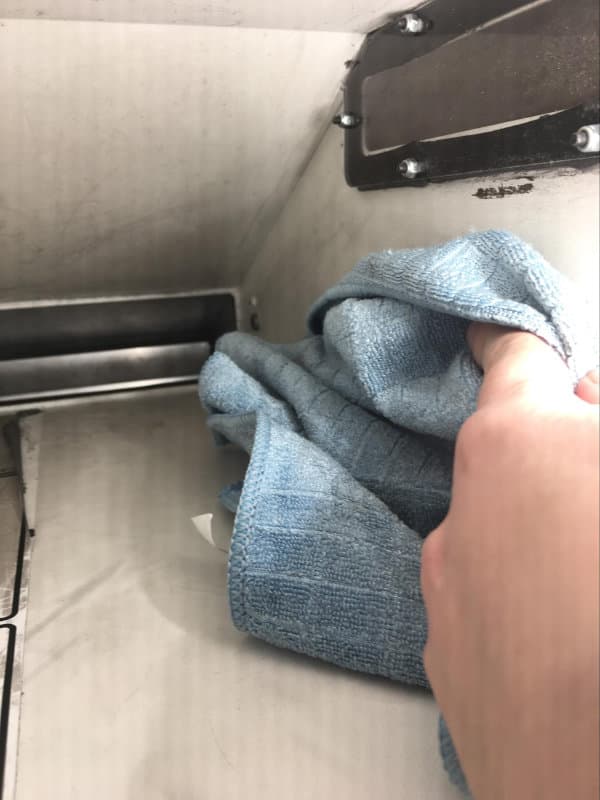
パウダーホッパーを拭く
最後に、清潔なマイクロファイバーの布でホッパーの内側を拭いてください。圧縮空気を使ってプリント筐体の中を掃除した場合、パウダーがホッパーに吹き戻されている可能性があります。
ステップ1:ホッパーを拭く
ホッパーの内側を清潔なマイクロファイバークロスで拭き、残っているパウダーを取り除きます。
次のステップ
すべての面を再度点検し、マシンからすべてのパウダーが取り除かれていることを確認できたら、クリーニング手順は完了です。
輸送するためにマシンのクリーニングを実施していた場合は、これで梱包の準備に移れます。
備考:
素材によっては、UIでは把握できない特定のマシンセットアップ要件があります。選択した素材のセットアップ要件をすべて満たし、パーツ設計ガイドラインに記載されている注意事項や指示内容に必ず従うようにしてください:
プリントの初期段階では、異なる種類のパウダーが混ざって縞模様になったり、変色したりと、汚れが出始めていないか注意深く観察します。汚れの兆候が見られるようになったら、プリントを中止し、汚れているパウダーを廃棄し、この記事に記載されているクリーニング手順をすべて繰り返します。