
Caution:
Removing the machine from its packaging requires at least two people that are comfortable lifting and moving large and heavy objects.

This guide illustrates the various components of the Fuse 1 and Fuse 1+ 30W printers, the initial setup, and how to begin printing. For additional information, consult the instruction manual and safety documentation.
Product components
Fuse X1
Front
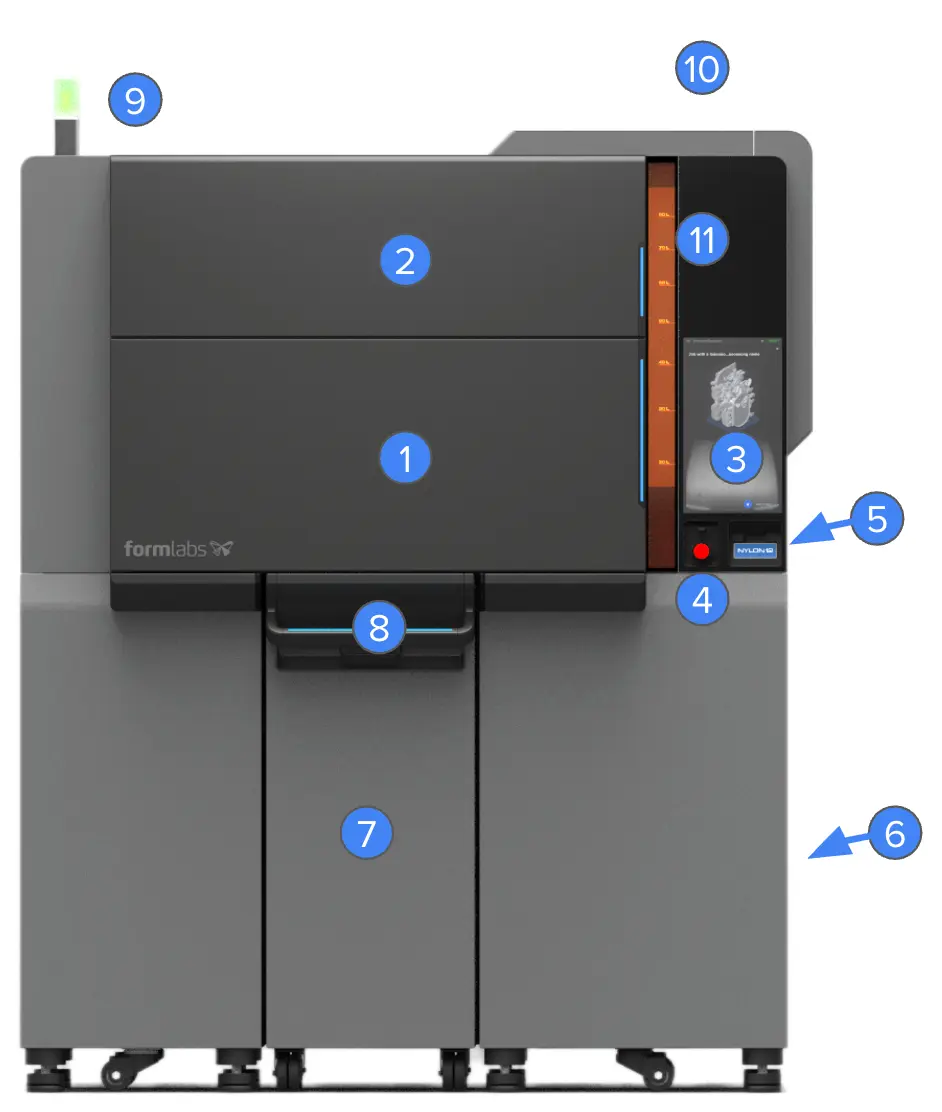
Rear (not pictured): intake filters
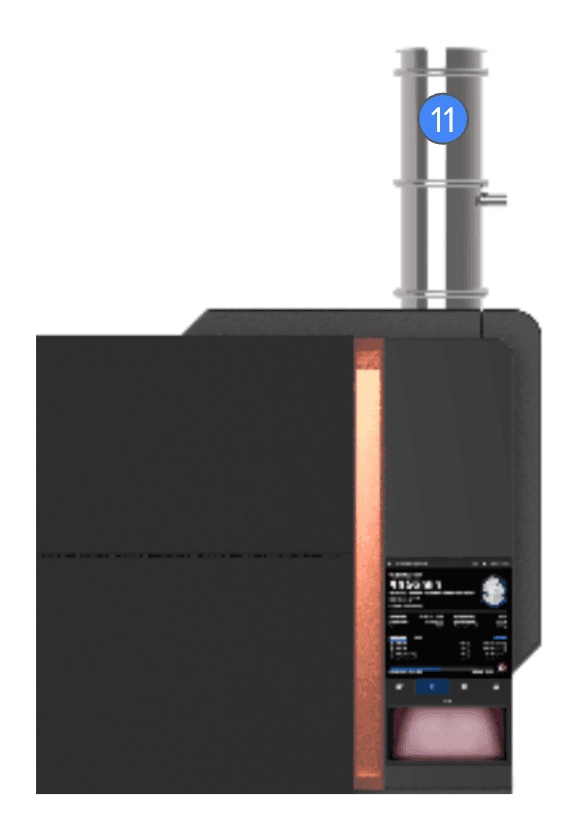
Vacuum conveyor (mounted)
Print chamber
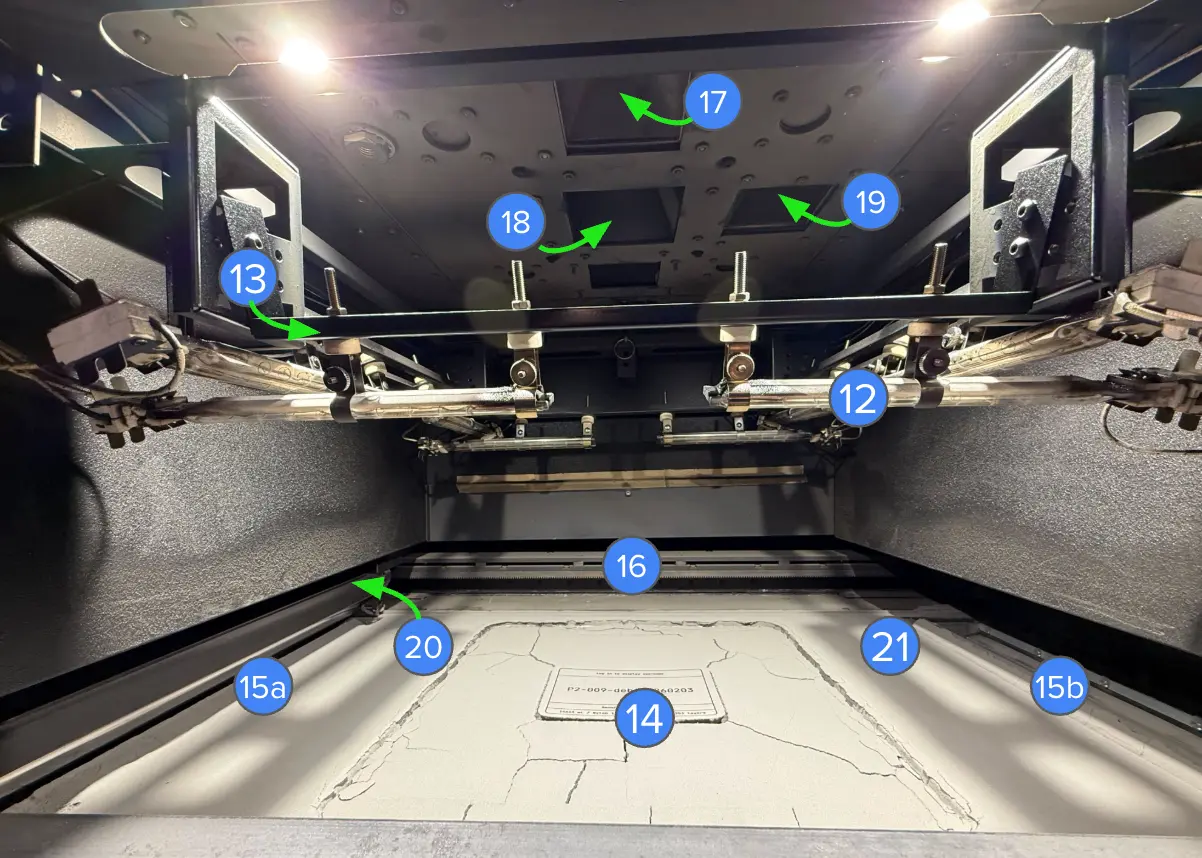
Overhead lights (not numbered)
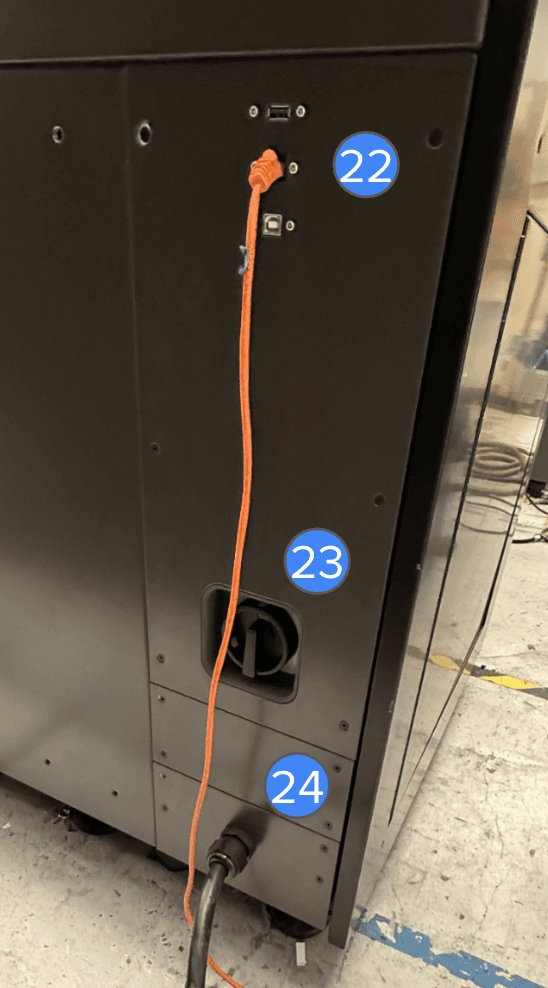
Rear panel
Fuse X1 Build Unit
Additional Fuse X1 package components
Unbox
Prior to unboxing, prepare a suitable workspace for the printer. Review the unboxing and setup support article for more detailed unboxing instructions.
Caution:
Removing the machine from its packaging requires at least two people that are comfortable lifting and moving large and heavy objects.
Installing

Notice:
Fuse X1 printers require an operating environment that is low in ambient humidity and static electricity. Due to the sensitive nature of its components and the printing mediums, system reliability and print quality may fluctuate if the ambient temperature and moisture are outside the recommended ranges. Refer to the support article on workspace preparation for the recommended operating environs. When performing maintenance or testing with the exterior paneling of the machine removed, ground equipment to the grounding stud marked with this protective earth symbol.
Connecting
Preparing for use
Next steps
Once you’ve set up your Fuse X1 printer, download PreForm to your computer and prepare for your first print.
After installing PreForm, refer to support articles on using PreForm and designing successful 3D models to learn more about the software and about preparing models for printing on Formlabs SLS printers.
If this is your first time using PreForm, an onboarding tutorial will appear and walk you through the software’s capabilities. Click Help > Show Onboarding Tutorial to review this information at any time.
Upload a print job to the machine and start the print on the touchscreen. After the build chamber has fully cooled, remove it from the printer and move it to the Fuse Sift X1 to retrieve and clean your prints. After unpacking the powder cake in the Fuse Sift X1, transfer your printed parts to the Fuse Blast for cleaning and polishing.