技術白書
Formlabs Logo

Form 4 and Form 4L generation error messages

Form 4 and Form 4L generation error messages

Form 4およびForm 4Lに何らかの異常が発生した場合、タッチスクリーンにエラーメッセージとエラーの詳細が表示されます。この記事では、Form 4世代のプリンターで表示される一般的なエラーコード、または通常の操作で想定されるエラーコードを解決するための初期トラブルシューティング手順の概要を説明します。この記事に掲載されていないエラーコードが発生した場合は、下の一般的なトラブルシューティングの手順を参照してください。

Form 4およびForm 4L世代のエラーコードはX.YY.ZZの形式で表示され、Xは製品コード、YYはサブシステム、ZZは当該エラーに関連する警告を示す固有のエラーコードを意味します。Form 4世代のプリンターのマシンコードは1であるため、プリンターで発生するエラーコードは全て1から始まります。エラーグループ番号はエラーのタイプを、サブコードは特定のサブシステムまたは故障モードをそれぞれ示します。例えば、Form 4世代のエラーグループ3のサブコードは全て、ヒーターとレジンの温度に関するものです。具体例を挙げると、エラー1.3.1はレジンが目標温度に達しなかったことに関するエラーになります。

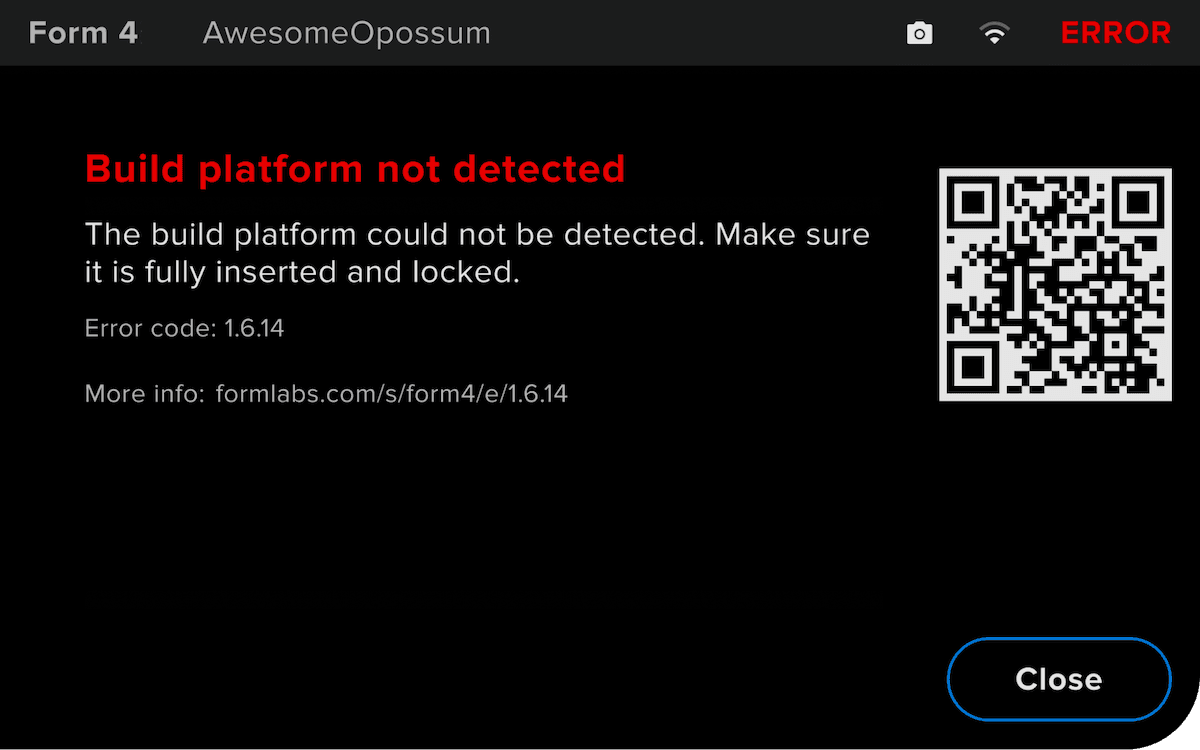
Form 4のエラーメッセージの例

一般的なトラブルシューティング手順

The following steps are recommended for most issues seen on Form 4 and Form 4L generation printers:

  1. Common steps for bugs, software issues, and electrical issues:
    1. Ensure that your printer's firmware is up to date.
    2. Update PreForm, then regenerate and reupload your print job.
    3. Power cycle the printer using the switch on the rear of the machine. Leave the unit powered off for at least 30 seconds before powering back on.
    4. If an issue persists and the printer’s firmware is already up to date, manually reinstall the latest firmware package.
    5. If an issue began immediately after updating the printer’s firmware, roll back the firmware package to the previous version.
  2. Best practices for opening a support case with Formlabs Support:
    1. Provide photos of the specific error code and any other symptoms you are seeing.
    2. Note the context of the issue (e.g., did the issue occur immediately after installation, after a software update, etc.).
    3. Note the frequency of this issue and whether it is persistent or intermittent.
    4. Note the resin and print settings you are printing with.
    5. Provide diagnostic logs from your printer.
    6. Note all troubleshooting steps already attempted.

診断ログ

Form 4およびForm 4L世代のプリンターには、本製品の機能に関する詳細情報の提供が可能な診断ログが保存されています。問題発生時にFormlabsサポート正規販売代理店にご連絡いただく際、早期解決が図れるよう、これらの診断ログならびにその他の情報(観察結果や詳しい状況説明など)をご提供ください。

Wi-Fiまたはイーサネット経由でインターネットに接続されているマシンの場合:

  1. プリンターのHome(ホーム)画面の左下にある歯車のアイコンをタップします。Settings(設定)メニューが開きます。
  2. Support(サポート)をタップします。Support(サポート)メニューが表示されます。
  3. Send diagnostic information(診断情報の送信)をタップします。診断情報をアップロードするかどうかを確認するメッセージが表示されます。
  4. Upload(アップロード)をタップしてアップロードを開始します。アップロードが完了すると、確認メッセージが表示されます。

インターネットに接続されていないプリンタの場合:

  1. PreFormを開きます。
  2. Edit Job Setup(ジョブのセットアップを編集)をクリックします。Job Setup(ジョブのセットアップ)ウィンドウが開きます。
  3. お使いのプリンターのシリアルネームを選択します。
  4. Download Logs(ログのダウンロード)をクリックします。確認ウィンドウが表示されます。
  5. Browse(参照)をクリックして、診断ログをお使いのコンピューター内の指定場所にダウンロードします。
  6. OKをクリックします。診断ログは暗号化されたFORMLOGS形式で保存・表示されます。
  7. Formlabsサポートまたは正規販売代理店に連絡する際、このファイルを添付してください。
  8. PreFormにERROR_BAD_STATEというメッセージが表示された場合、アップロードに必要なストレージ容量が不足している可能性があります。Queue(キュー)のリストから不要なプリントジョブを削除し、ログのアップロードに必要なストレージ容量を確保します。
  9. プリンターを再起動して、もう一度アップロードを試みます。
こちらからネットワークや非ネットワークの接続オプションに関する

詳細をご確認いただけます。

コントロールエラー(エラーグループ1)

All subcodes of Form 4 and Form 4L Error Group 1 (1–61) relate to subsystem communication and motor control in the machine.

Error 1.1.1: Could not home motor

Error 1.1.1 indicates that a motor failed to reach its home position. The motor may have stalled due to debris or the limit switch the printer uses to determine the motor’s position may be damaged. Check for and remove any debris in the resin tank or on the build platform, then check whether the build platform and mixer travel normally during a print. This error was removed in firmware version 1.4. If you see this error message repeatedly, update the printer's firmware.

Error 1.1.3: Internal error

Error 1.1.3 indicates an internal communication error between the printer’s subsystems. To resolve this issue:

  1. Perform a factory reset.
  2. If the error persists, replace the motherboard. Follow the instructions in the repair guide Replacing the Form 4 motherboard (post 2024-11-15), Replacing the Form 4 motherboard (pre 2024-11-15), or Replacing the Form 4L motherboard, depending on the type and date of manufacture of your printer. Replacement motherboards can be purchased from the Formlabs web store.

Error 1.1.4: Resin level sensor is not programmed

Error 1.1.4 indicates an issue with the LevelSense board in the printer. To resolve this issue:

  1. Reboot your printer.
  2. Ensure that the printer's firmware is up to date. If the firmware is up to date, manually reinstall the latest firmware package.
  3. Inspect and reseat the LevelSense cables.
    1. Form 4: Follow the instructions in the repair guide Replacing the Form 4 LevelSense board to Step 2: Disconnect the LevelSense board cable.
    2. Form 4L: Follow the instructions in the repair guide Replacing the Form 4L LevelSense board to Step 3: Disconnect the LevelSense board cable.
  4. If the error persists, replace the LevelSense board. Follow the instructions in the repair guides Replacing the Form 4 LevelSense board or Replacing the Form 4L LevelSense board. Replacement LevelSense boards can be purchased from the Formlabs web store.

Error 1.1.5: Could not measure resin in the tank

Error 1.1.5 indicates an issue with the LevelSense board in the printer. If a print is in progress, monitor it to make sure that the resin tank does not run out of resin. To resolve this issue, follow the same troubleshooting steps for Error 1.1.4: Resin level sensor is not programmed.

Error 1.1.6: Mixer detected debris

Error 1.1.6 indicates that the mixer hit debris while moving across the resin tank. To resolve this issue:

  1. Ensure that your printer's firmware is up to date.
  2. Inspect and clean the resin tank to remove debris, including under the wear strips along the edge of the tank film.
  3. Print a cleaning sheet and filter the resin.
  4. Check the build platform for debris or damage, such as deep scratches or burrs. Clean or replace if necessary.
  5. Check the mixer for damage or debris. Clean or replace if necessary.
  6. The mixer rides along the lip of the resin tank. Ensure the lip of the resin tank is clean and free of debris.
  7. Ensure the mixer arm is fully seated in the mixer body.
  8. When using a more viscous resin such as Rigid 4000 Resin or Rigid 10K Resin:
    1. Manually mix the resin in the tank with the wiper or a spatula with rounded corners. It is good practice to manually mix any resin stored in the tank after several weeks.
    2. Turn on resin preheating to reduce resin viscosity at the beginning of the print. On the touchscreen, tap Settings > Configuration. Toggle Resin preheating to ON.
    3. Consider using the Print Settings Editor to increase the Start Temperature to be equal to the Operating Temperature. The increased initial temperature will reduce the viscosity of the resin, lowering the likelihood of a false debris detection error.
  9. Debris is generated from print failure. Review Formlabs best practices for printing with Form 4 and Form 4L generation printers to reduce your chance of print failure before attempting another print.
  10. If the error persists with a clean tank and build platform, power off the printer. Grip the mixer and slowly move it back and forth by hand, feeling for any changes in resistance. If there are changes in resistance, remove the resin tank and check again.
    1. If the changes in resistance are still present: replace the mixer drive assembly. Follow the instructions in the repair guides Replacing the Form 4 mixer drive assembly or Replacing the Form 4L mixer drive assembly. Replacement mixer drive assemblies can be purchased from the Formlabs web store.
    2. If the movement is now smooth: there was debris in the resin tank, damage or debris on the mixer, or the mixer was not fully seated. Repeat steps 2–7.
  11. Align the build platform.
  12. Try again with a different resin tank, if available.
  13. If the mixer was colliding with the build platform because the build platform stuck to the resin tank during the print, replace the Light Processing Unit, particularly if the LPU has exceeded its expected lifetime or is physically damaged. Replacement Light Processing Units can be purchased from the Formlabs Store.
  14. If you see this error message repeatedly, contact Formlabs Support or your authorized reseller.

If this error occurs immediately when the printer turns on or the mixer moves unexpectedly when using the Move motors tool (with no resin tank or mixer inserted), replace the mixer drive assembly. Follow the instructions in the repair guides Replacing the Form 4 mixer drive assembly or Replacing the Form 4L mixer drive assembly. Replacement mixer drive assemblies can be purchased from the Formlabs web store.

Error 1.1.7: Build platform detected debris

Error 1.1.7 indicates the build platform encountered debris while lowering into the resin tank. To resolve this issue:

  1. Ensure that your printer's firmware is up to date.
  2. Inspect and clean the resin tank to remove debris, including under the wear strips along the edge of the tank film.
  3. Print a cleaning sheet and filter the resin.
  4. Check the build platform for debris or damage, such as deep scratches or burrs. Clean or replace if necessary.
  5. Align the build platform.
  6. Try again with a different resin tank, if available.
  7. If you see this error message repeatedly, contact Formlabs Support or your authorized reseller.

Error 1.1.17: Cover opened

Error 1.1.17 indicates that the cover (Form 4 generation) or door (Form 4L generation) was opened during printing. For safety reasons, the print pauses whenever the cover or door is open. Close the cover or door to continue.

If the cover or door was not open or closing it does not resolve the issue:

  1. Open the cover (Form 4 generation) or door (Form 4L generation).
  2. Check for the interlock magnets.
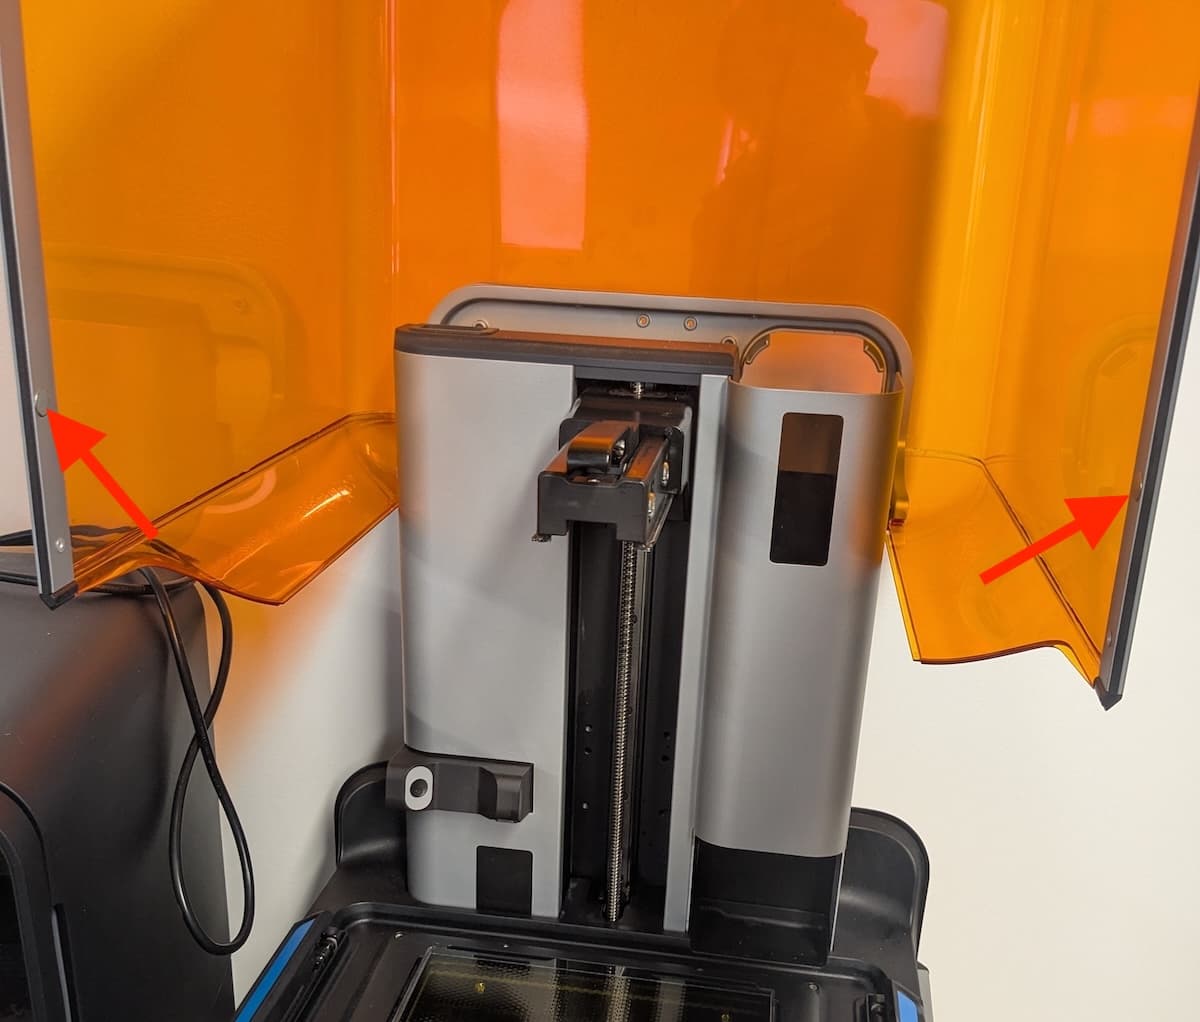
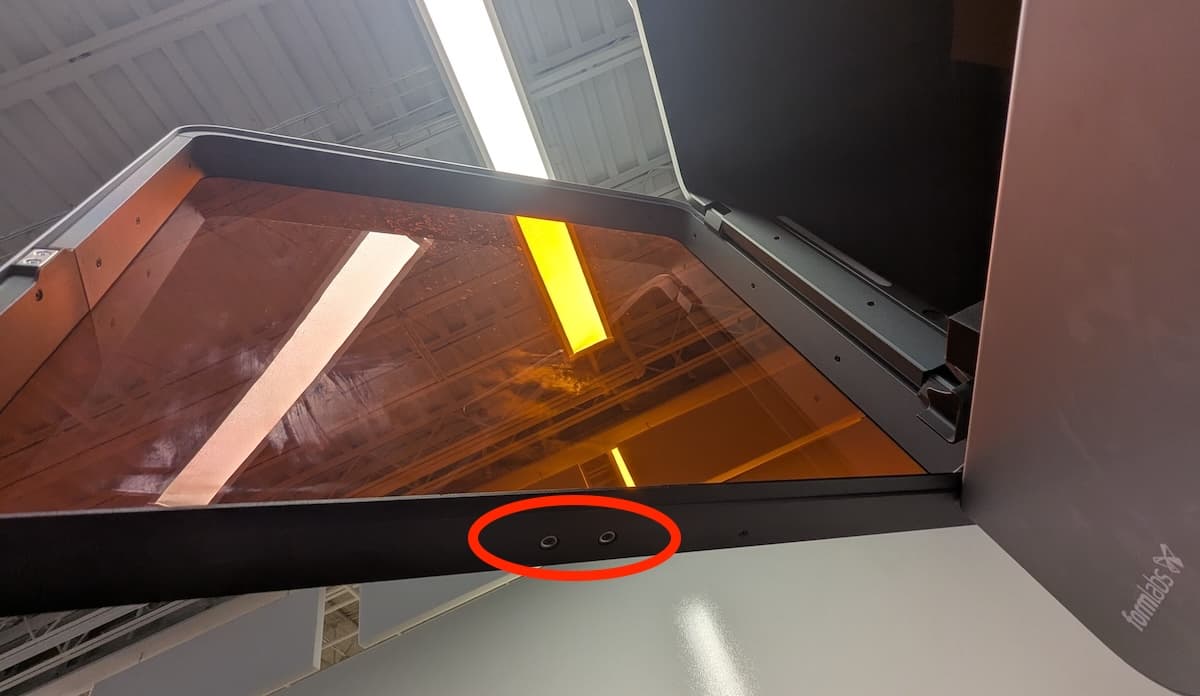
Form 4世代:プリンターのカバー下端に丸いインターロックマグネットが2つ接着されています。
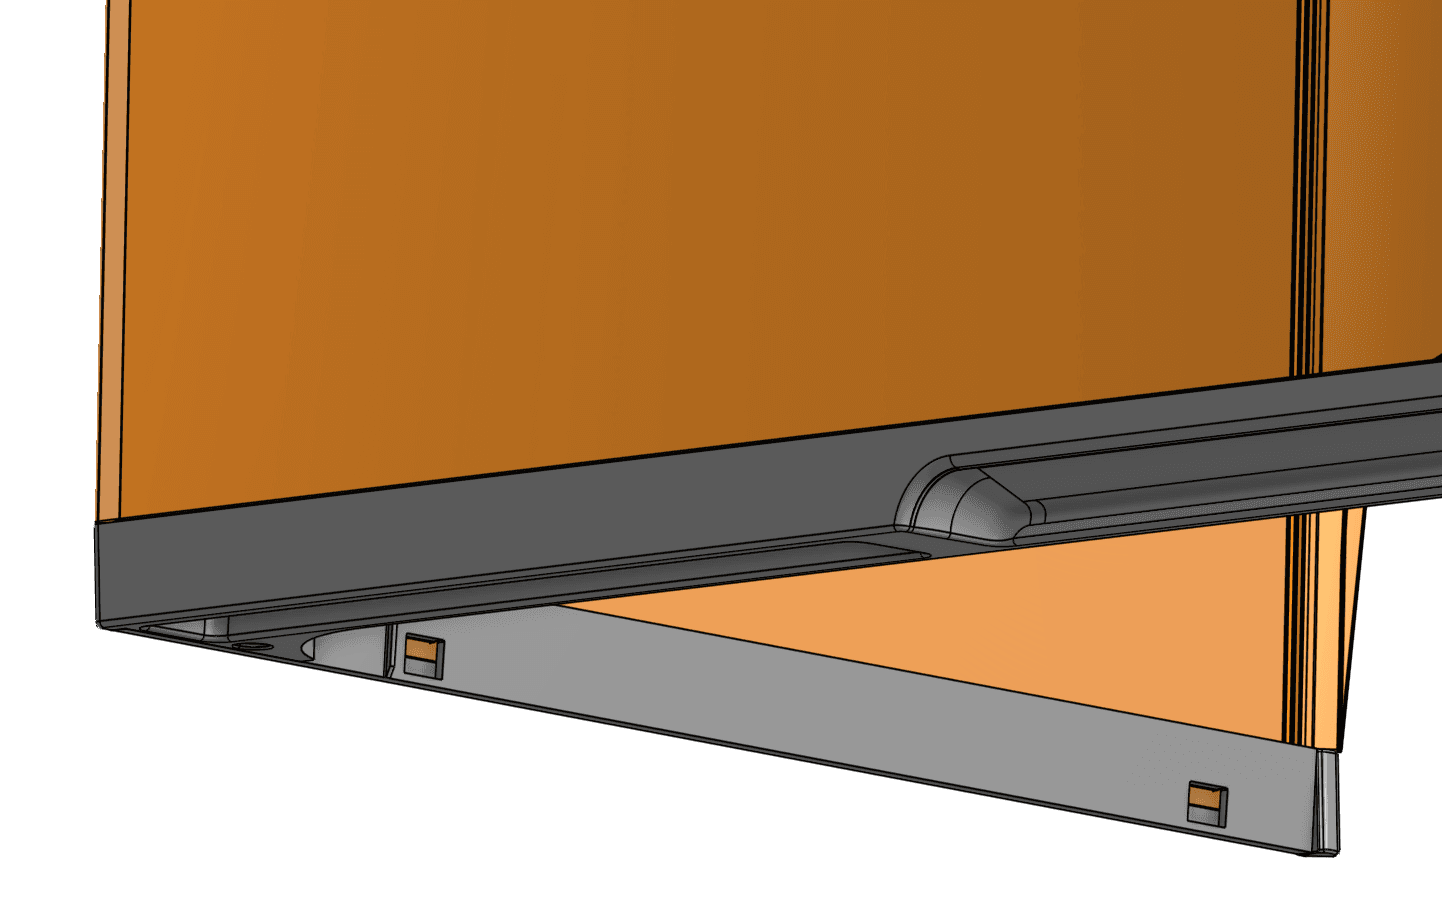
Form 4世代:新しいForm 4世代のプリンターでは、マグネットはカバートリムの下に固定されています。これらのマグネットが損傷したり外れたりする可能性は低いです。
Form 4L世代:プリンターのドア下端に丸型のインターロックマグネットが2つあり、それぞれネジで固定されています。
Form 4 generation: The printer has two round interlock magnets glued to the bottom edge of the cover. The magnets are N52 grade. 10 mm in diameter, and 2 mm thick.
Form 4世代:新しいForm 4世代のプリンターでは、マグネットはカバートリムの下に固定されています。これらのマグネットが損傷したり外れたりする可能性は低いです。
Form 4L世代:プリンターのドア下端に丸型のインターロックマグネットが2つあり、それぞれネジで固定されています。
  1. If any magnets are not present, contact Formlabs Support or your authorized reseller for assistance.
  2. Reboot your printer.

Error 1.1.23: Motherboard communication failed

Error 1.1.23 indicates that the printer failed to send a message to the motherboard. To resolve this issue:

  1. Reboot your printer.
  2. Ensure that your printer's firmware is up to date. If the printer’s firmware is already up to date, manually reinstall the latest firmware package.
  3. If this error occurs when the printer powers on, disconnect all USB devices from the printer’s USB-C port and power cycle the printer. If the printer boots up successfully, the devices may be plugged back in.
  4. Leave the printer unplugged overnight before attempting another print.
  5. If the error persists, contact Formlabs Support or your authorized reseller for assistance.

Error 1.1.31: Incompatible firmware

Error 1.1.31 indicates an issue with the firmware installed on the printer. Ensure that your printer's firmware is up to date. If the issue persists and the printer’s firmware is already up to date, manually reinstall the latest firmware package. Reboot your printer and try again.

Error 1.1.32: LPU fan failed

Error 1.1.32 indicates that the Light Processing Unit (LPU) cooling fan has failed. Continuing to use the printer may lead to damage to the LPU. To resolve this issue:

  1. Reboot your printer.
  2. Ensure that your printer's firmware is up to date. If the printer’s firmware is already up to date, manually reinstall the latest firmware package.
  3. If the error persists, replace the LPU cooling fan. Follow the instructions in the repair guides Replacing the Form 4 Light Processing Unit fan or Replacing the Form 4L Light Processing Unit fan. Replacement LPU fans are available from the Formlabs web store.

Error 1.1.33: Backlight fan failed

Error 1.1.33 indicates that the Backlight Unit cooling fan has failed. Continuing to use the printer may lead to damage to the Backlight Unit. To resolve this issue:

  1. Reboot your printer.
  2. Ensure that your printer's firmware is up to date. If the printer’s firmware is already up to date, manually reinstall the latest firmware package.
  3. If the error persists, replace the Backlight Unit. Follow the instructions in the repair guides Replacing the Form 4 Backlight Unit or Replacing the Form 4L Backlight Unit. Replacement Backlight Units are available from the Formlabs web store.

Error 1.1.34: PSU fan failed

Error 1.1.34 indicates that the power supply cooling fan has failed. Continuing to use the printer may lead to damage to the power supply. Reboot your printer, reflash its firmware, and try again. If you see this error message repeatedly, contact Formlabs Support or your authorized reseller.

Error 1.1.40: Printer voltage lower than expected

Error 1.1.40 indicates that the power supply is outputting a lower voltage than expected. If your prints are successful, ignore this error message. However, low voltage may impact printing, including preventing the Backlight Unit from lighting up. To resolve this issue:

  1. Replace the power supply. Follow the instructions in the repair guides Replacing the Form 4 power supply or Replacing the Form 4L power supply. Replacement power supply units for the Form 4 are available from the Formlabs web store. Contact Formlabs Support or your authorized reseller for the Form 4L power supply and additional assistance.

Error 1.1.47: Could not home build platform

Error 1.1.47 indicates the build platform failed to return to its home position properly.

  1. Check for any obstructions blocking the build platform from reaching the top of the Z-axis.
  2. Inspect and reseat the Z-axis limit switch cable.
    1. Form 4: Follow the instructions in the repair guide Replacing the Form 4 Z-axis limit switch to Step 2: Disconnect the Z-axis limit switch cable.
    2. Form 4L: Follow the instructions in the repair guide Replacing the Form 4L Z-axis limit switch cable to Step 1: Disconnect the Z-axis limit switch cable.
  3. If the error persists, replace the Z-axis limit switch. Contact Formlabs Support or your authorized reseller for the replacement part and additional assistance.

Error 1.1.48: Could not home mixer

Error 1.1.48 indicates the mixer failed to return to its home position properly.

  1. Check for any obstructions blocking the mixer from reaching the sides of the resin tank.
  2. Inspect and reseat the mixer encoder board cable.
    1. Form 4: Follow the instructions in the repair guide Replacing the Form 4 mixer drive assembly to Step 2: Unplug the mixer encoder board cable.
    2. Form 4L: Follow the instructions in the repair guide Replacing the Form 4L mixer drive assembly to Step 1: Uninstall the mixer encoder board.
  3. If the error persists, replace the mixer drive assembly. Follow the instructions in the repair guides Replacing the Form 4 mixer drive assembly or Replacing the Form 4L mixer drive assembly. Replacement mixer drive assemblies are available from the Formlabs web store.

ヒーターエラー(エラーグループ3)

All subcodes of Form 4 and Form 4L Error Group 3 (1–12) relate to the heater.

Error 1.3.1: Resin could not be heated

Error 1.3.1 indicates that the resin did not reach its target temperature after a period of time. To resolve this issue:

  1. Ensure that the ambient temperature around your printer is above 18 °C (64 °F). If your operating environment is particularly cold, consider relocating the printer or heating the print environment.
  2. Update PreForm, then regenerate and reupload your print job.
  3. Reboot your printer.
  4. Ensure that your printer's firmware is up to date. If the printer’s firmware is already up to date, manually reinstall the latest firmware package.
  5. The tank heaters are part of the Light Processing Unit (LPU). Inspect and reseat the heater cable(s).
    1. Form 4: Follow the instructions in the repair guide Replacing the Form 4 Light Processing Unit to Step 3: Disconnect the tank heater cable.
    2. Form 4L: Follow the instructions in the repair guide Replacing the Form 4L Light Processing Unit to Step 3: Disconnect the tank heater cables.
  6. If the error persists, replace the LPU. Follow the instructions in the repair guides Replacing the Form 4 Light Processing Unit or Replacing the Form 4L Light Processing Unit. Replacement LPUs are available from the Formlabs web store.

For more information, read the support article Maintaining resin temperature.

Error 1.3.3: Resin is overheated

Error 1.3.3 indicates that the resin in the resin tank has exceeded its target temperature. To resolve this issue:

  1. Ensure that the ambient temperature around your printer is below 28 °C (82 °F). If your operating environment is particularly hot, consider relocating the printer or cooling the print environment.
  2. Update PreForm, then regenerate and reupload your print job. Let the resin tank cool down for 30 minutes or use another tank before retrying the print.
  3. Reboot your printer.
  4. Ensure that your printer's firmware is up to date. If the printer’s firmware is already up to date, manually reinstall the latest firmware package.
  5. Inspect and clean the mesh filter. Follow the instructions in the support articles Cleaning the rear mesh filter (Form 4 generation) or Cleaning the mesh filter (Form 4L generation).
  6. Check that the fan grate on the bottom of the printer is clear of any debris or cured resin.
  7. Inspect and clean the Light Processing Unit (LPU) fan filter.
    1. Form 4: Follow the instructions in the repair guide Replacing the Form 4 Light Processing Unit fan filter to Step 3: Removing the filter. Vacuum the filter.
    2. Form 4L: Follow the instructions in the repair guide Replacing the Form 4L Light Processing Unit fan filter to Step 4: Vacuum the fan filter (optional). Vacuum the filter.
  8. If the LPU fan filter cannot be cleaned, replace it. Replacement LPU fan filters are available on the Formlabs web store.
  9. The tank heaters are part of the Light Processing Unit. Inspect and reseat the heater cable(s).
    1. Form 4: Follow the instructions in the repair guide Replacing the Form 4 Light Processing Unit to Step 3: Disconnect the tank heater cable.
    2. Form 4L: Follow the instructions in the repair guide Replacing the Form 4L Light Processing Unit to Step 3: Disconnect the tank heater cables.
  10. If the error persists, replace the LPU. Follow the instructions in the repair guides Replacing the Form 4 Light Processing Unit or Replacing the Form 4L Light Processing Unit. Replacement LPUs are available from the Formlabs web store.

For more information, read the support article Maintaining resin temperature.

Error 1.3.4: Heater is overheated

Error 1.3.4 indicates that the heater temperature has exceeded its safe operating range. Stop any current print jobs, as continuing may damage your printer and result in a print failure. To resolve this issue, follow the same troubleshooting steps for Error 1.3.3: Resin is overheated.

For more information, read the support article Maintaining resin temperature.

Error 1.3.5: Heater is not connected

Error 1.3.5 indicates that the heater may not be connected. The heater is located in the frame of the LPU assembly.

  1. Reboot your printer.
  2. Ensure that your printer's firmware is up to date. If the printer’s firmware is already up to date, manually reinstall the latest firmware package.
  3. The tank heaters are part of the Light Processing Unit. Inspect and reseat the heater cable(s).
    1. Form 4: Follow the instructions in the repair guide Replacing the Form 4 Light Processing Unit to Step 3: Disconnect the tank heater cable.
    2. Form 4L: Follow the instructions in the repair guide Replacing the Form 4L Light Processing Unit to Step 3: Disconnect the tank heater cables.
  4. If the error persists, replace the LPU. Follow the instructions in the repair guides Replacing the Form 4 Light Processing Unit or Replacing the Form 4L Light Processing Unit. Replacement LPUs are available from the Formlabs web store.

Error 1.3.6 and Error 1.3.7: Could not measure resin temperature

Error 1.3.6 and Error 1.3.7 indicate that the printer could not measure the current temperature of the resin in the resin tank and may need to disable the heater. To resolve this issue:

  1. Reboot your printer.
  2. Ensure that your printer's firmware is up to date. If the printer’s firmware is already up to date, manually reinstall the latest firmware package.
  3. The printer uses an IR sensor mounted underneath the Light Processing Unit to measure resin temperature in the resin tank. Inspect and reseat the resin temperature sensor cable.
    1. Form 4: Follow the instructions in the repair guide Replacing the Form 4 resin temperature sensor to Step 2: Disconnect the resin temperature sensor cable.
    2. Form 4L: Follow the instructions in the repair guide Replacing the Form 4L resin temperature sensor to Step 3: Disconnect the heater cables.
  4. If the error persists, replace the resin temperature sensor. Follow the instructions in the repair guides Replacing the Form 4 resin temperature sensor or Replacing the Form 4L resin temperature sensor. Replacement resin temperature sensors are available from the Formlabs web store.

Error 1.3.8 and Error 1.3.9: Could not measure heater temperature

Error 1.3.8 and Error 1.3.9 indicate that the printer could not measure the current temperature of the heater. The heater is located under the frame of the LPU assembly.

  1. Reboot your printer.
  2. Ensure that your printer's firmware is up to date. If the printer’s firmware is already up to date, manually reinstall the latest firmware package.
  3. The tank heaters are part of the Light Processing Unit (LPU). Inspect and reseat the heater cable(s).
    1. Form 4: Follow the instructions in the repair guide Replacing the Form 4 Light Processing Unit to Step 3: Disconnect the tank heater cable.
    2. Form 4L: Follow the instructions in the repair guide Replacing the Form 4L Light Processing Unit to Step 3: Disconnect the tank heater cables.
  4. If the error persists, replace the LPU. Follow the instructions in the repair guides Replacing the Form 4 Light Processing Unit or Replacing the Form 4L Light Processing Unit. Replacement LPUs are available from the Formlabs web store.

Error 1.3.10 and Error 1.3.11: Heater current is too high

Error 1.3.10 and Error 1.3.11 indicate that the heater encountered an issue during the preprint process or the print itself. The heater is located in the frame of the LPU assembly. To resolve this issue, follow the same troubleshooting steps for Error 1.3.8 and Error 1.3.9: Could not measure heater temperature.

Error 1.3.12: Heating resin to printing temperature

The printer may show Error 1.3.12 to inform you that it is heating the resin in the resin tank. It does not necessarily indicate that there is an issue. If the printer fails to heat the resin after a prolonged length of time, check the resin cartridge as you would for a heater-related error.

加速度センサーのエラー(エラーグループ4)

All subcodes of Form 4 and Form 4L Error Group 4 (1–7) relate to the accelerometer.

Error 1.4.1: Printer is out of level

Formlabs SLA printers operate best when perfectly level. The touchscreen prompts you to level the printer when necessary, showing Error 1.4.1. Tap Settings > Tools > Level printer on the printer’s touchscreen to view the current level status. Follow the touchscreen prompts and use the leveling tool to level the printer. If the error persists, reflash your printer's firmware.

Error 1.4.2 and Error 1.4.3: Accelerometer is not connected

Error 1.4.2 and Error 1.4.3 indicate an issue with the accelerometer in the printer. Reboot your printer, reflash its firmware, and try again. If you see this error message repeatedly, contact Formlabs Support or your authorized reseller.

Error 1.4.7: Accelerometer recalibration failed

Error 1.4.7 indicates the accelerometer calibration routine failed. To resolve this issue:

  1. Ensure the printer is level and not moving.
  2. Reboot your printer.
  3. Ensure that your printer's firmware is up to date. If the printer’s firmware is already up to date, manually reinstall the latest firmware package.

バックライトエラー(エラーグループ5)

All subcodes of Form 4 and Form 4L Error Group 5 (1–11) relate to the UV Backlight Unit.

Error 1.5.1: Backlight overheating

Error 1.5.1 indicates that the Backlight Unit is overheating. Printing will resume when the Backlight Unit has cooled down. To resolve this issue:

  1. Ensure that the ambient temperature around your printer is below 18 °C (64 °F). If your operating environment is particularly hot, consider relocating the printer or cooling the print environment.
  2. Update PreForm, then regenerate and reupload your print job. Let the Backlight Unit cool down for 30 minutes before retrying the print.
  3. Reboot your printer.
  4. Ensure that your printer's firmware is up to date. If the printer’s firmware is already up to date, manually reinstall the latest firmware package.
  5. Inspect and clean the mesh filter. Follow the instructions in the support articles Cleaning the rear mesh filter (Form 4 generation) or Cleaning the mesh filter (Form 4L generation).
  6. Check that the fan grate on the bottom of the printer is clear of any debris or cured resin.
  7. Inspect and reseat the Backlight Unit cable.
    1. Form 4: Follow the instructions in the repair guide Replacing the Form 4 Backlight Unit to Step 5: Unhook the backlight driver cable.
    2. Form 4L: Follow the instructions in the repair guide Replacing the Form 4L Backlight Unit to Step 5: Unplug the backlight cable.
  8. If the error persists, replace the Backlight Unit. Follow the instructions in the repair guides Replacing the Form 4 Backlight Unit or Replacing the Form 4L Backlight Unit. Replacement Backlight Units are available from the Formlabs web store.

Error 1.5.2: Backlight is not detected

Error 1.5.2 indicates that the Backlight Unit could not be detected. To resolve this issue:

  1. Reboot your printer.
  2. Ensure that your printer's firmware is up to date. If the printer’s firmware is already up to date, manually reinstall the latest firmware package.
  3. Inspect and reseat the Backlight Unit cable.
    1. Form 4: Follow the instructions in the repair guide Replacing the Form 4 Backlight Unit to Step 5: Unhook the backlight driver cable.
    2. Form 4L: Follow the instructions in the repair guide Replacing the Form 4L Backlight Unit to Step 5: Unplug the backlight cable.
  4. If the error persists, replace the Backlight Unit. Follow the instructions in the repair guides Replacing the Form 4 Backlight Unit or Replacing the Form 4L Backlight Unit. Replacement Backlight Units are available from the Formlabs web store.

In some rare cases, a replacement Form 4L generation Backlight Unit may cause your printer to display this error immediately after installation. If this happens, enable Remote Assistance and contact Formlabs Support.

Error 1.5.5: Backlight is not recognized

Error 1.5.5 indicates that the Backlight Unit could not be recognized. To resolve this issue, follow the same troubleshooting steps for Error 1.5.2: Backlight is not detected.

In some rare cases, a replacement Form 4L generation Backlight Unit may cause your printer to display this error immediately after installation. If this happens, enable Remote Assistance and contact Formlabs Support.

Error 1.5.6: Backlight is on too long

Error 1.5.6 indicates that the Backlight Unit was on for more than five minutes, so the printer shut it off as a self-protection mechanism. To resolve this issue:

  1. Update PreForm, then regenerate and reupload your print job.
  2. Reboot your printer.
  3. Ensure that your printer's firmware is up to date. If the printer’s firmware is already up to date, manually reinstall the latest firmware package.
  4. Inspect and reseat the Backlight Unit cable.
    1. Form 4: Follow the instructions in the repair guide Replacing the Form 4 Backlight Unit to Step 5: Unhook the backlight driver cable.
    2. Form 4L: Follow the instructions in the repair guide Replacing the Form 4L Backlight Unit to Step 5: Unplug the backlight cable.
  5. If the error persists, replace the Backlight Unit. Follow the instructions in the repair guides Replacing the Form 4 Backlight Unit or Replacing the Form 4L Backlight Unit. Replacement Backlight Units are available from the Formlabs web store.

Error 1.5.7: Backlight is not responsive

Error 1.5.7 indicates that the Backlight Unit did not respond to a command from the printer. To resolve this issue, follow the same troubleshooting steps for Error 1.5.2: Backlight is not detected.

Error 1.5.9 and Error 1.5.10: Could not measure backlight temperature

Error 1.5.9 and Error 1.5.10 indicate that the printer could not measure the temperature of the Backlight Unit. To resolve this issue, follow the same troubleshooting steps for Error 1.5.2: Backlight is not detected.

Error 1.5.11: Could not turn on backlight

Error 1.5.11 indicates that the printer could not turn on the Backlight Unit. To resolve this issue, follow the same troubleshooting steps for Error 1.5.2: Backlight is not detected.

消耗品エラー(エラーグループ6)

All subcodes of Form 4 and Form 4L Error 6 (1–32) relate to issues with consumables (the resin cartridge, resin tank, and build platform).

Error 1.6.2: Cartridge is missing

If the resin cartridge is removed during printing, the print can still continue for a period of time using the resin stored in the resin tank. The printer displays Error 1.6.2 to indicate this. Reinsert the resin cartridge to continue. If that does not resolve the issue:

  1. Reboot your printer.
  2. Ensure that your printer's firmware is up to date. If the printer’s firmware is already up to date, manually reinstall the latest firmware package.
  3. Try again with another resin cartridge, if any are available.
  4. Test the original resin cartridge in another printer, if any are available.
  5. Inspect and reseat the cartridge RFID cable.
    1. Form 4: Follow the instructions in the repair guide Replacing the Form 4 resin cartridge RFID board to Step 3: Disconnect the resin cartridge RFID cable.
    2. Form 4L: Follow the instructions in the repair guide Replacing the Form 4L resin cartridge RFID boards to Step 6: Disconnect the resin cartridge RFID cable.
  6. If the error persists, replace the resin cartridge RFID board(s). Follow the instructions in the repair guides Replacing the Form 4 resin cartridge RFID board or Replacing the Form 4L resin cartridge RFID boards. Replacement resin cartridge RFID boards are available from the Formlabs web store.

Error 1.6.3: Printing paused because of missing cartridge

If the resin cartridge is removed during printing, the print can still continue for a period of time using the resin stored in the resin tank. After that, the print pauses. The printer displays Error 1.6.3 to indicate the print has paused due to the resin cartridge being removed. Reinsert the resin cartridge to continue. If that does not resolve the issue, follow the same troubleshooting steps for Error 1.6.2: Cartridge is missing.

Error 1.6.4: Left cartridge mismatch (Form 4L generation only)

The printer checks the resin type in the tank and cartridge to ensure they match the current print job. If the resin type in the left hand resin cartridge does not match the resin type identified in the print job, the printer displays Error 1.6.4 and prompts you to insert a resin cartridge that matches the print job settings. Make sure the resin in the resin cartridge matches the job's resin type, with the same material version number. If that does not resolve the issue:

  1. Reboot your printer.
  2. Ensure that your printer's firmware is up to date. If the printer’s firmware is already up to date, manually reinstall the latest firmware package.
  3. Update PreForm, then regenerate and reupload your print job.
  4. Try again with another resin cartridge, if any are available.
  5. Test the original resin cartridge in another printer, if any are available.
  6. Inspect and reseat the left resin cartridge RFID cable. Follow the instructions in the repair guide Replacing the Form 4L resin cartridge RFID boards to Step 6: Disconnect the resin cartridge RFID cable.
  7. If the error persists, replace the left resin cartridge RFID board. Follow the instructions in the repair guide Replacing the Form 4L resin cartridge RFID boards. Replacement resin cartridge RFID boards are available from the Formlabs web store.

Error 1.6.5: Left cartridge has exceeded limit (Form 4L generation only)

Each cartridge contains and can reliably dispense one liter of resin. If the cartridge has exceeded its lifetime, the printer displays Error 1.6.5. After the full liter dispenses, dispose of the cartridge and continue printing with a new cartridge. Restart the print once the depleted cartridge has been replaced. If this error is incorrectly thrown, follow the same troubleshooting steps for Error 1.6.4: Left cartridge mismatch.

Error 1.6.6: Right cartridge mismatch (Form 4L generation only)

The printer checks the resin type in the tank and cartridge to ensure they match the current print job. If the resin type in the right hand resin cartridge does not match the resin type identified in the print job, the printer displays Error 1.6.6 and prompts you to insert a resin cartridge that matches the print job settings. Make sure the resin in the resin cartridge matches the job's resin type, with the same material version number. If that does not resolve the issue:

  1. Reboot your printer.
  2. Ensure that your printer's firmware is up to date. If the printer’s firmware is already up to date, manually reinstall the latest firmware package.
  3. Update PreForm, then regenerate and reupload your print job.
  4. Try again with another resin cartridge, if any are available.
  5. Test the original resin cartridge in another printer, if any are available.
  6. Inspect and reseat the right resin cartridge RFID cable. Follow the instructions in the repair guide Replacing the Form 4L resin cartridge RFID boards to Step 6: Disconnect the resin cartridge RFID cable.
  7. If the error persists, replace the right resin cartridge RFID board. Follow the instructions in the repair guide Replacing the Form 4L resin cartridge RFID boards. Replacement resin cartridge RFID boards are available from the Formlabs web store.

Error 1.6.7: Right cartridge has exceeded limit (Form 4L generation only)

Each cartridge contains and can reliably dispense one liter of resin. If the cartridge has exceeded its lifetime, the printer displays Error 1.6.7. After the full liter dispenses, dispose of the cartridge and continue printing with a new cartridge. Restart the print once the depleted cartridge has been replaced. If this error is incorrectly thrown, follow the same troubleshooting steps for Error 1.6.6: Right cartridge mismatch.

Error 1.6.9: Tank is missing

Error 1.6.9 indicates that the resin tank is missing or has been removed during the print. Reinsert and secure the resin tank to continue. If that does not resolve the issue:

  1. Reboot your printer.
  2. Ensure that your printer's firmware is up to date. If the printer’s firmware is already up to date, manually reinstall the latest firmware package.
  3. Try again with another resin tank, if any are available.
  4. Test the original resin tank in another printer, if any are available.
  5. Inspect and reseat the tank RFID cable.
    1. Form 4: Follow the instructions in the repair guide Replacing the Form 4 resin tank RFID board to Step 4: Disconnect the resin tank RFID cable.
    2. Form 4L: Follow the instructions in the repair guide Replacing the Form 4L resin tank RFID board to Step 3: Disconnect the resin tank RFID board.
  6. If the error persists, replace the resin tank RFID board. Follow the instructions in the repair guides Replacing the Form 4 resin tank RFID board or Replacing the Form 4L resin tank RFID board. Replacement resin tank RFID boards are available from the Formlabs web store.

Error 1.6.10: Incorrect tank is inserted

The printer displays Error 1.6.10 when the type of resin in the tank does not match what is required for the job. Remove the resin tank and replace it with one that matches the job.

備考:

プリントジョブに指定されているレジンの種類に合わせてレジンタンクを再プログラミングする場合は、無視をタップしてください。

Error 1.6.11: Tank has exceeded lifetime

Error 1.6.11 indicates that the resin tank has exceeded its recommended lifetime. Consider replacing your resin tank to ensure successful printing.

Error 1.6.12: Tank is not locked

Error 1.6.12 indicates that the resin tank is not locked in place using the tank latches. Press down on the sides of the resin tank with your thumbs and close the latches to secure the tank. If that does not resolve the issue:

  1. Reboot your printer.
  2. Ensure that your printer's firmware is up to date. If the printer’s firmware is already up to date, manually reinstall the latest firmware package.
  3. Remove the resin tank and inspect the tank latches for damage.
    1. If either is damaged, replace the tank latches. Follow the instructions in the repair guide Replacing the Form 4 resin tank latch. Replacement resin tank latches are available from the Formlabs web store.

Error 1.6.14: Could not detect build platform

Error 1.6.14 indicates that the printer could not detect a build platform. Insert and secure a build platform to continue. If you are certain that a clean build platform is inserted in the printer, you can also tap Ignore to continue.

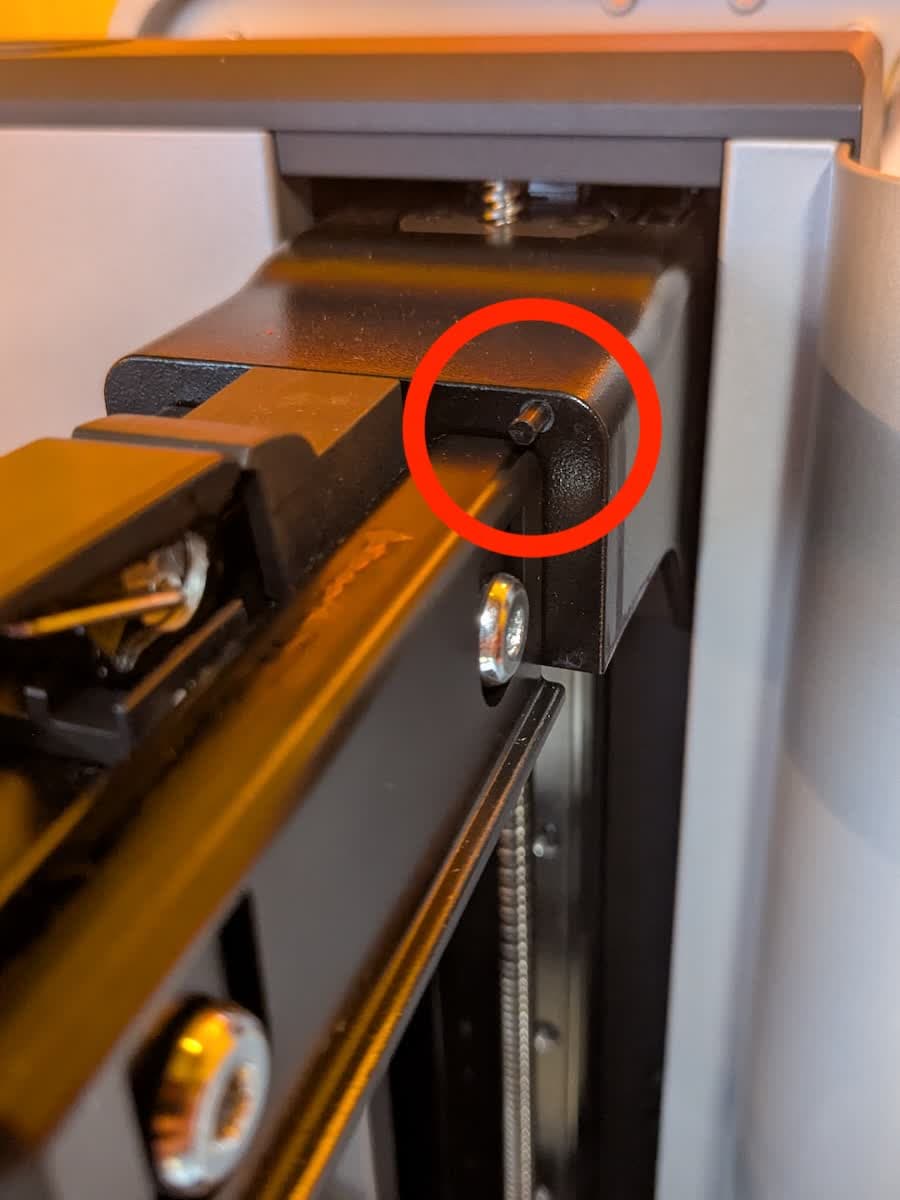
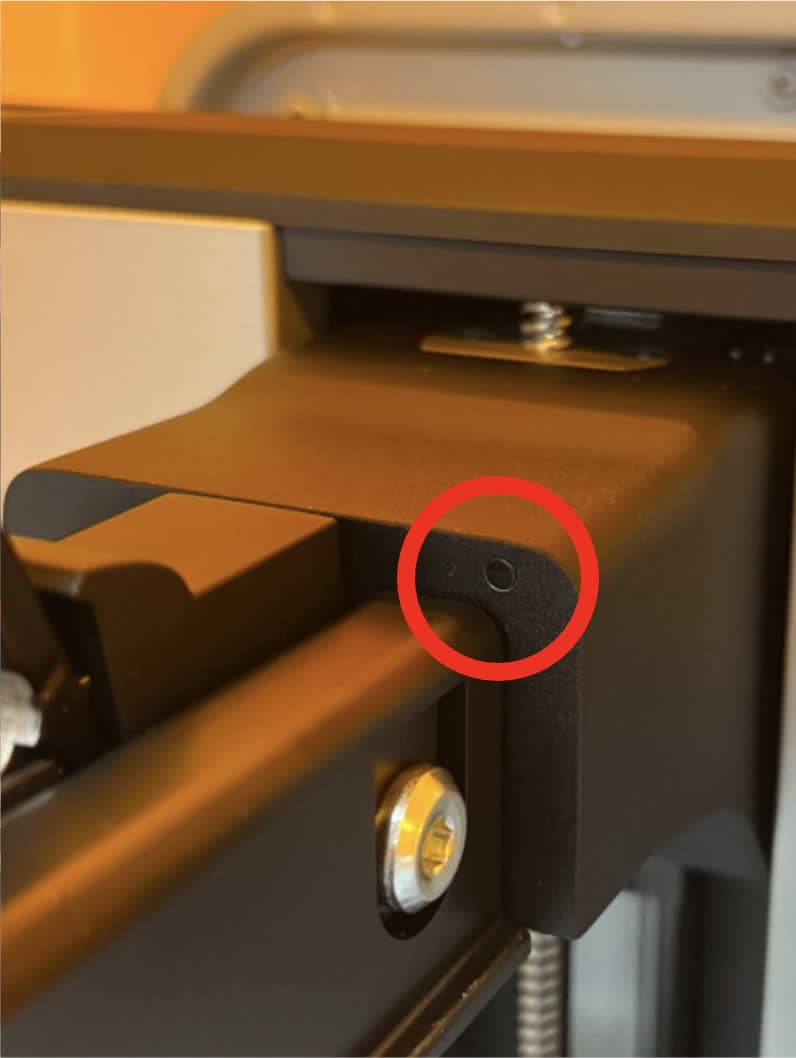
If that does not resolve the issue, open the printer cover, remove the build platform, and inspect the plunger pin in the top-right corner of the build platform mount.

Form 4のビルドプラットフォーム検出用プランジャー(通常時)
Form 4のビルドプラットフォーム検出用プランジャーが固着している
Form 4のビルドプラットフォーム検出用プランジャー(通常時)
Form 4のビルドプラットフォーム検出用プランジャーが固着している

If the plunger is visible:

  1. Manually push the plunger in. If the printer detects that a build platform has been inserted, try again with another build platform (if available).
  2. Reboot your printer.
  3. Ensure that your printer's firmware is up to date. If the printer’s firmware is already up to date, manually reinstall the latest firmware package.
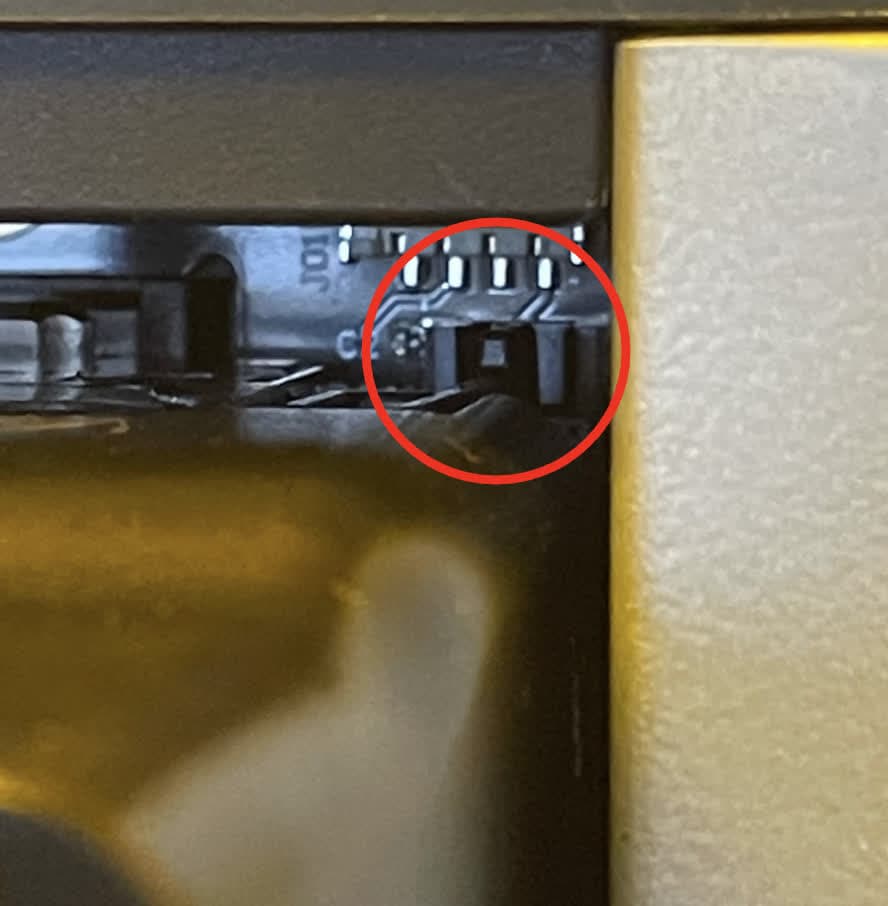
  4. Check if the U-shaped limit switch on the far side of the plunger is undamaged.
Form 4ビルドプラットフォーム検出リミットスイッチの位置

If the plunger is stuck inside the build platform mount:

  1. Download the plunger trim tool. You can also contact Formlabs Support for the tool.
  2. Print the tool in any inflexible resin, such as Grey Resin, Tough 1500 Resin, or Rigid 10K Resin. Do not use Elastic 50A Resin, Flexible 80A Resin, or another resin with similar material properties.
    • If you see the Could not detect build platform error, tap Ignore to continue.
  3. Wash and post-cure the parts appropriately for the material you use.
  4. Remove the resin tank and build platform. Close the printer cover.
  5. On the printer touchscreen, tap the gear icon. The Settings screen appears. Tap Tools > Move motors > Start.
  6. Under Z Axis, tap Mid. The build platform mount moved to the middle of the Z-axis lead screw.
  1. Insert a clean build platform into the printer. Close the printer cover.
  2. Tap Close. The build platform mount returns to its home position.
  3. If you see a notification that the build platform was detected, the fix was successful.

If the error persists, contact Formlabs Support or your authorized reseller for assistance.

Error 1.6.27: Cartridge mismatch (Form 4 generation only)

The printer checks the resin type in the tank and cartridge to ensure they match the current print job. If they do not match the resin type identified in the print job, the printer displays Error 1.6.27 and prompts you to insert a resin cartridge that matches the print job settings. Make sure the resin in the resin cartridge matches the job's resin type, with the same material version number. If that does not resolve the issue:

  1. Reboot your printer.
  2. Ensure that your printer's firmware is up to date. If the printer’s firmware is already up to date, manually reinstall the latest firmware package.
  3. Update PreForm, then regenerate and reupload your print job.
  4. Try again with another resin cartridge, if any are available.
  5. Test the original resin cartridge in another printer, if any are available.
  6. Inspect and reseat the resin cartridge RFID cable. Follow the instructions in the repair guide Replacing the Form 4 resin cartridge RFID board to Step 3: Disconnect the resin cartridge RFID cable.
  7. If the error persists, replace the resin cartridge RFID board. Follow the instructions in the repair guide Replacing the Form 4 resin cartridge RFID board. Replacement resin cartridge RFID boards are available from the Formlabs web store.

Error 1.6.28: Cartridge has exceeded limit (Form 4 generation only)

Each cartridge contains and can reliably dispense one liter of resin. If the cartridge has exceeded its lifetime, the printer displays Error 1.6.28. After the full liter dispenses, dispose of the cartridge and continue printing with a new cartridge. Restart the print once the depleted cartridge has been replaced. If this error is incorrectly thrown, follow the same troubleshooting steps for Error 1.6.27: Cartridge mismatch (Form 4 generation only).

Error 1.6.33: Unrecognized tank inserted

Formlabs has multiple resin tank types for its SLA printers. Error 1.6.33 indicates that the printer could not recognize the inserted resin tank. To resolve this issue:

  1. Reboot your printer.
  2. Ensure that your printer's firmware is up to date. If the printer’s firmware is already up to date, manually reinstall the latest firmware package.
  3. Try again with another resin tank, if any are available.
  4. Test the original resin tank in another printer, if any are available.
  5. Inspect and reseat the resin tank RFID cable.
    1. Form 4: Follow the instructions in the repair guide Replacing the Form 4 resin tank RFID board to Step 4: Remove the resin tank RFID board.
    2. Form 4L: Follow the instructions in the repair guide Replacing the Form 4L resin tank RFID board to Step 3: Disconnect the resin tank RFID board.
  6. If the error persists, replace the resin tank RFID board. Follow the instructions in the repair guides Replacing the Form 4 resin tank RFID board or Replacing the Form 4L resin tank RFID board. Replacement resin tank RFID boards are available from the Formlabs web store.

破片検出エラー(エラーグループ7)

Form 4およびForm 4Lのエラーグループ7のサブコード(1-7)は全て、プリント準備中にプリンターがレジンタンクまたはビルドプラットフォーム内のゴミを検出したことに関するものです。

エラー1.7.2:ミキサーがゴミを検出

エラー1.7.2は、造形前のビルドプラットフォームのスクレイピング中にミキサーがゴミに遭遇したことを示します。スクレーパーでビルドプラットフォームから硬化済みのレジンを取り除き、もう一度やり直してください。問題が解決しない場合は、エラー 1.1.6:ミキサーがデブリを検出しましたのトラブルシューティングと同じ手順に従ってください。

エラー1.7.3:ビルドプラットフォームが破片を検出しました

エラー1.7.3は、プリント前にビルドプラットフォームがレジンタンクに降下中、破片に遭遇したことを示します。スクレーパーでビルドプラットフォームから硬化済みのレジンを取り除き、もう一度やり直してください。問題が解決しない場合は、エラー 1.1.7:ビルドプラットフォームがデブリを検出しましたのトラブルシューティングと同じ手順に従ってください。

ミキサーエラー(エラーグループ8)

Form 4およびForm 4Lのエラーグループ8のサブコード(1)は全て、ヒーターに関するものです。

エラー1.8.1:ミキサーを検出できません

エラー 1.8.1は、プリンターがミキサーを検出できなかったことを意味します。この問題の解決方法:

  1. ミキサーが所定の位置に装着され、ラッチで固定されていることを確認してください。
  2. ミキサーエンコーダーボードを点検し、再接続します。
  3. エラーが続く場合は、ミキサードライブアセンブリを交換してください。修復ガイドミキサードライブアセンブリの交換(Form 4)またはミキサードライブアセンブリの交換(Form 4L)の手順に従ってください。交換用のミキサードライブアセンブリは、Formlabsストアでご購入いただけます。

ディスペンサーエラー(エラーグループ 9)

Form 4およびForm 4Lのエラーグループ 9のサブコード(1-25)は全て、カメラシステムに関するものです。

エラー1.9.4:レジンレベルを測定できませんでした

エラー1.9.4は、プリンターがレジンタンク内のレジン量を測定できなかったことを意味します。この問題を解決するには:

  1. プリントを再試行します。エラーが再発しない場合は、レジン中の気泡が原因であった可能性があります。
  2. センサー上またはセンサーとレジンタンクの間に、レジンセンサーを遮る障害物がないか点検します。レジンセンサーは、カメラの横でレジンタンクの左奥を見下ろすような形で設置されています。
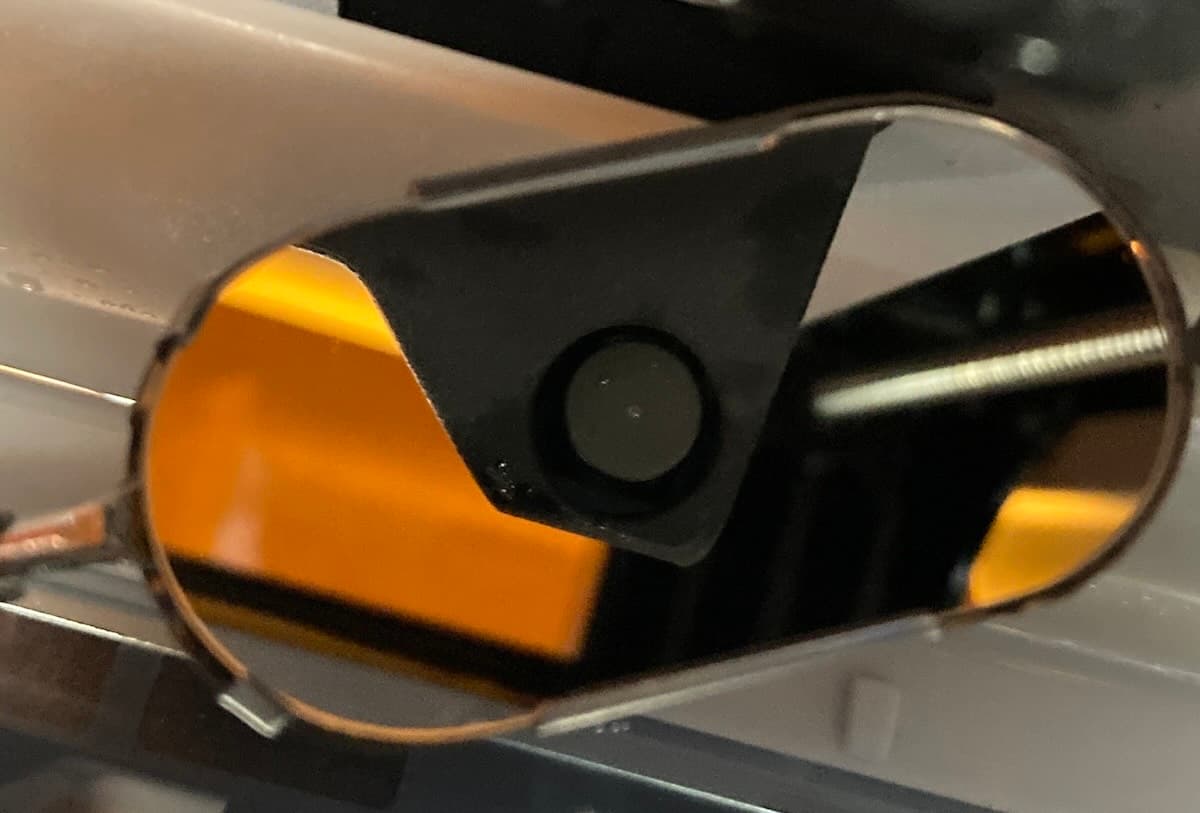
  3. センサーにレジンが付着していないか確認します。ミラーを使ってセンサーを上方から見る必要があるかもしれません。レジンが見えたら、イソプロピルアルコールで湿らせた糸くずの出ない布で拭いてください。
Form 4レベルセンスボード上の汚れ
  1. On the printer’s touchscreen, tap Settings > Tools > Level printer to view the current level status of your printer. Follow the touchscreen prompts and use the leveling tool to level the printer.
  2. Recalibrate the resin level sensor.
  3. Reboot your printer.
  4. Ensure that your printer's firmware is up to date. If the printer’s firmware is already up to date, manually reinstall the latest firmware package.
  5. Inspect and reseat LevelSense board cables.
    1. Form 4: Follow the instructions in the repair guide Replacing the Form 4 LevelSense board to Step 2: Disconnect the LevelSense board cable.
    2. Form 4L: Follow the instructions in the repair guide Replacing the Form 4L LevelSense board to Step 3: Disconnect the LevelSense board cable.
  6. If the error persists, replace the LevelSense board. Follow the instructions in the repair guides Replacing the Form 4 LevelSense board or Replacing the Form 4L LevelSense board. Replacement LevelSense boards are available from the Formlabs web store.

Error 1.9.5: Tank is overfilled with resin

If the resin tank is overfilled, the printer displays Error 1.9.5. Use a syringe or small disposable cup to remove small amounts of resin, and pour it into a separate container. If the printer incorrectly warns of a resin tank overfill:

  1. Check for obstructions blocking the resin sensor, either on the sensor or between the sensor and the resin tank. It is located next to the camera, pointing down at the back-left corner of the resin tank.
  2. On the printer’s touchscreen, tap Settings > Tools > Level printer to view the current level status of your printer. Follow the touchscreen prompts and use the leveling tool to level the printer.
  3. Recalibrate the resin level sensor.
  4. Reboot your printer.
  5. Ensure that your printer's firmware is up to date. If the printer’s firmware is already up to date, manually reinstall the latest firmware package.
  6. Inspect and reseat LevelSense board cables.
    1. Form 4: Follow the instructions in the repair guide Replacing the Form 4 LevelSense board to Step 2: Disconnect the LevelSense board cable.
    2. Form 4L: Follow the instructions in the repair guide Replacing the Form 4L LevelSense board to Step 3: Disconnect the LevelSense board cable.
  7. If the error persists, replace the LevelSense board. Follow the instructions in the repair guides Replacing the Form 4 LevelSense board or Replacing the Form 4L LevelSense board. Replacement LevelSense boards are available from the Formlabs web store.

Error 1.9.6: Not enough resin to finish print

Error 1.9.6 indicates that the current print job requires more resin than is available in the resin tank and resin cartridge. You may need to replace the resin cartridge during the print. The printer will pause and display Error 1.9.6 when the cartridge is empty. To resolve this issue:

  1. Make sure the resin tank and resin cartridge have enough resin to finish print.
  2. Try another resin cartridge if any are available.
  3. On the printer’s touchscreen, tap Settings > Tools > Level printer to view the current level status of your printer. Follow the touchscreen prompts and use the leveling tool to level the printer.
  4. Recalibrate the resin level sensor.
  5. Recalibrate the cartridge floor load cell.
  6. Reboot your printer.
  7. Ensure that your printer's firmware is up to date. If the printer’s firmware is already up to date, manually reinstall the latest firmware package.
  8. Inspect and reseat LevelSense board cables.
    1. Form 4: Follow the instructions in the repair guide Replacing the Form 4 LevelSense board to Step 2: Disconnect the LevelSense board cable.
    2. Form 4L: Follow the instructions in the repair guide Replacing the Form 4L LevelSense board to Step 3: Disconnect the LevelSense board cable.
  9. Inspect and reseat the cartridge floor cables.
    1. Form 4: Follow the instructions in the repair guide Replacing the Form 4 cartridge floor to Step 2: Disconnect the dispense motor and load cell cables.
    2. Form 4L: Follow the instructions in the repair guide Replacing the Form 4L cartridge floor to Step 2: Disconnect the cartridge floor cables.
  10. Replace the LevelSense board. Follow the instructions in the repair guides Replacing the Form 4 LevelSense board or Replacing the Form 4L LevelSense board. Replacement LevelSense boards are available from the Formlabs web store.
  11. Replace the cartridge floor(s). Follow the instructions in the repair guides Replacing the Form 4 cartridge floor or Replacing the Form 4L cartridge floor. Replacement cartridge floors are available from the Formlabs web store.
  12. If the error persists, contact Formlabs Support or your authorized reseller.

Error 1.9.7: Printing paused due to low resin

Formlabs SLA printers have a component known as LevelSense that measures the amount of resin in the resin tank during a print. By monitoring the resin level, the printer can automatically dispense resin from the cartridge into the tank whenever the resin in the tank begins to run low. Error 1.9.7 indicates that the printer has paused to refill the resin tank. If you see this message repeatedly:

  1. Make sure that the resin cartridge is not empty and the vent cap is open.
  2. Check the bite valve on the underside of the cartridge to make sure it opens when squeezed.
  3. If the issue persists, follow the same troubleshooting steps for Error 1.9.6: Not enough resin to finish print.

Error 1.9.9: Left cartridge is empty (Form 4L generation only)

The printer displays Error 1.9.9 if there is no more resin in the left hand cartridge. Each cartridge contains and can reliably dispense one liter of resin. After the full liter dispenses, dispose of the cartridge and continue printing with a new cartridge.

If a cartridge is not empty but the printer displays this error:

  1. Try another resin cartridge if any are available.
  2. Reboot your printer.
  3. Ensure that your printer's firmware is up to date. If the printer’s firmware is already up to date, manually reinstall the latest firmware package.
  4. Recalibrate the cartridge floor load cell.
  5. Inspect and reseat the left cartridge floor cables. Follow the instructions in the repair guide Replacing the Form 4L cartridge floor to Step 2: Disconnect the cartridge floor cables.
  6. If the error persists, replace the left cartridge floor. Follow the instructions in the repair guide Replacing the Form 4L cartridge floor. Replacement cartridge floors are available from the Formlabs web store.

Error 1.9.10: Right cartridge is empty (Form 4L generation only)

The printer displays Error 1.9.10 if there is no more resin in the right hand cartridge. Each cartridge contains and can reliably dispense one liter of resin. After the full liter dispenses, dispose of the cartridge and continue printing with a new cartridge.

If a cartridge is not empty but the printer displays this error:

  1. Try another resin cartridge if any are available.
  2. Reboot your printer.
  3. Ensure that your printer's firmware is up to date. If the printer’s firmware is already up to date, manually reinstall the latest firmware package.
  4. Recalibrate the cartridge floor load cell.
  5. Inspect and reseat the right cartridge floor cables. Follow the instructions in the repair guide Replacing the Form 4L cartridge floor to Step 2: Disconnect the cartridge floor cables.
  6. If the error persists, replace the right cartridge floor. Follow the instructions in the repair guide Replacing the Form 4L cartridge floor. Replacement cartridge floors are available from the Formlabs web store.

Error 1.9.11: Left cartridge is dispensing slowly (Form 4L generation only)

Error 1.9.11 indicates that resin is dispensing from the left hand resin cartridge at a slower rate than expected. If a cartridge is not empty but the printer is unable to dispense resin, an issue with the cartridge may be preventing resin from dispensing:

  1. The newest Tough family of resins cause the resin cartridge bite valve to swell over time. A swollen bite valve dispenses resin more slowly, especially towards the end of a cartridge’s life. If you are printing with a resin in the Tough family, print and install a cartridge shim, especially if you’ve seen Error 1.227.5 or Error 1.227.6.
  2. Check the bite valve on the underside of the cartridge to make sure it opens when squeezed.
  3. Shake the resin cartridge to ensure that the resin is mixed thoroughly.
  4. Check the temperature around the printer and your resin storage area. The recommended operating temperature range for Form 4L generation printers is 18–28 °C (64–82 °F).
  5. Try another resin cartridge if any are available.
  6. Reboot your printer.
  7. Ensure that your printer's firmware is up to date. If the printer’s firmware is already up to date, manually reinstall the latest firmware package.
  8. Inspect and reseat the left cartridge floor cables. Follow the instructions in the repair guide Replacing the Form 4L cartridge floor to Step 2: Disconnect the cartridge floor cables.
  9. If the error persists, replace the left cartridge floor. Follow the instructions in the repair guide Replacing the Form 4L cartridge floor. Replacement cartridge floors are available from the Formlabs web store.

備考:

エラーメッセージが表示されていないにも関わらず、プリンターのレジン供給が遅くなる場合があります。そのような場合には、エラーメッセージの有無にかかわらず、上記のトラブルシューティング手順に従ってレジン供給の問題に対処してください。

Error 1.9.12: Right cartridge is dispensing slowly (Form 4L generation only)

Error 1.9.12 indicates that resin is dispensing from the right hand resin cartridge at a slower rate than expected. If a cartridge is not empty but the printer is unable to dispense resin, an issue with the cartridge may be preventing resin from dispensing:

  1. The newest Tough family of resins cause the resin cartridge bite valve to swell over time. A swollen bite valve dispenses resin more slowly, especially towards the end of a cartridge’s life. If you are printing with a resin in the Tough family, print and install a cartridge shim, especially if you’ve seen Error 1.227.5 or Error 1.227.6.
  2. Check the bite valve on the underside of the cartridge to make sure it opens when squeezed.
  3. Shake the resin cartridge to ensure that the resin is mixed thoroughly.
  4. Check the temperature around the printer and your resin storage area. The recommended operating temperature range for Form 4L generation printers is 18–28 °C (64–82 °F).
  5. Try another resin cartridge if any are available.
  6. Reboot your printer.
  7. Ensure that your printer's firmware is up to date. If the printer’s firmware is already up to date, manually reinstall the latest firmware package.
  8. Inspect and reseat the right cartridge floor cables. Follow the instructions in the repair guide Replacing the Form 4L cartridge floor to Step 2: Disconnect the cartridge floor cables.
  9. If the error persists, replace the right cartridge floor. Follow the instructions in the repair guide Replacing the Form 4L cartridge floor. Replacement cartridge floors are available from the Formlabs web store.

備考:

エラーメッセージが表示されていないにも関わらず、プリンターのレジン供給が遅くなる場合があります。そのような場合には、エラーメッセージの有無にかかわらず、上記のトラブルシューティング手順に従ってレジン供給の問題に対処してください。

エラー1.9.13、エラー1.9.14、エラー1.9.15、エラー1.9.19:LevelSenseの再較正距離エラー

Formlabs SLA光造形プリンタには、プリント中にレジンタンク内のレジン量を測定するLevelSenseと呼ばれるコンポーネントが搭載されています。Form 4およびForm 4L世代のプリンターは、レベルセンスセンサーから液体レジンまでの距離を測定することでレジン量を検知します。プリンターが誤ったレジンレベルを測定する場合は、レベルセンスを再較正してください。プリンターがこの距離を測定できない場合、または想定される距離より遠い場合、プリンターはエラー1.9.13エラー1.9.14エラー1.9.15、またはエラー1.9.19を表示します。これらの問題を解決するには:

  1. 画面の指示に従って、プラスチックカードがレジンセンサーの下、LPUの上に平らに置かれていることを確認します。
  2. センサー上またはセンサーとレジンタンクの間に、レジンセンサーを遮る障害物がないか点検します。レジンセンサーは、カメラの横でレジンタンクの左奥を見下ろすような形で設置されています。
  3. センサーにレジンが付着していないか確認します。ミラーを使ってセンサーを上方から見る必要があるかもしれません。レジンが見えたら、イソプロピルアルコール(IPA)で湿らせた糸くずの出ない布で拭いてください。
Form 4レベルセンスボード上の汚れ
  1. Reboot your printer.
  2. Ensure that your printer's firmware is up to date. If the printer’s firmware is already up to date, manually reinstall the latest firmware package.
  3. Inspect and reseat LevelSense board cables.
    1. Form 4: Follow the instructions in the repair guide Replacing the Form 4 LevelSense board to Step 2: Disconnect the LevelSense board cable.
    2. Form 4L: Follow the instructions in the repair guide Replacing the Form 4L LevelSense board to Step 3: Disconnect the LevelSense board cable.
  4. Replace the LevelSense board. Follow the instructions in the repair guides Replacing the Form 4 LevelSense board or Replacing the Form 4L LevelSense board. Replacement LevelSense boards are available from the Formlabs web store.

Error 1.9.16, Error 1.9.17, and Error 1.9.18: LevelSense temperature errors

Formlabs SLA printers have a component known as LevelSense that measures the amount of resin in the resin tank during a print. On Form 4 and Form 4L generation printers, the LevelSense system also measures the ambient temperature to accurately measure the resin level. If the printer is incorrectly measuring resin level, recalibrate the LevelSense. During recalibration, if the printer cannot measure the ambient temperature or it is out of the expected range, the printer displays Error 1.9.16, Error 1.9.17, or Error 1.9.18. To resolve these issues:

  1. Ensure that the ambient temperature around the LevelSense board is between 10–40 °C (50–104 °F). Consider relocating the printer or cooling or heating the print environment if necessary.
  2. Reboot your printer.
  3. Ensure that your printer's firmware is up to date. If the printer’s firmware is already up to date, manually reinstall the latest firmware package.
  4. Inspect and reseat LevelSense board cables.
    1. Form 4: Follow the instructions in the repair guide Replacing the Form 4 LevelSense board to Step 2: Disconnect the LevelSense board cable.
    2. Form 4L: Follow the instructions in the repair guide Replacing the Form 4L LevelSense board to Step 3: Disconnect the LevelSense board cable.
  5. Replace the LevelSense board. Follow the instructions in the repair guides Replacing the Form 4 LevelSense board or Replacing the Form 4L LevelSense board. Replacement LevelSense boards are available from the Formlabs web store.

Error 1.9.20: Filling tank

Error 1.9.21: Could not determine offset

Error 1.9.21 indicates that the cartridge sensor readings were not stable during cartridge floor load cell calibration. Make sure that nothing is sitting on the cartridge floor(s) and retry the cartridge floor calibration process. If the issue persists:

  1. Reboot your printer.
  2. Ensure that your printer's firmware is up to date. If the printer’s firmware is already up to date, manually reinstall the latest firmware package.
  3. Inspect and reseat the cartridge floor cables.
    1. Form 4: Follow the instructions in the repair guide Replacing the Form 4 cartridge floor to Step 2: Disconnect the dispense motor and load cell cables.
    2. Form 4L: Follow the instructions in the repair guide Replacing the Form 4L cartridge floor to Step 2: Disconnect the cartridge floor cables.
  4. Replace the cartridge floor(s). Follow the instructions in the repair guides Replacing the Form 4 cartridge floor or Replacing the Form 4L cartridge floor. Replacement cartridge floors are available from the Formlabs web store.

Error 1.9.22: Cartridge is empty (Form 4 generation only)

The printer displays Error 1.9.22 if there is no more resin in the cartridge. Each cartridge contains and can reliably dispense one liter of resin. After the full liter dispenses, dispose of the cartridge and continue printing with a new cartridge.

If a cartridge is not empty but the printer displays this error:

  1. Try another resin cartridge if any are available.
  2. Reboot your printer.
  3. Ensure that your printer's firmware is up to date. If the printer’s firmware is already up to date, manually reinstall the latest firmware package.
  4. Recalibrate the cartridge floor load cell.
  5. Inspect and reseat the cartridge floor cables. Follow the instructions in the repair guide Replacing the Form 4 cartridge floor to Step 2: Disconnect the dispense motor and load cell cables.
  6. Replace the cartridge floor. Follow the instructions in the repair guide Replacing the Form 4 cartridge floor. Replacement cartridge floors are available from the Formlabs web store.

備考:

エラーメッセージが表示されていないにも関わらず、プリンターにレジンが供給されない場合があります。そのような場合には、エラーメッセージの有無にかかわらず、上記のトラブルシューティング手順に従ってレジン供給の問題に対処してください。

Error 1.9.23: Cartridge is dispensing slowly (Form 4 generation only)

Error 1.9.23 indicates that resin is dispensing from the resin cartridge at a slower rate than expected. If a cartridge is not empty but the printer is unable to dispense resin, an issue with the cartridge may be preventing resin from dispensing:

  1. The newest Tough family of resins cause the resin cartridge bite valve to swell over time. A swollen bite valve dispenses resin more slowly, especially towards the end of a cartridge’s life. If you are printing with a resin in the Tough family, print and install a cartridge shim, especially if you’ve seen Error 1.227.5 or Error 1.227.6.
  2. Check the bite valve on the underside of the cartridge to make sure it opens when squeezed.
  3. Shake the resin cartridge to ensure that the resin is mixed thoroughly.
  4. Check the temperature around the printer and your resin storage area. The recommended operating temperature range for Form 4 generation printers is 18–28 °C (64–82 °F).
  5. Try another resin cartridge if any are available.
  6. Reboot your printer.
  7. Ensure that your printer's firmware is up to date. If the printer’s firmware is already up to date, manually reinstall the latest firmware package.
  8. Inspect and reseat the cartridge floor cables. Follow the instructions in the repair guide Replacing the Form 4 cartridge floor to Step 2: Disconnect the dispense motor and load cell cables.
  9. Replace the cartridge floor. Follow the instructions in the repair guide Replacing the Form 4 cartridge floor. Replacement cartridge floors are available from the Formlabs web store.

備考:

エラーメッセージが表示されていないにも関わらず、プリンターのレジン供給が遅くなる場合があります。そのような場合には、エラーメッセージの有無にかかわらず、上記のトラブルシューティング手順に従ってレジン供給の問題に対処してください。

Error 1.9.24: Printing paused due to low resin

Formlabs SLA printers have a component known as LevelSense that measures the amount of resin in the resin tank during a print. By monitoring the resin level, the printer can automatically dispense resin from the cartridge into the tank whenever the resin in the tank begins to run low.

However, printers with Open Material Mode cannot automatically dispense from the resin cartridge. Error 1.9.24 indicates that the printer has paused to allow the user to manually refill the resin tank. If you see this message repeatedly:

  1. On the printer’s touchscreen, tap Settings > Tools > Level printer to view the current level status of your printer. Follow the touchscreen prompts and use the leveling tool to level the printer.
  2. Recalibrate the resin level sensor.
  3. Recalibrate the cartridge floor load cell.
  4. Reboot your printer.
  5. Ensure that your printer's firmware is up to date. If the printer’s firmware is already up to date, manually reinstall the latest firmware package.
  6. Inspect and reseat LevelSense board cables.
    1. Form 4: Follow the instructions in the repair guide Replacing the Form 4 LevelSense board to Step 2: Disconnect the LevelSense board cable.
    2. Form 4L: Follow the instructions in the repair guide Replacing the Form 4L LevelSense board to Step 3: Disconnect the LevelSense board cable.
  7. Replace the LevelSense board. Follow the instructions in the repair guides Replacing the Form 4 LevelSense board or Replacing the Form 4L LevelSense board. Replacement LevelSense boards are available from the Formlabs web store.

レーザーユニット(LPU)のエラー(エラーグループ10)

All subcodes of Form 4 and Form 4L Error Group 10 (1–9) relate to the Light Processing Unit (LPU).

Error 1.10.1 and Error 1.10.4: LPU is not connected

Error 1.10.1 and Error 1.10.4 indicate that the Light Processing Unit (LPU) is not connected. To resolve these issues:

  1. Reboot your printer.
  2. Ensure that your printer's firmware is up to date. If the printer’s firmware is already up to date, manually reinstall the latest firmware package.
  3. Inspect and reseat the HDMI cable.
    1. Form 4: Follow the instructions in the repair guide Replacing the Form 4 Light Processing Unit to Step 2: Unplug the HDMI cable.
    2. Form 4L: Follow the instructions in the repair guide Replacing the Form 4L Light Processing Unit to Step 2: Unplug the HDMI cable.
  4. Reseat the System on Module (SOM).
    1. Form 4: Follow the instructions in the repair guide Replacing the Form 4 SOM to Step 8: Remove the SOM.
    2. Form 4L: Follow the instructions in the repair guide Replacing the Form 4L SOM to Step 8: Remove the SOM.
  5. Form 4L only: Replace the HDMI cable. Follow the instructions in the repair guide Replacing the Form 4L HDMI cable. Replacement HDMI cables are available from the Formlabs web store.
  6. If the error persists, contact Formlabs Support or your authorized reseller.

Error 1.10.3: LPU is not detected

Error 1.10.3 indicates that the Light Processing Unit (LPU) could not be detected. To resolve this issue, follow the same troubleshooting steps for Error 1.10.1 and Error 1.10.4: LPU is not connected.

Error 1.10.5: Could not load print file

Error 1.10.5 indicates an issue with a file in the uploaded print job. Update PreForm and the printer’s firmware, then reupload the print job.

Error 1.10.8: LPU has exceeded lifetime

Error 1.10.8 indicates that the Light Processing Unit has been used beyond its recommended lifetime. Continuing to print may lead to print failures. Replace the LPU. Follow the instructions in the repair guides Replacing the Form 4 Light Processing Unit or Replacing the Form 4L Light Processing Unit. Replacement LPUs are available from the Formlabs web store.

カメラのエラー(エラーグループ12)

All subcodes of Form 4 and Form 4L Error Group 12 (1–5) relate to the camera system.

Error 1.12.2: Camera is not connected

Error 1.12.2 indicates that the camera, which is used to capture post-print photos, is not connected. If you purposefully disconnected or removed the camera, ignore this message. To resolve this issue:

  1. Reboot your printer.
  2. Ensure that your printer's firmware is up to date. If the printer’s firmware is already up to date, manually reinstall the latest firmware package.
  3. Inspect and reseat the camera ribbon cable.
    1. Form 4: Follow the instructions in the repair guide Replacing the Form 4 camera to Step 1: Disconnect the camera ribbon cable.
    2. Form 4L: Follow the instructions in the repair guide Replacing the Form 4L camera to Step 2: Disconnect the camera ribbon cable.
  4. If the error persists, replace the camera. Follow the instructions in the repair guides Replacing the Form 4 camera or Replacing the Form 4L camera. Replacement cameras are available from the Formlabs web store.

Error 1.12.3: Photo capture failed

Error 1.12.3 indicates that the camera failed to take a photo. To resolve this issue, follow the same troubleshooting steps for Error 1.12.2: Camera is not connected.

圧縮フェーズのエラー(エラーグループ13)

各レイヤーの圧縮フェーズとは、ビルドプラットフォームがレジンタンク内で降下することを指します。Form 4およびForm 4Lのエラーグループ13は全て、ヒーターに関するものです。

エラー1.13.1:ビルドプラットフォームがゴミを検出しました

エラー1.13.1は、圧縮フェーズ中にプリンターがレジンタンク内またはビルドプラットフォーム上にゴミを検出したことを意味します。この問題を解決するには、エラー 1.1.7:ビルドプラットフォームがデブリを検出しましたのトラブルシューティングと同じ手順に従ってください。

プリントステータスエラー(エラーグループ 15)

All subcodes of Form 4 and Form 4L Error Group 15 (1–6) relate to an issue with the print state.

Error 1.15.1: Could not load print job

Error 1.15.1 indicates an issue with the uploaded print job. Update PreForm and the printer’s firmware, then reupload the print job.

Error 1.15.2: Job already printing

Error 1.15.2 indicates that a new print job did not start because one was already in progress. Wait for the current print to finish before starting a new one. If no job is currently running, reboot your printer, reflash its firmware, and try again.

Error 1.15.3: Print job is invalid

Error 1.15.3 indicates an issue with the uploaded print job. It may have been generated using a version of PreForm that is incompatible with the firmware on the printer. Update PreForm and the printer’s firmware, then reupload the print job.

Error 1.15.5: Fit tuning incompatible

Error 1.15.5 indicates the printer’s Fit Tuning values were updated after this job was uploaded. To resolve this issue, reupload the job through PreForm.

Error 1.15.6: Not enough storage space to print

Error 1.15.6 indicates there is not enough storage on the printer to store print data even after auto-deleting jobs from history. Delete jobs from the queue and reupload the job without the timelapse feature via PreForm.

レジンポンプシステムエラー(エラーグループ20)

All subcodes of Form 4 and Form 4L Error Group 20 (1–15) relate to an issue with the Resin Pumping System.

Error 1.20.1: Check resin container

The Resin Pumping System pumps resin from a 5 L container into the printer. If the container is empty, replace it to continue your print. If the container is not empty, there may be an issue with the resin card inserted into the pump. Contact Formlabs Support or your authorized reseller for assistance.

Error 1.20.4: Resin pump is not connected

The Resin Pumping System (Form 4) communicates with Form 4 and Form 4L generation printers via a USB connection. Error 1.20.4 indicates that the printer recognized a resin pump through the resin cartridge RFID sensor but wasn't able to communicate with the pump through the USB cable. To resolve this issue:

  1. Inspect and reseat the pump’s USB-C cable, ensuring that the cable is fully plugged into the printer.
  2. Replace the USB-C cable. Follow the instructions in the repair guide Replacing the Form 4 Resin Pumping System USB-C cable. Purchase a replacement cable that transmits both power and data from a third-party supplier.
  3. Reboot your printer.
  4. With the resin pump connected to the printer, update your printer's firmware.

Error 1.20.6: Could not update resin pump firmware

Error 1.20.6 indicates that the printer tried to update the resin pump's firmware but failed. This can happen if the pump is disconnected while it is being updated. To resolve this issue, follow the same troubleshooting steps for Error 1.20.4: Resin pump is not connected.

Error 1.20.14: Resin pump connection problem

Error 1.20.14 indicates that there is a problem with the connection to the resin pump. Make sure the pump is connected directly to the printer using the integrated USB cable. Do not connect the resin pump to the printer via a hub, adapter, or other USB accessory. If the error persists, follow the same troubleshooting steps for Error 1.20.4: Resin pump is not connected.

Error 1.20.15: Resin pump power problem

Error 1.20.15 indicates an issue with the power being delivered to the resin pump. To resolve this issue, follow the same troubleshooting steps for Error 1.20.4: Resin pump is not connected. If the error persists, replace the resin pump.

Colorレジンのエラー(エラーグループ22)

Form 4およびForm 4Lのエラーグループ22のサブコード(1-4)は全て、Colorレジンに関するものです。

エラー1.22.1:タンクの色が一致しません

タンク内のレジンの色がジョブに必要な色と一致しない場合、プリンターにエラー1.22.1と表示されます。レジンタンクを取り外し、プリントジョブと一致するタンクに入れ替えてください。

備考:

プリントジョブに指定されているレジンの色に合わせてレジンタンクを再プログラミングする場合は、無視をタップしてください。

エラー1.22.2:カートリッジの色が一致しません(Form 4世代のみ)

カートリッジ内のレジンの色がジョブに必要な色と一致しない場合、プリンターにエラー1.22.2が表示されます。カートリッジを取り外し、プリントジョブと一致するタンクに入れ替えてください。それでも問題が解決しない場合は、エラー1.6.27:カートリッジが一致しません(Form 4世代のみ)と同じトラブルシューティング手順に従ってください。

エラー1.22.3:左カートリッジのレジンカラーが不一致(Form 4L世代のみ)

左カートリッジのレジンカラーがジョブに必要なカラーと一致しない場合、プリンターにエラー1.22.3が表示されます。左側のカートリッジを取り外し、プリントジョブと一致するタンクに入れ替えてください。それでも問題が解決しない場合は、エラー1.6.4:左側のカートリッジが一致しません(Form 4L世代のみ)と同じトラブルシューティング手順に従ってください。

エラー1.22.4:右カートリッジの色が一致しません(Form 4L世代のみ)

右カートリッジのレジンの色がジョブに必要な色と一致しない場合、プリンターにエラー1.22.4が表示されます。右側のカートリッジを取り外し、プリントジョブと一致するタンクに入れ替えてください。それでも問題が解決しない場合は、エラー1.6.6:右側のカートリッジが一致しません(Form 4L世代のみ)と同じトラブルシューティング手順に従ってください。

消耗品エラー(エラーグループ227)

Form 4およびForm 4Lのエラーグループ227のサブコード(1-4)は全て、装着されたレジンカートリッジに関するものです。

エラー1.227.1:レジンカートリッジが非対応(Form 4世代のみ)

カートリッジ内のレジンがプリンターに対応していない場合、プリンターにエラー1.227.1が表示されます。具体的には、生体適合性用途のレジンをForm 4BプリンターではなくForm 4プリンターに装着している場合に発生します。誤ったプリンターにカートリッジを装着している場合は、正しいプリンターに移し替えてください。それ以外の場合は、Form 4Bのセットアップ手順に従い、Formlabsの生体適合性材料の恒久ライセンスをプリンターに登録してください。

エラー1.227.2:右側のレジンカートリッジが非対応(Form 4L世代のみ)

右側のカートリッジのレジンがプリンターに対応していない場合、プリンターにエラー1.227.2が表示されます。具体的には、生体適合性用途のレジンをForm 4BLプリンターではなくForm 4Lプリンターに装着している場合に発生します。誤ったプリンターにカートリッジを装着している場合は、正しいプリンターに移し替えてください。それ以外の場合は、Form 4BLのセットアップ手順に従い、Formlabsの生体適合性材料の恒久ライセンスをプリンターに登録してください。

エラー1.227.3:左のレジンカートリッジが非対応(Form 4L世代のみ)

左のカートリッジのレジンがプリンターに対応していない場合、プリンターはエラー1.227.3を表示します。具体的には、生体適合性用途のレジンをForm 4BLプリンターではなくForm 4Lプリンターに装着している場合に発生します。誤ったプリンターにカートリッジを装着している場合は、正しいプリンターに移し替えてください。それ以外の場合は、Form 4BLのセットアップ手順に従い、Formlabsの生体適合性材料の恒久ライセンスをプリンターに登録してください。

エラー1.227.4:レジンカートリッジが非対応(Form 4L世代のみ)

両方のカートリッジのレジンがプリンターに対応していない場合、プリンターにエラー1.227.4が表示されます。具体的には、生体適合性用途のレジンをForm 4BLプリンターではなくForm 4Lプリンターに装着している場合に発生します。誤ったプリンターにカートリッジを装着している場合は、正しいプリンターに移し替えてください。それ以外の場合は、Form 4BLのセットアップ手順に従い、Formlabsの生体適合性材料の恒久ライセンスをプリンターに登録してください。

エラー1.227.5:カートリッジのチェックを推奨

Toughファミリーの最新レジンは、時間の経過とともにレジンカートリッジのバイトバルブが膨張することがあります。バイトバルブが膨張していると、特にカートリッジの寿命が近づくにつれてレジンの供給が遅くなります。限定的かつ少数のケースではありますが、バイトバルブが最終的にレジンカートリッジから完全に脱落し、レジン漏れにつながることがあります。レジンカートリッジが50回の供給サイクルを経過した後、プリンターが供給性能の低下を示すエラー1.227.5を表示する可能性があります。供給の問題やレジンのこぼれを防ぐために、以下の手順を実施してください。

  1. プリンターからレジンカートリッジを取り外します。
    • Form 4Lでは、エラー1.227.5は左側のレジンカートリッジに対応します。
  2. プリンターカバー(Form 4世代)またはドア(Form 4L世代)を開けます。
  3. レジンタンクにカートリッジからレジンを注ぎます。レジンレベルがレジンタンクフレームに目印として印刷されている上限ラインに達するまで注ぎます。レジンタンクを過剰に充填しないでください。
  4. ベントキャップをレジンカートリッジにねじ込みます。
  5. レジンカートリッジが空または空に近い場合は、新しいレジンカートリッジを装着してからプリントを続行してください。他のレジンカートリッジがない場合は、元のレジンカートリッジを再度装着してください。プリンターにカートリッジが空ですというメッセージが表示される可能性がありますが、レジンタンク内の残りのレジンを使用してプリントを続けることができます。
  6. レジンカートリッジにまだかなりの量のレジンが残っている場合は、カートリッジの裏面にあるロット番号を確認してください。ロット番号は8桁の番号で、形式はYYYYMMDDです。ロット番号20251022以降は、バイトバルブがレジンカートリッジから脱落しないよう金具が変更されています。
    • レジンカートリッジのロット番号が20251022以降のものである場合は、レジンカートリッジをプリンターに再装着してプリントを続けてください。レジンの供給速度が遅くなる可能性がありますが、レジン漏れの危険はありません。まだの場合は、シムをプリントして取り付けることで、バルブの膨張による吐出の中断を防ぐことができます。
    • レジンカートリッジのロット番号が20251022より前の場合は、レジンカートリッジの使用を中止し、Formlabsサポートまでご連絡ください。

エラー1.227.6:カートリッジのチェックを推奨(Form 4L世代のみ)

最新のToughファミリーのレジンは、時間の経過とともにレジンカートリッジのバイトバルブが膨張することがあります。バイトバルブが膨張していると、特にカートリッジの寿命が近づくにつれてレジンの供給が遅くなります。限定的かつ少数のケースではありますが、バイトバルブが最終的にレジンカートリッジから完全に脱落し、レジン漏れにつながることがあります。Form 4L世代のプリンターでは、右側のレジン供給カートリッジが50回の供給サイクルを経過した後、プリンターが供給性能の低下を示すエラー1.227.6を表示する可能性があります。供給関連の問題やレジン漏れを防ぐために:

  1. 右側のカートリッジスロットからレジンカートリッジを取り外します。
  2. プリンターのドアを開けます。
  3. レジンタンクにカートリッジからレジンを注ぎます。レジンレベルがレジンタンクフレームに目印として印刷されている上限ラインに達するまで注ぎます。レジンタンクを過剰に充填しないでください。
  4. ベントキャップをレジンカートリッジにねじ込みます。
  5. レジンカートリッジが空または空に近い場合は、新しいレジンカートリッジを装着してからプリントを続行してください。他のレジンカートリッジがない場合は、元のレジンカートリッジを再度装着してください。プリンターにカートリッジが空ですというメッセージが表示される可能性がありますが、レジンタンク内の残りのレジンを使用してプリントを続けることができます。レジンカートリッジにまだかなりの量のレジンが残っている場合は、カートリッジの裏面にある
  6. ロット番号
  7. を確認してください。ロット番号は8桁の番号で、形式はYYYYMMDDです。ロット番号20251022以降は、バイトバルブがレジンカートリッジから脱落しないよう金具が変更されています。
    • レジンカートリッジのロット番号が20251022以降のものである場合は、レジンカートリッジをプリンターに再装着してプリントを続けてください。レジンの供給速度が遅くなる可能性がありますが、レジン漏れの危険はありません。まだの場合は、シムをプリントして取り付けることで、バルブの膨張による吐出の中断を防ぐことができます。レジンカートリッジのロット番号が20251022より前の場合は、レジンカートリッジの使用を中止し、
    • Formlabsサポート
    • までご連絡ください。

プリンターが初期化されない

If the printer does not initialize when powered on, ensure that the cover is closed. If it is closed, open the cover and check for the two round interlock magnets located along the bottom edge of the cover. If one of the magnets has detached from the cover, it may have attached itself to the printer shell or become lodged underneath one of the resin tank latches. Attach the magnet to the cover with a strong adhesive. Once the adhesive is dry, close the cover to continue.

If the issue persists, contact Formlabs Support or your authorized reseller for assistance. If both magnets are present, reboot your printer, update its firmware, and try again.

その他および内部エラー

まれに、プリンターが関連するエラーコードと共に内部エラーを表示することがあります。内部エラーが表示された場合は、プリンターの診断ログをアップロードし、Formlabsサポートにお問い合わせください。

エラー1.196.3

エラー1.196.3は、プリンターの空き容量が不足していることが原因で発生することがあります。Queue(キュー)から古いプリントジョブを削除し、プリントを再試行してください。

エラー1.225.1

エラー1.225.1は、プリンターが選択されたWi-Fiネットワークへの接続中にエラーが発生したことを意味します。プリンターとWi-Fiルーター(可能な場合)を再起動し、再度お試しください。

エラー1.226.5:プリント中にプリンターがリセットされました

エラー1.226.5は、電源の問題によりプリント中にプリンターが再起動したことを示します。プリントジョブの実行中にプリンターの電源が一旦遮断されると、電力が戻ってもプリンターはプリントを再開しません。この問題を解決するには:

  1. プリンターを別のコンセントまたは電源に接続します。
  2. 別の電源ケーブルがあれば、そちらをお使いください。
  3. プリンターを使用中の建物で定期的に停電や電力不足が発生する場合は、お使いのプリンターを無停電電源装置(UPS) に接続することもご検討ください。
  4. このエラーが続く場合は、プリンターの電源が故障している可能性があります。

エラー1.240.5

エラー1.240.5は、プリンターが破損したプリントジョブを受信したことを示します。プリントジョブをプリンターに送信する際にネットワーク接続に問題が発生した可能性があります。プリントジョブを再アップロードします。問題が再発する場合は、USBなどより安定した接続方法でジョブを再アップロードしてください。

トラブルシューティングのために

Remote Assistance(リモートアシスタンス)

を有効にする

During troubleshooting, Formlabs Support may need additional information from or access to your printer. You may be asked to enable Remote Assistance on your machine.

To prepare your printer for remote assistance:

  1. Ensure that your printer's firmware is up to date.
  2. Tap the gear icon to access the Settings screen. The Settings screen appears.
  3. Tap Support. The Support screen appears.
  4. Tap Remote Assistance. The toggle turns blue when it is enabled.

トラブルシューティングのための分析機能を有効化

During troubleshooting, Formlabs Support may need additional information from or access to your printer. You may be asked to enable Analytics on your machine.

To prepare your printer for dashboard logging:

  1. Ensure that your printer's firmware is up to date.
  2. Tap the gear icon to access the Settings screen. The Settings screen appears.
  3. Tap Analytics. The Analytics screen appears.
  4. Tap Share print logs and Share post-print photos. The toggles turn blue when enabled.

プリンターを工場出荷時の状態にリセットする

状況によっては、工場出荷時の設定に戻すファクトリーリセットを実行することで、プリンターの異常な動作が解消されることがあります。異常な動作には、未知のエラーメッセージの表示、ファームウェアの更新失敗、タッチスクリーンの無反応、PreFormへの接続トラブルなどが含まれます。工場出荷時の状態にリセットすると、Queue(キュー)に保存しているプリントジョブや登録したネットワーク接続の設定等、カスタマイズした設定がすべて消去されます。

備考:

工場出荷時の状態にリセットすると、プリントジョブ情報、それまでにカスタマイズした設定や診断ログがすべて消去されます。工場出荷時の状態にリセットする前に、診断ログをアップロードしておくようにしてください。

工場出荷時の状態にリセットするには:
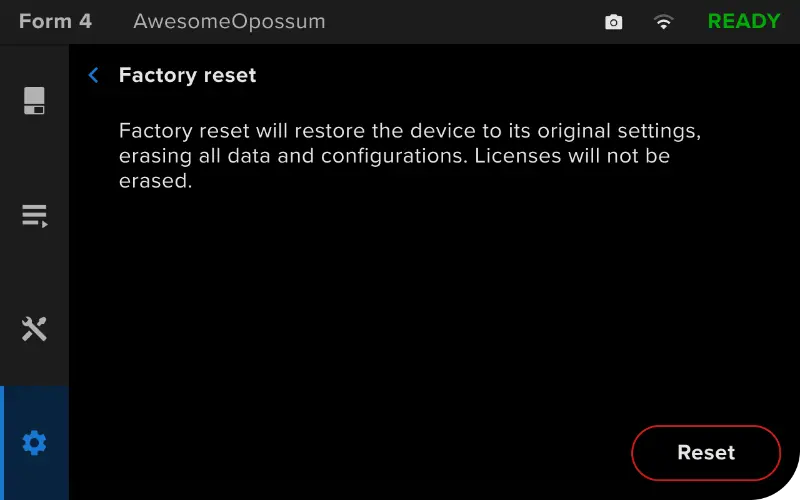
  1. Settings(設定) > General(一般) > Factory reset(ファクトリーリセット)の順にタップします。Factory reset(ファクトリーリセット)画面が表示されます。
  2. Reset(リセット)をタップします。確認画面が開きます。
  3. Reset(リセット)タップします。プリンターが工場出荷時の状態に戻ります。
Form 4のファクトリーリセット画面

If you cannot perform a factory reset using the touchscreen, use the physical button on the back of the machine:

  1. Turn the printer off using the power switch at the back of the machine.
  2. Turn the printer back on.
  3. When the Formlabs logo appears, push and hold the reset button located above the USB port in the rear of the printer. If you press the button too early, the printer will not boot and the touchscreen will flash until you power cycle the printer. Hold the button for at least 10 seconds, until Resetting to factory defaults appears on the touchscreen. You may need to use a paperclip or other small tool to push the reset button.
  4. Release the button. If you release the button too early, power cycle the machine and try again.
  5. The touchscreen displays Factory reset complete before initializing the printer.
Form 4世代のプリンターのファクトリーリセットボタン

ファクトリーリセットが成功したことを確認するには、タッチスクリーン上のQueue(キュー)をタップします。リセットが成功していれば、プリントキューは空になっているはずです。リセットをしても異常な動作が解決しない場合は、Formlabsサポートまたは正規販売代理店にご連絡ください。